
CHEROCON to 1 Ton YJ Build


Thread Starter
CF Veteran
Joined: Jul 2008
Posts: 1,371
Likes: 2
From: Bonney Lake, WA
Got a bit more done today.
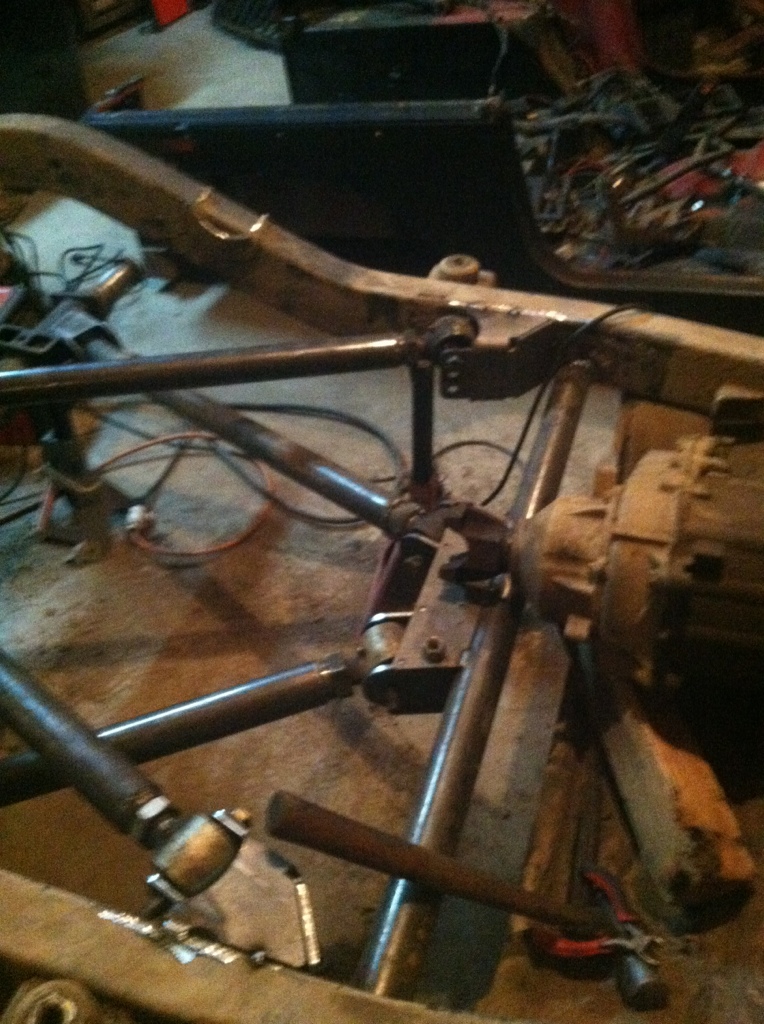
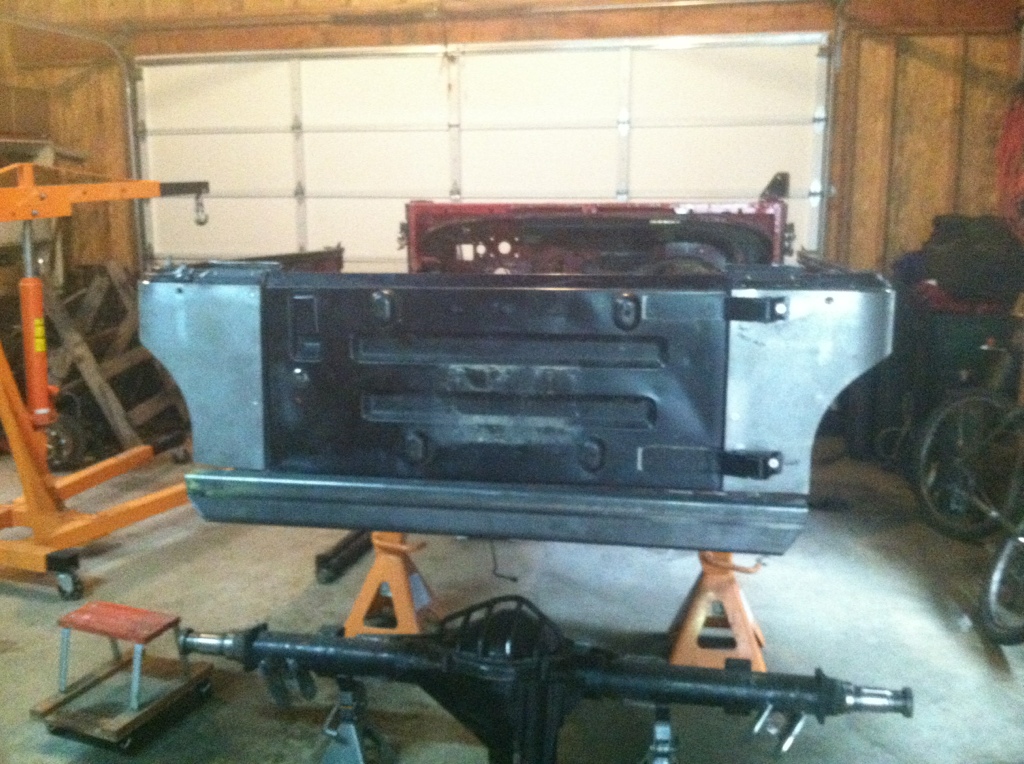
Pulled the tub off so i could get to the link mounts easier. I cut off all tabs and brackets from the frame that werent going to be used.
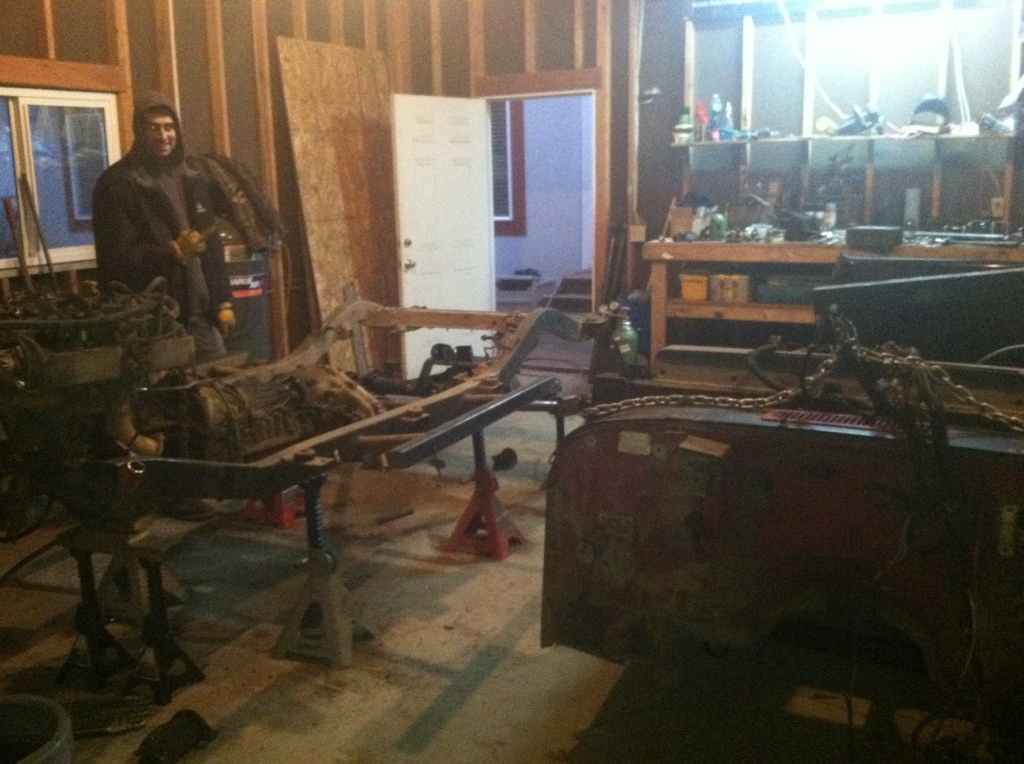
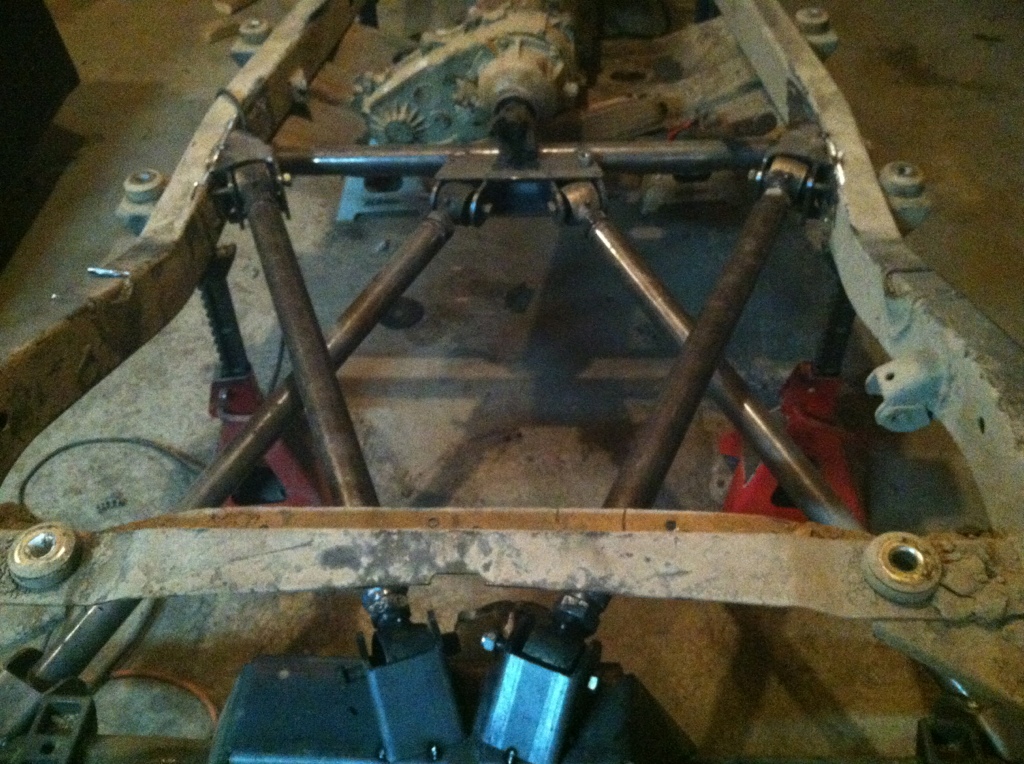
Got everything fit and tacked together. The upper links are about 34" long
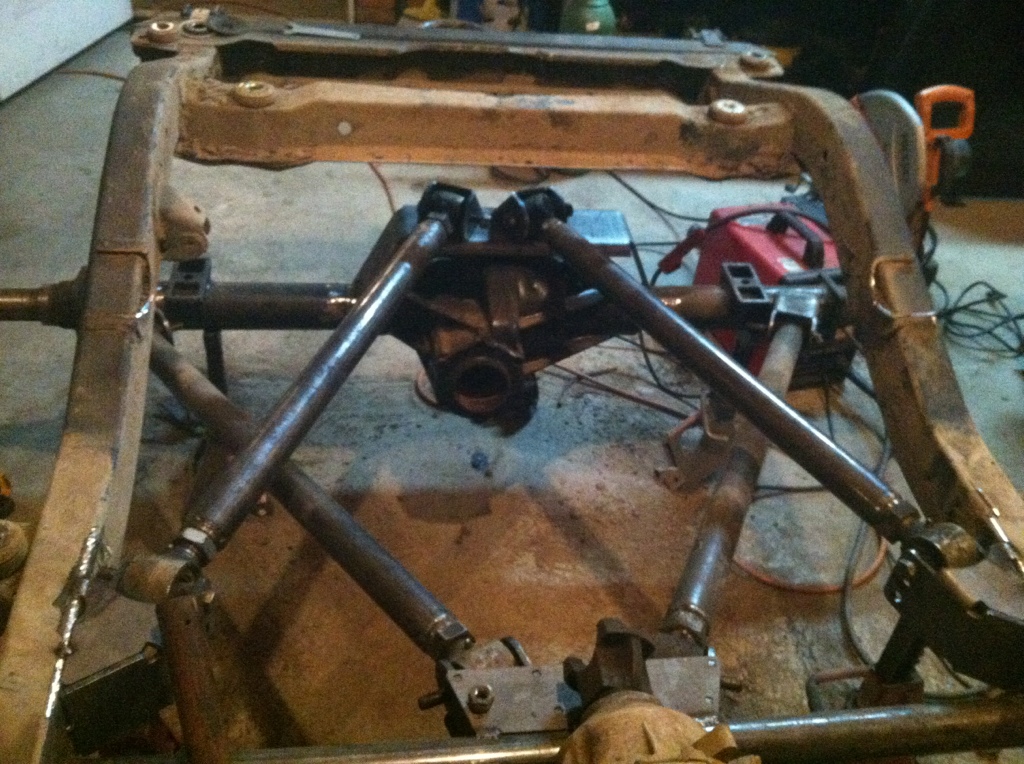
Should have all the finish welds done on all brackets this week and then try to begin on the rear frame and bumper
Pulled the tub off so i could get to the link mounts easier. I cut off all tabs and brackets from the frame that werent going to be used.
Got everything fit and tacked together. The upper links are about 34" long
Should have all the finish welds done on all brackets this week and then try to begin on the rear frame and bumper
Thread Starter
CF Veteran
Joined: Jul 2008
Posts: 1,371
Likes: 2
From: Bonney Lake, WA
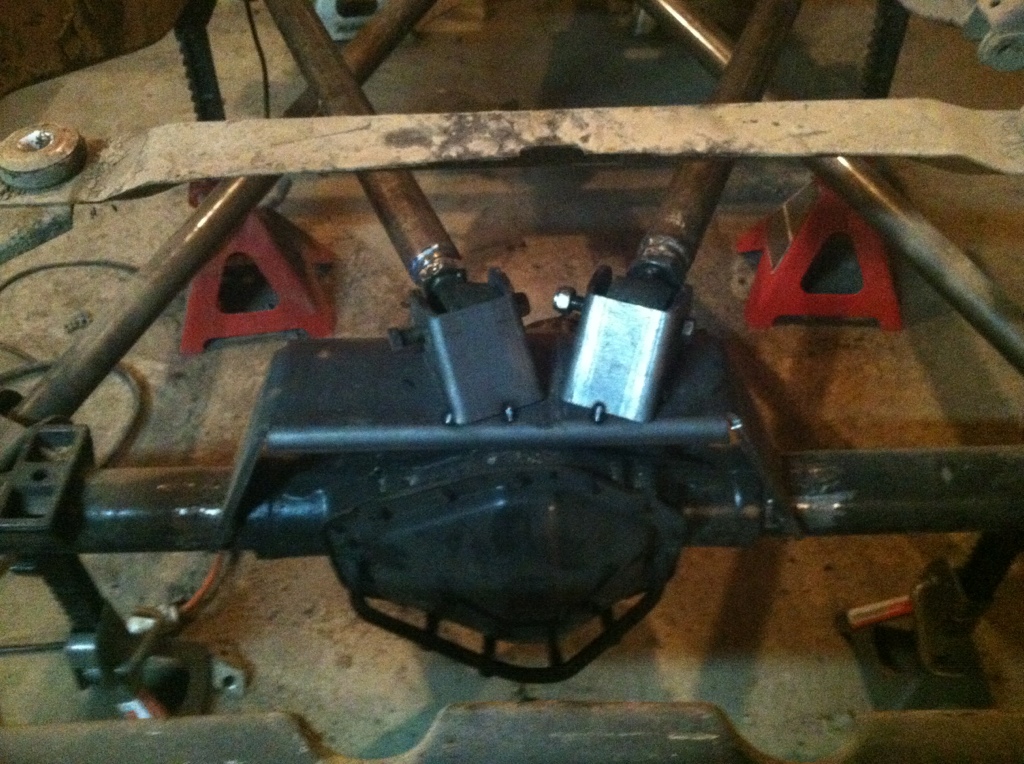
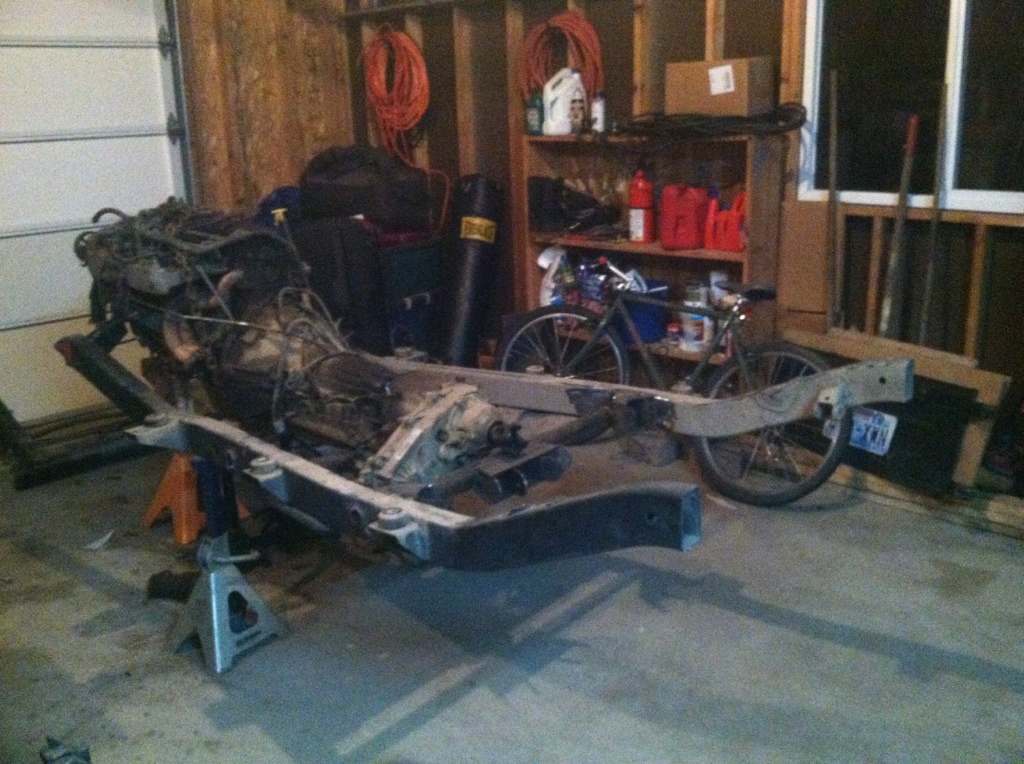
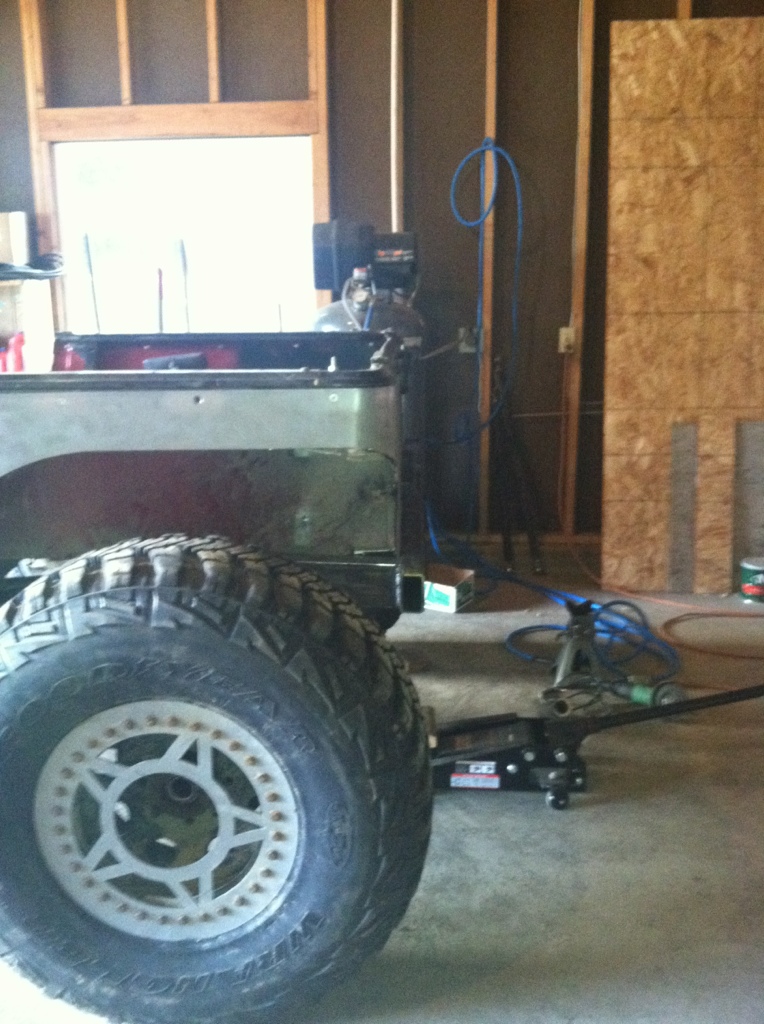
Pulled the rear axle out and took the links off to get all the finish welds done. I then cut off the rear of the frame to get started building a high clearance rear frame section with 2"x4" box tube
Senior Member
Joined: Oct 2009
Posts: 940
Likes: 0
From: Oly, washington
Year: 1989
Model: Cherokee
Engine: 4.0 str. 6
Damn your retiring the cherocar?!! Man that thing was sick. I remember when you were building it up an had leaf fronts an coils rear. But the yj is looking sick man. Keep it up. One of these days I gotta get over to your neck of the woods an come wheeling with yall.
Keep all 4 on the floor see ya on the trails!
Keep all 4 on the floor see ya on the trails!

Thread Starter
CF Veteran
Joined: Jul 2008
Posts: 1,371
Likes: 2
From: Bonney Lake, WA
So over the last week i got the finish welds done on the 14 bolt brackets.
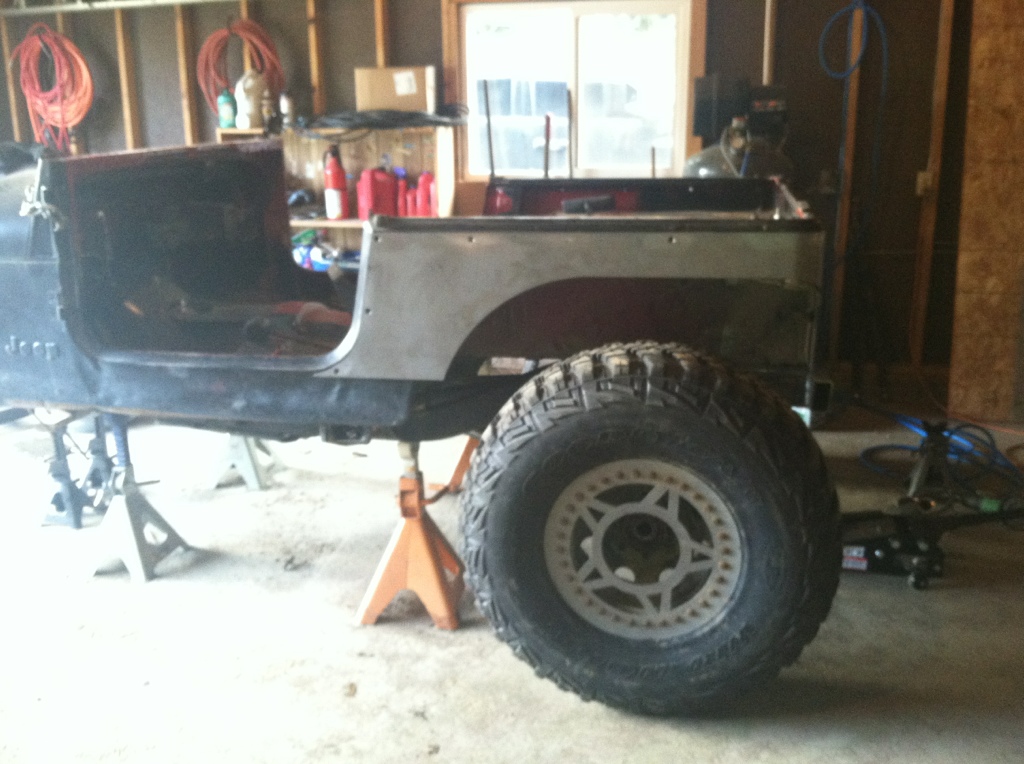
Today i picked up some 2"x4" square tube to build the rear frame and bumper
I cut the body to just under the tailgate to get as much clearance as possible
Rear frame tacked in place
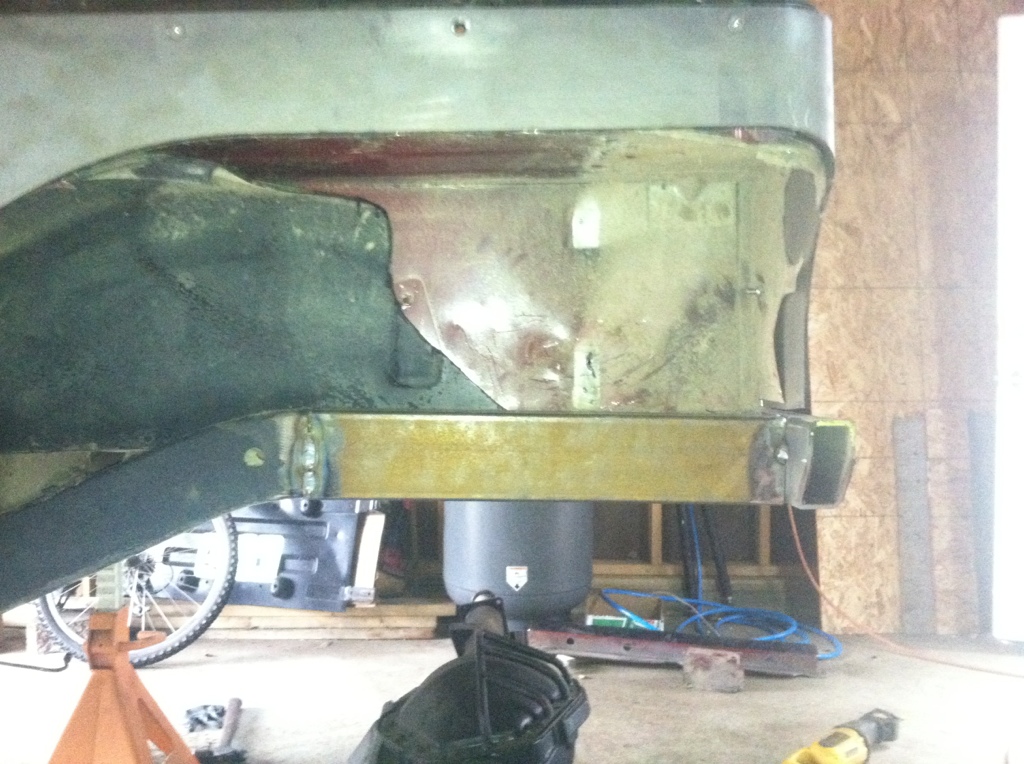
I gained about 4" more clearance than the stock bumper location.
Got the tailgate mounted to the corner guards also. I then realized i would need to make rear body mounts to make sure the tailgate would clear the bumper so i threw together some quick mounts off the new frame which gave me the perfect amount of clearance
I pulled the body back off to finish all the welds on the new frame and made some fish plates for support. I will be sanding down the frame for paint and finish cleaning off all unnecessary brackets from the frame
Today i picked up some 2"x4" square tube to build the rear frame and bumper
I cut the body to just under the tailgate to get as much clearance as possible
Rear frame tacked in place
I gained about 4" more clearance than the stock bumper location.
Got the tailgate mounted to the corner guards also. I then realized i would need to make rear body mounts to make sure the tailgate would clear the bumper so i threw together some quick mounts off the new frame which gave me the perfect amount of clearance
I pulled the body back off to finish all the welds on the new frame and made some fish plates for support. I will be sanding down the frame for paint and finish cleaning off all unnecessary brackets from the frame

Thread Starter
CF Veteran
Joined: Jul 2008
Posts: 1,371
Likes: 2
From: Bonney Lake, WA
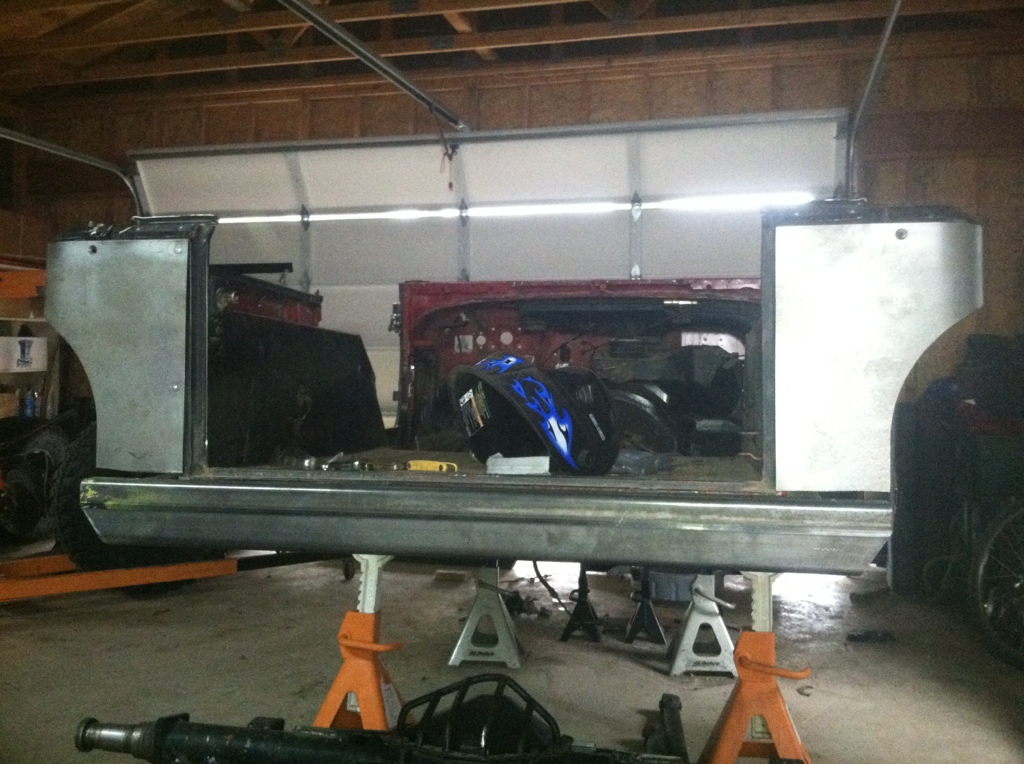
Didnt get a whole lot done today since i ran out of gas for my welder. But i did adjust the rear links a bit to get it all lined up. I threw the tires on and set it to where i want ride height to be


Thread Starter
CF Veteran
Joined: Jul 2008
Posts: 1,371
Likes: 2
From: Bonney Lake, WA
Didnt get a lot done today.
I cleaned up the tub a bit and decided to start on my grill. I love round headlights and didnt want to do a tj grill and hood swap so i figured i could make my own!
Sanded down the headlight housings and cut to size some sheet metal pieces
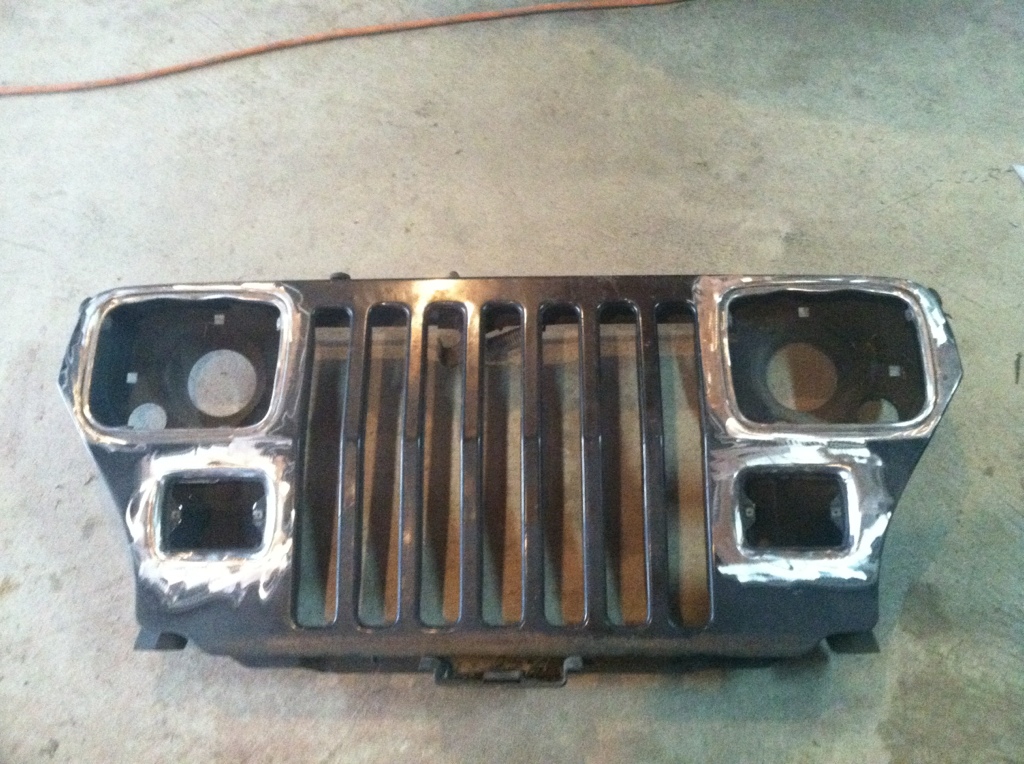
Welded the sheet metal to close off the square headlight holes and marker light holes
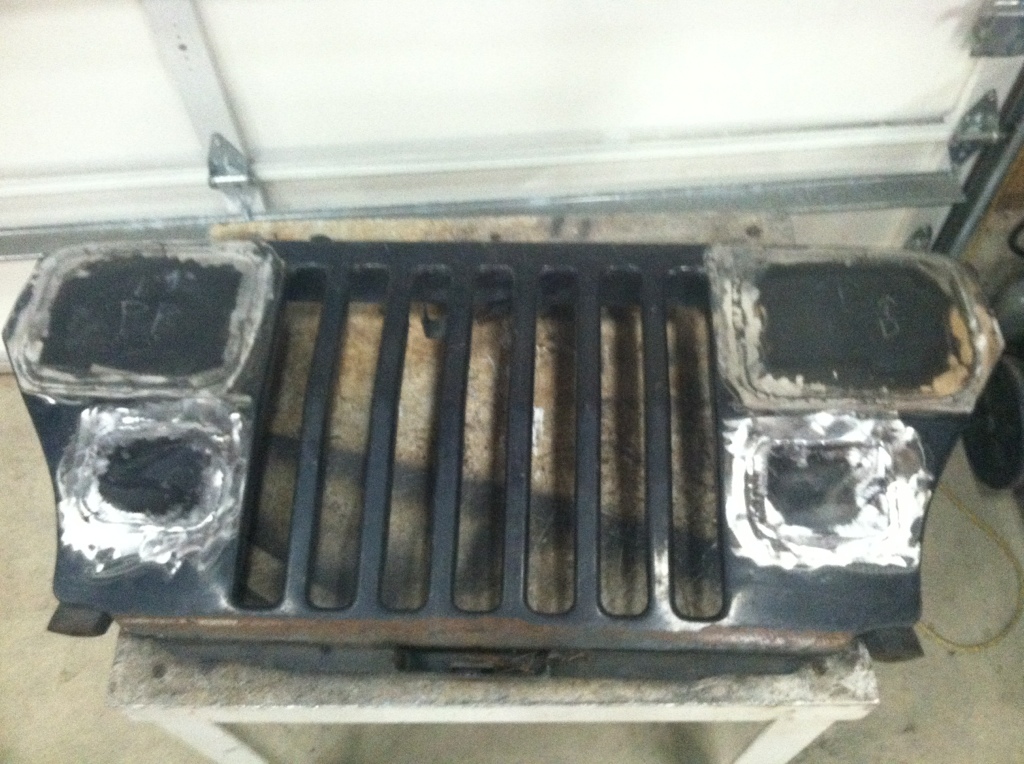
Ground down the welds flush and put some bondo over the welds to smooth it out
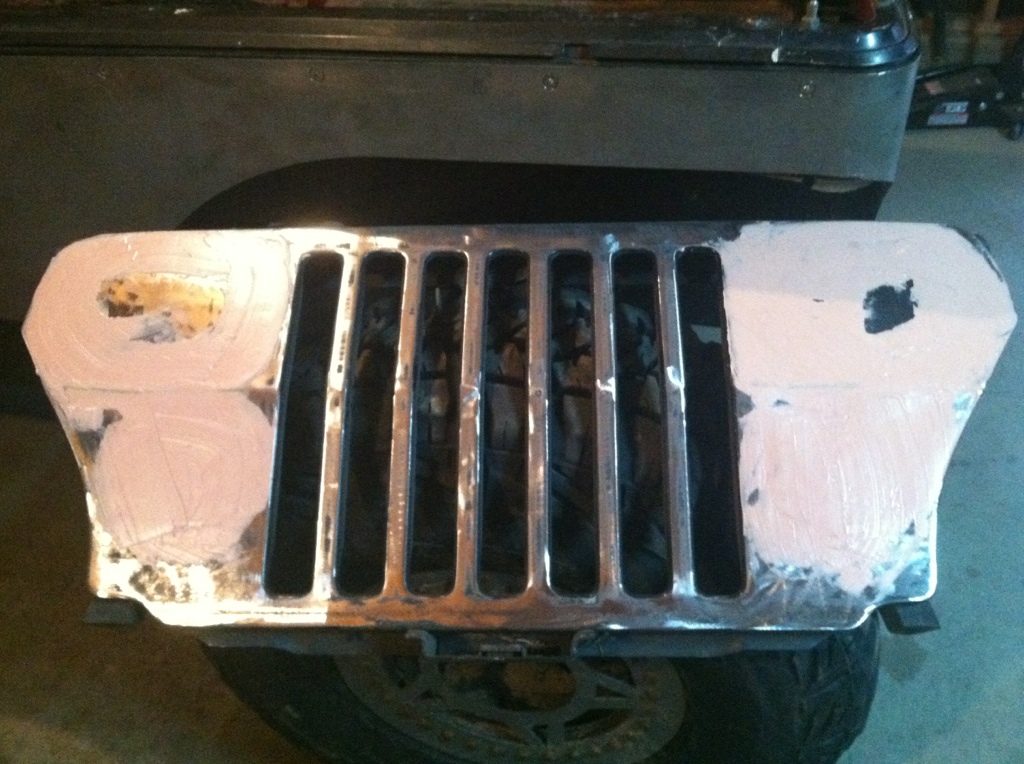
Letting the bondo dry over night then will sand it down this week and decide where and how big i want the new round lights to be
I cleaned up the tub a bit and decided to start on my grill. I love round headlights and didnt want to do a tj grill and hood swap so i figured i could make my own!
Sanded down the headlight housings and cut to size some sheet metal pieces
Welded the sheet metal to close off the square headlight holes and marker light holes
Ground down the welds flush and put some bondo over the welds to smooth it out
Letting the bondo dry over night then will sand it down this week and decide where and how big i want the new round lights to be
Senior Member
Joined: Jul 2010
Posts: 536
Likes: 1
From: anacortes, wa
Year: 1996
Model: Cherokee
Engine: 4.0 HO
Didnt get a lot done today.
I cleaned up the tub a bit and decided to start on my grill. I love round headlights and didnt want to do a tj grill and hood swap so i figured i could make my own!
Sanded down the headlight housings and cut to size some sheet metal pieces
Welded the sheet metal to close off the square headlight holes and marker light holes
Ground down the welds flush and put some bondo over the welds to smooth it out
Letting the bondo dry over night then will sand it down this week and decide where and how big i want the new round lights to be
 know one will know that is a Yj at heart besides us haha!