
Rear Head Bolt #14


Thread Starter
Junior Member
Joined: Mar 2012
Posts: 34
Likes: 0
From: Virginia
Year: 2000
Model: Cherokee
Engine: 4.0L
I have searched this forum a few different times, but unfortunately, I still can not find my answer.
The recommended tool for removing the head bolts in my 2000 XJ is supposedly a 1/2" drive breaker bar and/or ratchet.
But I could/can not seem to fit the 1/2" drive ratchet between the body flange and the socket on the rear head bolt. If you know about the bolt, you know that it leaves only an inch or three to squeeze a socket and ratchet over the head bolt.
I have seen guys on the internet including youtube using the 1/2" drive, but I had to use a 3/8" drive breaker bar personally to get the bolts out, but I'm still left with the issue of torquing them back down.
So, is there a combination of a socket and adapter that I should be using that I just haven't thought of maybe? I need to use the 1/2" drive torque ratchet to tighten everything because I could not find a 3/8" drive that goes up to 120ft.lbs..
Any Advice?

Junior Member
Joined: Jul 2014
Posts: 63
Likes: 0
From: Hertfordshire, UK
Year: 2000
Model: Cherokee
Engine: 4.0 I6
I feel your pain. I've only done it once and it was a real struggle.
I just got the bolt as tight as I could with my fingers, at which point I could just get the socket on (without the bar), then I got that finger tight.
After that I used 2 short extensions with a flexible joint between them. Even then the extension wasn't fully into the socket, just enough to turn it. It only needed about 1/2 a turn beyond finger tight anyway. I was advised here that overtightening is more likely to cause leaks than undertightening and it's been leak free for several months now.

Senior Member
Joined: Jul 2011
Posts: 731
Likes: 3
- Remove the engine cylinder head bolts. Bolt No.14 cannot be removed until the head is moved forward Engine Cylinder Head Assembly Pull bolt No.14 out as far as it will go and then suspend the bolt in this position (tape around the bolt)
- Remove the engine cylinder head and gasket Engine Cylinder Head Assembly
- If this was the first time the bolts were removed, put a paint dab on the top of the bolt. If the bolts have a paint dab on the top of the bolt or it isn't known if they were used before, discard the bolts.
- Stuff clean lint free shop towels into the cylinder bores.
The engine cylinder head gasket is a composition gasket. The gasket is to be installed DRY. DO NOT use a gasket sealing compound on the gasket.
If the engine cylinder head is to be replaced and the original valves used, measure the valve stem diameter. Only standard size valves can be used with a service replacement engine cylinder head unless the replacement head valve stem guide bores are reamed to accommodate oversize valve stems. Remove all carbon buildup and reface the valves.
- Remove the shop towels from the cylinder bores. Coat the bores with clean engine oil.
- Position the engine cylinder head gasket (with the numbers facing up) onto the cylinder block CAUTION: Engine cylinder head bolts should be reused only once. Replace the head bolts if they were used before or if they have a paint dab on the top of the bolt.
- With bolt No.14 held in place (tape around bolt), install the engine cylinder head. Remove the tape from bolt No.14.
- Coat the threads of stud bolt No.11 with Loctite 592 sealant, or equivalent.
- Tighten the engine cylinder head bolts in sequence according to the following procedure Engine Cylinder Head Bolt Tightening SequenceCAUTION: During the final tightening sequence, bolt No.11 will be tightened to a lower torque than the rest of the bolts. DO NOT overtighten bolt No.11.
- Tighten all bolts in sequence (1 through 14) to 30 N�m (22 ft. lbs.) torque.
- Tighten all bolts in sequence (1 through 14) to 61 N�m (45 ft. lbs.) torque.
- Check all bolts to verify they are set to 61 N�m (45 ft. lbs.) torque.
- Tighten bolts (in sequence):
- Bolts 1 through 10 to 149 N�m (110 ft. lbs.) torque.
- Bolt 11 to 13 N�m (100 ft. lbs.) torque.
- Bolts 12 through 14 to 149 N�m (110 ft. lbs.) torque.
- Check all bolts in sequence to verify the correct torque.
- If not already done, clean and mark each bolt with a dab of paint after tightening. Should you encounter bolts which were painted in an earlier service operation, replace them.
- Install
Can you get a socket with a universal joint on it? Or possibly a short stubby extension? Or maybe some combination of deep socket/u-joint?
It also might be possible to unbolt the transmission mount from the crossmember, and jack up on the trans or t-case slightly to give you a smidgen of room at the firewall?
CF Veteran
Joined: Aug 2010
Posts: 8,357
Likes: 103
From: Canton, MI
Year: 1999
Model: Cherokee
Engine: 4.0
I have searched this forum a few different times, but unfortunately, I still can not find my answer.
The recommended tool for removing the head bolts in my 2000 XJ is supposedly a 1/2" drive breaker bar and/or ratchet.
But I could/can not seem to fit the 1/2" drive ratchet between the body flange and the socket on the rear head bolt. If you know about the bolt, you know that it leaves only an inch or three to squeeze a socket and ratchet over the head bolt.
I have seen guys on the internet including youtube using the 1/2" drive, but I had to use a 3/8" drive breaker bar personally to get the bolts out, but I'm still left with the issue of torquing them back down.
So, is there a combination of a socket and adapter that I should be using that I just haven't thought of maybe? I need to use the 1/2" drive torque ratchet to tighten everything because I could not find a 3/8" drive that goes up to 120ft.lbs..
Any Advice?
The recommended tool for removing the head bolts in my 2000 XJ is supposedly a 1/2" drive breaker bar and/or ratchet.
But I could/can not seem to fit the 1/2" drive ratchet between the body flange and the socket on the rear head bolt. If you know about the bolt, you know that it leaves only an inch or three to squeeze a socket and ratchet over the head bolt.
I have seen guys on the internet including youtube using the 1/2" drive, but I had to use a 3/8" drive breaker bar personally to get the bolts out, but I'm still left with the issue of torquing them back down.
So, is there a combination of a socket and adapter that I should be using that I just haven't thought of maybe? I need to use the 1/2" drive torque ratchet to tighten everything because I could not find a 3/8" drive that goes up to 120ft.lbs..
Any Advice?
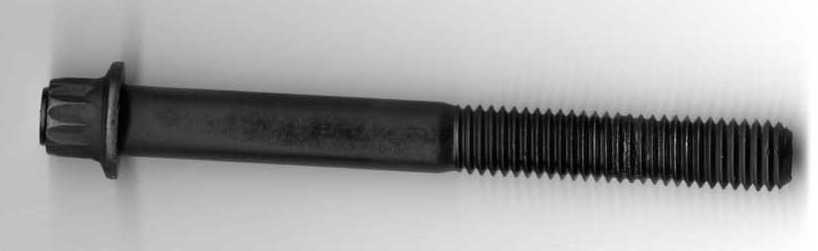
Going on with a new bolt I cut the threaded end off a bolt using a Dremel cut-off wheel (see pic) which allowed the use of a shallow 12 point 1/2"-1/2" drive socket to torque it down.
Don't worry about cutting the threaded end off the bolt, it does not degrade the strength of the bolt. You will, in essence, be making a bolt similar to the bolts under the valve cover. The threaded end of those external bolts were used for a lifting fixture at the factory to install the engine in the Jeep.
With the threaded end cut off the bolt you'll need to find another spot to attach the bonding strap to the intake manifold. Make a new strap, if required, using AWG 8 wire and the approprite terminal ends.
As stated above, you will have to suspend the bolt up to clear the block when removing the head and reinstalling it.
Removal/installation deep socket:
I used a Kobalt (Lowe's) 1/2" Drive, 1/2" 12 point socket deep socket to remove/install the bolts (except #14). I had to drill out the center of the socket using a 7/16" drill so it would fit over the threads on the external bolts. The 12 point Kobalt shallow socket didn't need drilling.
Modified bolt:
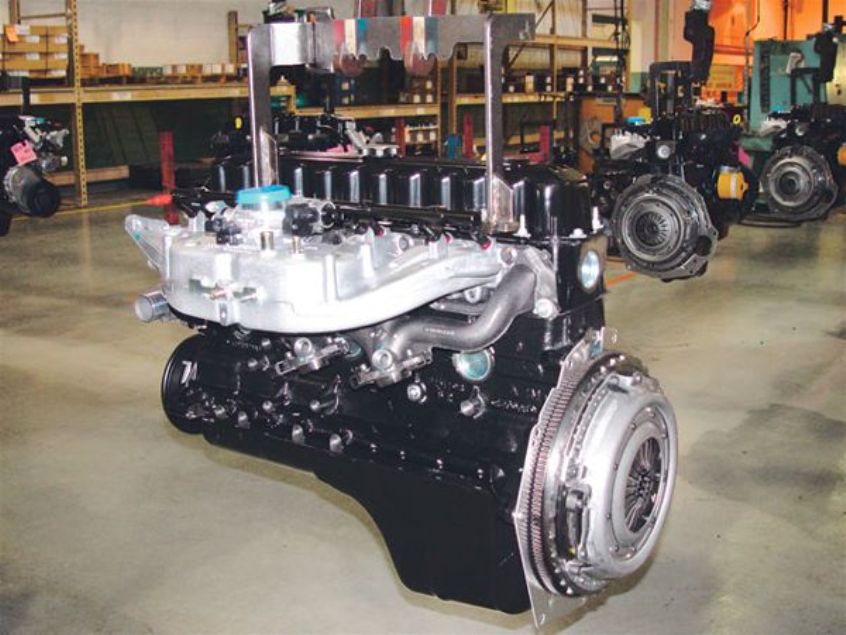
Pic of lifting fixture installed at the factory:
Thread Starter
Junior Member
Joined: Mar 2012
Posts: 34
Likes: 0
From: Virginia
Year: 2000
Model: Cherokee
Engine: 4.0L
Thanks Guys, I'm going to try some Snap-On Combinations. I'm sure between that, AllData, this, and sense, I'll be able to torque it down.
Appreciate It!
Appreciate It!

Senior Member
Joined: May 2014
Posts: 672
Likes: 5
From: Colorado
Year: 2001, 1997
Model: Cherokee
Engine: 4.0L
I used a 3/8" drive 12-point socket to loosen up that socket. I may have also used a 1/2"F x 3/8"M adapter and a 1/2" drive breaker bar. Some people use 1/2" drive 13mm shallow socket there and get the breaker bar mostly on. To torque that bolt, I used a 3/8" drive torque wrench. My torque wrench goes up to 100 ft-lb on the scale, but I found I could set it 110 ft-lb. I compared on some bolts against my 1/2" drive torque wrench and as best I could tell it was accurate.
Last edited by md21722; Jan 22, 2015 at 10:45 PM.
Trending Topics
Thread Starter
Junior Member
Joined: Mar 2012
Posts: 34
Likes: 0
From: Virginia
Year: 2000
Model: Cherokee
Engine: 4.0L
I used a 3/8" drive 12-point socket to loosen up that socket. I may have also used a 1/2"F x 3/8"M adapter and a 1/2" drive breaker bar. Some people use 1/2" drive 13mm shallow socket there and get the breaker bar mostly on. To torque that bolt, I used a 3/8" drive torque wrench. My torque wrench goes up to 100 ft-lb on the scale, but I found I could set it 110 ft-lb. I compared on some bolts against my 1/2" drive torque wrench and as best I could tell it was accurate.
Sounds good. I used a 3/8" breaker bar w/ the 12-pt as well. I may talk to the Snap On dealer at work this week and see if he's got any new 3/8" drive torque wrenches.


Thread
Thread Starter
Forum
Replies
Last Post
SixShooterXJCherokee
Stock XJ Cherokee Tech. All XJ Non-modified/stock questions go here
9
Sep 23, 2015 06:27 PM
SixShooterXJCherokee
Stock XJ Cherokee Tech. All XJ Non-modified/stock questions go here
9
Aug 30, 2015 08:06 PM
XJUSMC
Modified XJ Cherokee Tech
2
Aug 28, 2015 04:52 AM
lpresnell
Stock Grand Cherokee Tech. All ZJ/WJ/WK Non-modified/stock questions go here!
9
Aug 26, 2015 02:34 PM
Currently Active Users Viewing This Thread: 1 (0 members and 1 guests)