
Kickin' a dead horse - Renix Closed -> Open swap parts list

Thread Starter
Seasoned Member


Joined: Aug 2011
Posts: 331
Likes: 14
From: Dallas, Texas
Year: 1987
Model: Wagoneer
Engine: 4.0L
Hey fellas,
Was hoping I could get a few points clarified and *hopefully* help others going through the same process while updating my old closed cooling system to the newer open cooling system. I have read and re-read so many dang posts that my head is swimming. I decided to compile a list of parts I'd need for *my* build as all the different threads seemed to have variations. Some keep the heater control valve, some delete it. Some use standard hoses and some use formed hoses. Some hard wire the fan to manual, some convert it to a different type of switch. Etc. Etc. Pretty confusing for me to be honest.
Well, I'm trying to do the following:
I was hoping that I could get some input on my list below, and comments on the areas I denoted as "Point 1", "Point 2", etc.

Point 2: Is the old-style Renix upper rad hose still used for this conversion?
Point 3: From what I can gather both new/old style hoses are the same and both will work?
Point 7 & 8: Yeah I still don't get how this works and/or the best/easiest way to do this. I'd like my e-fan to be automatic as it would be when stock.
Point 13: Are there literally any reasons why someone would want to keep this valve? It seems that having fluid flowing constantly would prevent sludge build-up and this would be nothing but advantageous...that said, the engineers didn't agree with that statement...so there is a reason.
Point 15: I've got a cracked/collapsed piece of vacuum tube that runs into the firewall. About 18'' back from the firewall. Is there a way to splice and fix this or do you just replace the whole line? If the whole line is replaced, is there a certain part number or do you just grab vacuum hard line and plug/play?
Point 16 & 17: These are the part numbers referenced in the below linked thread, but do these need to be cut/spliced to make them fit the heater core input/outputs when upgrading the thermostat housings only?
Point 18: These are the pieces that BleepinJeep used during his youtube show, but he didn't use preformed hoses and therefore may have had to do some additional work I'd imagine...so since I want preformed hoses do I need this adapters?
Point 19: I was reading this recent thread with input from Cruiser54 and ElMartillo, but again, his project was a bit different than mine. I don't get why ElMartillo used/bought a 90* elbow.
https://www.cherokeeforum.com/f2/hos...221251/index2/
Lastly, thank y'all for your assistance!
S/F,
-Matt
Was hoping I could get a few points clarified and *hopefully* help others going through the same process while updating my old closed cooling system to the newer open cooling system. I have read and re-read so many dang posts that my head is swimming. I decided to compile a list of parts I'd need for *my* build as all the different threads seemed to have variations. Some keep the heater control valve, some delete it. Some use standard hoses and some use formed hoses. Some hard wire the fan to manual, some convert it to a different type of switch. Etc. Etc.
Pretty confusing for me to be honest. Well, I'm trying to do the following:
- Replace the Renix radiator with HO radiator
- Eliminate the heater control valve
- Have the e-fan switch on automatically
- Have it look a close to stock as possible/plausible (ie, what preformed hoses)
I was hoping that I could get some input on my list below, and comments on the areas I denoted as "Point 1", "Point 2", etc.

Point 2: Is the old-style Renix upper rad hose still used for this conversion?
Point 3: From what I can gather both new/old style hoses are the same and both will work?
Point 7 & 8: Yeah I still don't get how this works and/or the best/easiest way to do this. I'd like my e-fan to be automatic as it would be when stock.
Point 13: Are there literally any reasons why someone would want to keep this valve? It seems that having fluid flowing constantly would prevent sludge build-up and this would be nothing but advantageous...that said, the engineers didn't agree with that statement...so there is a reason.
Point 15: I've got a cracked/collapsed piece of vacuum tube that runs into the firewall. About 18'' back from the firewall. Is there a way to splice and fix this or do you just replace the whole line? If the whole line is replaced, is there a certain part number or do you just grab vacuum hard line and plug/play?
Point 16 & 17: These are the part numbers referenced in the below linked thread, but do these need to be cut/spliced to make them fit the heater core input/outputs when upgrading the thermostat housings only?
Point 18: These are the pieces that BleepinJeep used during his youtube show, but he didn't use preformed hoses and therefore may have had to do some additional work I'd imagine...so since I want preformed hoses do I need this adapters?
Point 19: I was reading this recent thread with input from Cruiser54 and ElMartillo, but again, his project was a bit different than mine. I don't get why ElMartillo used/bought a 90* elbow.
https://www.cherokeeforum.com/f2/hos...221251/index2/
Lastly, thank y'all for your assistance!
S/F,
-Matt
Thread Starter
Seasoned Member
Joined: Aug 2011
Posts: 331
Likes: 14
From: Dallas, Texas
Year: 1987
Model: Wagoneer
Engine: 4.0L
Unfortunately, the radiator is leaking from both reservoirs, the water pump is toast, and all the piping could use a a changing - dry rot galore underneath the hood. Reason I'm looking to do the change over is for the easy of checking coolant level/quality over the older version.
CF Veteran
Joined: Apr 2009
Posts: 4,734
Likes: 12
Year: 2015, 2012
Model: Grand Cherokee (WK2)
Engine: 3.6L
I found it easier to see through the coolant reservoir on my '87 versus trying to peer down into the overflow tank on my '92.
I actually paid closer attention to the '87 because it was easier.
I actually paid closer attention to the '87 because it was easier.
::CF Moderator::
Joined: Aug 2011
Posts: 43,971
Likes: 1,577
From: Prescott, Az
Year: 1990
Model: Cherokee (XJ)
Engine: 4.0
Coupla things here.
You CAN get an open system radiator with the bung for the fan switch.
Change to the later heater hoses at the same time. Napa 11038 and 11039.
As for the vacuum lines to the ball in the front bumper, relocate the ball to the engine bay. Keep in mind in the ne photo that the recovery bottle was temporary....
Thread Starter
Seasoned Member
Joined: Aug 2011
Posts: 331
Likes: 14
From: Dallas, Texas
Year: 1987
Model: Wagoneer
Engine: 4.0L
Coupla things here.
You CAN get an open system radiator with the bung for the fan switch.
Change to the later heater hoses at the same time. Napa 11038 and 11039.
As for the vacuum lines to the ball in the front bumper, relocate the ball to the engine bay. Keep in mind in the ne photo that the recovery bottle was temporary....
You CAN get an open system radiator with the bung for the fan switch.
Change to the later heater hoses at the same time. Napa 11038 and 11039.
As for the vacuum lines to the ball in the front bumper, relocate the ball to the engine bay. Keep in mind in the ne photo that the recovery bottle was temporary....
Thanks for the tips. I'll work to move that little pressure ball.
So I've not opened my radiator yet - do you happen to know what brand or possibly a part number for the radiator with the bung...that seems like a much easier option.
Thread Starter
Seasoned Member
Joined: Aug 2011
Posts: 331
Likes: 14
From: Dallas, Texas
Year: 1987
Model: Wagoneer
Engine: 4.0L
I do get your point, but I just keep hearing about how unreliable this system can be, I figured since mine is currently shot that it's as good a time as any to get the worrisome monkey off my back.
Trending Topics
::CF Moderator::
Joined: Aug 2011
Posts: 43,971
Likes: 1,577
From: Prescott, Az
Year: 1990
Model: Cherokee (XJ)
Engine: 4.0
I've bought them at Napa and they came with the bung.
::CF Moderator::
Joined: Aug 2011
Posts: 43,971
Likes: 1,577
From: Prescott, Az
Year: 1990
Model: Cherokee (XJ)
Engine: 4.0
So, if you need a radiator, go open system. If you have good radiators like mine do, do the filler neck mod.
That plastic bottle needs to go. Too much of a liability.
Thread Starter
Seasoned Member
Joined: Aug 2011
Posts: 331
Likes: 14
From: Dallas, Texas
Year: 1987
Model: Wagoneer
Engine: 4.0L
So this one actually appears to have the bung. I've got it reserved and I'm going to pick it up today. Fingers crossed!
http://www.napaonline.com/Catalog/Ca...02_0240358698#
http://www.napaonline.com/Catalog/Ca...02_0240358698#
::CF Moderator::
Joined: Aug 2011
Posts: 43,971
Likes: 1,577
From: Prescott, Az
Year: 1990
Model: Cherokee (XJ)
Engine: 4.0
So this one actually appears to have the bung. I've got it reserved and I'm going to pick it up today. Fingers crossed!
http://www.napaonline.com/Catalog/Ca...02_0240358698#
http://www.napaonline.com/Catalog/Ca...02_0240358698#
Looks like all you'll need is heater hoses, recovery bottle and splice......
CF Veteran
Joined: Apr 2009
Posts: 4,734
Likes: 12
Year: 2015, 2012
Model: Grand Cherokee (WK2)
Engine: 3.6L
The pressure bottles do seem to be fragile. I saw one time where some company had fabbed up one made from aluminum. Looked much stronger. I think it was around $100.
Thread Starter
Seasoned Member
Joined: Aug 2011
Posts: 331
Likes: 14
From: Dallas, Texas
Year: 1987
Model: Wagoneer
Engine: 4.0L
That and the plastic heater water control valve. I did find a metal one, made by Murray, at O'Reilly's. But I took your advice and eliminated the valve completely.
The pressure bottles do seem to be fragile. I saw one time where some company had fabbed up one made from aluminum. Looked much stronger. I think it was around $100.
The pressure bottles do seem to be fragile. I saw one time where some company had fabbed up one made from aluminum. Looked much stronger. I think it was around $100.
That's basically the reason I want to convert; the plastic bottle/lid and the fact that most of my system is crapped out already. If I replace the leaking radiator (which probably lowered the pressure?) with a new sealed radiator, next I'm going to have a lid blown off, etc etc.
I'm adding everything up right now (I still need to get the coolant costs to be accurate), but so far, total cost to convert over is going to be about $250, but that's with all new hoses, clamps, etc. Not really too too awful

::CF Moderator::
Joined: Aug 2011
Posts: 43,971
Likes: 1,577
From: Prescott, Az
Year: 1990
Model: Cherokee (XJ)
Engine: 4.0
Firestorm,
That's basically the reason I want to convert; the plastic bottle/lid and the fact that most of my system is crapped out already. If I replace the leaking radiator (which probably lowered the pressure?) with a new sealed radiator, next I'm going to have a lid blown off, etc etc.
I'm adding everything up right now (I still need to get the coolant costs to be accurate), but so far, total cost to convert over is going to be about $250, but that's with all new hoses, clamps, etc. Not really too too awful
Thread Starter
Seasoned Member
Joined: Aug 2011
Posts: 331
Likes: 14
From: Dallas, Texas
Year: 1987
Model: Wagoneer
Engine: 4.0L
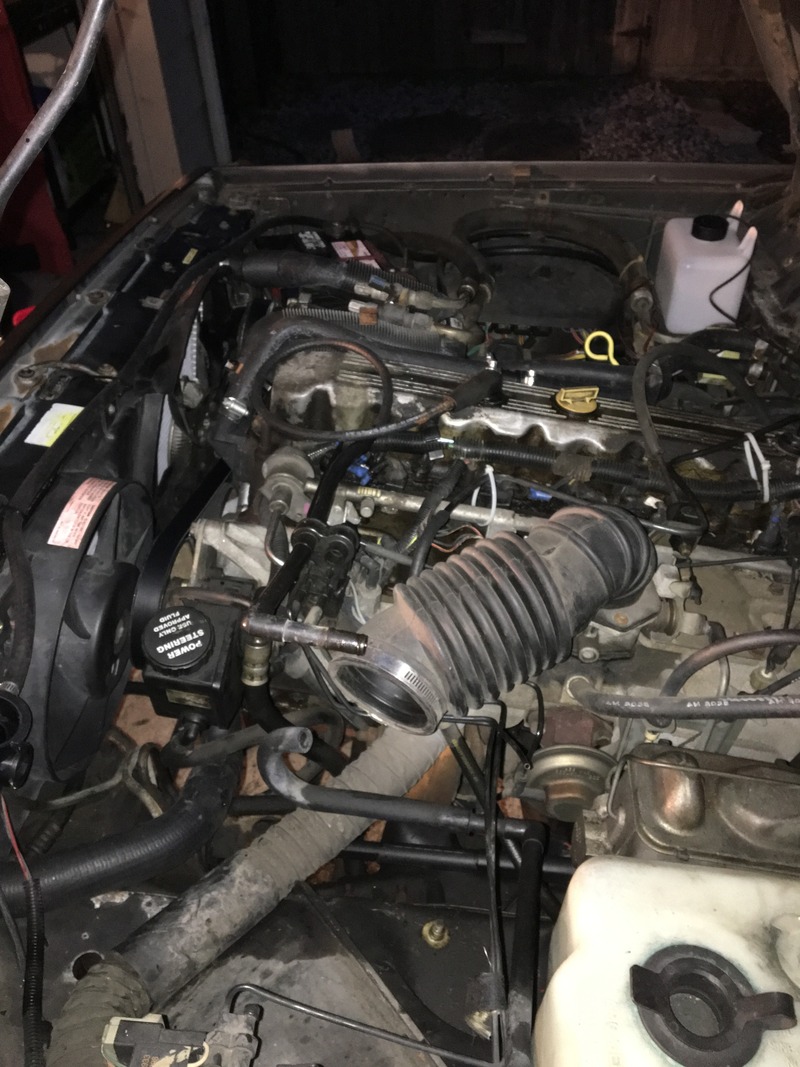
Well great news! Did the install today and I can definitely state that I over-estimated the amount of complexity that would be involved in the switchover.
I've only had two hiccups; 1) I somehow cracked the thermostat housing when tightening the bottom bolt. It leaks pretty badly when running so I wasn't even able to let it get up to temperature to put the additional coolant/distilled water into the system. Pretty easy fix though. And 2) I absolutely destroyed one of the fan nuts getting it off. I think the clutch is gone anyway, so I'll be upgrading to a dual electric fan when funds avail themselves. That said, I need to find another nut until then I 'reckon.
Lastly, I didn't loose a single *drop* of ATF fluid during the changeover. I checked the dipstick tube and it was completely dry. I did not add anymore just yet because my driveway is on a fairly steep incline and the front is elevated, so I want to wait to check again before I add additional fluid.
All-in-all though, this was a very very easy changeover and I'll have piece of mind now that I've flooded both the heater core and the engine with fresh water. I wasn't able to fully drain the engine after flooding it with the hose, so I'll probably end up testing the coolant to ensure I have the proper mixture before too long.
