
How to Rebuild 97-01 XJ Hatch Release and Latch - Picture Heavy


Thread Starter
Junior Member
Joined: Sep 2010
Posts: 31
Likes: 0
From: Empire of Alaska
Year: 2000
Model: Cherokee
Engine: 4.0L
Check out my other thread on installing an internal release for the hatch so that you'll never have a hatch stuck shut again or have to shimmy out of the back doors when camping out: Installing an Interior Hatch Release in your XJ
Greetings. I figured after coming here for years and mostly lurking due to lack of time I should start posting up some informational threads on subjects that I wasn't able to find when I had these problems. This one specifically pertains to the rear latch and release on the hatch of last generation Cherokees sticking due to rust, general malingering, and incompetent previous owners. I'll say this right now, this is not a hand-holding how-to, if you can't use a basic drill and punches just use a big hammer to smash these parts out and replace them with eBay stuff. This will also be a long read since I'd rather write it up once than answer a million questions. For the short version just scroll through the pictures but don't blame if you mess something up.
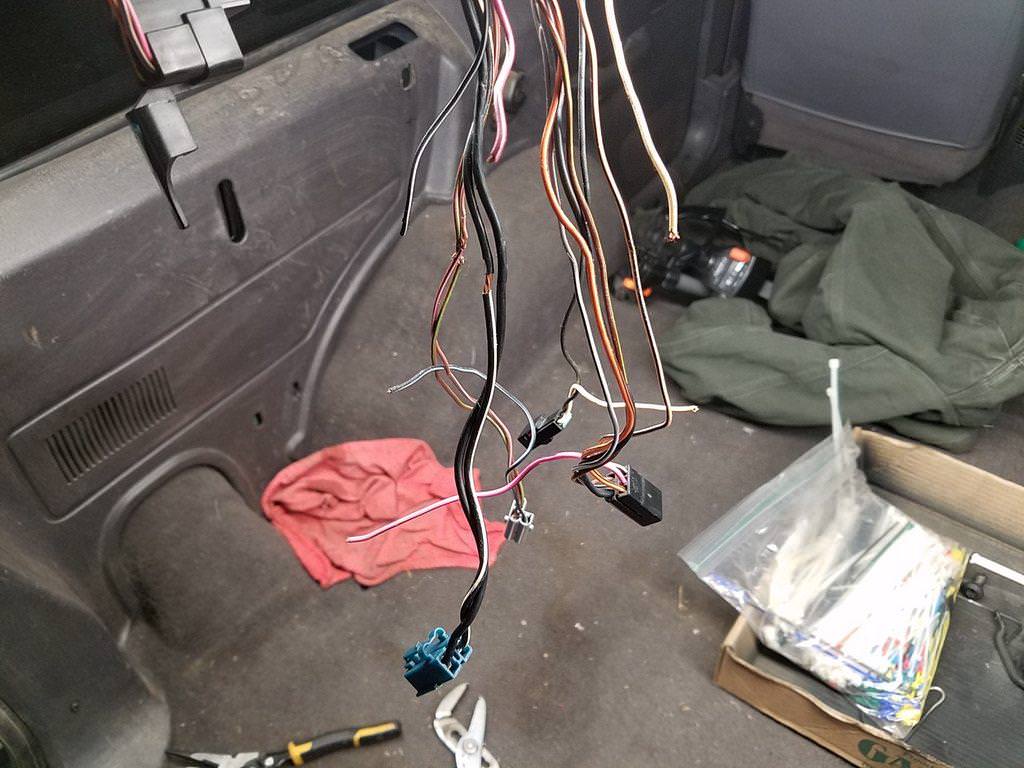
This all started with the automatic door locks turning on the rear wiper and the next day the brake pedal doing the same thing. I pulled the hatch apart to find I had a couple of broken wires. I have no idea how anything back there was working once I unwrapped the loom. That's another thread.

The only replacement parts you'll need for this are two 1.73-2" stainless 1/4-20 or 1/4-28 bolts with some sort of head that you can thin down considerably and locking nuts, preferably nylocks. You'll see why later. At first I used a couple of hex bolts I had lying around but those ended up being too short to catch the nylocks so please ignore them in the images where they're present. Alternatively you can use some Chicago/sex/binding bolts cut to the exact length as the original post's shoulders but since those are more expensive and harder to find I doubt many will follow that route. You could also tack weld the original rivets back into place if you were careful removing them but then you can't service this in the future. Also, you should really clean out the bottom of the hatch and use anti-rust paint while you're in there, shouldn't you? Don't half *** this if you're going to waste so much of your life fixing stupid things like the rear hatch.
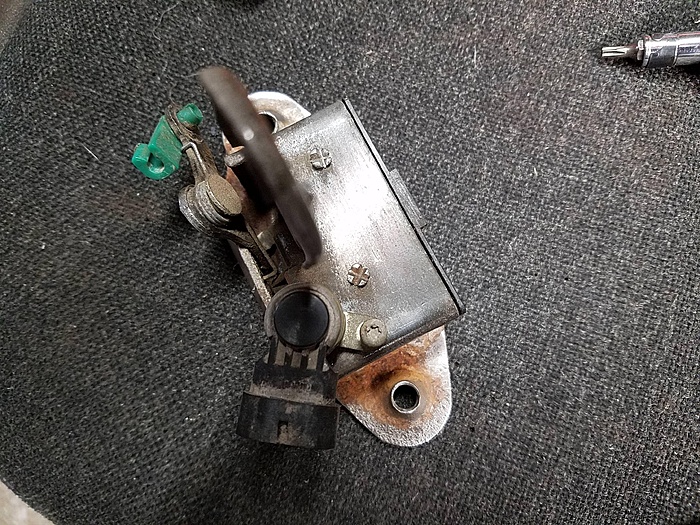
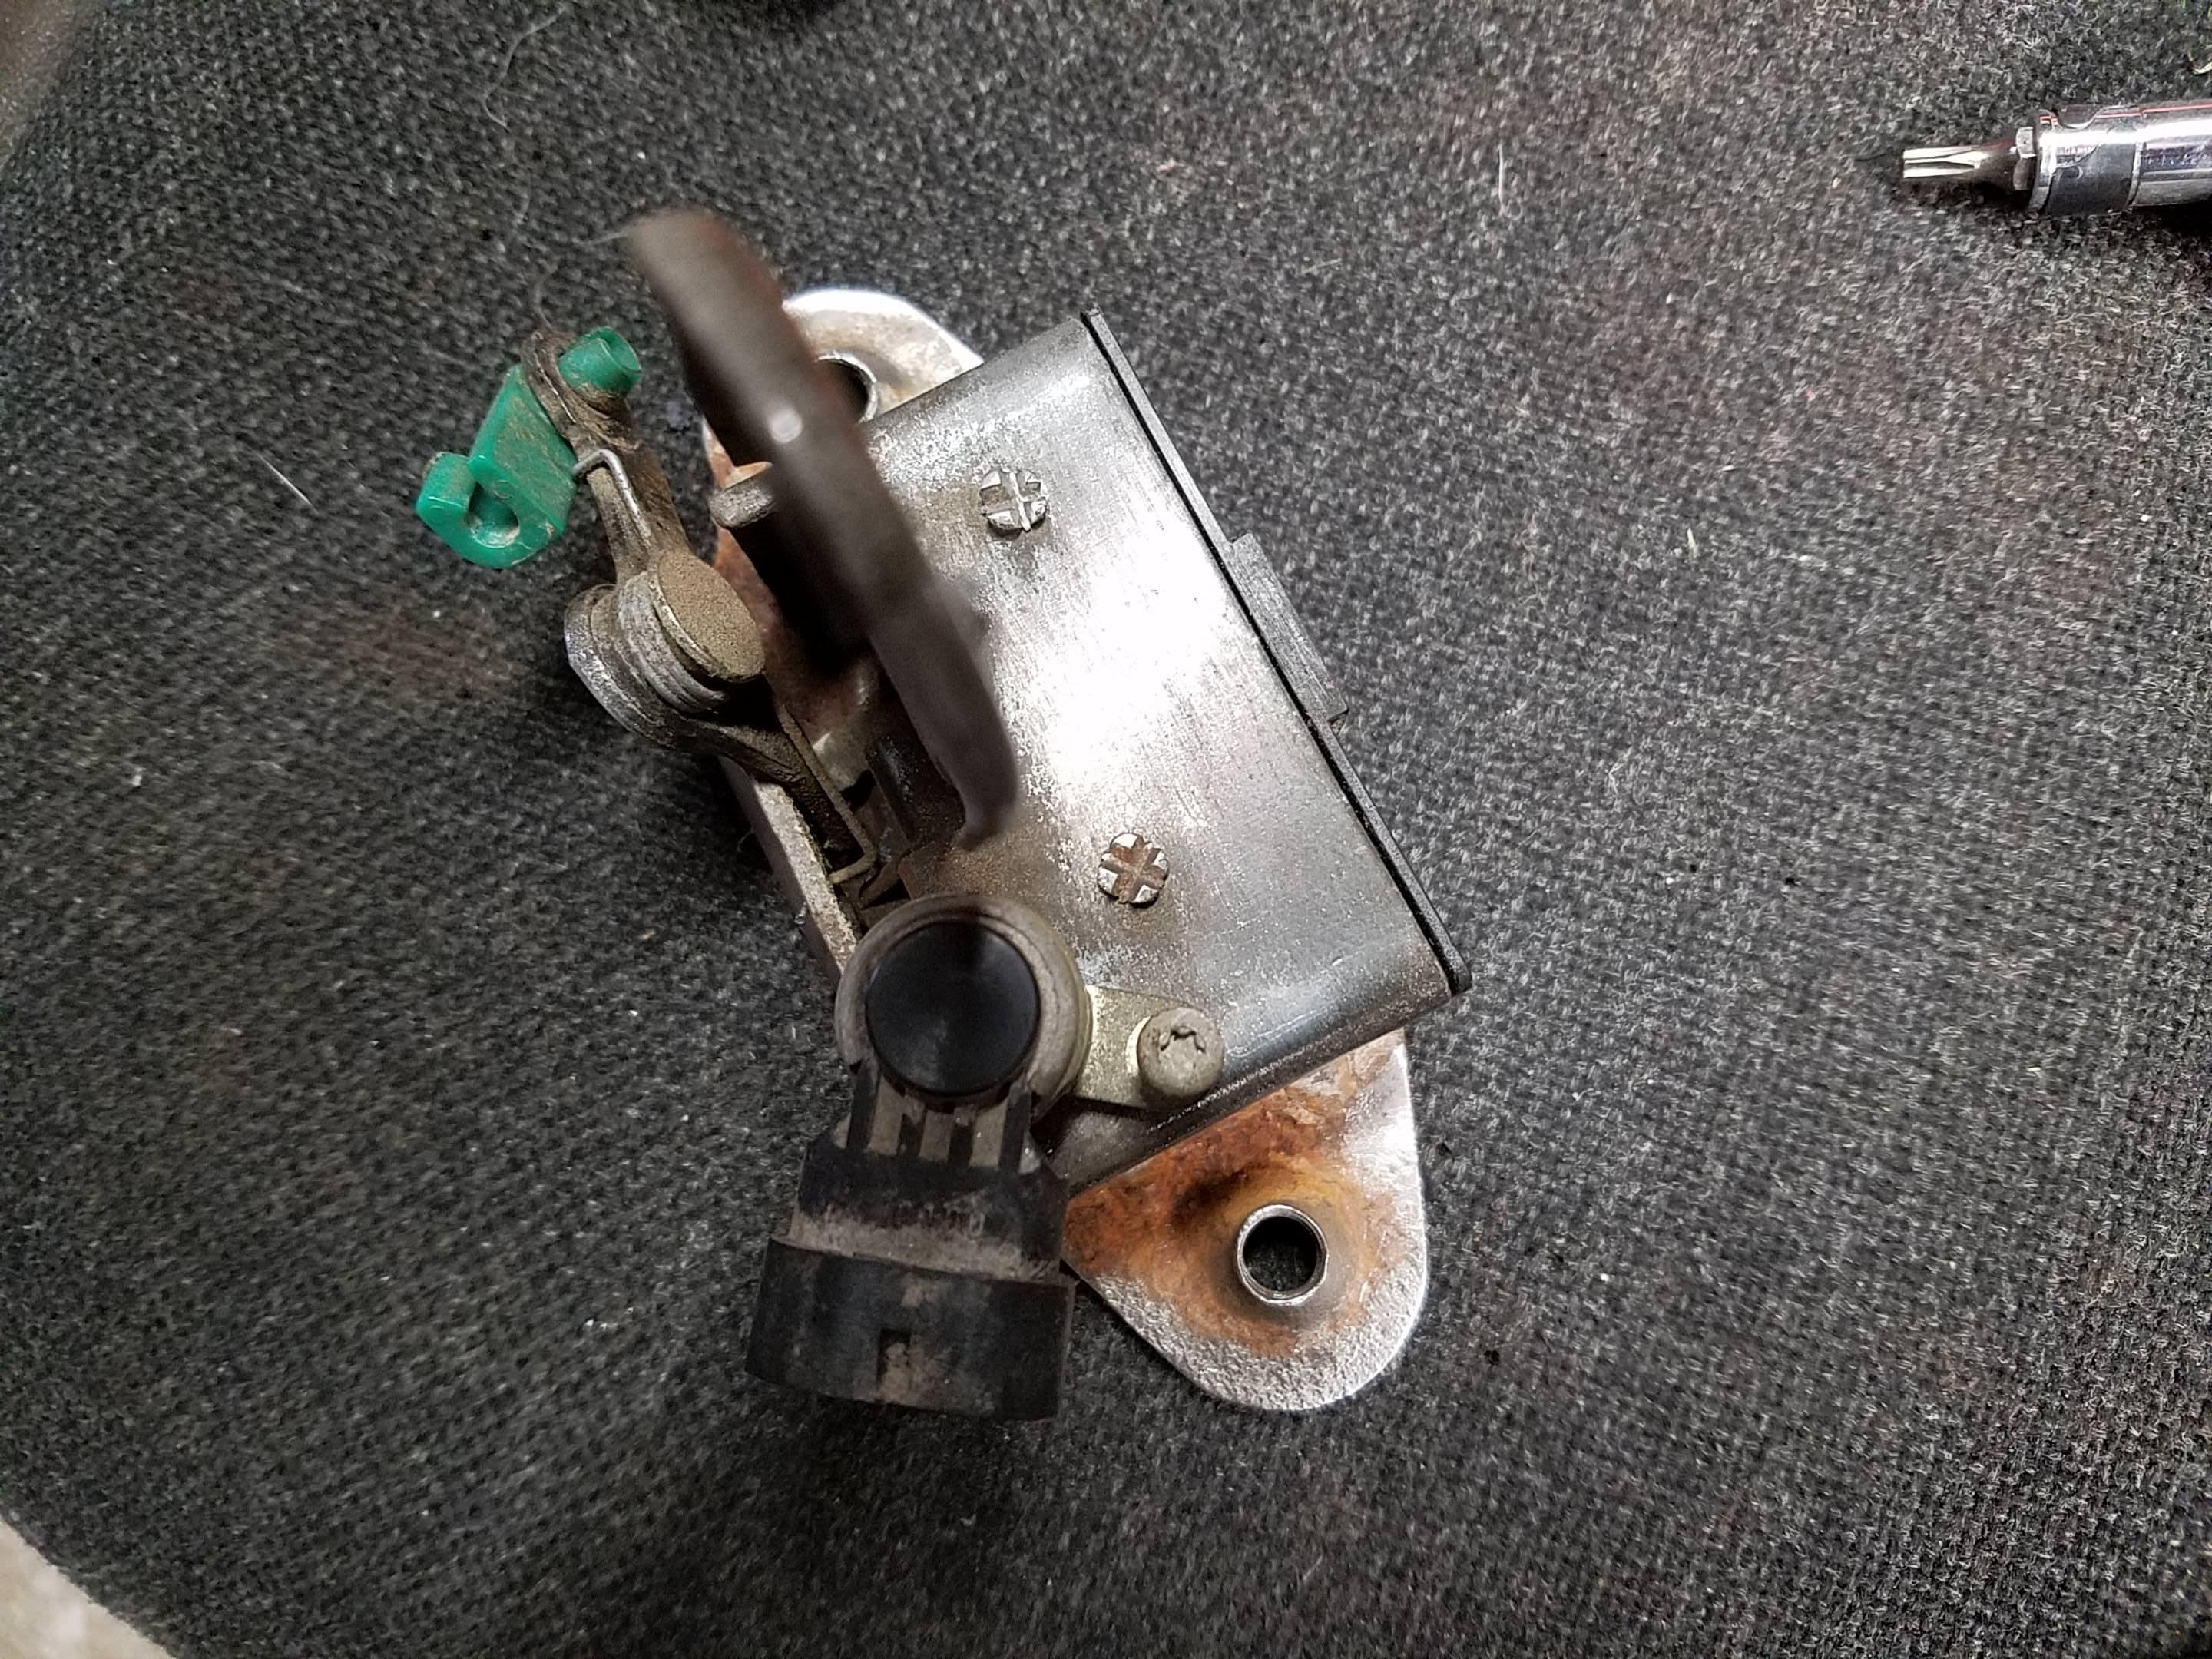
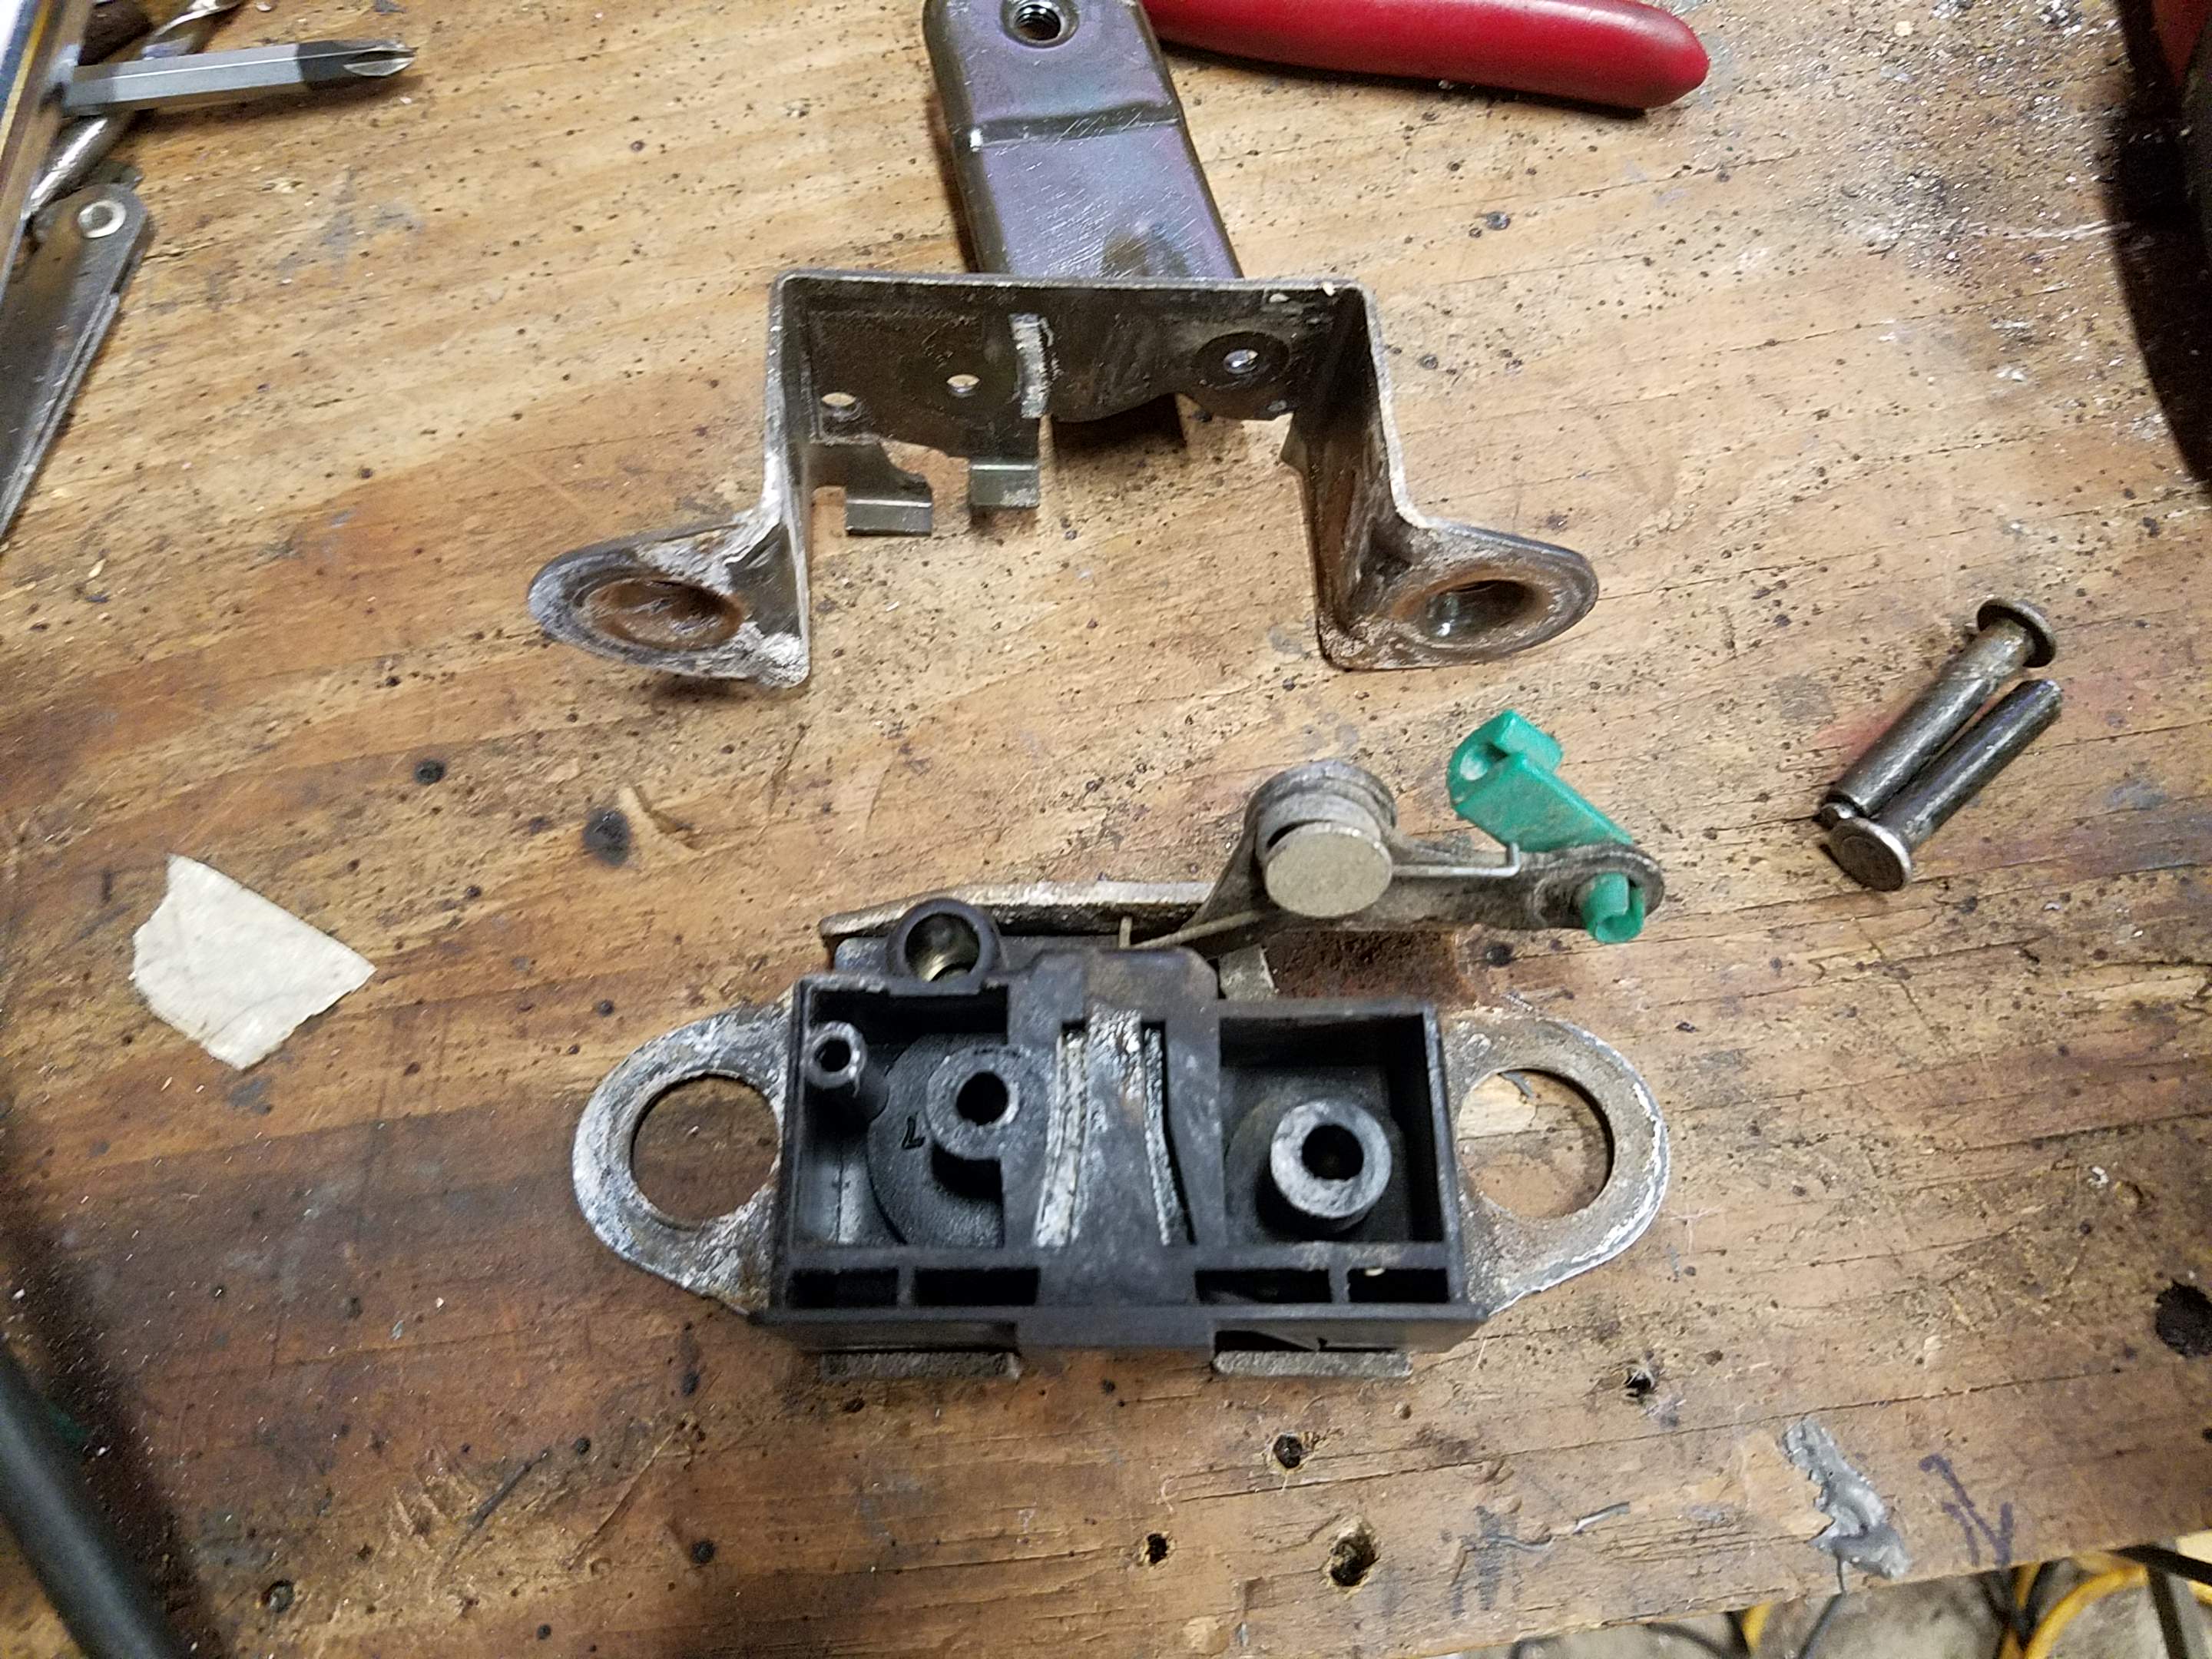
First, the actual catch mechanism. This is removed by unplugging the latch switch on the left and detaching the rod that goes up to the release on the right side. Remove the three T40 Torx bolts and pull it out through the back of the hatch. Mine was quite rusty due to living its life in Vermont and being sprayed full of who knows what. I've already cleaned most of the rust off in the first pictures.
This unit was never meant to be taken apart for servicing but we know that's just part of the master plan of our oligarch masters to keep the common man down. Get out your angle grinder, file, Dremel, or axe and go at it! Just keep in mind that this is mostly sheet metal and plastic so be gentle. Remove the hatch switch first with your T15 Torx bit.
Knock the pins out through the bottom and pull the top piece of the bracket off.

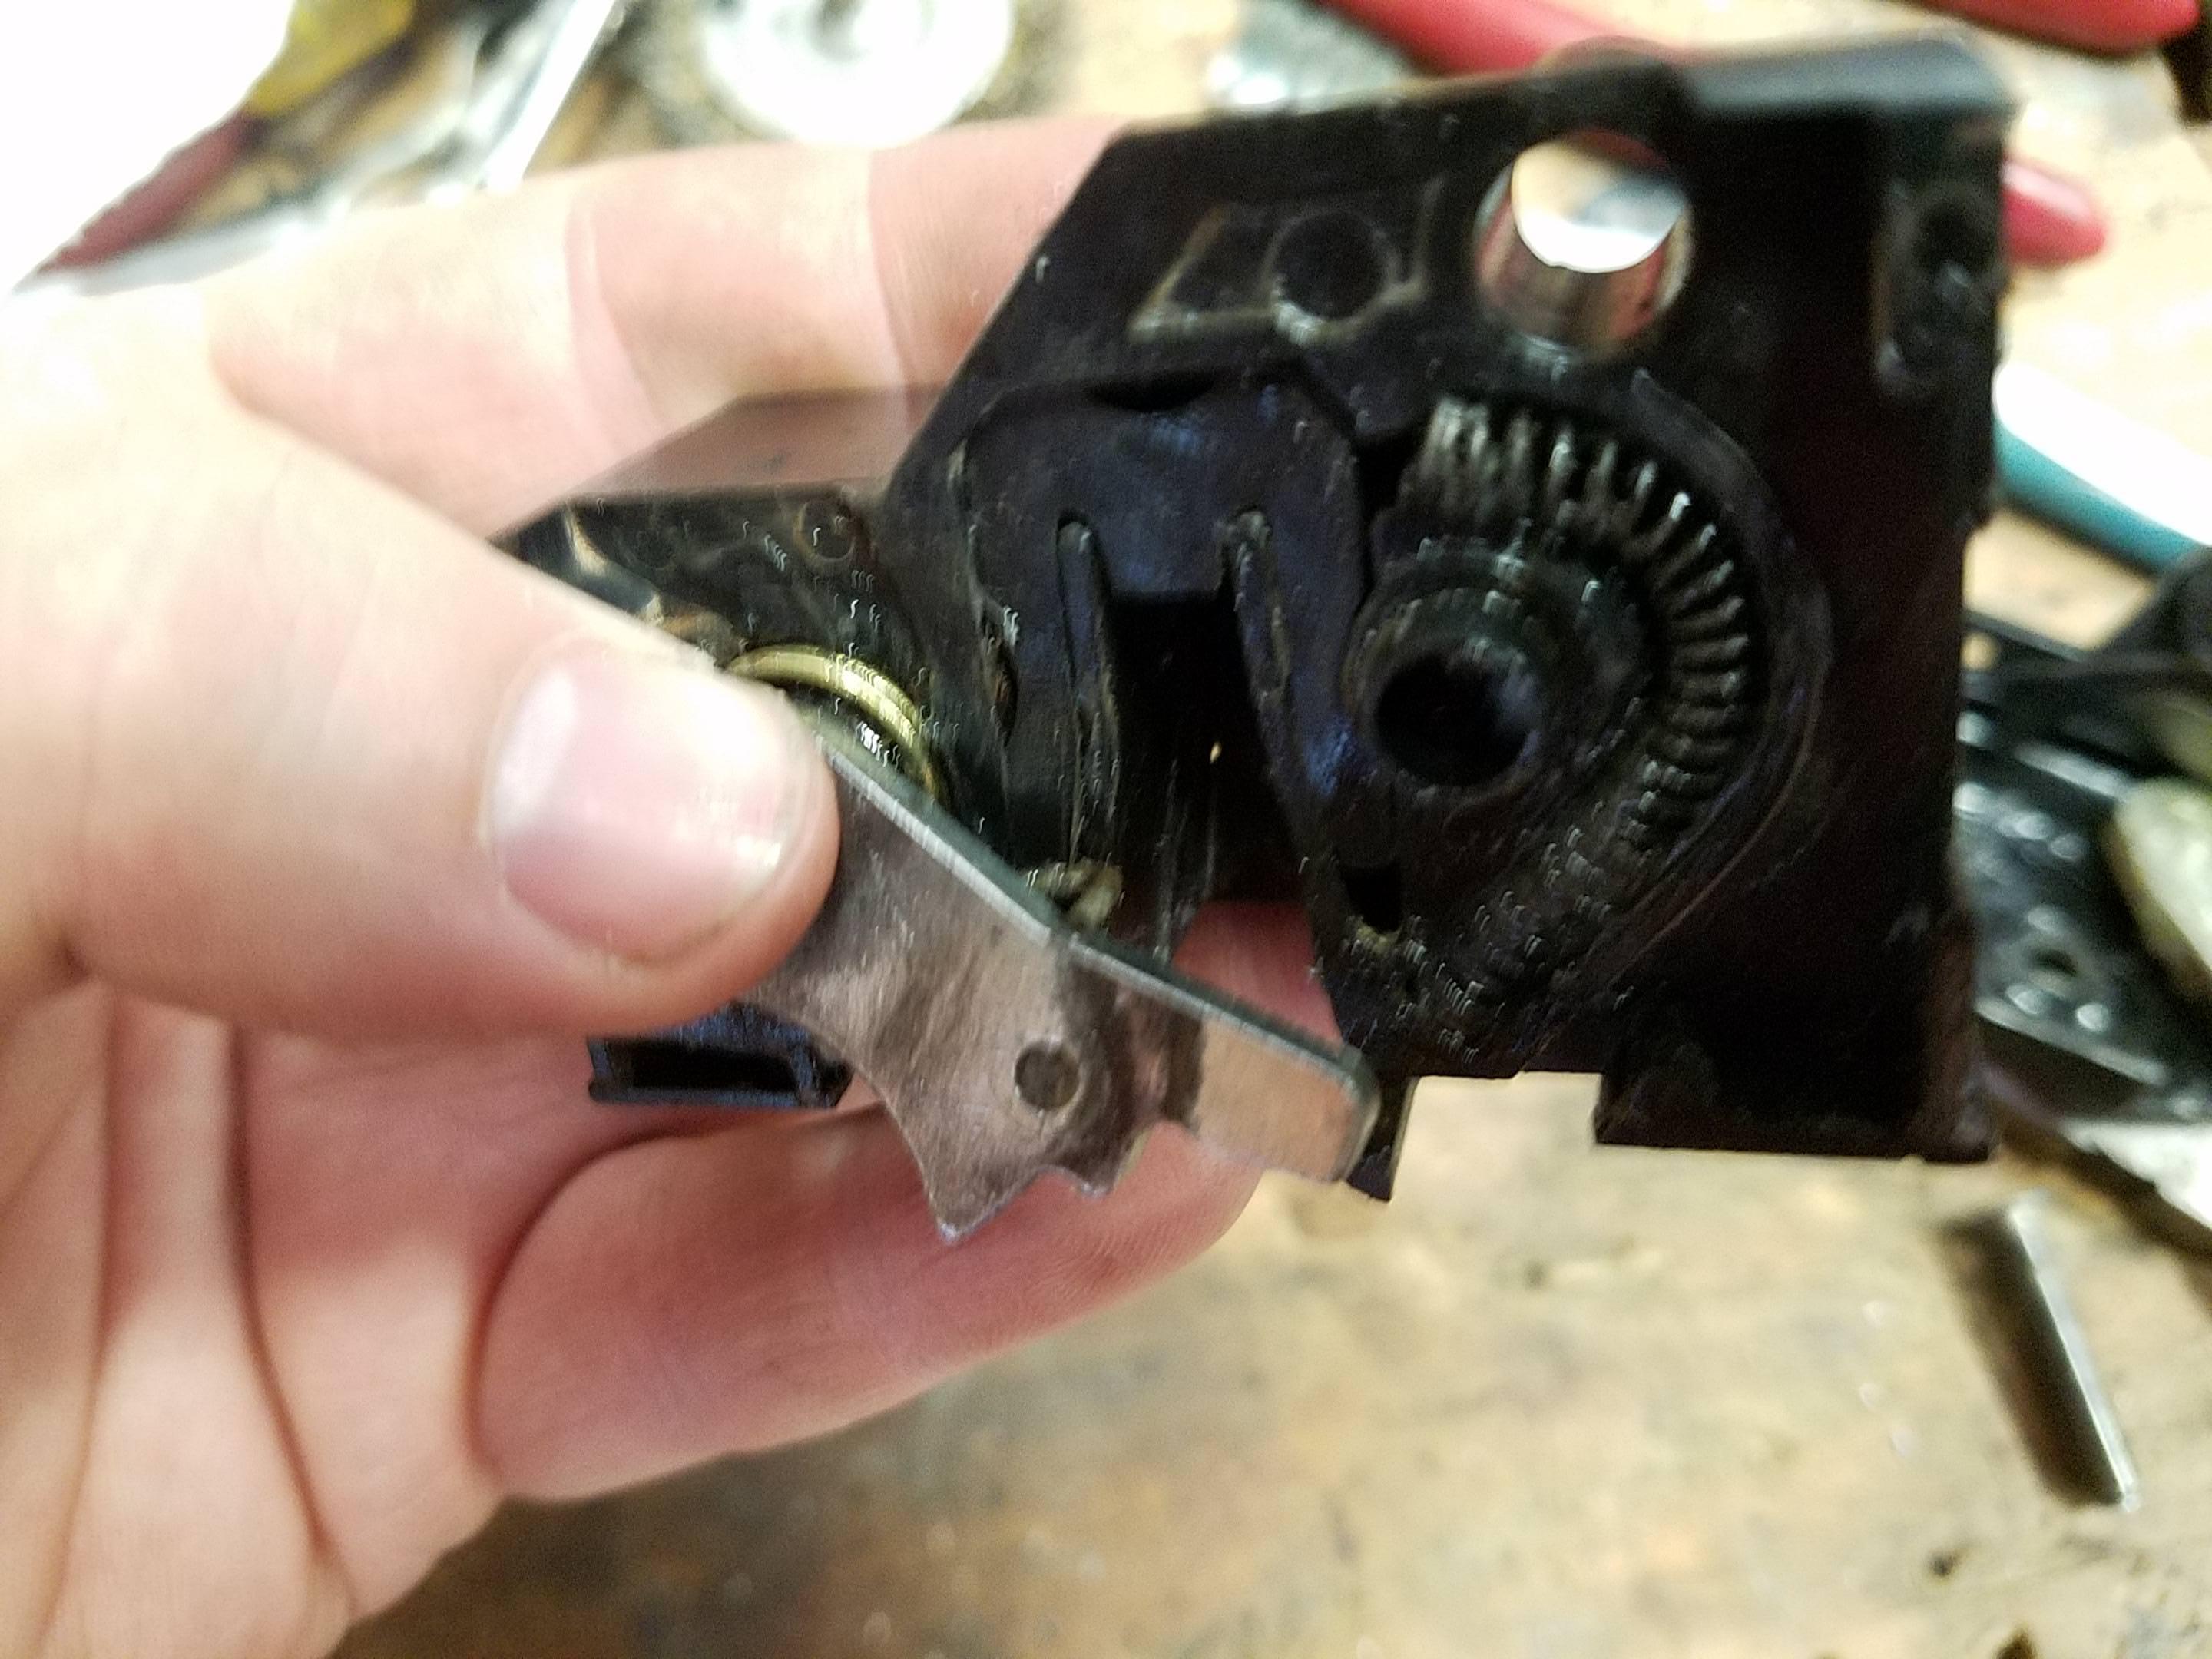
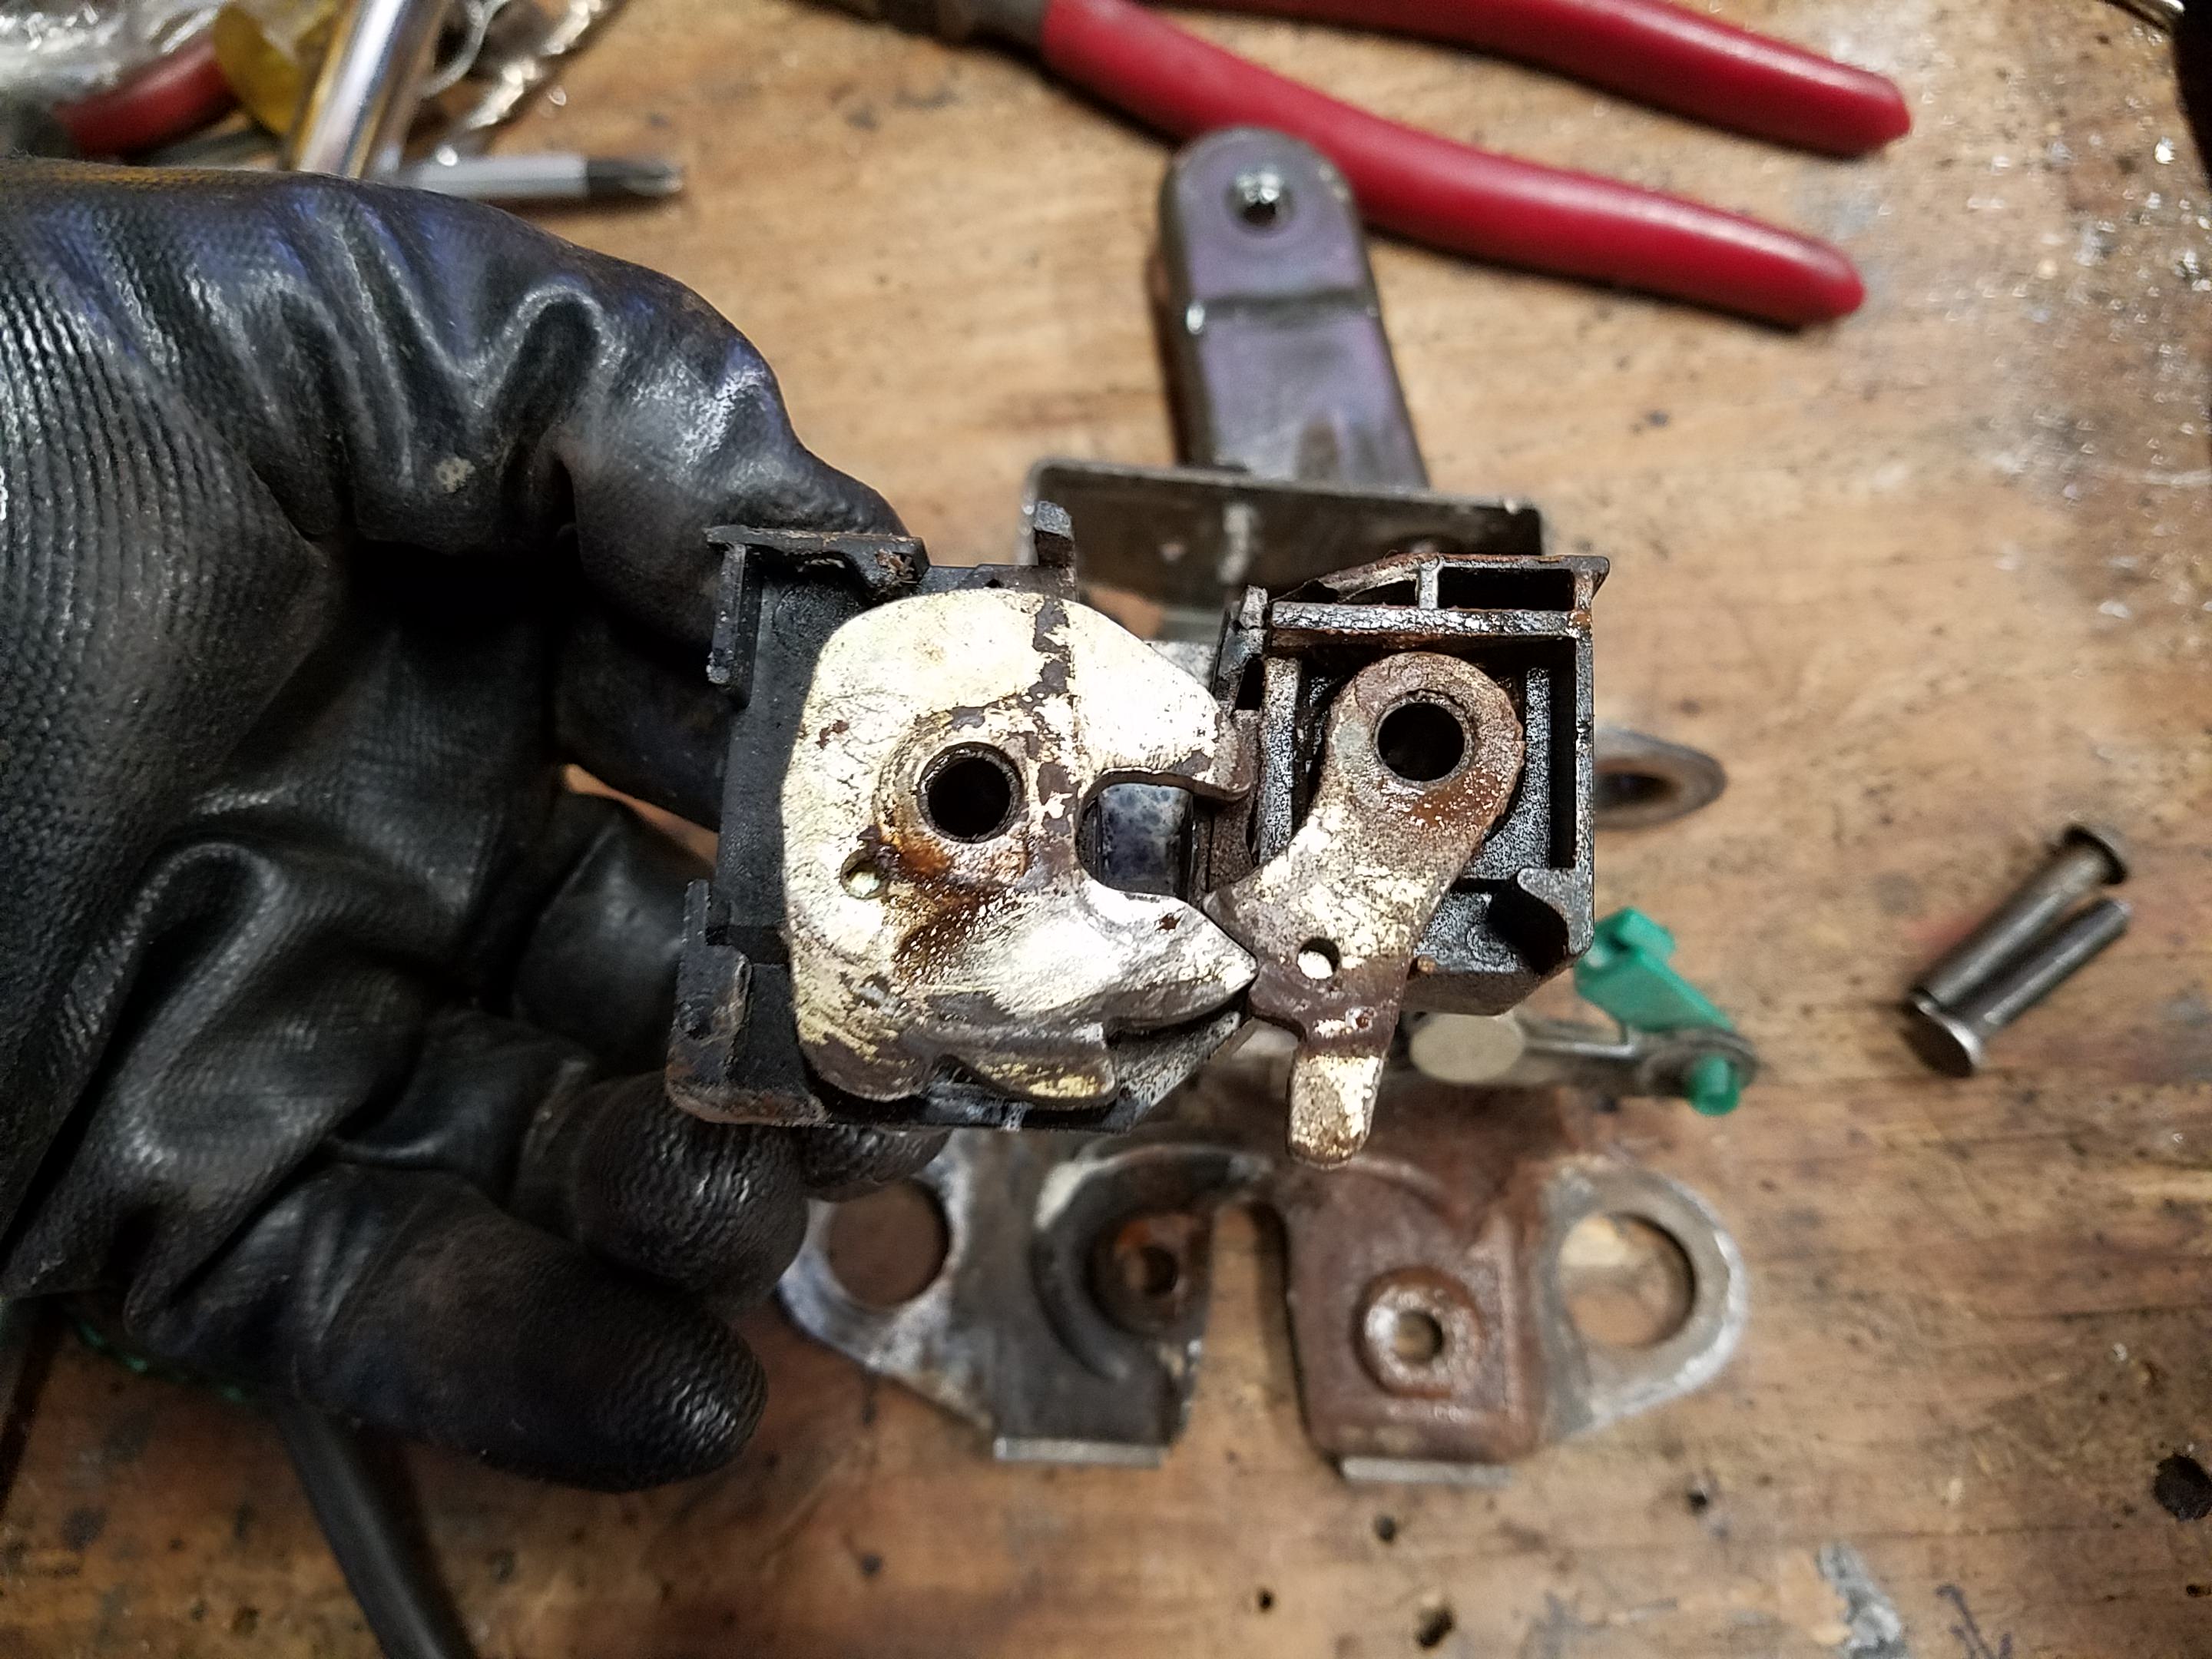
Yep, this is nasty. These parts are only being held in by tension so be careful at this point. Carefully lift the catch straight off while holding down the pawl on the right. After that pop the spring out of its track and then lift the pawl straight up and off, remove it's spring.


During this I finished cleaning up the two halves of the sheet metal housing and painted them appropriately. Don't bother trying to diassemble the little sear mechanism in the back that trips the pawl, it's not worth it unless yours is absolutely encrusted. Even painting right over mine it had no issues with movement.
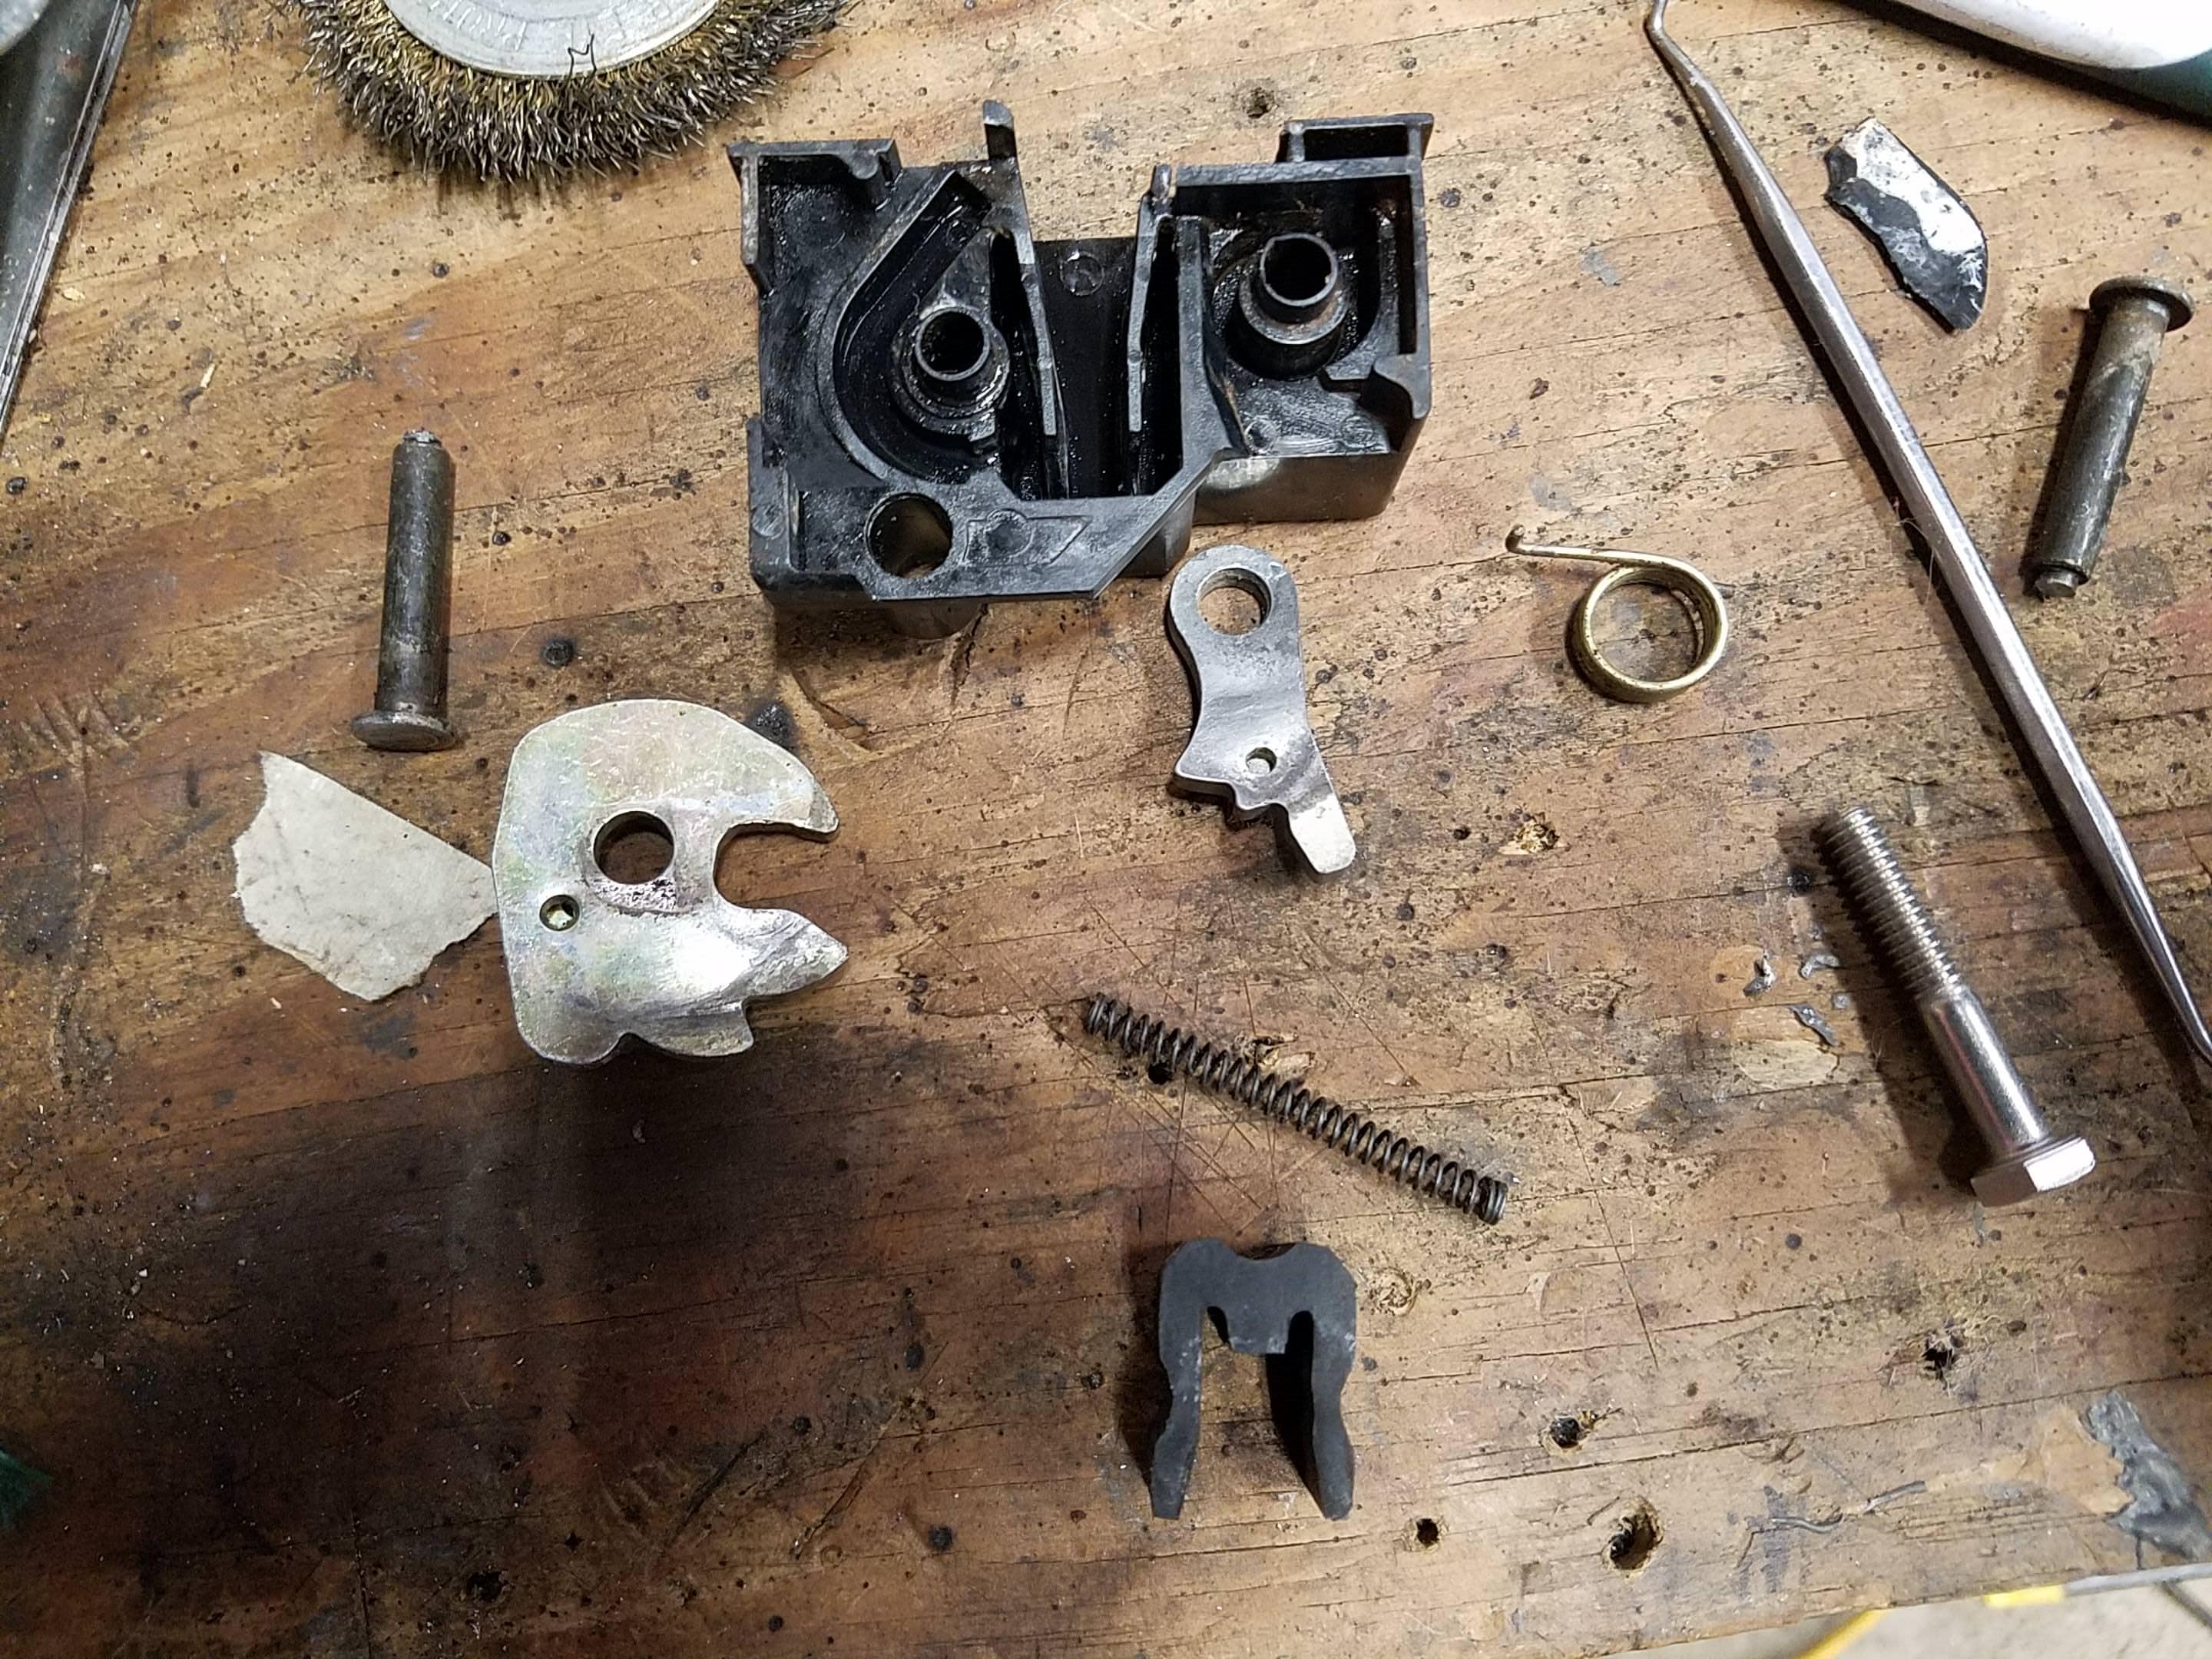
Here's everything cleaned up. I used a wire wheel on the metal parts and 90% isopropyl on the plastic along with q-tips and papertowels.
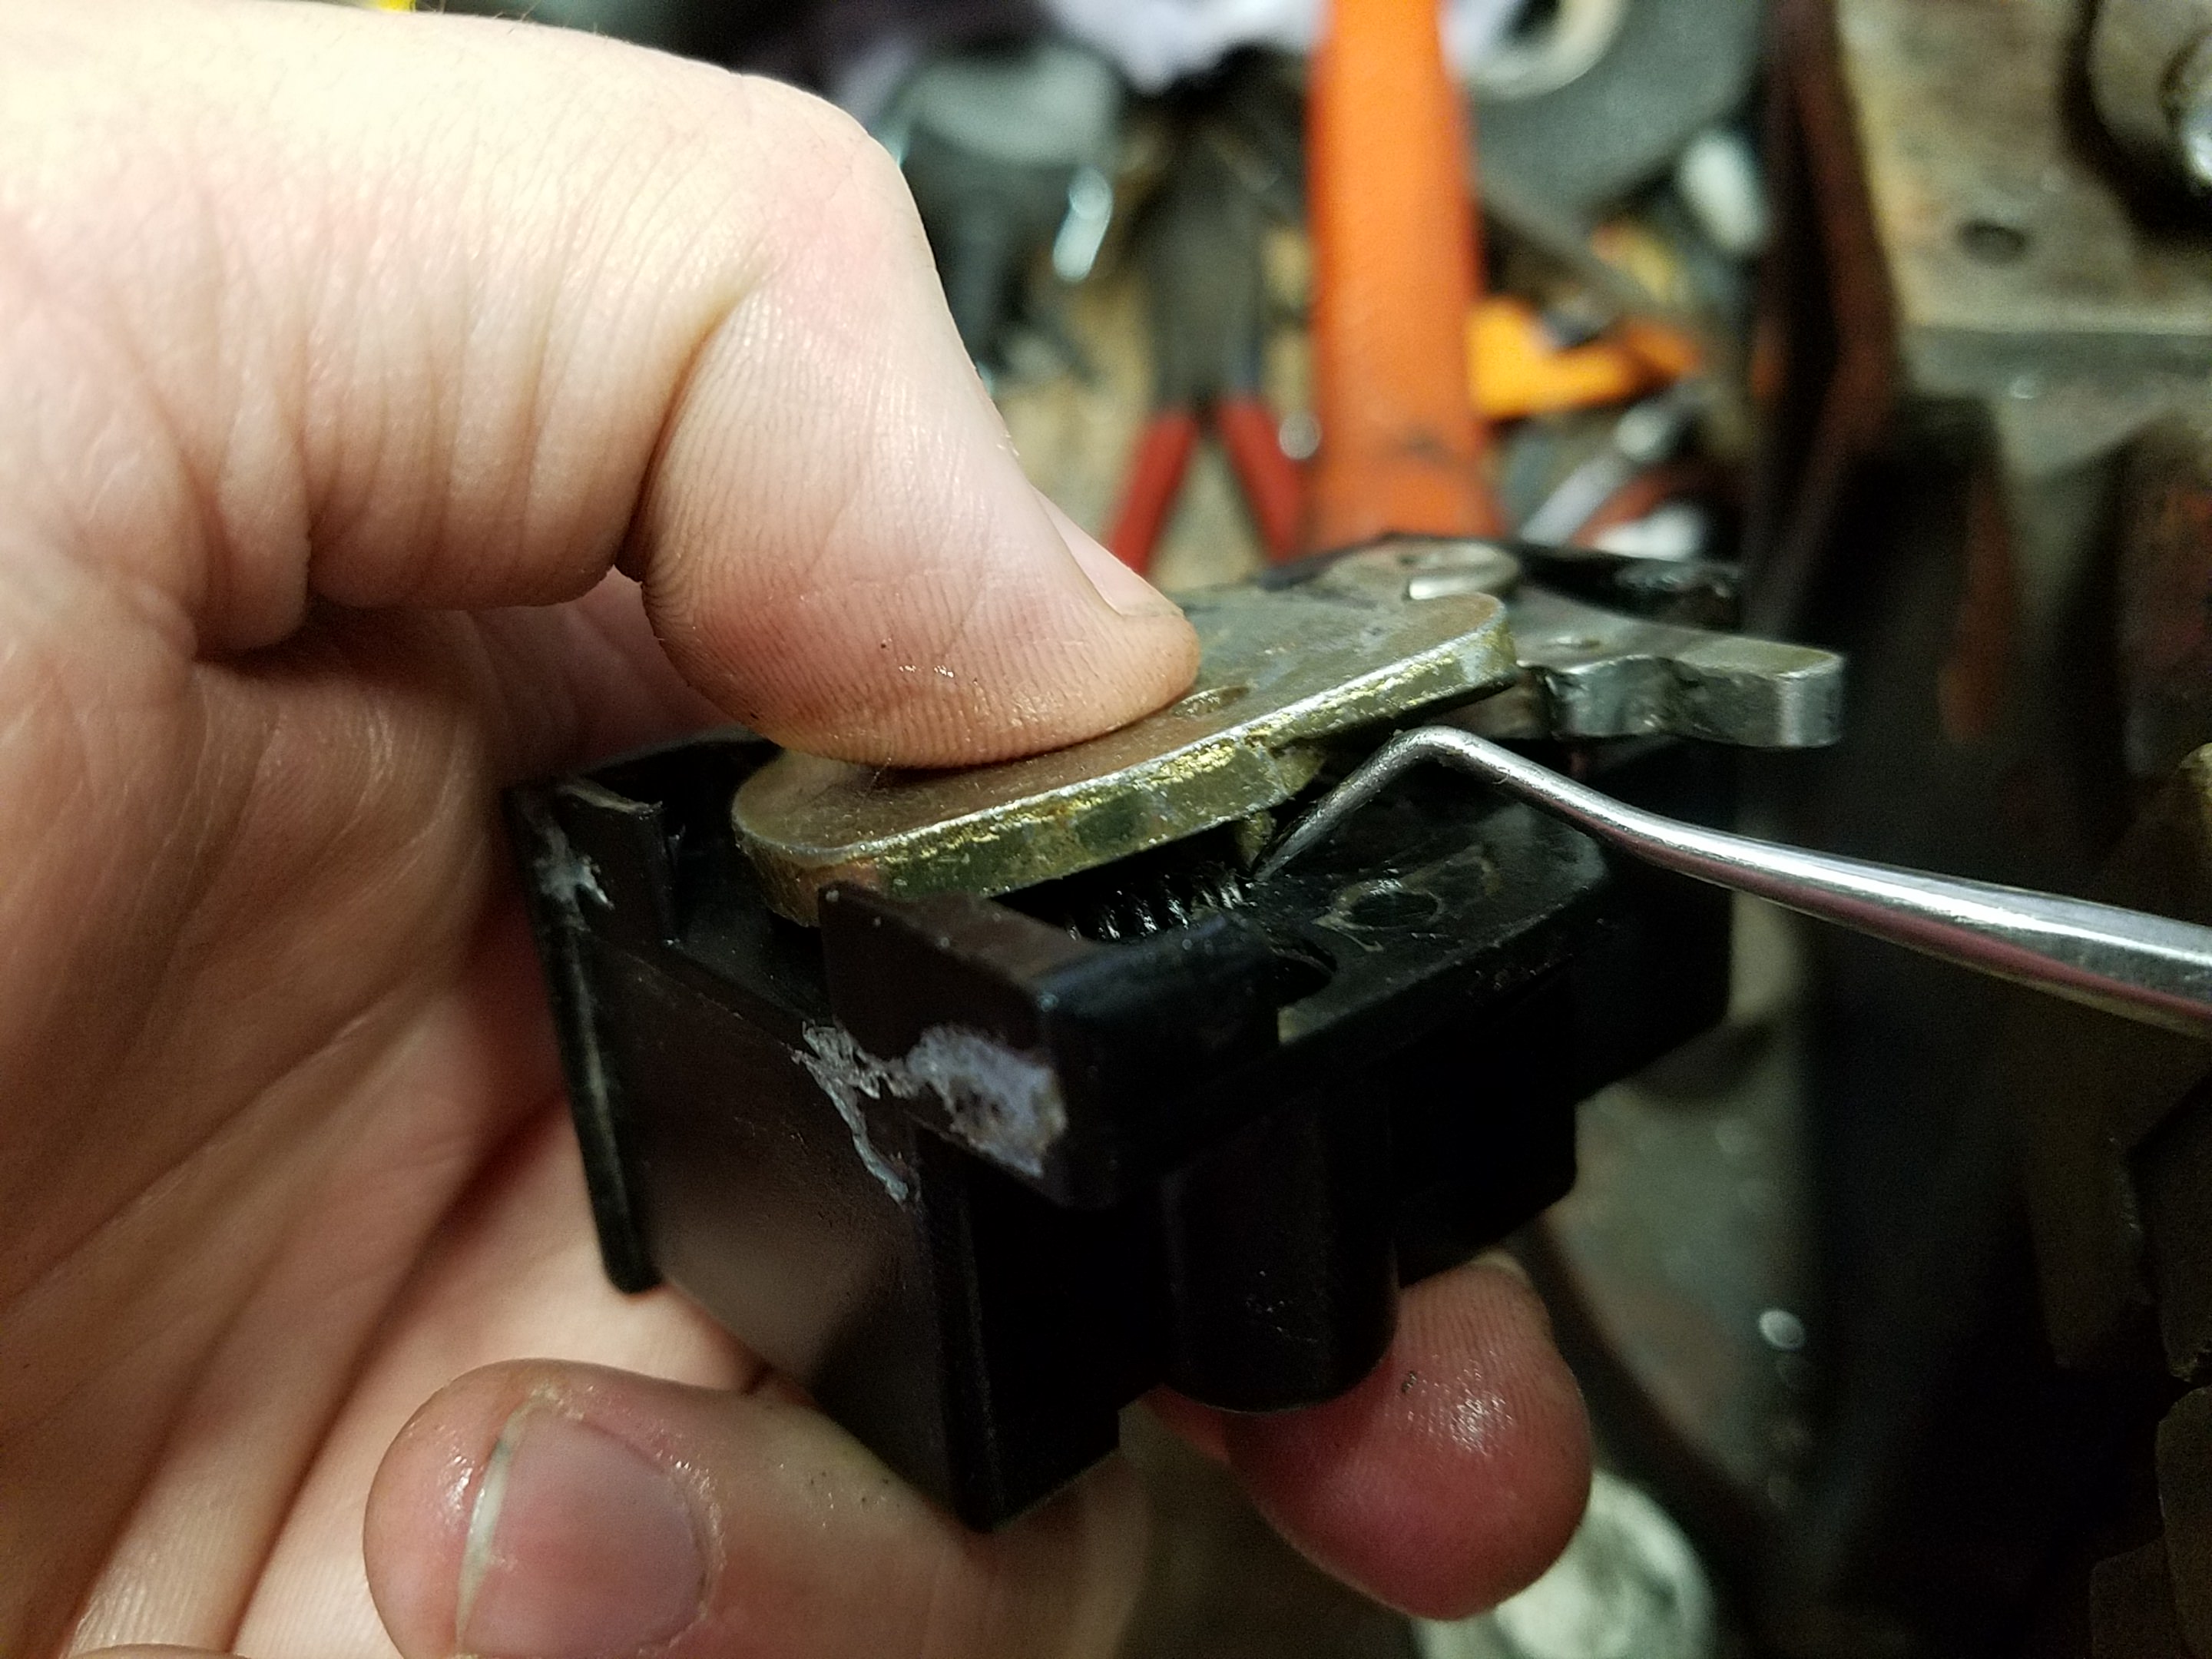
When reassembling drop the pawl's spring down into place with the short leg sticking up and start at this position catching the leg and rotating it while keeping downward pressure. Eventually it will go into place but be aware it can come off pretty easily. If you need to, throw one of your replacement bolts through it with a nut on the back until you get the catch into place but I found this wasn't really necessary. To get the catch back into place start it on its peg with the protrusion all the way to the right side, you'll see there's a little ramped area all the way toward the pawl where you can press it down. I helped it along with a pick. I used dielectric grease when reassembling since it's good down to -50F and is pretty easy to dissolve with WD-40 later on if it does end up gumming up the works. Don't put too much in the catch's spring channel since it's a really weak spring.

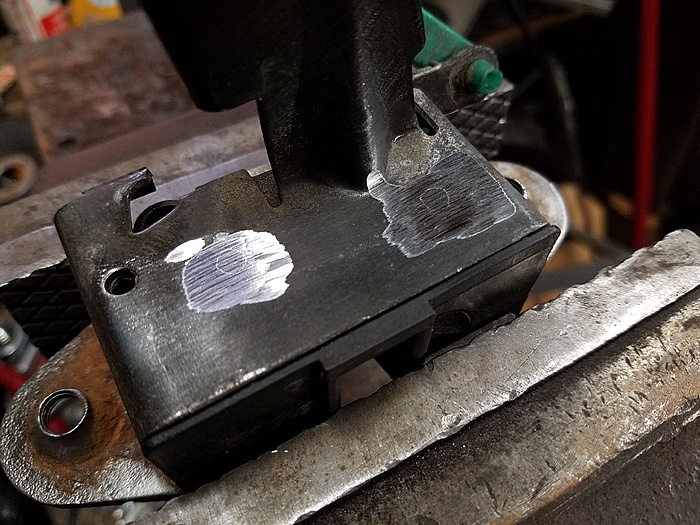
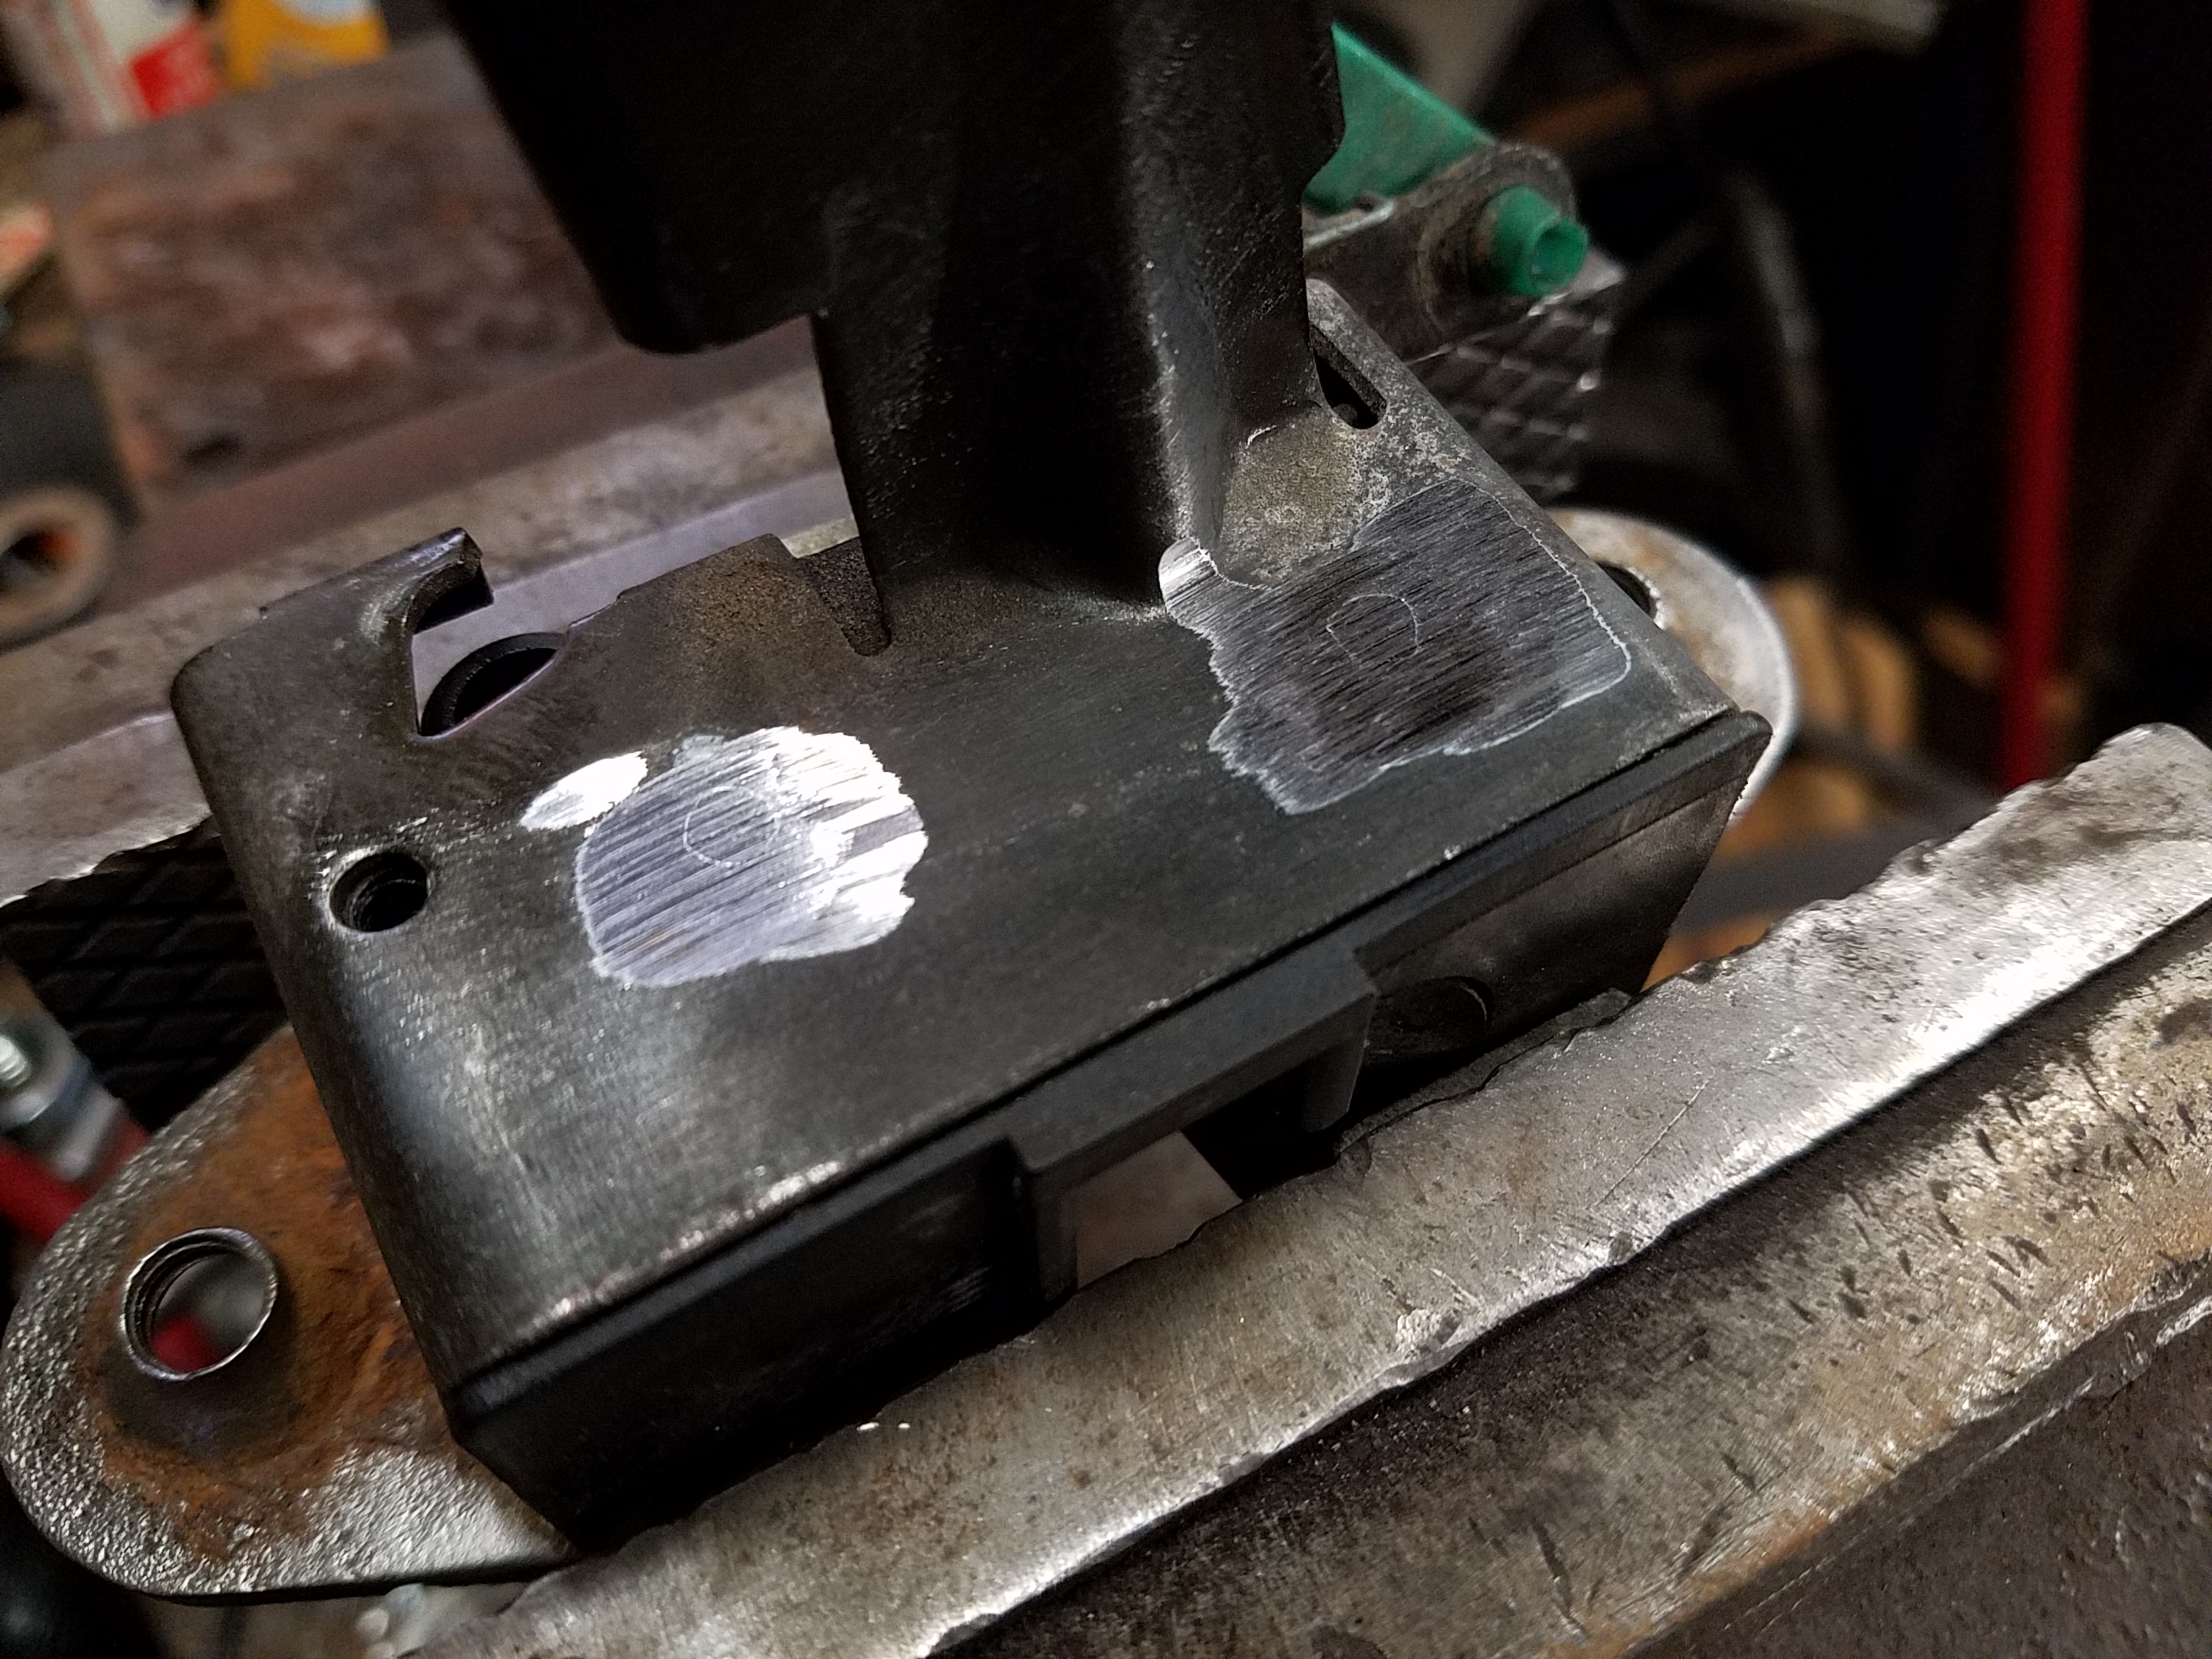
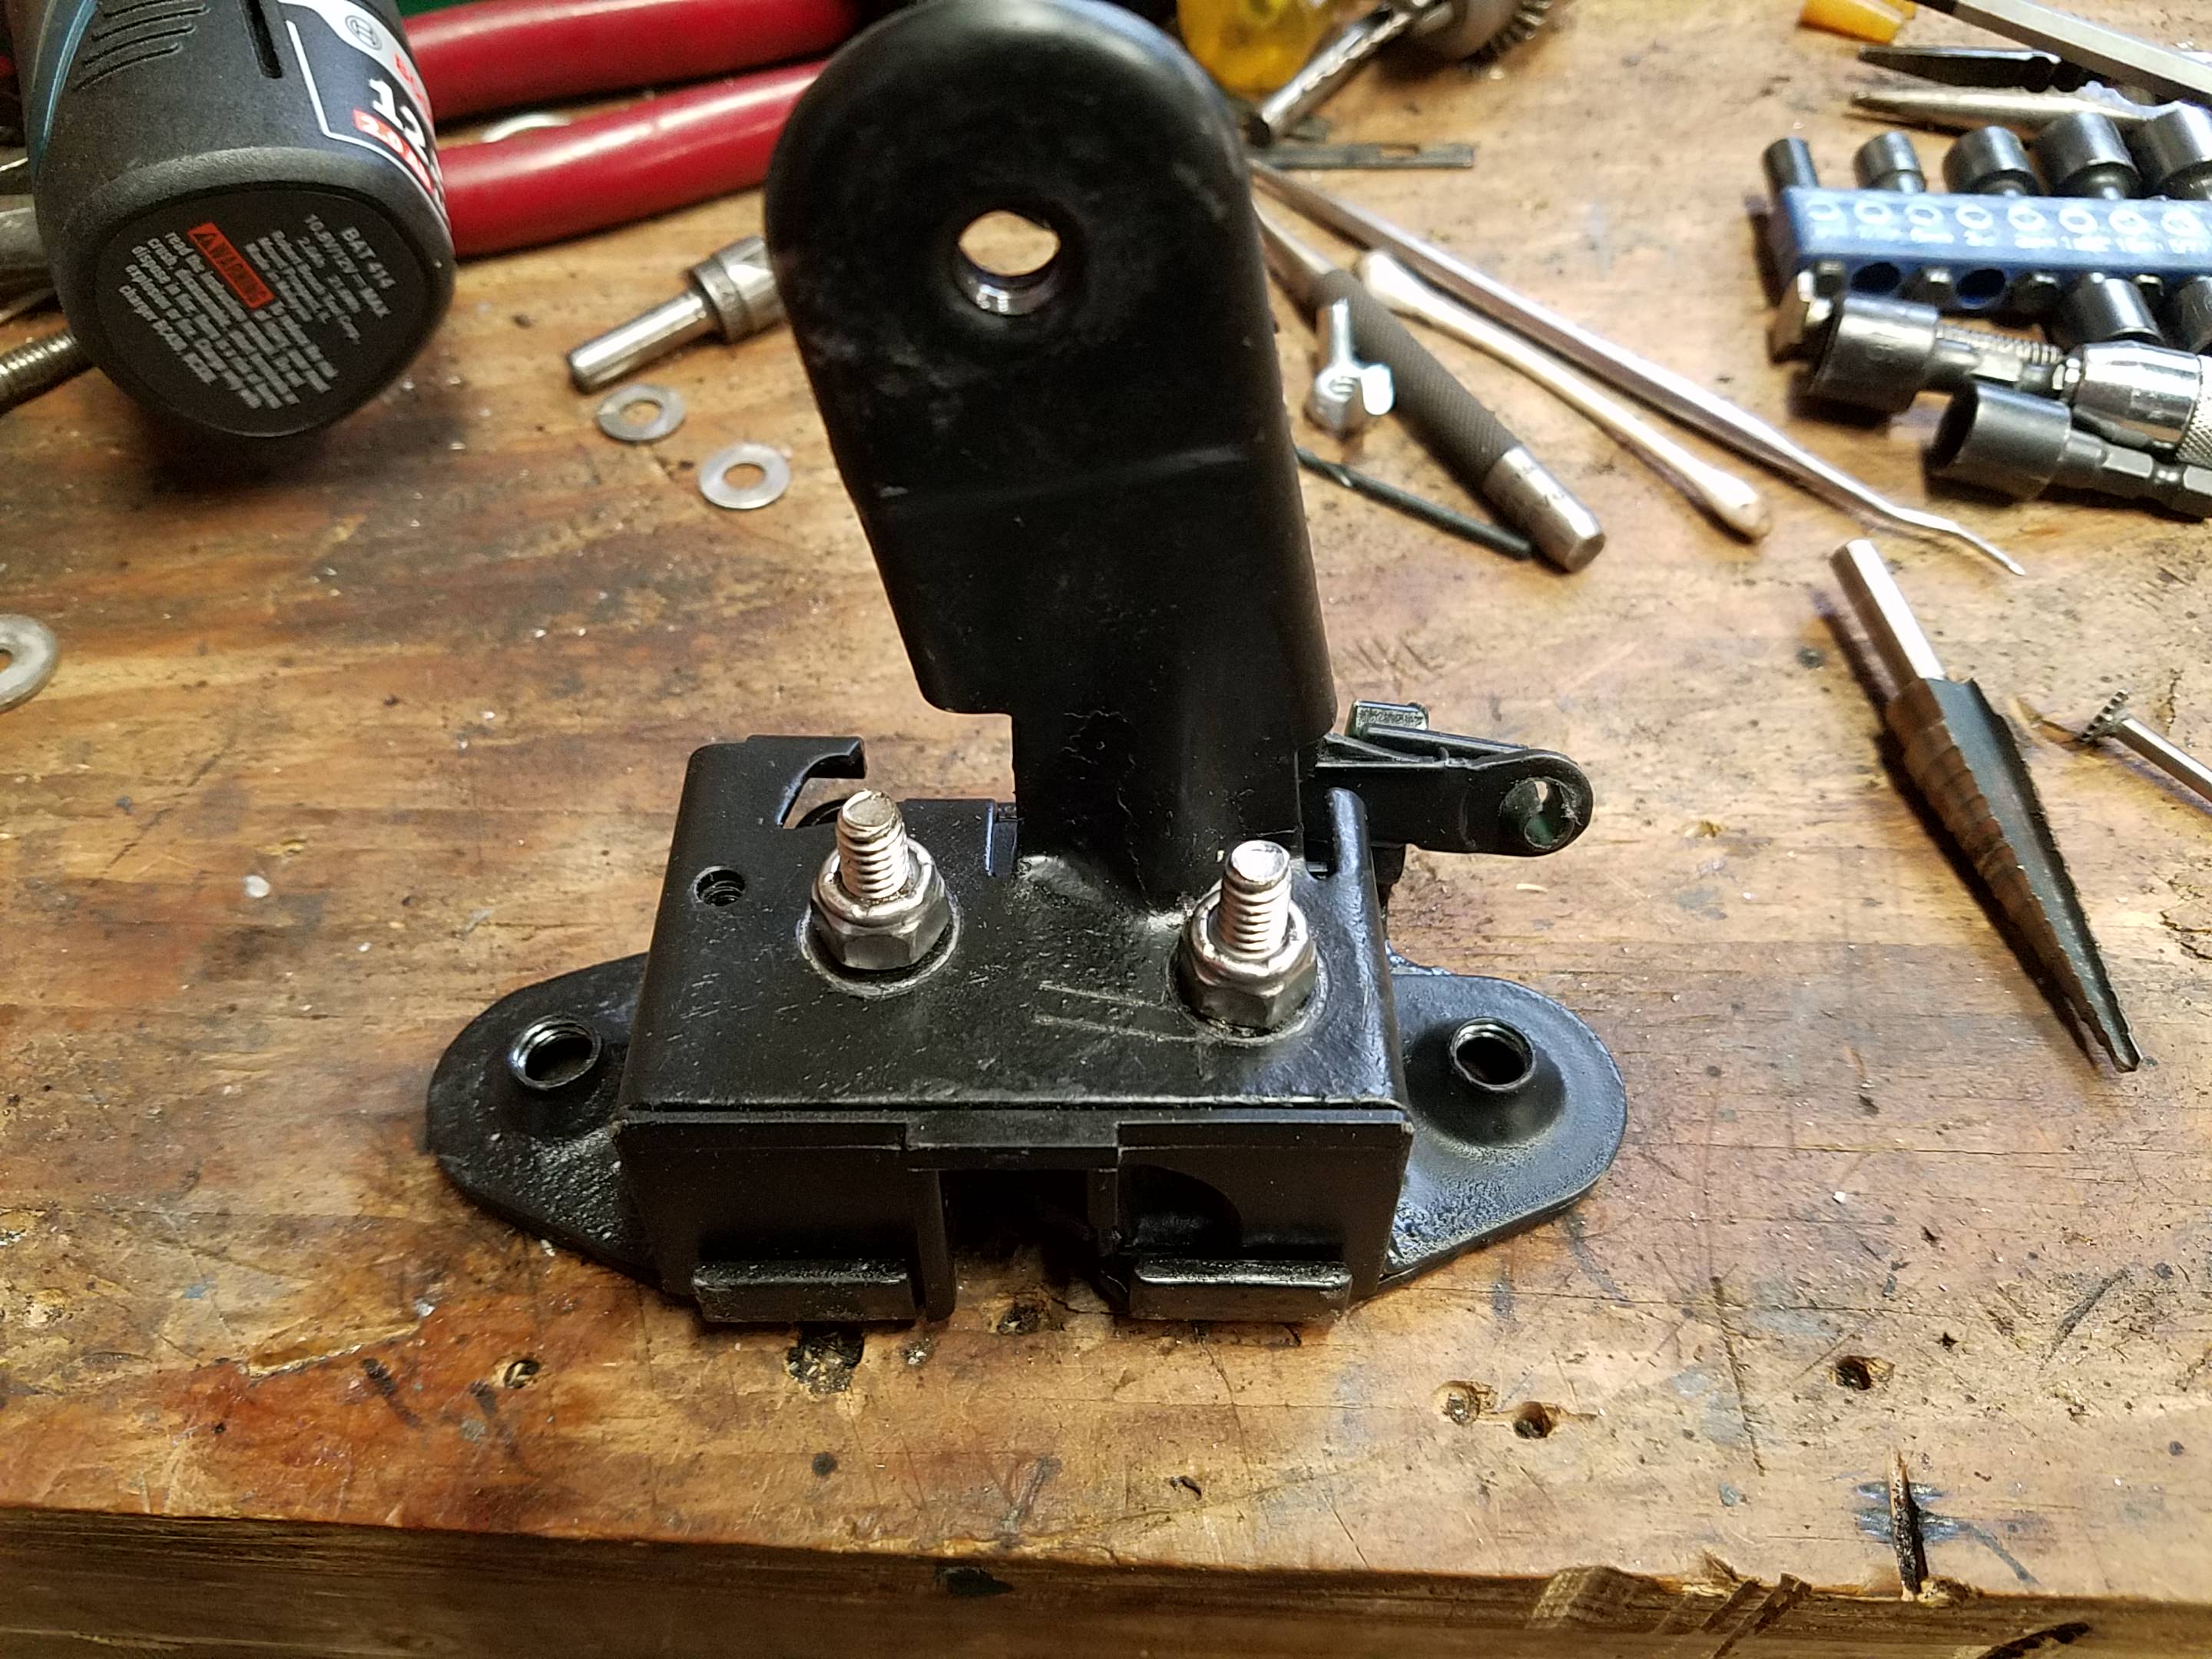
At this point You'll want to enlarge the holes in the top metal housing where the heads of the rivets passed through. Just enough to get the .25" bolts through. I used a step drill bit for this but you could file these or use a standard twist bit. You'll also have to reduce the heads of your new hardware to recess into the bottom part of the housing as the original posts did, use them as a guide. Start dropping everything back together and being careful not to pop those parts out. This will probably happen a few times but keep trying. I ended up using a quick clamp to hold the pieces while holding the bolt head with a screwdriver from the left and bolting on the nylocks with a driver from the right.
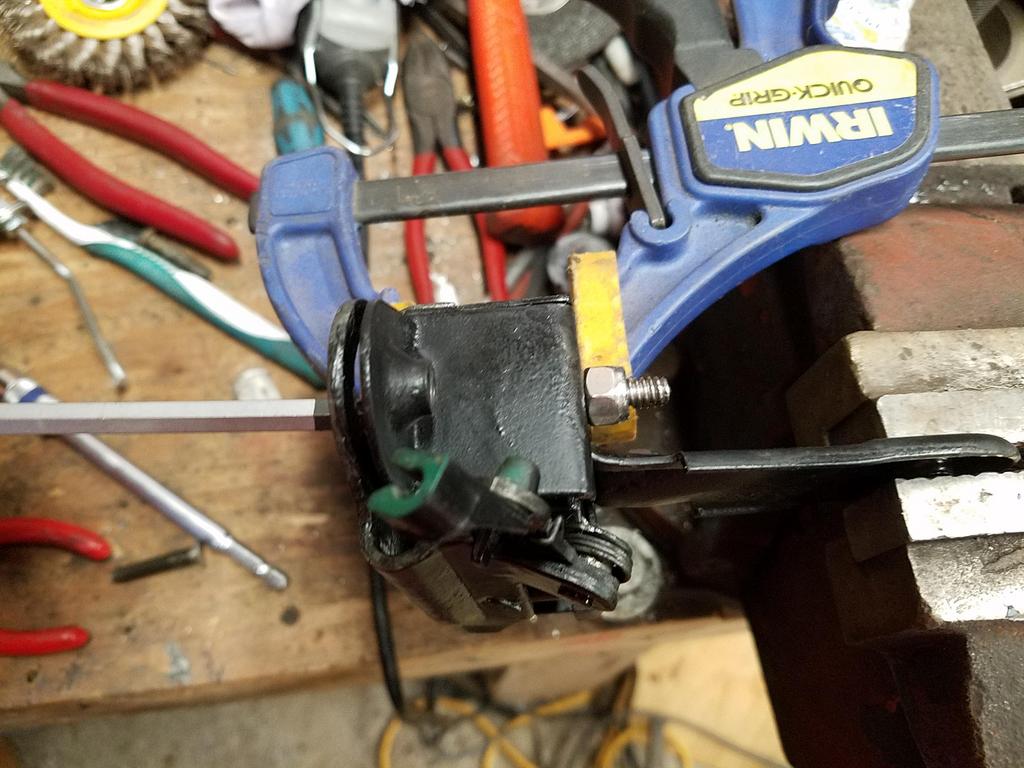
Don't go crazy clamping it down, just enough to get it barely snug. The reason we're using nylocks is that the original pins had a shoulder on them. Why? Partly so they could form the rivet heads and more importantly to act as a spacer for when you put in the two giant Torx bolts on the bottom. See, the threading for those is in that top part and the bolts pasts through the bottom piece and in some situations you could bind up the bits by doing too many ugga-duggas. Our new bolts are mostly there as assembly tools and the nylocks prevent you from having loose nuts but being able to tighten it down *just* enough to keep it together before you reinsert it into the car.
And that's it, at this point it should be assembled. You'll want to test the catch by pressing it in with a screwdriver and then hitting the sear lever to move the pawl out of the way. Note there are two positions on the pawl, one that's halfway closed and one that's fully locked. Hopefully the catch will spring open completely but don't be surprised when it doesn't. That long coil spring in there is mostly a keeper to make sure the catch doesn't rotate closed when open but if there's any real binding when you try to tug it open with the sear lever held in the open position loosen your nylocks slightly.

Reinstall is reverse of removal. Test it all again with the three Torx bolts barely snugged down and again when you crank them down. I suggest using some blue Loctite at this point so you don't have problems in the future. I also hit it with a final coat of quick paint before final install to cover the scuffed up areas and since even stainless hardware can rust when exposed to a bunch of road salt.
Greetings. I figured after coming here for years and mostly lurking due to lack of time I should start posting up some informational threads on subjects that I wasn't able to find when I had these problems. This one specifically pertains to the rear latch and release on the hatch of last generation Cherokees sticking due to rust, general malingering, and incompetent previous owners. I'll say this right now, this is not a hand-holding how-to, if you can't use a basic drill and punches just use a big hammer to smash these parts out and replace them with eBay stuff. This will also be a long read since I'd rather write it up once than answer a million questions. For the short version just scroll through the pictures but don't blame if you mess something up.
This all started with the automatic door locks turning on the rear wiper and the next day the brake pedal doing the same thing. I pulled the hatch apart to find I had a couple of broken wires. I have no idea how anything back there was working once I unwrapped the loom. That's another thread.
The only replacement parts you'll need for this are two 1.73-2" stainless 1/4-20 or 1/4-28 bolts with some sort of head that you can thin down considerably and locking nuts, preferably nylocks. You'll see why later. At first I used a couple of hex bolts I had lying around but those ended up being too short to catch the nylocks so please ignore them in the images where they're present. Alternatively you can use some Chicago/sex/binding bolts cut to the exact length as the original post's shoulders but since those are more expensive and harder to find I doubt many will follow that route. You could also tack weld the original rivets back into place if you were careful removing them but then you can't service this in the future. Also, you should really clean out the bottom of the hatch and use anti-rust paint while you're in there, shouldn't you? Don't half *** this if you're going to waste so much of your life fixing stupid things like the rear hatch.
First, the actual catch mechanism. This is removed by unplugging the latch switch on the left and detaching the rod that goes up to the release on the right side. Remove the three T40 Torx bolts and pull it out through the back of the hatch. Mine was quite rusty due to living its life in Vermont and being sprayed full of who knows what. I've already cleaned most of the rust off in the first pictures.
This unit was never meant to be taken apart for servicing but we know that's just part of the master plan of our oligarch masters to keep the common man down. Get out your angle grinder, file, Dremel, or axe and go at it! Just keep in mind that this is mostly sheet metal and plastic so be gentle. Remove the hatch switch first with your T15 Torx bit.
Knock the pins out through the bottom and pull the top piece of the bracket off.
Yep, this is nasty. These parts are only being held in by tension so be careful at this point. Carefully lift the catch straight off while holding down the pawl on the right. After that pop the spring out of its track and then lift the pawl straight up and off, remove it's spring.
During this I finished cleaning up the two halves of the sheet metal housing and painted them appropriately. Don't bother trying to diassemble the little sear mechanism in the back that trips the pawl, it's not worth it unless yours is absolutely encrusted. Even painting right over mine it had no issues with movement.
Here's everything cleaned up. I used a wire wheel on the metal parts and 90% isopropyl on the plastic along with q-tips and papertowels.
When reassembling drop the pawl's spring down into place with the short leg sticking up and start at this position catching the leg and rotating it while keeping downward pressure. Eventually it will go into place but be aware it can come off pretty easily. If you need to, throw one of your replacement bolts through it with a nut on the back until you get the catch into place but I found this wasn't really necessary. To get the catch back into place start it on its peg with the protrusion all the way to the right side, you'll see there's a little ramped area all the way toward the pawl where you can press it down. I helped it along with a pick. I used dielectric grease when reassembling since it's good down to -50F and is pretty easy to dissolve with WD-40 later on if it does end up gumming up the works. Don't put too much in the catch's spring channel since it's a really weak spring.
At this point You'll want to enlarge the holes in the top metal housing where the heads of the rivets passed through. Just enough to get the .25" bolts through. I used a step drill bit for this but you could file these or use a standard twist bit. You'll also have to reduce the heads of your new hardware to recess into the bottom part of the housing as the original posts did, use them as a guide. Start dropping everything back together and being careful not to pop those parts out. This will probably happen a few times but keep trying. I ended up using a quick clamp to hold the pieces while holding the bolt head with a screwdriver from the left and bolting on the nylocks with a driver from the right.
Don't go crazy clamping it down, just enough to get it barely snug. The reason we're using nylocks is that the original pins had a shoulder on them. Why? Partly so they could form the rivet heads and more importantly to act as a spacer for when you put in the two giant Torx bolts on the bottom. See, the threading for those is in that top part and the bolts pasts through the bottom piece and in some situations you could bind up the bits by doing too many ugga-duggas. Our new bolts are mostly there as assembly tools and the nylocks prevent you from having loose nuts but being able to tighten it down *just* enough to keep it together before you reinsert it into the car.
And that's it, at this point it should be assembled. You'll want to test the catch by pressing it in with a screwdriver and then hitting the sear lever to move the pawl out of the way. Note there are two positions on the pawl, one that's halfway closed and one that's fully locked. Hopefully the catch will spring open completely but don't be surprised when it doesn't. That long coil spring in there is mostly a keeper to make sure the catch doesn't rotate closed when open but if there's any real binding when you try to tug it open with the sear lever held in the open position loosen your nylocks slightly.
Reinstall is reverse of removal. Test it all again with the three Torx bolts barely snugged down and again when you crank them down. I suggest using some blue Loctite at this point so you don't have problems in the future. I also hit it with a final coat of quick paint before final install to cover the scuffed up areas and since even stainless hardware can rust when exposed to a bunch of road salt.
Last edited by ColonelColt; Nov 21, 2017 at 08:29 PM.
Thread Starter
Junior Member
Joined: Sep 2010
Posts: 31
Likes: 0
From: Empire of Alaska
Year: 2000
Model: Cherokee
Engine: 4.0L
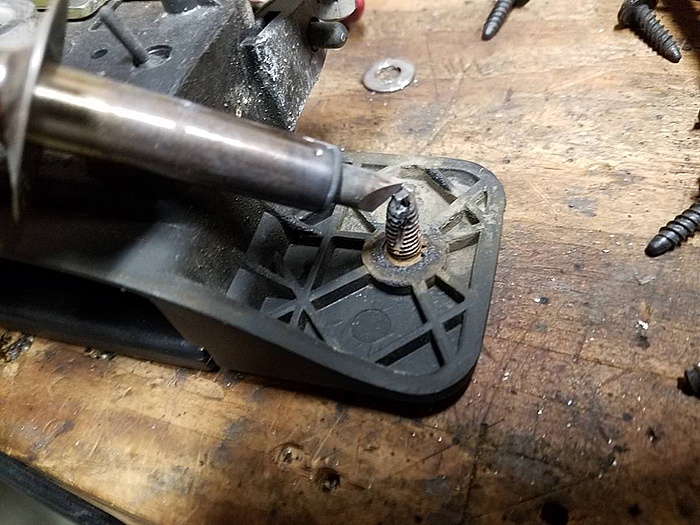
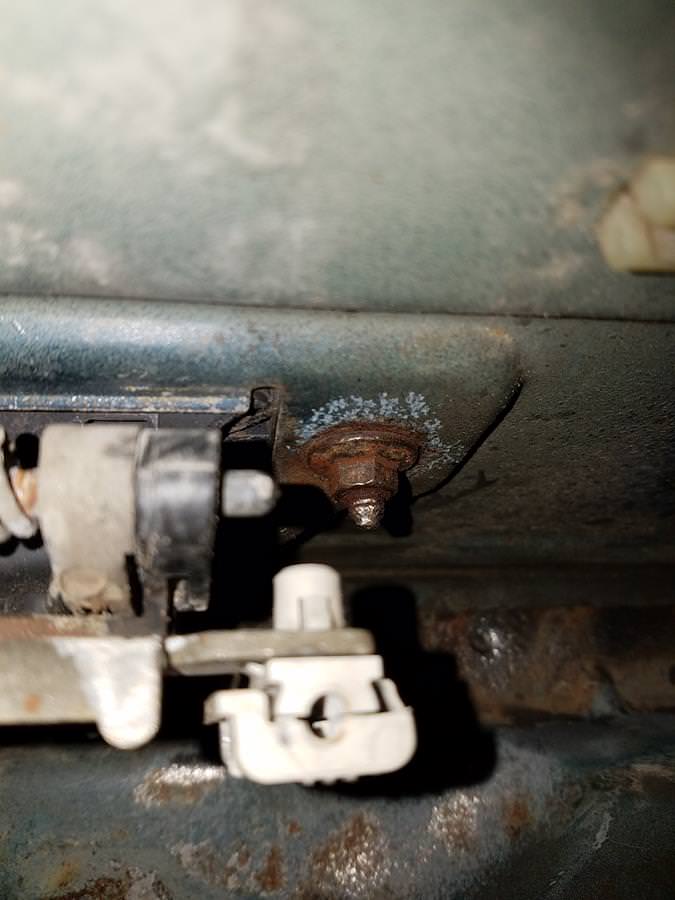
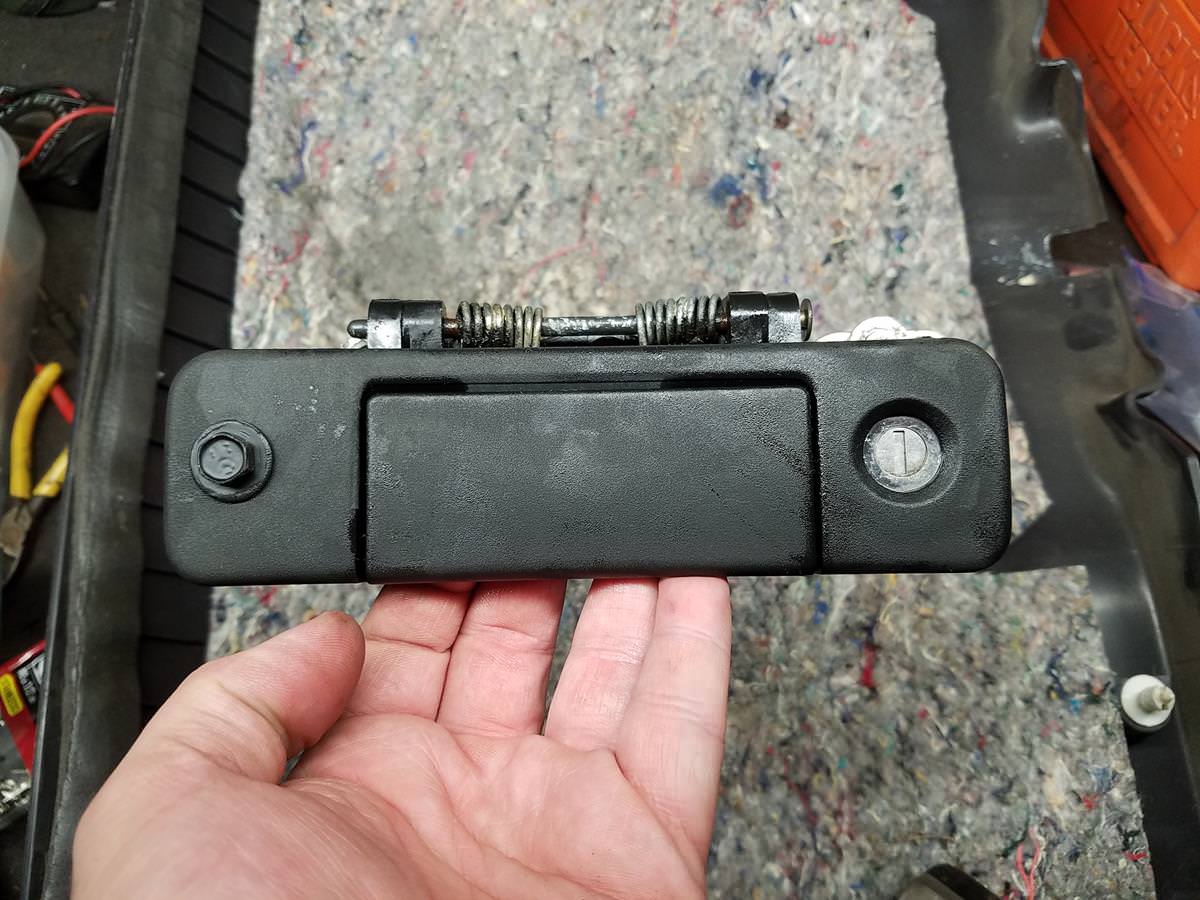
Next up is the actual release itself. Unfortunately most of this thing is really something you don't want to take apart unless you have to but it also doesn't have any internal recess you can't simply spray out and lube unlike the latch itself. This started with mine being loose and wanting to remove and clean it but unfortunately the nut was totally frozen onto the stud. I tried quite a few methods of getting it free but none worked. Eventually they all start spinning in the plastic since they're badly designed with a totally smooth head. You can't heat it up since it's embedded in plastic so I ended up inserting a Dremel through the panel from the right side and cutting straight through the nut and stud and using a large screwdriver to snap the nut in half.

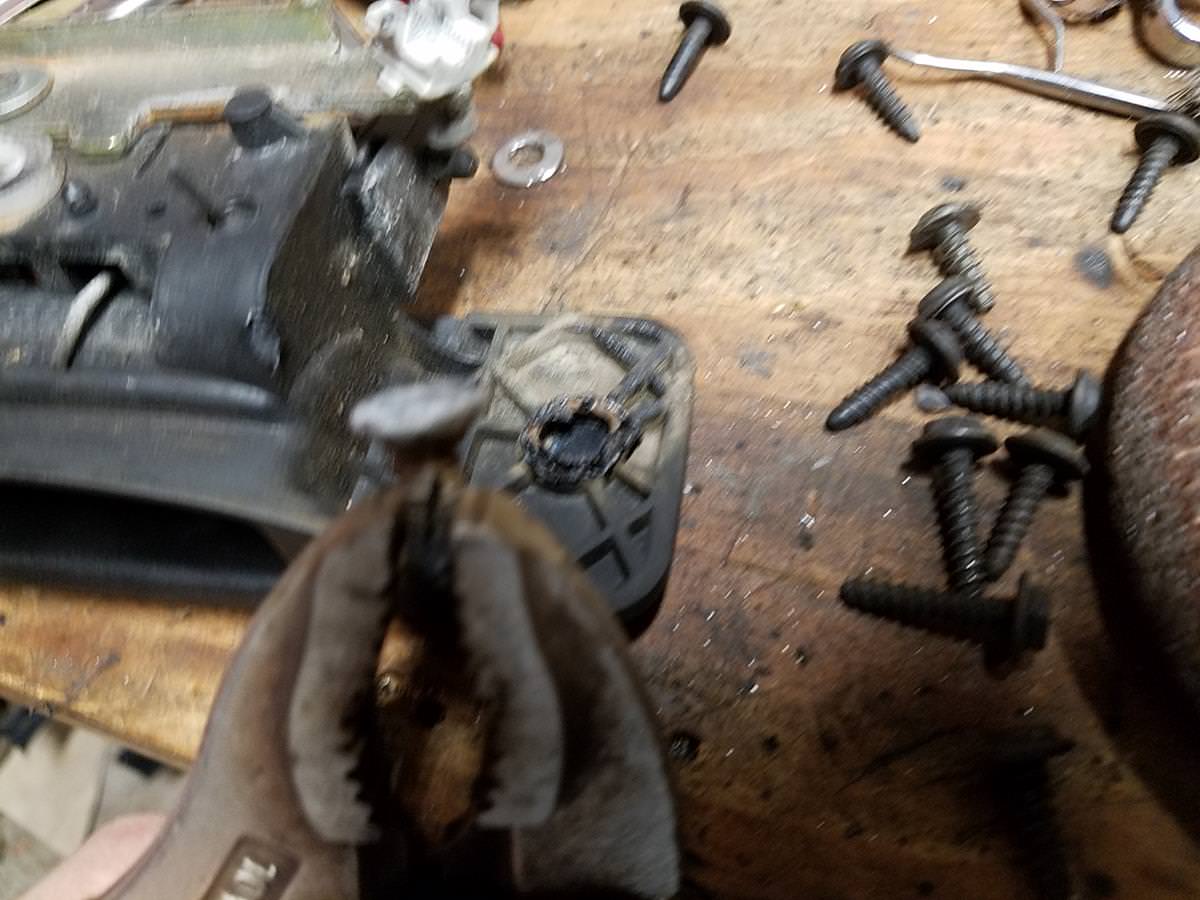
It will be kind of a pain to wiggle it out of its recess in the hatch but it will come out with any kind of forcing. Make sure you clean up and paint any corroded areas where it was installed. Now, there are several methods you could use to remove the stud from Dremeling the plastic away around the back of the head to simply grabbing it with vise grips and snapping it out and hoping it doesn't break your release mechanism. I opted for heating it up with a higher powered soldering iron and then wiggling it back and forth while pulling rearward with vise grips and it came right out.
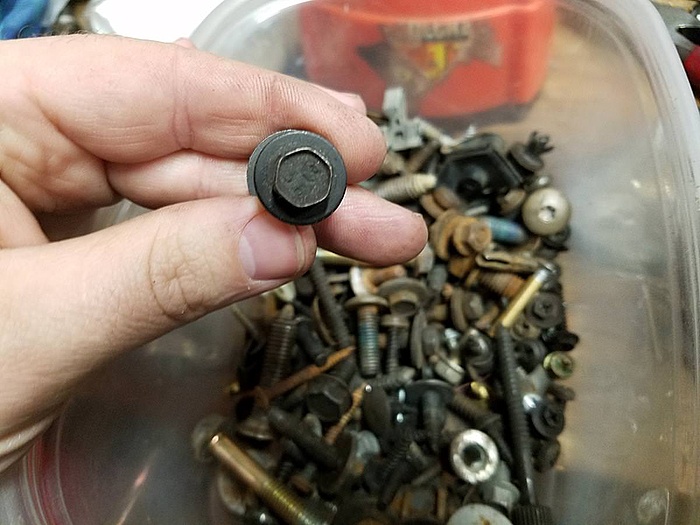
Be careful while you're doing this that you're not messing up the face area of your release. You can see the totally smooth round head here. Forgive the blur.

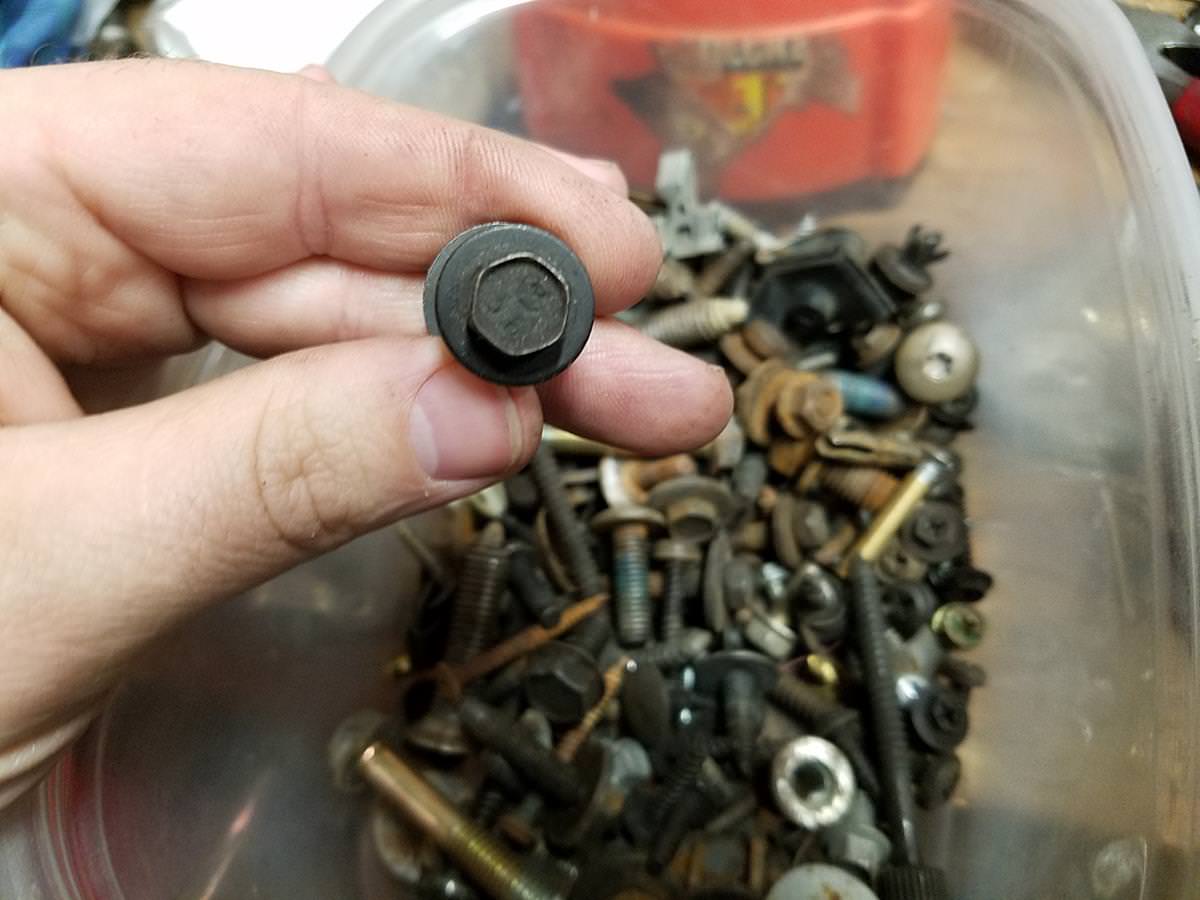
Next clean up the area on the back of the release so it's relatively smooth and dig into your massive stockpile of AMC/Chrysler hardware. I found a metric 9.8 grade bolt from somewhere on a Cherokee with a matching free spinning washer nut. You could use almost anything for this, it doesn't have to be fancy or strong but keep in mind that every ******* in a BMW behind you is going to be eyeballing your Jeep's *** from eye level so try to keep it classy.
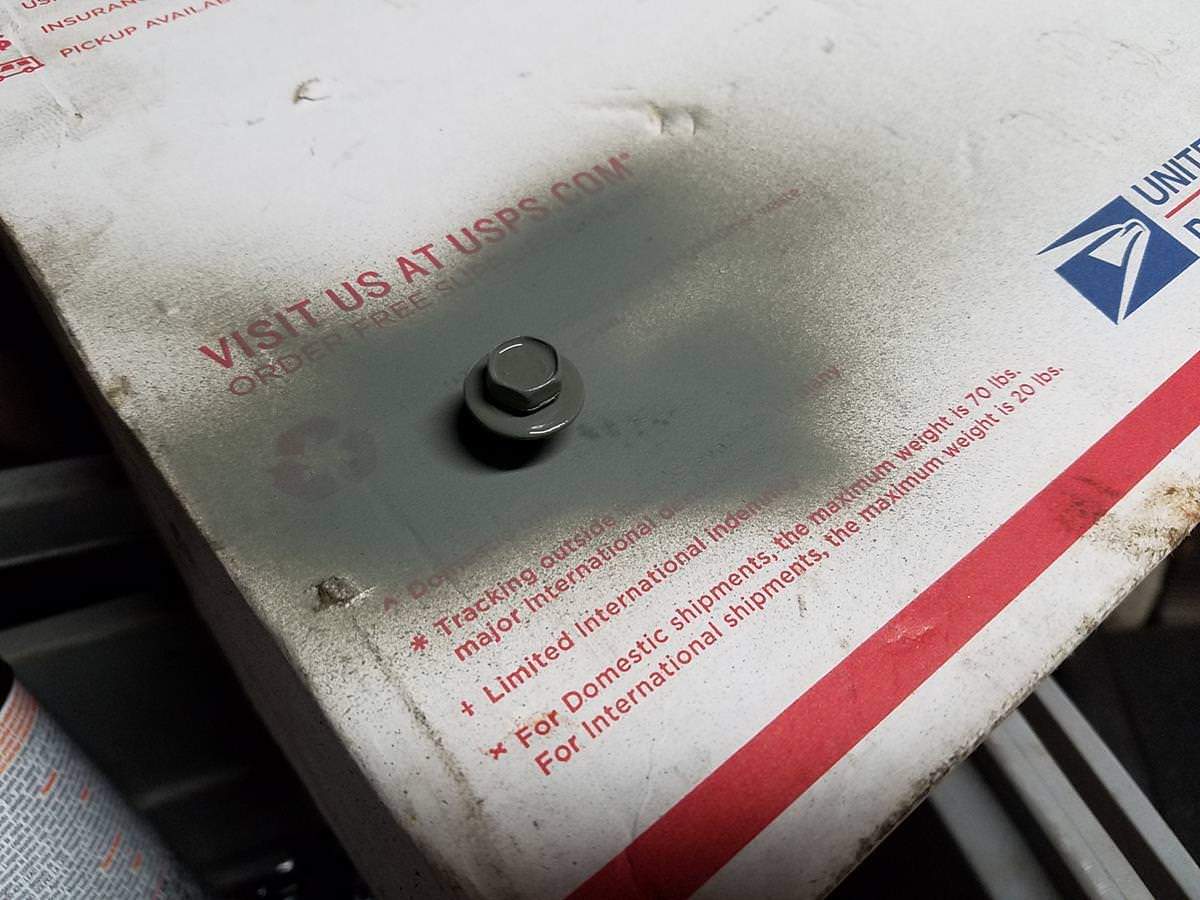
Next you're going to find a matching drill bit size and mark the release *from the back* and carefully drill through it. I found one that was just barely smaller than the thread of the bolt I used so that when I put it through it threaded into the plastic and was firmly held in place. But wait! You're not putting exposed iron alloy on the outside of your Jeep are you? Clean and paint that bolt. I used self etching primer followed by enamel paint.

After this you'll want to brush off any visible gunk on the release mechanism parts and blow it off with a compressor if you can. If you can't I recommend finding some plastic safe solvent like isopropyl alcohol or plastic safe aerosol gun cleaner. If you spray this with brake cleaner you're almost certainly going to have discoloration. Anything that had a spring I hit with lots of silicone lubricant and any of the contact points that were bearing on another part (weird plastic clip spring, handle arm point, sliding locking bar) that were either moved by the handle or the lock cylinder I used dielectric grease.

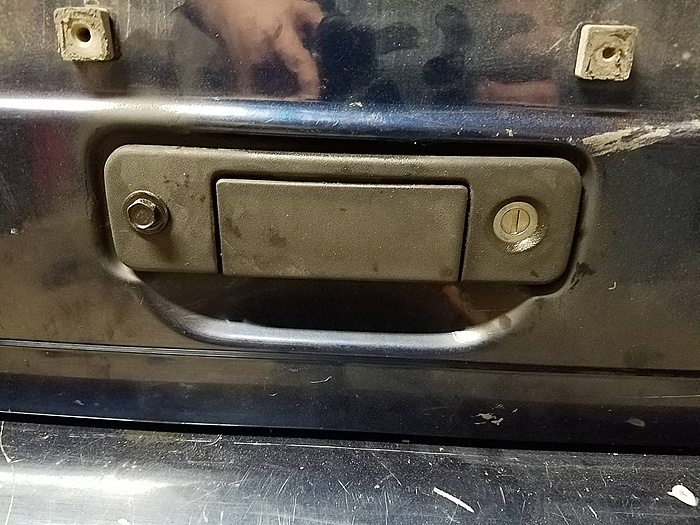
Once you wiggle it back into place slide it all the way over toward the lock side and reach around from the rear and install your nut. Again, use blue Loctite or a nylock for this. The worst thing is the hatch that won't open. The perspective in this picture doesn't look right but it sits pretty much where the lock cylinder does and looks like it's meant to be there. I ended up hitting the bolt head with some cheap, fast drying black paint to matte it down a bit to match the handle better.
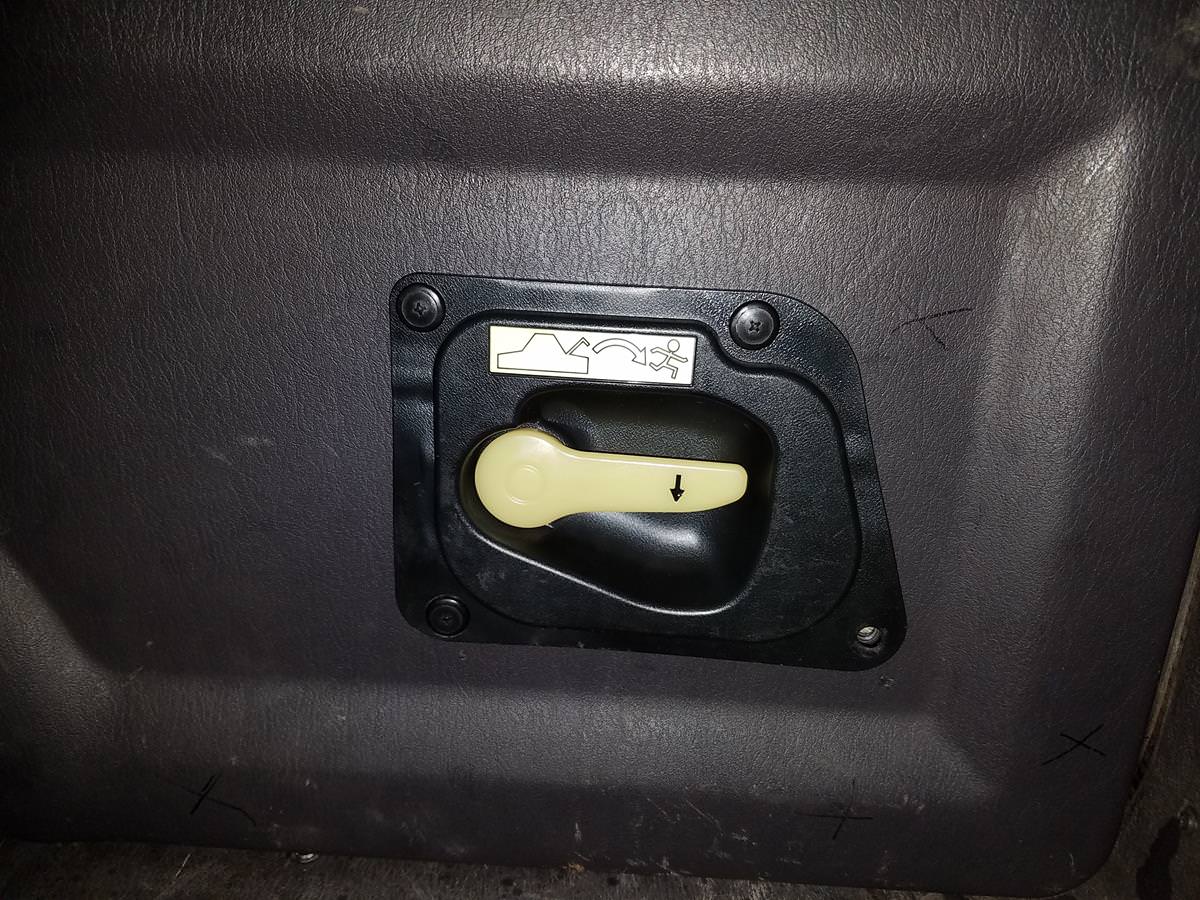
I'll be creating another thread on how to add a interior hatch release later today. I'll post a link at the top of this thread to that one, if anyone's interested.
It will be kind of a pain to wiggle it out of its recess in the hatch but it will come out with any kind of forcing. Make sure you clean up and paint any corroded areas where it was installed. Now, there are several methods you could use to remove the stud from Dremeling the plastic away around the back of the head to simply grabbing it with vise grips and snapping it out and hoping it doesn't break your release mechanism. I opted for heating it up with a higher powered soldering iron and then wiggling it back and forth while pulling rearward with vise grips and it came right out.

Be careful while you're doing this that you're not messing up the face area of your release. You can see the totally smooth round head here. Forgive the blur.
Next clean up the area on the back of the release so it's relatively smooth and dig into your massive stockpile of AMC/Chrysler hardware. I found a metric 9.8 grade bolt from somewhere on a Cherokee with a matching free spinning washer nut. You could use almost anything for this, it doesn't have to be fancy or strong but keep in mind that every ******* in a BMW behind you is going to be eyeballing your Jeep's *** from eye level so try to keep it classy.
Next you're going to find a matching drill bit size and mark the release *from the back* and carefully drill through it. I found one that was just barely smaller than the thread of the bolt I used so that when I put it through it threaded into the plastic and was firmly held in place. But wait! You're not putting exposed iron alloy on the outside of your Jeep are you? Clean and paint that bolt. I used self etching primer followed by enamel paint.
After this you'll want to brush off any visible gunk on the release mechanism parts and blow it off with a compressor if you can. If you can't I recommend finding some plastic safe solvent like isopropyl alcohol or plastic safe aerosol gun cleaner. If you spray this with brake cleaner you're almost certainly going to have discoloration. Anything that had a spring I hit with lots of silicone lubricant and any of the contact points that were bearing on another part (weird plastic clip spring, handle arm point, sliding locking bar) that were either moved by the handle or the lock cylinder I used dielectric grease.
Once you wiggle it back into place slide it all the way over toward the lock side and reach around from the rear and install your nut. Again, use blue Loctite or a nylock for this. The worst thing is the hatch that won't open. The perspective in this picture doesn't look right but it sits pretty much where the lock cylinder does and looks like it's meant to be there. I ended up hitting the bolt head with some cheap, fast drying black paint to matte it down a bit to match the handle better.

I'll be creating another thread on how to add a interior hatch release later today. I'll post a link at the top of this thread to that one, if anyone's interested.
Thread Starter
Junior Member
Joined: Sep 2010
Posts: 31
Likes: 0
From: Empire of Alaska
Year: 2000
Model: Cherokee
Engine: 4.0L
Other thread is up: https://www.cherokeeforum.com/f67/in...our-xj-240502/
Bugout4x4 you might want to unquote my original post since it adds a crap ton more images to the thread that aren't needed. Have fun.
Bugout4x4 you might want to unquote my original post since it adds a crap ton more images to the thread that aren't needed. Have fun.
CF Veteran
Joined: May 2015
Posts: 4,481
Likes: 18
From: Arizona
Year: 97
Model: Cherokee
Engine: 4.0
Other thread is up: https://www.cherokeeforum.com/f67/in...our-xj-240502/
Bugout4x4 you might want to unquote my original post since it adds a crap ton more images to the thread that aren't needed. Have fun.
Bugout4x4 you might want to unquote my original post since it adds a crap ton more images to the thread that aren't needed. Have fun.