C101 Connector Diagram
#1
Junior Member
Thread Starter
Join Date: Jan 2017
Location: North Carolina (southeastern NC)
Posts: 60
Likes: 0
Received 0 Likes
on
0 Posts
Year: 1988
Engine: 4.0L

Not sure where this should go, but I wanted to make sure it was available in case it can help anyone. I couldn't find a key while I was running down electrical issues, so I tracked every C101 connection to its component.
Hope it helps
#2
::CF Moderator::
Join Date: Aug 2011
Location: Prescott, Az
Posts: 43,937
Received 1,540 Likes
on
1,247 Posts
Year: 1990
Model: Cherokee (XJ)
Engine: 4.0
I like it, but c101 should have more stuff in it.
#3
Junior Member
Thread Starter
Join Date: Jan 2017
Location: North Carolina (southeastern NC)
Posts: 60
Likes: 0
Received 0 Likes
on
0 Posts
Year: 1988
Engine: 4.0L
I hope that doesn't mean mine has been messed with, but these 21 wires are all that was there. Didnt see any remnants of wires or connectors in the other slots. What else should be going through the C101? The MAP sensor, Crank sensor and Synch sensors go into the wire bundle that joins the wires from the other side of the C101. Knock sensor connects through the gray connector that is there close to the C101. Does this sound right?
I started going through this after jeep started running rough intermittently on acceleration, then started to do it all of the time. All sensors good, checked all at the sensor by ohms and volts when applicable, also reading within limits on REM II engine monitor.(just remembered, one that I have not checked at the sensor is CTS, but REM readings at 175-180 degrees.
New motor - ran like a top, REALLY GOOD (especially after replacing injectors with Volvo 4-holes (tip #37) until it started feeling like it was straining to accelerate.
Anyway, that's how I came across all of this, since everything was checking within limits I suspected a wiring issue (wire loom sat on top of the motor and was driven for a while before I realized it was melting some of the 3/4 loom). I inspected all of the wires and everything looks well, including the crimped connections.
I am currently working to eliminate the C101 and upgrade those crimps. By the way, thanks for the tips, after I finish this I'll have 1,2,3,4,6,7,8,9,11,13,36 & 37 under my belt.
#4
::CF Moderator::
Join Date: Aug 2011
Location: Prescott, Az
Posts: 43,937
Received 1,540 Likes
on
1,247 Posts
Year: 1990
Model: Cherokee (XJ)
Engine: 4.0
I think you're good. Not enough coffee before I posted. I'm gonna steal that diagram!!!!!
Why no CPS in there?
Why no CPS in there?
Last edited by cruiser54; 11-09-2018 at 01:28 PM.
#5
Junior Member
Thread Starter
Join Date: Jan 2017
Location: North Carolina (southeastern NC)
Posts: 60
Likes: 0
Received 0 Likes
on
0 Posts
Year: 1988
Engine: 4.0L
CPS (and MAP) wires go straight from the sensor, through the firewall into ECU.
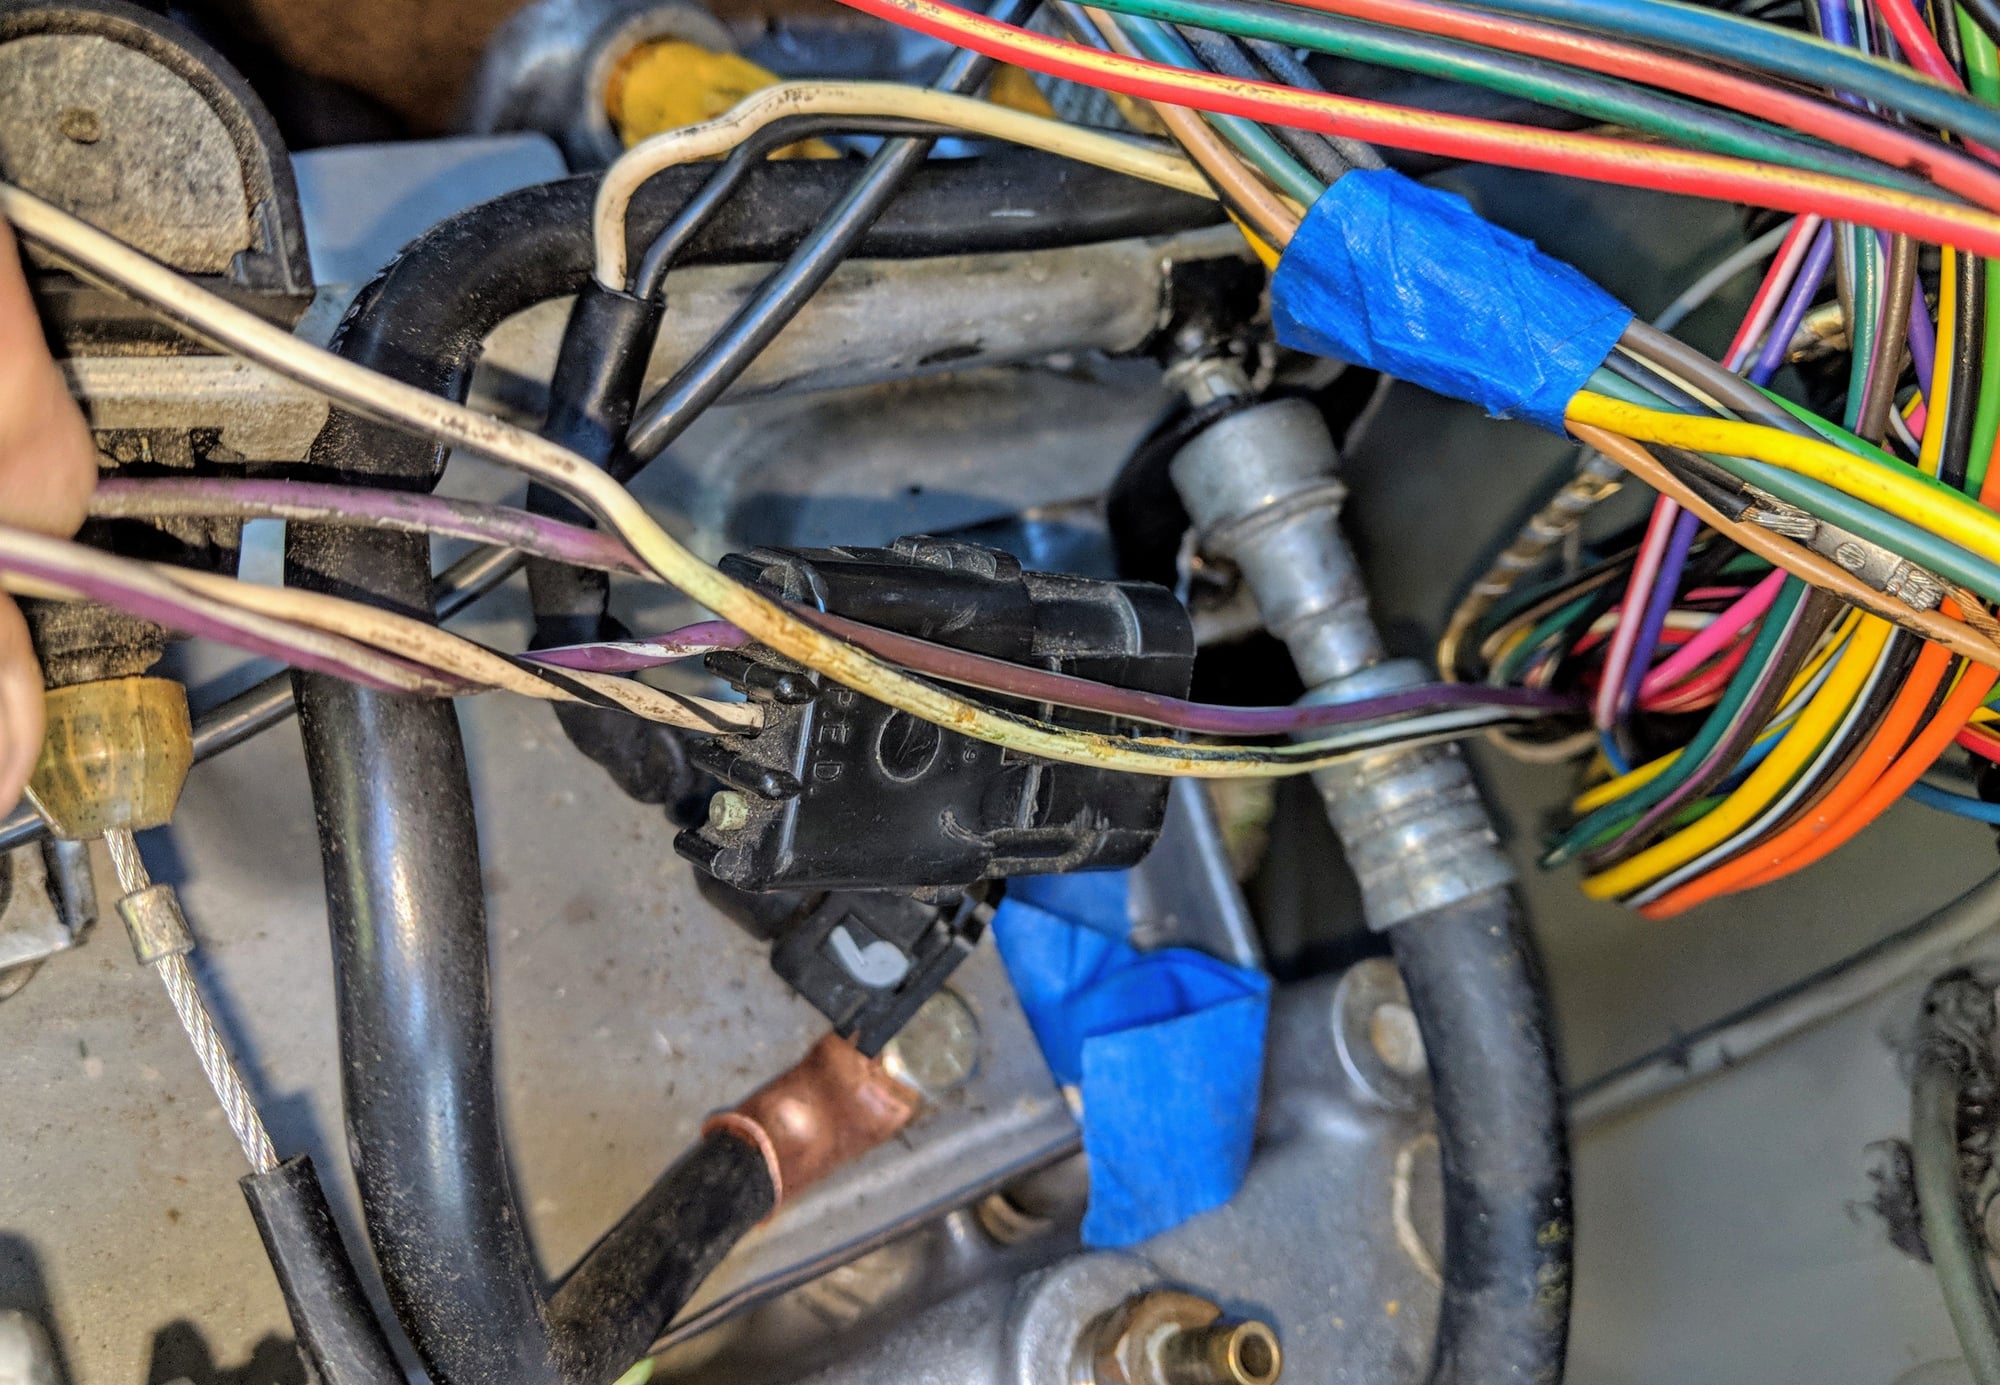
Crank sensor wires are the purple and white.
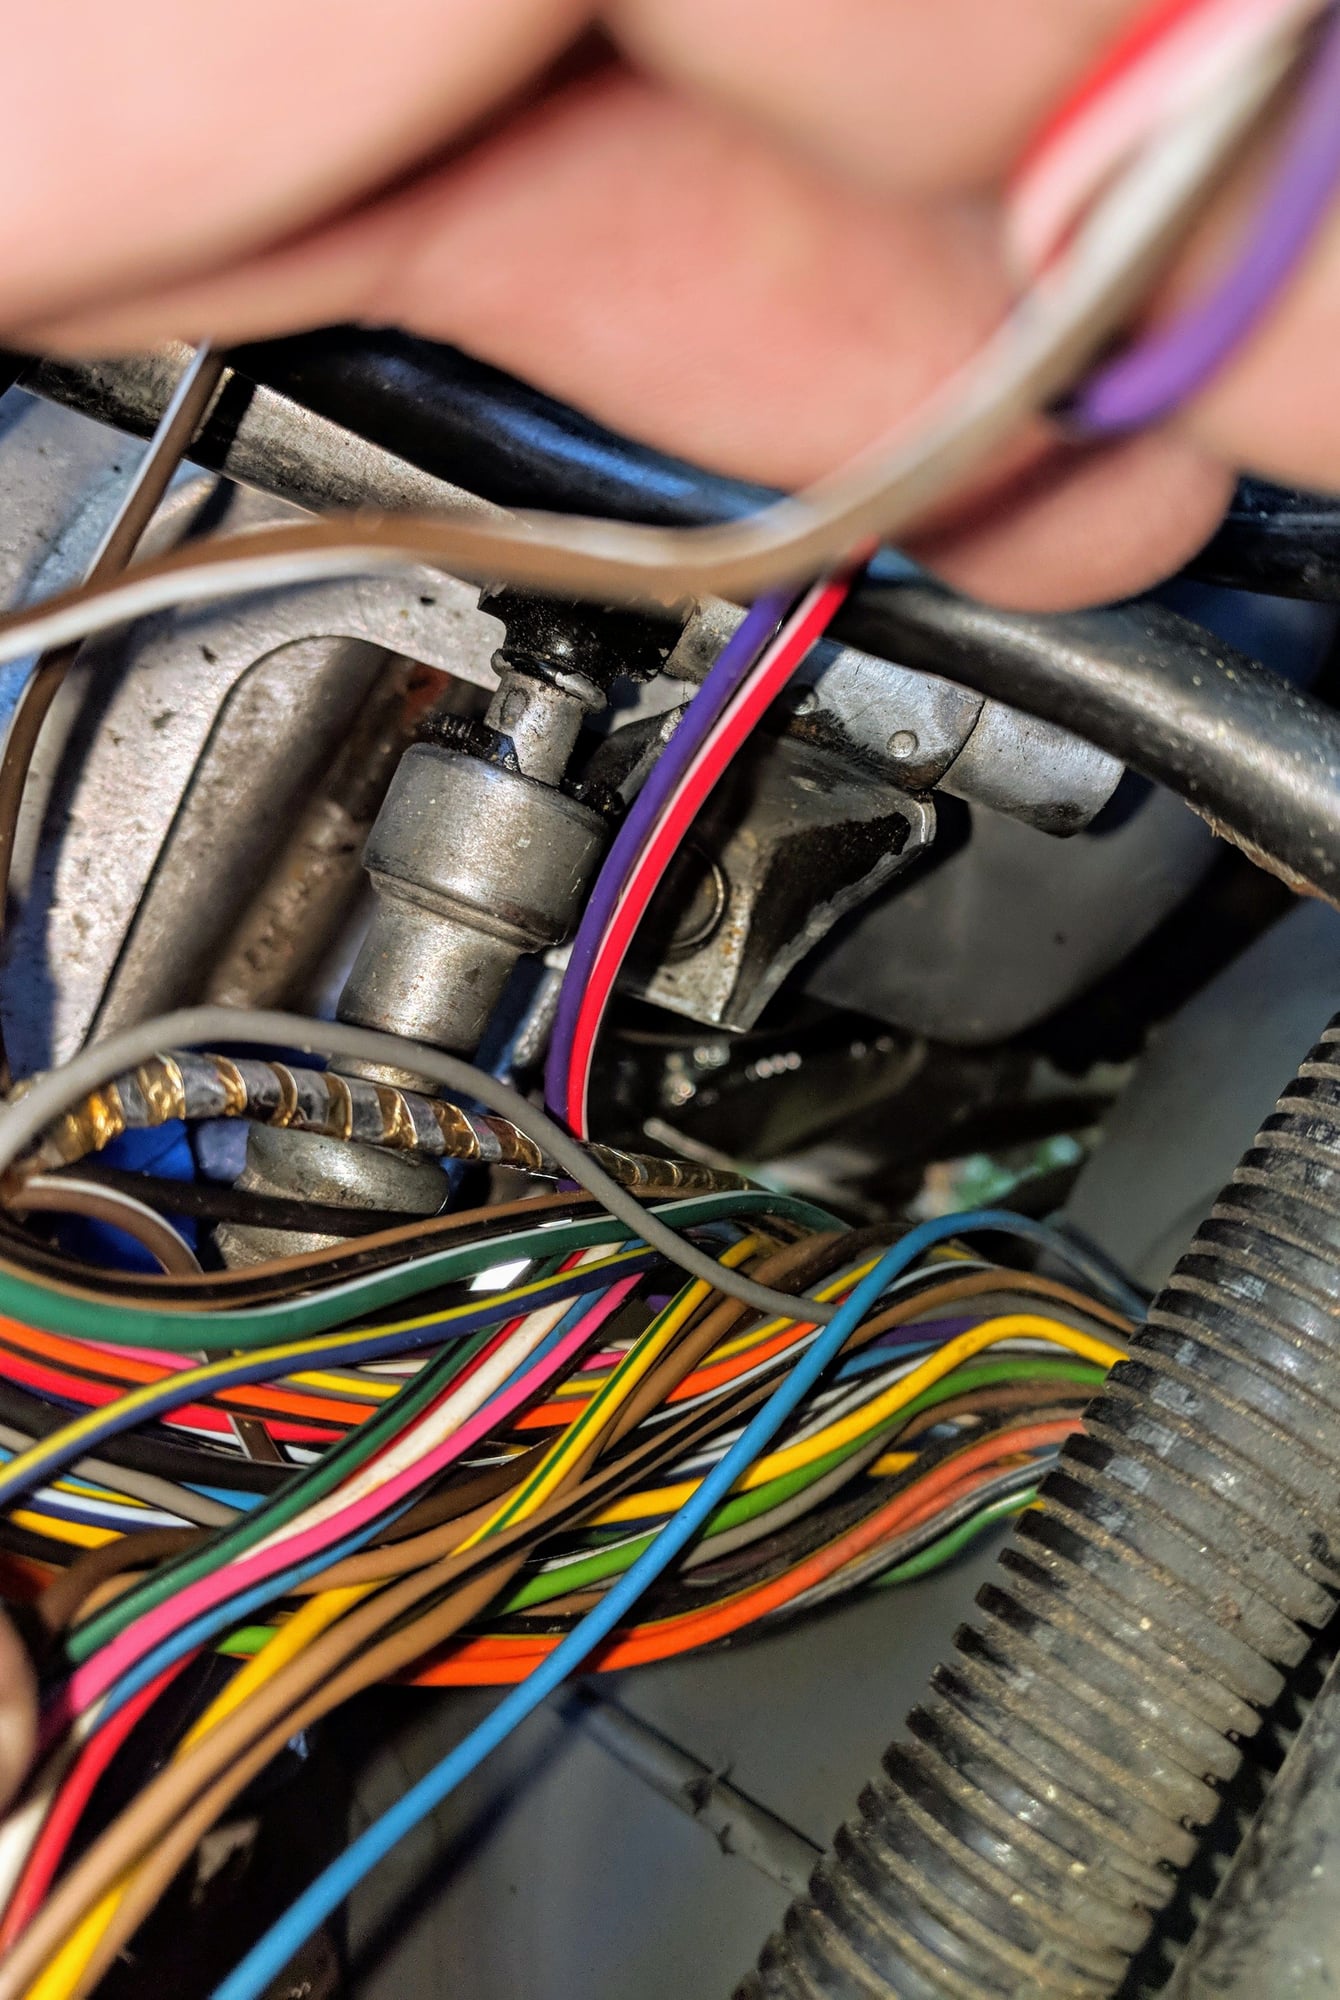
MAP sensor wires are purple and red w/white stripe. Brown wire w/white stripe on top of them is a common ground that goes back into the harness.
#6
::CF Moderator::
Join Date: Aug 2011
Location: Prescott, Az
Posts: 43,937
Received 1,540 Likes
on
1,247 Posts
Year: 1990
Model: Cherokee (XJ)
Engine: 4.0
Only if it has had thr CPS bypass mod....
#7
Junior Member
Thread Starter
Join Date: Jan 2017
Location: North Carolina (southeastern NC)
Posts: 60
Likes: 0
Received 0 Likes
on
0 Posts
Year: 1988
Engine: 4.0L
So does that mean that prior owner has made that modification? Would it go through C101 from factory?
If so makes sense - as I was checked ng my crimps I found several that had been solderd and have a different kind of tape covering them than the on that was only crimped.
If so makes sense - as I was checked ng my crimps I found several that had been solderd and have a different kind of tape covering them than the on that was only crimped.
Trending Topics
#8
::CF Moderator::
Join Date: Aug 2011
Location: Prescott, Az
Posts: 43,937
Received 1,540 Likes
on
1,247 Posts
Year: 1990
Model: Cherokee (XJ)
Engine: 4.0
So does that mean that prior owner has made that modification? Would it go through C101 from factory?
If so makes sense - as I was checked ng my crimps I found several that had been solderd and have a different kind of tape covering them than the on that was only crimped.
If so makes sense - as I was checked ng my crimps I found several that had been solderd and have a different kind of tape covering them than the on that was only crimped.
Dealer repair. I have the bulletin in paper form out in the garage.
Do you have the pin location numbers from the C101??
B2 has the Violet with tracer and B3 has White with tracer for the CPS.
#9
Junior Member
Thread Starter
Join Date: Jan 2017
Location: North Carolina (southeastern NC)
Posts: 60
Likes: 0
Received 0 Likes
on
0 Posts
Year: 1988
Engine: 4.0L
That makes sense - two of the slots that are empty (on both side of the C101) are B2 and B3. There are also no remnants of the old wires either Violet-T or White-T), as I would think would be the case in a dealer repair? (Looks clean)
#10
::CF Moderator::
Join Date: Aug 2011
Location: Prescott, Az
Posts: 43,937
Received 1,540 Likes
on
1,247 Posts
Year: 1990
Model: Cherokee (XJ)
Engine: 4.0
#11
Junior Member
Thread Starter
Join Date: Jan 2017
Location: North Carolina (southeastern NC)
Posts: 60
Likes: 0
Received 0 Likes
on
0 Posts
Year: 1988
Engine: 4.0L
See if you can open this http://www.lunghd.com/Downloads_and_...-90-update.pdf
#12
::CF Moderator::
Join Date: Aug 2011
Location: Prescott, Az
Posts: 43,937
Received 1,540 Likes
on
1,247 Posts
Year: 1990
Model: Cherokee (XJ)
Engine: 4.0
#13
Junior Member
Thread Starter
Join Date: Jan 2017
Location: North Carolina (southeastern NC)
Posts: 60
Likes: 0
Received 0 Likes
on
0 Posts
Year: 1988
Engine: 4.0L
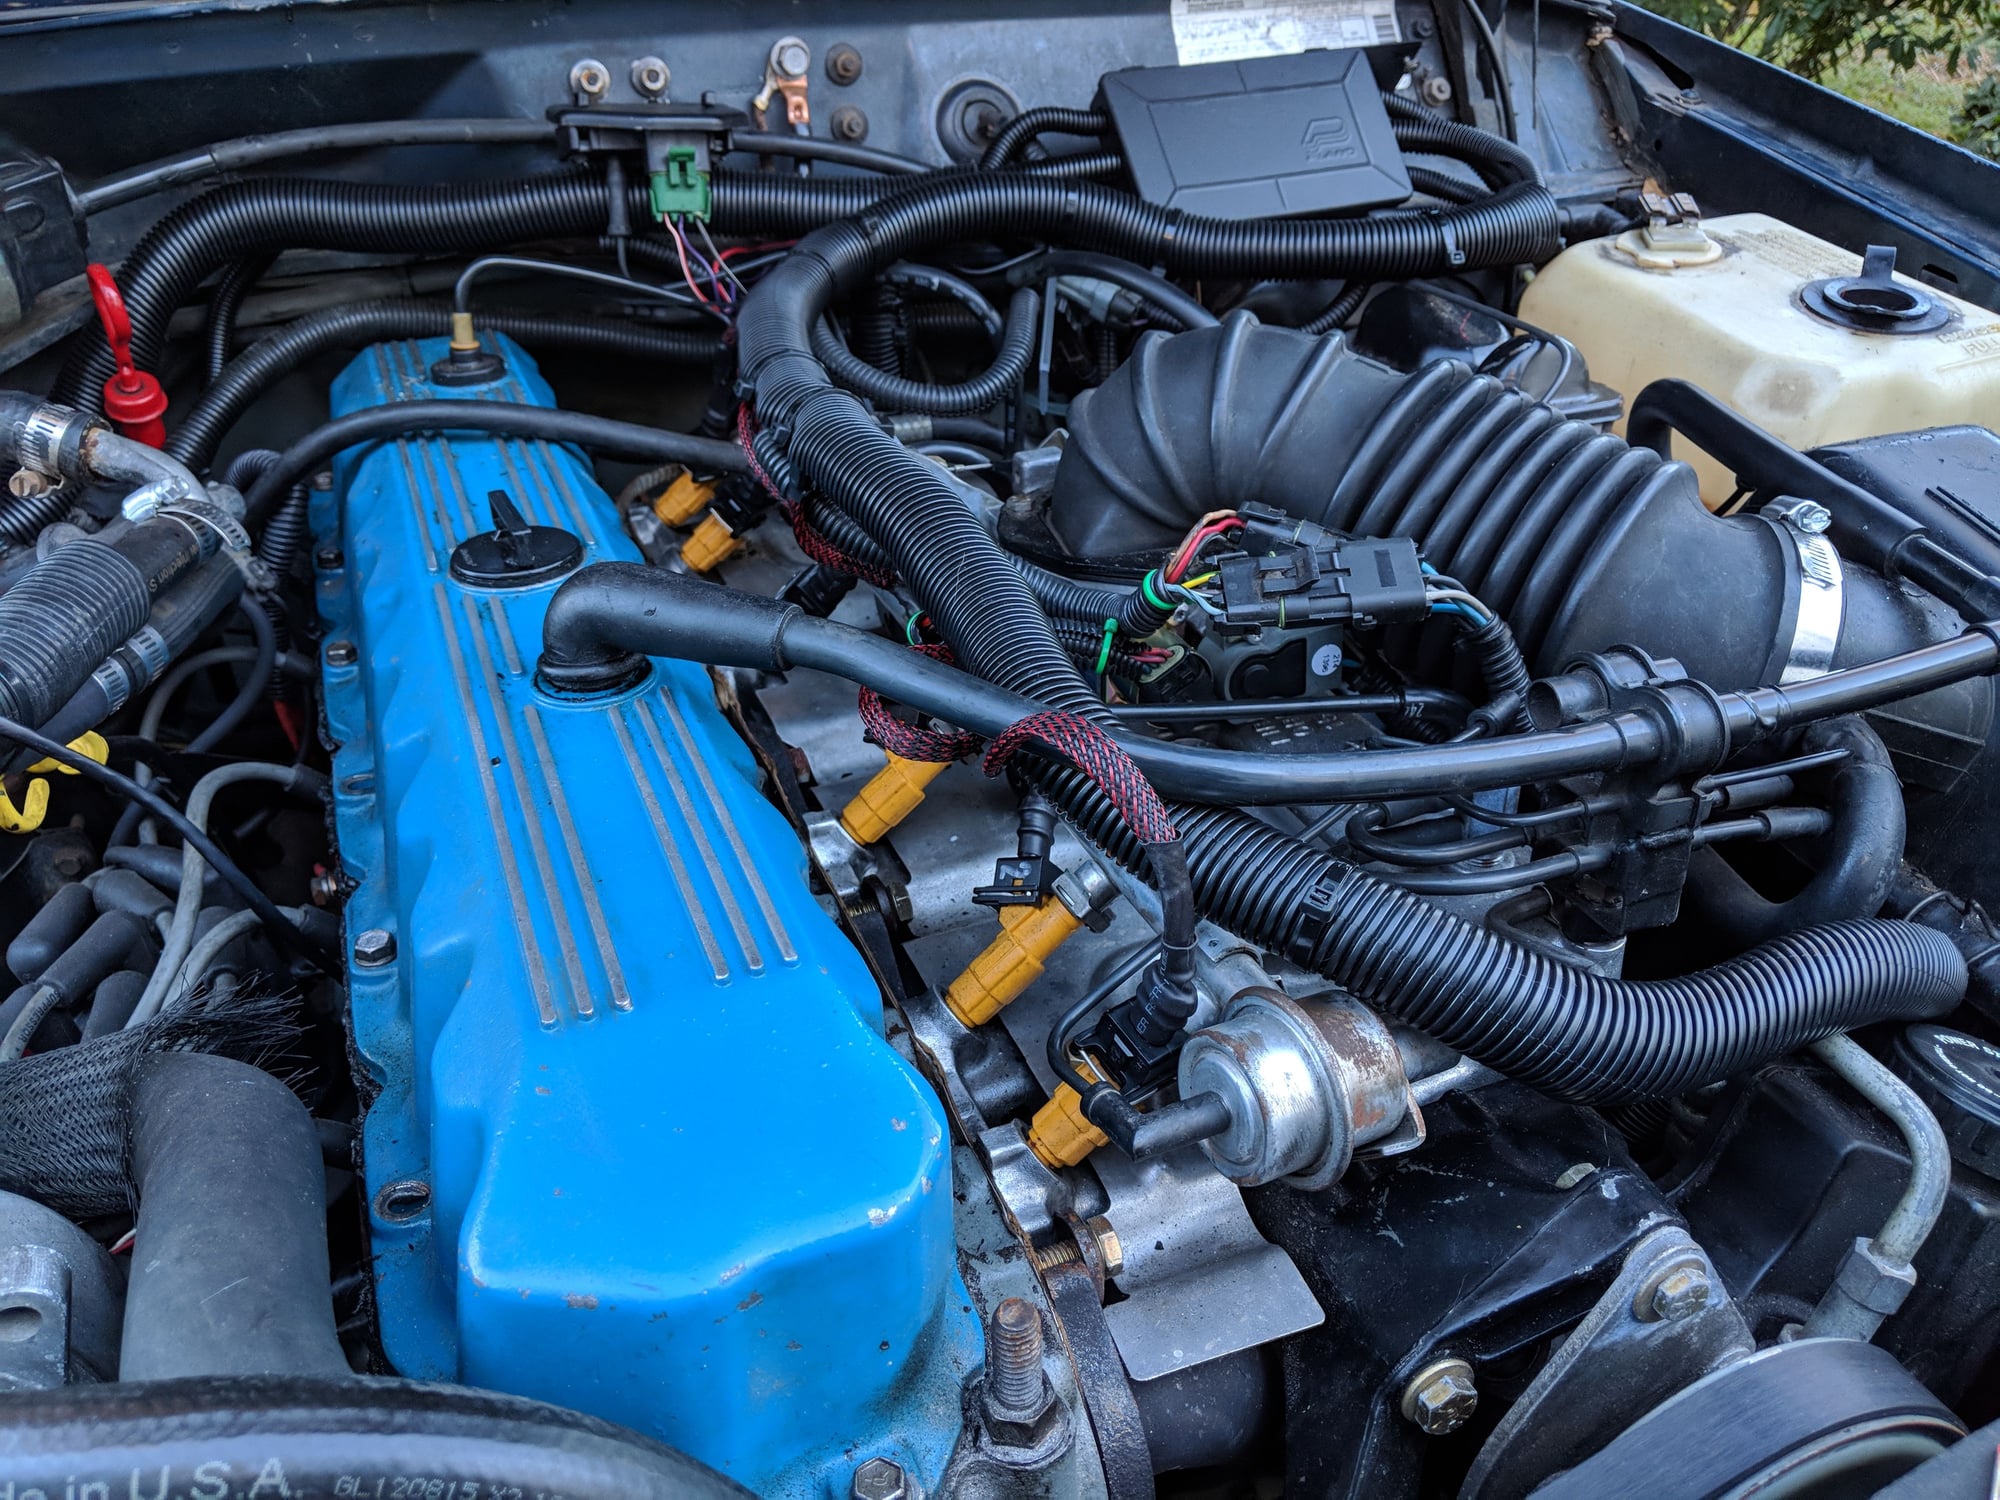
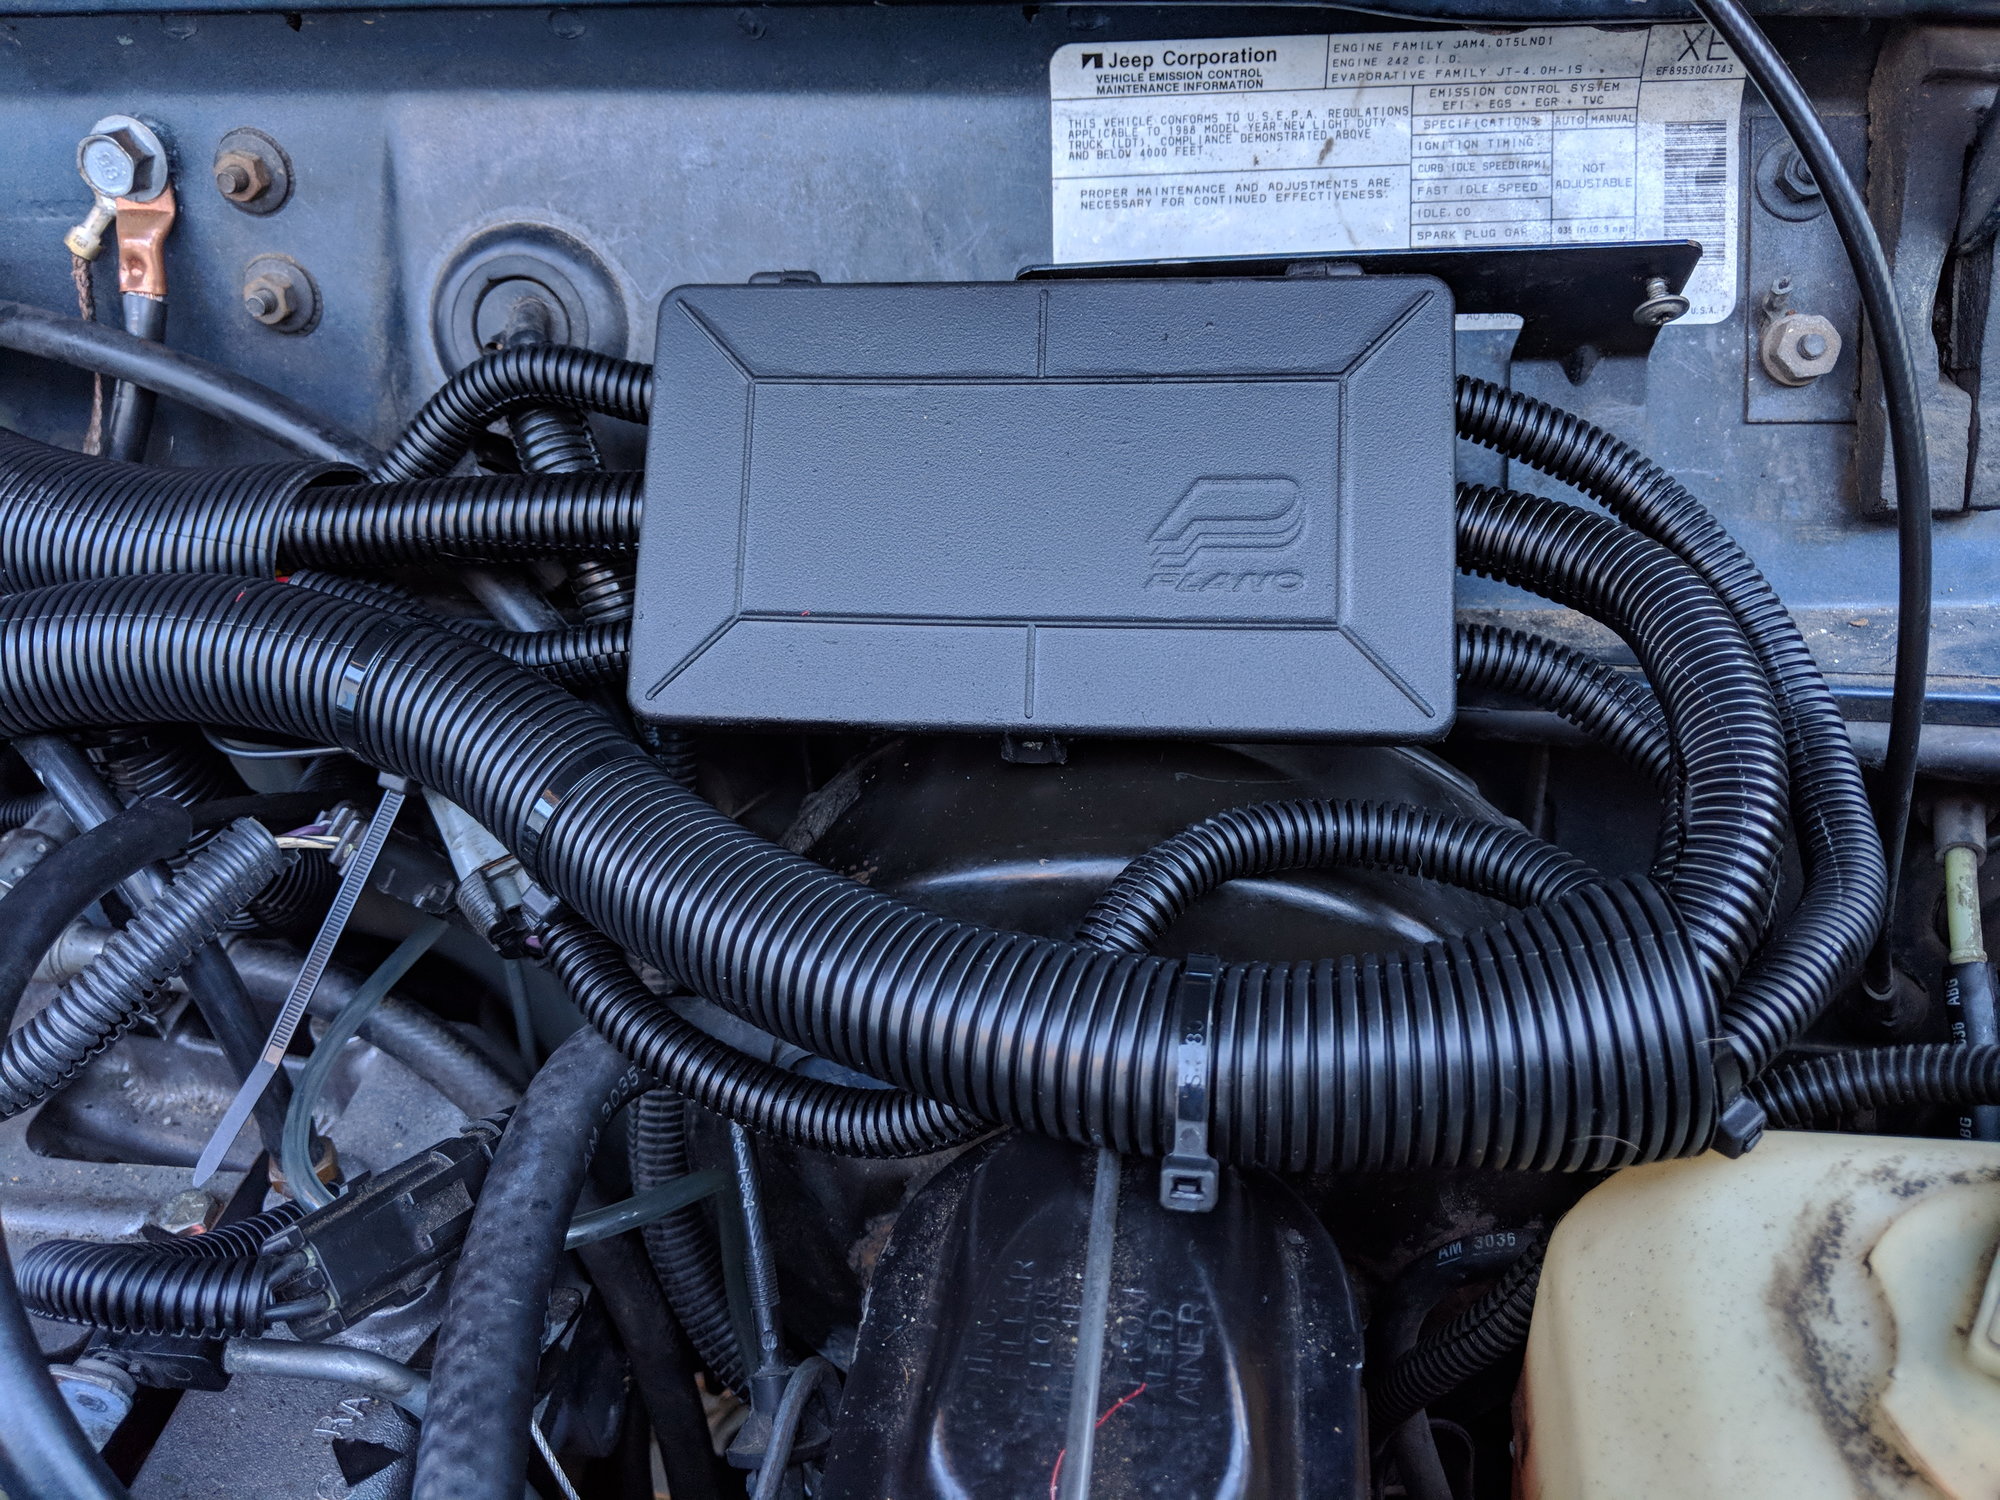
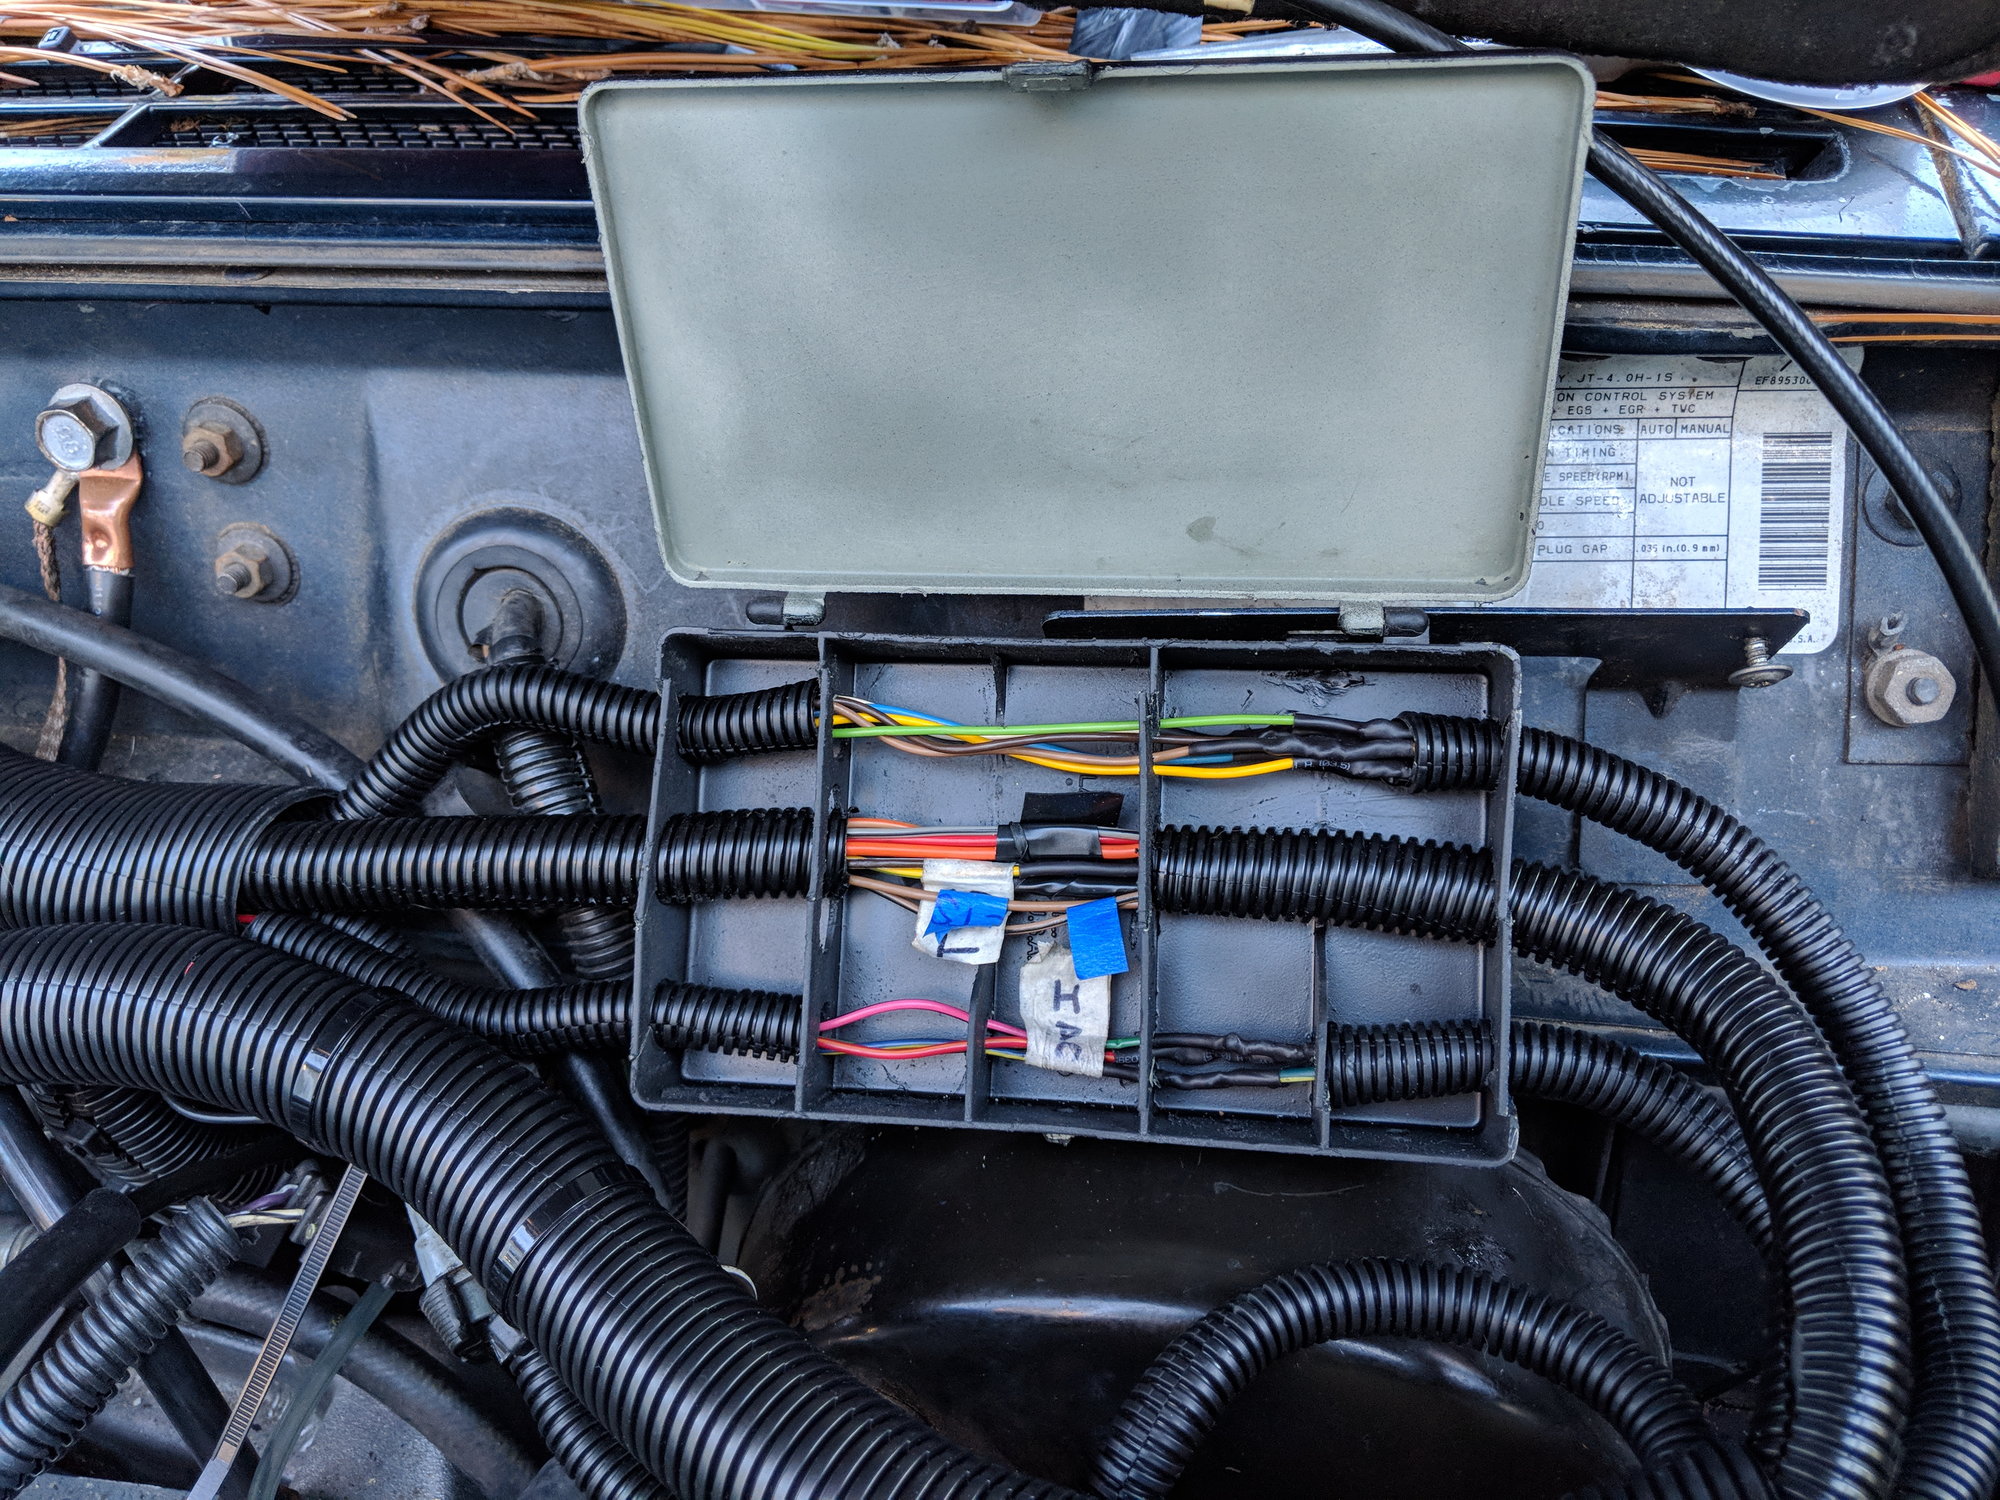
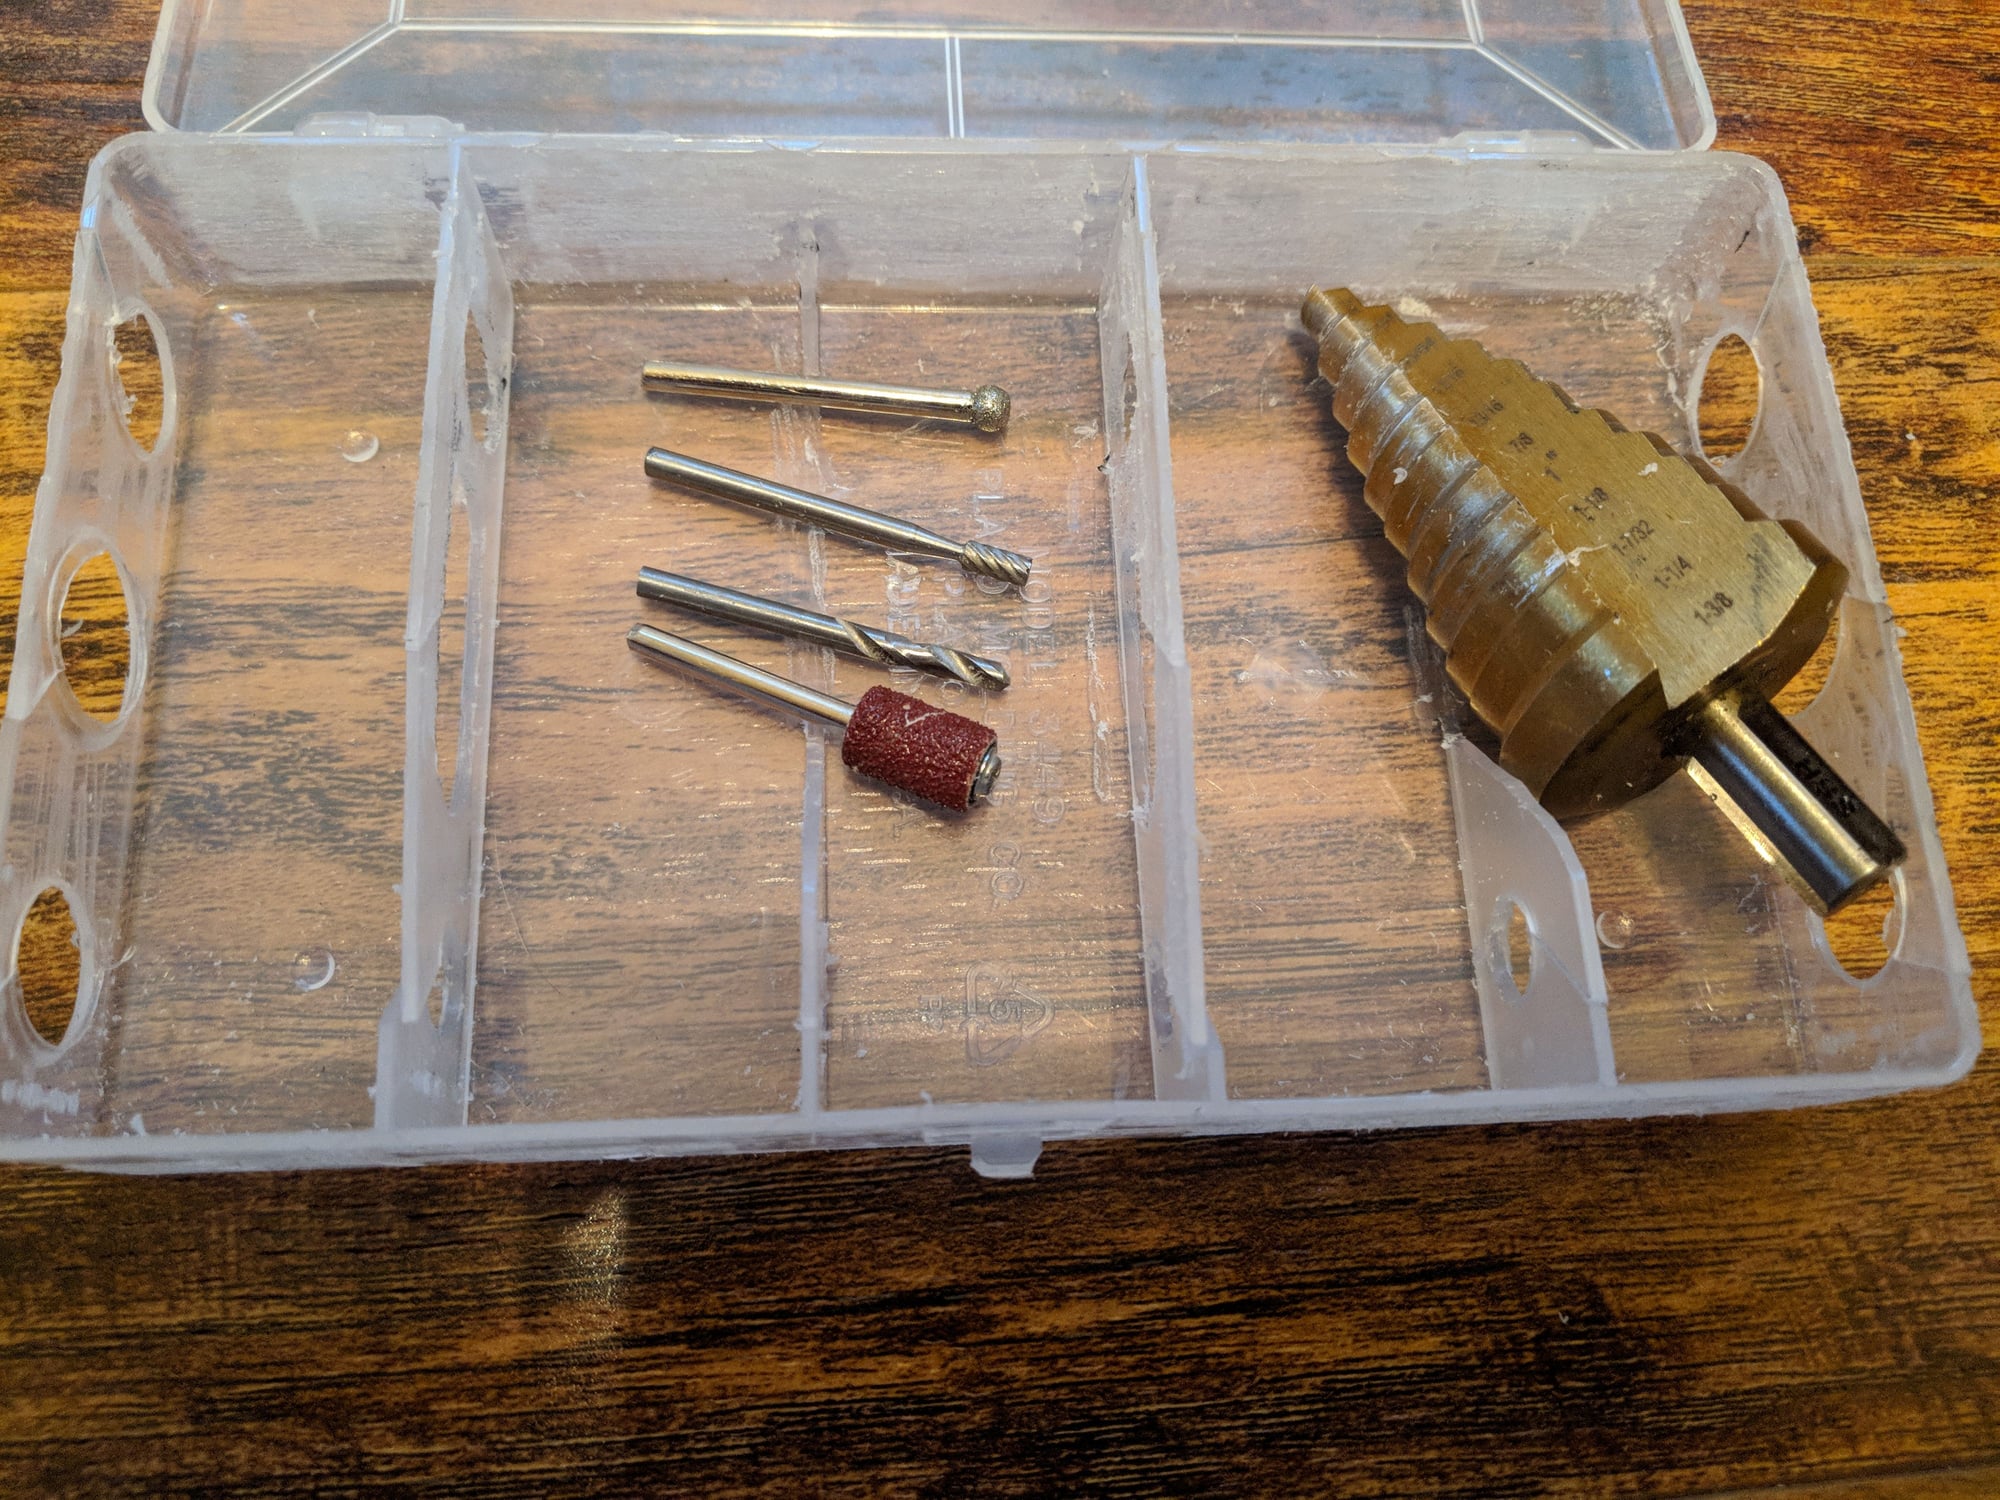

Got is finished! Not hard, just time consuming. While I had the harness unwrapped and disconnected from everything I went ahead and replaced the old, loose injector connectors as well.
Since I had all of the wires out and tracked back to their individual components I decided to keep them seperated and run them through a box to alow access to them for future troubleshooting - top row are the injector (+) wires, center row are sensor wires that were running through the C101, bottom row are all Idle Air Control wires.
I used a plastic fishing lure holder ($1.67 at WalMart), drilled it out with a universal bit, did the fine tuning with my Dremal, then sanded it, sprayed with a coat of etching primer and finished it off with 5 coats of PlastiDip spray rubber coating. I like how it turned out - nice and neat and accessible for future wrestling matches.
Just in case anyone is interested I have included photos of the finished product as well as a few as I was making it.
Hope it helps.
I think this may have fixed the rough running issues that I was having and couldnt track it down. Time will tell, need a good solid test drive furtherthan around the block - but point is that this is something I should have done a long time ago to save a lot of headache.
#14
::CF Moderator::
Join Date: Aug 2011
Location: Prescott, Az
Posts: 43,937
Received 1,540 Likes
on
1,247 Posts
Year: 1990
Model: Cherokee (XJ)
Engine: 4.0
WOW!!!!! Nice work.


 I appreciate the diagram, pics and explanation.