
broken bolt in crank

Thread Starter
Seasoned Member
Joined: Jan 2011
Posts: 303
Likes: 4
From: Austin
Year: 1987
Model: Wagoneer
Engine: 4.0
Suck it, Trebek!

So it only took 3 days, about a dozen trips to various hardware stores, 5 cut drill bits, 1 $20 right angle attachment, 4 dremel bits, a borrowed tap and die set, 3 awesome dudes to help out (thanks Adam, Matt, and John!), and quite a bit of prayer, but I'm back in the game, good as new (almost).
(had to take the front bumper off to make this work)
So, after the swearing and panic had subsided, I started googling. Everyone was saying to get some EZ Outs, or drill it, or take it to a machine shop (above all else, I was reading that I was screwed). EZ Outs didn't work (I tried 3 different types: the one pictured above, the 4 sided fluted kind, and some pretty spiffy ones from Sears called Drill-out Power Extractors).

Left handed drill bits didn't work, either. One of the biggest problems was access- with the welded cross-member in front of the engine, I couldn't fit my drill into to space to get a drill bit in concentricity with the crank snout.
I tried several things, like cutting the drill bit shorter with a cut off wheel, and finally bought a Craftsman right angle attachment for the drill, in lieu of dropping $130 on a Dewalt right angle drill. It bought me an extra inch or two, and I was able to get progressively bigger holes drilled in the bolt.
Since my first hole wasn't centered on the bolt, I could only go up to 3/8" without risking hitting the crank threads (use cobalt bits, not the titanium coated ones-one of the up sides of having used a grade 5 bolt is that the material is significantly softer than the crank, making it easier to remove).

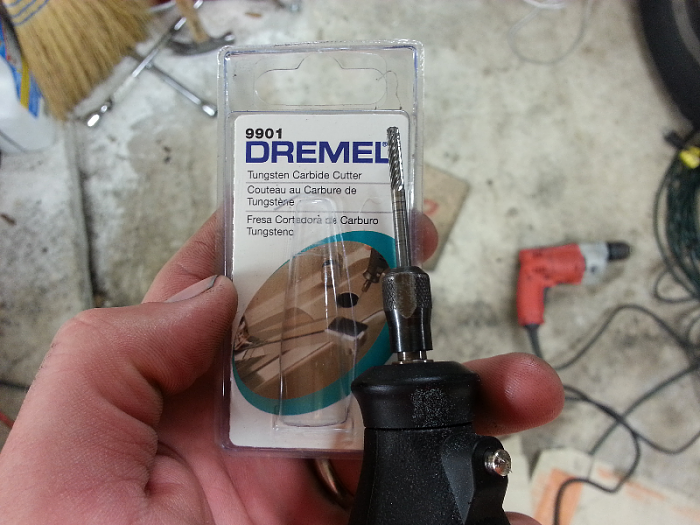
I tried to use a screw driver to knock the material out of the threads, but that was a waste of time. I picked up 2 Dremel 9901 tungsten carbide cutting bits and went to town on the bolt.
I got enough material removed to start seeing threads all the way around and down the length. Now it was time for the tap. Spin it a half a turn, then back it out. Slowly but surely, we got there.

Then the last piece:


Very carefully grease up the HB, start it with a longer bolt (!) and torque it up once it's on! Win!


Knowing what I know now, and having the tools, this could be done in 4ish hours.

So it only took 3 days, about a dozen trips to various hardware stores, 5 cut drill bits, 1 $20 right angle attachment, 4 dremel bits, a borrowed tap and die set, 3 awesome dudes to help out (thanks Adam, Matt, and John!), and quite a bit of prayer, but I'm back in the game, good as new (almost).
(had to take the front bumper off to make this work)
So, after the swearing and panic had subsided, I started googling. Everyone was saying to get some EZ Outs, or drill it, or take it to a machine shop (above all else, I was reading that I was screwed). EZ Outs didn't work (I tried 3 different types: the one pictured above, the 4 sided fluted kind, and some pretty spiffy ones from Sears called Drill-out Power Extractors).

Left handed drill bits didn't work, either. One of the biggest problems was access- with the welded cross-member in front of the engine, I couldn't fit my drill into to space to get a drill bit in concentricity with the crank snout.
I tried several things, like cutting the drill bit shorter with a cut off wheel, and finally bought a Craftsman right angle attachment for the drill, in lieu of dropping $130 on a Dewalt right angle drill. It bought me an extra inch or two, and I was able to get progressively bigger holes drilled in the bolt.
Since my first hole wasn't centered on the bolt, I could only go up to 3/8" without risking hitting the crank threads (use cobalt bits, not the titanium coated ones-one of the up sides of having used a grade 5 bolt is that the material is significantly softer than the crank, making it easier to remove).

I tried to use a screw driver to knock the material out of the threads, but that was a waste of time. I picked up 2 Dremel 9901 tungsten carbide cutting bits and went to town on the bolt.

I got enough material removed to start seeing threads all the way around and down the length. Now it was time for the tap. Spin it a half a turn, then back it out. Slowly but surely, we got there.

Then the last piece:


Very carefully grease up the HB, start it with a longer bolt (!) and torque it up once it's on! Win!


Knowing what I know now, and having the tools, this could be done in 4ish hours.
Last edited by letinsh; Jul 20, 2014 at 11:40 PM.

Thread
Thread Starter
Forum
Replies
Last Post
carverdave
Stock XJ Cherokee Tech. All XJ Non-modified/stock questions go here
8
Sep 1, 2024 08:55 AM
JayneCobb
Stock XJ Cherokee Tech. All XJ Non-modified/stock questions go here
26
Aug 11, 2020 03:22 PM
hogluvr
Stock XJ Cherokee Tech. All XJ Non-modified/stock questions go here
7
Sep 16, 2015 08:15 AM
erupert66
Stock XJ Cherokee Tech. All XJ Non-modified/stock questions go here
7
Sep 15, 2015 02:07 PM
Jared Hall
Stock XJ Cherokee Tech. All XJ Non-modified/stock questions go here
2
Sep 7, 2015 08:56 AM
Currently Active Users Viewing This Thread: 1 (0 members and 1 guests)