Jeep Grand Cherokee 1993-2004: How to Replace Coil Springs
Whether you're replacing your stock coil springs with new ones or swapping your current coil springs for some lifted ones, the process of doing so is pretty much identical. Here's how to get the job done.
This article applies to the Jeep Grand Cherokee WJ/ZJ (1993-2004).
Even though coil springs are made to be quite durable, there is a possibility that they could potentially wear out or fatigue over time. This could be due to how the vehicle was used, or if overly heavy loads were hauled or towed with the vehicle. Nothing is indestructible, so as slim as the chances could be, there is always the possibility that you just might have to swap them out for some new ones.
For Jeep owners, it's much more common for them to want to swap coil springs for lifted or leveling ones, or to go back to a stock height spring. Luckily, the process is essentially the same.
Keep in mind that a job of this magnitude should be done by someone who is confident in their mechanical abilities. It's not that it is extremely difficult, but it will require the proper equipment, firm knowledge of your vehicle's suspension system, and following the correct steps so you don't end up going down the wrong path.


Materials Needed
- Jack and jack stands
- Standard sockets sizes 7/16"-3/4"
- Millimeter sockets sizes 10mm-17mm
- Ratchet
- Standard wrenches sizes 7/16"-3/4"
- Millimeter wrenches sizes 10mm-15mm
- T55 Torx bit
- Spring compressor (optional)
To complete this job, it might be necessary to use a spring compressor if it's not possible to lower the axle assembly low enough to remove or install the spring. This might definitely be the case if you are installing a lifted spring, as it will be much longer than the stock spring. Some auto parts stores have spring compressors that you can rent. If you do decide to purchase one, make sure you get a good one; this is not a tool you want to save money and buy cheap. It will be responsible for holding back a lot of energy, so keep this in mind when making your buying decision.
Step 1 – Raise vehicle and support it on jack stands
Using your jack, raise the vehicle and support the vehicle with jack stands. You will want to place the jack stands under the sub frame rails, as you will need to be able to freely lower and raise the axle assembly on its own.
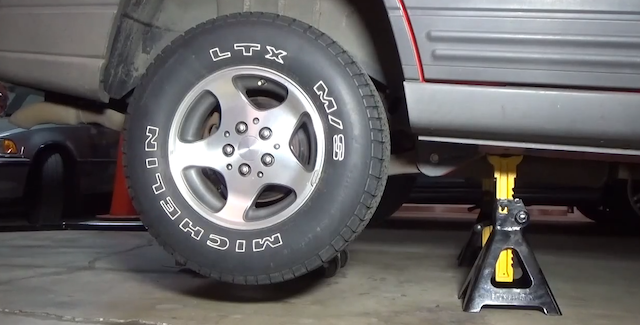
Step 2 – Remove the wheels
Using the correct size socket for the lug nuts on your vehicle, go ahead and remove the wheels.
Step 3 – Mark and disconnect driveshaft (front with 4WD only)
This step only applies to the front of the vehicle and only if you have 4WD. If this applies to your vehicle, go ahead and mark the orientation of the driveshaft as it sits in the yoke of the axle input shaft. You will want to put it back in the same place it was removed from, and marking it will ensure that you do. After it has been marked, go ahead and disconnect the driveshaft. The driveshaft is held into the axle input shaft yoke by two U-clamps, which have two bolts each. Once you remove the bolts and clamps, you will be able to remove the U-joint out of the input shaft yoke.
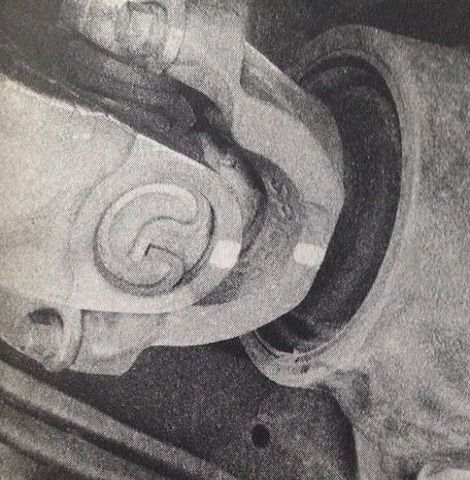
Figure 3. Marking of the driveshaft. 
Figure 4. Driveshaft bolt removal.
Step 4 – Support the axle assembly with a floor jack
Using your floor jack, support the axle assembly. For the front axle, it might require two floor jacks because the axle assembly itself is heavier on one side than the other.
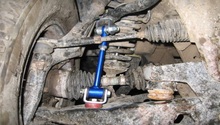
Step 5 – Unbolt the stabilizer bar links
In order for the axle to be able to be freed up and be lowered far down enough, certain parts will have to be disconnected. One of these parts will be the stabilizer bar links. The easiest way to do this is to just remove the nut that secures the top of the link on the front bar's links, and the bottom of the link on the rear bar's links.
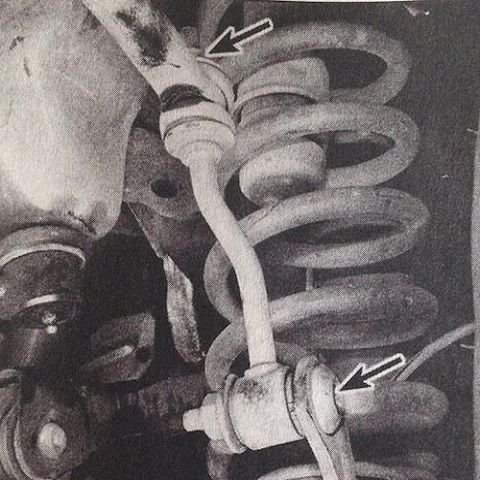
Figure 5. Front bar link. 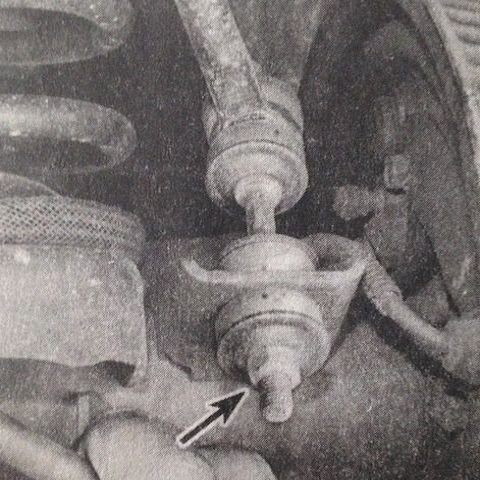
Figure 6. Rear bar link.
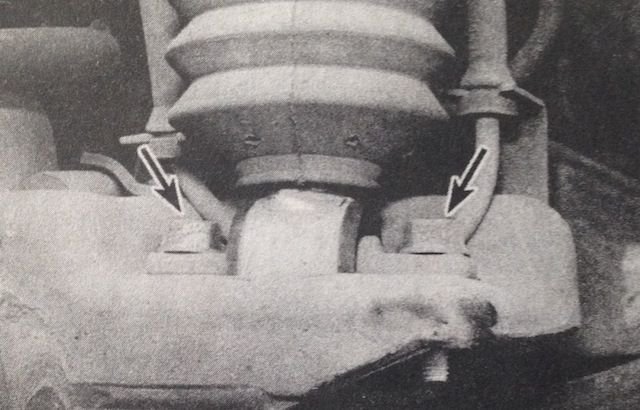
Step 6 – Unbolt shock absorbers
The next component that needs to be disconnected in order to free up the axle will be the shock absorbers. The easiest place to disconnect them will be where they bolt to the axle. The front shocks are held onto the axle by two bolts on each one where as the rear shocks are held onto the axle by a bolt and nut on the bottom part of the shock.
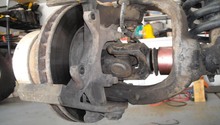
Step 7 – Disconnect track bars
Both the front and rear axles have a track bar that helps to locate and keep the axle in place while driving. You will want to disconnect the track bar from the axle bracket. Both the front and rear track bars are into the axle bracket by a bolt and nut. Removing this will allow you to remove the track bar from the bracket. The rear lower track bar bolt is what you will need the T55 Torx Bit for in order to remove it.
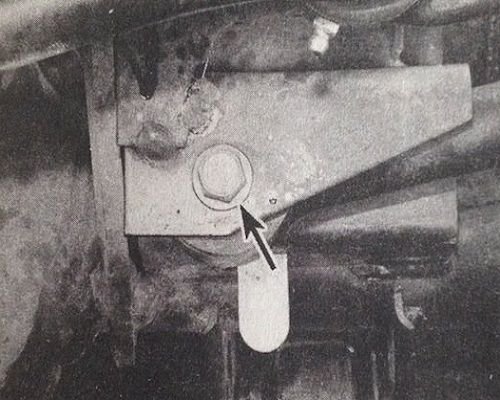
Figure 8. Front track bar bolt. 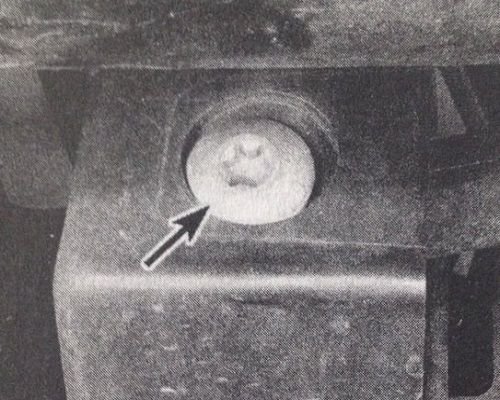
Figure 9. Rear track bar bolt.
Step 8 – Lower axle assembly and remove springs
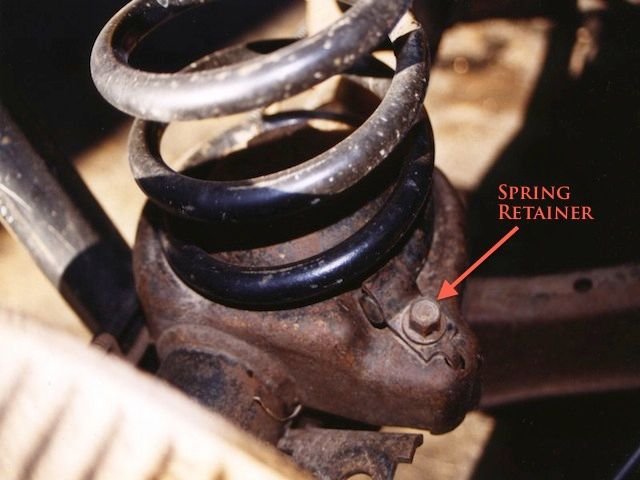
Now that everything has been disconnected, you can lower the axle assembly with your floor jack(s). You will want to lower the axle until the coil spring is fully extended and you can see that the top of the spring is not touching the top isolator any more. The isolator is the rubber piece that the coil spring was seated in. Once it has been fully extended, you can then unbolt the spring retainer that holds the bottom of the coil spring to the axle housing and remove the springs.
Step 9 – Install new coil springs
The installation is the reverse as removal.
- Place coil spring on axle housing, place spring retainer over bottom coil, and tighten.
- Raise axle back into place so the top of spring sits in isolator.
- Connect the track bars.
- Connect the shock absorbers.
- Connect stabilizer bar end links.
- On front axle, reconnect the driveshaft to axle input shaft yoke and align marks that you made before removing.
- Install the wheels.
- Lower the vehicle back onto the ground.
Related Discussions
- Need Advice Replacing Coil Springs - CherokeeForum.com
- Up Country Coil Springs - CherokeeForum.com
- Coil Springs - CherokeeForum.com