Jeep Cherokee 1984-2001: How to Replace Ball Joints
The ball joints allow radial spindle movement. Wheel movement and turning would not be possible without ball joints. Ball joints are able to withstand large amounts of force; although, wear will always occur with time.
This article applies to the Jeep Cherokee XJ (1984-2001).
Inside a ball joint is a socket that has enough room for a ball to move about freely inside. At the bottom of the socket is a cup. This cup keeps the ball end of the joint inside the socket. During driving, a large amount of movement occurs inside the socket. Grease is used to reduce friction between the socket wall and ball. A rubber boot keeps the grease inside the socket and the dirt outside.
Any free play between the spindle and ball joint creates a problem often observed by the driver as steering wheel looseness and squeaking noises. It's important to periodically grease your ball joints if there are unsealed. Perform this service at every other oil change.

Materials Needed
- Socket set (10mm-21mm)
- Pry bar
- 12 point 14mm socket
- 36mm socket
- 1/2" ratchet
- Breaker bar
- Impact wrench
- Torque wrench
- Flat head screwdriver
- Wire or thick string
- Ball joint C-clamp
- Pickle fork or ball joint separation tool
- Large hammer
- Needle nose pliers
- Ball joint grease
- Grease gun
- Cotter pins
- Ball joint(s)
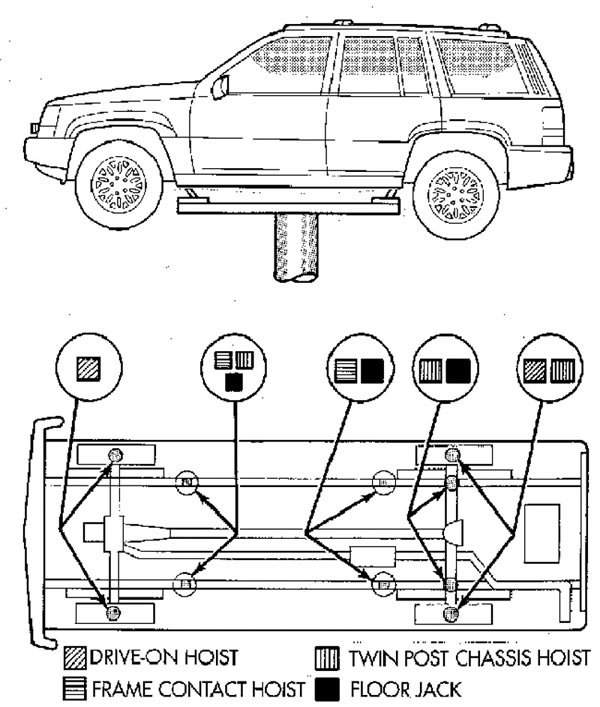
Step 1 – Raise and support the front of the vehicle
If you do not have an air or electric impact wrench capable of loosening lug nuts, do this before the tires leave the ground. Engage your emergency parking brake. Place your floor jack below the jacking point and lift high enough to place a jack stand beside it. A block of wood can be placed between the jack stand and underbody to reduce the chance of damage.
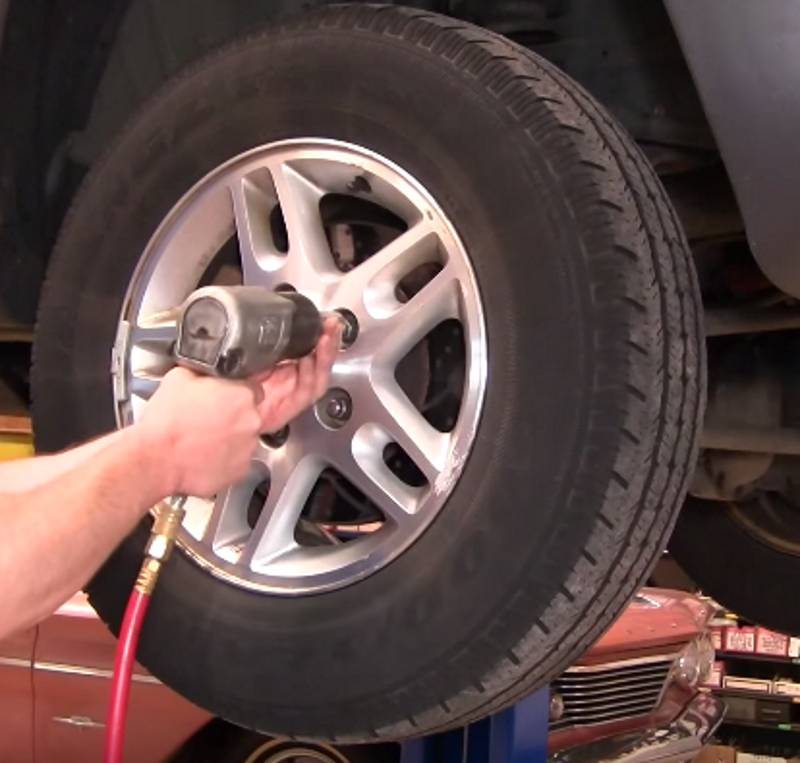
Step 2 – Remove the wheel(s)
Depending on your Cherokee's year and trim package, you may need to remove a wheel cover to expose the lug nuts. These often snap into place and can be easily removed with a flat head screwdriver.
Use a 3/4" socket or similar size to remove the lug nuts from the wheel.
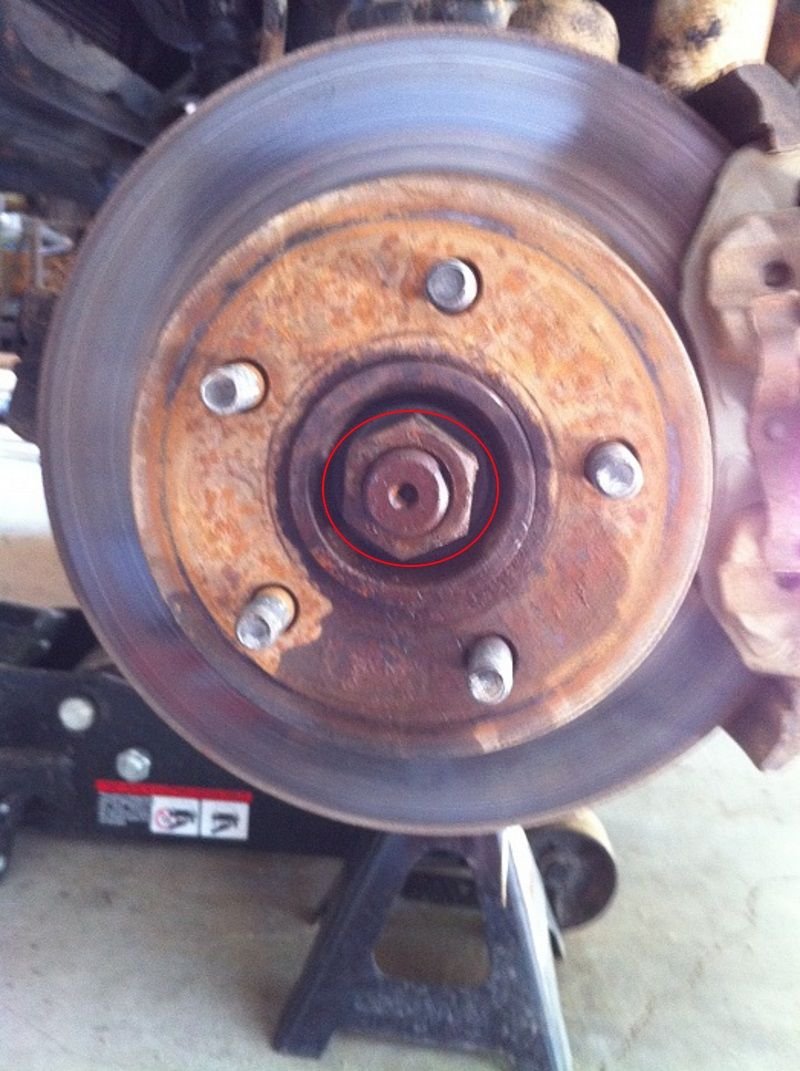
Step 3 – Remove the axle nut
If you have an impact wrench capable of removing the axle nut, this step can be completed after Step 4. Install two or three of the lug nuts onto the wheel studs far enough for them to contact the rotor surface. First straighten out the cotter pin and pull it out of the axle shaft. Remove the nut cap and the spring washer behind it. Your are now ready to remove the axle nut. Have a second person apply pressure on the brake pedal while you remove the axle nut with a 36mm socket and a breaker bar. If the rotor still spins a large chisel, screwdriver, or pry bar can be placed in the vents of the rotor and wedged against the pavement. Remove the flat washer once the axle nut is removed.
Step 4 – Remove the caliper from the rotor
Behind the brake caliper you will see two bolts. These bolts attach the caliper bracket to the wheel hub. Remove these bolts and hang the brake caliper assembly out of the way with some wire or thick string. Do not let the caliper's weight rest on the rubber hose, otherwise damage may result.
Step 5 – Remove the rotor/drum from the hub
Look for a set screw on the face of the rotor/drum between the wheel studs. If none is present, the rotor/drum can be pulled free from the wheel hub.
If your Cherokee has front drum brakes, pull/wiggle the drum off the wheel hub. You may need to lightly tap the face of the drum with a hammer to break free if it is rusted. Do the same for the rotor, but do not strike the shiny portion of the rotor (where the brake pad contacts). The rotor can be tapped between the wheel studs.
Step 6 – Remove the wheel hub and axle
There are three bolts on the backside of the wheel hub surrounding the axle. Remove these bolts with a 12 point 14mm socket. A wobble extension will make these easier to reach.
Pull/wiggle the wheel hub to separate it from the spindle. A pry bar or a punch/hammer can be used to aid this process. The hub, backing plate, and axle may come out as a complete unit. If they don't, removal is simple. Grab the end of the axle to pull it out of the front differential and through the spindle.

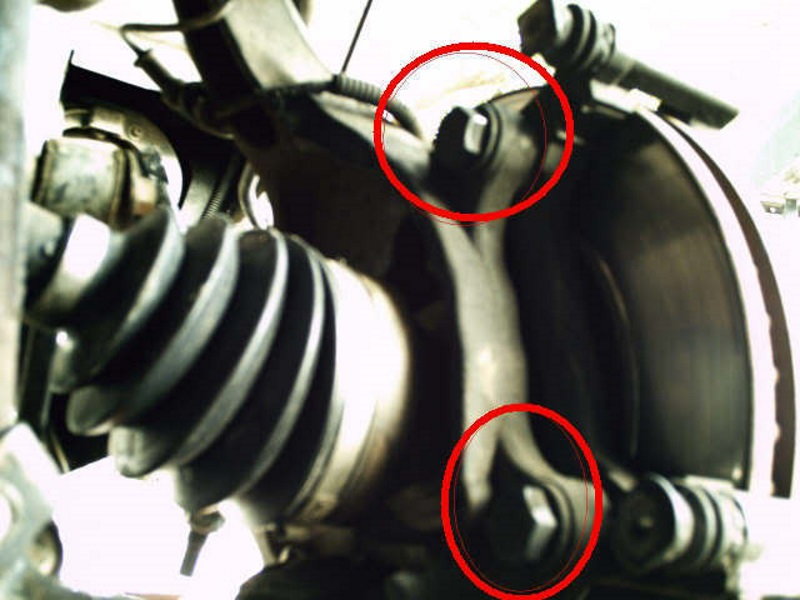
Step 7 – Remove the spindle from the ball joints
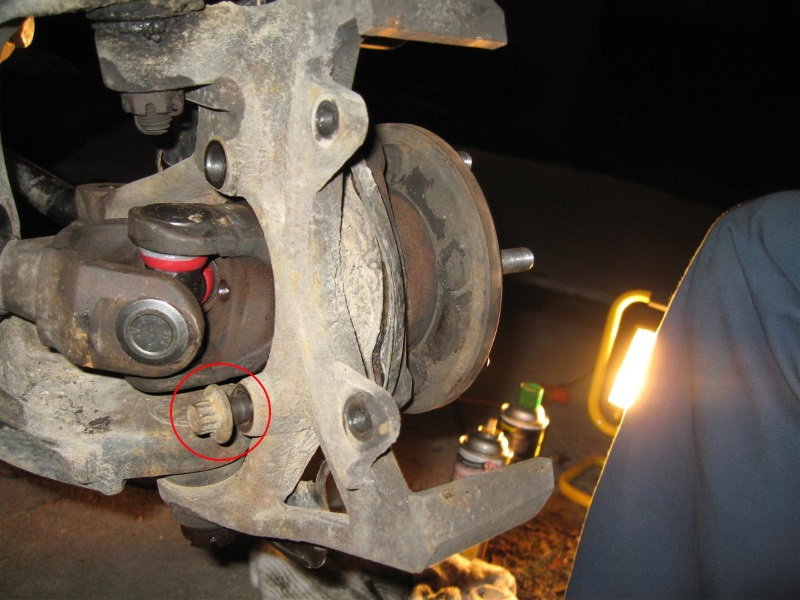
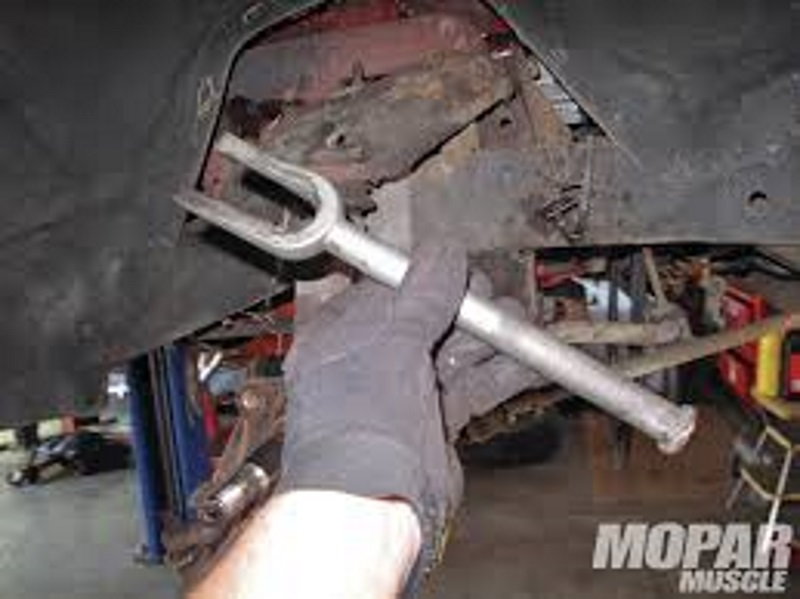
Remove the cotter pin from the castle nuts on the upper and lower ball joints. Loosen the castle nut until there are four or five threads remaining. Using a pickle fork and a hammer or a ball joint separator, separate the ball joints from the spindle. If you're using a pickle fork, wedge it between the ball joint and spindle. Four or five solid hits should be enough. A ball joint separator is best. If your not replacing both ball joints, the pickle fork can easily tear the rubber boot on your good ball joint. Completely remove the castle nut once the ball joints have been separated.
Step 8 – Press out the ball joints
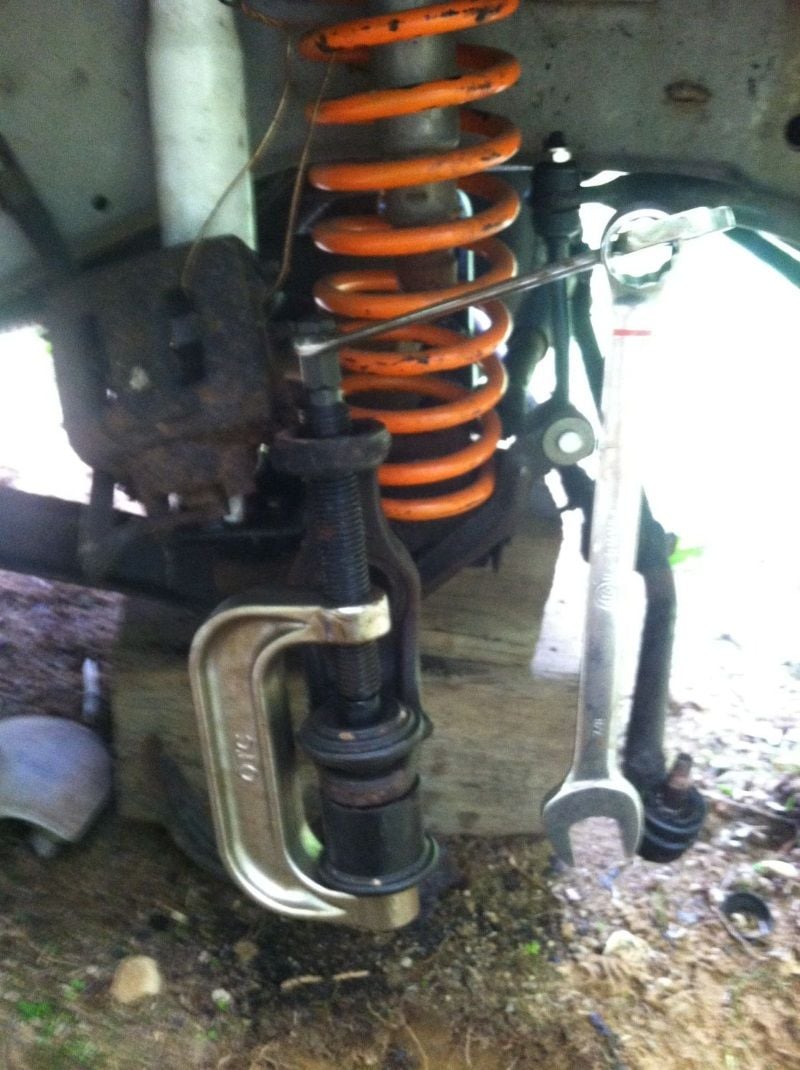
Using a ball joint C-clamp tool, press the ball joints from the spindle. Place the correct adapters into the C-clamp. Make sure the ball joint is being pressed the correct way. The ball joint shaft should be moving through the spindle on the upper ball joint. The lower ball joint is opposite.
Step 9 – Install the new ball joint
Grease the outer edge of the ball joint where it contacts the spindle to make installation easier. Using the correct adapters, press the ball joint into the spindle. You will feel the ball joint bottom out against the spindle once it's fully installed. If your C-clamp adapters do not fit flatly against the spindle, washers can be placed between the two to straighten the angle.
Your new ball joints may need to be greased. If so, install a grease gun filled with suitable ball joint grease onto the ball joint zerk fitting and fill the joint. Do not overfill the joint with grease. Once the rubber boot begins to expand, you've applied enough.
Step 10 – Finish the installation
- Slide the spindle back onto the ball joints and tighten the castle nuts between 65 to 75 ft. lbs. Remember to install the cotter pin. It's recommended to use new cotter pins.
- Carefully slide the axle shaft back into the differential and install the backing plate as well as wheel hub. Tighten the wheel hub bolts between 60 to 70 ft. lbs.
- Install the axle nut washer, and then the nut. Torque the nut to 150 ft. lbs. Re-install the spring washer and nut cap, then the cotter pin.
- Tighten up the caliper bracket bolts. Once your ready, torque the wheel lug nuts to 100 ft. lbs.
Featured Videos: Jeep Cherokee Ball Joint Replacement
-
Part One
-
Part Two
-
Part Three
Related Discussions
- Change Upper and Lower Ball Joints - CherokeeForum.com
- Best Brand of Cheap Ball Joint - CherokeeForum.com
- How to Get Ball Joints Out with No Press - CherokeeForum.com
- Adjustable Ball Joints versus Non-Adjustable - CherokeeForum.com