Jeep Cherokee 1984-2001: Transmission Diagnostic Guide
A modern automatic transmission is a complex mechatronic (MECHAnical-elecTRONIC) system. Every system in the transmission, from the high pressure hydraulic system to the gear train and clutches, are interrelated. It can be difficult to diagnose a complex and difficult-to-understand system. This simple and informative how-to will direct you towards identifying that rough shift or "limp mode" condition in your truck.
This article applies to the Jeep Cherokee XJ (1984-2001).
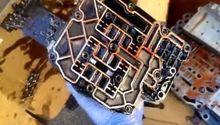
An automatic transmission is composed of three main systems. The hydraulic system, which provides pressure lubrication for bearings as well as gears and does the work of shifting and holding clutches. The electronic system, which is the brains of the transmission and includes the solenoid devices that act on the hydraulic fluid. Then there is the mechanical system, which includes the gears, shafts, bearings and torque converter.
All of these systems are related and interact in a complex way to essentially multiply engine in a manner which is both efficient and pleasing the truck's passengers. When one, or a combination of, these systems is not working, it is often very difficult to determine the root cause. For example, you feel a poor shift or a clutch slipping during a shift; is it because a solenoid is not responding according to its defined operation characteristics, or is it because clutch material has degraded causing the poor shift? Follow this how-to and learn to diagnose your truck's transmission.
Materials Needed
- DRB-II scan tool for reading transmission DTC (Diagnostic Trouble Code)
- Aisin-Warner AW-4 service manual
Step 1 – Basic functional checks
- Check as well as verify that the transmission cable is functioning and adjust if necessary.
- Check and verify proper function of the engine throttle cable.
- Check for proper transmission fluid level. Start the engine and cycle through the gears (P to R to D to R to D to P) a few times. With the engine running and transmission in "Park," check the transmission fluid level and top off as required.
Pro Tip
Many instances of poor transmission performance or poor transmission shift quality is a result of low fluid level or old transmission fluid. Ensure that the fluid is no older than 30,000 miles and is filled to the proper level. Additionally, water in a transmission leads to poor performance and significantly reduced lifespan. If the truck has forded deep water and poor transmission performance has followed, immediately change the transmission fluid with a thorough drain and flush.
Step 2 – Perform manual shift test
If everything in Step 1 checks OK, perform this test as outlined in the AW-4 diagnostic and service manual.
- Disconnect transmission control module or module fuse.
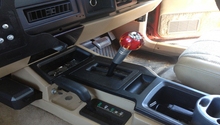
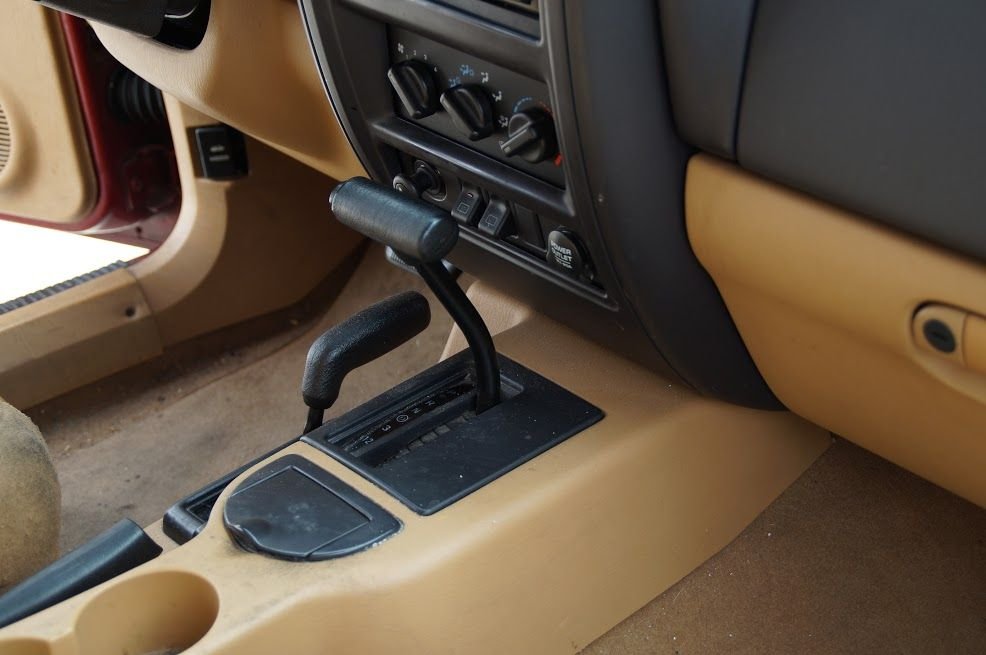
- Road test the truck and verify that all gear selector positions are the correct gear ranges in the transmission: 1st gear ONLY is gear selector position "1-2"; 3rd gear ONLY "3" gear selector position; 4th gear is "OD" gear selector position.
- Manually downshift transmission from "OD" to "3" to "1-2" and ensure gear is selected. Take care to not over-speed the engine!
- If the transmission shifts as normal, perform the "Pressure Test" and "Torque Converter Stall Test" as outlined in the Aisin-Warner AW-4 service manual.

Figure 2. Transmission diagnostic chart. 
Figure 3. Additional transmission diagnostics and tests.
Step 3 – Scan for DTC using DRB-II scan tool
If the transmission fails any of the above diagnostic tests use the DRB-II tool to read any DTC's that are stored on the Transmission Control Module (TCM).
- Follow the scan tools instructions to read and record the TCM's fault, or trouble, codes.
- Follow the DTC definition chart in the service manual and define what component or part has failed inside the transmission.
Related Discussions
- Cherokee Trans Issue - CherokeeForum.com
- XJ Transmission Issue - CherokeeForum.com
- Auto Transmission Issues - CherokeeForum.com
- Won't Shift Out of First Gear - CherokeeForum.com
- Transmission Leak Near Radiator - CherokeeForum.com