
My H4 Upgrade

Thread Starter
Seasoned Member
Joined: Jul 2011
Posts: 379
Likes: 2
From: New England
Year: 2000
Model: Cherokee
Engine: 4.0L
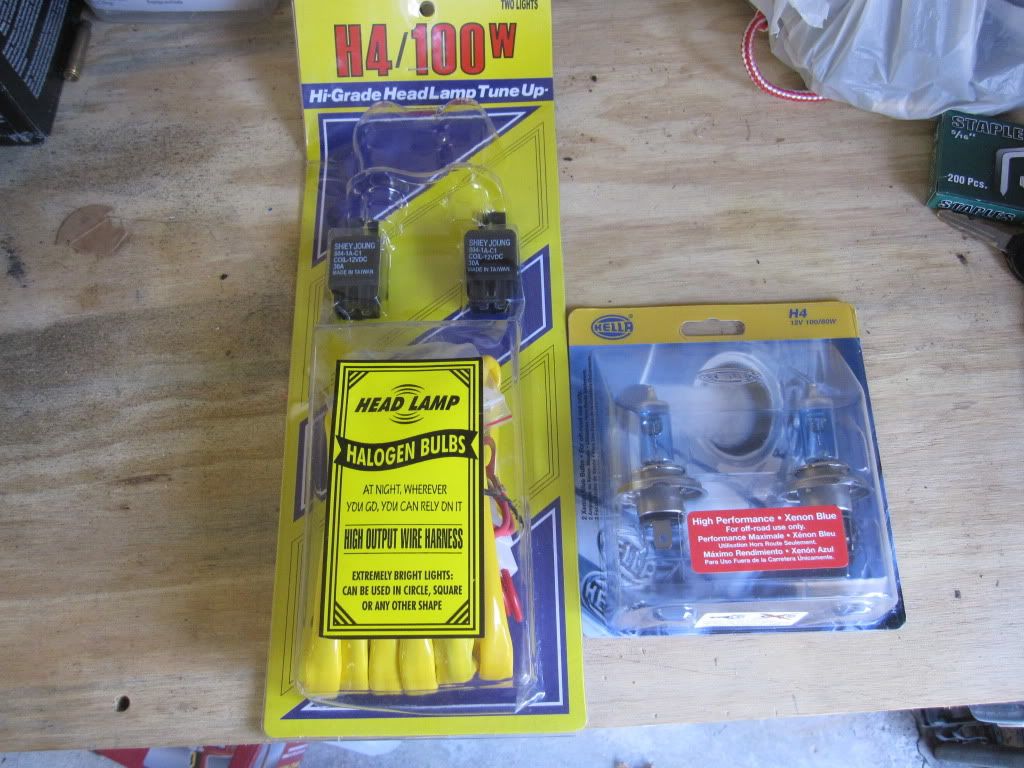
Wiring Harness- $30.43
Hella H4 100/80w bulbs- $27.16
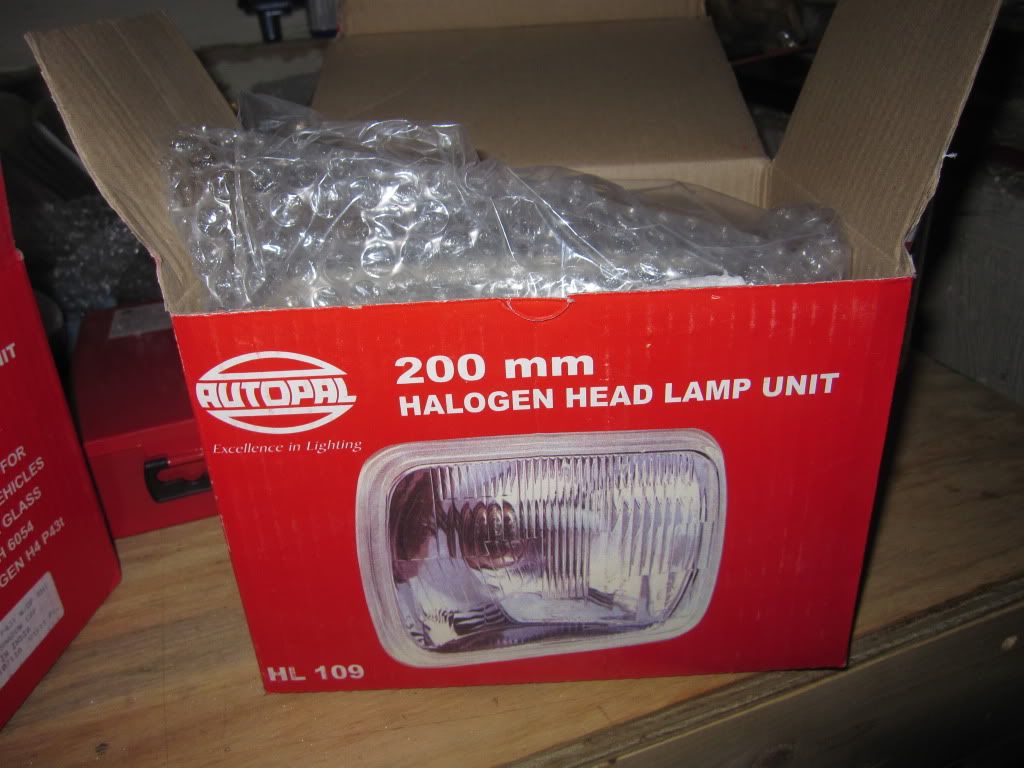
Autopal H4 Housings- $26.95
http://www.ebay.com/itm/200mm-H6054-...item4cf8f40eb7
Total time: <1hr
Grand total: $84.54
Significantly brighter headlights: PRICELESS!
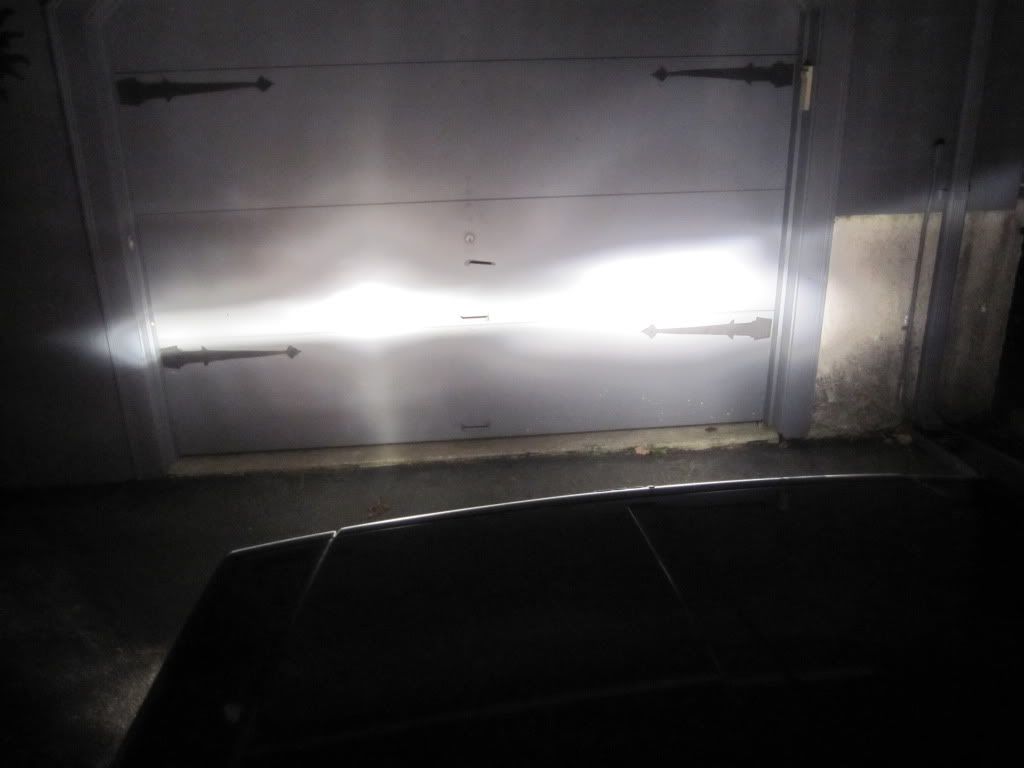
Lets start out with silverstar H6054 sealed beams on the stock wiring harness:

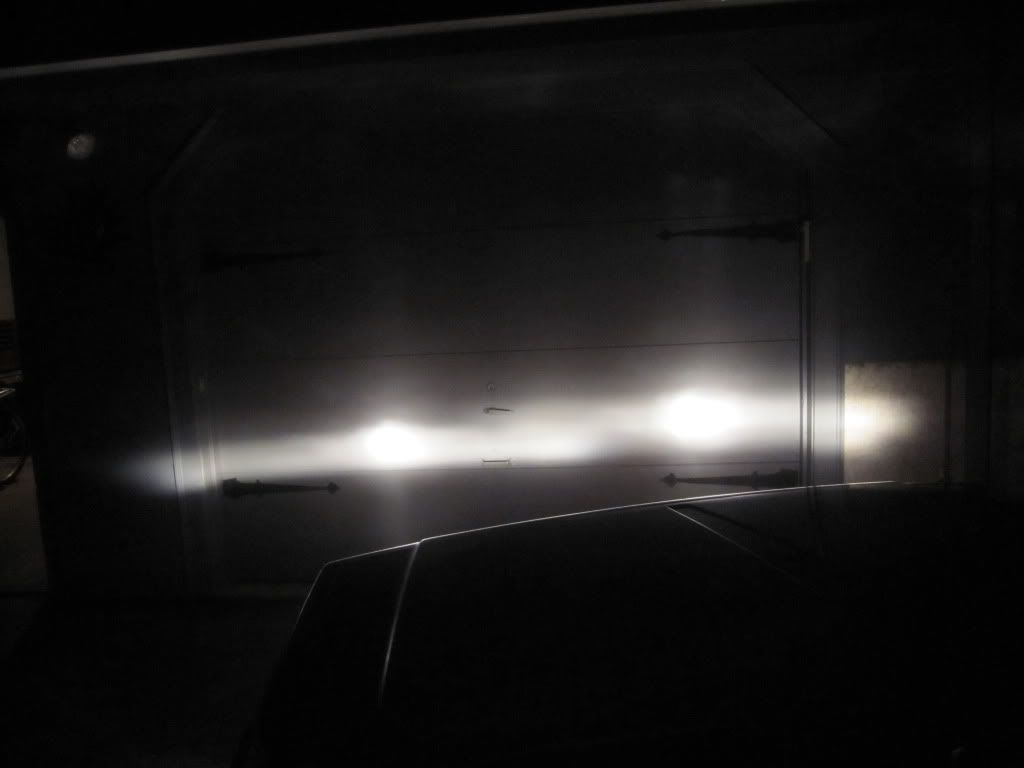
These are better than the regular sealed H6054....BUT WE CAN DO BETTER!
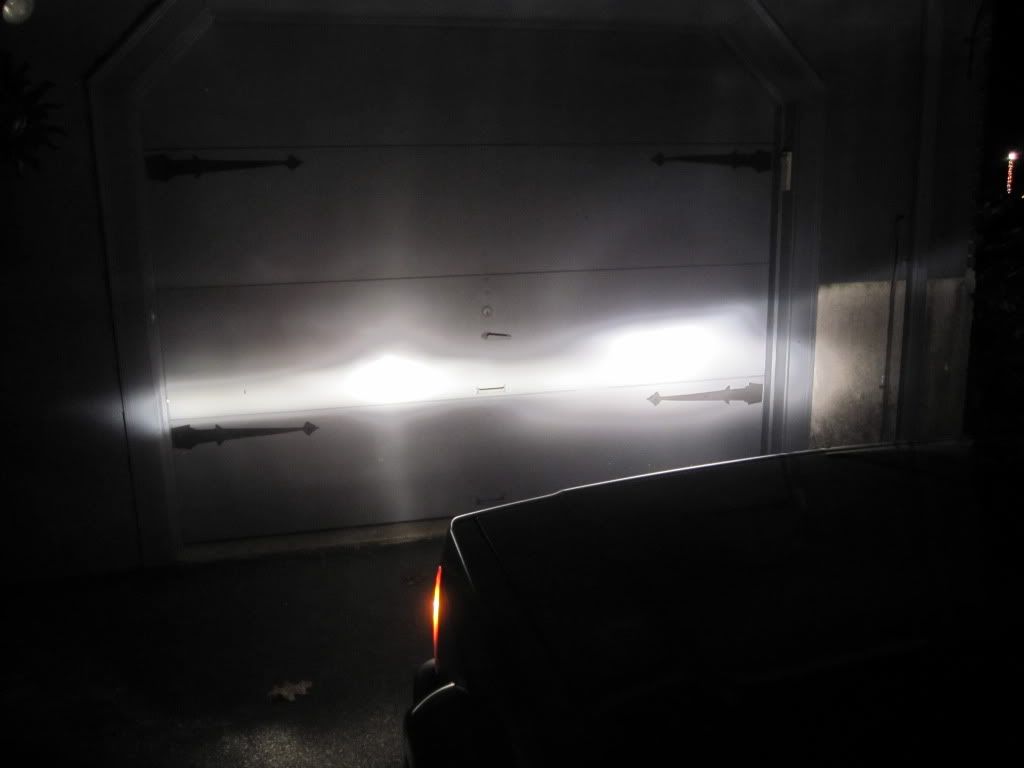
After the wiring upgrade. These are H6054 Silverstars.
Better, but the difference is really negligible.
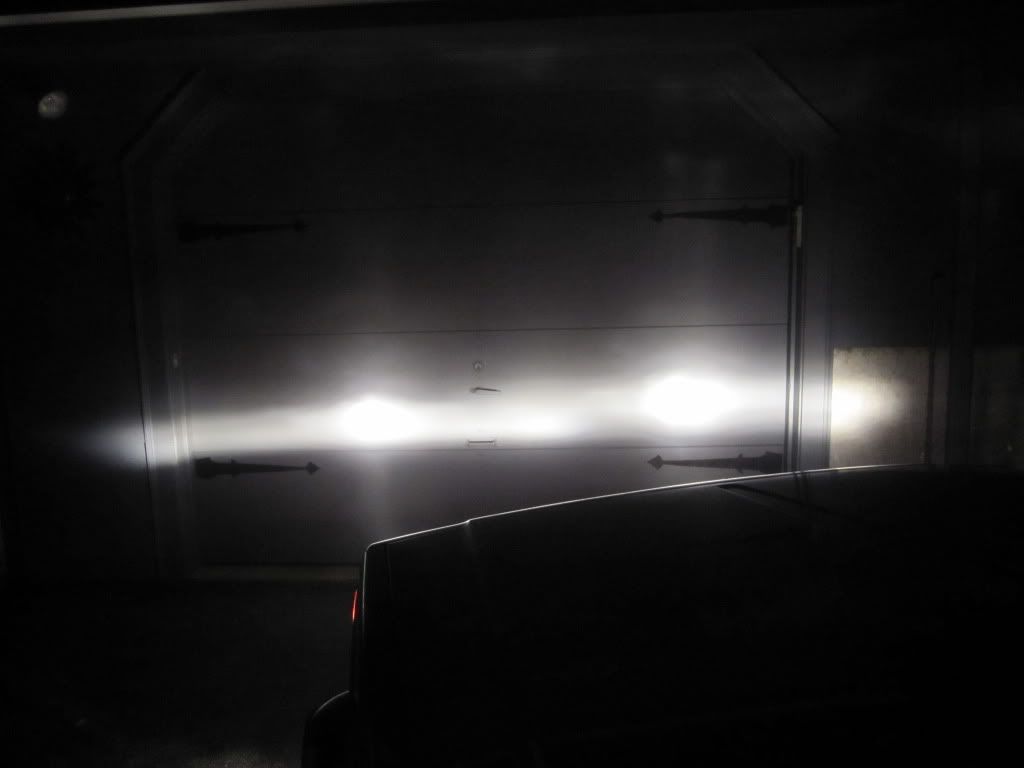
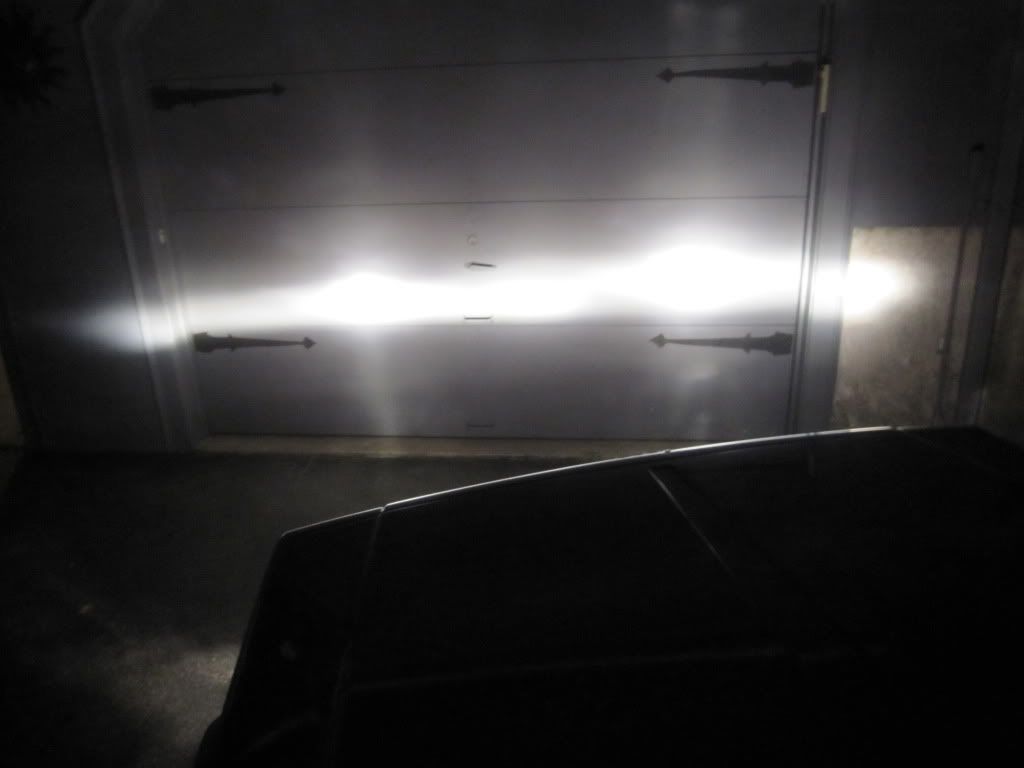
BAM! Big boys come out to play.
Autopal H4 housings and Hella 100/80w light bulbs. Silverstar on left and H4 on right. Wish my camera could have captured this better. This is with them not aimed correctly as well.
Take note of the much brighter and more pure white H4 bulb.
Tools needed:
Screwdriver
Zip ties
No beer involved in this project
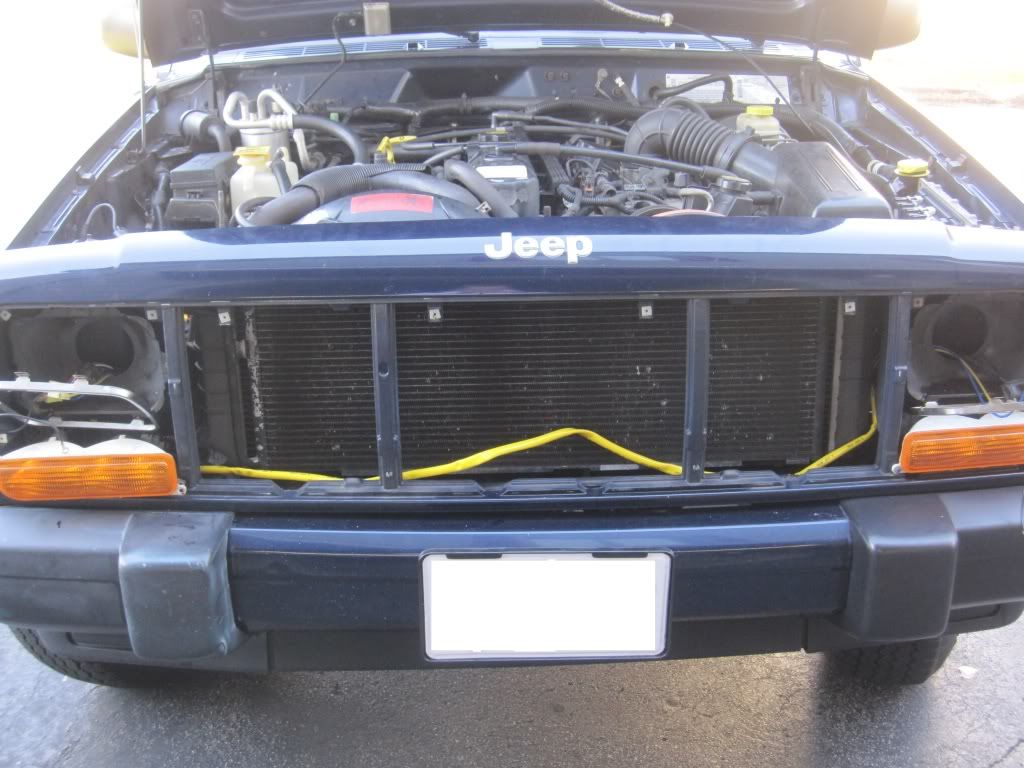
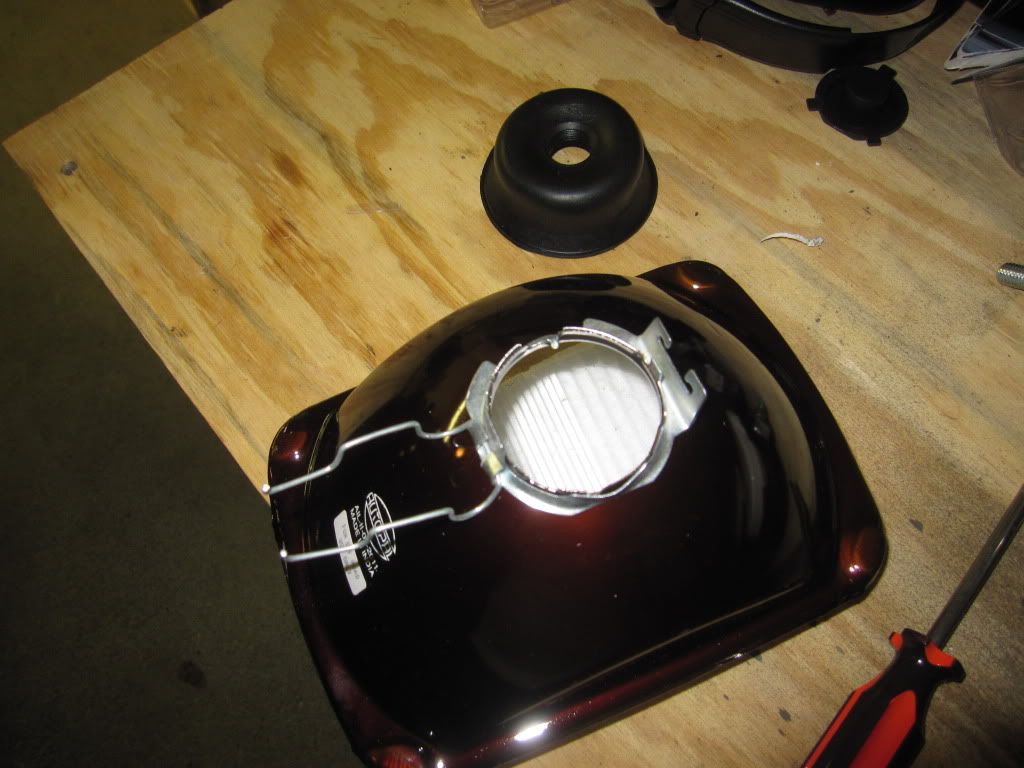
Start out by taking off your grill and headlight brackets. Next unscrew your headlight silver frames. I couldn't get the bottom to screws out of either of mine so I just bent them down, worked out fine. The reason you must take the grill off (only four bolts) is to run the wire under the grill area. You will want zip ties unless you want to see an ugly yellow wire behind the grill. I zip tied to the rubber radiator(?) tubes that run beneath the grill.
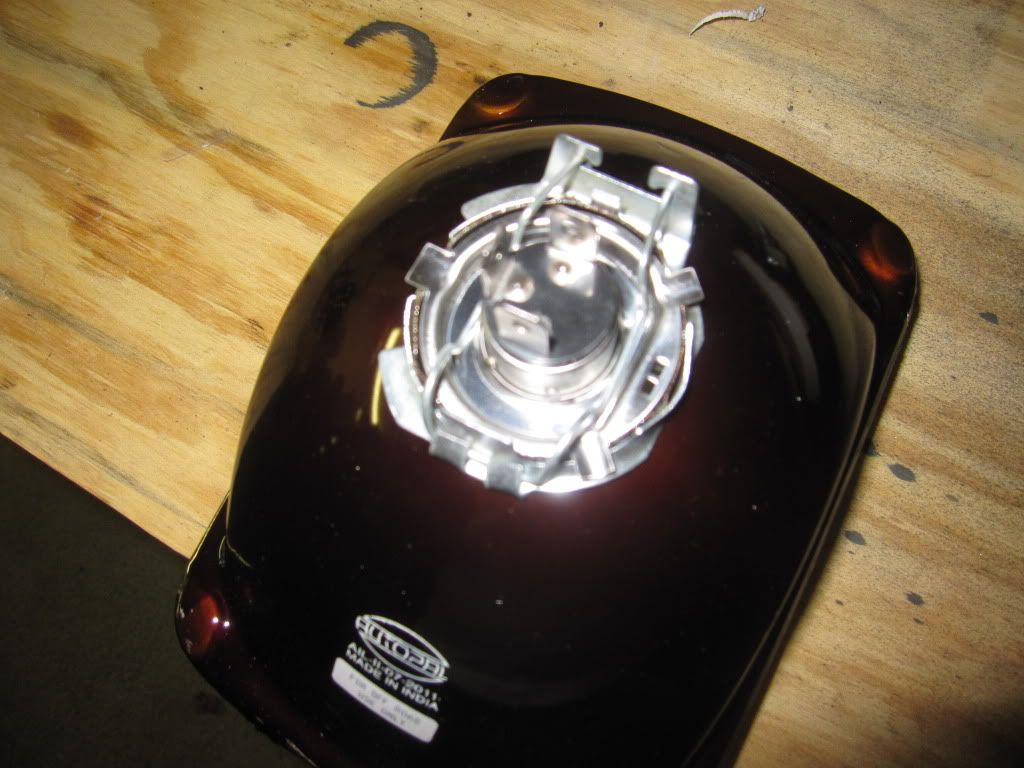
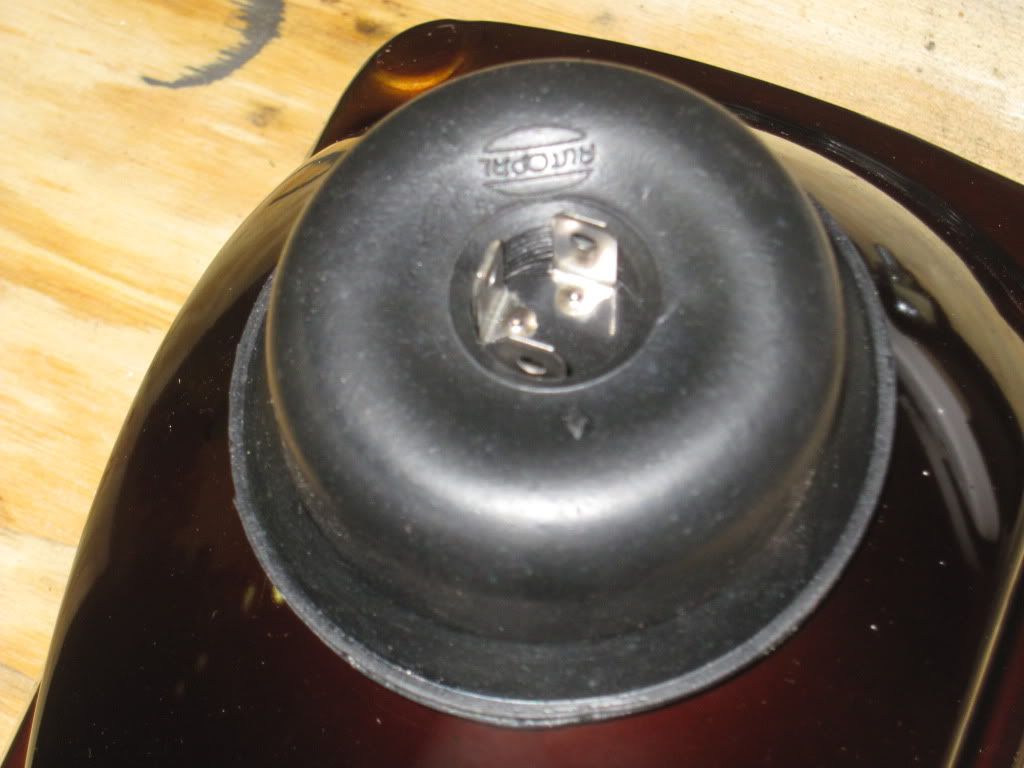
Like so. As you can tell, I have not yet zip tied down in this picture. New H4 connectors are pulled through the headlight sockets.
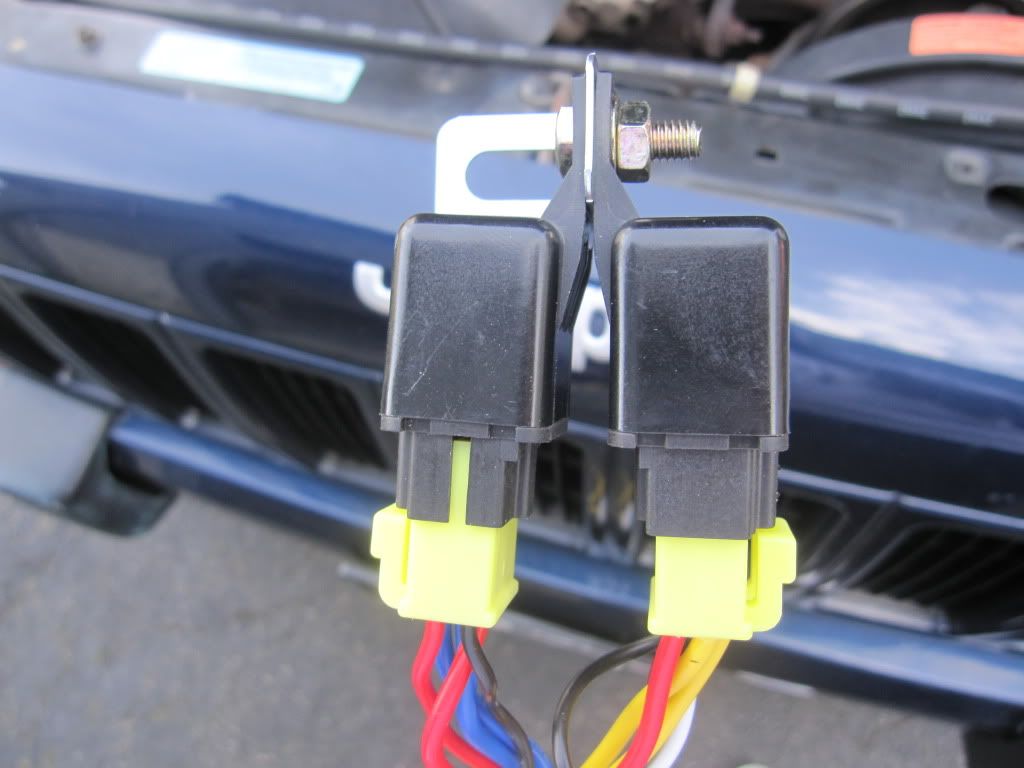
Relays screwed together on the bracket the kit comes with. One relay for the high beam and one for low. I don't have any pics of this mounted, but there are plenty of existing holes in the engine sidewall where you can mount this easily. Alternatively you can probably 3M tape this to the engine wall as well.
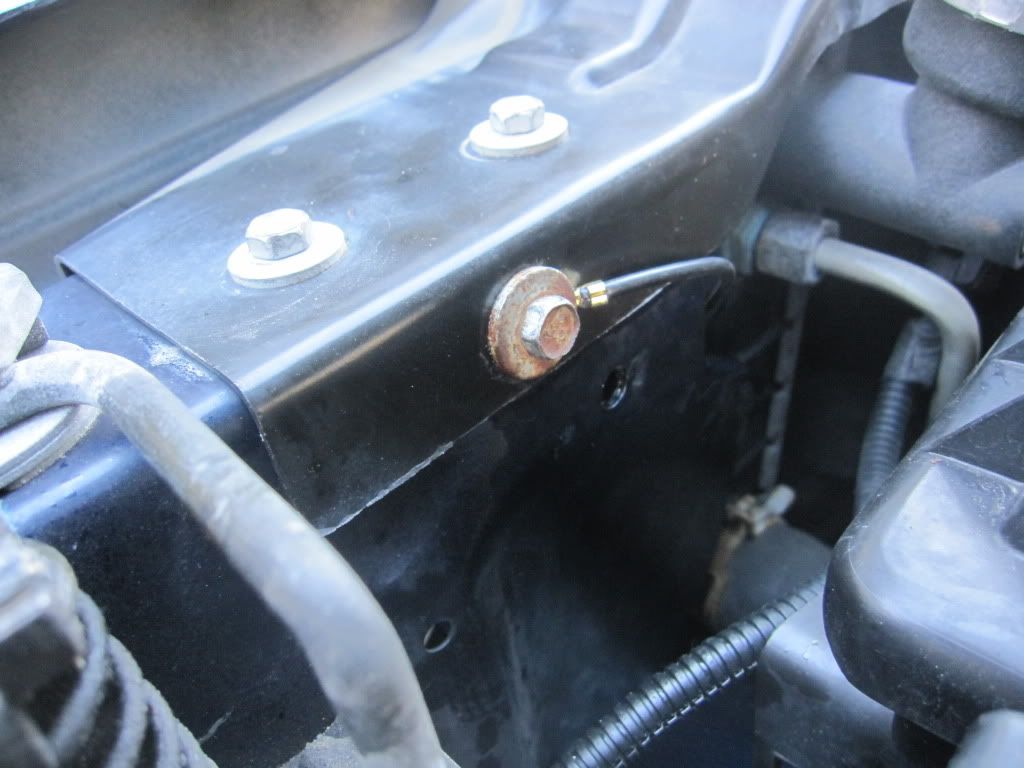
Here is where I grounded the passenger side. I believe this was a bolt on the front by the radiator housing. Again, easily accessible right up front.
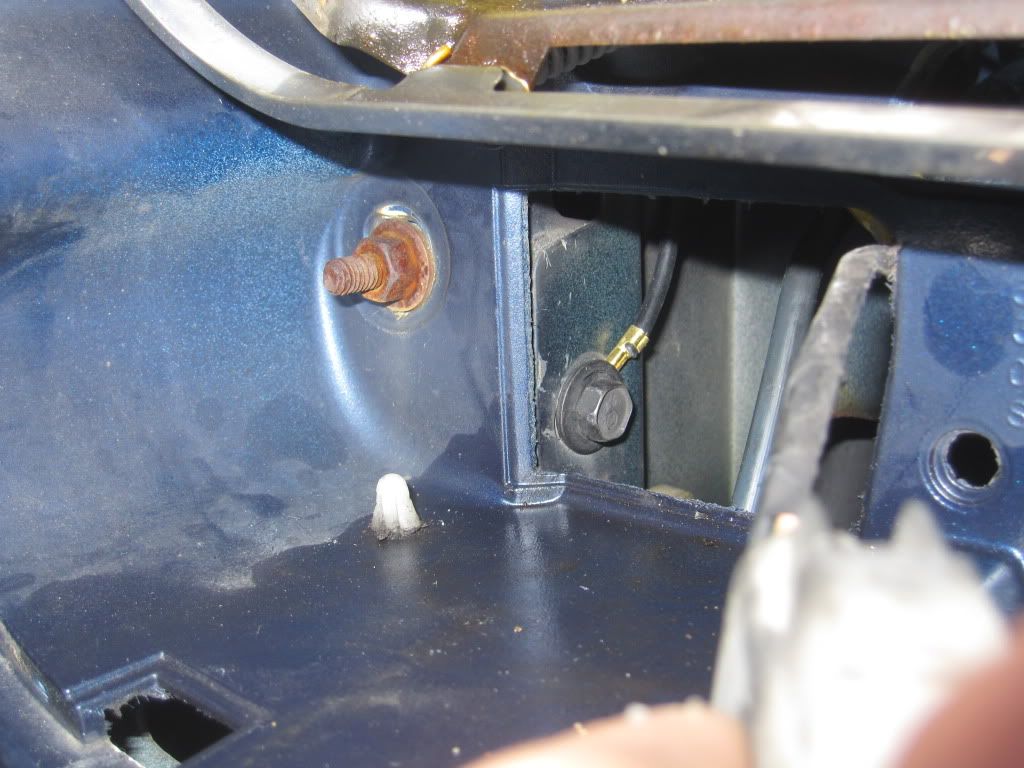
Here is where I grounded the driver side. This was a bit tricky because the ground wire is short. I took off the blinker assembly for better access. This screw is literally right behind it and worked out perfectly.
Should of posted this first, but here is where the wiring harness is fed through the passenger side headlight.

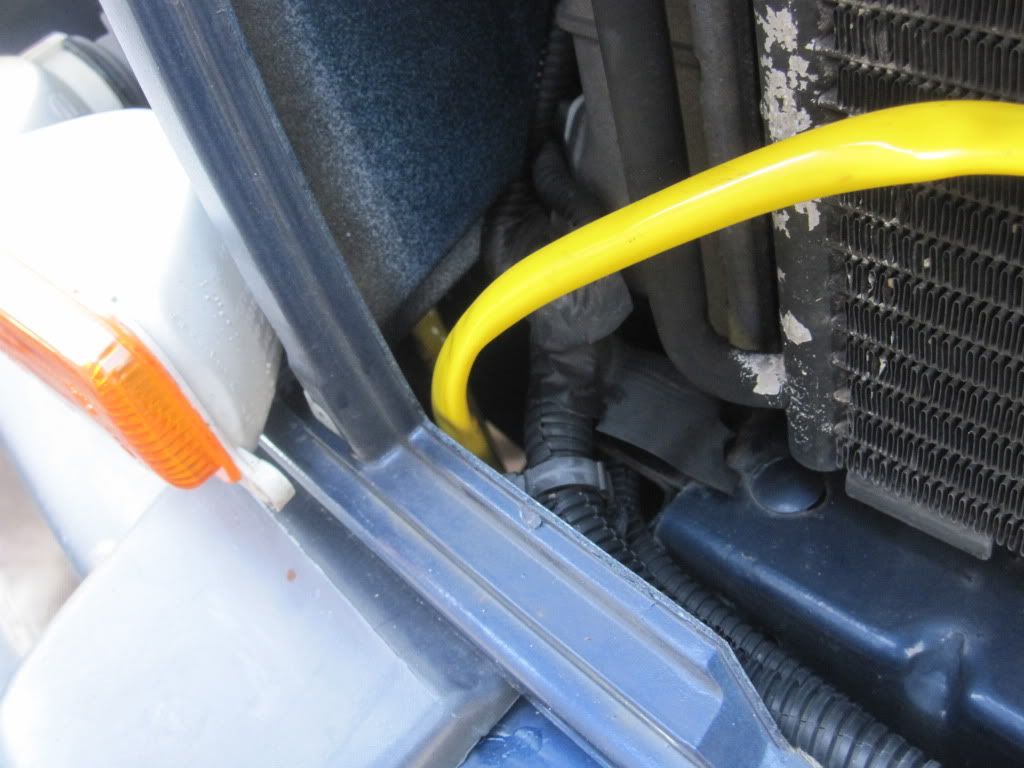
And pull through underneath and just run it along the bottom of the radiator. Very simple.
Here are the autopals.
Final thoughts. Definitely worth it for people who don't want to spend $300 on an expensive HID system. Very pleased. This would be one of the first mods I would do. I would say visibility, and light pattern improved 100%. My only complaint is that the new headlight housings get HOT HOT to the touch, burn the hair off your finger hot. I am going to add a fuse to the wiring harness between the battery and headlight socket just in case. I know there have been other write ups and what not but I thought I would share my positive experiences.
Hella H4 100/80w bulbs- $27.16
Autopal H4 Housings- $26.95
http://www.ebay.com/itm/200mm-H6054-...item4cf8f40eb7
Total time: <1hr
Grand total: $84.54
Significantly brighter headlights: PRICELESS!
Lets start out with silverstar H6054 sealed beams on the stock wiring harness:
These are better than the regular sealed H6054....BUT WE CAN DO BETTER!
After the wiring upgrade. These are H6054 Silverstars.
Better, but the difference is really negligible.
BAM! Big boys come out to play.
Autopal H4 housings and Hella 100/80w light bulbs. Silverstar on left and H4 on right. Wish my camera could have captured this better. This is with them not aimed correctly as well.
Take note of the much brighter and more pure white H4 bulb.
Tools needed:
Screwdriver
Zip ties
No beer involved in this project
Start out by taking off your grill and headlight brackets. Next unscrew your headlight silver frames. I couldn't get the bottom to screws out of either of mine so I just bent them down, worked out fine. The reason you must take the grill off (only four bolts) is to run the wire under the grill area. You will want zip ties unless you want to see an ugly yellow wire behind the grill. I zip tied to the rubber radiator(?) tubes that run beneath the grill.
Like so. As you can tell, I have not yet zip tied down in this picture. New H4 connectors are pulled through the headlight sockets.
Relays screwed together on the bracket the kit comes with. One relay for the high beam and one for low. I don't have any pics of this mounted, but there are plenty of existing holes in the engine sidewall where you can mount this easily. Alternatively you can probably 3M tape this to the engine wall as well.
Here is where I grounded the passenger side. I believe this was a bolt on the front by the radiator housing. Again, easily accessible right up front.
Here is where I grounded the driver side. This was a bit tricky because the ground wire is short. I took off the blinker assembly for better access. This screw is literally right behind it and worked out perfectly.
Should of posted this first, but here is where the wiring harness is fed through the passenger side headlight.
And pull through underneath and just run it along the bottom of the radiator. Very simple.
Here are the autopals.
Final thoughts. Definitely worth it for people who don't want to spend $300 on an expensive HID system. Very pleased. This would be one of the first mods I would do. I would say visibility, and light pattern improved 100%. My only complaint is that the new headlight housings get HOT HOT to the touch, burn the hair off your finger hot. I am going to add a fuse to the wiring harness between the battery and headlight socket just in case. I know there have been other write ups and what not but I thought I would share my positive experiences.
Member
Joined: Aug 2010
Posts: 185
Likes: 0
From: Eastern Iowa/SW Wisconsin
Year: 1999
Model: Cherokee
Engine: 4.0 I6
My install went really well. The only hard part was finding a place with an existing bolt to mount the harnesses to, but it all worked out well. These lights are bright! I have mine aimed really low so I don't blind people as I haven't dialed them in, and they still light up the things in the distance very well. Whole install took about an hour using a screwdriver and a wrench or two to loosen some bolts for the grounds.
Trending Topics
CF Veteran
Joined: Oct 2011
Posts: 4,440
Likes: 3
From: Seal Beach, CA
Year: 1996
Model: Cherokee
Engine: 4.0 HO Straight Six
It's really simple to do. All I need now is some 100w bulbs to complete it all (I have 55 watters in there now). But even with those bulbs it's night and day difference with the harness
CF Veteran
Joined: Feb 2011
Posts: 3,500
Likes: 0
From: Long Beach, Ca
Year: 2000
Model: Cherokee
Engine: 4.0 I6
I did this exact upgrade and I love the 80/100w bulbs!! The only thing I dislike is that both my autopal housing cracked within a month. I'm going to blame that on low quality glass and the extensive road debris (sand and rocks) thats here in the desert. I'll be replacing the autopal housings with IPF housings later but its not high priority just yet.
Edit. No one has flashed me yet for having too bright of lights. I think mine are aimed a little low anyway...
Edit. No one has flashed me yet for having too bright of lights. I think mine are aimed a little low anyway...
CF Veteran
Joined: Jun 2011
Posts: 2,460
Likes: 0
From: Dayton, Ohio
Year: 1992
Model: Comanche
Engine: 4.0
Originally Posted by K2dark_xj
everybody except you will hate it that you 80/100's. Personally, I would run a 55w/65w IPF fatboy H4. or run an HID. but regardless, still a sweet setup.


CF Veteran
Joined: Oct 2011
Posts: 4,440
Likes: 3
From: Seal Beach, CA
Year: 1996
Model: Cherokee
Engine: 4.0 HO Straight Six