
Install Guide - H. D. Offroad Engineering Frame Stiffeners (Rear) 56k beware

Thread Starter
Senior Member
Joined: Apr 2010
Posts: 720
Likes: 1
From: Marshall, WI
Year: 1994
Model: Cherokee
Engine: 4.0L i6
Here is my guide on how to install the HD Engineering Rear Frame Stiffeners. I ordered the full set (front, middle and rear). As I complete the middle and front I will continue to post my guides on how I installed them. I am by no means a professional fabricator, just a shade tree mechanic so I’m not responsible for any issues you may come across following my guide. I'm just trying to help those out there who may be looking into these frame stiffeners.
As I have no past welding experience I decided to start with the rear frame stiffeners as they do not support as much weight as the front. I figured the more experienced I become from all the welding that these require, by the time I get to the front where the welds really matter I should have it down.
So let’s being shall we!
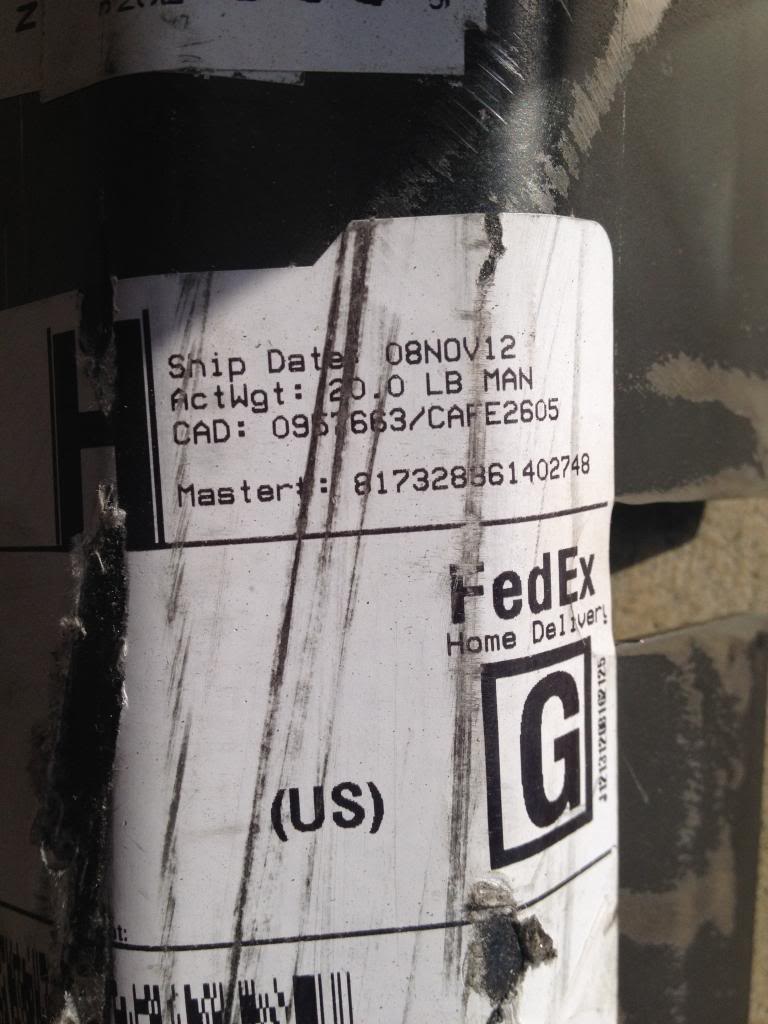
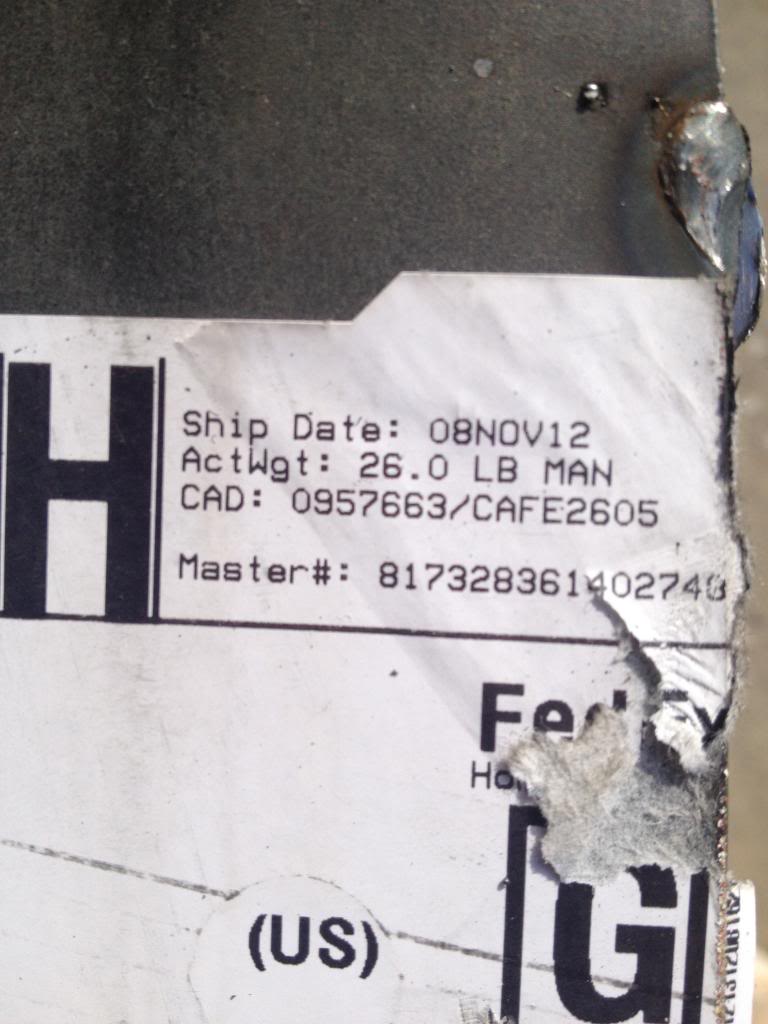
FedEx delivers the goods!!!
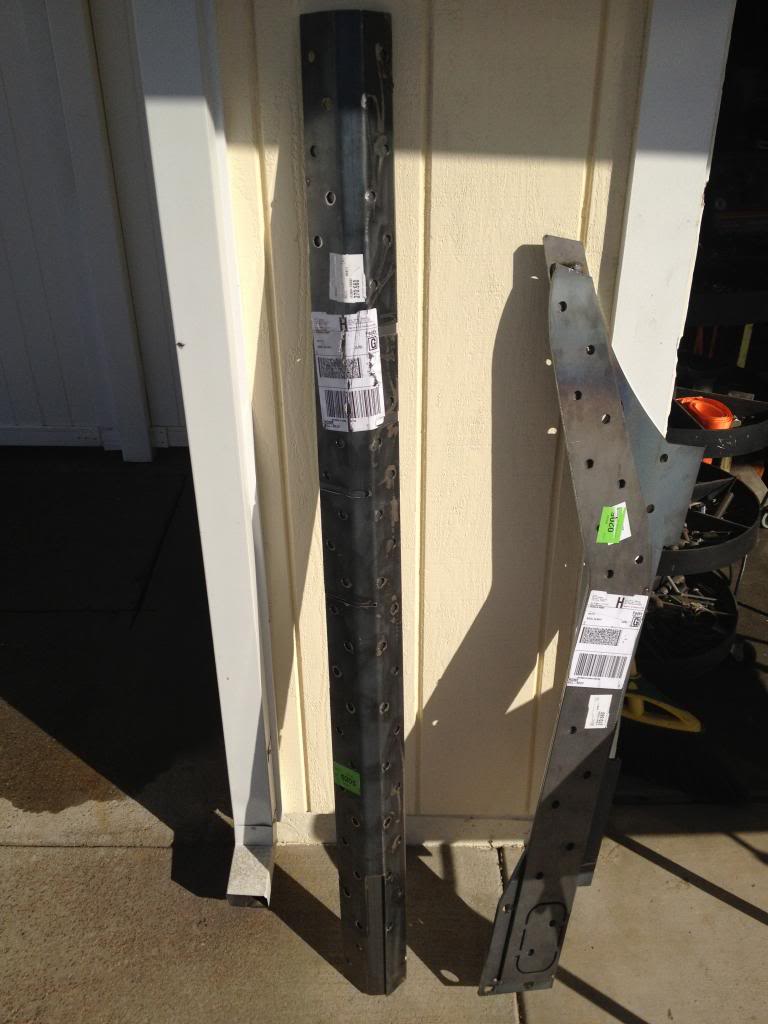
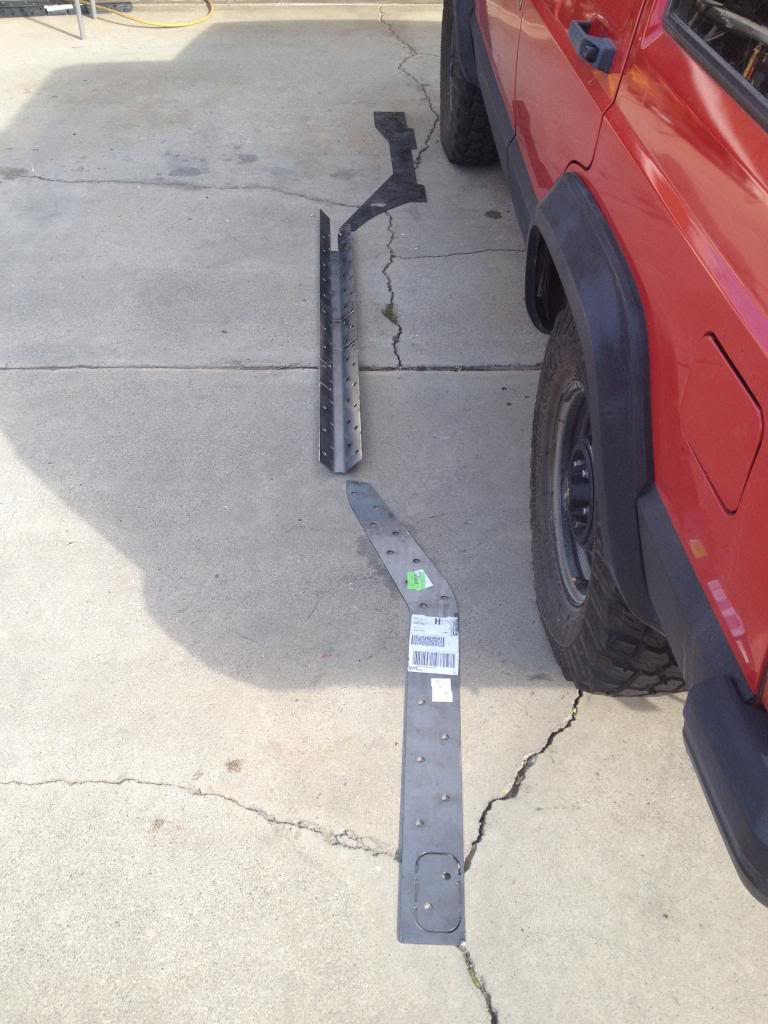
As you can see from the pictures, they are shipped as is, not wrapped or boxed. 20lbs for the middle frame stiffeners and 26lbs for the front & rear. For a combined total of 46lbs added weight to the XJ. Beefy!!!
.
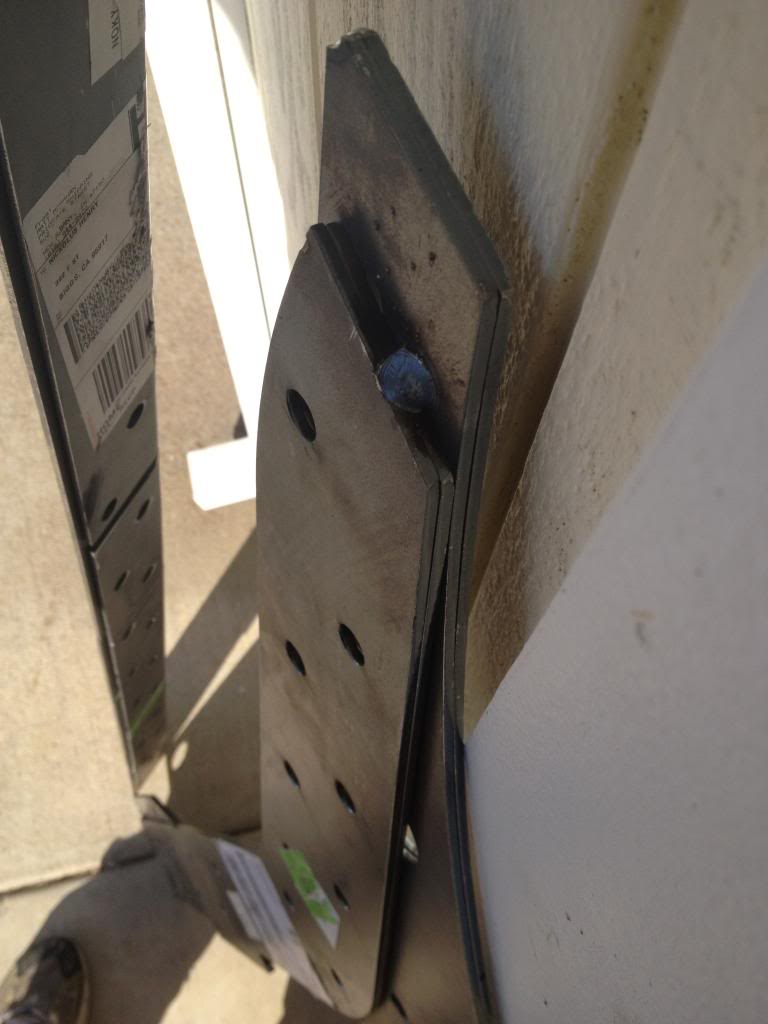
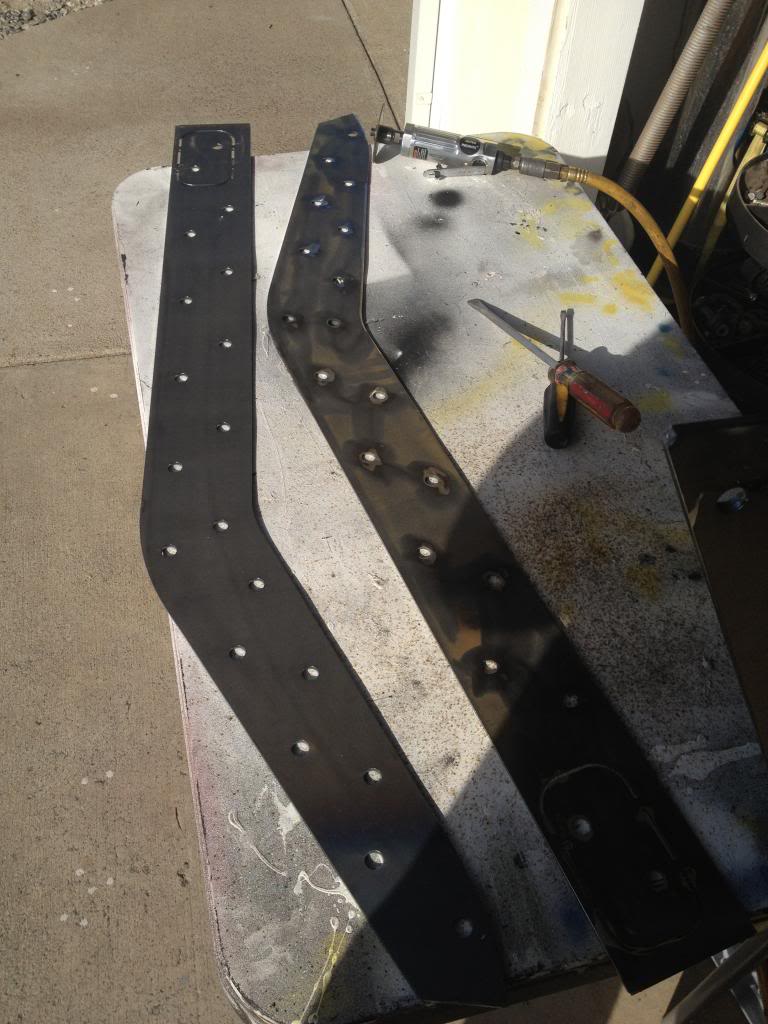
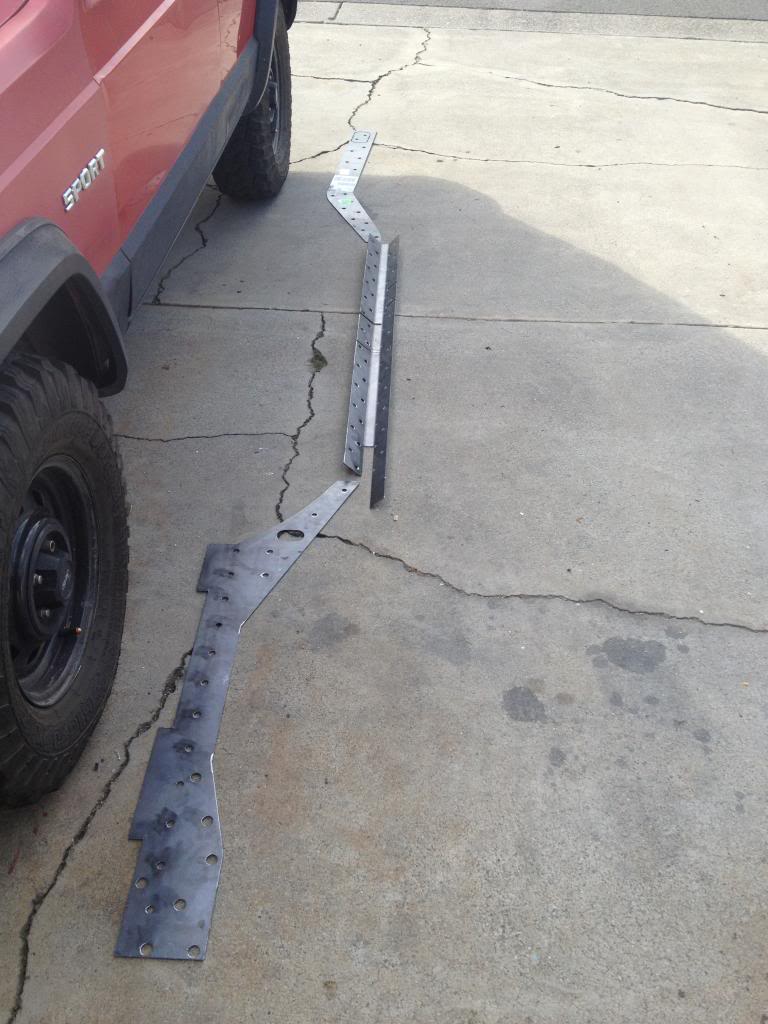
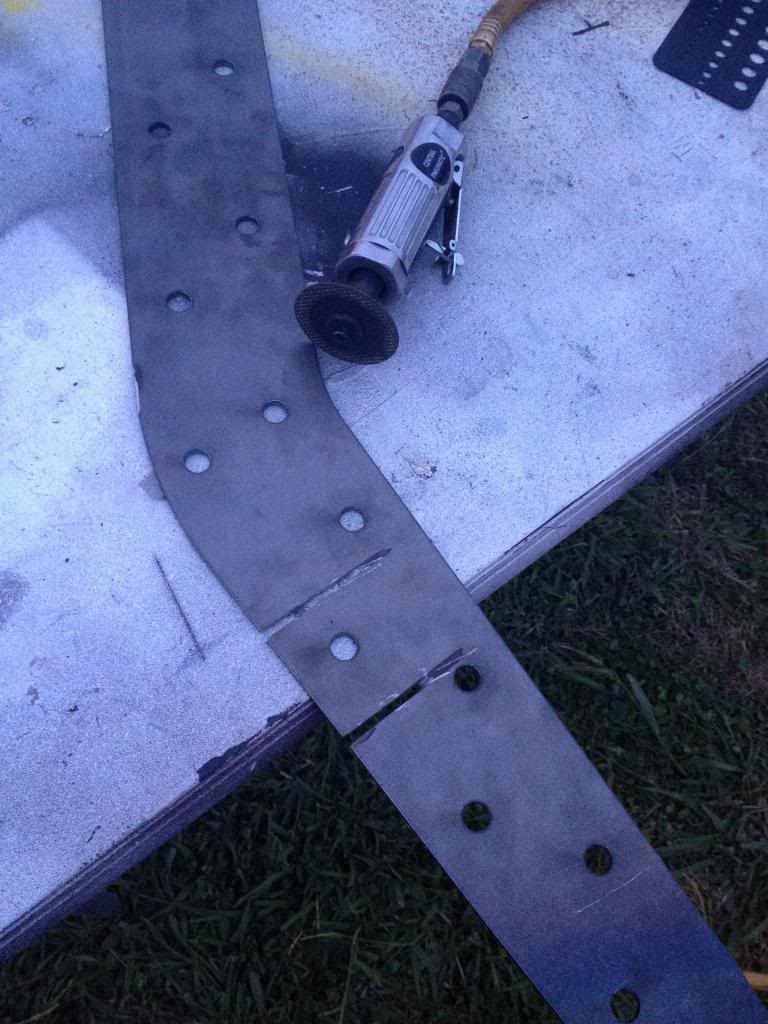
The sets are tac welded together.
.
Just use a grinder/cutting wheel and some screwdrivers to separate them all.
.
.
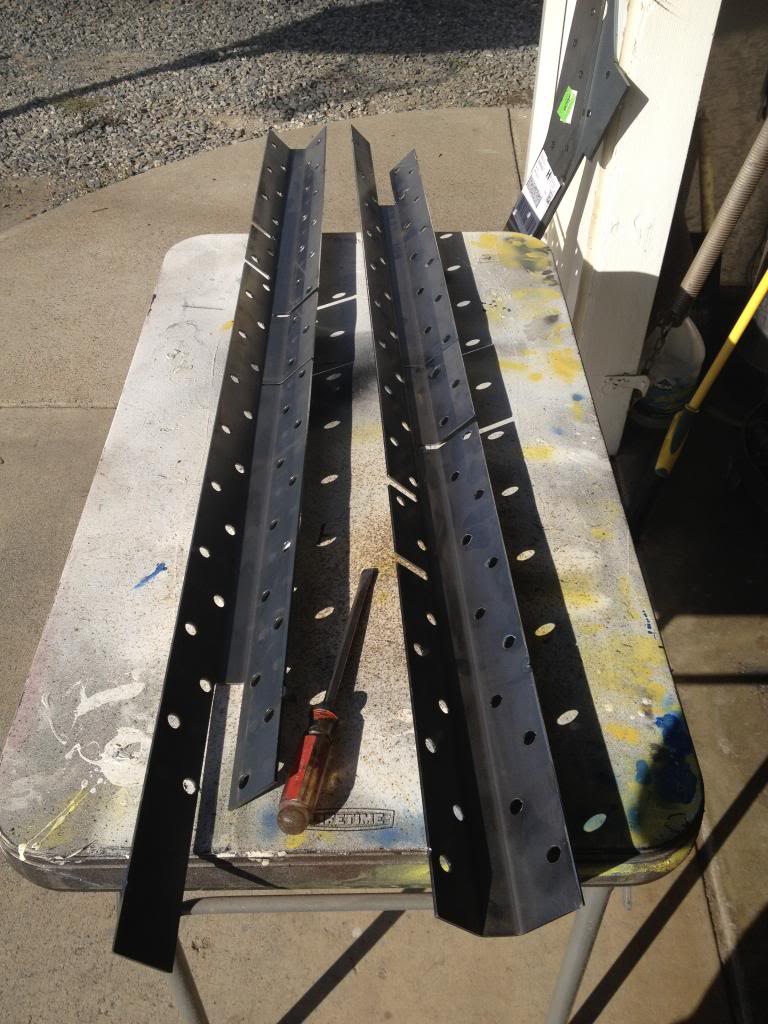
Here they are laid out next to the XJ they will be installed on.
.
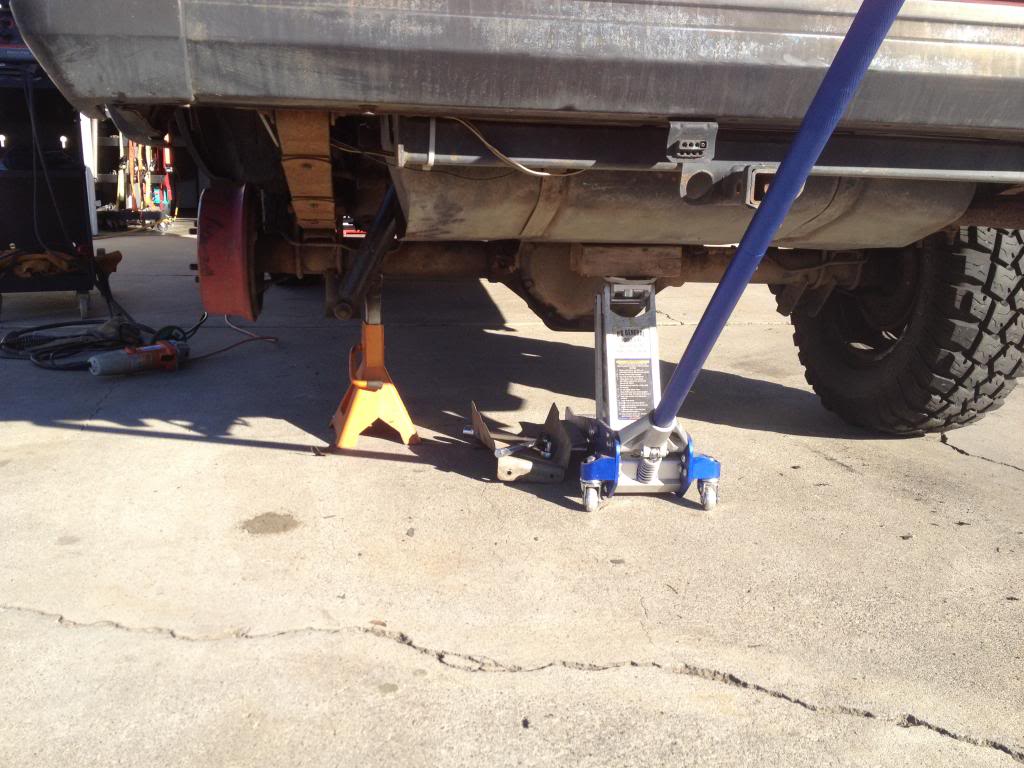
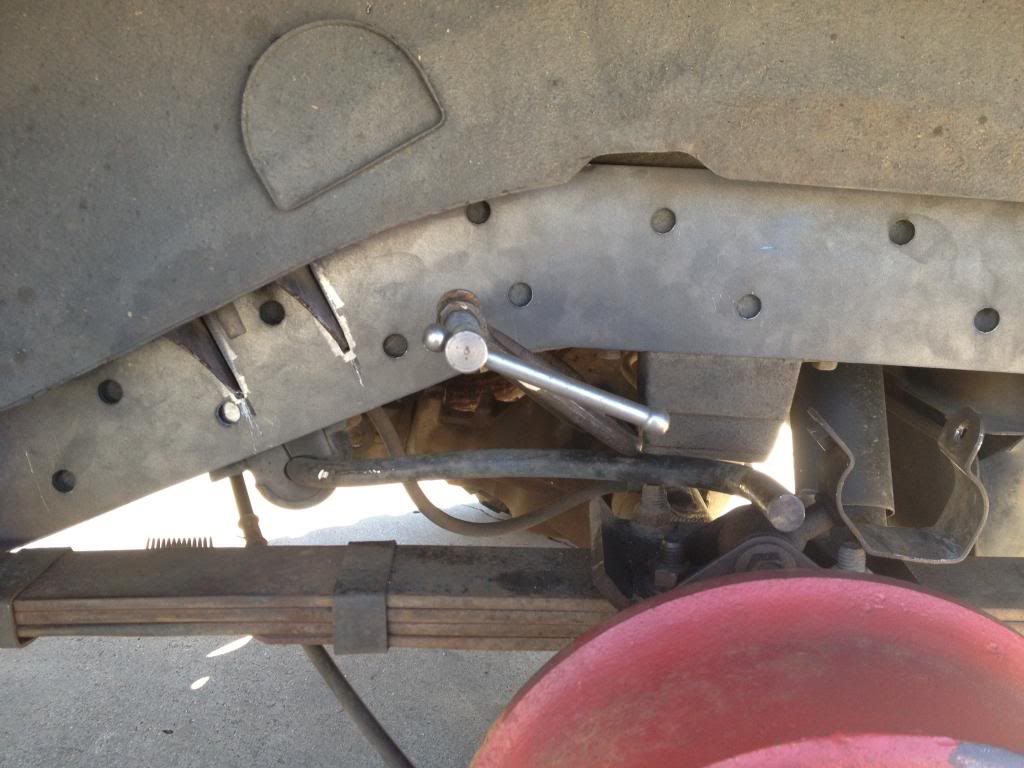
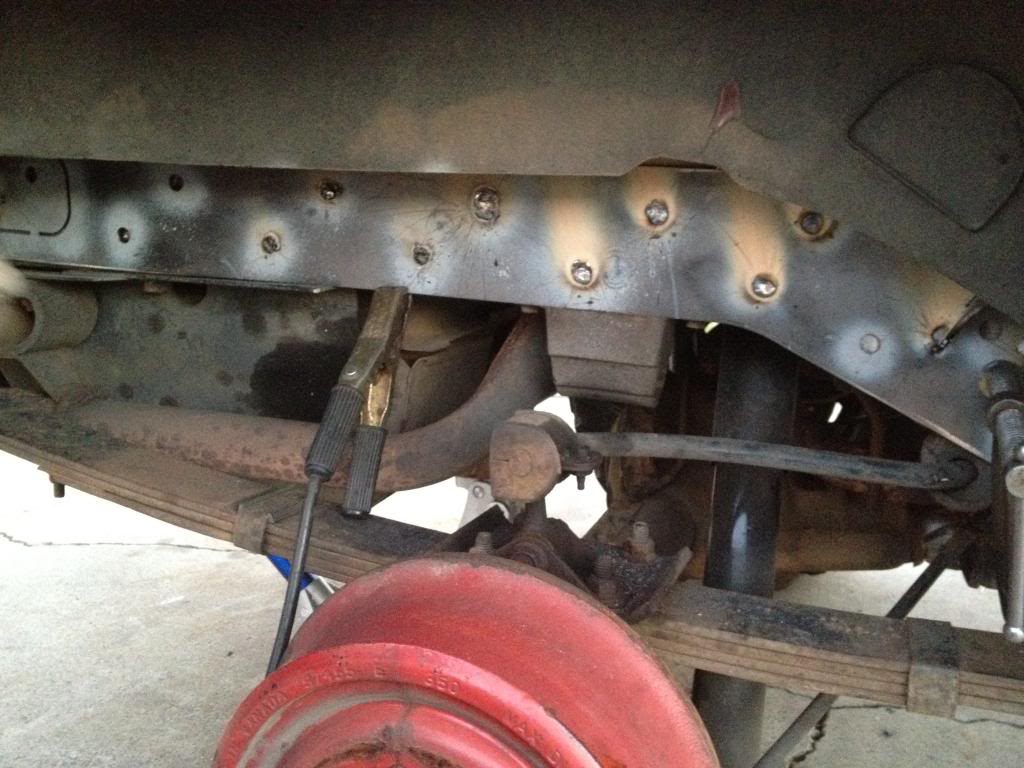
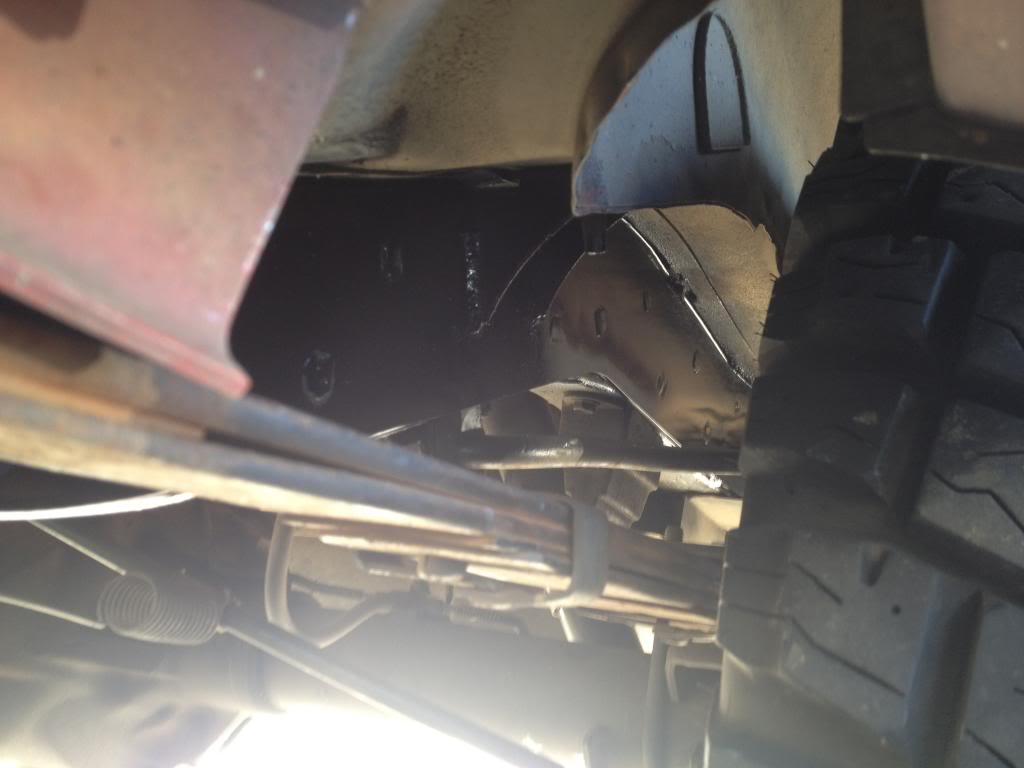
The best way to make room while working on the rear is to jack the axle up just enough to remove the tire. Place jack under axle and then jack up on the gas take skid. My gas take just has the stock skid from the factory. It didn’t seem to bend or budge when lifting up the rear. Doing this will lower the axle/spring packs and tension bar allowing easier access to the rear frame.
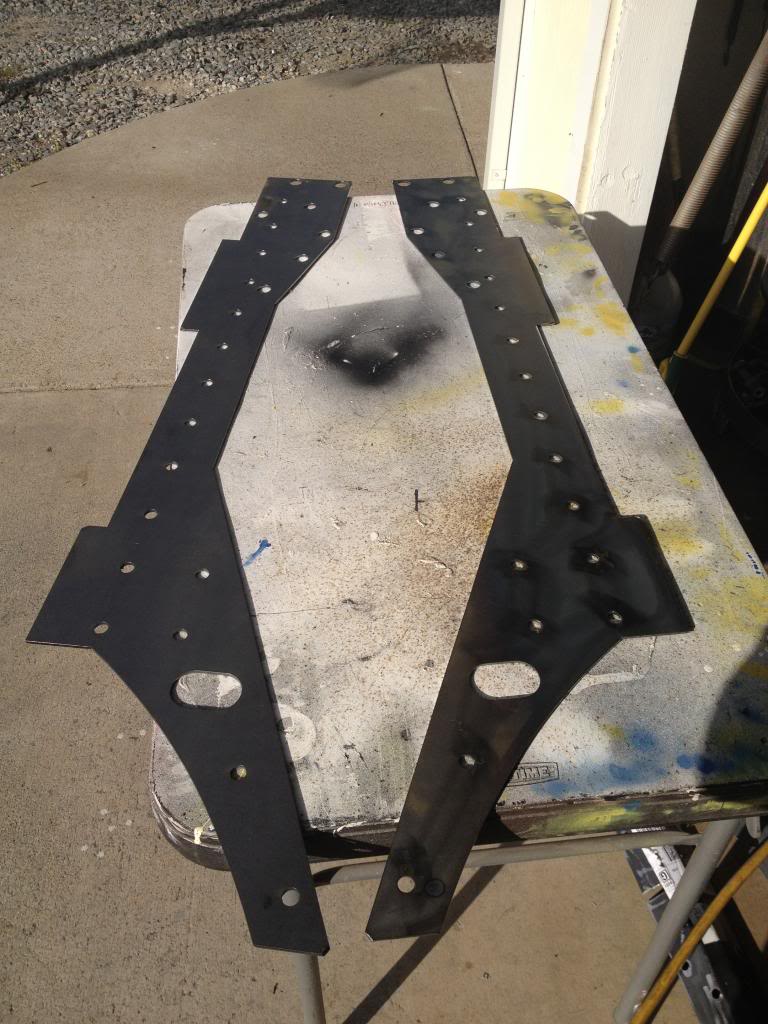
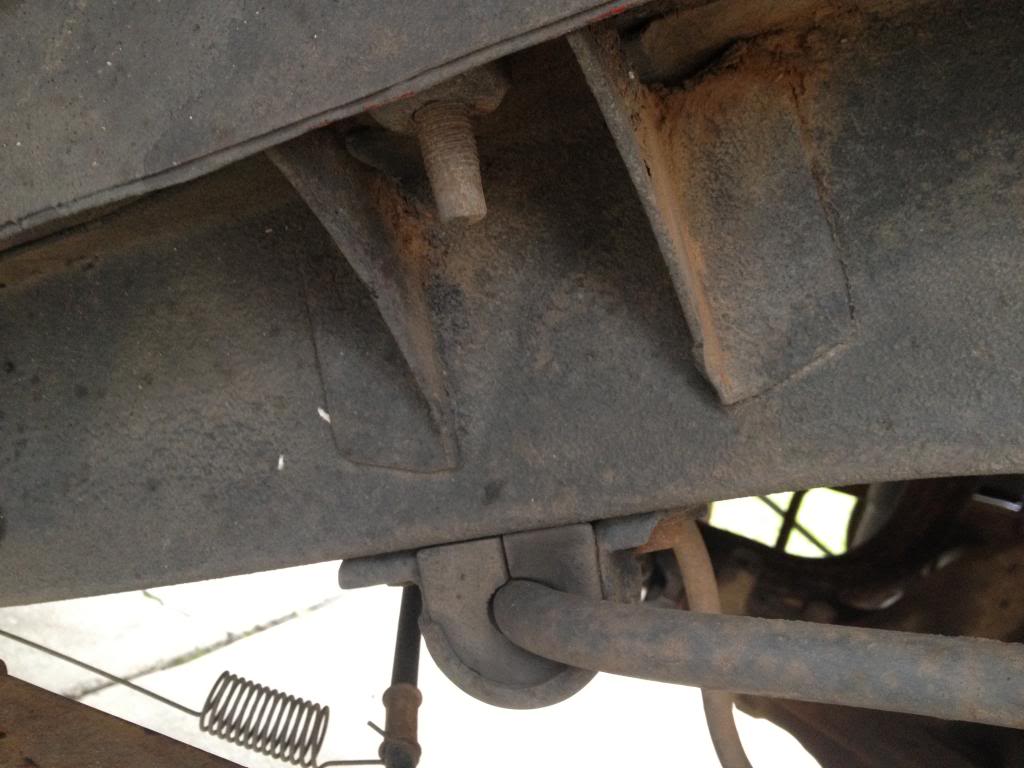
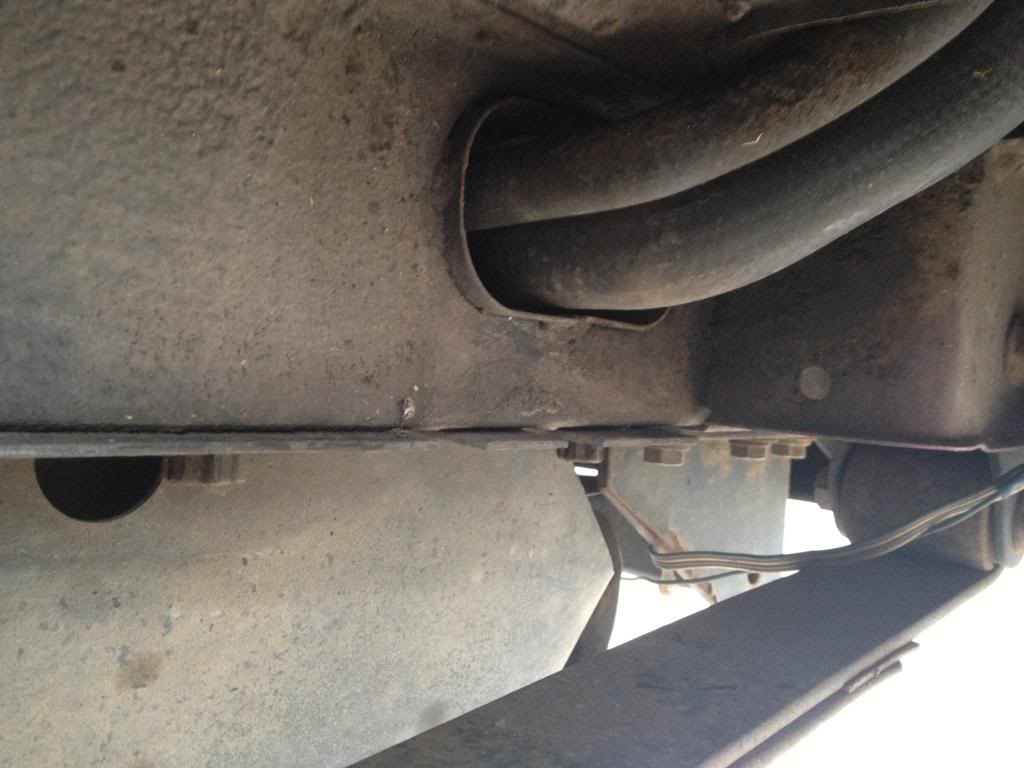
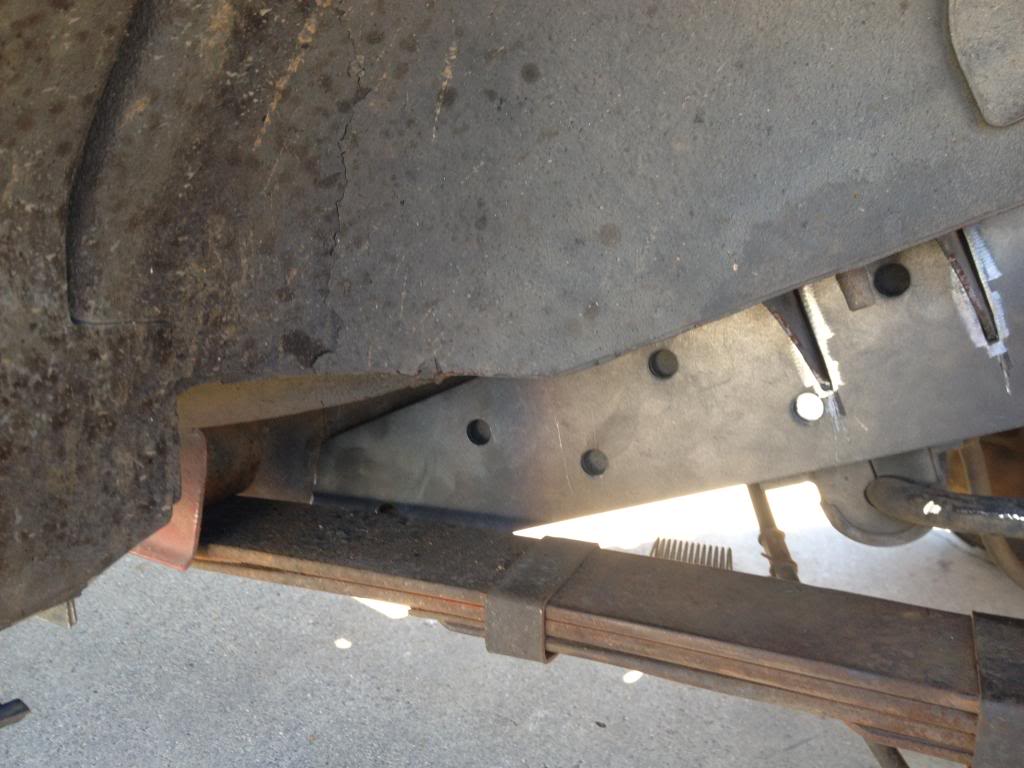
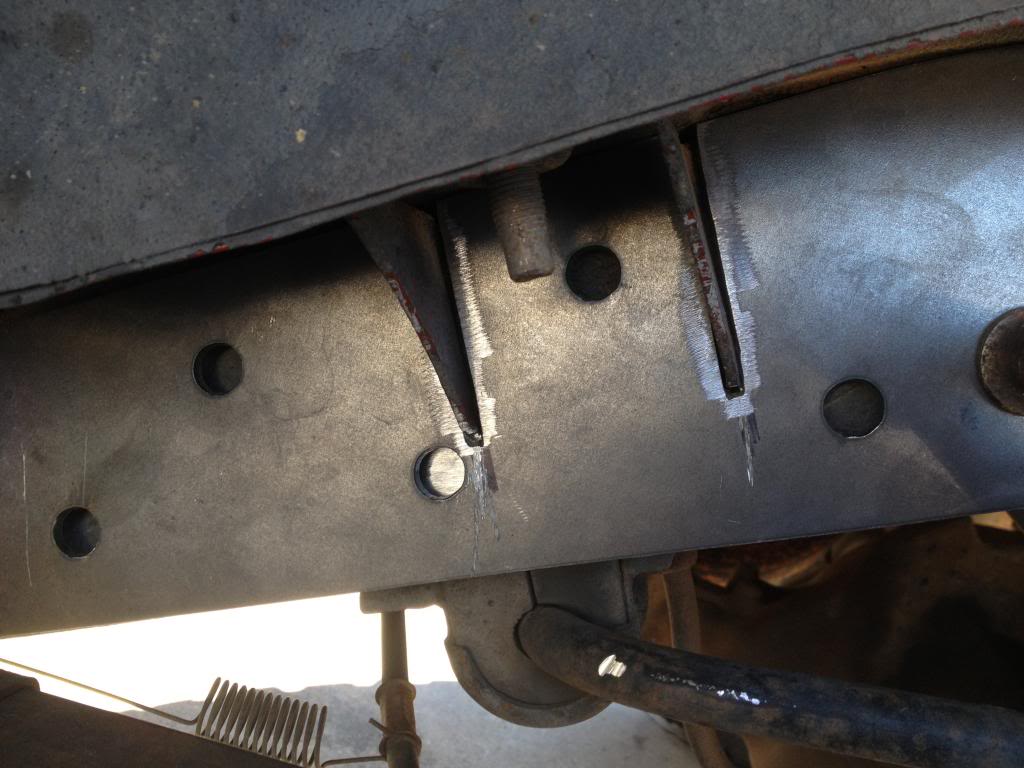
I started on the rear driver side. The first thing you will notice when checking out the rear is the body mounts. Sadly HD does not put notches in the frame stiffeners for this, but nothing a cutting wheel can’t take care of
 . Also on the driver side, you have to deal with the gas tank hoses.
 .
.
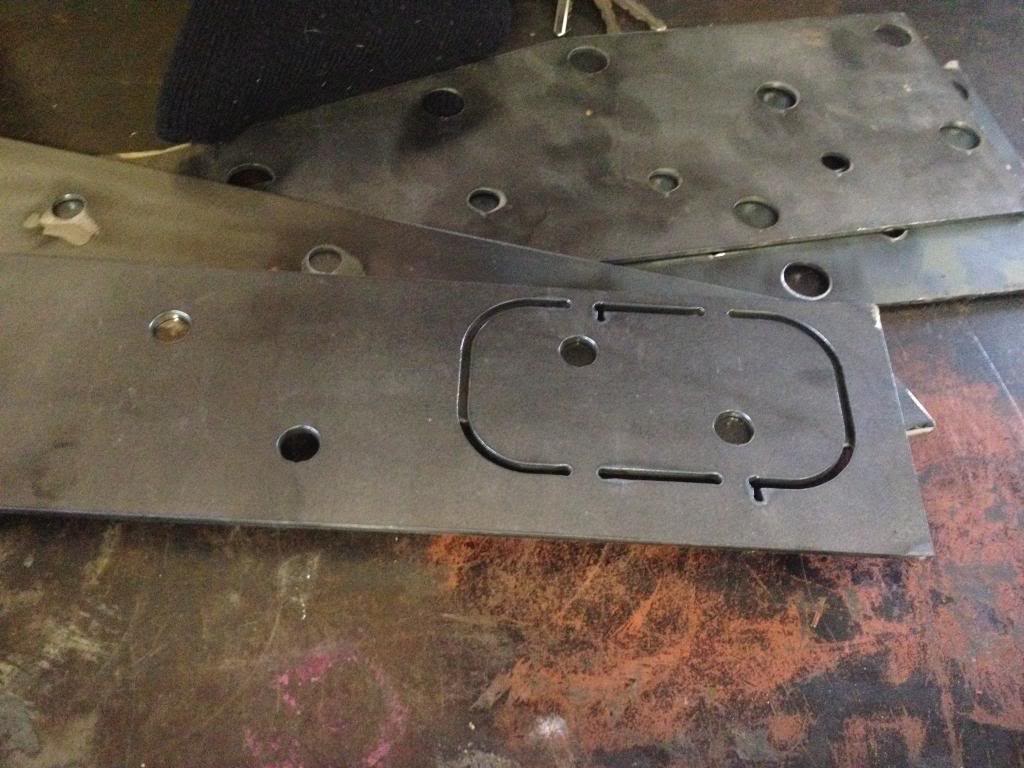
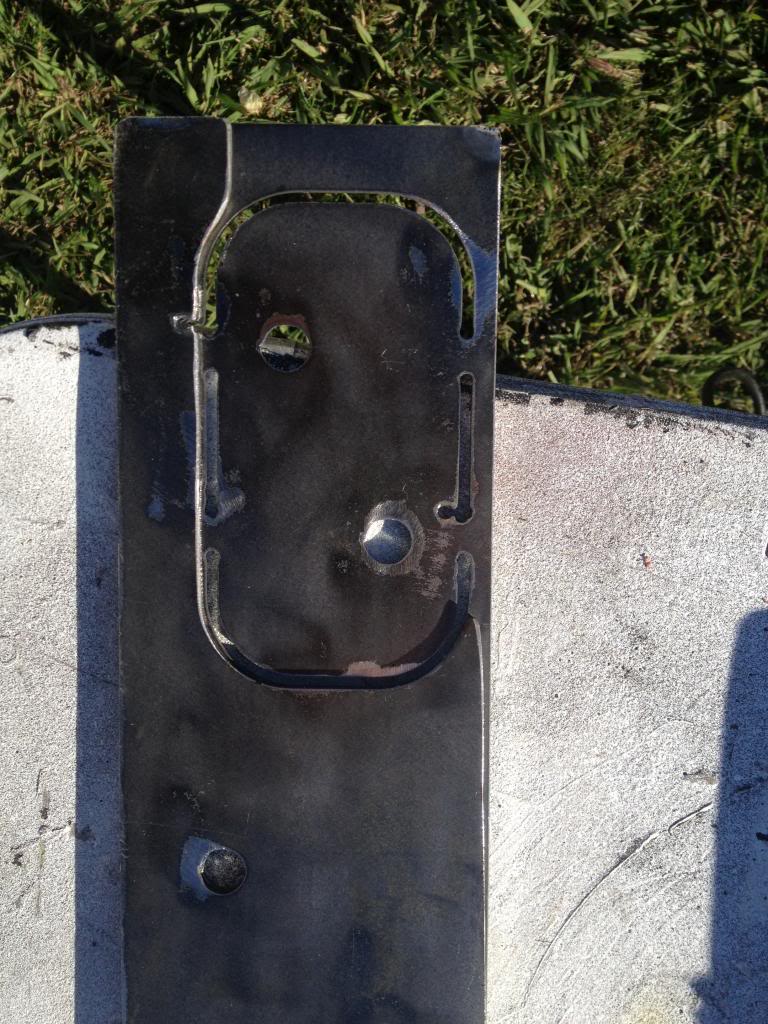
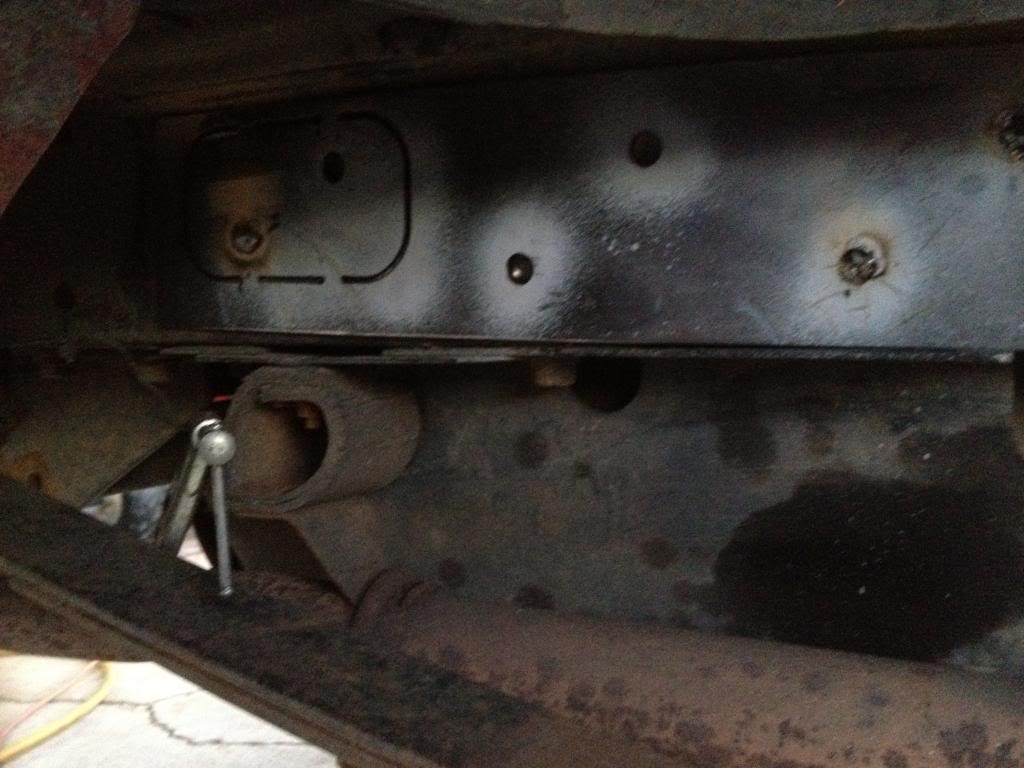
Now the real fun begins. First thing that needs to be done is cutting out the access hole for the gas tank hoses.
 .
.
Next get a marker/chalk/whatever to mark where the notches will need to be cut to allow the frame stiffener to slide into place around the body mount.
 .
.
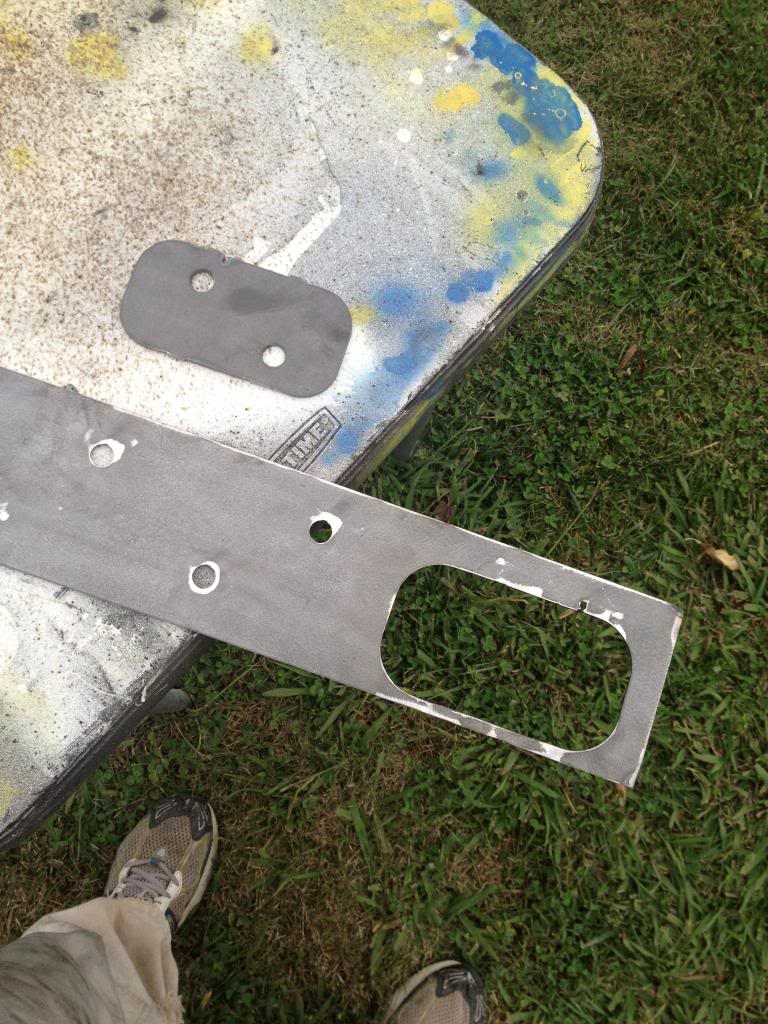
Once the marks have been made, take it over to the bench and begin cutting those notches out. This is a long process because of all the going back and forth to ensure the cuts are right, it fits, etc. After about the 5th time I decided to modify mine. I ended up cutting the rear access hole for the tank lines off. This way it could just slide into place without having to deal with the dang tank lines. My reasoning for doing this, the top part of the access hole (as pictured above) is very narrow and thin. And honestly not much is gained by leaving it on and trying to weld near the gas tank hoses. But this is my opinion, it is not required but did make it go a lot faster and easier. Luckily only the driver side has to deal with the gas tank hoses. The passenger side was a breeze to get mounted up.
.
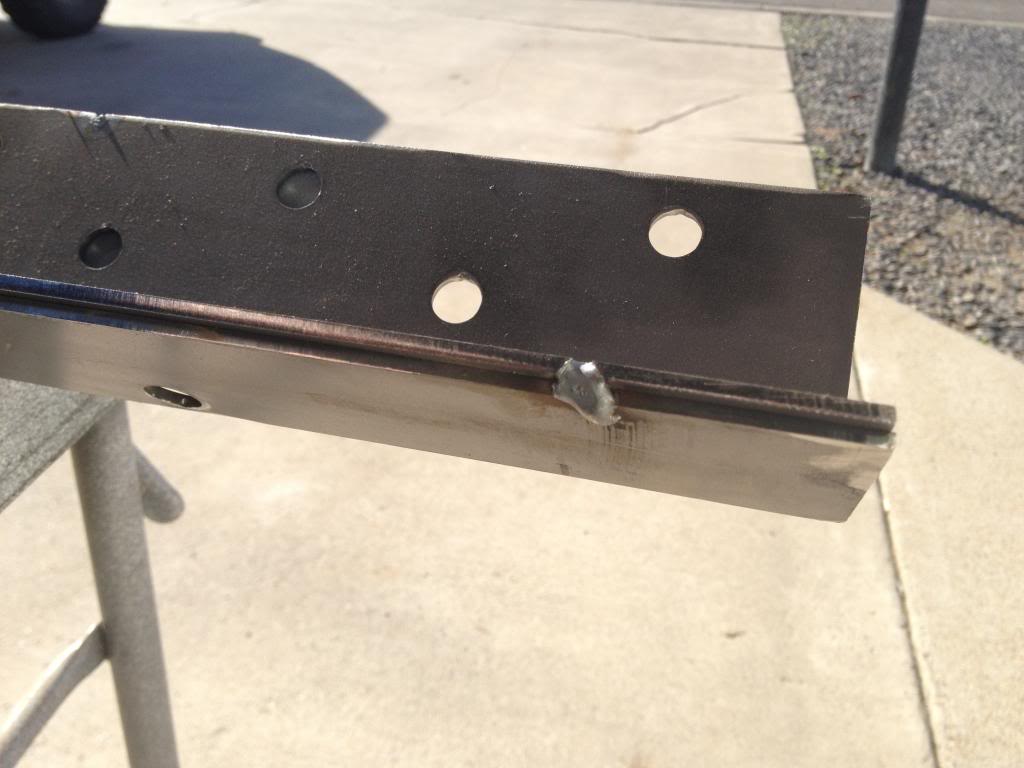
Once all the cutting has been made and everything aligns up, the grinding and welding can begin.
 .
.
 .
.
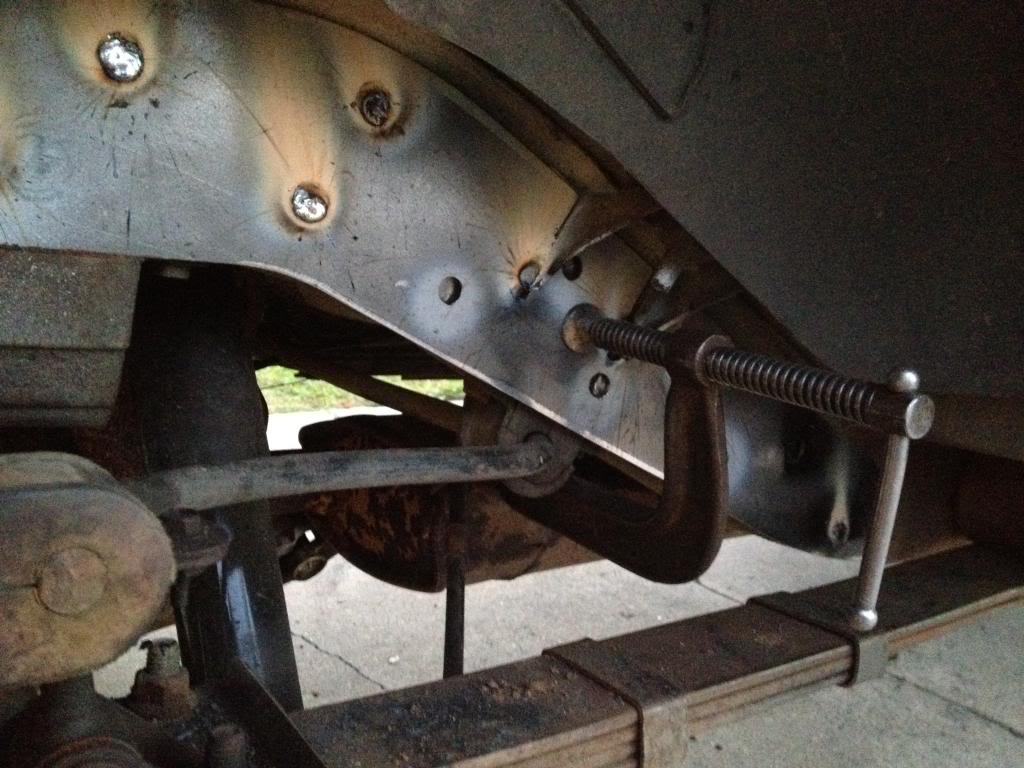
Grinding: I used a c-clamp to hold the frame stiffener in place and then took some primer paint and sprayed it on all the plug welds. This way I only had to grind off the undercoating on the spots that needed it. I don’t have any pictures of this process but the one below gives you a general idea.
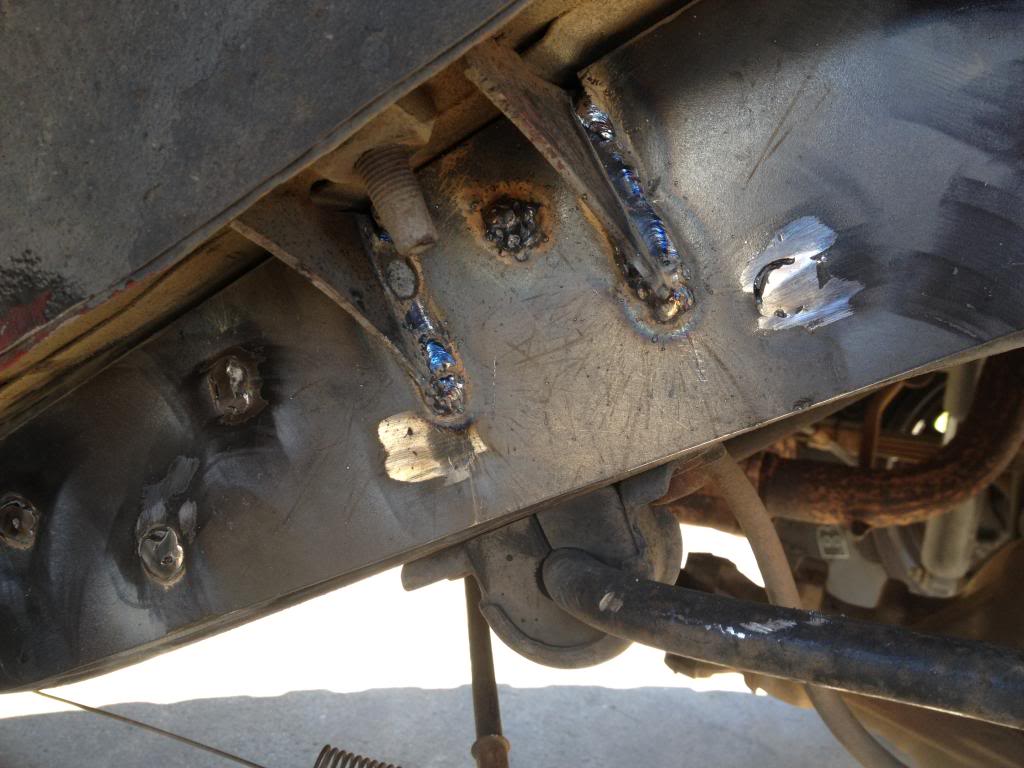
Welding: I used a Lincoln electric wire feed welder 135 amp. Settings I found to work best were, volts “C” and wire speed “2”. As I stated above, I have no previous welding experience at all. I did some practice welds on a bunch of old bolts laying around to get a general feel of how it all works. So please don’t hate on my welds, I know they are not the best or very pretty but the only way to learn is to do in my opinion.
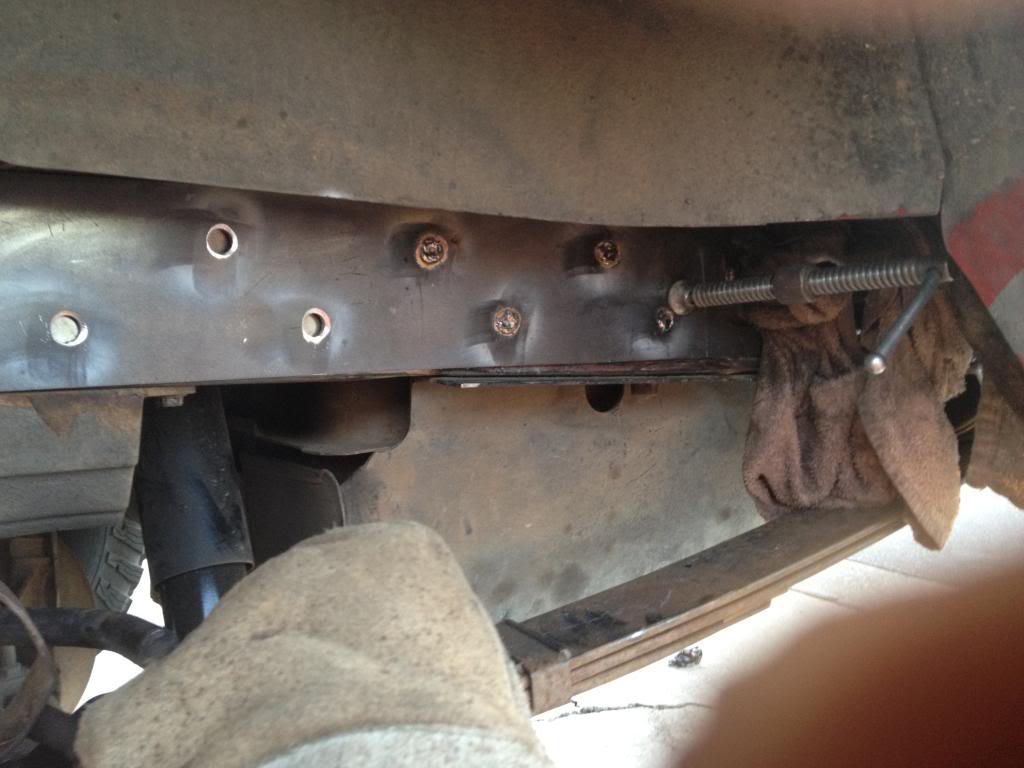
I used some RustOleum and painted the back sides of both rear frame stiffeners in hopes of eliminating any future rust before welding them into place. As the rear frame bends, you will need some heavy duty c-clamps to bend the frame stiffeners to the frame. I used two 5” c-clamps and they worked great. I first made the mistake of working form the front to the back on the driver’s side, this was not a fun trial and error but it all worked out in the end, so start in the back and work your way forward. Again, START IN THE BACK AND WORK FORWARD!! I also wrapped the gas tank hoses in very wet towl to avoid any fires.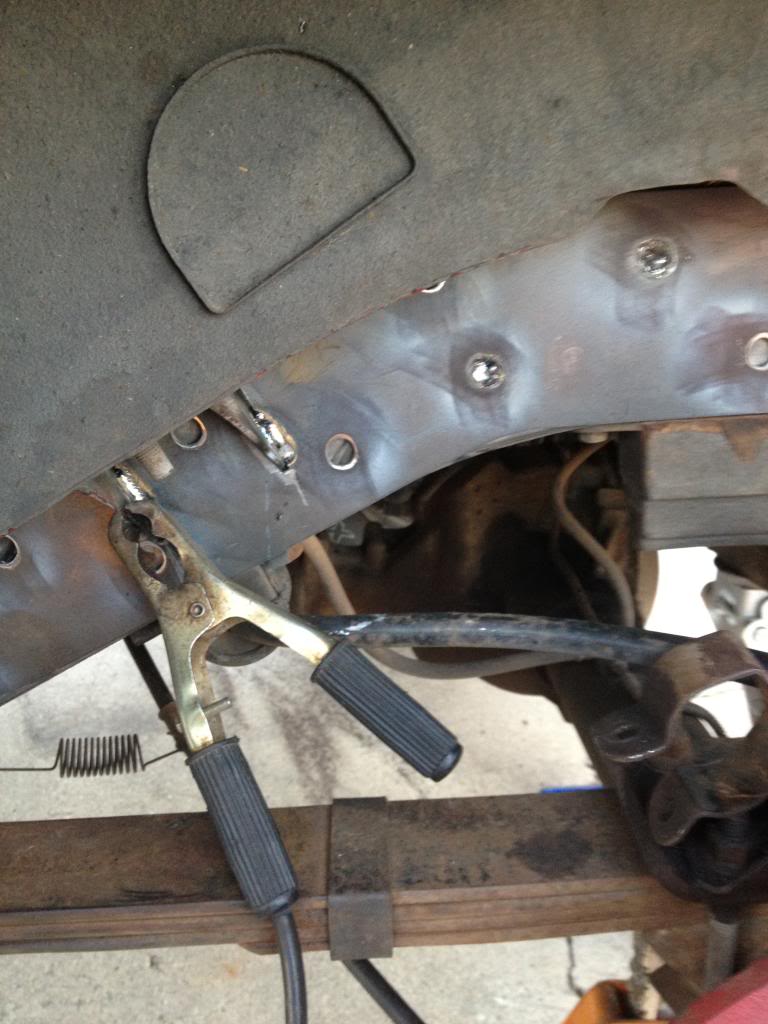
.
 .
.
 .
.
 .
.

Here are some pictures from the passenger’s side frame stiffeners being welded on.
.
.
.

.
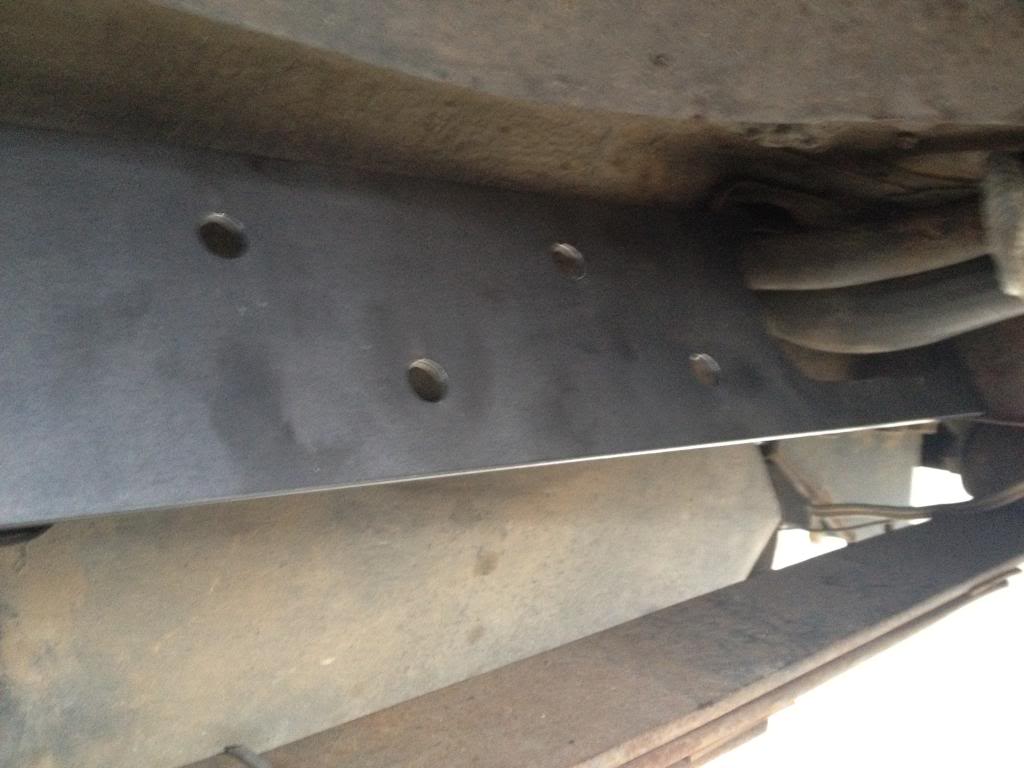
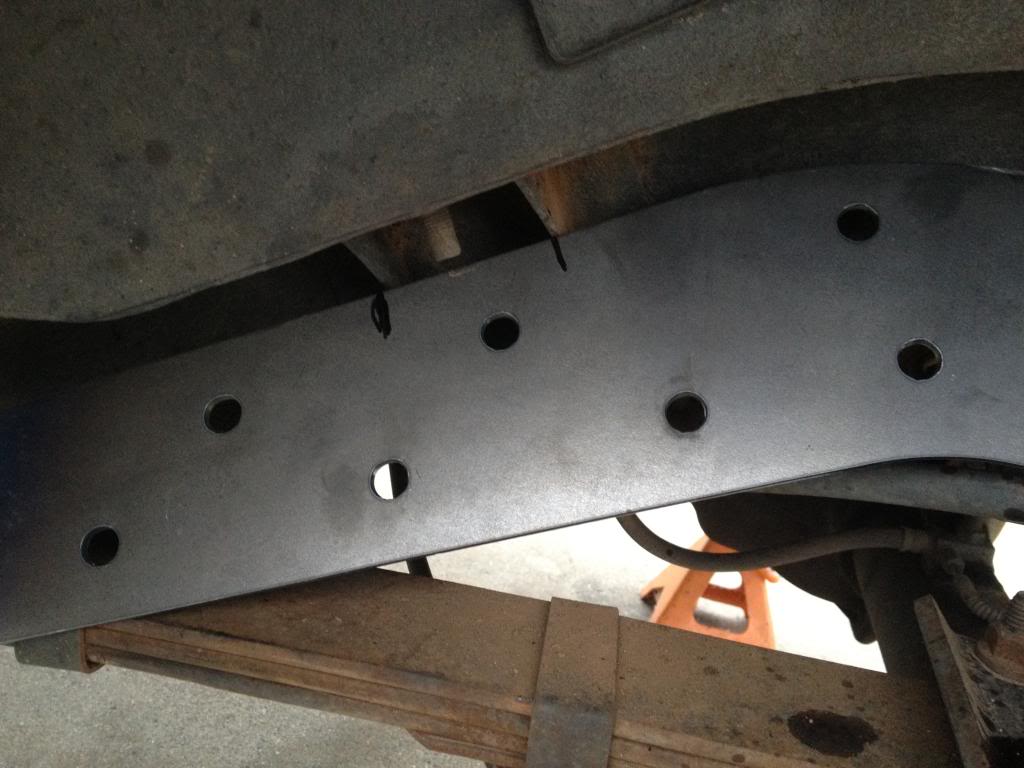
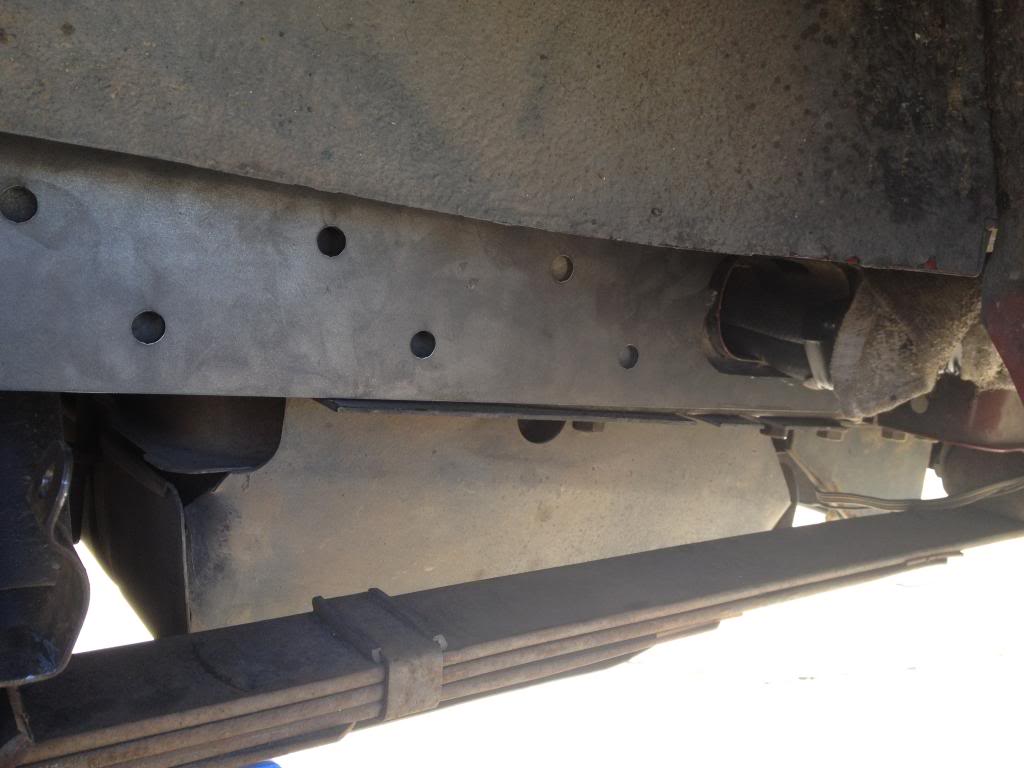
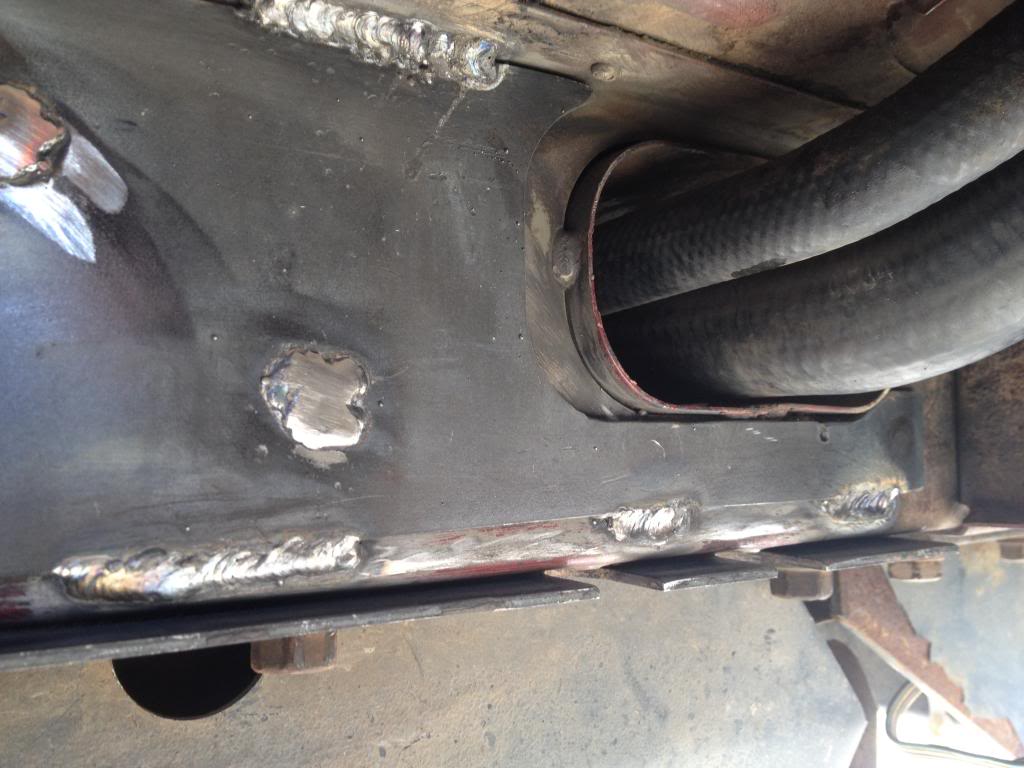
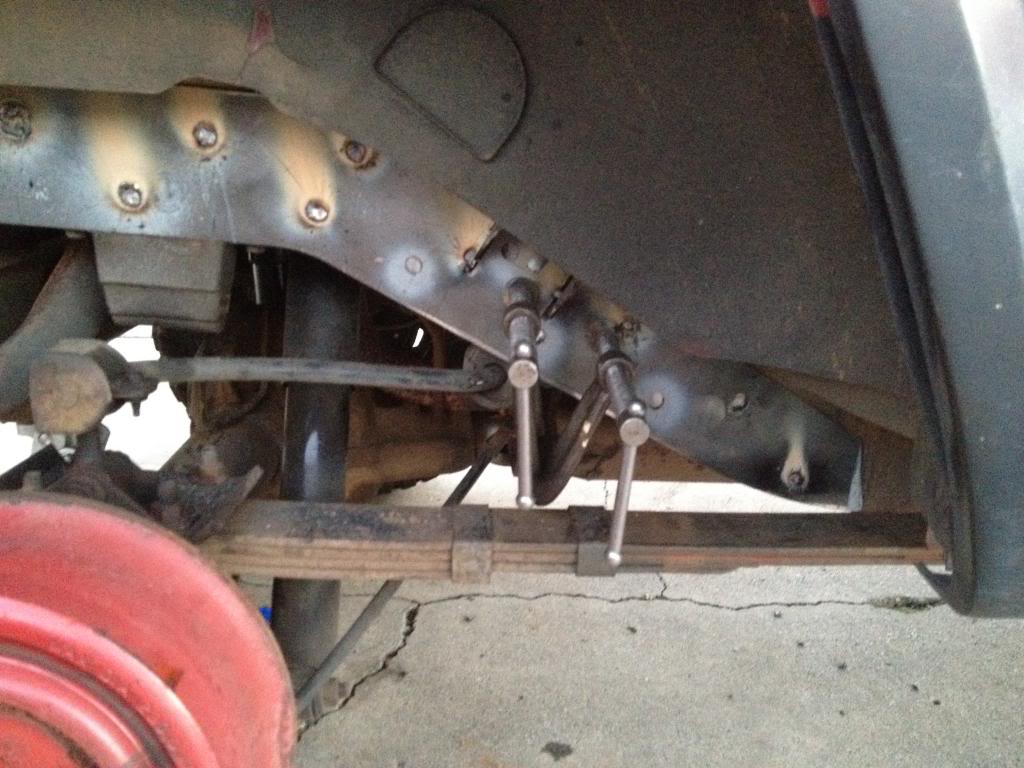
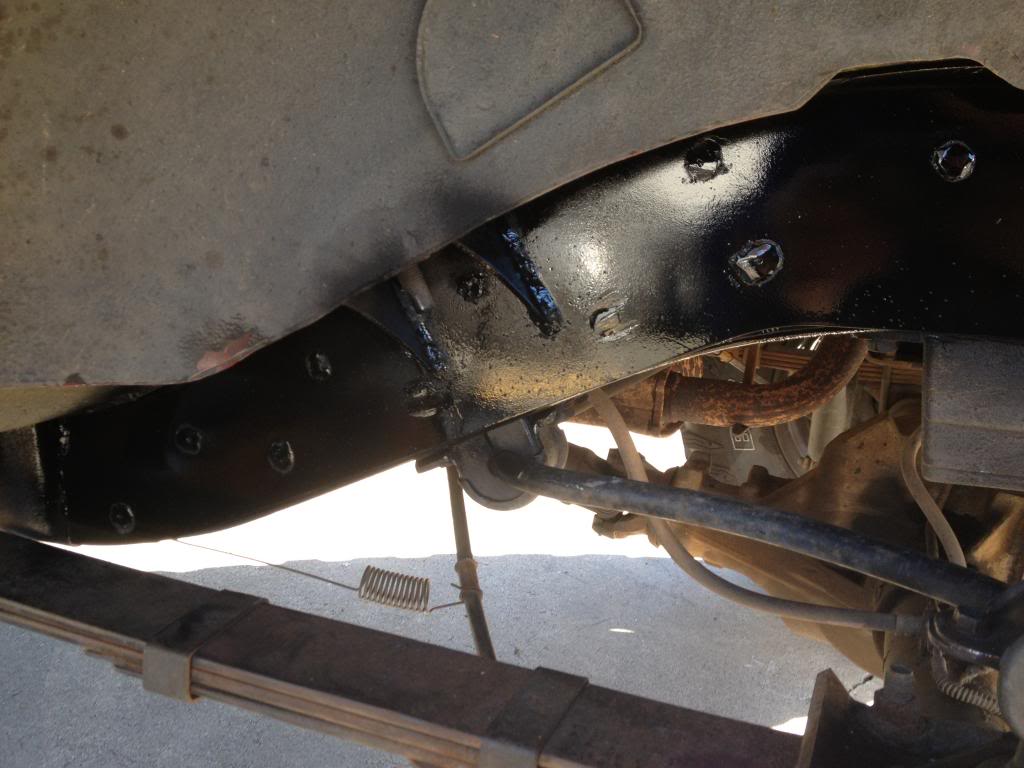
Once all the welding is done, I took a grinder and cleaned up some of the plug welds so they looked a little nicer. I then painted them with RustOleum gloss black and painted both sides. Here are some pictures of the final product installed.
 .
.
 .
.
 .
.
It took me a good two days to complete this project. I did this by myself, so it might not take as long if you have some help. Hope this helped and stay tuned for the middle and front guides soon to come.
Feel free to post comments/questions…Cheers!
As I have no past welding experience I decided to start with the rear frame stiffeners as they do not support as much weight as the front. I figured the more experienced I become from all the welding that these require, by the time I get to the front where the welds really matter I should have it down.
So let’s being shall we!
FedEx delivers the goods!!!
As you can see from the pictures, they are shipped as is, not wrapped or boxed. 20lbs for the middle frame stiffeners and 26lbs for the front & rear. For a combined total of 46lbs added weight to the XJ. Beefy!!!
.
The sets are tac welded together.
.
Just use a grinder/cutting wheel and some screwdrivers to separate them all.
.
.
Here they are laid out next to the XJ they will be installed on.
.
The best way to make room while working on the rear is to jack the axle up just enough to remove the tire. Place jack under axle and then jack up on the gas take skid. My gas take just has the stock skid from the factory. It didn’t seem to bend or budge when lifting up the rear. Doing this will lower the axle/spring packs and tension bar allowing easier access to the rear frame.
I started on the rear driver side. The first thing you will notice when checking out the rear is the body mounts. Sadly HD does not put notches in the frame stiffeners
. Also on the driver side, you have to deal with the gas tank hoses. . Now the real fun begins. First thing that needs to be done is cutting out the access hole for the gas tank hoses.
. Next get a marker/chalk/whatever to mark where the notches will need to be cut to allow the frame stiffener to slide into place around the body mount.
. Once the marks have been made, take it over to the bench and begin cutting those notches out. This is a long process because of all the going back and forth to ensure the cuts are right, it fits, etc. After about the 5th time I decided to modify mine. I ended up cutting the rear access hole for the tank lines off. This way it could just slide into place without having to deal with the dang tank lines. My reasoning for doing this, the top part of the access hole (as pictured above) is very narrow and thin. And honestly not much is gained by leaving it on and trying to weld near the gas tank hoses. But this is my opinion, it is not required but did make it go a lot faster and easier. Luckily only the driver side has to deal with the gas tank hoses. The passenger side was a breeze to get mounted up.
.
Once all the cutting has been made and everything aligns up, the grinding and welding can begin.
. . Grinding: I used a c-clamp to hold the frame stiffener in place and then took some primer paint and sprayed it on all the plug welds. This way I only had to grind off the undercoating on the spots that needed it. I don’t have any pictures of this process but the one below gives you a general idea.
Welding: I used a Lincoln electric wire feed welder 135 amp. Settings I found to work best were, volts “C” and wire speed “2”. As I stated above, I have no previous welding experience at all. I did some practice welds on a bunch of old bolts laying around to get a general feel of how it all works. So please don’t hate on my welds, I know they are not the best or very pretty but the only way to learn is to do in my opinion.
I used some RustOleum and painted the back sides of both rear frame stiffeners in hopes of eliminating any future rust before welding them into place. As the rear frame bends, you will need some heavy duty c-clamps to bend the frame stiffeners to the frame. I used two 5” c-clamps and they worked great. I first made the mistake of working form the front to the back on the driver’s side, this was not a fun trial and error but it all worked out in the end, so start in the back and work your way forward. Again, START IN THE BACK AND WORK FORWARD!! I also wrapped the gas tank hoses in very wet towl to avoid any fires.
.
. . . Here are some pictures from the passenger’s side frame stiffeners being welded on.
.
.
.
.
Once all the welding is done, I took a grinder and cleaned up some of the plug welds so they looked a little nicer. I then painted them with RustOleum gloss black and painted both sides. Here are some pictures of the final product installed.
. . . It took me a good two days to complete this project. I did this by myself, so it might not take as long if you have some help. Hope this helped and stay tuned for the middle and front guides soon to come.
Feel free to post comments/questions…Cheers!
Last edited by kissthis66; Nov 26, 2012 at 02:54 AM.
CF Veteran
Joined: Jan 2009
Posts: 2,740
Likes: 0
Year: 87
Model: Cherokee
Engine: 4.0
My only suggestion involves weld prep. Grind off the undercoating, and grind of the mill coating before welding. Will make the puddle act normal and minimize the popping and contamination in your welds.
ALso add some stitch welding along the top and bottom.... like weld 3" skip 6"
Lastly WHen donme grind down all the welds and re fill them in. Then Paint.
ALso add some stitch welding along the top and bottom.... like weld 3" skip 6"
Lastly WHen donme grind down all the welds and re fill them in. Then Paint.
Thread Starter
Senior Member
Joined: Apr 2010
Posts: 720
Likes: 1
From: Marshall, WI
Year: 1994
Model: Cherokee
Engine: 4.0L i6
Grinding: I used a c-clamp to hold the frame stiffener in place and then took some primer paint and sprayed it on all the plug welds. This way I only had to grind off the undercoating on the spots that needed it. I don�t have any pictures of this process but the one below gives you a general idea.

CF Veteran
Joined: Nov 2011
Posts: 2,322
Likes: 1
From: Edmonton
Year: 1990
Model: Cherokee
Engine: 4.0
no it wont. you just want good penetration onto the circumference of the holes using all the metal thats available. there is no such thing as a welder who hasn't ground a weld and redone it.
CF Veteran
Joined: Jan 2009
Posts: 2,740
Likes: 0
Year: 87
Model: Cherokee
Engine: 4.0
I would definately do some mmore reading about installing these. Everyone I have seen advertised recommends stitch welding.... I personally dimple died my stiffners, and then welded them completely, but MY rig is also chop toped, with a bunch of other crap welded to it.
I always completely remove all mill scale as well as all of the undercoating from the frame rails. It removes most of the contaminents in your welds. A defect in a weld is a bad thing.
As for technique when welding up rossete welds... I start at the bottom.. and mover around the rossette, then will in the center. After all the welds are done.. I come back with my grinder, and grind all the welds smooth. I really like ppl not noticing that my rig has stiffners or many other m0ds.. kinda like them thinking my rig is a pile of crap.
Thread Starter
Senior Member
Joined: Apr 2010
Posts: 720
Likes: 1
From: Marshall, WI
Year: 1994
Model: Cherokee
Engine: 4.0L i6
thanks, well i finally got the middle section installed, been really busy. will post my pics and what not here in the next week or so. so far i love it!!! well worth the $$$ for this set!
Trending Topics
CF Veteran
Joined: Nov 2011
Posts: 7,387
Likes: 10
From: City of Trees, CA
Year: 93 2 door
Model: Cherokee
Engine: 4.0
I plan on getting this complete stiffener set as well and in my research I found a good post about welding to the uniframe
post #14 http://www.pirate4x4.com/forum/jeep-...e-tie-ins.html
post #14 http://www.pirate4x4.com/forum/jeep-...e-tie-ins.html
Seasoned Member
Joined: Nov 2009
Posts: 258
Likes: 0
From: Boulder, CO
Year: 1999
Model: Cherokee
Engine: 4.0L I6
I would like to add to weld prep by saying use weld through primer on both the frame and the back of the stiffeners to prevent corrosion. Use it all the time in auto body its basically mandated for any metal to metal contact. Looks great!
Edit: I see you did use the primer. Disregard my post
Edit: I see you did use the primer. Disregard my post
Last edited by hearsedriver; Jan 11, 2013 at 08:44 PM. Reason: read to fast

Senior Member
Joined: Mar 2012
Posts: 517
Likes: 0
From: gresham
Year: 1993
Model: Cherokee
Engine: inline 6 4.0 ho
This thread just finalized my dicision on wether or not to get frame stiffeners! That's a solid write up on your process man! Props!  so my question is where can you get weld through primer at?
so my question is where can you get weld through primer at?

Thread Starter
Senior Member
Joined: Apr 2010
Posts: 720
Likes: 1
From: Marshall, WI
Year: 1994
Model: Cherokee
Engine: 4.0L i6
Originally Posted by kennzz05
havent seem it mentioned but are you guys unhooking the vehicle battery to reduce any chance of a voltage spike taking out the pcm/ecm