


cowl hood write-up (pic overkill)


Thread Starter
CF Veteran
Joined: Nov 2011
Posts: 7,387
Likes: 10
From: City of Trees, CA
Year: 93 2 door
Model: Cherokee
Engine: 4.0
 cowl hood write-up (pic overkill)
ok I'm sharing some measurements on my cowl hood. My dad helped out with the welding (mig). I will learn how to weld on my own very soon.
I wanted to do this mostly for looks. but it will help release hot air at low speeds as well.
I hope that my tips and tricks help someone do a better job on their own cowl hood than I did :P
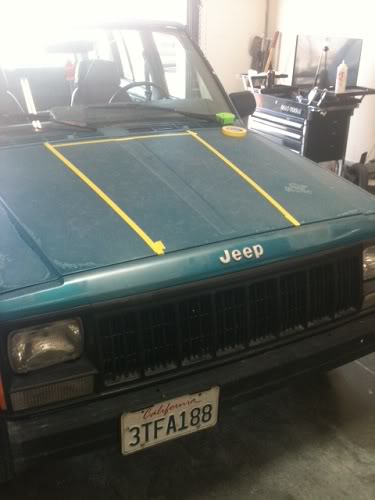
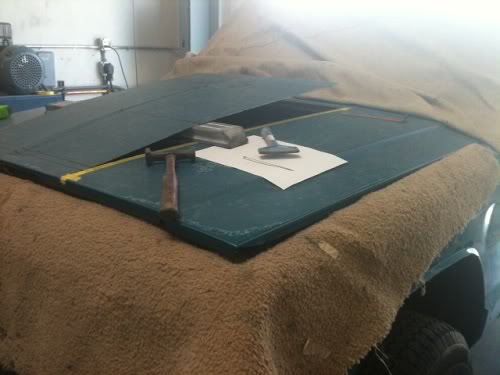
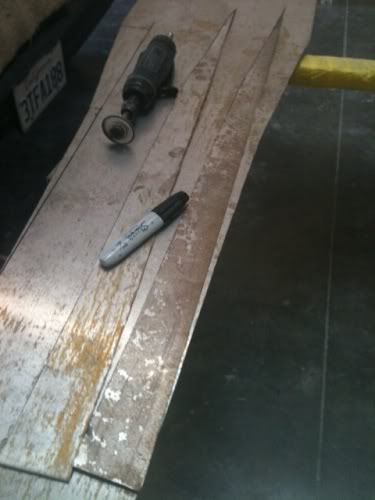
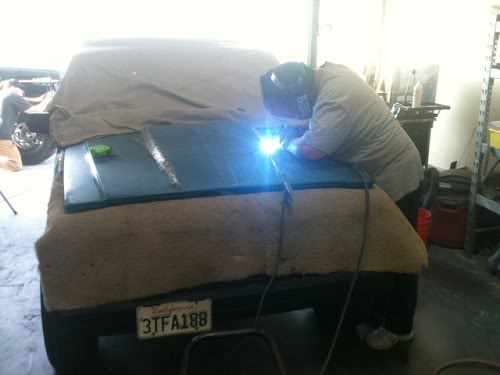
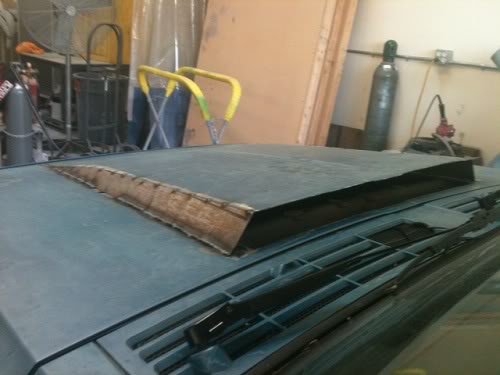
it took about 2 hours to get this far.
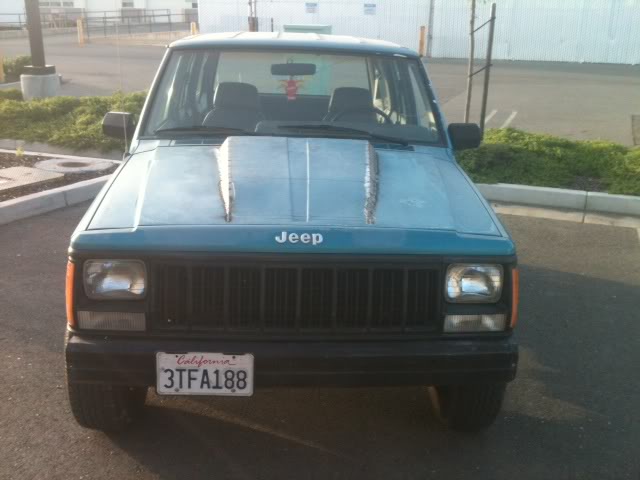
I wanted to do this mostly for looks. but it will help release hot air at low speeds as well.
I hope that my tips and tricks help someone do a better job on their own cowl hood than I did :P
it took about 2 hours to get this far.
Last edited by Atmos; Apr 29, 2012 at 05:59 PM.
Thread Starter
CF Veteran
Joined: Nov 2011
Posts: 7,387
Likes: 10
From: City of Trees, CA
Year: 93 2 door
Model: Cherokee
Engine: 4.0
I did some cleaning up on my hood today. decided I wanted to add a slant to the back of the cowl (should've included this in my original scrap metal cuts.. poor planning)
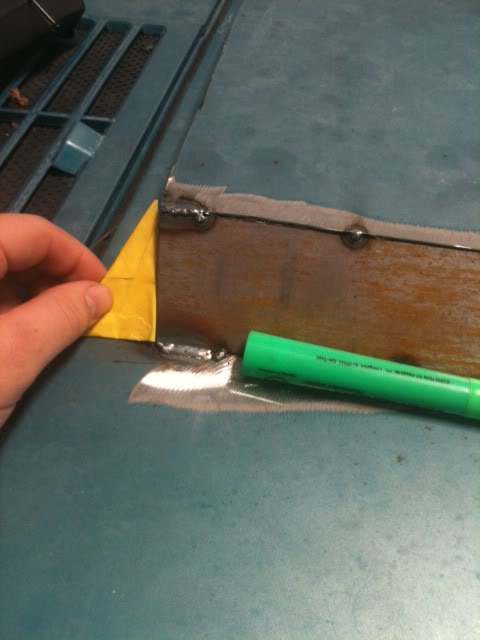
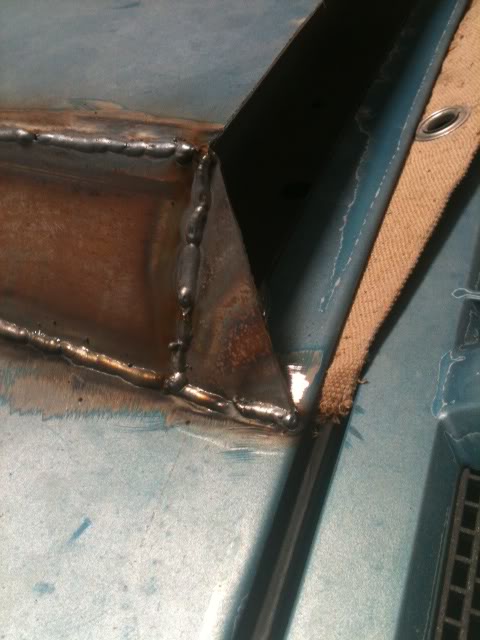
cleaned it all up and feathered it out
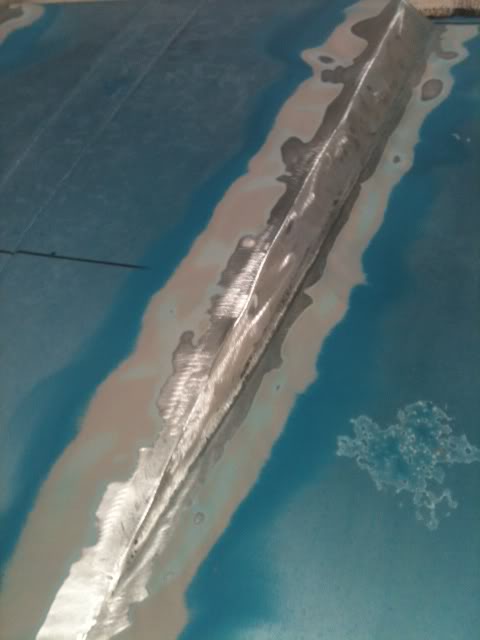
now for the facts. I kind of just jumped in there and started cutting things.
I would've done this differently if I had a do-over
there is a small frame holding the thin hood in place. I chose to leave these here and simply separate the hood from the 'frame' using a hammer and chisel. came off very easily
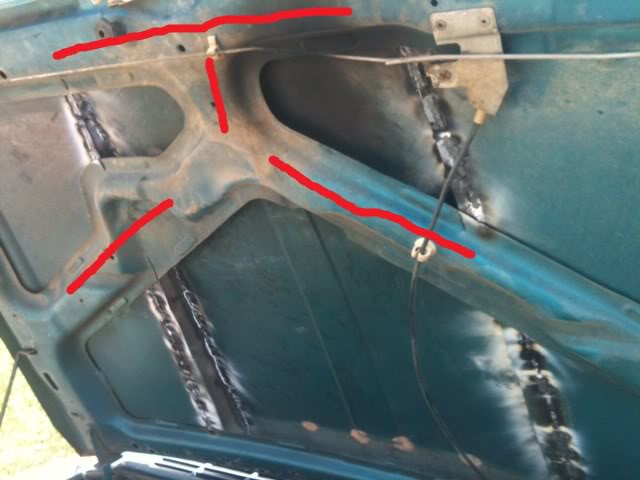
there is also part of the 'frame' on the hood closest to the windshield. this one also separates with ease. this part of the 'frame' also temporarily serves as a tray for catching any larger objects that fall in (I will put in some sort of screen later)
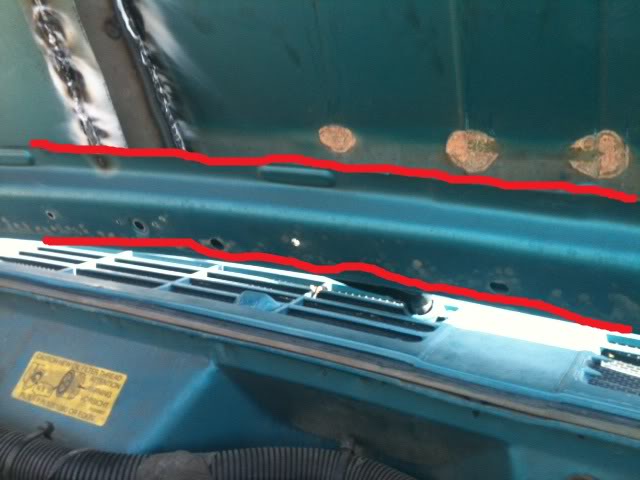
there is also a lip at the end of that same rear part of the frame ^^
it is about an inch long and I believe it pinches the hood to the edge of the frame. not positive.
I cut 1 1/4" (1.25") deep to avoid damaging or separating it
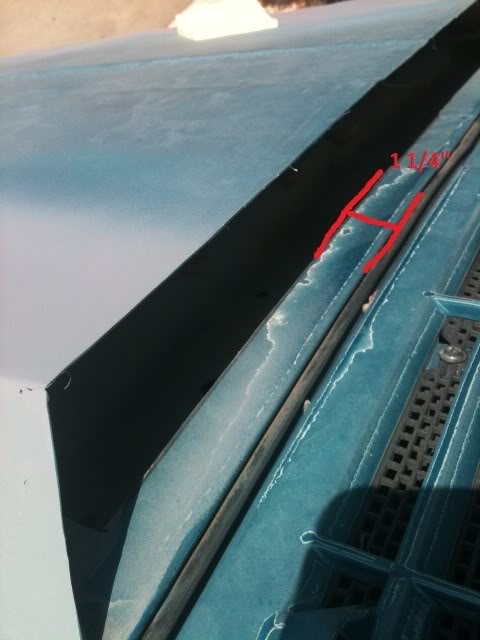
the top part of the hood was 24.5" from cut to cut
the bottom was 19" from cut to cut. I cut a direct line from each mark (no curve)
the slanted sheet metal was placed 1.5" from the cut (winshield side) and gradually came closer as it reached the bottom of the hood (grill side)
you'll have to figure out that part on your own. I just winged it.
here it is with some etching primer over it so it doesnt rust and I'll bondo it and paint next weekend hopefully
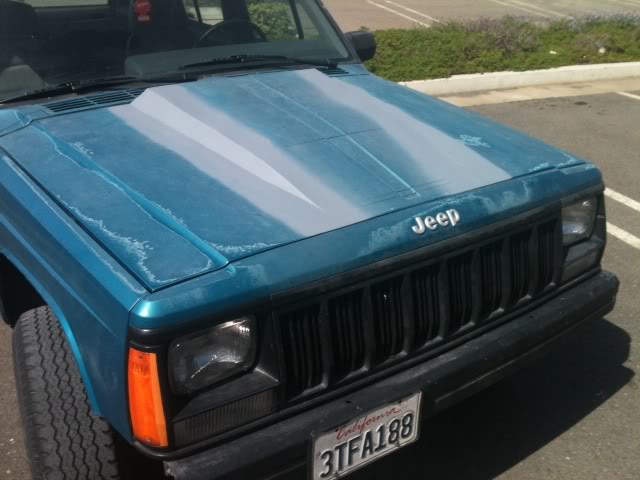
it still fits perfectly when it's opened
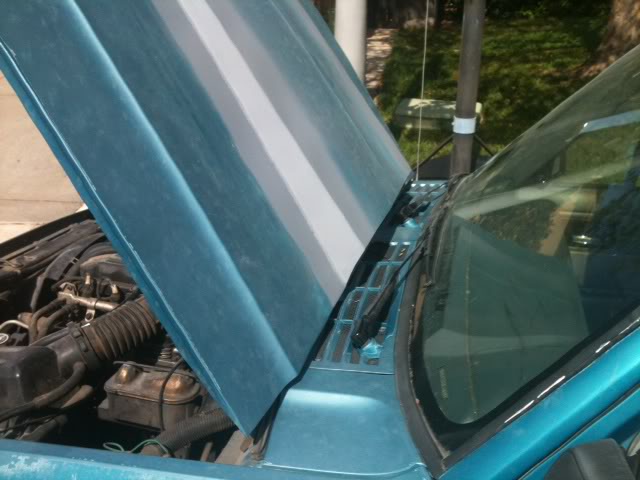
NOW. my complaints and changes
the hood doesnt close by just dropping it anymore, I have to push it all the way down on the passenger side after dropping it. not a big deal
there is a healthy amount of warping, but nothing that cant be fixed with bondo
If I had a do-over I would've cut the hood exactly straight at about 22" across because mine has a bit more curve than I prefer
be careful while cutting, I did cut into my hood 'frame' a couple of times
and I should've taken the hood off to do the entire project. the cover we put over my engine did catch on fire once haha. flashbacks..
cleaned it all up and feathered it out
now for the facts. I kind of just jumped in there and started cutting things.
I would've done this differently if I had a do-over
there is a small frame holding the thin hood in place. I chose to leave these here and simply separate the hood from the 'frame' using a hammer and chisel. came off very easily
there is also part of the 'frame' on the hood closest to the windshield. this one also separates with ease. this part of the 'frame' also temporarily serves as a tray for catching any larger objects that fall in (I will put in some sort of screen later)
there is also a lip at the end of that same rear part of the frame ^^
it is about an inch long and I believe it pinches the hood to the edge of the frame. not positive.
I cut 1 1/4" (1.25") deep to avoid damaging or separating it
the top part of the hood was 24.5" from cut to cut
the bottom was 19" from cut to cut. I cut a direct line from each mark (no curve)
the slanted sheet metal was placed 1.5" from the cut (winshield side) and gradually came closer as it reached the bottom of the hood (grill side)
you'll have to figure out that part on your own. I just winged it.
here it is with some etching primer over it so it doesnt rust and I'll bondo it and paint next weekend hopefully
it still fits perfectly when it's opened
NOW. my complaints and changes
the hood doesnt close by just dropping it anymore, I have to push it all the way down on the passenger side after dropping it. not a big deal
there is a healthy amount of warping, but nothing that cant be fixed with bondo
If I had a do-over I would've cut the hood exactly straight at about 22" across because mine has a bit more curve than I prefer
be careful while cutting, I did cut into my hood 'frame' a couple of times
and I should've taken the hood off to do the entire project. the cover we put over my engine did catch on fire once haha. flashbacks..
Thread Starter
CF Veteran
Joined: Nov 2011
Posts: 7,387
Likes: 10
From: City of Trees, CA
Year: 93 2 door
Model: Cherokee
Engine: 4.0
over all, I'm really happy with this hood. it gives the jeep a more aggressive look and I cant wait to finish it with bondo and paint
oh. and my cuts stopped 3.5" from the front of the hood (grill side). forgot that measurment
oh. and my cuts stopped 3.5" from the front of the hood (grill side). forgot that measurment
Last edited by Atmos; Apr 29, 2012 at 06:22 PM.

Thread
Thread Starter
Forum
Replies
Last Post
Currently Active Users Viewing This Thread: 1 (0 members and 1 guests)

