
Windshield Wiper Motor Removal/Bushing Replacement


Thread Starter
CF Veteran
Joined: Oct 2009
Posts: 2,867
Likes: 16
From: Fauquier County, Virginia
Year: 1991
Model: Cherokee
Engine: I-6 4.0 HO
Do your wipers struggle? Do they sit at different heights and drag/hop across the windshield even if there's a 1/16" layer of soap on it? Well I'm willing to bet it is one of two things. 1) Your bushings are likely old/hard/shot and need replacing, or 2) your wiper motor is crapped out. Luckily, more often than not it is the bushings. I'm going to show you how to replace them, and in the process how to remove and re-install the wiper motor in the event that it needs replacing.
Grab your gear, put on your gloves, get a cold brew, and read on!
Grab your gear, put on your gloves, get a cold brew, and read on!
Last edited by 89Laredo; Feb 23, 2016 at 04:24 PM.
Thread Starter
CF Veteran
Joined: Oct 2009
Posts: 2,867
Likes: 16
From: Fauquier County, Virginia
Year: 1991
Model: Cherokee
Engine: I-6 4.0 HO
To get serious, you'll need an assortment of sockets, a socket wrench, a couple of extensions, an assortment of Torx socket wrenches, a flat head and Phillips head screwdriver, and a c-clamp can be helpful. I apologize for forgetting the exact sizes of the sockets needed. I recall the torx one being a T-25 or T-30. Otherwise, the rest are as simple as pluck, check, fit, etc.
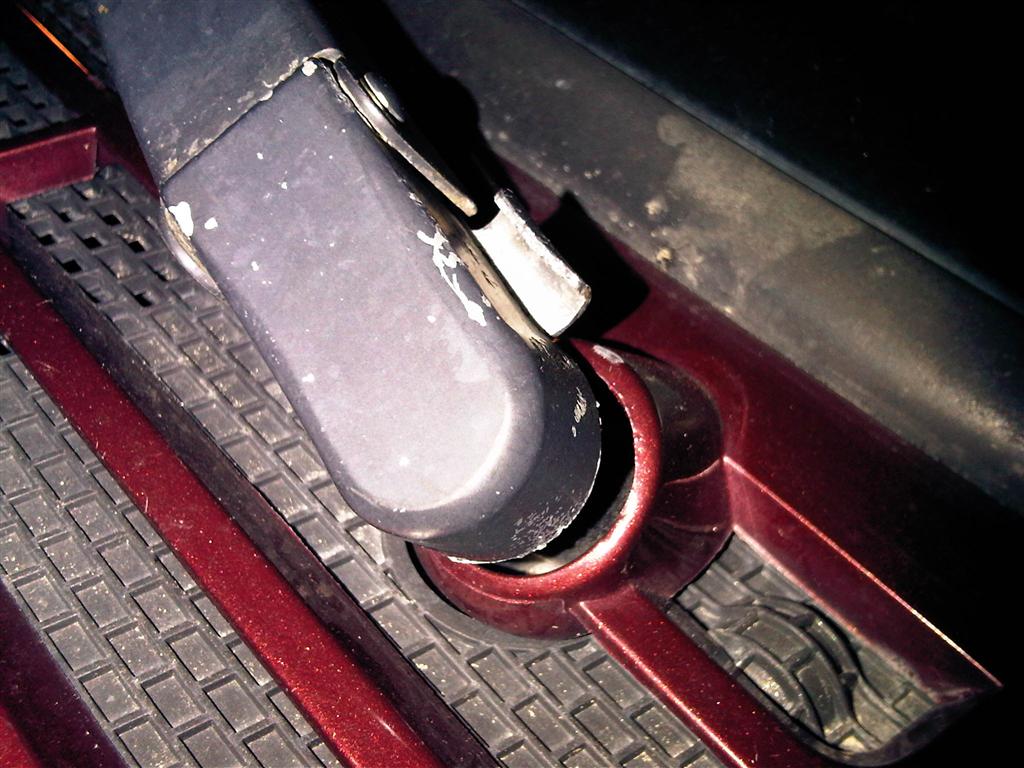
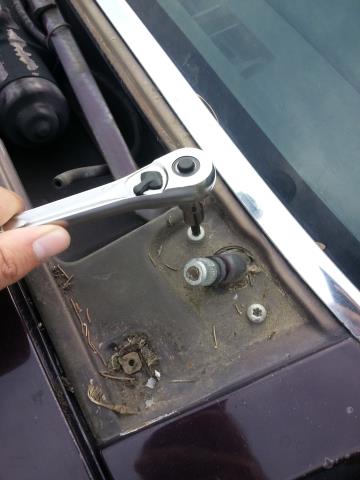
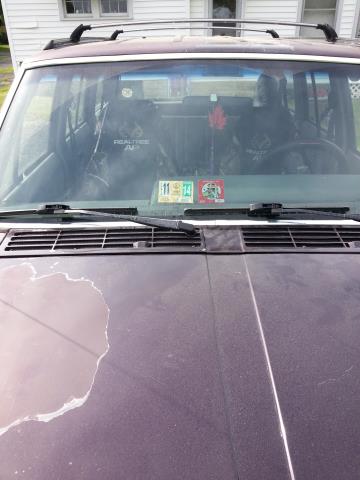
Start by doing the obvious and removing the wiper arms. This is easy, and hopefully you already know how to do it. Lift up on the arm, and near the mounting point is a little clip. Either use your fingers or a flat head to lift the clip up (don't take it out). Then the arm just pops off! I borrowed a pic from our lovely forum here:
Next, remove the 8 or so screws holding your cowl cover on. Be careful with these as you remove and set them aside. When you go to remove the cowl cover, be careful as you need to carefully lift it over the wiper arm gears. This cover is also quite flexible, so don't let it bend too much or it may crack/break. Last note: under the cowl cover are two little hoses going to each washer fluid nozzle. The hoses pluck right off, just be gentle and wiggle 'em a bit if need be.
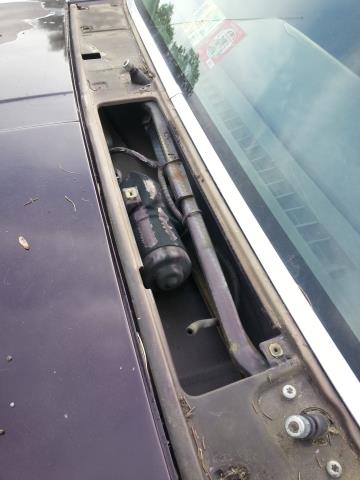
You should be here:
Next, take a sharpie or marker and make a line on the armatures on each side of the motor to make sure you put them back in the right orientation.
Then, use your torx socket to remove the bolts on each side of the wiper arm gears. They might be a bit tight and have large threads, like a screw more than a bolt. Be careful getting them out. To be safe, I went ahead and made sure I stored them so they went back into the same hole they came out of.
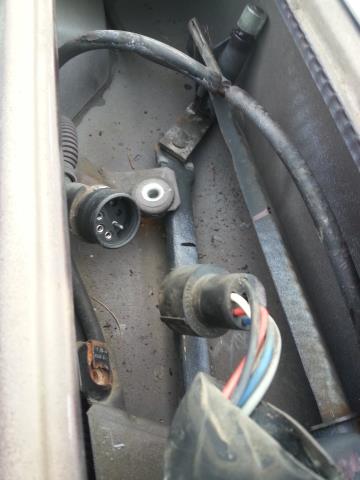
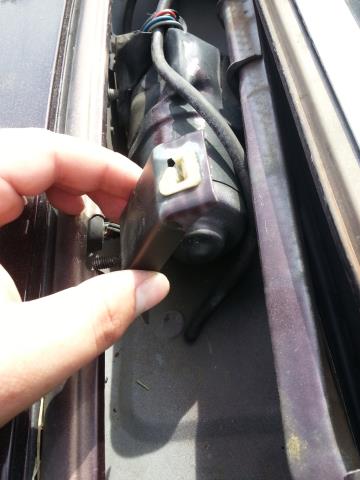
Then, unplug the wiper motor. This can also be tricky. Just work with it a bit. Don't yank and tear the wires!
Start by doing the obvious and removing the wiper arms. This is easy, and hopefully you already know how to do it. Lift up on the arm, and near the mounting point is a little clip. Either use your fingers or a flat head to lift the clip up (don't take it out). Then the arm just pops off! I borrowed a pic from our lovely forum here:
Next, remove the 8 or so screws holding your cowl cover on. Be careful with these as you remove and set them aside. When you go to remove the cowl cover, be careful as you need to carefully lift it over the wiper arm gears. This cover is also quite flexible, so don't let it bend too much or it may crack/break. Last note: under the cowl cover are two little hoses going to each washer fluid nozzle. The hoses pluck right off, just be gentle and wiggle 'em a bit if need be.
You should be here:
Next, take a sharpie or marker and make a line on the armatures on each side of the motor to make sure you put them back in the right orientation.
Then, use your torx socket to remove the bolts on each side of the wiper arm gears. They might be a bit tight and have large threads, like a screw more than a bolt. Be careful getting them out. To be safe, I went ahead and made sure I stored them so they went back into the same hole they came out of.
Then, unplug the wiper motor. This can also be tricky. Just work with it a bit. Don't yank and tear the wires!
Last edited by 1991Jeep_Man; Jul 11, 2014 at 04:18 PM.
Thread Starter
CF Veteran
Joined: Oct 2009
Posts: 2,867
Likes: 16
From: Fauquier County, Virginia
Year: 1991
Model: Cherokee
Engine: I-6 4.0 HO
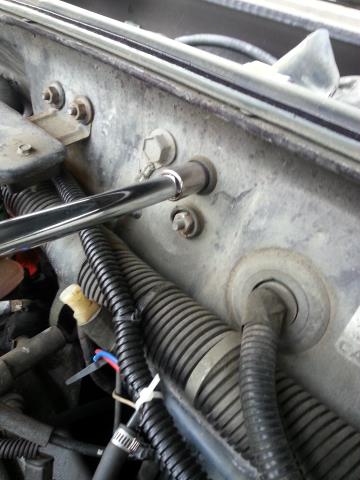
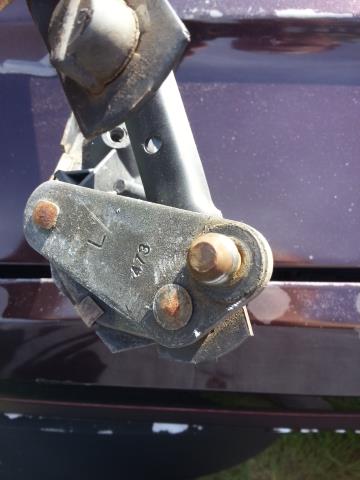
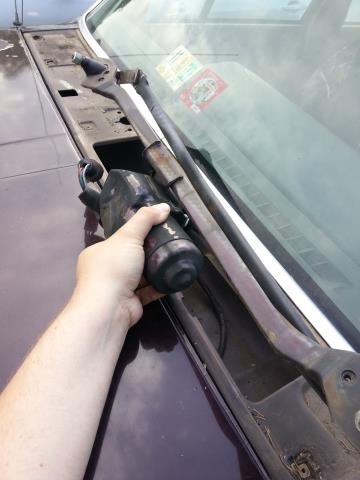
After you've unplugged the motor, proceed to loosen the primary mounting bolt under the motor. It sits in a weird bushing setup, so just be easy when removing (and eventually tightening) it. Don't rip the bushing.

Then go under the hood and remove the nuts holding on a bracket under the cowl. These nuts are near the mounting point of the MAP sensor. These also have bushings, but you don't need to be as careful.
Reach inside the cowl, and pluck the bracket!
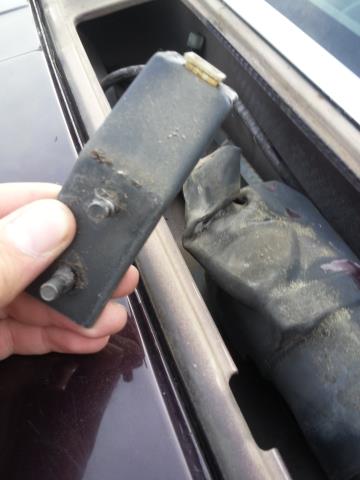
This bracket serves as a mounting point for the cowl cover. Be careful with it and don't lose/screw up that little plastic clip thing!
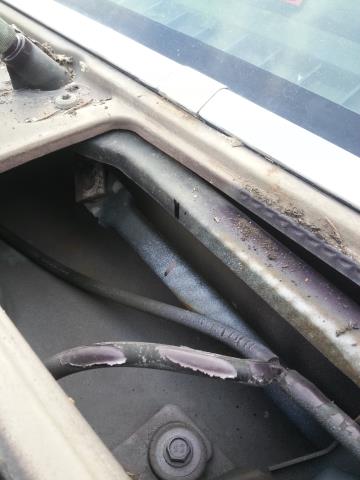
Now is the fun part! Using some human-arm origami and MUCH MUCH patience, work the assembly carefully out of the cowl. It takes some time and involves dropping the assembly (wiper gears included) into the cowl, back towards the passenger side, and wiggle it up and out. Just take your time, and you'll have this!

And these are what are likely causing the problem:
Then go under the hood and remove the nuts holding on a bracket under the cowl. These nuts are near the mounting point of the MAP sensor. These also have bushings, but you don't need to be as careful.
Reach inside the cowl, and pluck the bracket!
This bracket serves as a mounting point for the cowl cover. Be careful with it and don't lose/screw up that little plastic clip thing!
Now is the fun part! Using some human-arm origami and MUCH MUCH patience, work the assembly carefully out of the cowl. It takes some time and involves dropping the assembly (wiper gears included) into the cowl, back towards the passenger side, and wiggle it up and out. Just take your time, and you'll have this!
And these are what are likely causing the problem:
Thread Starter
CF Veteran
Joined: Oct 2009
Posts: 2,867
Likes: 16
From: Fauquier County, Virginia
Year: 1991
Model: Cherokee
Engine: I-6 4.0 HO
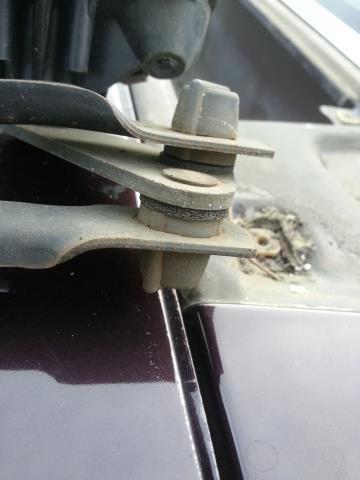
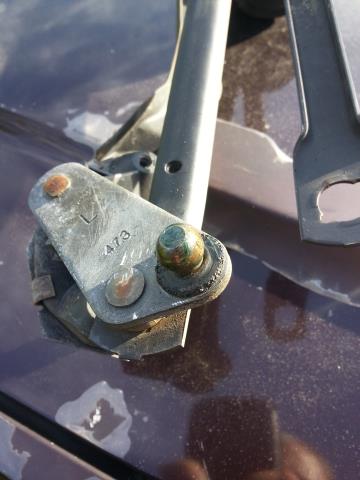
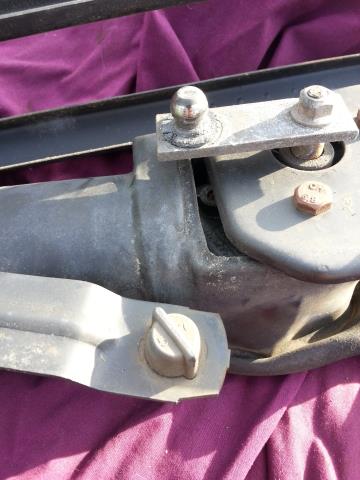
Now when it comes to removing these bushings, go one at a time as to not screw up any placements. Removal isn't too hard, just some patience. First, make sure you order Wiper Bushing Kit Part # 49447. On my '91, AutoConfused tries saying "Herka berk it ain't fit!" but ignore it and buy them.

You only end up using the top right three:
So, go ahead and start by popping one of the bushings off the little ball mount it sits on. Take your wide flat head screwdriver and wedge it under the bushing, and carefully work it up. It takes some working around, but it will pop off. Don't bend the wiper armature. Remember the armatures position relative to everything else!
You'll get this:
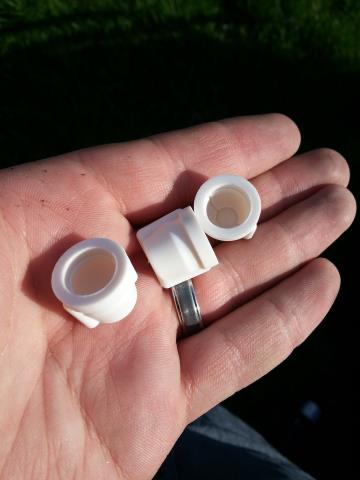
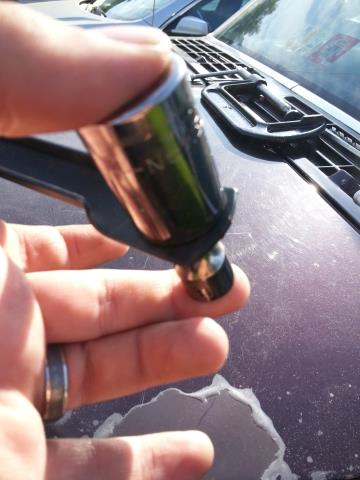
Now, I wasn't able to snap pics of my process for removing the bushing from the arm itself. It isn't hard and is where that c-clamp is more friendly than a hammer. Just get a socket sized slightly larger than the bottom cup end of the bushing. Place it open end under the cup end of the bushing. Proceed to use your clamp to press the old bushing from the top into the socket underneath. Easy!
Go ahead and take a wire-wheel or something to clean the ball joint thing. I went ahead and also added a dab of some brake slide lube I had leftover. Just a tad is all:
Time to press the new bushings onto the ball!
You only end up using the top right three:
So, go ahead and start by popping one of the bushings off the little ball mount it sits on. Take your wide flat head screwdriver and wedge it under the bushing, and carefully work it up. It takes some working around, but it will pop off. Don't bend the wiper armature. Remember the armatures position relative to everything else!
You'll get this:
Now, I wasn't able to snap pics of my process for removing the bushing from the arm itself. It isn't hard and is where that c-clamp is more friendly than a hammer. Just get a socket sized slightly larger than the bottom cup end of the bushing. Place it open end under the cup end of the bushing. Proceed to use your clamp to press the old bushing from the top into the socket underneath. Easy!
Go ahead and take a wire-wheel or something to clean the ball joint thing. I went ahead and also added a dab of some brake slide lube I had leftover. Just a tad is all:
Time to press the new bushings onto the ball!
Thread Starter
CF Veteran
Joined: Oct 2009
Posts: 2,867
Likes: 16
From: Fauquier County, Virginia
Year: 1991
Model: Cherokee
Engine: I-6 4.0 HO
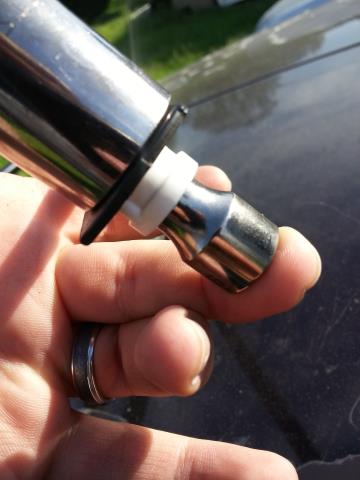
To press the new bushings into the arm (before you put the arm/new bushing onto the ball joint), take that socket you used to press it out and put it over the top of the arm where the bushing will press through to the other side. Then, use a socket size that will sit snugly into the bottom cup end of the bushing like so:
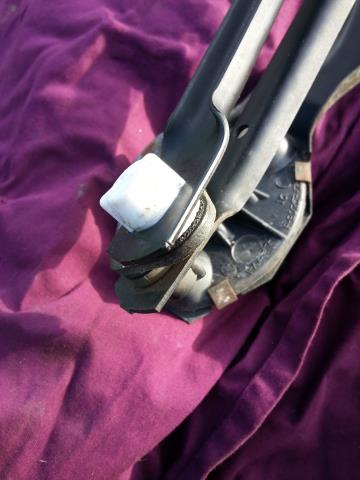
Then, carefully position the c-clamp and press the new bushing slowly and center into position! Note: it helps to use a dab of that lube from earlier and smear a tad tiny bit around the bushing. With the new bushing in place (it is normally to have a slight bit off wiggle room when seated around the rim in the arm), just simply press it onto to its ball joint and VIOLA!
Do this same thing for bushing directly on the other side of the one you just did. REMEMBER, don't let those arms swing in different directions or put them back on in the wrong orientation. I did this by accident, and one arm was angled up when it should have been down. Luckily, it was an easy fix. Just pay attention to you work! It is the same process for the other bushing.
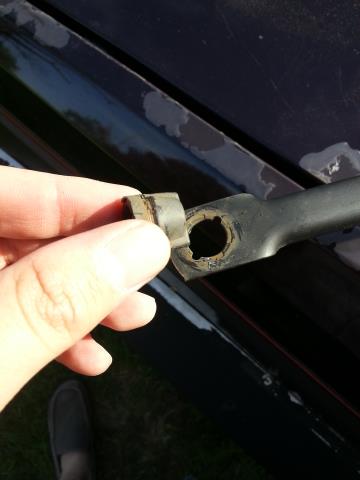
The last bushing is near the motor itself.
This one is quite tricky. You CAN do the same process as above though. Just keep in mind that you'll need to position the c-clamp differently and kind of walk the bushing into place on the ball joint. Just make sure you don't use the clamp against something that will bend. Be conscious of what you're doing, and DON'T ANGLE THOSE ARMS THE WRONG WAY!
With that one done, you've replaced your motor bushings!
Then, carefully position the c-clamp and press the new bushing slowly and center into position! Note: it helps to use a dab of that lube from earlier and smear a tad tiny bit around the bushing. With the new bushing in place (it is normally to have a slight bit off wiggle room when seated around the rim in the arm), just simply press it onto to its ball joint and VIOLA!
Do this same thing for bushing directly on the other side of the one you just did. REMEMBER, don't let those arms swing in different directions or put them back on in the wrong orientation. I did this by accident, and one arm was angled up when it should have been down. Luckily, it was an easy fix. Just pay attention to you work! It is the same process for the other bushing.
The last bushing is near the motor itself.
This one is quite tricky. You CAN do the same process as above though. Just keep in mind that you'll need to position the c-clamp differently and kind of walk the bushing into place on the ball joint. Just make sure you don't use the clamp against something that will bend. Be conscious of what you're doing, and DON'T ANGLE THOSE ARMS THE WRONG WAY!
With that one done, you've replaced your motor bushings!
Thread Starter
CF Veteran
Joined: Oct 2009
Posts: 2,867
Likes: 16
From: Fauquier County, Virginia
Year: 1991
Model: Cherokee
Engine: I-6 4.0 HO
Time to re-install. Mental note: check the armatures for their correct positions using your marker marks from earlier. The assembly will sit in the cowl like this:
Now, getting it there is the fun part. Try and remember your process for getting it out. It is tricky and requires patience. I ended up for some reason needing to loosen the MAP sensor nuts to wiggle the corresponding cowl bracket around. Once you get it in, DO NOT GET IT IN PLACE AND BOLT IT DOWN YET. I made this mistake and couldn't get that little bracket we removed earlier into place! Had to take it all back apart!
Slide the bracket back into place, and go ahead and tighten it down:

Also tighten up those MAP sensor bolts if you loosened them.
NOW, bolt the motor down with the primary bolt. This takes some patience. Just make sure the motor is in place and try to thread the bolt carefully as not to strip it. Once you get it started, tighten the bolt down just before finger tight. Leave wiggle room! This is so that you can position the wiper gears back through the cowl. Loosely install their bolts into their respective holes. Loosely! You'll need to press up on the arm gears to fit them snug and make sure your torx screws are going in properly. Get those flush and finger tight, alternating between each side's torx screws like you would wheel lugs.
With the arm gear screws finger tight and sitting flush, slightly tighten the primary mounting bolt just a little past finger tight. Then go back to the torx screws and tighten them down all the way, alternating between them. I have no torque value: I just make them slight grunt snug. No need to gorilla the hell out of them. Then, finally do the same for your primary bolt. All should be good and tight!
Next, make sure you re-route your washer fluid hoses to make sure they don't bind in the arms. I just routed the driver's side one under the wiper motor and the passenger side one against the cowl so it stays out of the way. Sorry for no pics, but this is easy to do. Just use common sense.
Don't put the cowl cover back on yet! Plug the motor back in (don't forget!) and hop in your rig. Turn the wipers 'on' and make sure everything is rotating nicely with no binding or wrong direction turning. Make sure everything checks out and turn the wipers and the rig off. Make sure you let the wipers do a complete cycle so that your wiper arms go back on right! Don't cut power with them halfway through the cycle.
NOW, reinstall the cowl cover carefully. Make sure you reattach those washer nozzle hoses to their nozzles! I forgot this lol. Then, position the cowl cover carefully and make sure everything looks nice and flush. Install the screws. I started from the outside and worked my way in. This seemed to work good for keeping it flat.
Finally, install the arms nice and flat and push the clips back down. VIOLA! You're done! Test 'em out and make sure your nozzles spray! Have beer (or root beer)!
Now, getting it there is the fun part. Try and remember your process for getting it out. It is tricky and requires patience. I ended up for some reason needing to loosen the MAP sensor nuts to wiggle the corresponding cowl bracket around. Once you get it in, DO NOT GET IT IN PLACE AND BOLT IT DOWN YET. I made this mistake
and couldn't get that little bracket we removed earlier into place! Had to take it all back apart!Slide the bracket back into place, and go ahead and tighten it down:
Also tighten up those MAP sensor bolts if you loosened them.
NOW, bolt the motor down with the primary bolt. This takes some patience. Just make sure the motor is in place and try to thread the bolt carefully as not to strip it. Once you get it started, tighten the bolt down just before finger tight. Leave wiggle room! This is so that you can position the wiper gears back through the cowl. Loosely install their bolts into their respective holes. Loosely! You'll need to press up on the arm gears to fit them snug and make sure your torx screws are going in properly. Get those flush and finger tight, alternating between each side's torx screws like you would wheel lugs.
With the arm gear screws finger tight and sitting flush, slightly tighten the primary mounting bolt just a little past finger tight. Then go back to the torx screws and tighten them down all the way, alternating between them. I have no torque value: I just make them slight grunt snug. No need to gorilla the hell out of them. Then, finally do the same for your primary bolt. All should be good and tight!
Next, make sure you re-route your washer fluid hoses to make sure they don't bind in the arms. I just routed the driver's side one under the wiper motor and the passenger side one against the cowl so it stays out of the way. Sorry for no pics, but this is easy to do. Just use common sense.
Don't put the cowl cover back on yet! Plug the motor back in (don't forget!) and hop in your rig. Turn the wipers 'on' and make sure everything is rotating nicely with no binding or wrong direction turning. Make sure everything checks out and turn the wipers and the rig off. Make sure you let the wipers do a complete cycle so that your wiper arms go back on right! Don't cut power with them halfway through the cycle.
NOW, reinstall the cowl cover carefully. Make sure you reattach those washer nozzle hoses to their nozzles! I forgot this lol. Then, position the cowl cover carefully and make sure everything looks nice and flush. Install the screws. I started from the outside and worked my way in. This seemed to work good for keeping it flat.
Finally, install the arms nice and flat and push the clips back down. VIOLA! You're done! Test 'em out and make sure your nozzles spray! Have beer (or root beer)!

Thread
Thread Starter
Forum
Replies
Last Post
Blackcherokee290
Stock XJ Cherokee Tech. All XJ Non-modified/stock questions go here
28
Jan 8, 2025 11:36 PM
Zeke P. Lucas
Stock XJ Cherokee Tech. All XJ Non-modified/stock questions go here
8
Aug 30, 2015 05:42 PM
relcock
Stock XJ Cherokee Tech. All XJ Non-modified/stock questions go here
0
Aug 26, 2015 11:16 PM
EBowen95
Stock XJ Cherokee Tech. All XJ Non-modified/stock questions go here
49
Aug 25, 2015 08:44 PM
Currently Active Users Viewing This Thread: 1 (0 members and 1 guests)