How to replace the drum brakes on your Chrysler 8.25
 09-12-2010, 10:35 AM
#16
Senior Member
Thread Starter

Join Date: Jun 2010
Location: Slaughter, LA
Posts: 849
Likes: 0
Received 0 Likes
on
0 Posts
Year: 1997
Model: Cherokee
Engine: 4.0L
Then fabricate and run the new lines. I’m not going to go into detail about how to double flare tubing properly. If you don’t have a kit, you can pick one up fairly cheaply at most parts stores. The lines are 3/16” for this Jeep. Practice until you can make the flares properly. My only piece of advice would be to file a bevel onto the outside edge of the tubing before you start the flare process. That seems to make the double bend easier to consistently accomplish.
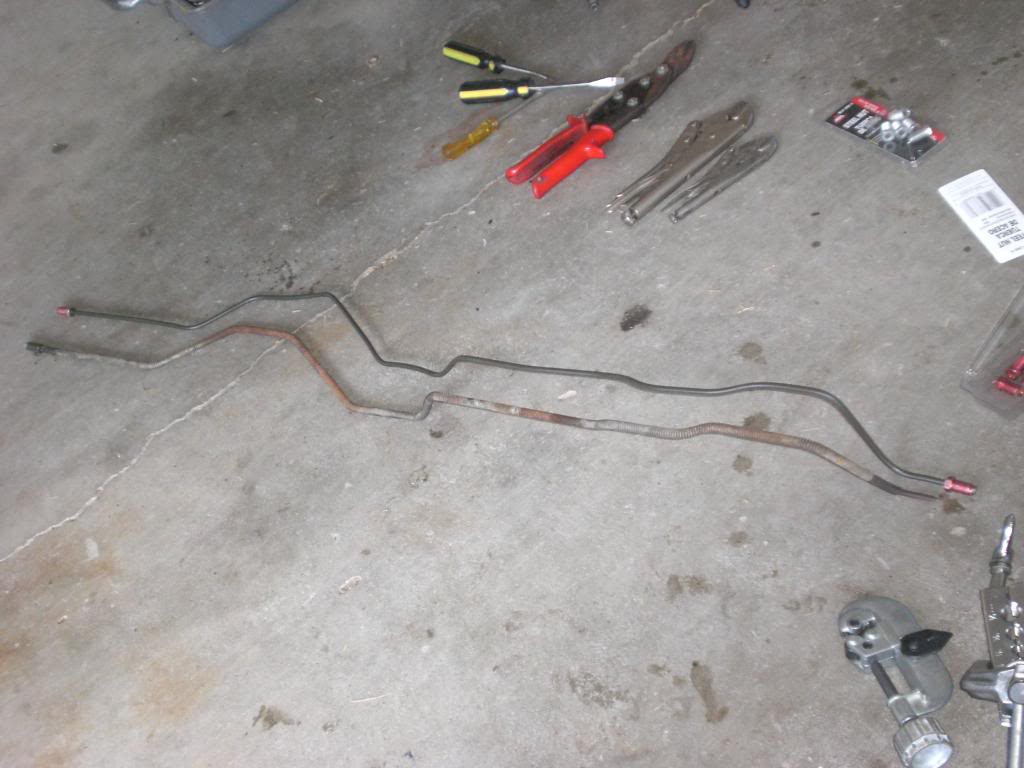
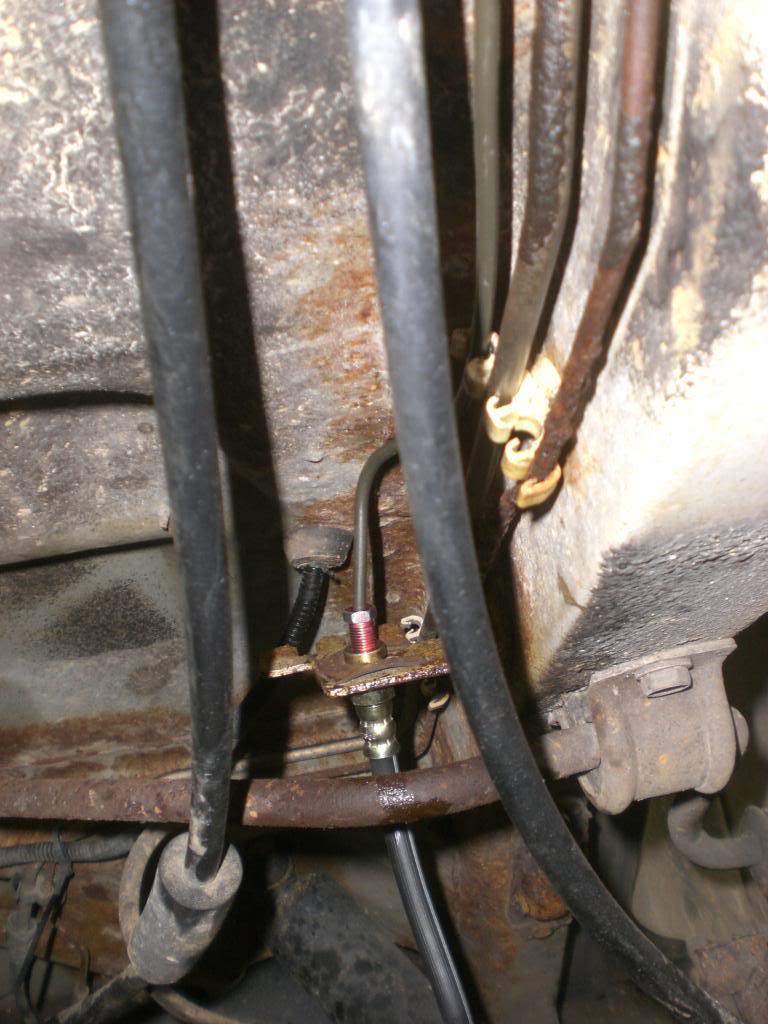
The OEM passenger side line broke upon removal so that had to be made new. There was a coiled sheath on the original line that I didn’t have for the new one. Not wanting any rubbing to make a mess, I used a piece of leftover gas hose to make a sheath for the tubing where it passed through the hold down bracket.
The OEM passenger side line broke upon removal so that had to be made new. There was a coiled sheath on the original line that I didn’t have for the new one. Not wanting any rubbing to make a mess, I used a piece of leftover gas hose to make a sheath for the tubing where it passed through the hold down bracket.
 09-12-2010, 10:36 AM
#17
Senior Member
Thread Starter
Join Date: Jun 2010
Location: Slaughter, LA
Posts: 849
Likes: 0
Received 0 Likes
on
0 Posts
Year: 1997
Model: Cherokee
Engine: 4.0L
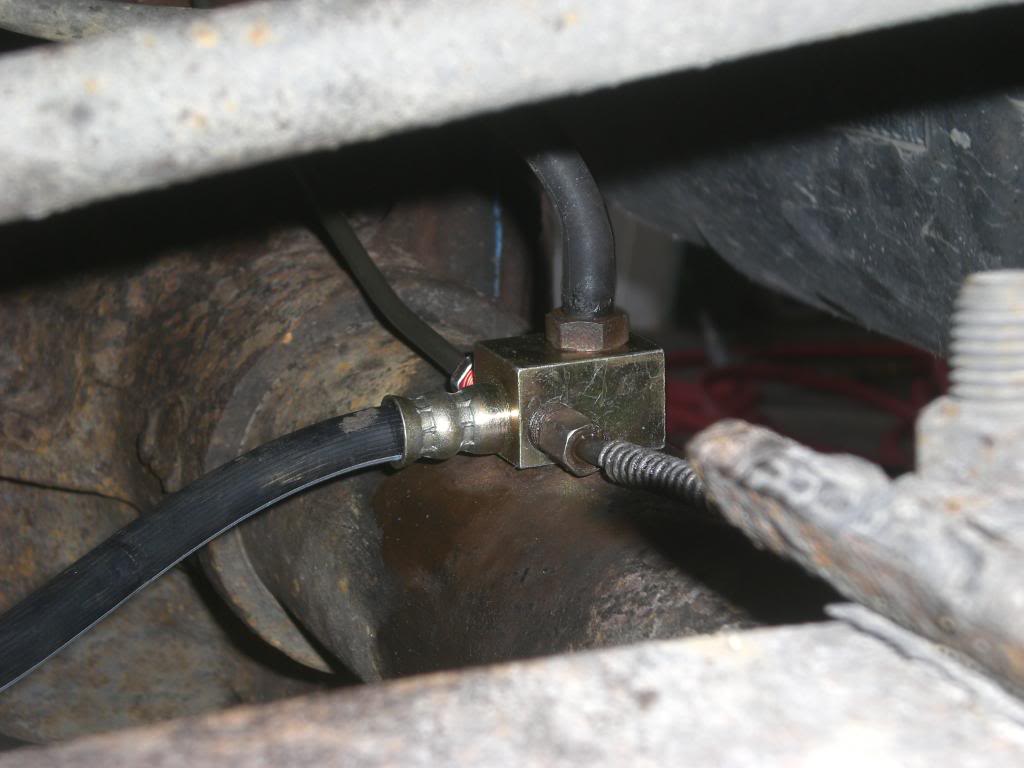
After the axle lines were completed and not rubbing on anything. (VERY IMPORTANT ABRASION IS BAD.) I started to run the main line from the proportioning valve.
First, I removed the old line and saved the special fitting from the valve. You’ll need to reuse it as it is an oddball size compared to the 3/8-24 threads everywhere else.
Then I ran the tubing from the front to the back, threading it through all of the required holders until I could attach a new fitting and make the final bend to hook it to the new rubber hose:
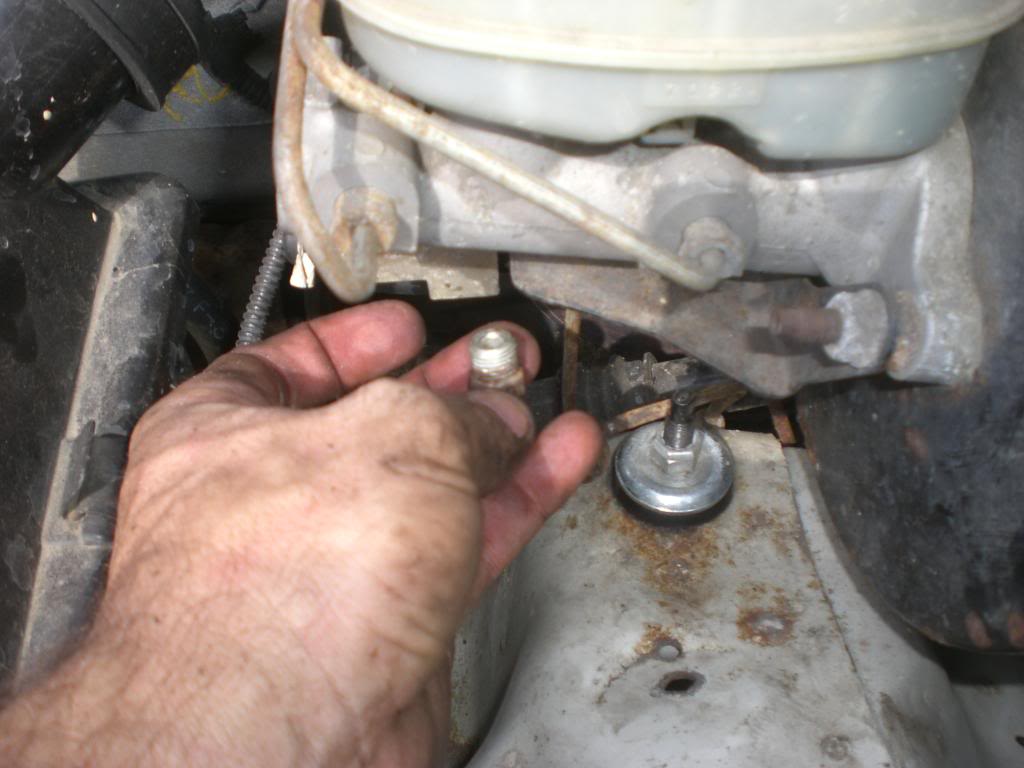
I then spent the next 30 minutes wailing and gnashing my teeth as I cross threaded the special fitting in to the proportioning valve on my first attempt. I finally got it to go in straight and here is what it looked like afterwards.
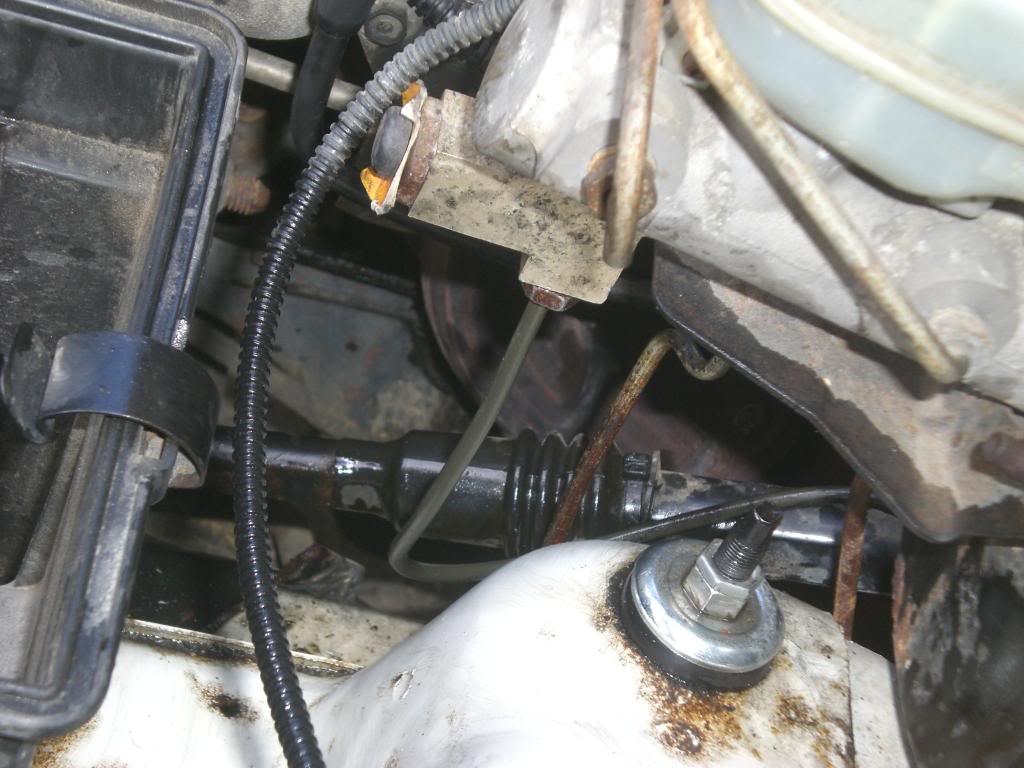
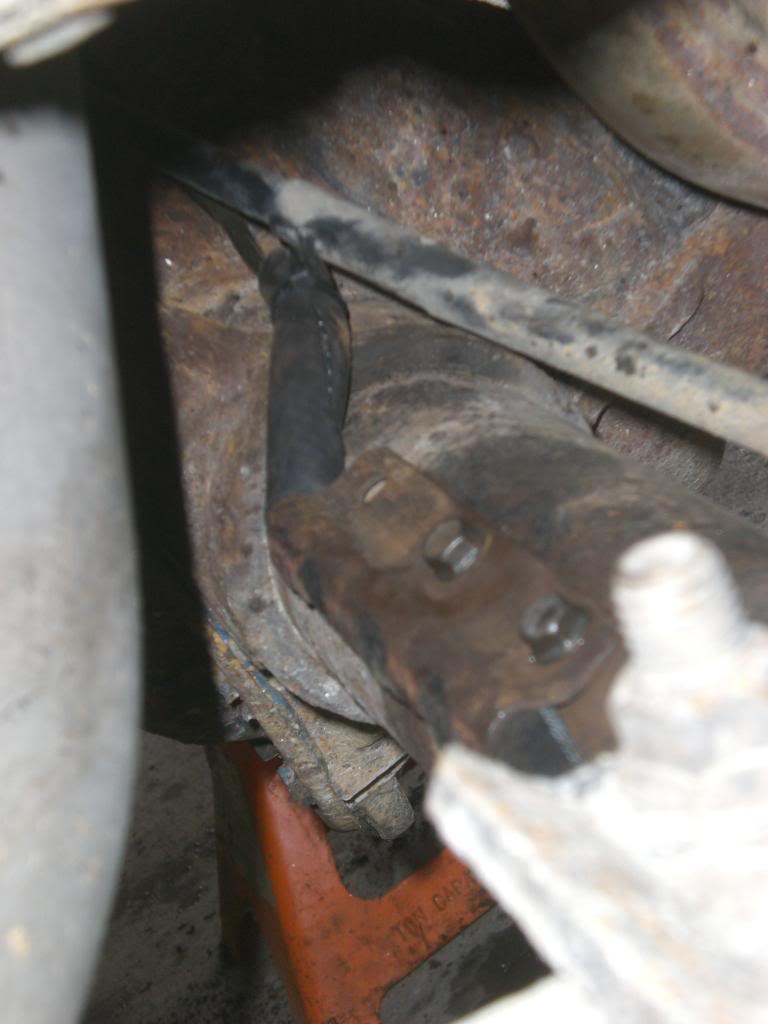
I then went back over the entire route to make sure that nothing was rubbing and that the new tube was staying in the holders properly.
First, I removed the old line and saved the special fitting from the valve. You’ll need to reuse it as it is an oddball size compared to the 3/8-24 threads everywhere else.
Then I ran the tubing from the front to the back, threading it through all of the required holders until I could attach a new fitting and make the final bend to hook it to the new rubber hose:
I then spent the next 30 minutes wailing and gnashing my teeth as I cross threaded the special fitting in to the proportioning valve on my first attempt. I finally got it to go in straight and here is what it looked like afterwards.
I then went back over the entire route to make sure that nothing was rubbing and that the new tube was staying in the holders properly.
09-12-2010, 10:37 AM
#18
Senior Member
Thread Starter
Join Date: Jun 2010
Location: Slaughter, LA
Posts: 849
Likes: 0
Received 0 Likes
on
0 Posts
Year: 1997
Model: Cherokee
Engine: 4.0L
After that, I refilled the master cylinder, and using my vacuum bleeder, drew the fluid to the new wheel cylinders starting with the passenger side and finishing on the driver’s side. This can also be accomplished with one person pumping and holding the pedal and another person modulating the bleeder screws.
Now is the time to put the wheels back on. Then pump the brakes a few times to center the shoes.
Once the brakes were bled, there is still one step left. Drum brakes are auto-adjusting. Generally, when you stop while going in reverse, that cable adjuster mechanism, (remember the pain in the *** that routes over the little cable tray?) ratchets the star wheel to keep the brakes the correct distance from the drum. Unless you want a spongy pedal until they self adjust, you need to go back into the star wheel area and spin the wheel top to bottom to spread the shoes until they are just barely dragging when you spin the wheels.
After you have adjusted the star wheels properly, you should recheck for leaks, top up the master cylinder and get ready to feel the wonders of a new brake system.
Oh, and I finished up the leftovers in the fridge while I was waiting for you to do the other drum assembly. I didn’t think you’d mind.
05-07-2011, 03:30 PM
#19
Senior Member
Thread Starter
Join Date: Jun 2010
Location: Slaughter, LA
Posts: 849
Likes: 0
Received 0 Likes
on
0 Posts
Year: 1997
Model: Cherokee
Engine: 4.0L
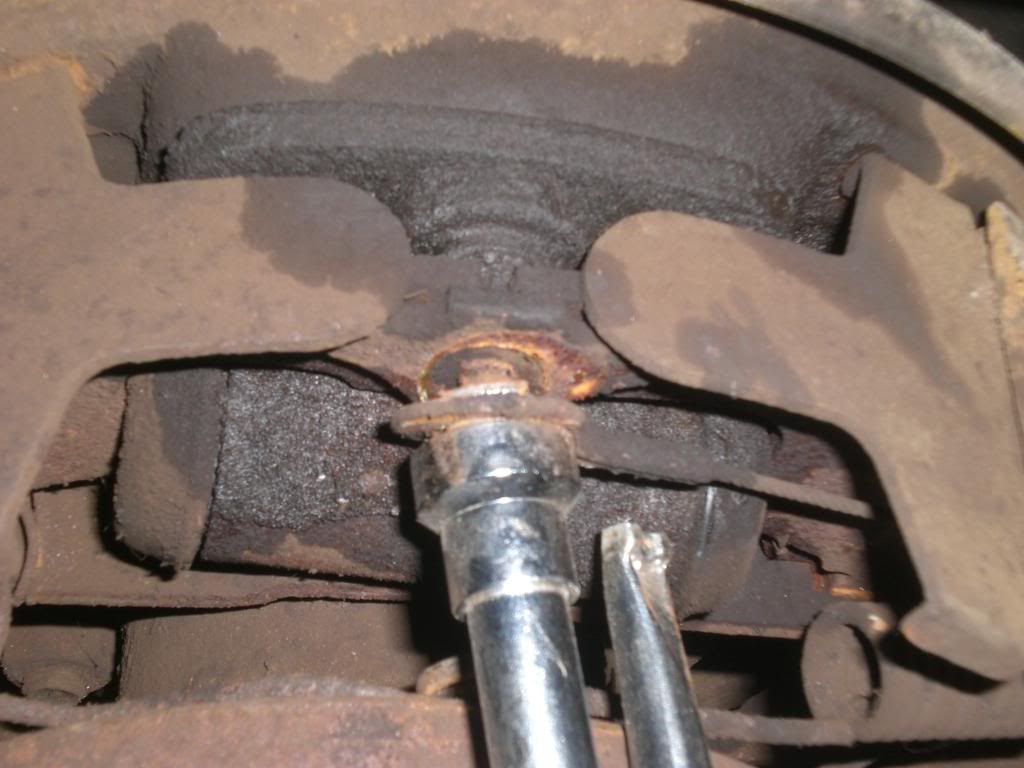
First remove the springs from the pin at the top:

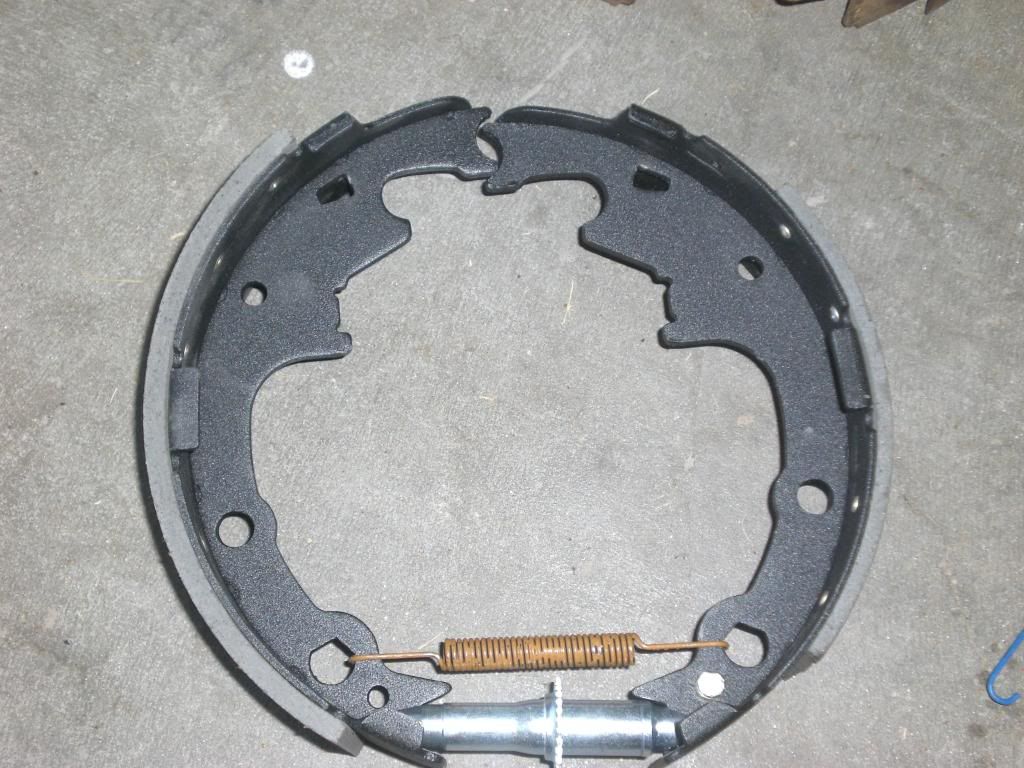
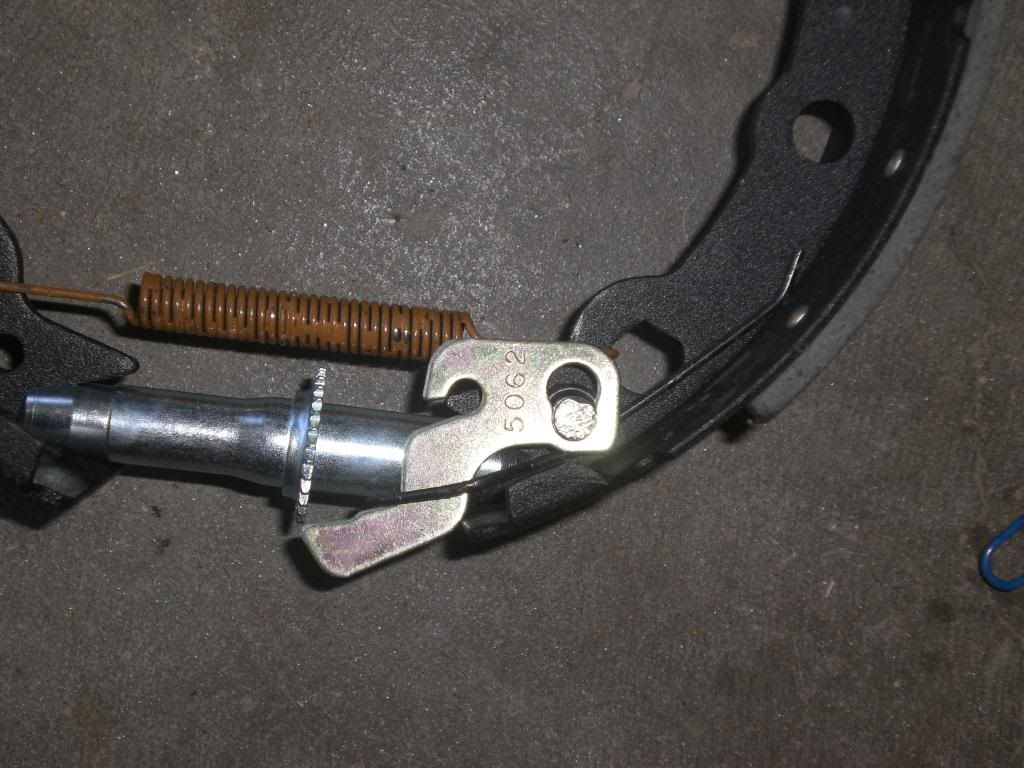
Then remove the wear adjuster cable:
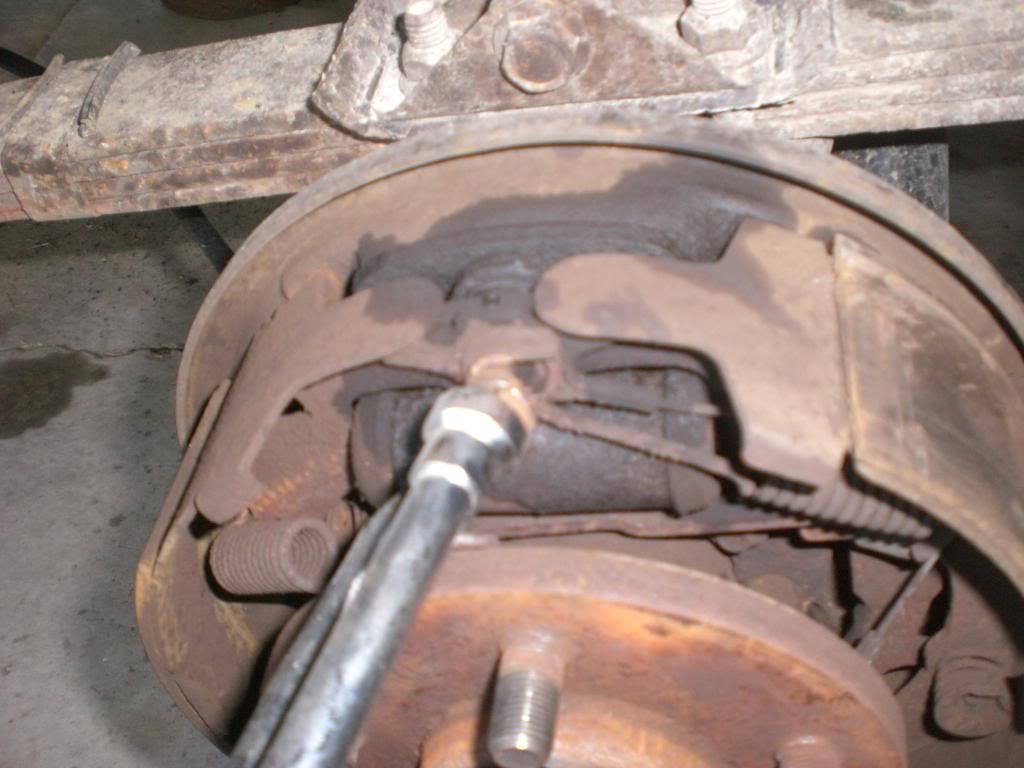
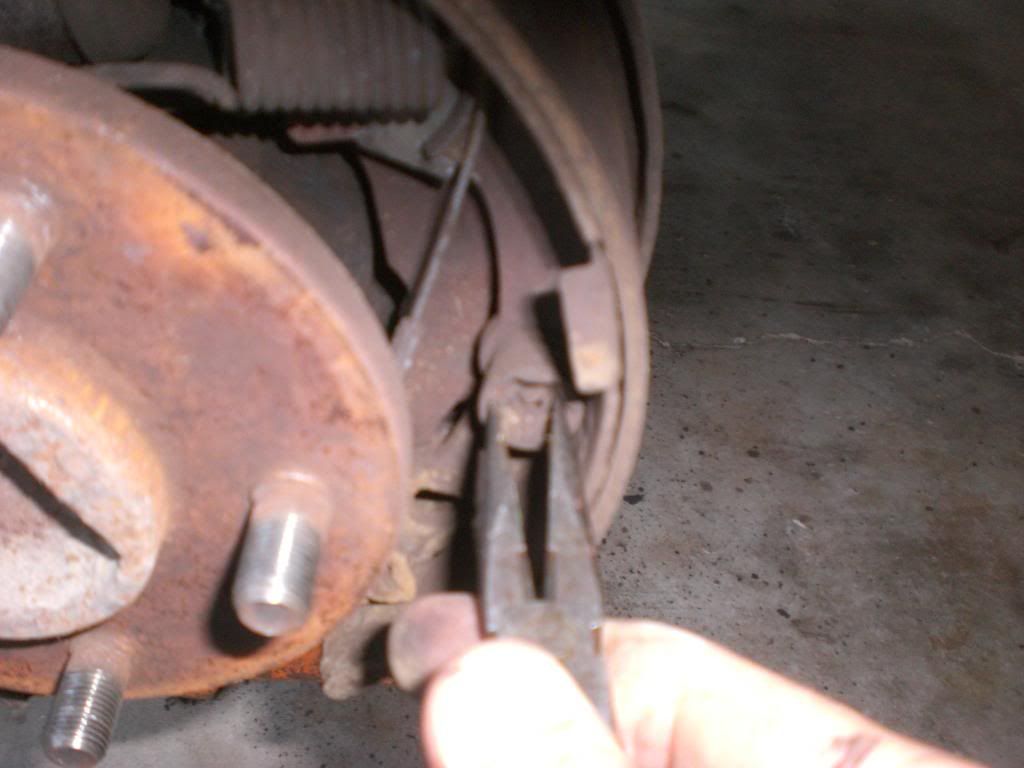
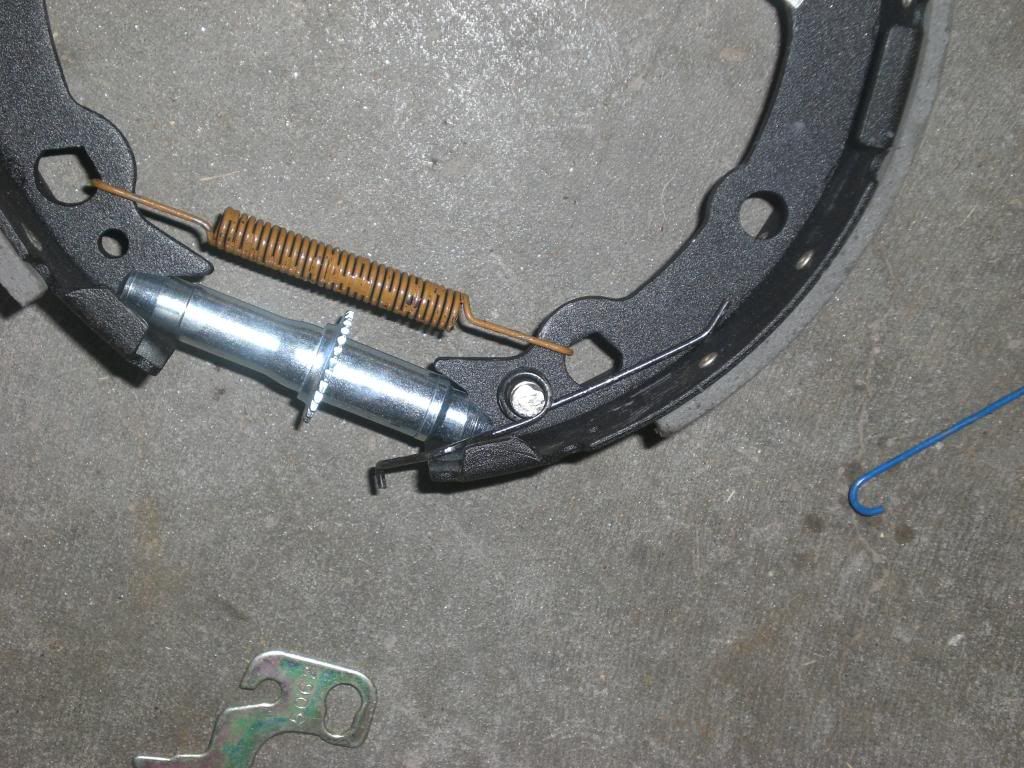
Then remove the spring/pin assemblies on each shoe. The caps must be pushed in and the pins rotated 90 degrees to free them up. You can see that the springs on mine were rusted and broken:
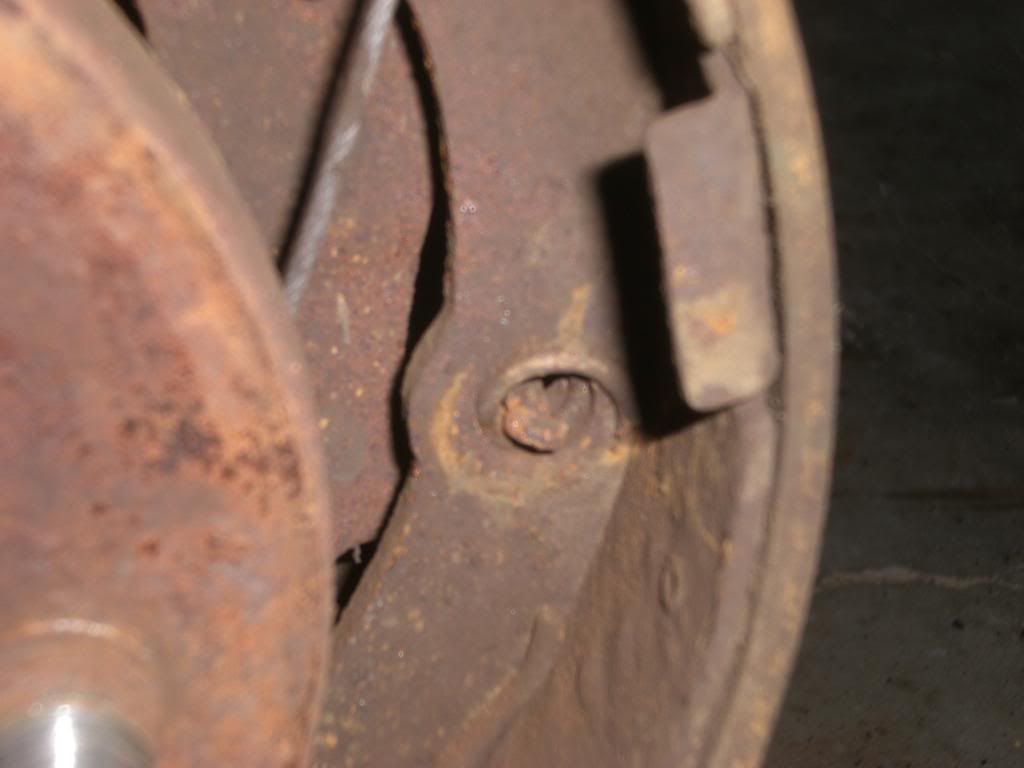
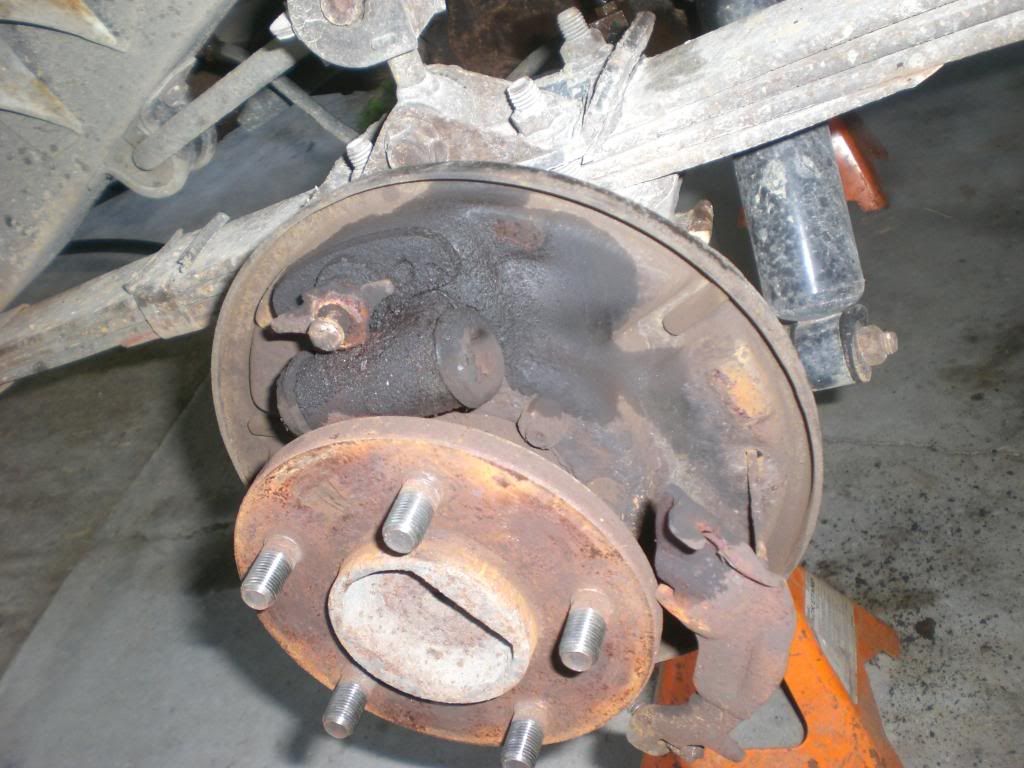
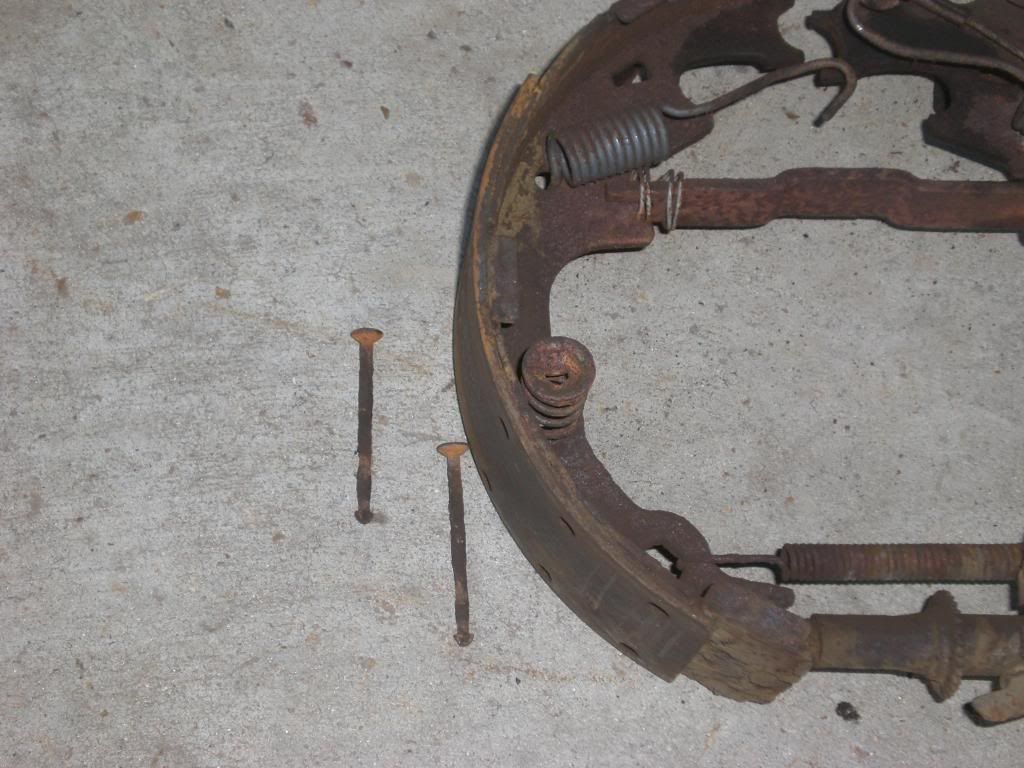
Now you should be able to remove the drums as a unit by spreading them apart and pulling the down and out over the axle. Remember that the emergency brake actuator must be twisted about 45 degrees for it to disengage from the rear shoe. You can see the actuator hanging on the right side of the backplate:
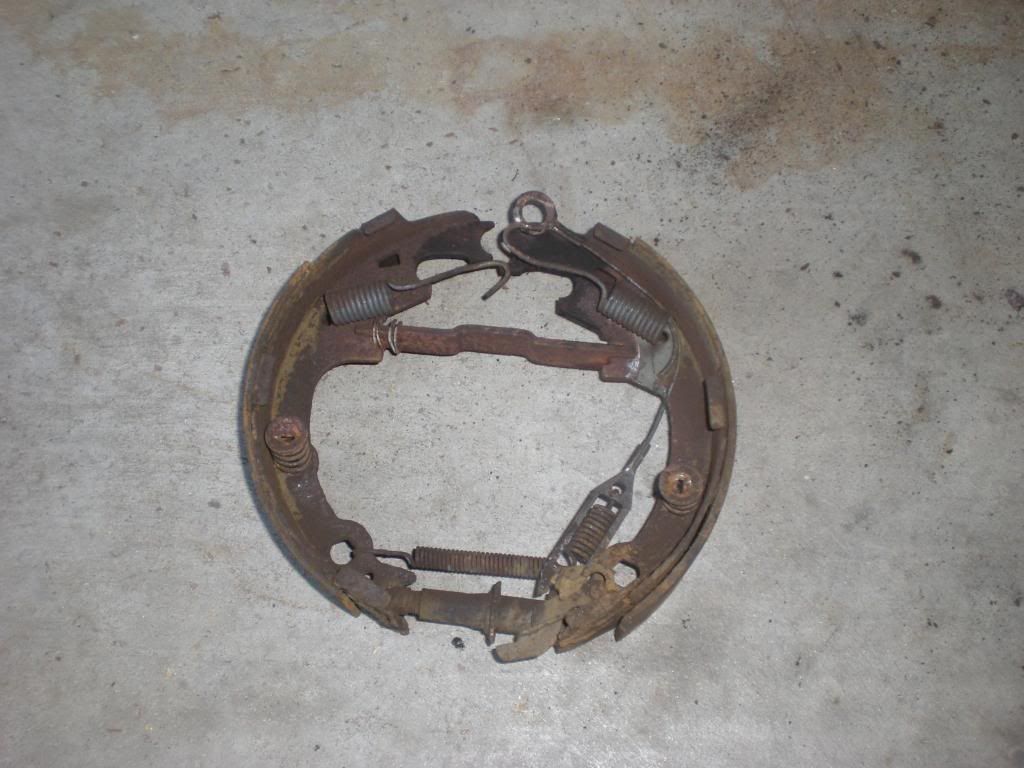
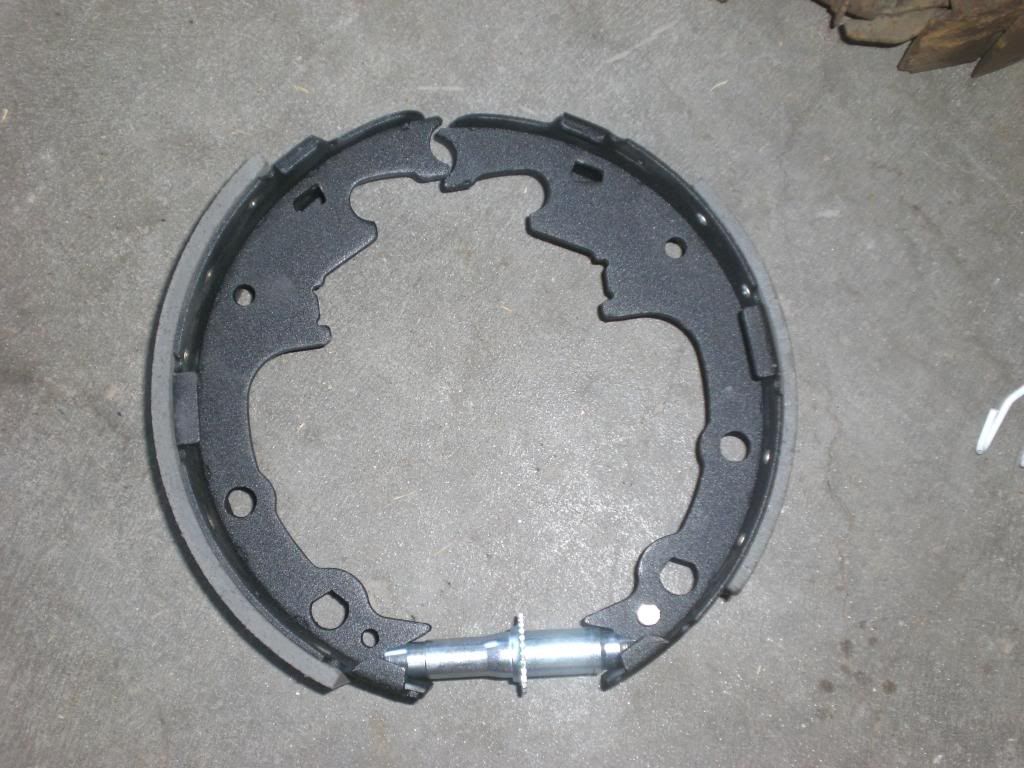
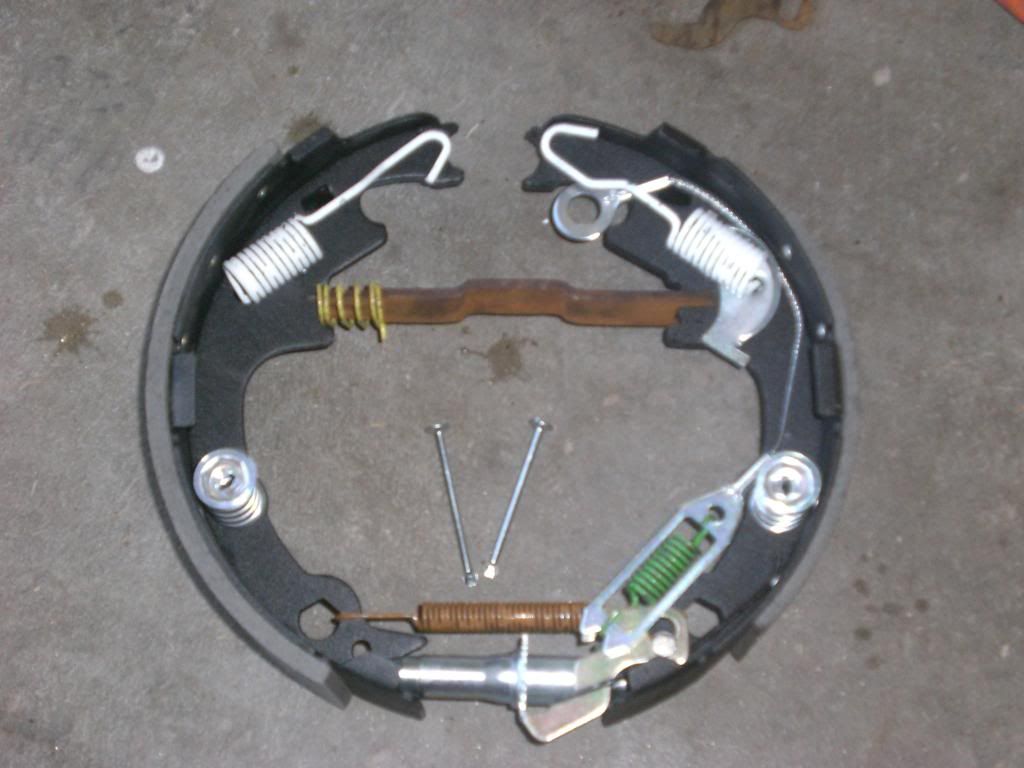
Here is what you just removed:
The pins that held the shoes in place with the 90 degree locking caps just push out the back:
Then remove the wear adjuster cable:
Then remove the spring/pin assemblies on each shoe. The caps must be pushed in and the pins rotated 90 degrees to free them up. You can see that the springs on mine were rusted and broken:
Now you should be able to remove the drums as a unit by spreading them apart and pulling the down and out over the axle. Remember that the emergency brake actuator must be twisted about 45 degrees for it to disengage from the rear shoe. You can see the actuator hanging on the right side of the backplate:
Here is what you just removed:
The pins that held the shoes in place with the 90 degree locking caps just push out the back:
That being said, until member 13667 noticed it and asked me about it, I hadn't noticed. My Jeep is still driving fine and braking great. I don't intend to change it until I need to do the rear brakes again.
Just wanted to bring it to the attention of anyone who might refer to this when working on their brakes.
Thanks!

Thread
Thread Starter
Forum
Replies
Last Post
JeepsAreForSpeed
Stock XJ Cherokee Tech. All XJ Non-modified/stock questions go here
7
08-04-2020 05:14 AM
Cane
Stock XJ Cherokee Tech. All XJ Non-modified/stock questions go here
40
08-26-2015 12:08 AM
Currently Active Users Viewing This Thread: 1 (0 members and 1 guests)