How to replace the drum brakes on your Chrysler 8.25
 09-12-2010, 10:17 AM
#1
Senior Member
Thread Starter

Join Date: Jun 2010
Location: Slaughter, LA
Posts: 849
Likes: 0
Received 0 Likes
on
0 Posts
Year: 1997
Model: Cherokee
Engine: 4.0L
Also known as, “How to lose all your hair and turn your Jeep into an undrivable disaster while screaming obscenities and gashing your knuckles.”
It is because of the second title to this thread that I am not recommending this procedure to anyone unless you have a minimum of mechanical knowledge and an extra vehicle. I am especially not recommending the brake line replacement portion of this procedure as even if it looks like it is correct, if the flares are not accomplished correctly, you are setting yourself up for a potentially nasty surprise down the road. (pun intended.)
If you’re still reading this, you must imagine that you know what you’re doing to some extent. (Or maybe like a train wreck, you just can’t look away.) Whatever.
The first thing that must happen is to investigate just how far you need to go with the parts replacement. My ’97 spent all of its life in Northern PA, so road salt and neglect took their toll. After the rusted line blew out, I looked at the rest of the system and decided that it wasn’t worth trying to salvage anything.
If you’re lucky and have a fairly rust free Jeep, you may only need to replace the shoes. That will be covered here. Because of the excessive iron oxide growth on mine, I chose to replace every single mechanical piece of the rear breaking system including all of the hydraulic lines back to the proportioning valve near the master cylinder. That will all be covered going forward.
DISCLAIMER: To replace the hydraulic lines, a DOUBLE FLARING kit MUST be used. I cannot emphasize this point enough. BRAKE LINES MUST BE DOUBLE FLARED. Compression fittings, although they will fit, are not rated for the high pressures of a braking system and are also illegal in most states for brake system applications. If you cannot fabricate the proper double flared tubing ends, DO NOT ATTEMPT TO REPLACE YOUR BRAKE LINES. I am not responsible for what may happen to you, your Jeep or anyone else if you choose to ignore this advice.
Alrighty. If you’re still with me let’s dig in.
 09-12-2010, 10:18 AM
#2
Senior Member
Thread Starter
Join Date: Jun 2010
Location: Slaughter, LA
Posts: 849
Likes: 0
Received 0 Likes
on
0 Posts
Year: 1997
Model: Cherokee
Engine: 4.0L
First thing to do is make coffee. Yes. I said make coffee. What? You think I’m doing this out of the goodness of my heart? If I’m going to be helping out here, I need something to drink and as this is going to take a while, it’s probably better if I don’t start drinking beer this early. So, get to it. I’ll wait.
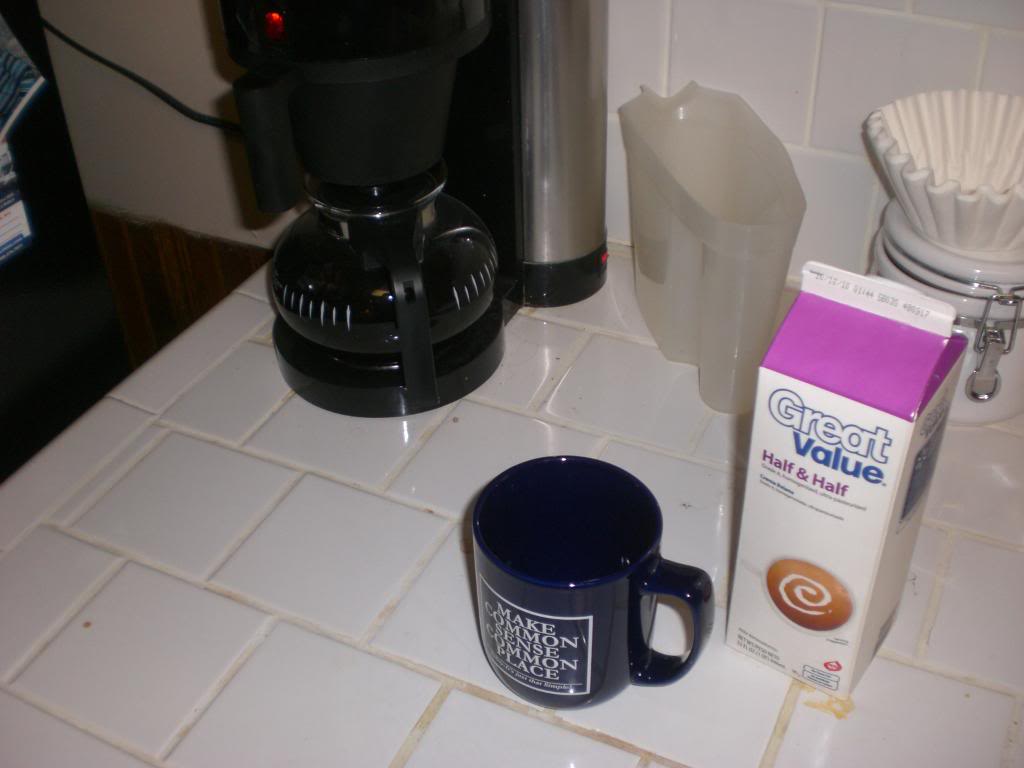

Perfect. You didn’t put sugar in this did you? Good.
Perfect. You didn’t put sugar in this did you? Good.
09-12-2010, 10:20 AM
#3
Senior Member
Thread Starter
Join Date: Jun 2010
Location: Slaughter, LA
Posts: 849
Likes: 0
Received 0 Likes
on
0 Posts
Year: 1997
Model: Cherokee
Engine: 4.0L
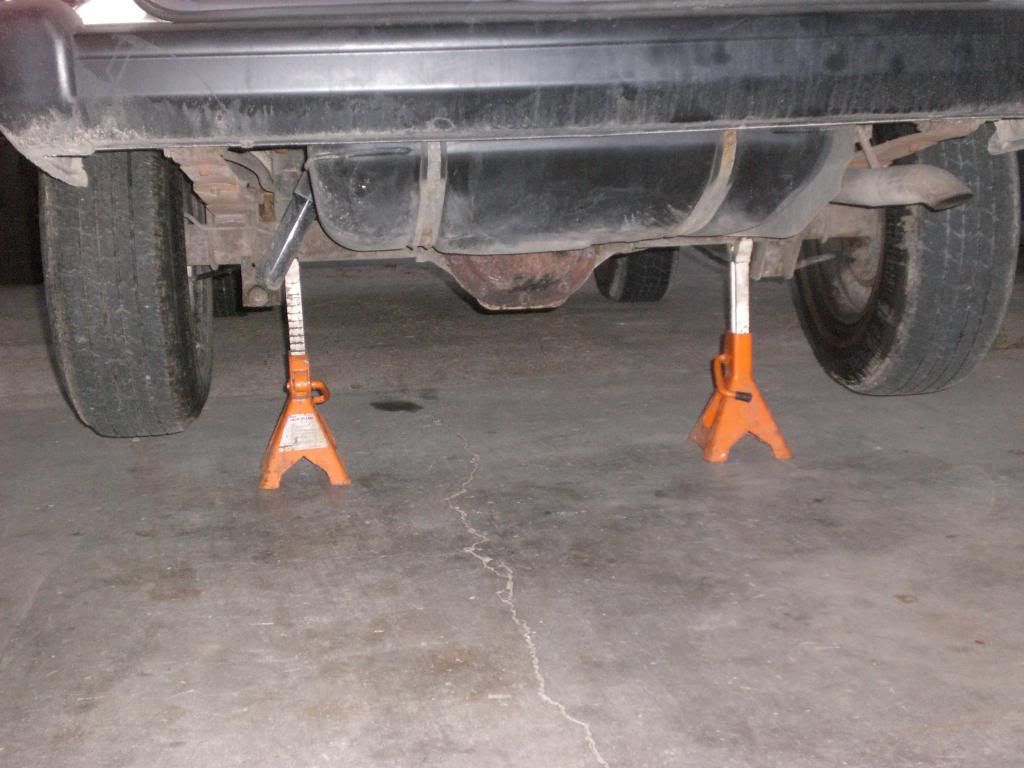
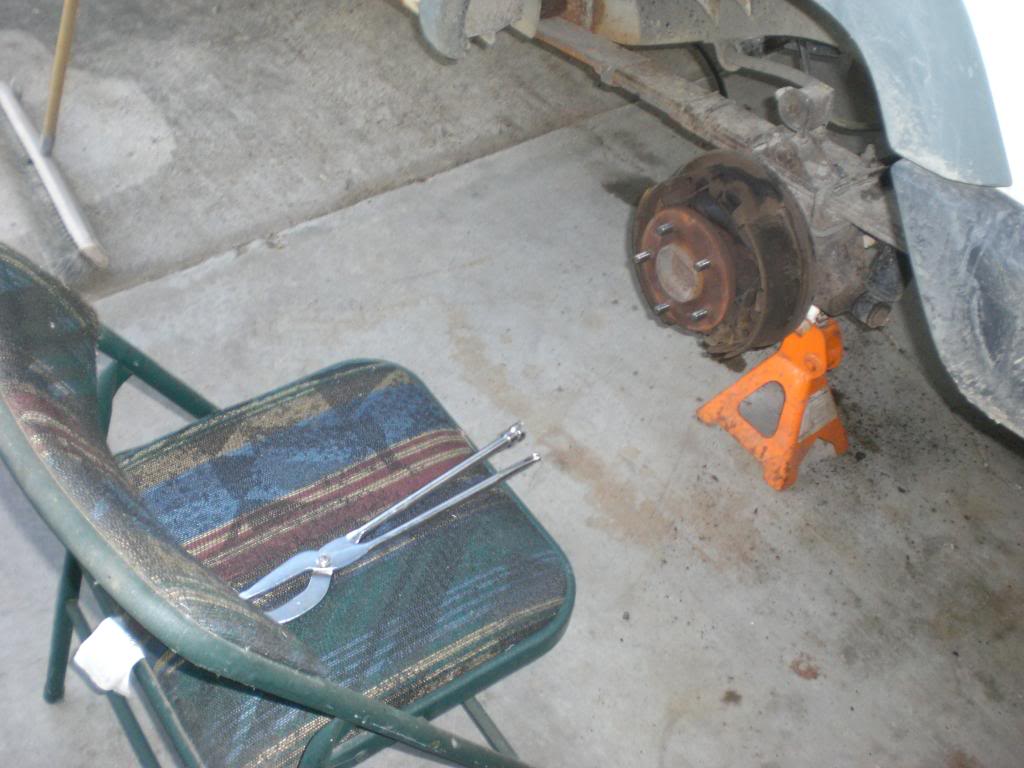
Next step is to set up the Jeep and workspace. Get the piggy on a decent surface that you won’t feel bad about rolling around on and set it as high as you can on stands.
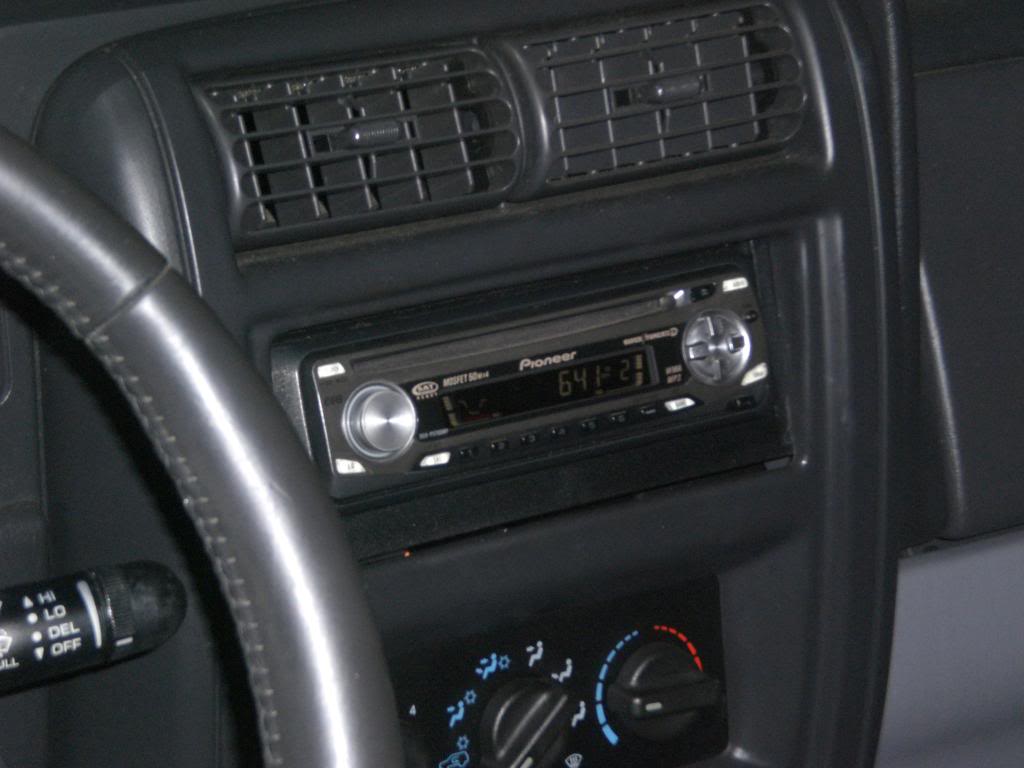
Then tune the radio to your favorite station. I prefer classic rock for this type of work but I’ll let you pick since it’s your house.
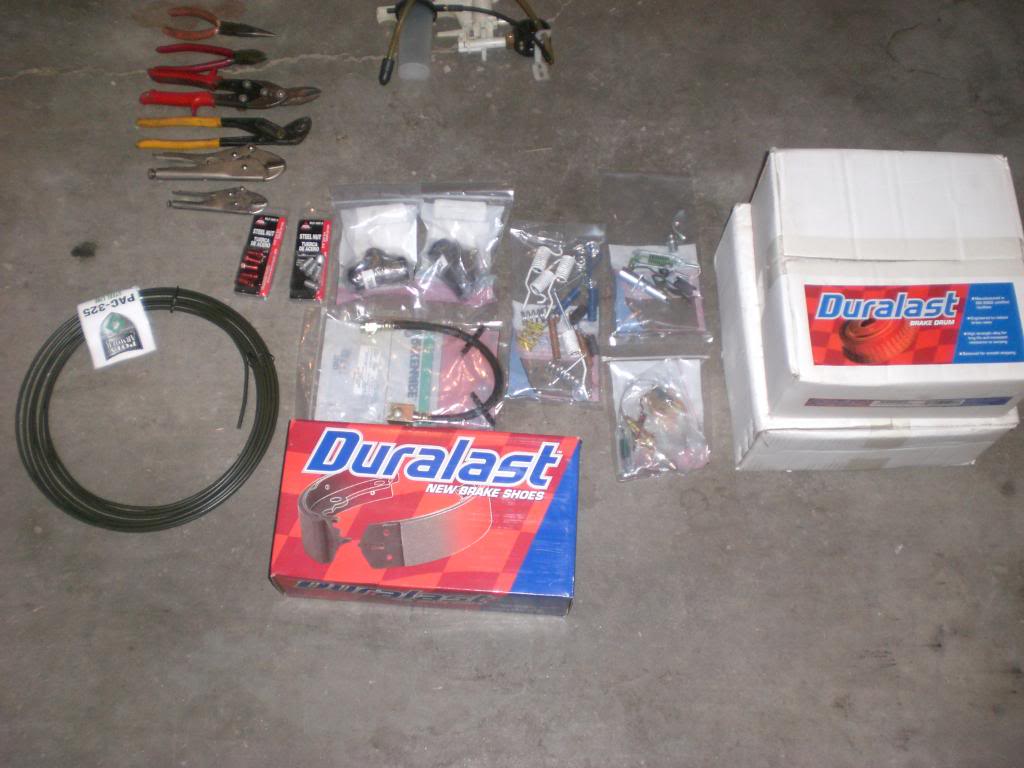
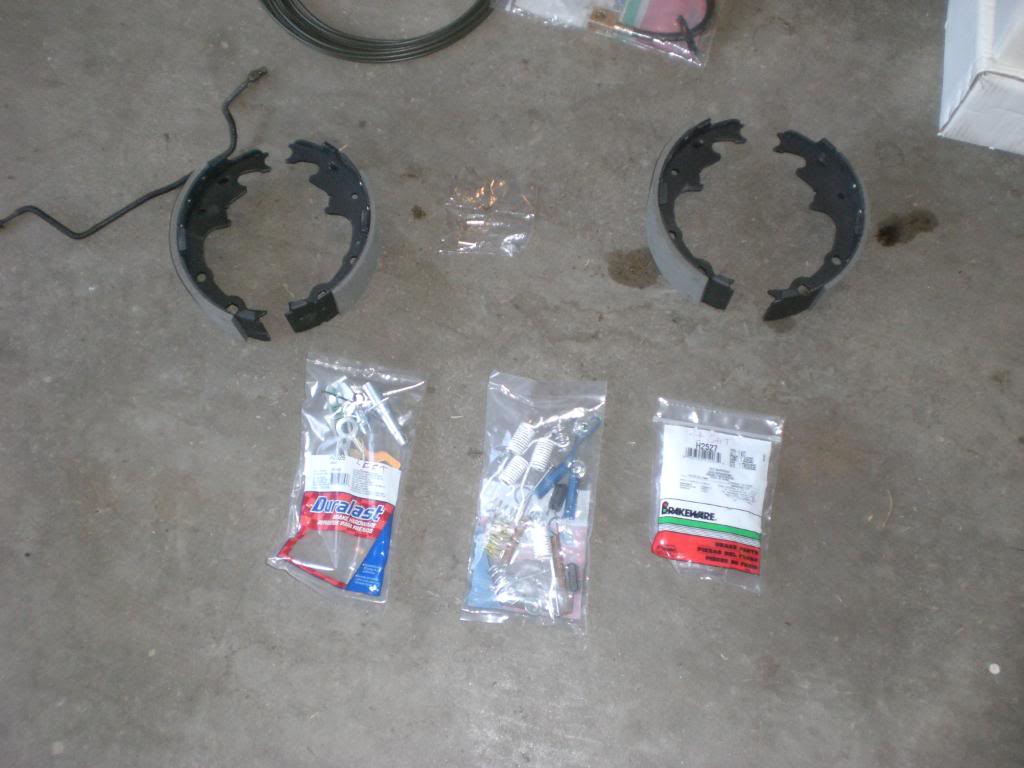
Now set out your tools.
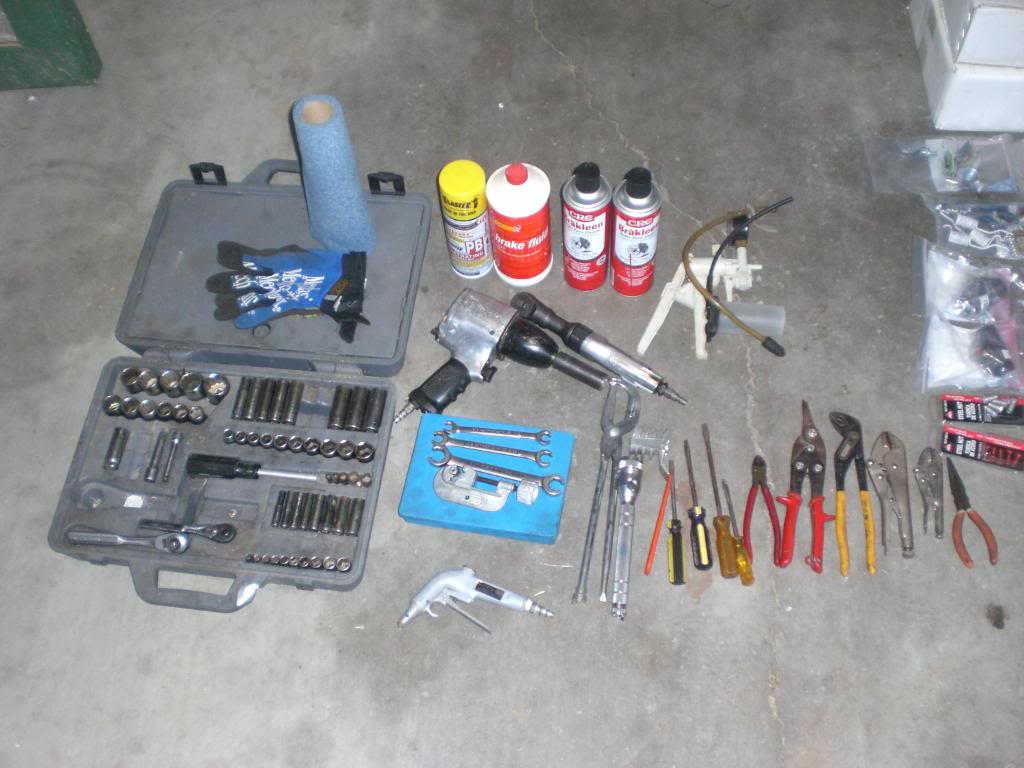
Because I expected the worst from mine because of the rust I got everything I could think of ready for hacking and slashing. You may or may not need all of this stuff.
Then set out the replacement parts:
Then tune the radio to your favorite station. I prefer classic rock for this type of work but I’ll let you pick since it’s your house.
Now set out your tools.
Because I expected the worst from mine because of the rust I got everything I could think of ready for hacking and slashing. You may or may not need all of this stuff.
Then set out the replacement parts:
09-12-2010, 10:21 AM
#4
Senior Member
Thread Starter
Join Date: Jun 2010
Location: Slaughter, LA
Posts: 849
Likes: 0
Received 0 Likes
on
0 Posts
Year: 1997
Model: Cherokee
Engine: 4.0L
Now we’re ready to start. Remove the wheels. I didn’t think you’d need a picture to figure out how to accomplish that so that’s all I’m going to say.
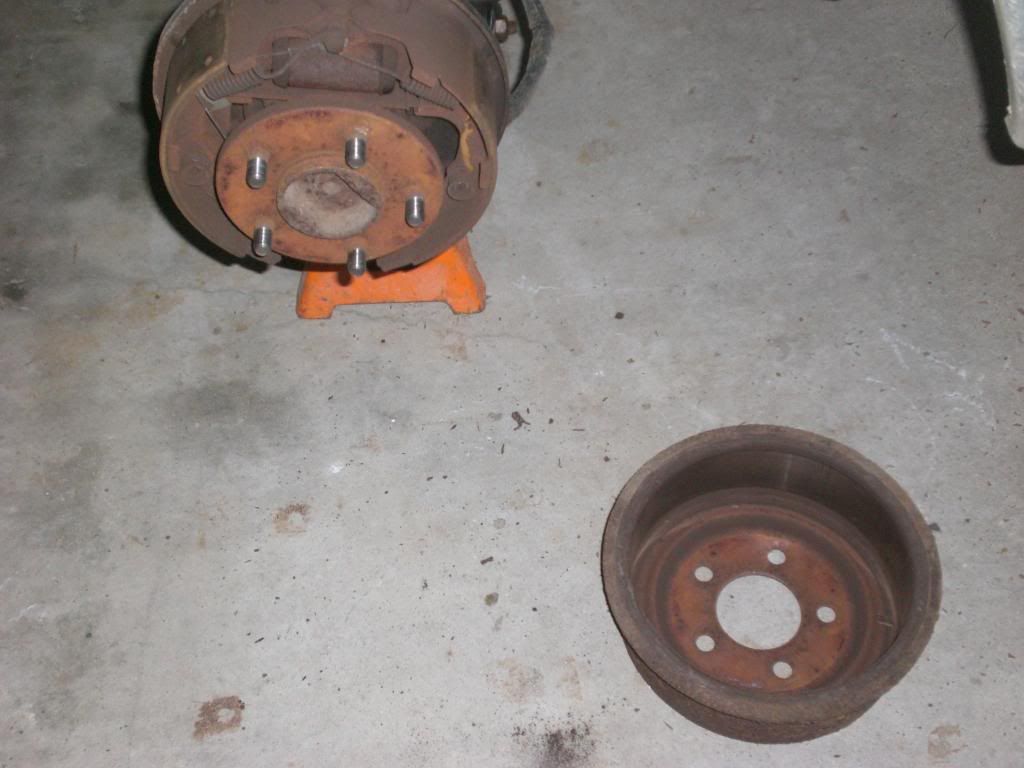
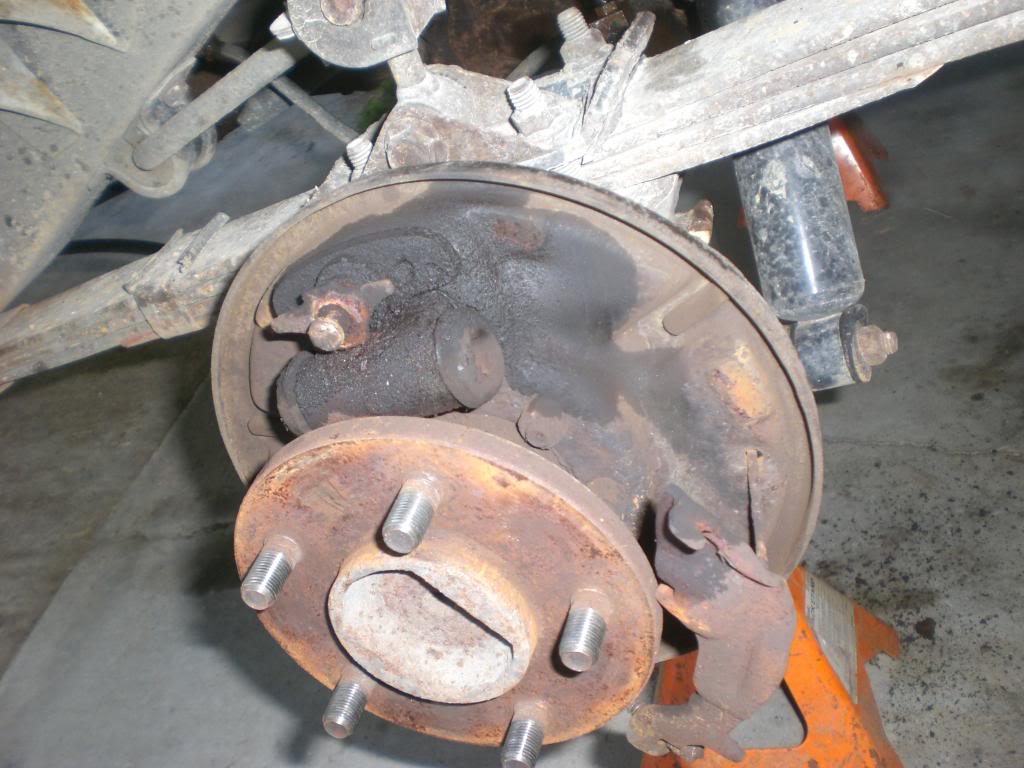
Next, it’s time to remove the drums. The drums are not attached to anything. They are just slipped over the shoes and studs. I got lucky and neither of mine was rusted to the axle. If yours seem to be welded in place, PB Blaster around the studs and beat on the drum between the studs with a hammer while pulling the drum towards you. They will eventually come loose. Be careful not to damage the back plate. You don’t want to have to replace that as well.
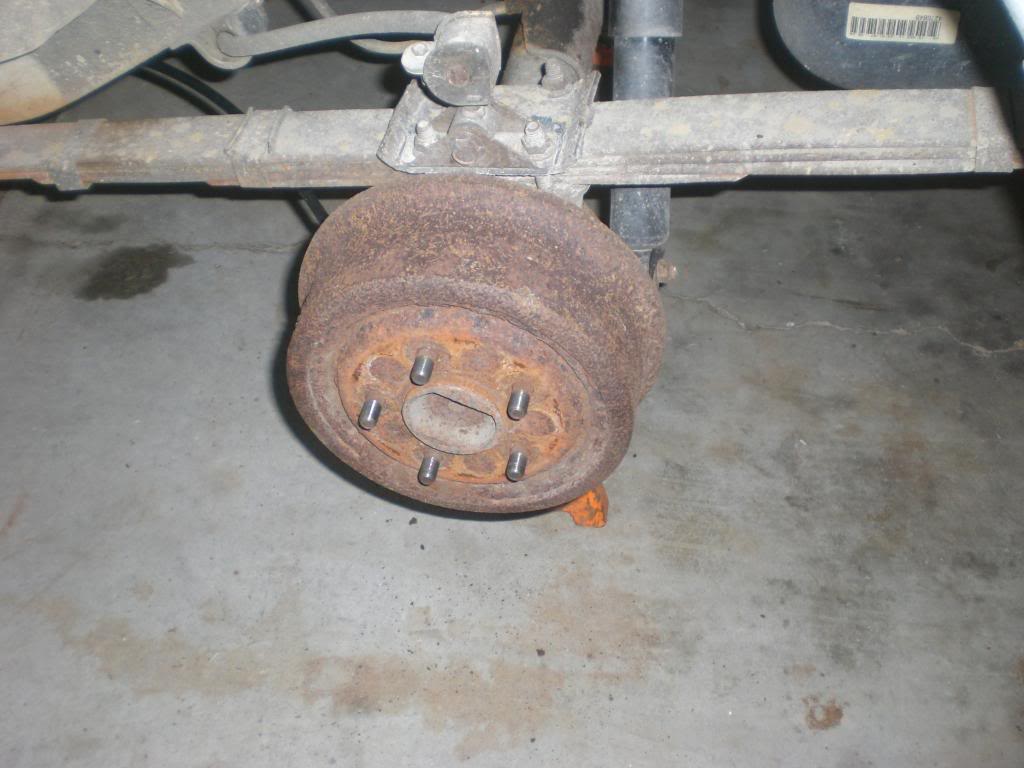
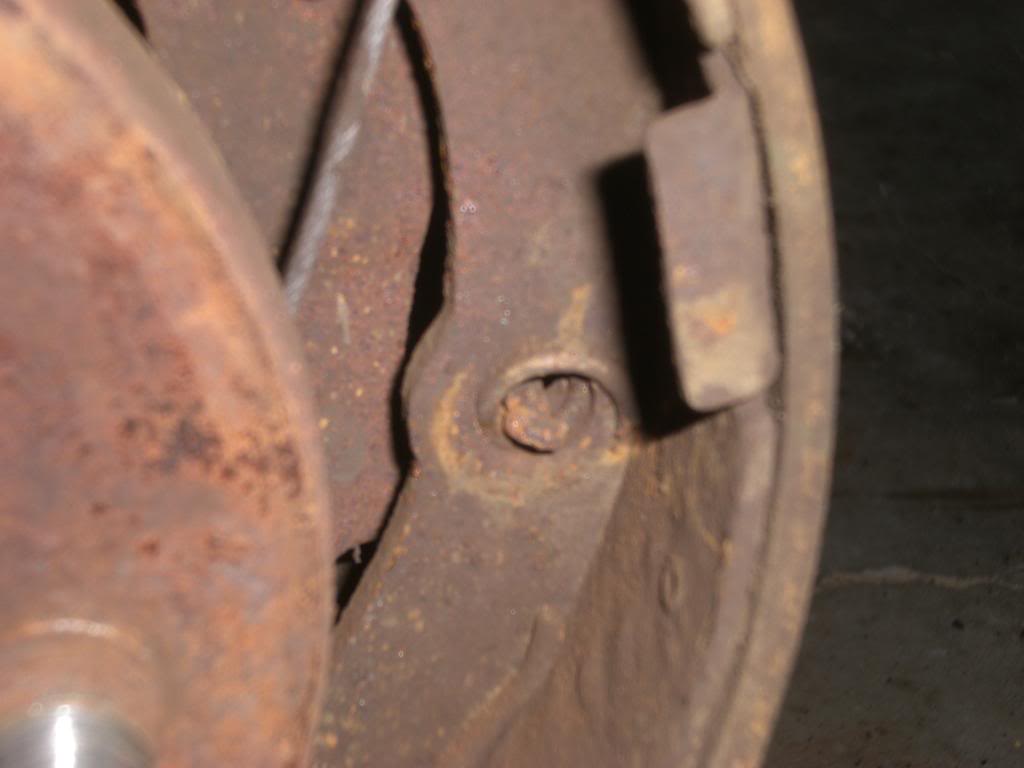
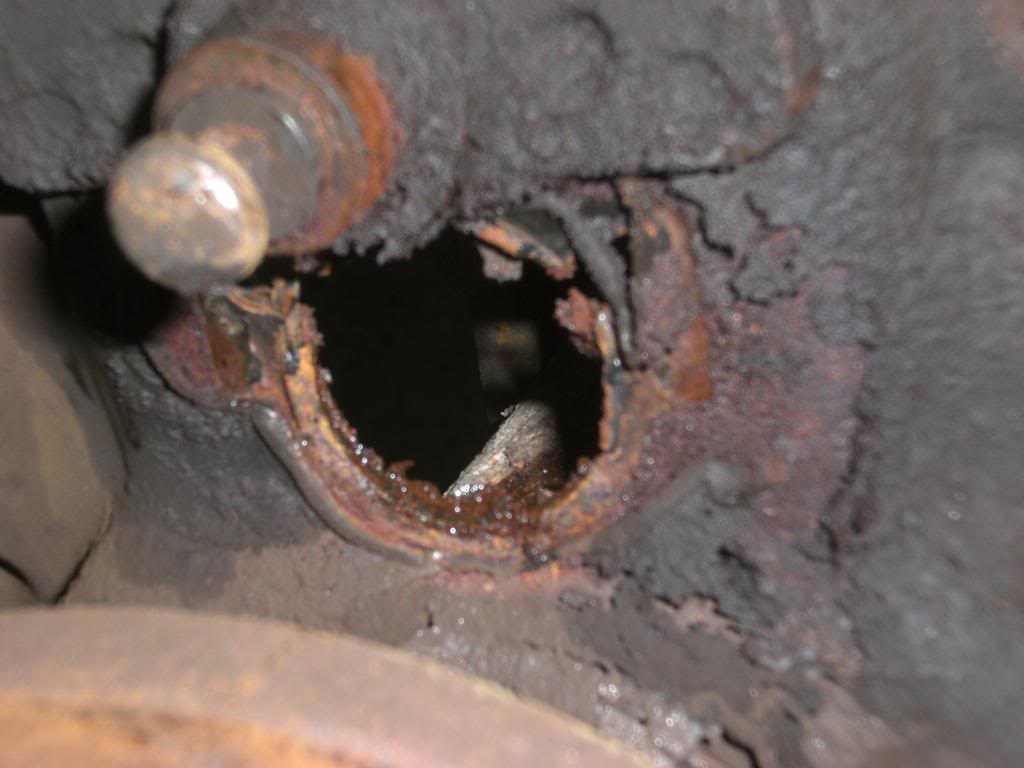
The second part of the drum removal that can cause hair removal is that the shoes may have carved a groove in the drum from normal wear and will not allow the drum to come off even if it is loose from the axle. If this is the case, you need to get a screwdriver and look at the bottom of the backplate for a rubber plug. Remove the plug and, with a flashlight, look for the star wheel adjuster. Spin the star wheel from bottom to top to loosen shoes and that should allow the drum to finally be pulled off the axle. There should be a rubber plug in the hole to keep out water. This one was missing and is probably the reason that the star wheel was seized.
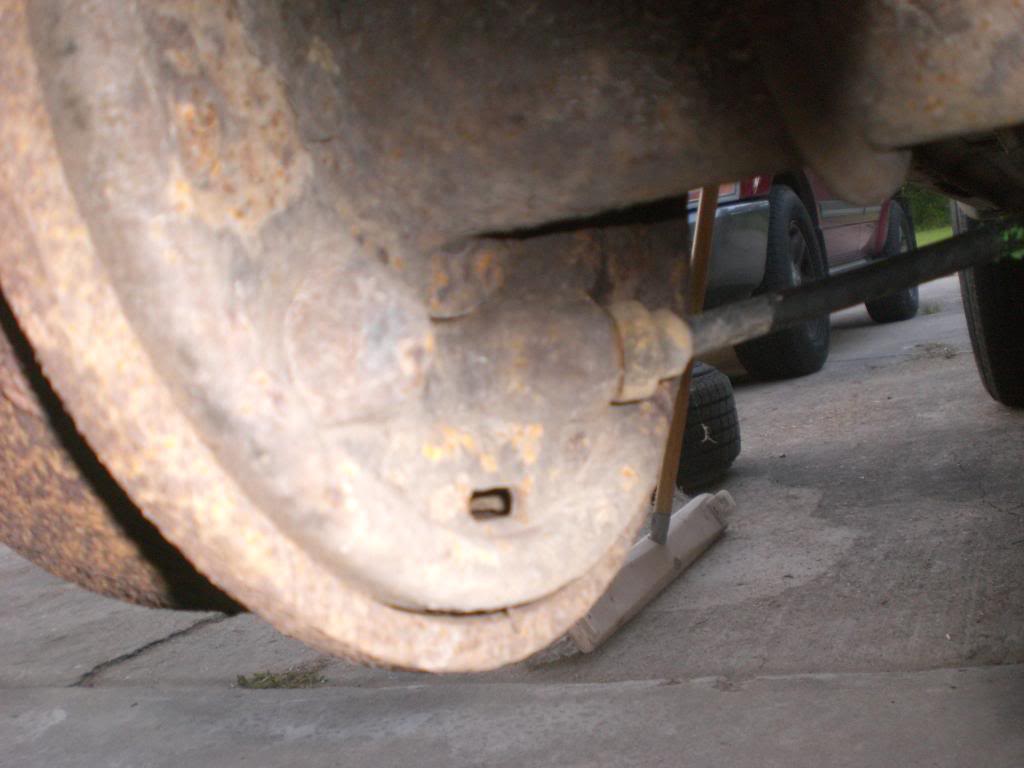
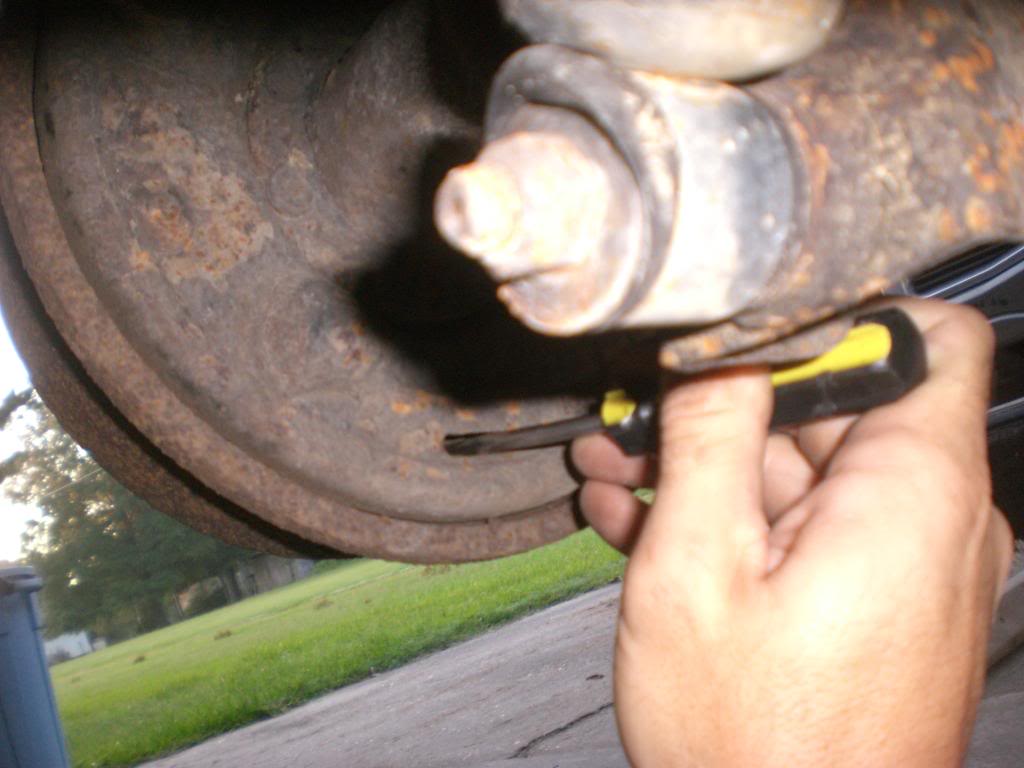
Of course, if the star wheel is rusted solid, you may just have to apply excessive force to the drum to drag it off over the shoes.
Now you should be here on both sides:
Next, it’s time to remove the drums. The drums are not attached to anything. They are just slipped over the shoes and studs. I got lucky and neither of mine was rusted to the axle. If yours seem to be welded in place, PB Blaster around the studs and beat on the drum between the studs with a hammer while pulling the drum towards you. They will eventually come loose. Be careful not to damage the back plate. You don’t want to have to replace that as well.
The second part of the drum removal that can cause hair removal is that the shoes may have carved a groove in the drum from normal wear and will not allow the drum to come off even if it is loose from the axle. If this is the case, you need to get a screwdriver and look at the bottom of the backplate for a rubber plug. Remove the plug and, with a flashlight, look for the star wheel adjuster. Spin the star wheel from bottom to top to loosen shoes and that should allow the drum to finally be pulled off the axle. There should be a rubber plug in the hole to keep out water. This one was missing and is probably the reason that the star wheel was seized.
Of course, if the star wheel is rusted solid, you may just have to apply excessive force to the drum to drag it off over the shoes.
Now you should be here on both sides:
Last edited by 2Evil4U; 09-12-2010 at 10:41 AM.
09-12-2010, 10:22 AM
#5
Senior Member
Thread Starter
Join Date: Jun 2010
Location: Slaughter, LA
Posts: 849
Likes: 0
Received 0 Likes
on
0 Posts
Year: 1997
Model: Cherokee
Engine: 4.0L
This next part is the most important piece of advice pertaining to drum brakes that I’ve ever been given. I’m not even going to charge you for it. UNDER NO CIRCUMSTANCES WILL YOU EVER TAKE MORE THAN ONE SIDE OF A DRUM BRAKE AXLE APART AT ONE TIME. Period. Don’t do it. You will need the one that is still complete to refer to when reassembling the other. If you ignore this advice, you will shortly discover why the second title of this thread is what it is.
09-12-2010, 10:23 AM
#6
Senior Member
Thread Starter
Join Date: Jun 2010
Location: Slaughter, LA
Posts: 849
Likes: 0
Received 0 Likes
on
0 Posts
Year: 1997
Model: Cherokee
Engine: 4.0L
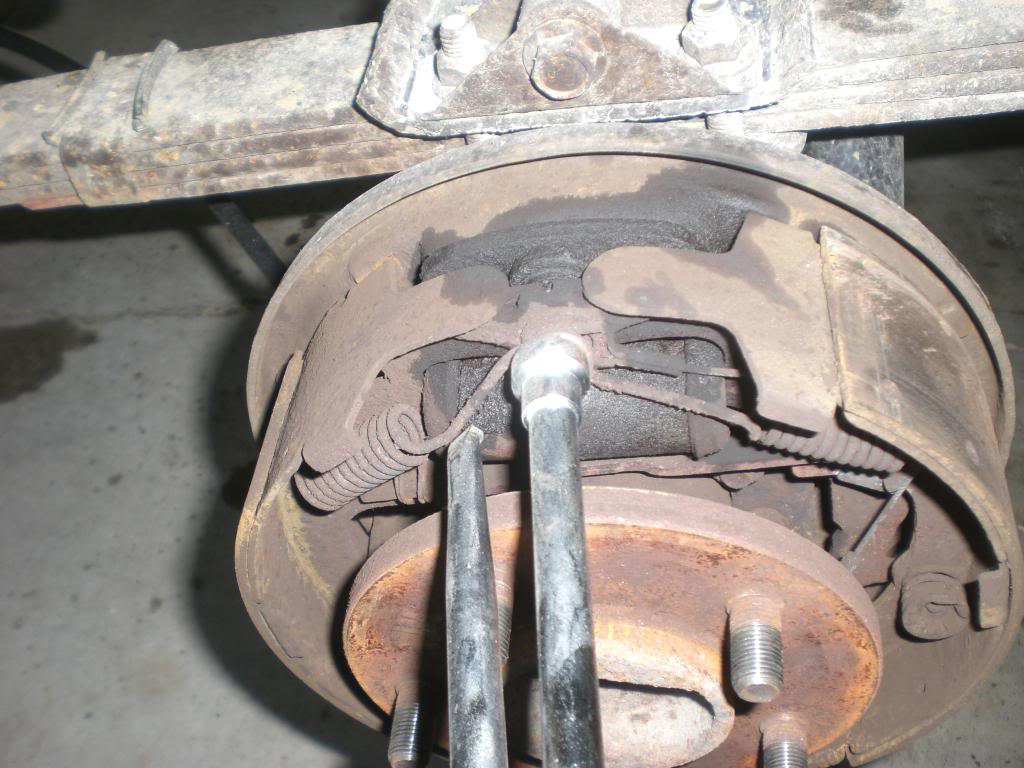
If you’re going to be replacing the lines, now’s the time to start PB Blastering them:
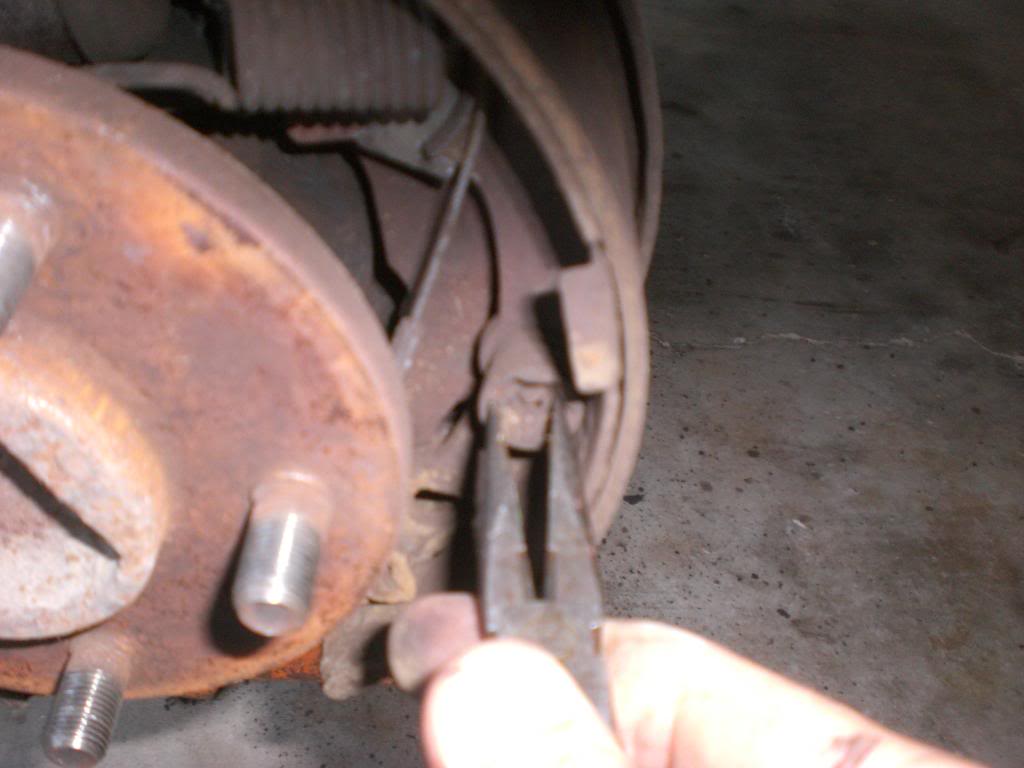
While that soaks, it’s now time to start remove the old junky brake shoes and mechanism. (ONE SIDE AT A TIME TO COMPLETION)
That weird tool is a drum brake plier. You don’t need one, but it does make removal and installation of the springs simple compared to a screwdriver.
While that soaks, it’s now time to start remove the old junky brake shoes and mechanism. (ONE SIDE AT A TIME TO COMPLETION)
That weird tool is a drum brake plier. You don’t need one, but it does make removal and installation of the springs simple compared to a screwdriver.
09-12-2010, 10:24 AM
#7
Senior Member
Thread Starter
Join Date: Jun 2010
Location: Slaughter, LA
Posts: 849
Likes: 0
Received 0 Likes
on
0 Posts
Year: 1997
Model: Cherokee
Engine: 4.0L
First remove the springs from the pin at the top:
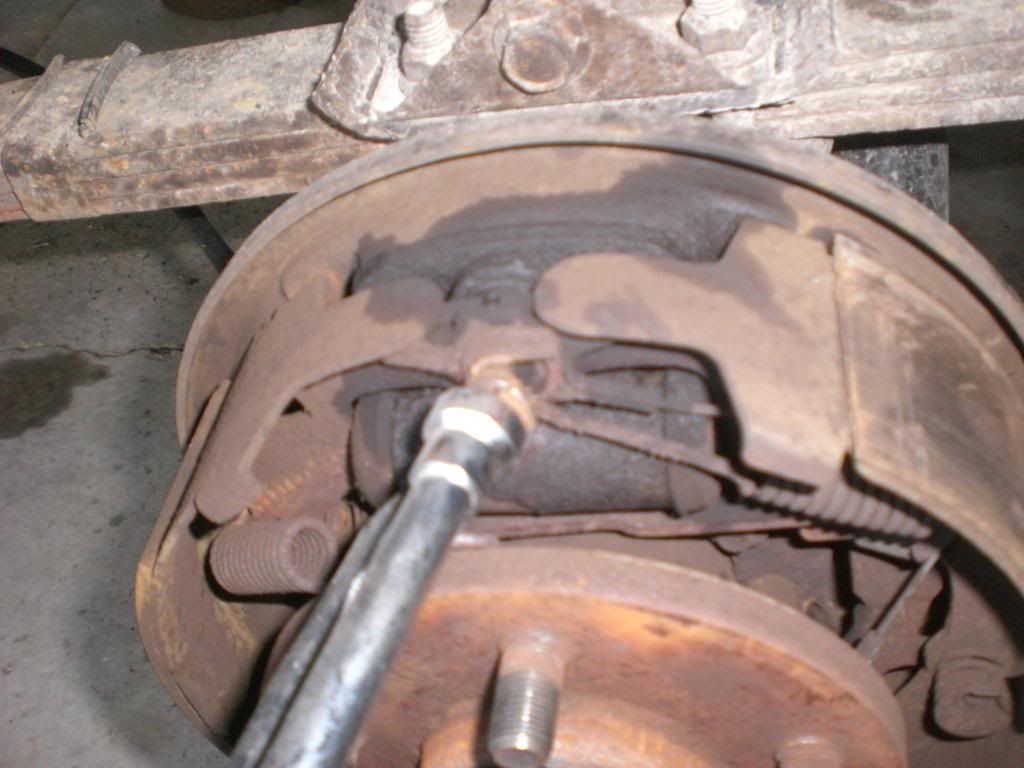
Then remove the wear adjuster cable:
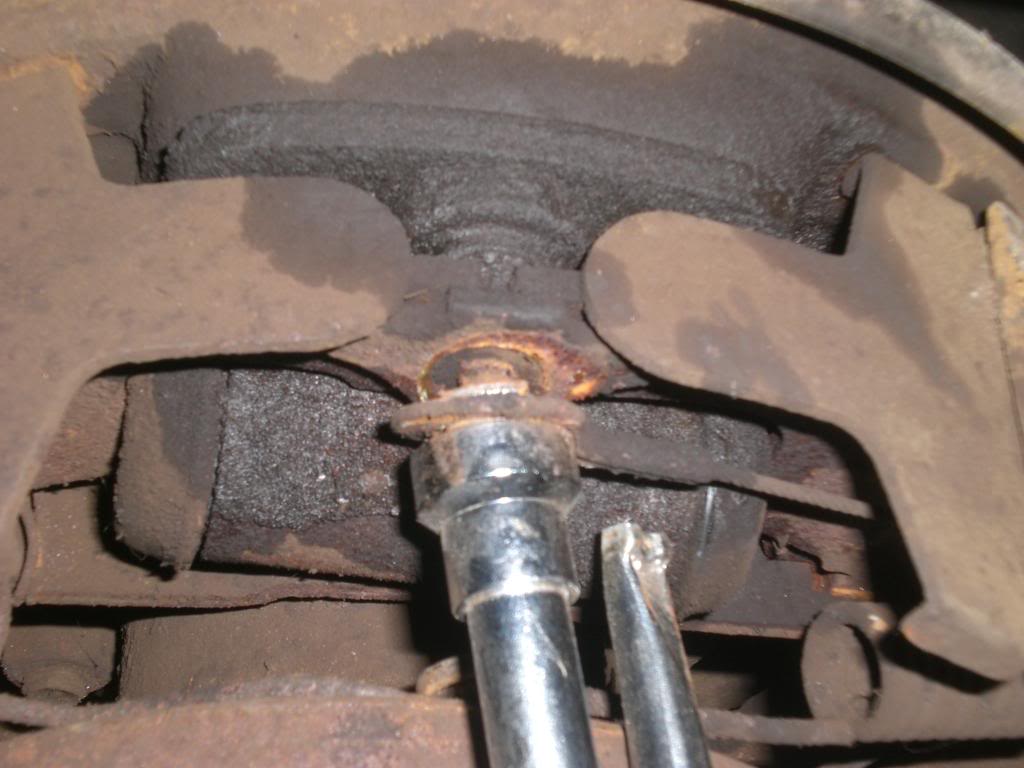
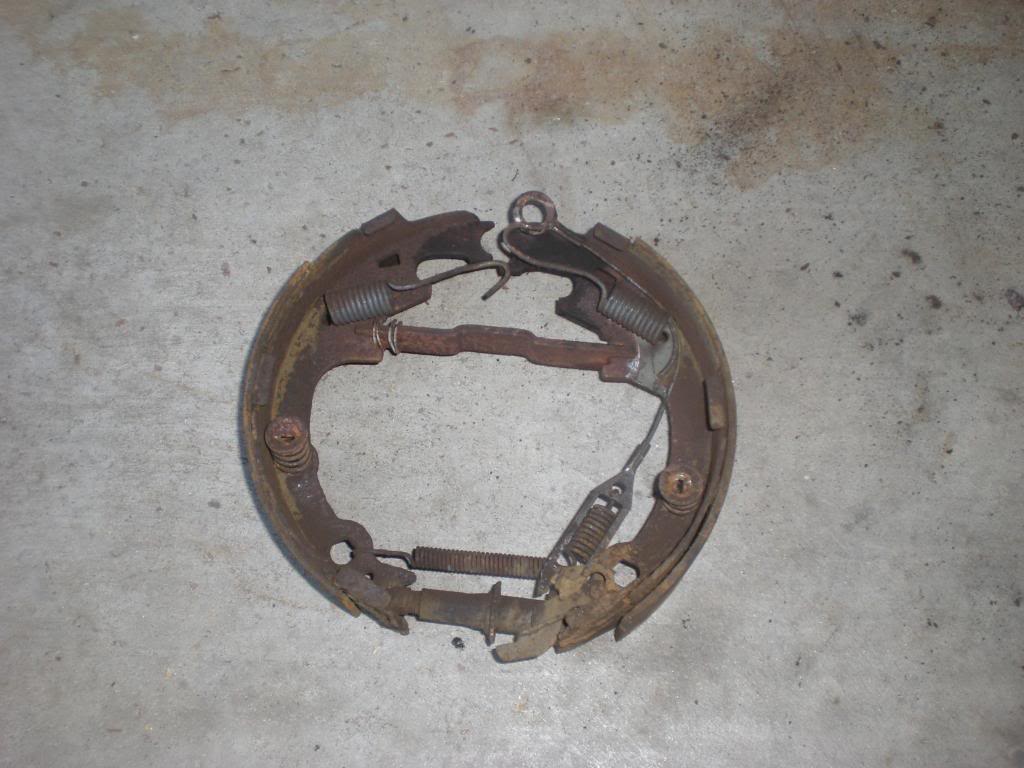
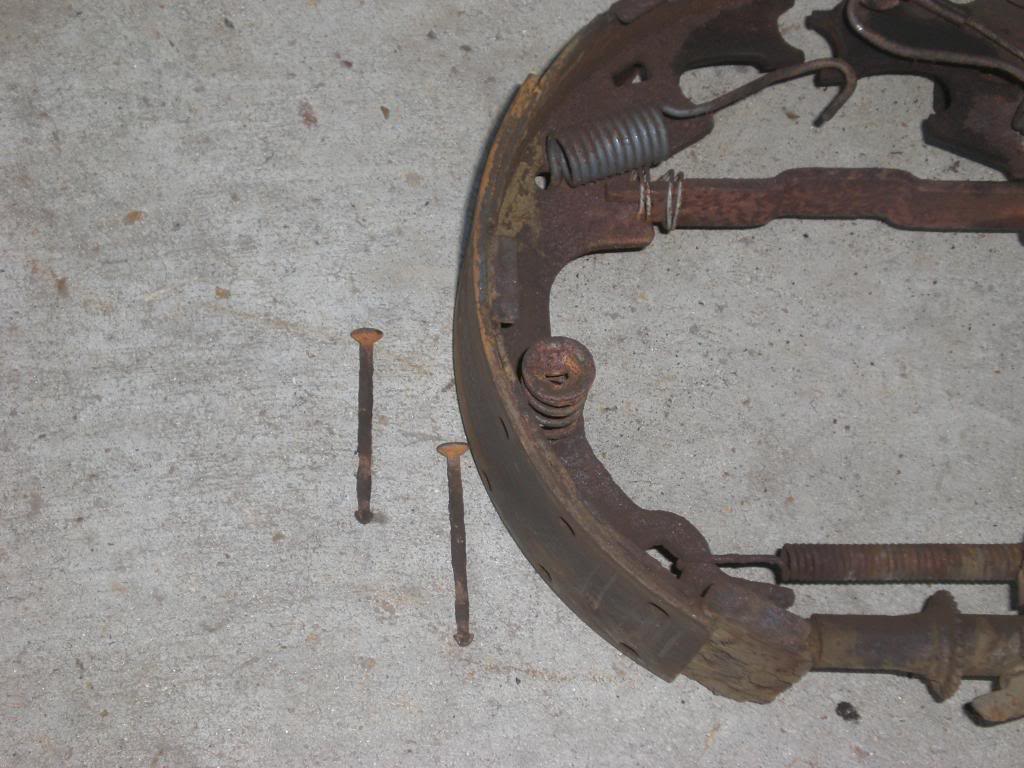
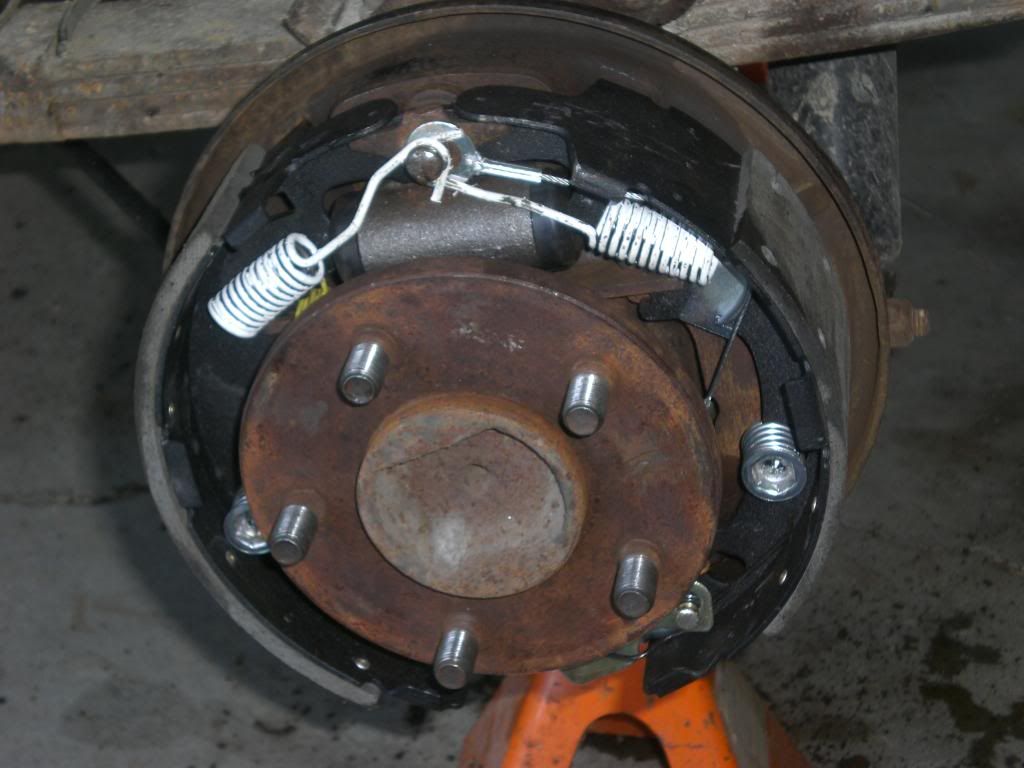
Then remove the spring/pin assemblies on each shoe. The caps must be pushed in and the pins rotated 90 degrees to free them up. You can see that the springs on mine were rusted and broken:
Now you should be able to remove the drums as a unit by spreading them apart and pulling the down and out over the axle. Remember that the emergency brake actuator must be twisted about 45 degrees for it to disengage from the rear shoe. You can see the actuator hanging on the right side of the backplate:
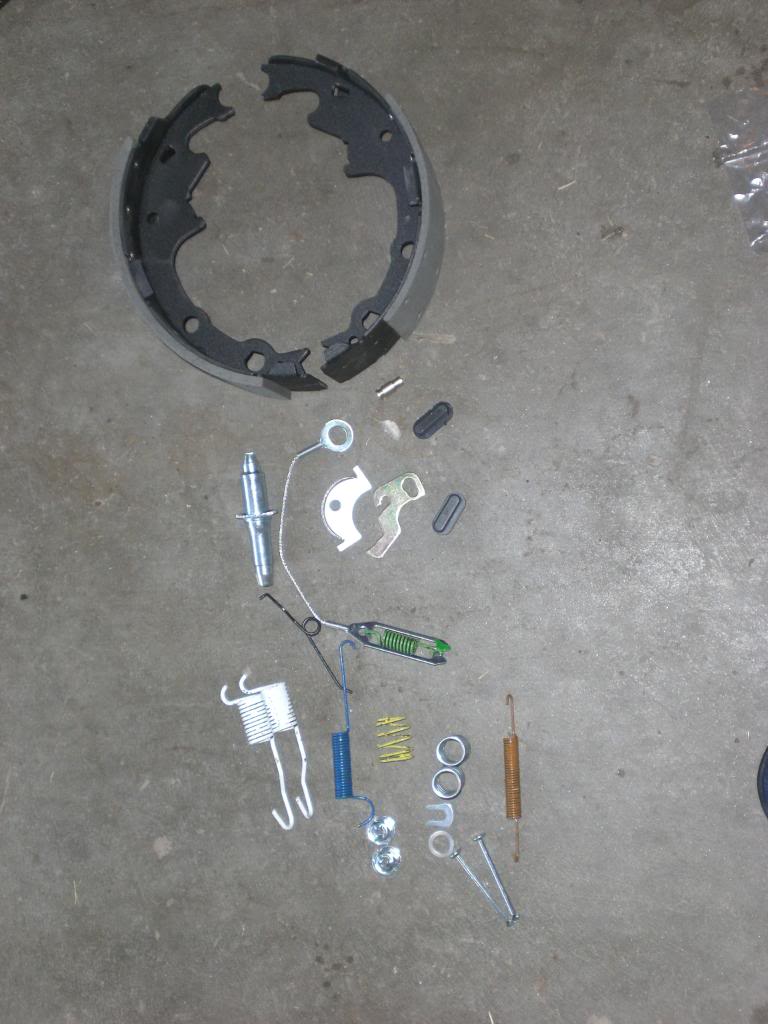
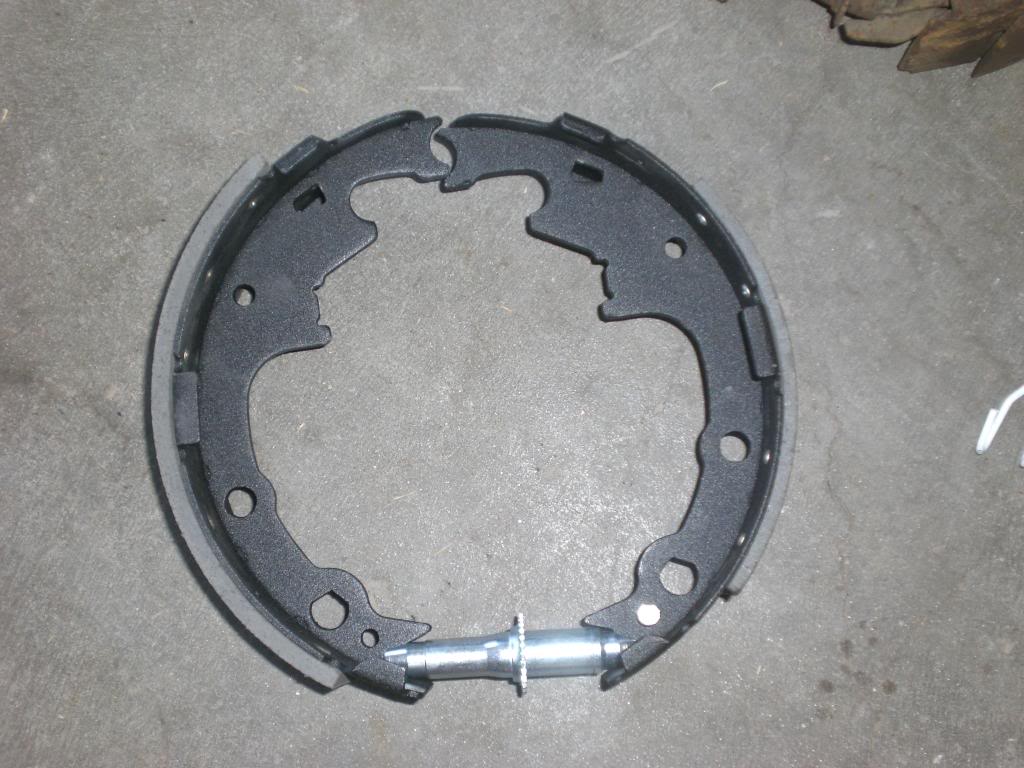
Here is what you just removed:
The pins that held the shoes in place with the 90 degree locking caps just push out the back:
Then remove the wear adjuster cable:
Then remove the spring/pin assemblies on each shoe. The caps must be pushed in and the pins rotated 90 degrees to free them up. You can see that the springs on mine were rusted and broken:
Now you should be able to remove the drums as a unit by spreading them apart and pulling the down and out over the axle. Remember that the emergency brake actuator must be twisted about 45 degrees for it to disengage from the rear shoe. You can see the actuator hanging on the right side of the backplate:
Here is what you just removed:
The pins that held the shoes in place with the 90 degree locking caps just push out the back:
Trending Topics
09-12-2010, 10:25 AM
#8
Senior Member
Thread Starter
Join Date: Jun 2010
Location: Slaughter, LA
Posts: 849
Likes: 0
Received 0 Likes
on
0 Posts
Year: 1997
Model: Cherokee
Engine: 4.0L
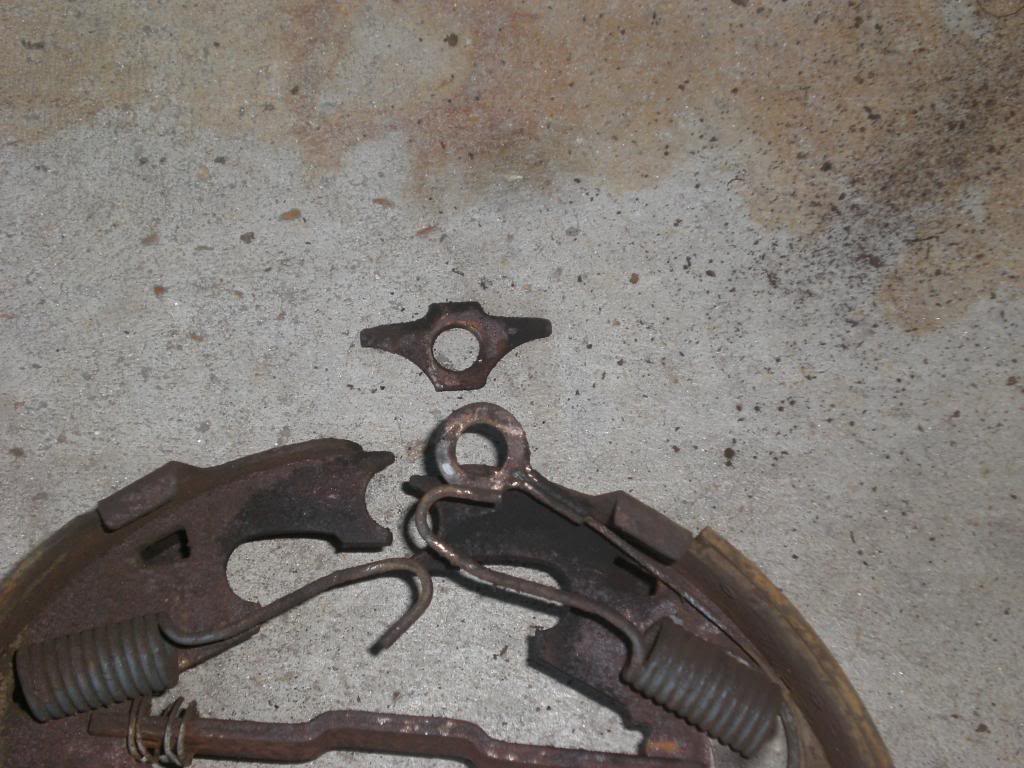
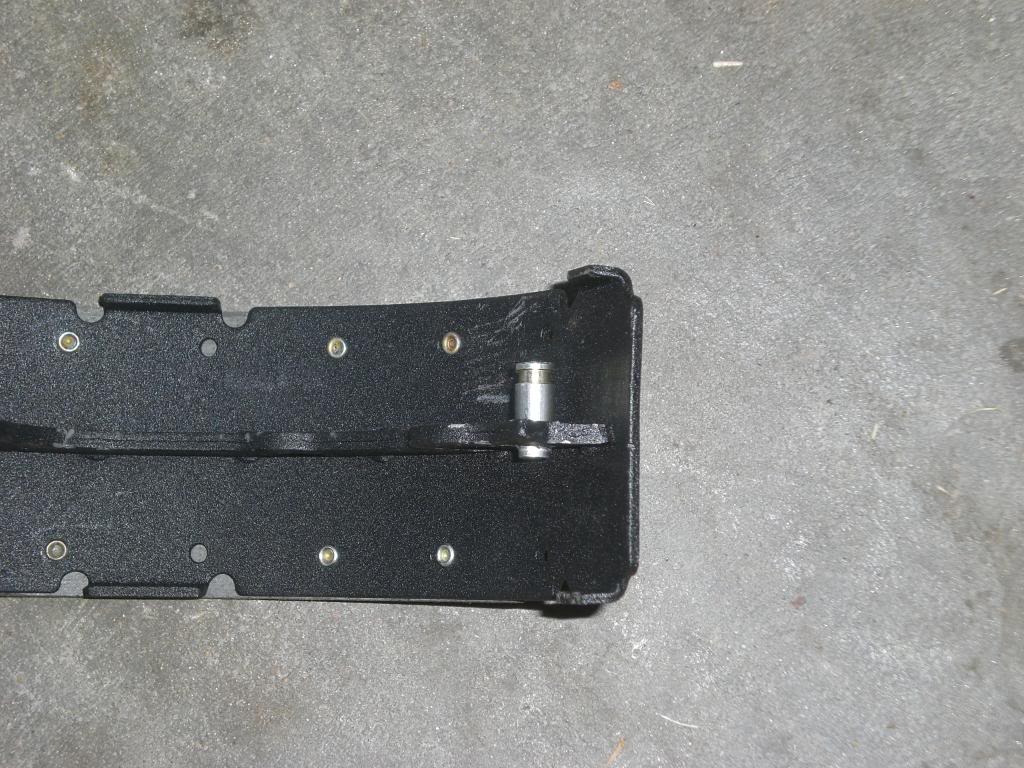
There are two pieces of this assembly that you will have to reuse. One is the metal cross bar and the other is the weird looking cap plate that was located under the springs on the pin at the top of the assembly. Both can be seen here:
09-12-2010, 10:26 AM
#9
Senior Member
Thread Starter
Join Date: Jun 2010
Location: Slaughter, LA
Posts: 849
Likes: 0
Received 0 Likes
on
0 Posts
Year: 1997
Model: Cherokee
Engine: 4.0L
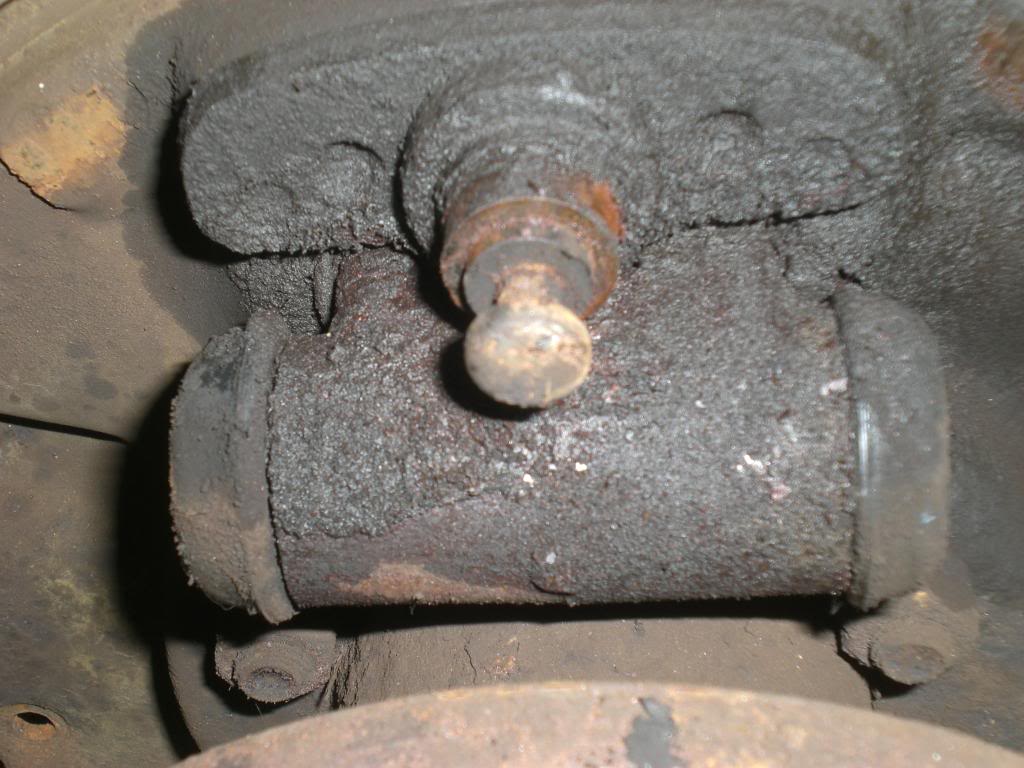
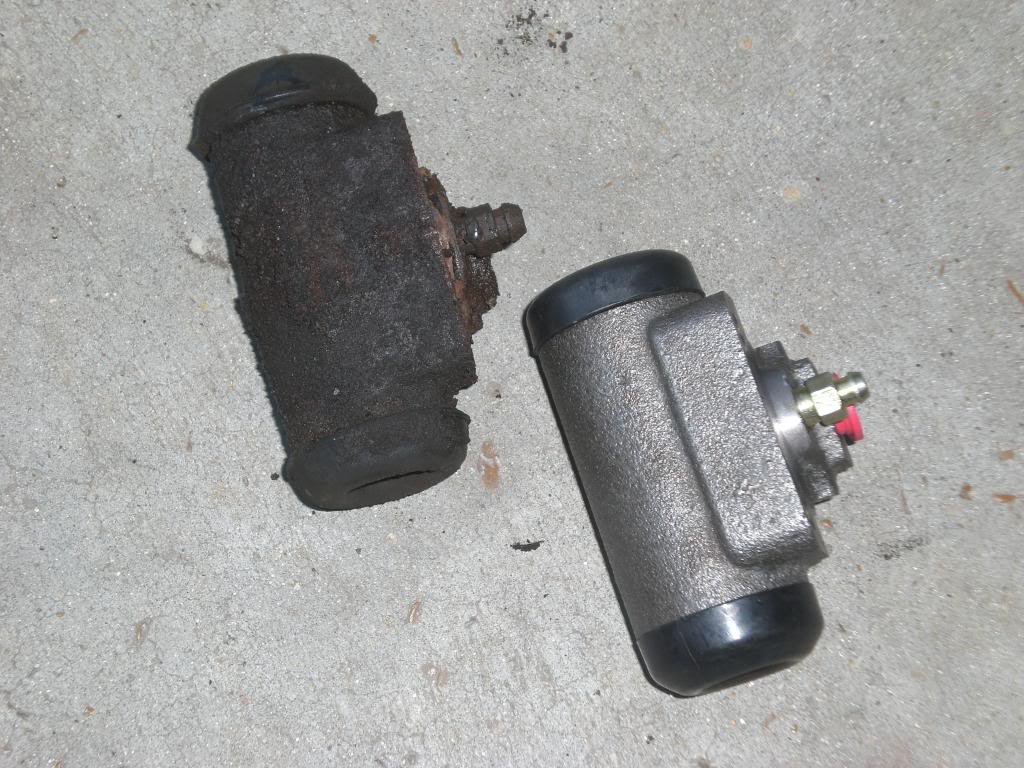
Now it’s time to disconnect the wheel cylinder and try to salvage some of the lines that aren’t corroded.
The line should be removed with a 3/8” tubing fitting wrench if you want the best chance of not destroying it. If the fitting does not turn on the tubing and the tubing kinks, just cut it off with a pair of diags and you’ll have to fab a new line.
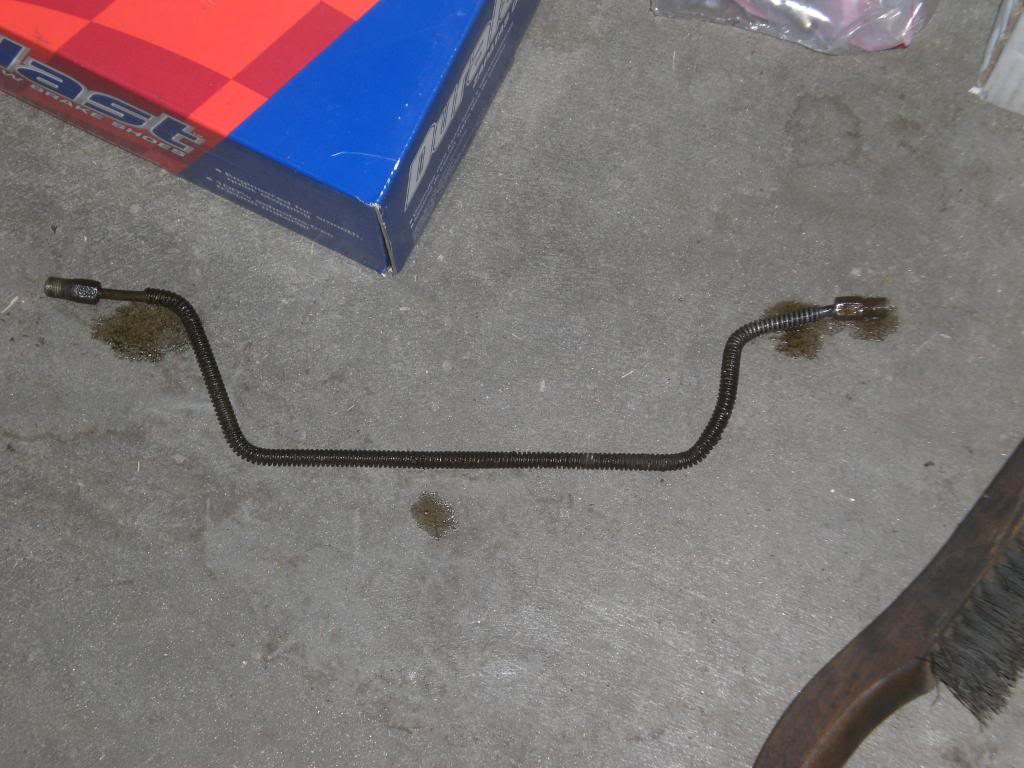
I got lucky on the short side. Both fittings were loose on the tubing and the line was fairly clean so it could be reused.
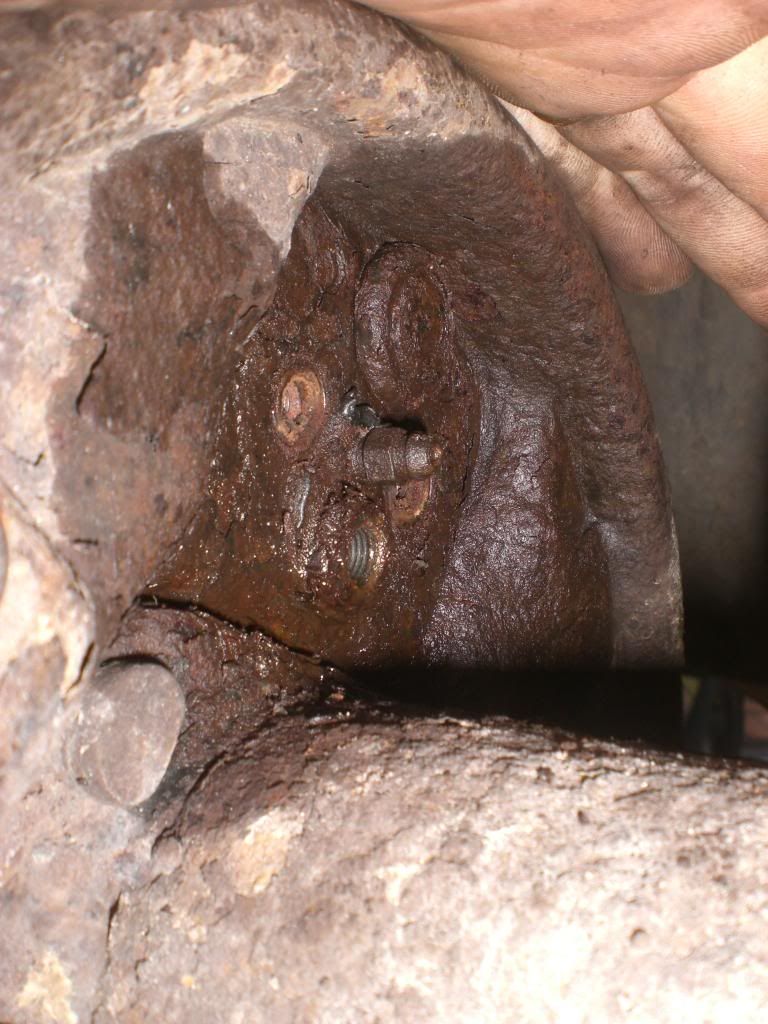
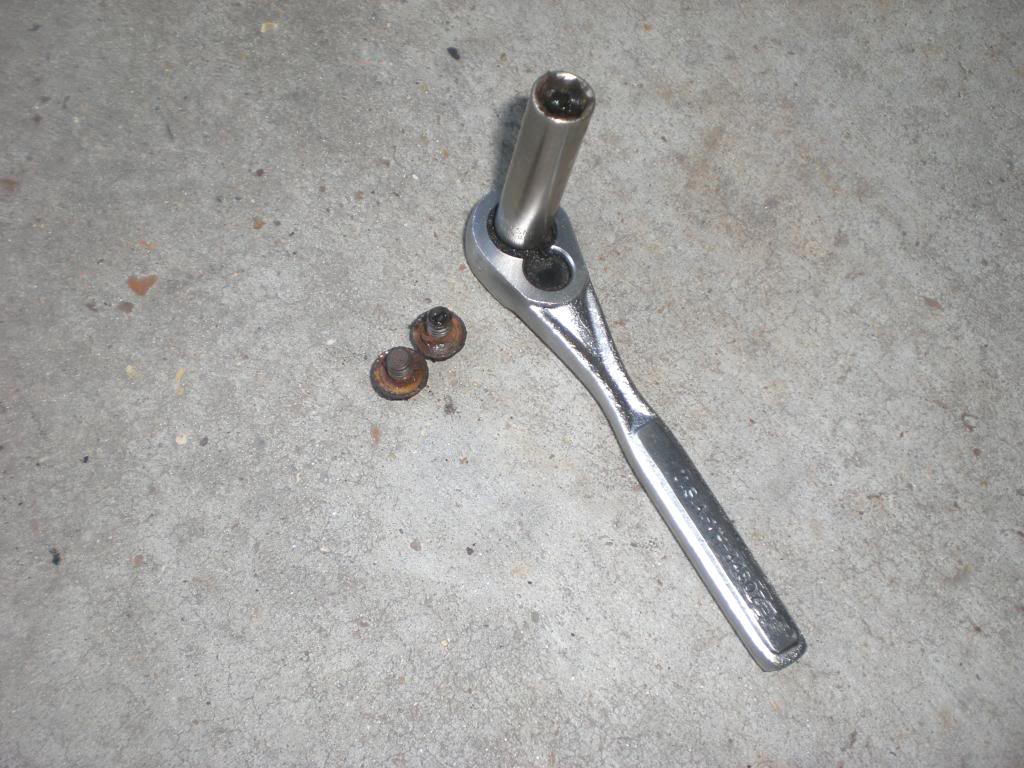
The wheel cylinder is held in place by a pair of 10mm screws. Be careful not to round off the heads. A 6-point socket will be best for this task. When the screws are out, pry the cylinder off and remove.
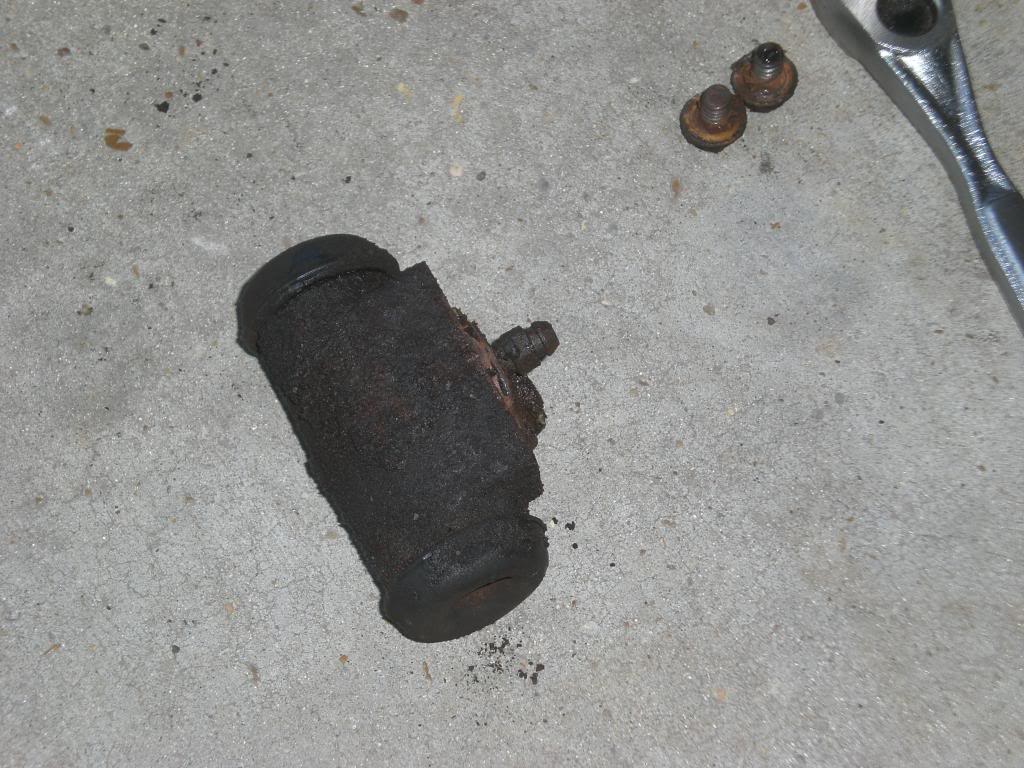
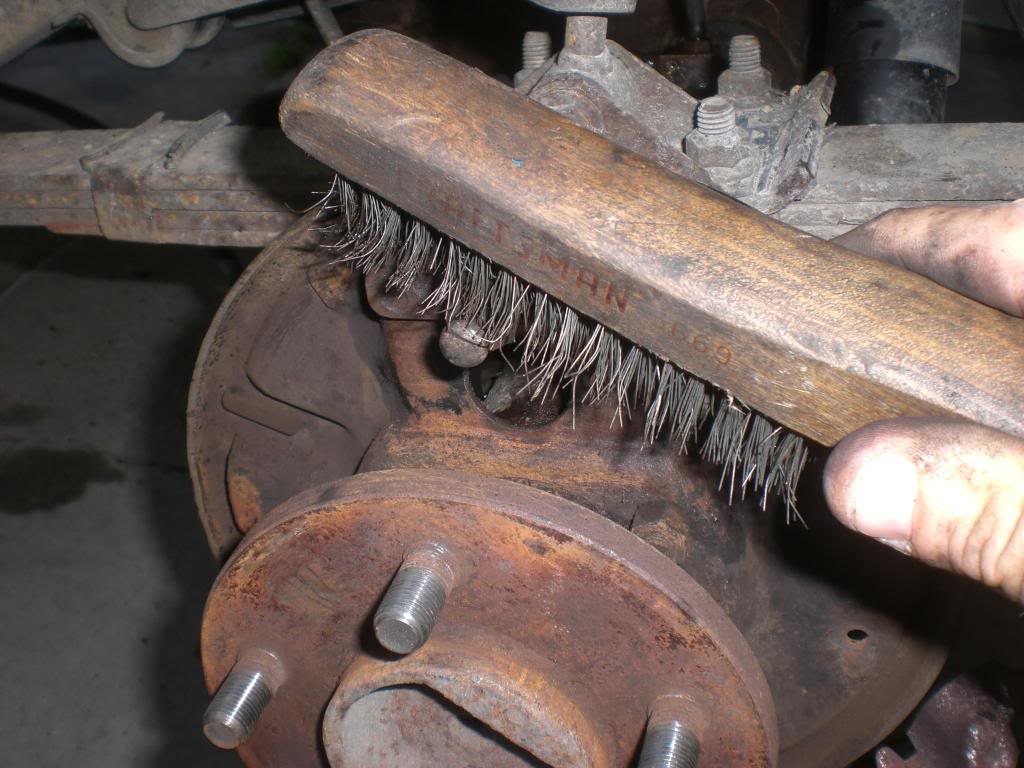
Now clean everything with a wire brush and scraper. There should be some silicone rubber left on the backplate that was used to seal the cylinder to the backplate to keep out water. Make sure this is gone when you’re finished cleaning.
The line should be removed with a 3/8” tubing fitting wrench if you want the best chance of not destroying it. If the fitting does not turn on the tubing and the tubing kinks, just cut it off with a pair of diags and you’ll have to fab a new line.
I got lucky on the short side. Both fittings were loose on the tubing and the line was fairly clean so it could be reused.
The wheel cylinder is held in place by a pair of 10mm screws. Be careful not to round off the heads. A 6-point socket will be best for this task. When the screws are out, pry the cylinder off and remove.
Now clean everything with a wire brush and scraper. There should be some silicone rubber left on the backplate that was used to seal the cylinder to the backplate to keep out water. Make sure this is gone when you’re finished cleaning.
09-12-2010, 10:28 AM
#10
Senior Member
Thread Starter
Join Date: Jun 2010
Location: Slaughter, LA
Posts: 849
Likes: 0
Received 0 Likes
on
0 Posts
Year: 1997
Model: Cherokee
Engine: 4.0L
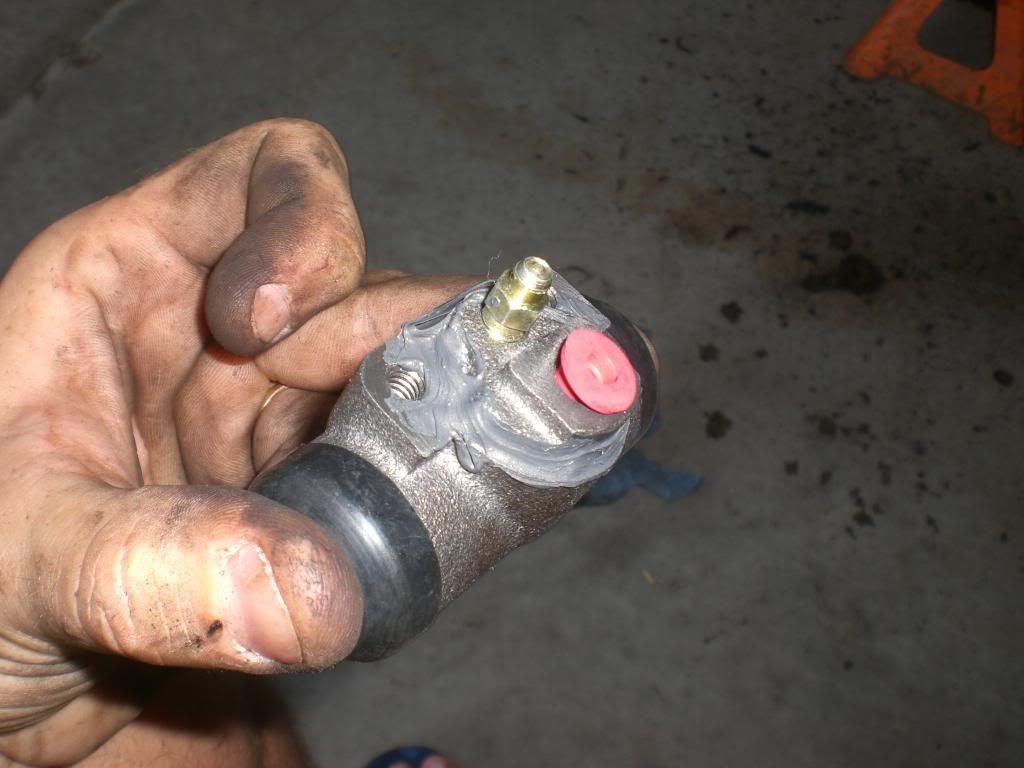
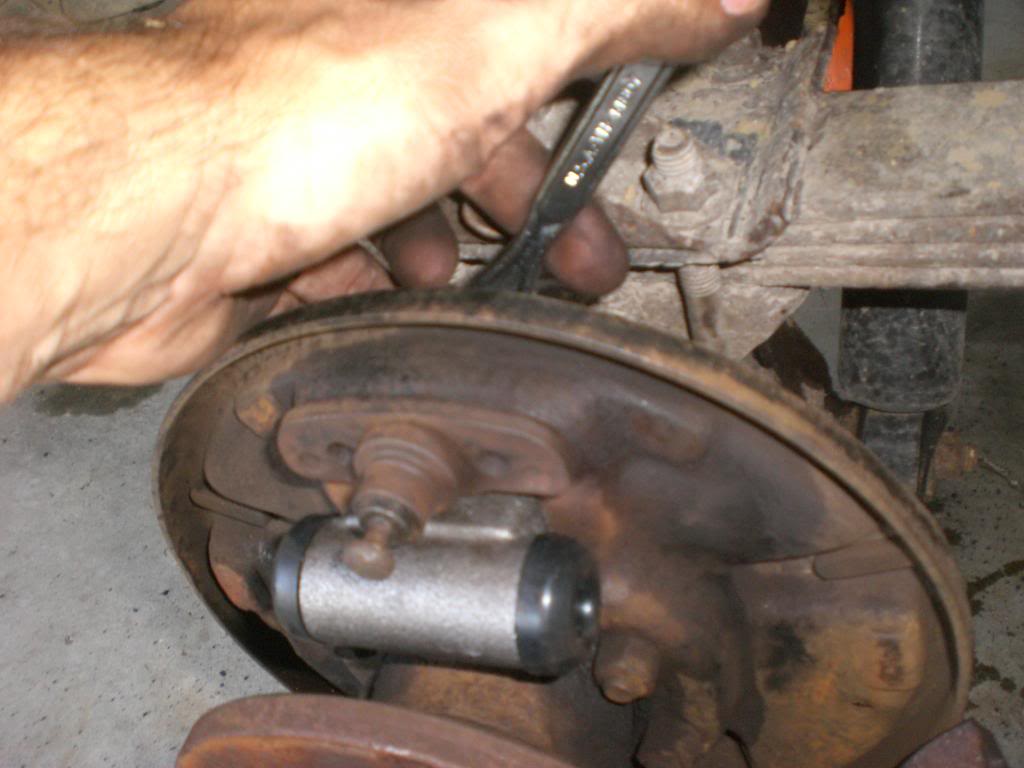
Now, find a new wheel cylinder and put a bead of silicone around the machined surface. Install it in the backplate using the screws you removed and tighten them up. (I’d say to torque them until they strip and then back out half a turn.) If you don’t want that much pain, just snug them up with a small wrench.
09-12-2010, 10:29 AM
#11
Senior Member
Thread Starter
Join Date: Jun 2010
Location: Slaughter, LA
Posts: 849
Likes: 0
Received 0 Likes
on
0 Posts
Year: 1997
Model: Cherokee
Engine: 4.0L
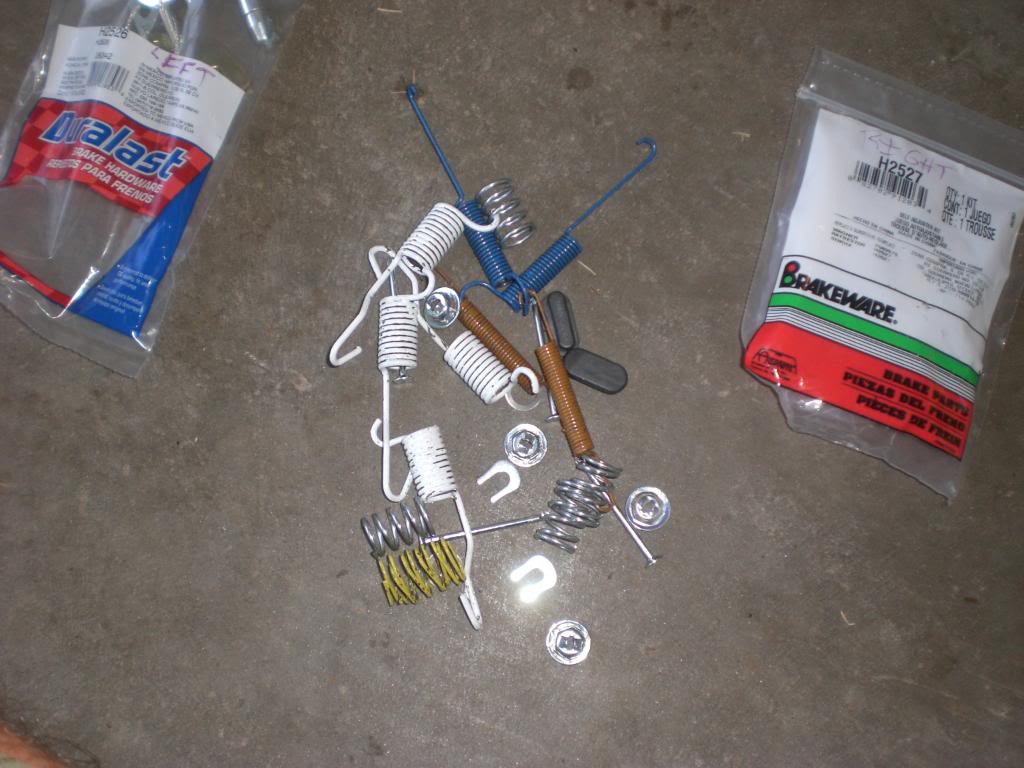
Now comes the fun part. Separate the replacement parts into right and left side units. This is very important. The Star Wheel Adjusters are opposite threaded and if you mix them up you will be in a world of pain later, so make sure you get them on the correct side the first time.
There will be a pin for the brake wear adjuster pivot that must be pressed into the rear shoe. You can start it with pliers as I did, but it is a very hard press and will have to be finished with a vice or arbor press.
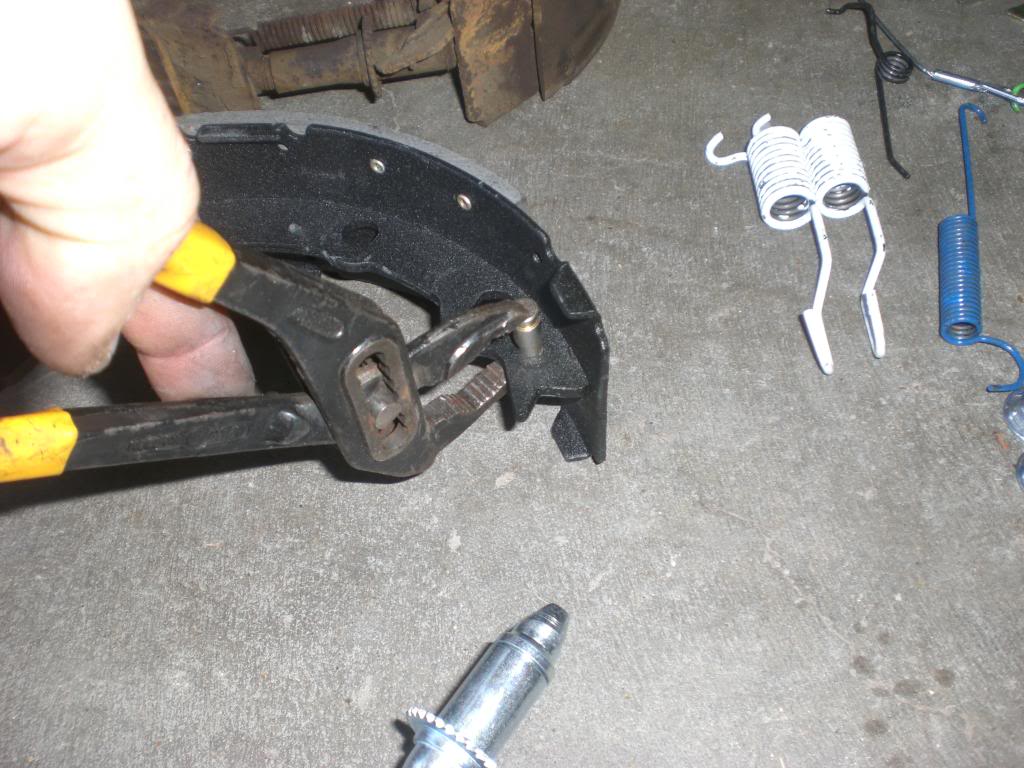
There will be a pin for the brake wear adjuster pivot that must be pressed into the rear shoe. You can start it with pliers as I did, but it is a very hard press and will have to be finished with a vice or arbor press.
09-12-2010, 10:30 AM
#12
Senior Member
Thread Starter
Join Date: Jun 2010
Location: Slaughter, LA
Posts: 849
Likes: 0
Received 0 Likes
on
0 Posts
Year: 1997
Model: Cherokee
Engine: 4.0L
Now it’s time to start assembling the unit:

You can see the reused cross bar in the last picture.
This can then be placed on the axle: DON’T FORGET TO REATTACH THE E-BRAKE ACTUATOR
You can see the reused cross bar in the last picture.
This can then be placed on the axle: DON’T FORGET TO REATTACH THE E-BRAKE ACTUATOR
09-12-2010, 10:31 AM
#13
Senior Member
Thread Starter
Join Date: Jun 2010
Location: Slaughter, LA
Posts: 849
Likes: 0
Received 0 Likes
on
0 Posts
Year: 1997
Model: Cherokee
Engine: 4.0L
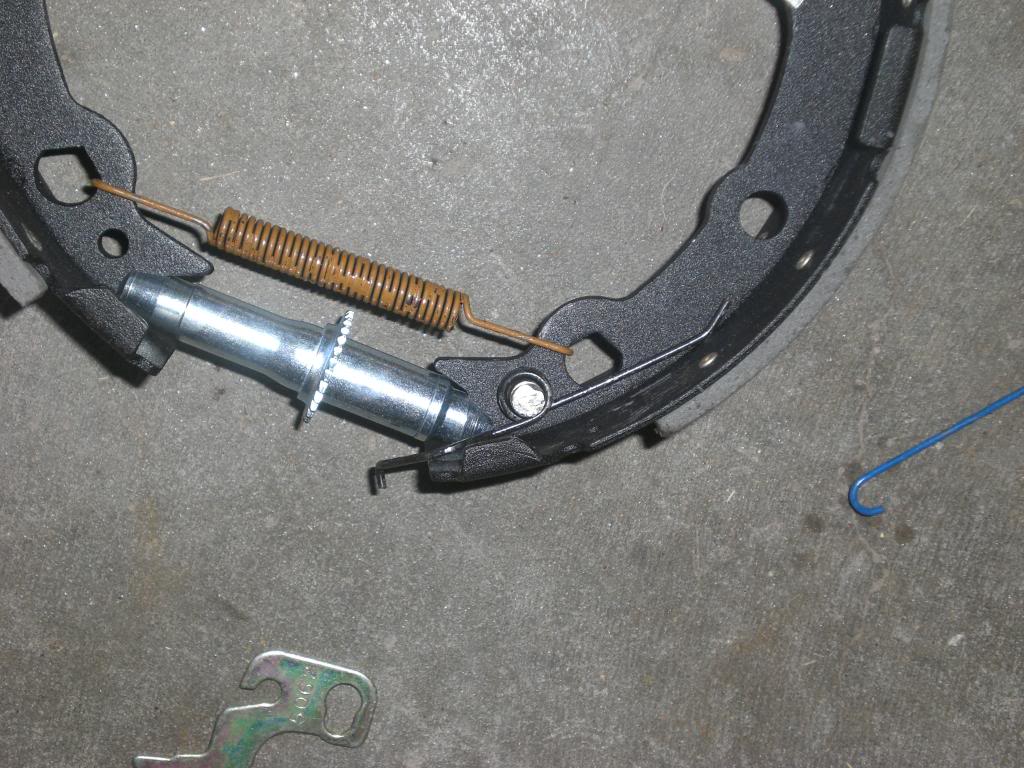
The best order of installation is to get the unit in place and reinstall the new pins with the springs and 90 degree caps on each shoe. First install the weird little spacer plate that you saved onto the pin.

Then install the flat end of the adjuster cable over the pin. THE BOTTOM PART OF THE CABLE ADJUSTER SHOULD NOT BE ATTACHED TO THE PIVOTING PART OF THE ADJUSTER AT THIS POINT. (I learned this the hard way. It just doesn’t work if it is. And here’s why.) The next step after putting the adjuster loop over the pin is to attach the main spring from that side. There is a cable tray piece that MUST BE INSTALLED IN THE HOLE THAT THE MAIN SPRING HOLDS IN PLACE. The cable tray has a stepped piece that centers it on the hole. If you try to install the adjuster under tension before you attach the main spring to hold the tray in place, the tray will not stay centered in the pivot hole properly. Now you can attach the spring that hold the tray to the pin. Then attach the main spring from the other side.
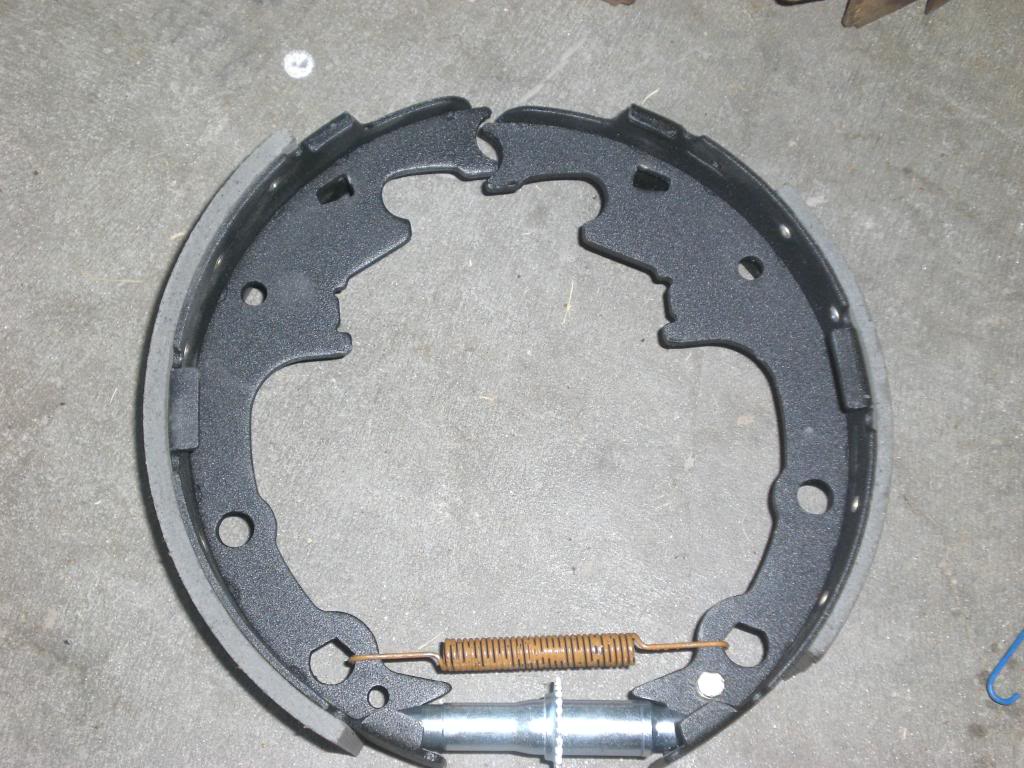
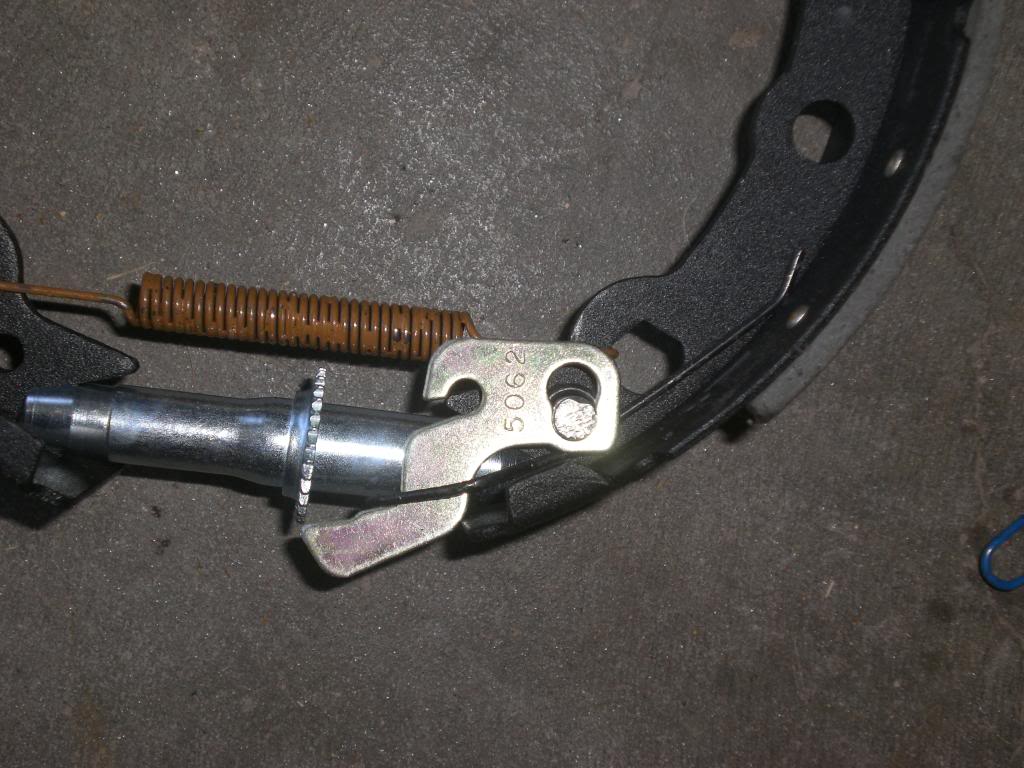
When the upper springs are attached properly, route the cable around the tray, grab it with pliers at the bottom and attach it to the pivoting adjuster as shown by the green spring.
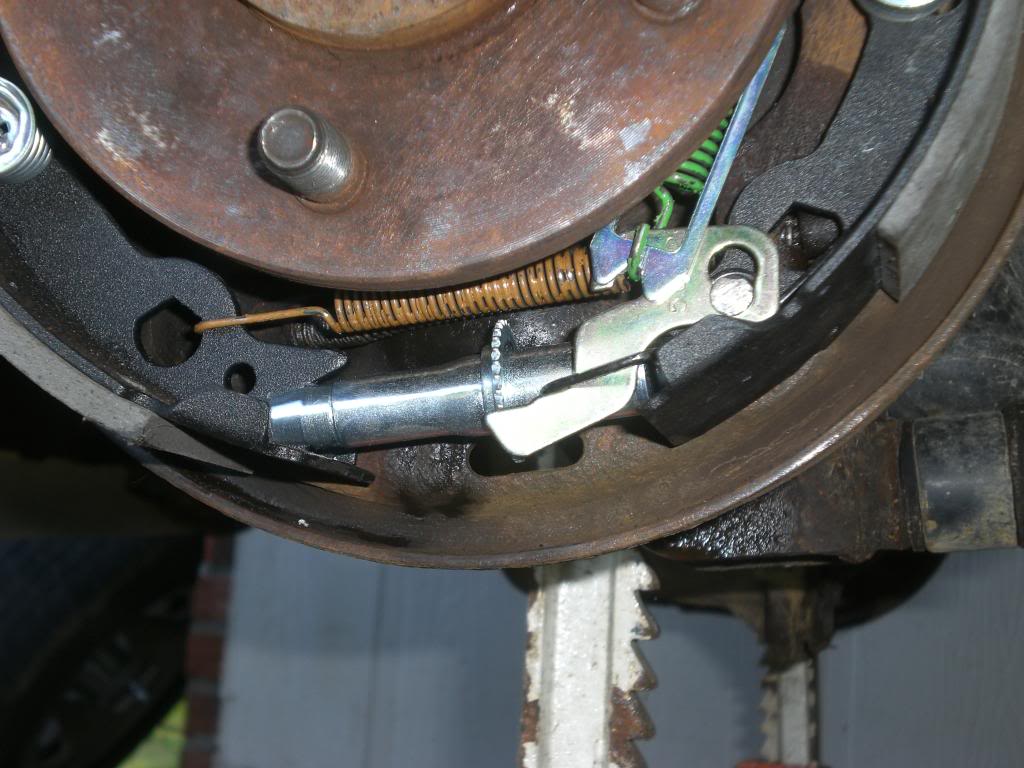
Then install the flat end of the adjuster cable over the pin. THE BOTTOM PART OF THE CABLE ADJUSTER SHOULD NOT BE ATTACHED TO THE PIVOTING PART OF THE ADJUSTER AT THIS POINT. (I learned this the hard way. It just doesn’t work if it is. And here’s why.) The next step after putting the adjuster loop over the pin is to attach the main spring from that side. There is a cable tray piece that MUST BE INSTALLED IN THE HOLE THAT THE MAIN SPRING HOLDS IN PLACE. The cable tray has a stepped piece that centers it on the hole. If you try to install the adjuster under tension before you attach the main spring to hold the tray in place, the tray will not stay centered in the pivot hole properly. Now you can attach the spring that hold the tray to the pin. Then attach the main spring from the other side.
When the upper springs are attached properly, route the cable around the tray, grab it with pliers at the bottom and attach it to the pivoting adjuster as shown by the green spring.
09-12-2010, 10:32 AM
#14
Senior Member
Thread Starter
Join Date: Jun 2010
Location: Slaughter, LA
Posts: 849
Likes: 0
Received 0 Likes
on
0 Posts
Year: 1997
Model: Cherokee
Engine: 4.0L
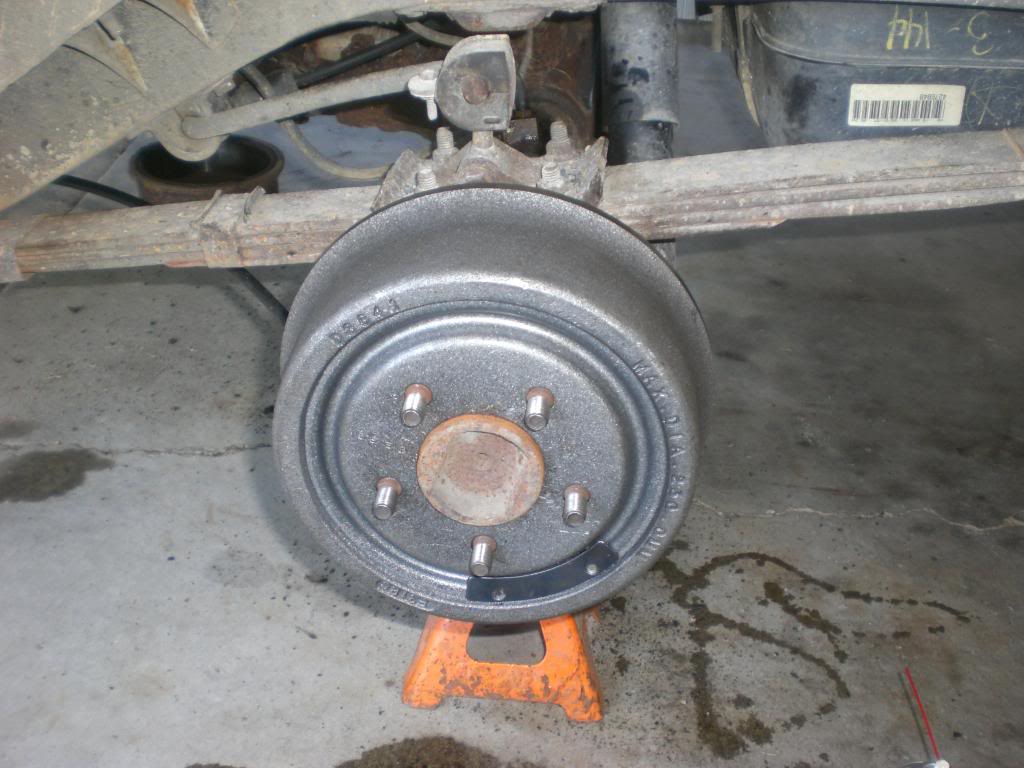
Next step is very important. CLEAN THE DRUMS AND SHOES WITH BRAKE CLEANER. New drums are coated in cosmoline from the factory to prevent rust. This stuff is a grease. It does not make for good stopping. Spray the inside of the drums down with brake cleaner to remove all of the residue. Then do the same for the new shoes as you have probably crapped them up pretty good during the reassembly phase. Then install the new drum.
Now repeat the same procedure on the other side.
When you’re done with that we’ll tackle the lines. I’ll be inside drinking coffee. Let me know when you’re finished.
Now repeat the same procedure on the other side.
When you’re done with that we’ll tackle the lines. I’ll be inside drinking coffee. Let me know when you’re finished.
09-12-2010, 10:33 AM
#15
Senior Member
Thread Starter
Join Date: Jun 2010
Location: Slaughter, LA
Posts: 849
Likes: 0
Received 0 Likes
on
0 Posts
Year: 1997
Model: Cherokee
Engine: 4.0L
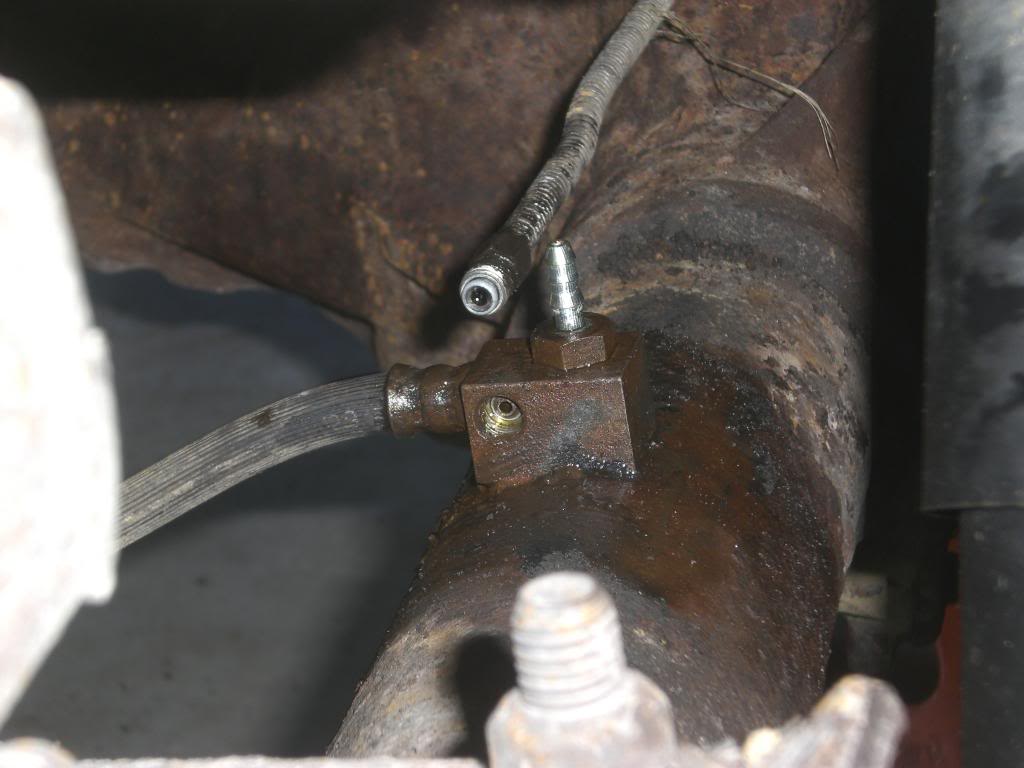
Ok. Now you’ve got the drum assemblies finished and need to get fluid to the new cylinders. Here’s how to accomplish that. We’ll take it piece by piece.
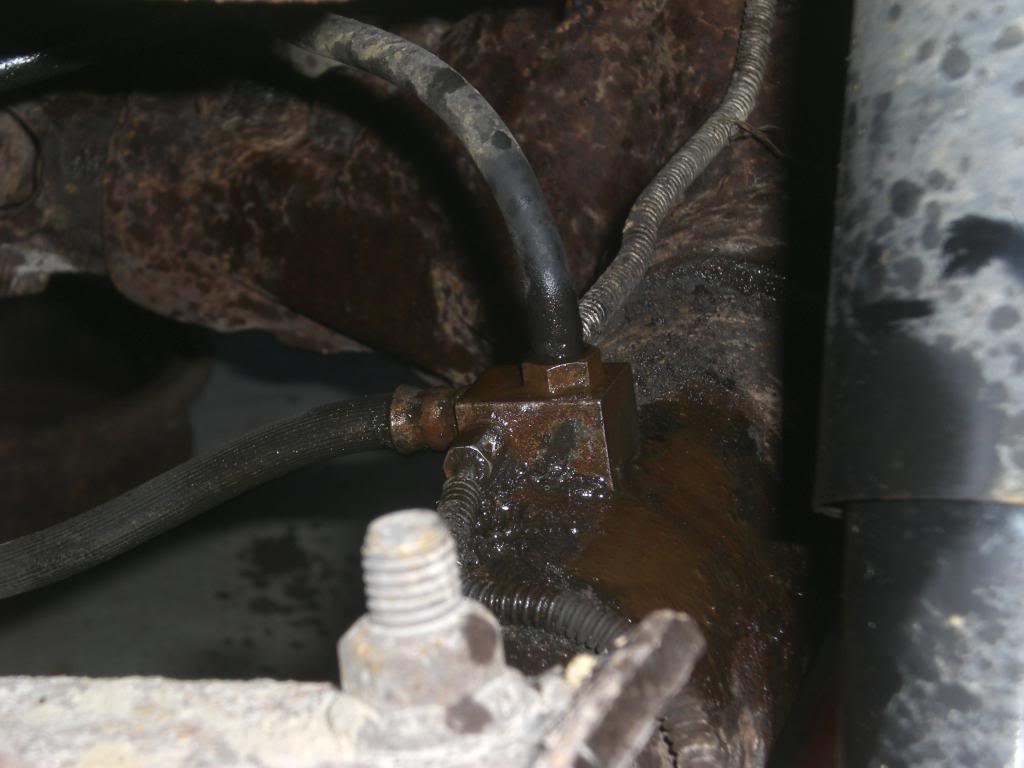
First, remove the old crappy rubber hose and splitter from the axle. By the way, that barb is your axle vent. You don’t want to break that hold down bolt.
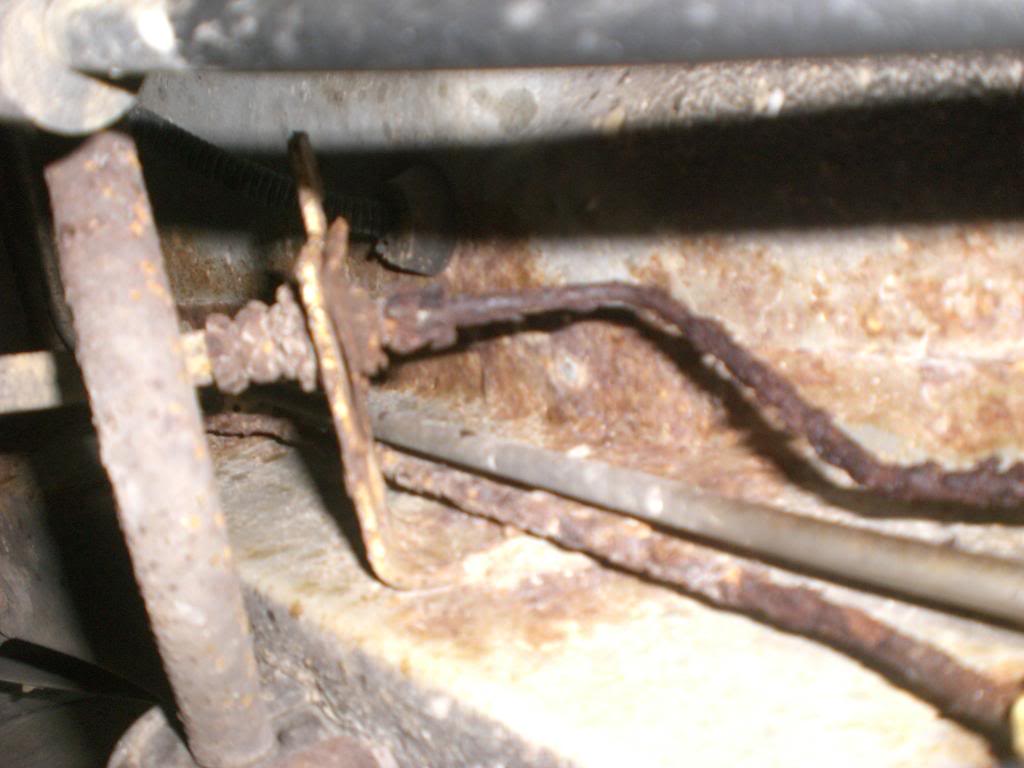
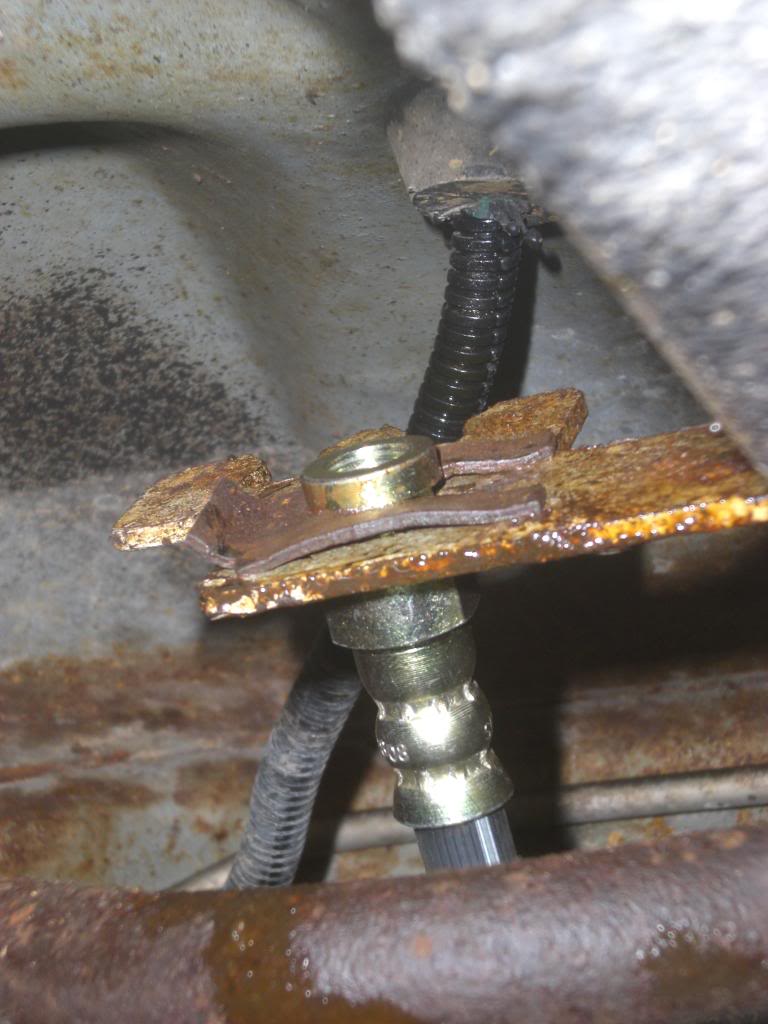
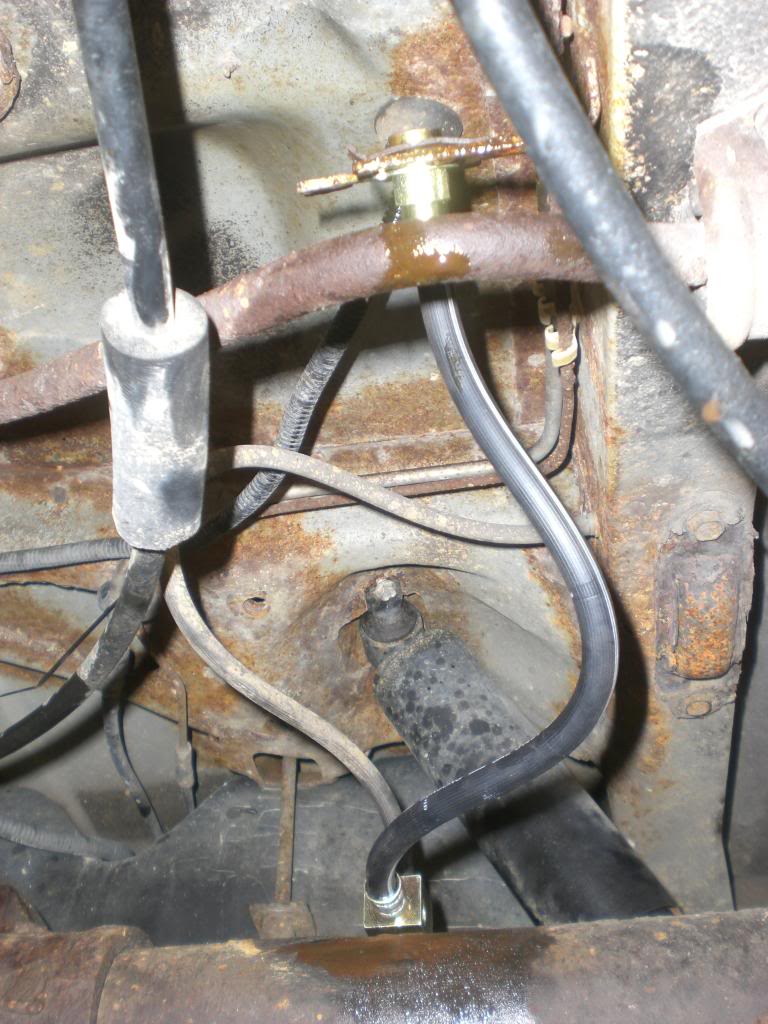
Then remove the spring tab from the frame connection for the rubber hose. It can be seen more clearly in this picture after I reinstalled it as it had been totally rusted up.
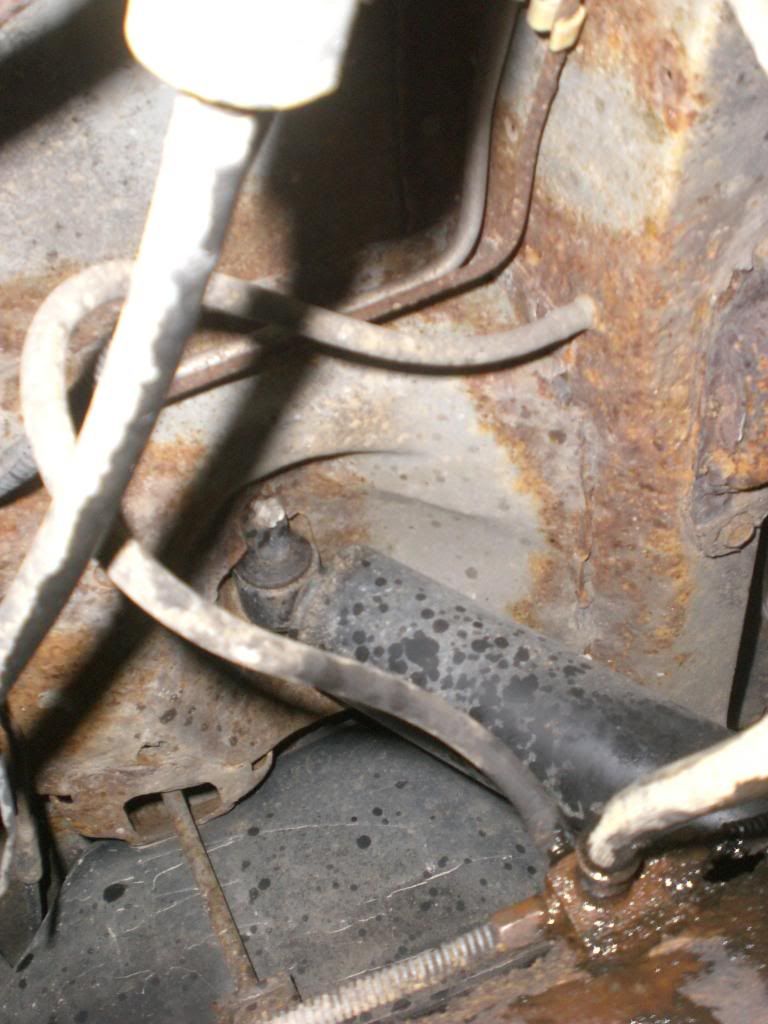
Attach the new splitter to the axle and reattach the vent hose.
First, remove the old crappy rubber hose and splitter from the axle. By the way, that barb is your axle vent. You don’t want to break that hold down bolt.
Then remove the spring tab from the frame connection for the rubber hose. It can be seen more clearly in this picture after I reinstalled it as it had been totally rusted up.
Attach the new splitter to the axle and reattach the vent hose.

