
Electric Fan Assembly Replacement

Thread Starter
Junior Member
Joined: May 2013
Posts: 37
Likes: 1
From: Kansas City
Year: 1999
Model: Cherokee
Engine: 4.0
Mod Note: This will mostly be the same for any 4.0 XJ.
This write up is for replacing the stock electric fan assembly on the Jeep Cherokee (XJ). I did this on my 1999 Cherokee Sport with the 4.0 liter engine.
Tools needed:
1. 8mm socket (a 1/4 inch drive and ratchet if possible, makes it easier)
2. flashlight
3. pliers
Overview:
There are 2 screws on the top of the assembly and two slots/clips on the bottom that keep it in place. The replacement is fairly easy, but allow yourself an hour in case you have trouble pulling out the old assembly and putting in the new one; or (like me) if you drop clips or screws and have to fish them out.
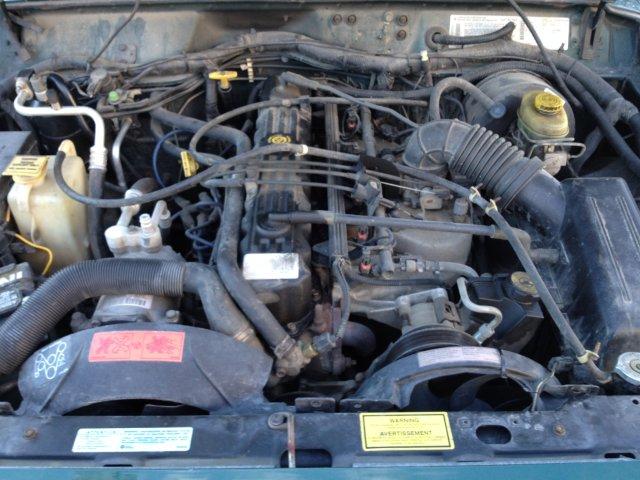
Step 1:
Remove the two screws on top of the assembly; they are also keeping a coolant line in place. When doing this, be sure that the little clips stay in place on the body.
Step 2:
Next, you will need to move over to the passenger side and remove the two screws holding in the coolant line and also the plastic covering for the mechanical fan. This needs to be done so that the entire coolant line can be moved out of the way of the electric fan assembly. Same thing with the clips, leave them on the body.
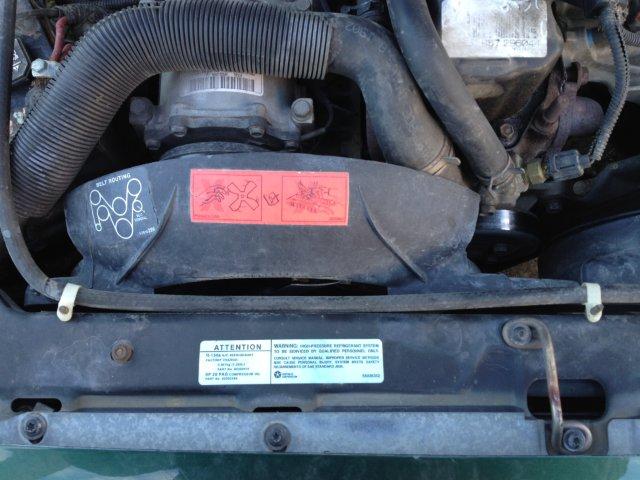
Step 3:
Now that all the screws are removed (4) move the coolant line out of the way so that it doesn't get in the way. Notice that it runs from the coolant tank over to the radiator cap.
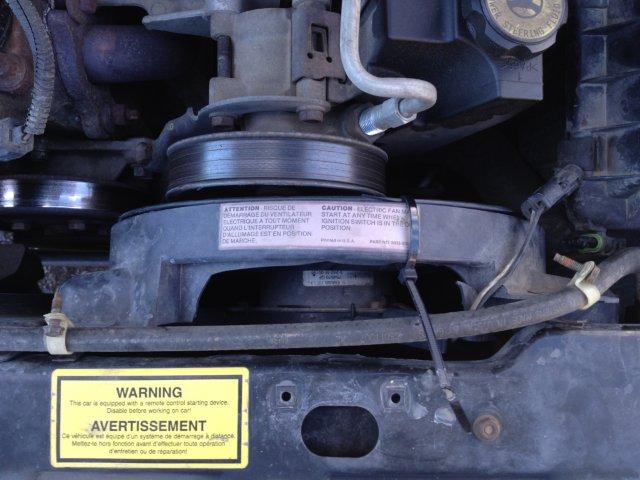
Step 4:
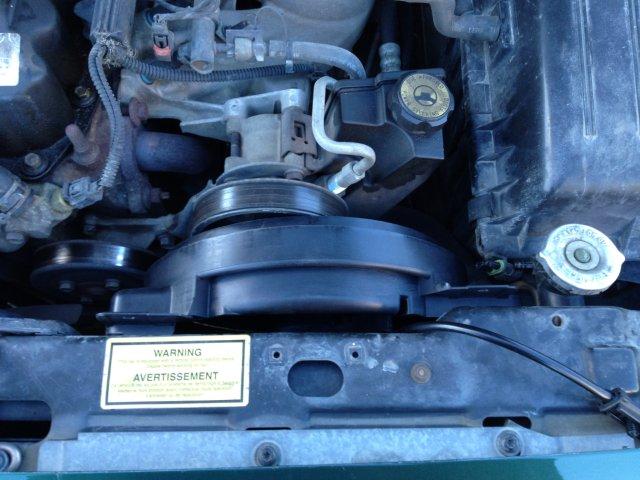
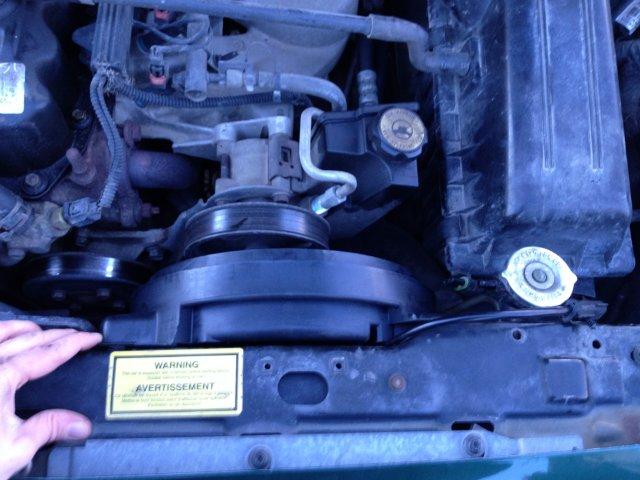
Here is the first fun part; remove the fan assembly. Make sure that the electric connector is unplugged, then pull the fan up and out. You will need to ease it back and forth and work it around the belt pulley. Mine was already broke, so I just did some yanking. Once out, the empty bay looks like this.
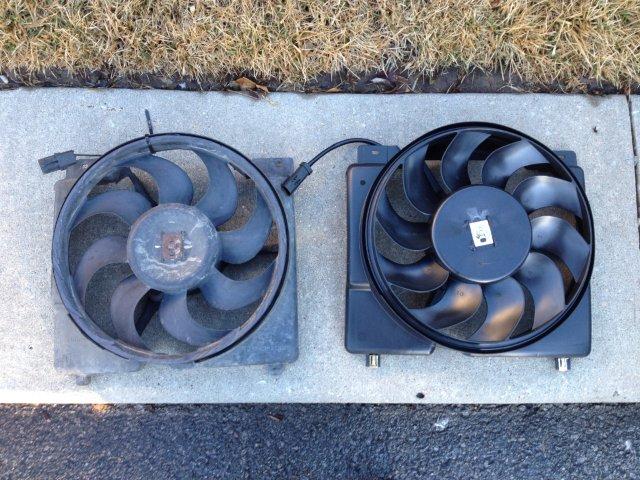
Here is the old fan assembly next to the new one. The old stock one is an 8 blade and the new one is a 10 blade. I ordered mine from Quadratec.
This write up is for replacing the stock electric fan assembly on the Jeep Cherokee (XJ). I did this on my 1999 Cherokee Sport with the 4.0 liter engine.
Tools needed:
1. 8mm socket (a 1/4 inch drive and ratchet if possible, makes it easier)
2. flashlight
3. pliers
Overview:
There are 2 screws on the top of the assembly and two slots/clips on the bottom that keep it in place. The replacement is fairly easy, but allow yourself an hour in case you have trouble pulling out the old assembly and putting in the new one; or (like me) if you drop clips or screws and have to fish them out.
Step 1:
Remove the two screws on top of the assembly; they are also keeping a coolant line in place. When doing this, be sure that the little clips stay in place on the body.
Step 2:
Next, you will need to move over to the passenger side and remove the two screws holding in the coolant line and also the plastic covering for the mechanical fan. This needs to be done so that the entire coolant line can be moved out of the way of the electric fan assembly. Same thing with the clips, leave them on the body.
Step 3:
Now that all the screws are removed (4) move the coolant line out of the way so that it doesn't get in the way. Notice that it runs from the coolant tank over to the radiator cap.
Step 4:
Here is the first fun part; remove the fan assembly. Make sure that the electric connector is unplugged, then pull the fan up and out. You will need to ease it back and forth and work it around the belt pulley. Mine was already broke, so I just did some yanking. Once out, the empty bay looks like this.
Here is the old fan assembly next to the new one. The old stock one is an 8 blade and the new one is a 10 blade. I ordered mine from Quadratec.
Last edited by 89Laredo; Feb 23, 2016 at 03:44 PM.
Thread Starter
Junior Member
Joined: May 2013
Posts: 37
Likes: 1
From: Kansas City
Year: 1999
Model: Cherokee
Engine: 4.0
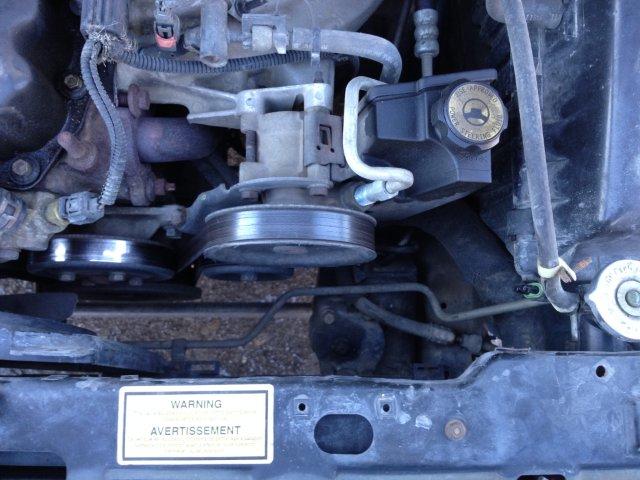
Step 5:
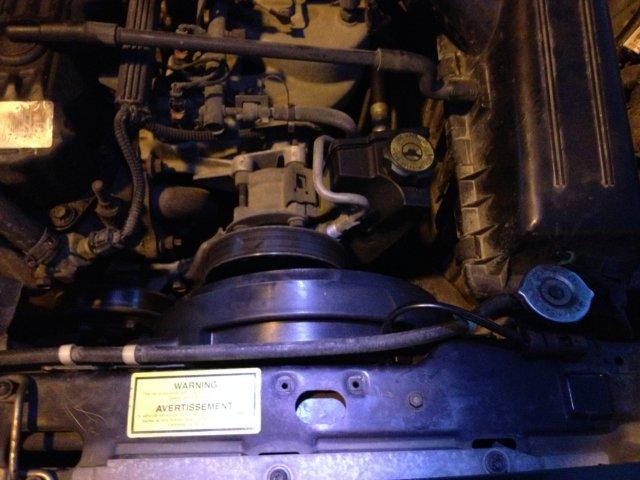
Now for the REALLY fun part; getting the new fan in. This is tough, and requires you to ease the fan in at an angle around the pulley. You will probably also have to move around the mechanical fan cover on the passenger side; this is okay, it can be clipped back in no problem. I had to lightly squeeze the fan blade into the assembly and go in the bay at an angle. Once it was partially in I just tapped on the left side, then the right side, until it fell down in to place. Once the assembly is in the bay, it will look like this.
Step 6:
Next comes fitting the plastic clips on the bottom of the assembly into their slots. Use your flash light to make sure the clips are in place; you may have to look from under the vehicle. Once this is done, the holes on the top of the assembly should align with the holes and clips on the body.
Step 7:
After the clips are in place and the holes aligned, make sure that the plastic fan cover on the passenger side is also back in place with its plastic tabs in their slots. Take the coolant hose and put it back into place and put all 4 screws back into position. Be careful not to strip them and rotate tightening them until they are all snug and the fan assembly does not move when you wiggle it.
Step 8:
Plug in the electric connector and you are good to go! The connector on my new fan assembly did not match the connector on the Jeep, so I had to take my old plug off my old fan and splice it into the new fan; hopefully this doesn't happen to you.
Last edited by 89Laredo; Feb 23, 2016 at 03:43 PM.

Thread
Thread Starter
Forum
Replies
Last Post
Aryl
Stock XJ Cherokee Tech. All XJ Non-modified/stock questions go here
12
May 5, 2024 10:29 PM
RunnerInPink
Stock XJ Cherokee Tech. All XJ Non-modified/stock questions go here
25
Oct 10, 2017 10:34 AM
Blue04
Stock Grand Cherokee Tech. All ZJ/WJ/WK Non-modified/stock questions go here!
3
Aug 29, 2015 12:29 AM
Rad Vlad
Stock XJ Cherokee Tech. All XJ Non-modified/stock questions go here
7
Aug 20, 2015 07:44 PM
Currently Active Users Viewing This Thread: 1 (0 members and 1 guests)