
Detour's Backbone Installation Write-up

Thread Starter
CF Veteran
Joined: Oct 2007
Posts: 3,883
Likes: 6
From: W-PA
Year: 2001
Model: Cherokee
Engine: 4.0
This is a write-up for Detour's Backbone front winch bumper. Enjoy 
First, of all things, you need to order "da bumper". It's real easy. First make sure you have at least $350 ready. Next you
wanna go to XJ / MJ Backbone Bumper System and check out some of the pictures. Have a nice big bowl in
front of you to catch the drool. After drying off your mouth, call him up or send him an email saying "i want that damn
bumper!" and he'll bill you, you pay him, he ships it out, etc etc, you own a jeep, you know the drill VERY WELL.
A week or two later, a big brown box will appear on your doorstep. Rip that open and you will find this inside:
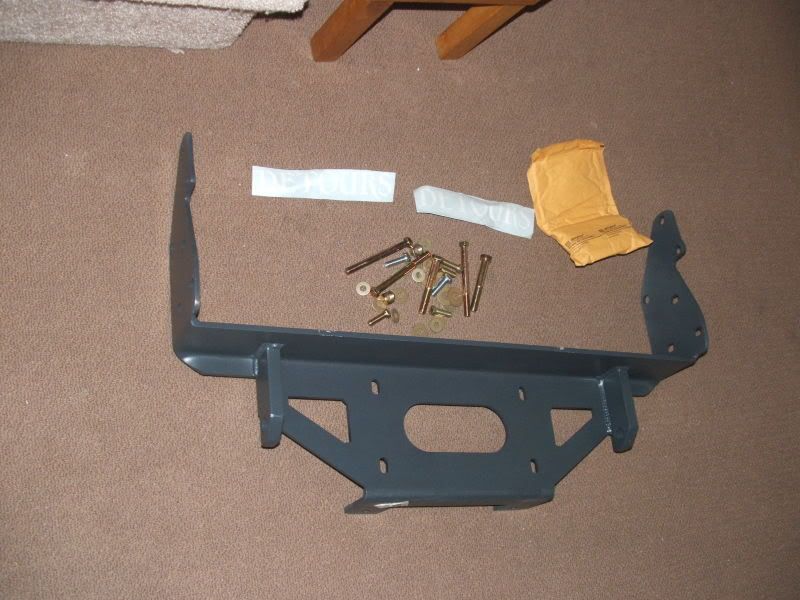
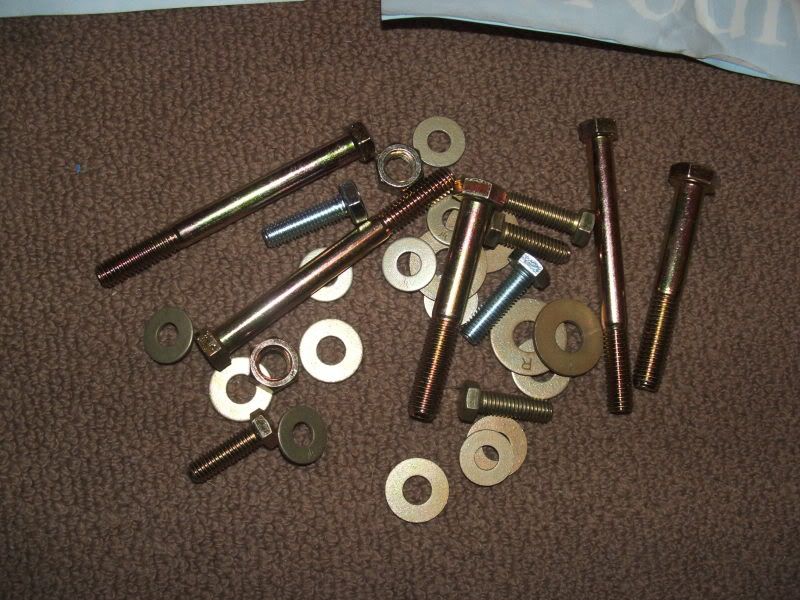
inside that envelope is where the nuts and bolts are hiding...
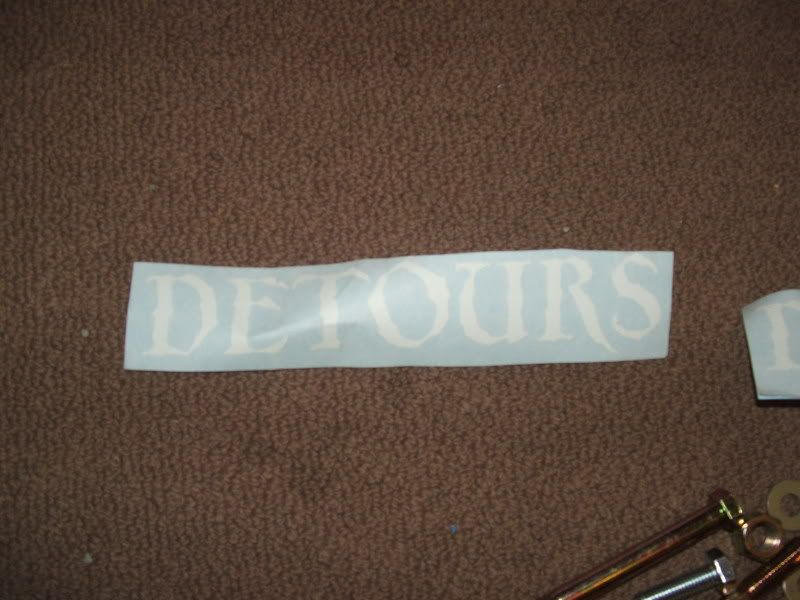
There were two white papers included and best thing of the entire package:
A STICKER!
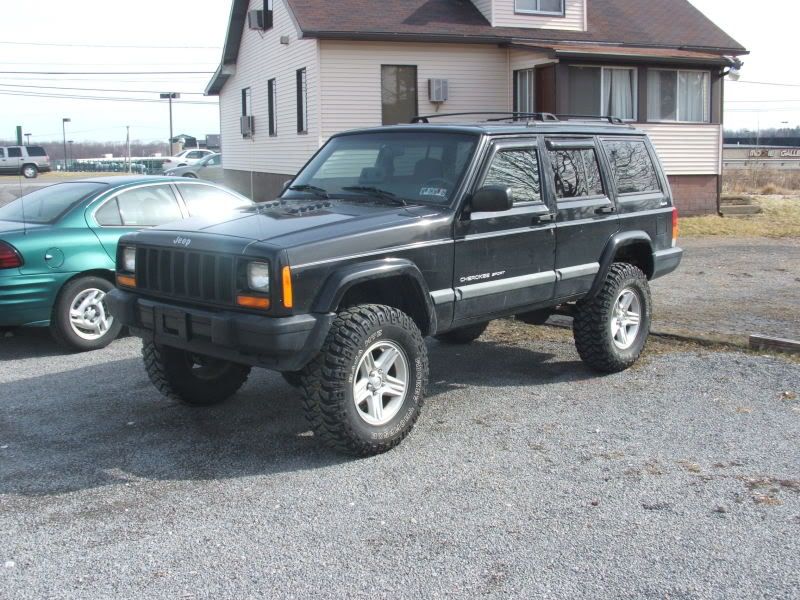
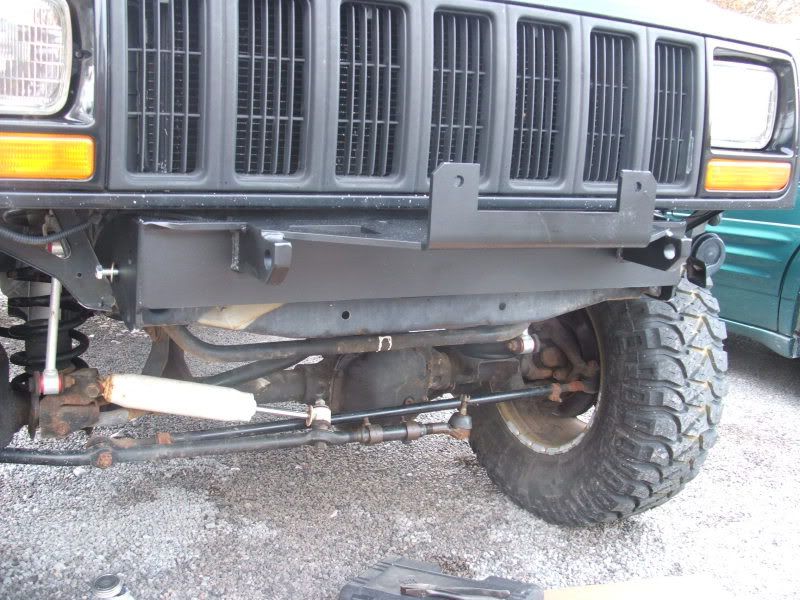
Now you have everything you need to put this bumper on your.......you do have a cherokee right? I sure hope so. Here's
what we will be installing it on:
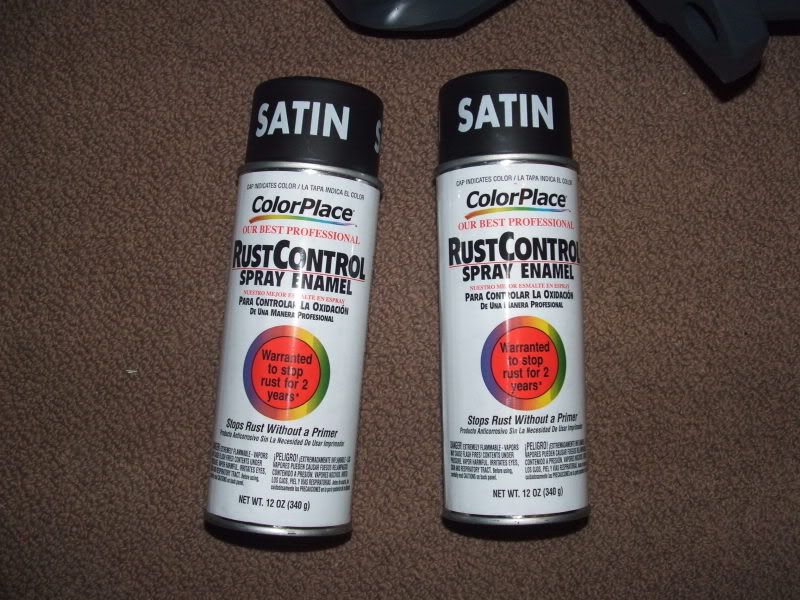
Before we can install it, we hafta paint it. Detours is smart. They send the winch bumper primed but not painted. Most
companies use powerdercoating and it ALWAYS get's damaged through shipping. You can't really touch up
powercoating that well. This bumper comes primed and ready for you to rattle can it or pro-paint it. In my case, i opted
for the most un-common color used on bumpers: black.
Let's see how much the two cans costs cuz i can't remember...
Oh damnit.....(rubbing eyes)
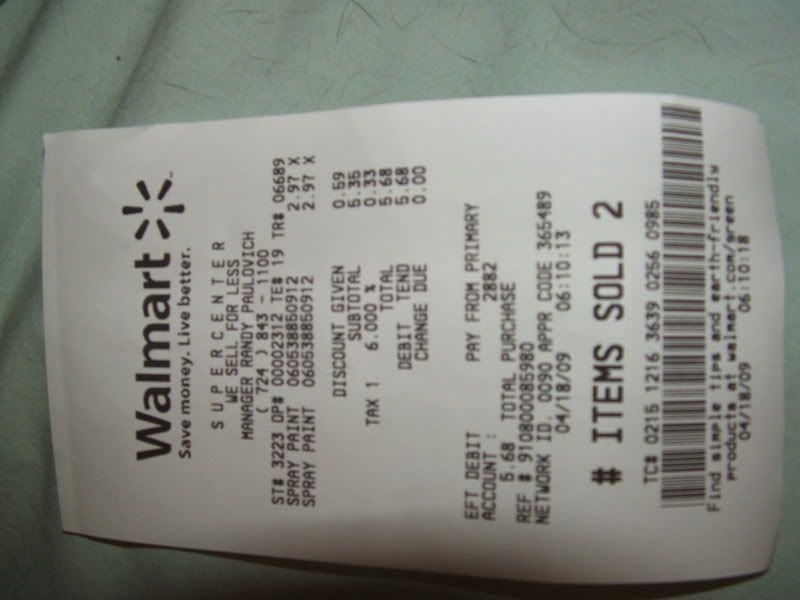
Ahh there it is. Almost $6. See, not too bad. Cheap paint!
Now it's time to paint the bumper so it's ready to be bolted on.
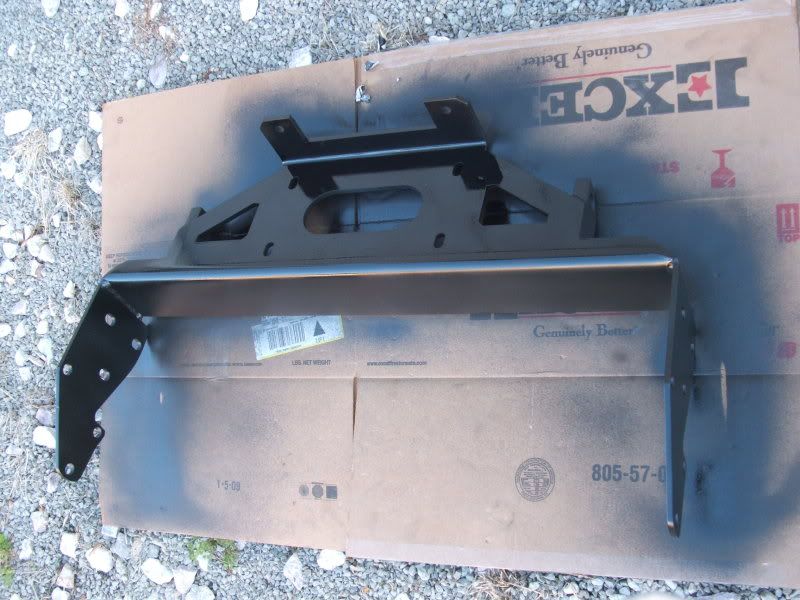
Paint it first so it would have time to dry while you are tearing apart your front end monster-garage style.
Ok let's climb under the front and check out what we need to remove or snap in half (argh!!!!)..
First, of all things, you need to order "da bumper". It's real easy. First make sure you have at least $350 ready. Next you
wanna go to XJ / MJ Backbone Bumper System and check out some of the pictures. Have a nice big bowl in
front of you to catch the drool. After drying off your mouth, call him up or send him an email saying "i want that damn
bumper!" and he'll bill you, you pay him, he ships it out, etc etc, you own a jeep, you know the drill VERY WELL.
A week or two later, a big brown box will appear on your doorstep. Rip that open and you will find this inside:
inside that envelope is where the nuts and bolts are hiding...
There were two white papers included and best thing of the entire package:
A STICKER!
Now you have everything you need to put this bumper on your.......you do have a cherokee right? I sure hope so. Here's
what we will be installing it on:
Before we can install it, we hafta paint it. Detours is smart. They send the winch bumper primed but not painted. Most
companies use powerdercoating and it ALWAYS get's damaged through shipping. You can't really touch up
powercoating that well. This bumper comes primed and ready for you to rattle can it or pro-paint it. In my case, i opted
for the most un-common color used on bumpers: black.
Let's see how much the two cans costs cuz i can't remember...
Oh damnit.....(rubbing eyes)
Ahh there it is. Almost $6. See, not too bad. Cheap paint!
Now it's time to paint the bumper so it's ready to be bolted on.
Paint it first so it would have time to dry while you are tearing apart your front end monster-garage style.
Ok let's climb under the front and check out what we need to remove or snap in half (argh!!!!)..
Thread Starter
CF Veteran
Joined: Oct 2007
Posts: 3,883
Likes: 6
From: W-PA
Year: 2001
Model: Cherokee
Engine: 4.0
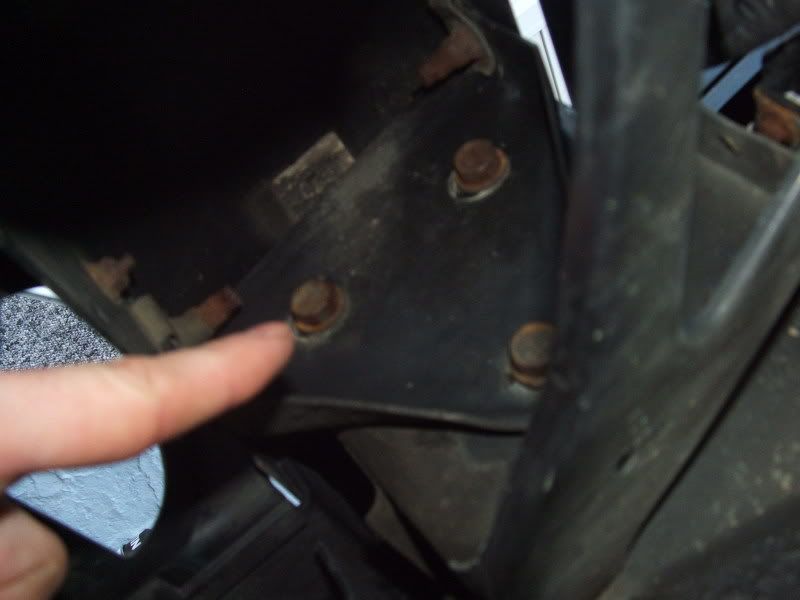
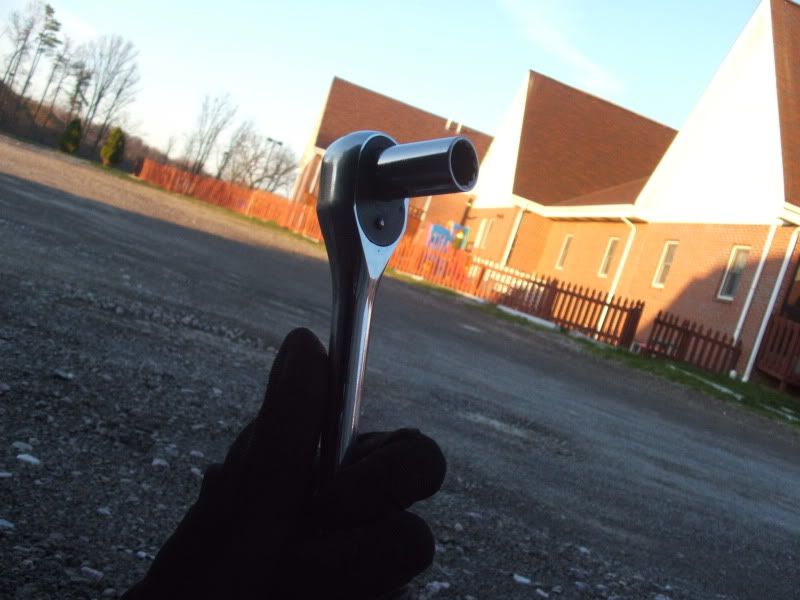
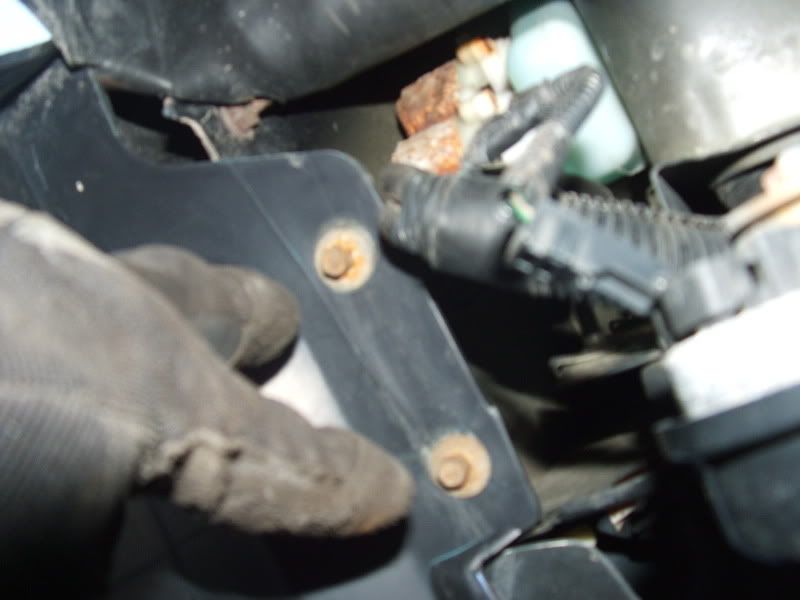
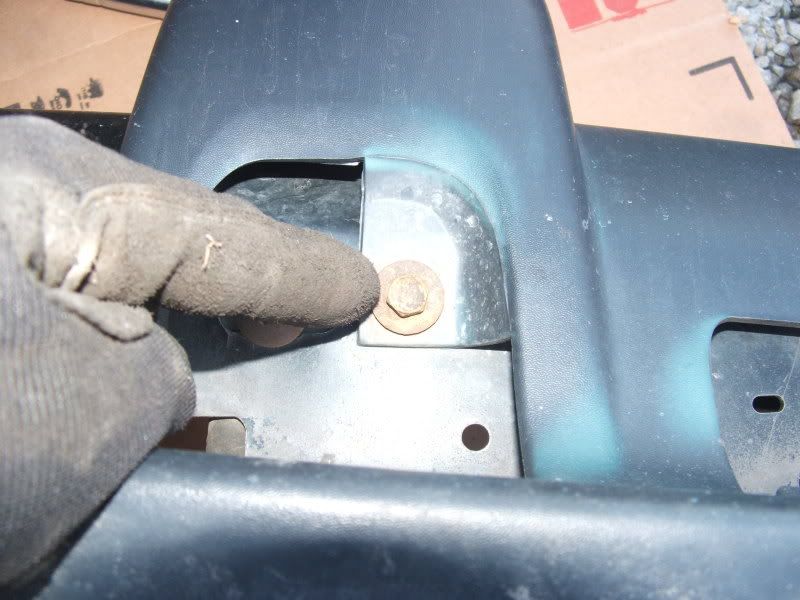
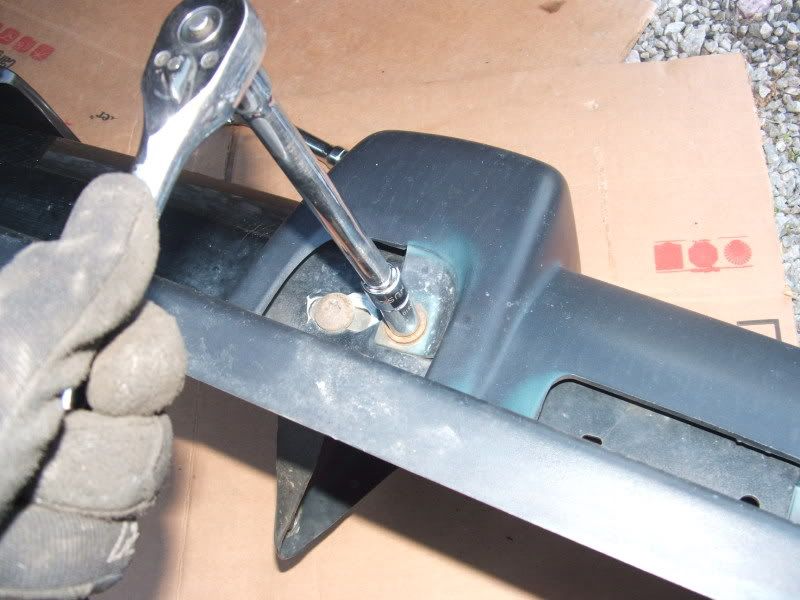
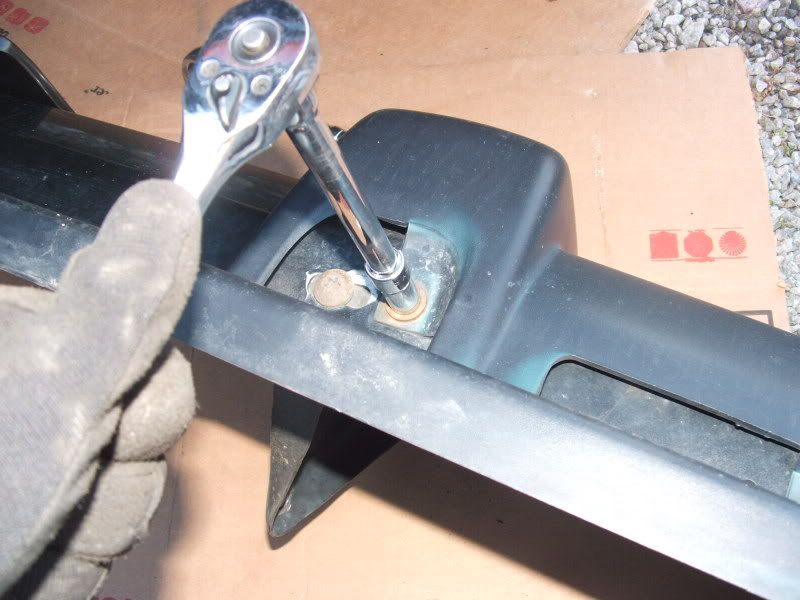
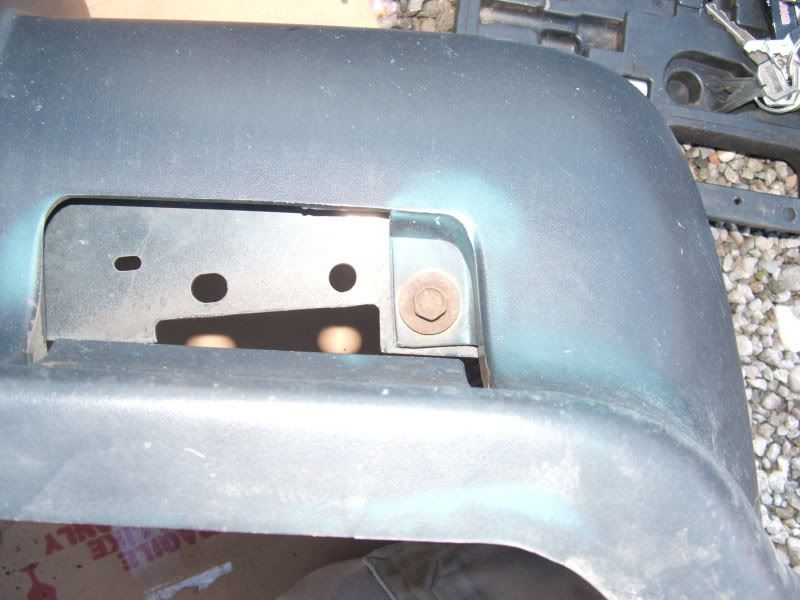
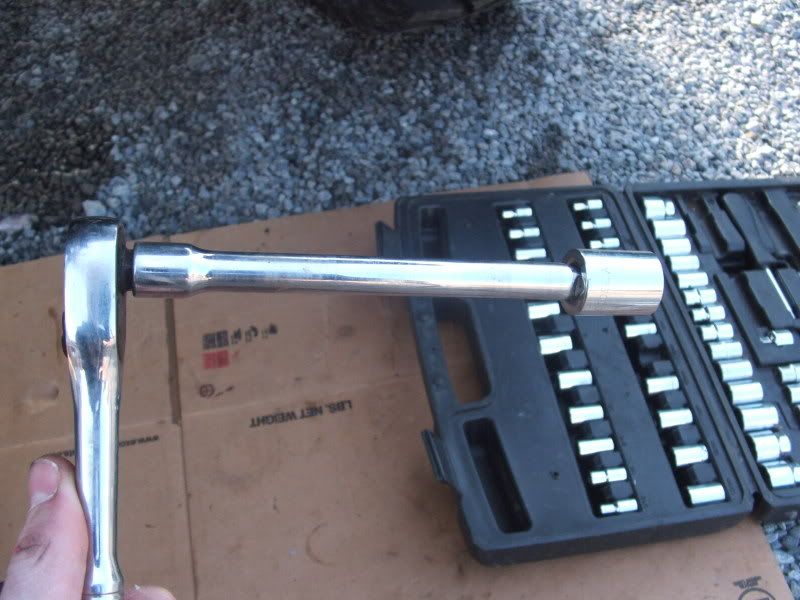
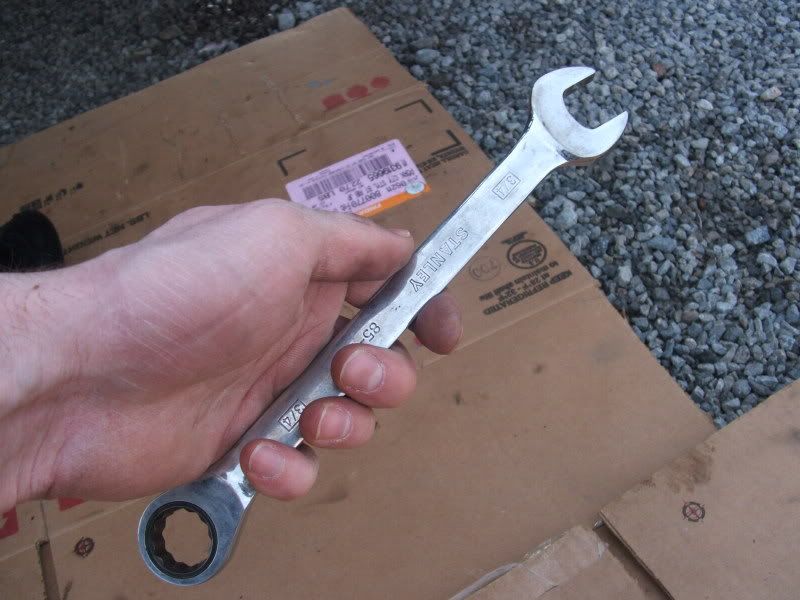
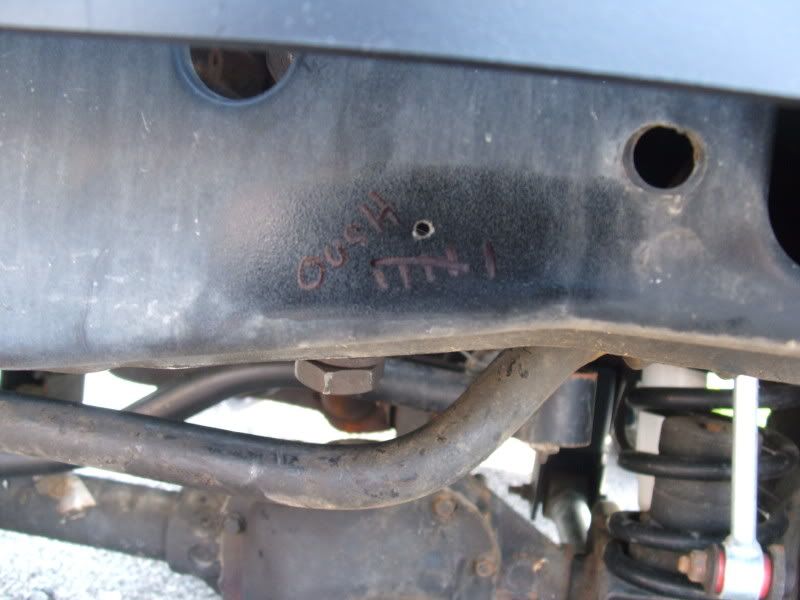
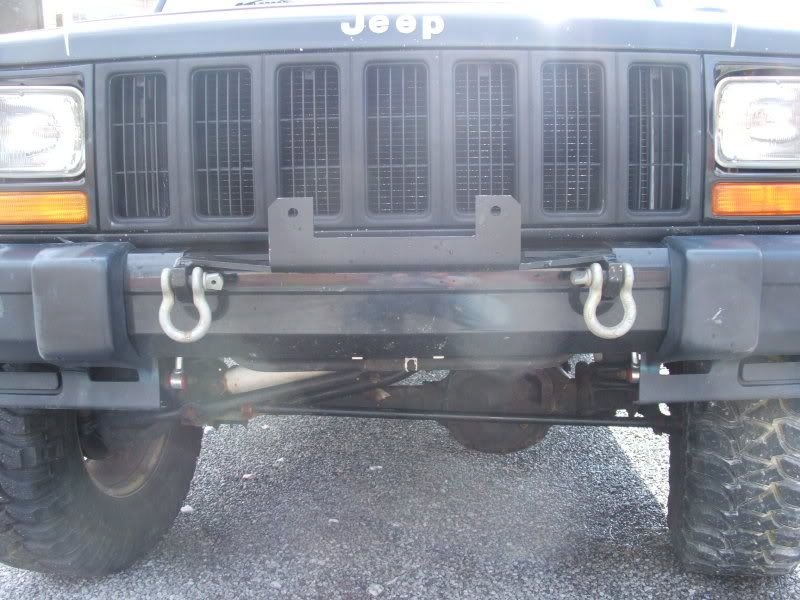
There are two brackets holding the bumper to the fake frame with three bolts per side. In order to remove those bolts,
you will need one of these:
With a 15mm socket....
Stick that cool little tool on the bolts and turn counterclockwise..
Remove all six bolts. I was curled up in a little ball expecting the bumper to fall on my nuts but that never occured. I
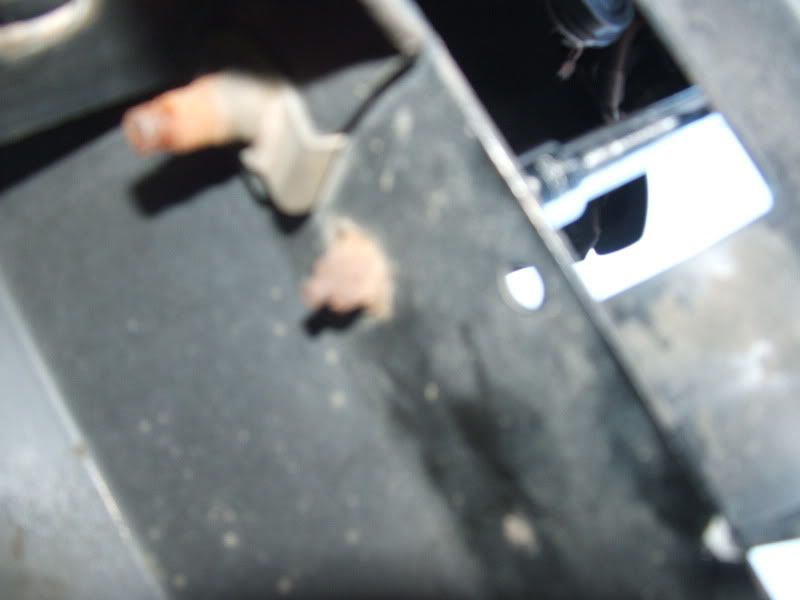
realized that there was something still holding the bumper on. Hmm.....AH HA! Found two pesky little bastard screws
holding the end caps on. they are on in the inside and you can see them by laying down and looking up through the hole
(remove plastic flare flap up and out of the way)...
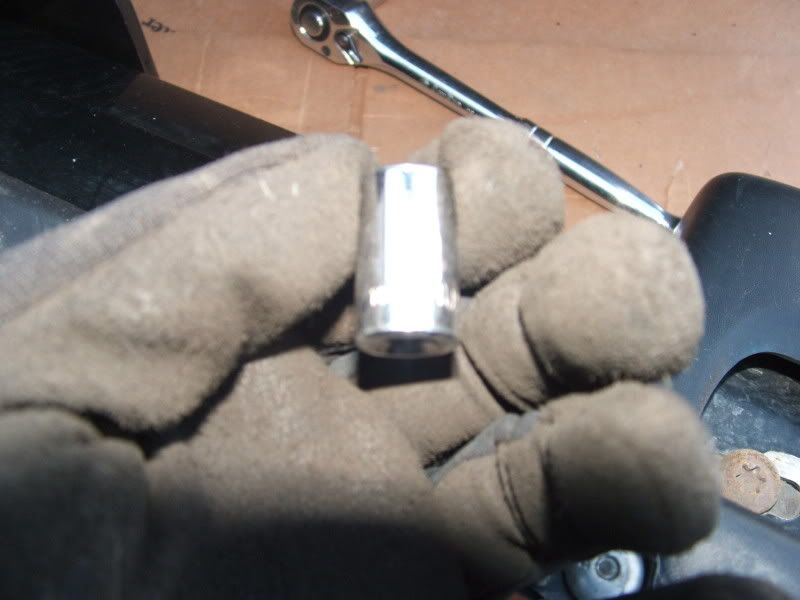
They are way up on the inside of the end caps so you need some reach. Take out the extenze pills and blend them with
water. Pour it on your neat little tool that you used to remove the six bumper bolts. This will be the result:
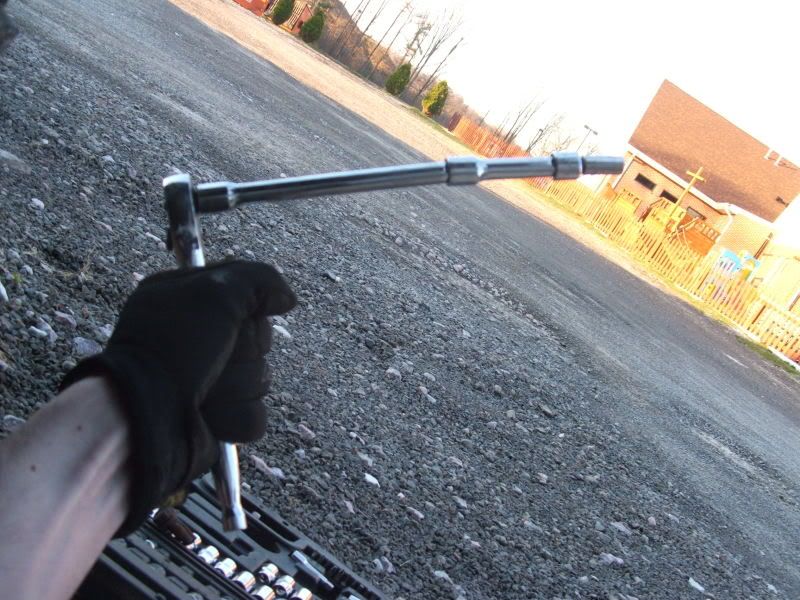
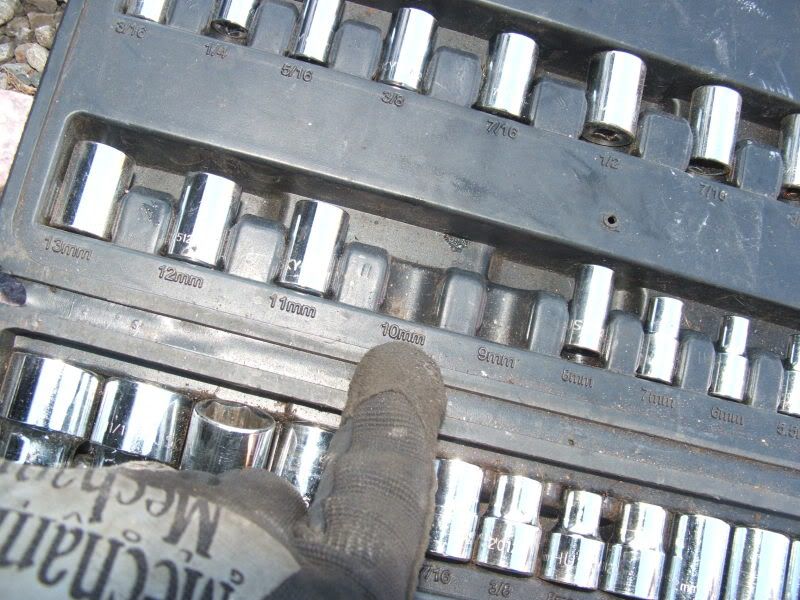
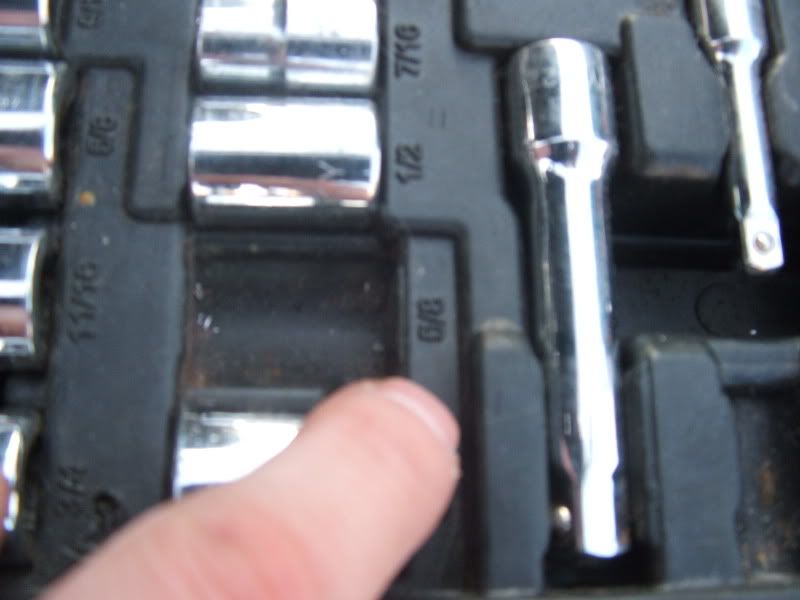
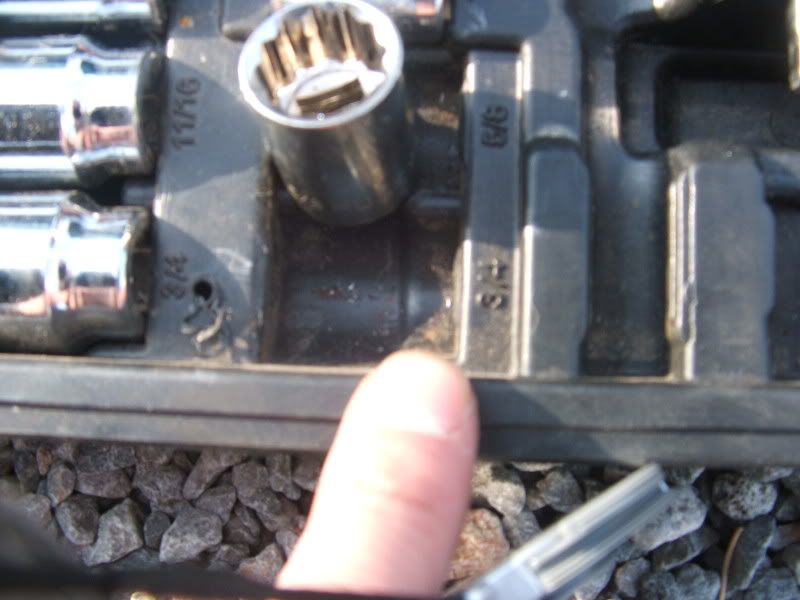
See, longer is better. Now go through your entire socket set, one by one, and try to find the right size socket. Of course
it's always the last one you pick up and in this case it is size.......
umm...can't see.....
..damn camera.......ahh screw it, simple:
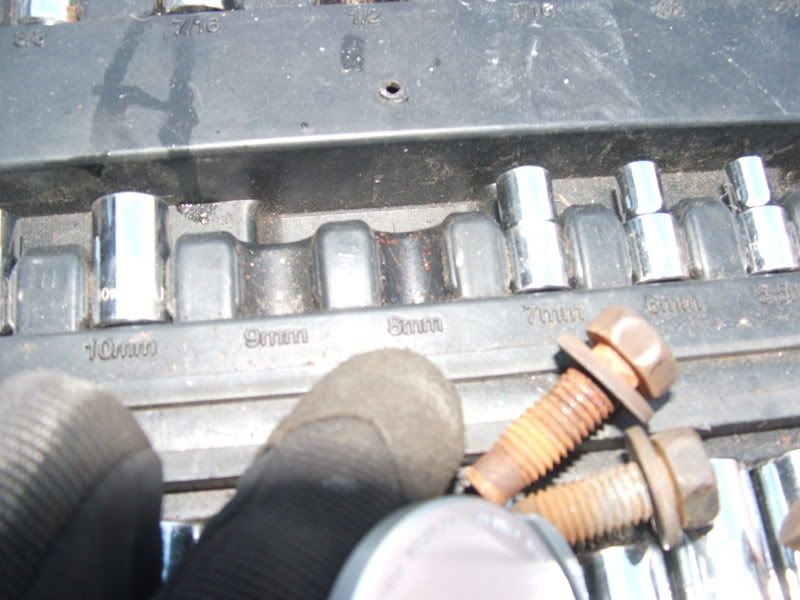
It's 8mm. No i didn't get 8mm and 9mm mixed up. I lost 9mm when i first bought this $50 set of sockets. Nice job right?
Thread Starter
CF Veteran
Joined: Oct 2007
Posts: 3,883
Likes: 6
From: W-PA
Year: 2001
Model: Cherokee
Engine: 4.0
Back on topic. Remove those two screws on both sides and then the bumper will start to release itself. I was lucky once
again cuz some sort of hose halted the bumper's progress towards earth:
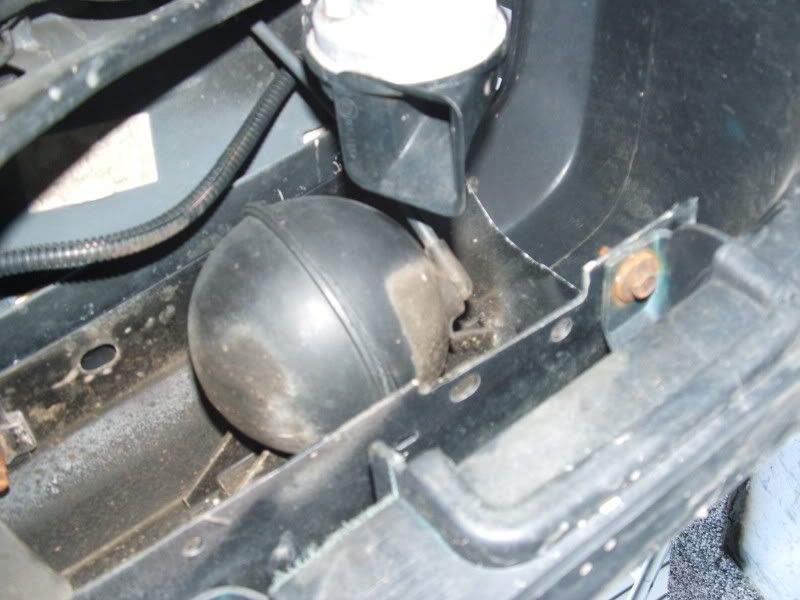
Someone installed a bomb that apparently did not function correctly and has been collecting dust. There's a hose
coming out of it and i assume it's a vacuum powered bomb. Since my AC and heater don't work this thing has no
chance to explode but I'll keep it in there anyways. Pull that hose out of the bomb....CAREFULLY.....
and ....HOUSTON, WE HAVE TOUCHDOWN!
Mission accomplished!
Ok now you have the bumper in YOUR command, let's remove the end caps. They are in the way of measuring if you
decide to keep your factory bumper.
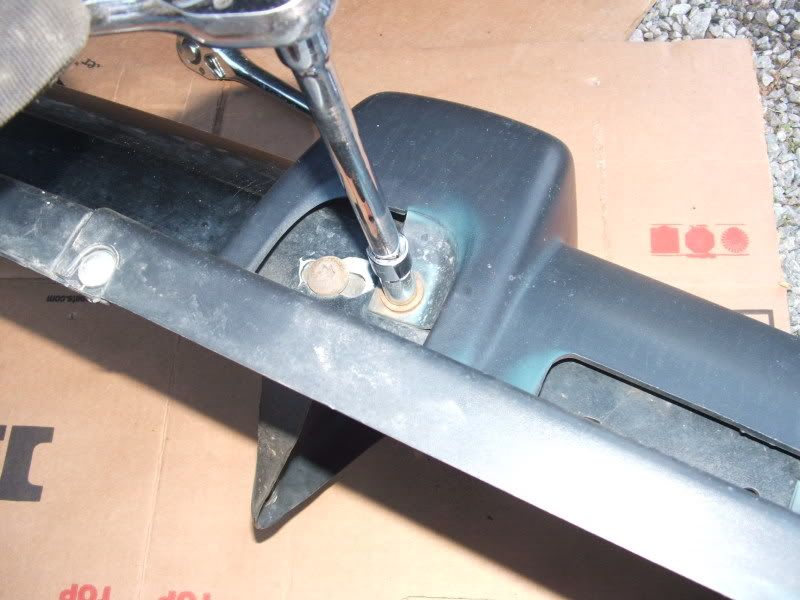
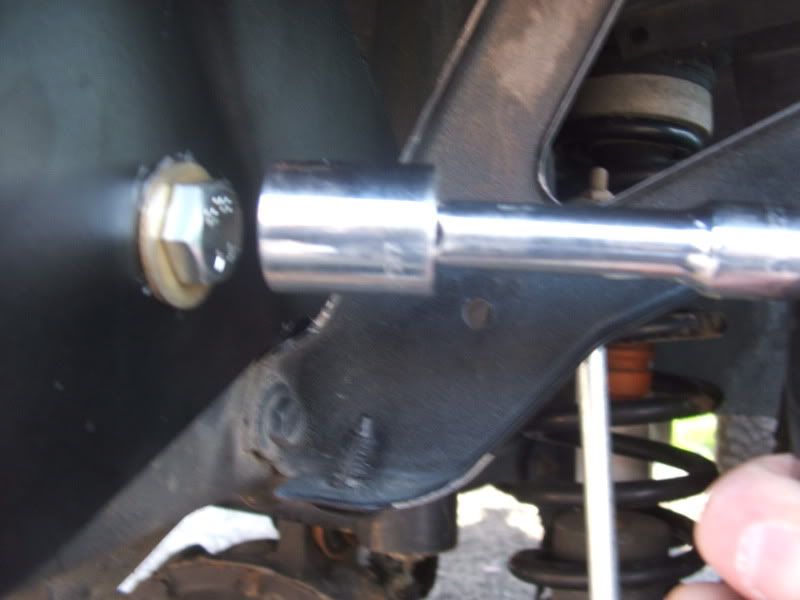
There are two bolts per side, on the bottom:
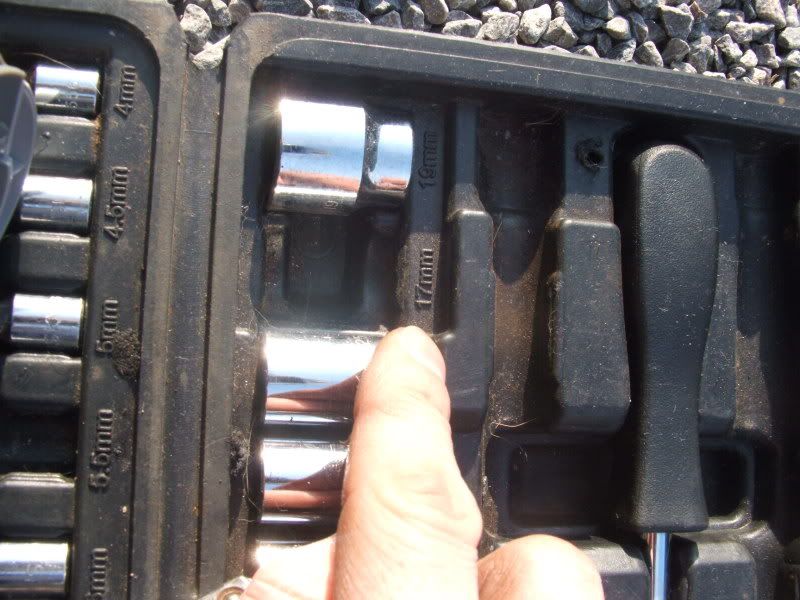
You will need your trusty tool you've been using and a socket in the size of....
oh..here we go again...
10mm. Yeah, the same size holding the rear end caps on, that i snapped in half.
take that wonderful tool with the socket and remove that bolt...
(3 minutes later)
(7 minutes later)
Hmm it just keeps spinning without coming out. Let's look underneath..
Ahhh no wonder. No biggie though, nothing my grips can't handle..
Here's the other bolt near the end..
Once you get those off, the end cap will pull away from the bumper..
again cuz some sort of hose halted the bumper's progress towards earth:
Someone installed a bomb that apparently did not function correctly and has been collecting dust. There's a hose
coming out of it and i assume it's a vacuum powered bomb. Since my AC and heater don't work this thing has no
chance to explode but I'll keep it in there anyways. Pull that hose out of the bomb....CAREFULLY.....
and ....HOUSTON, WE HAVE TOUCHDOWN!
Mission accomplished!
Ok now you have the bumper in YOUR command, let's remove the end caps. They are in the way of measuring if you
decide to keep your factory bumper.
There are two bolts per side, on the bottom:
You will need your trusty tool you've been using and a socket in the size of....
oh..here we go again...
10mm. Yeah, the same size holding the rear end caps on, that i snapped in half.
take that wonderful tool with the socket and remove that bolt...
(3 minutes later)
(7 minutes later)
Hmm it just keeps spinning without coming out. Let's look underneath..
Ahhh no wonder. No biggie though, nothing my grips can't handle..
Here's the other bolt near the end..
Once you get those off, the end cap will pull away from the bumper..
Thread Starter
CF Veteran
Joined: Oct 2007
Posts: 3,883
Likes: 6
From: W-PA
Year: 2001
Model: Cherokee
Engine: 4.0
Of course, like the bumper itself, it doesn't come off without a fight. There's another freakin bolt holding it on. What
the....screw it, just tear it...
Ok that's off and so is the other side. Let's go check out the bumper and see how it's drying..
Nice
Back to the bumper. Mine came with this bling bling low rider flap or whatever it's called. Garbage really. Not need either.
Let's take that off.
..and throw it away...literally.

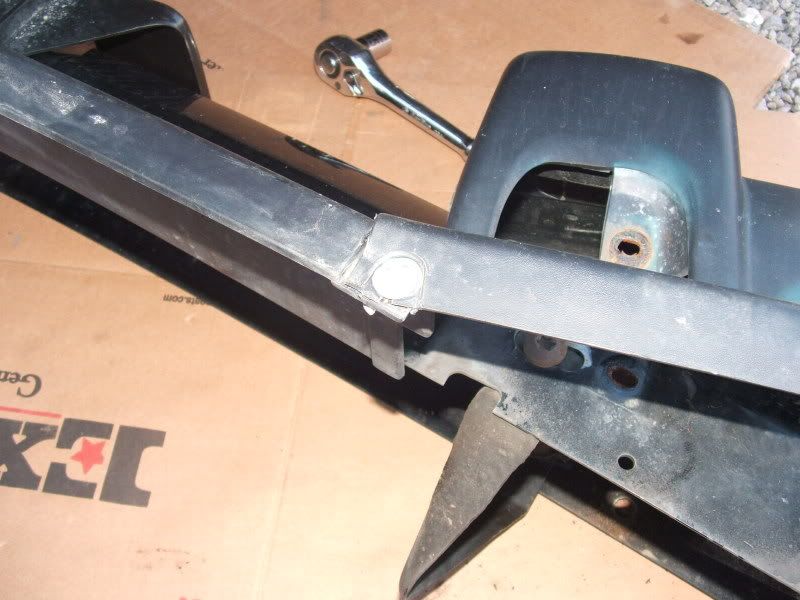
Now comes the time where you have to remove the three steering box bolts. I was expecting to breeze through this with
ease but of course nothing ever goes as planned. I ended up snapping two of the three steering box bolts. They were
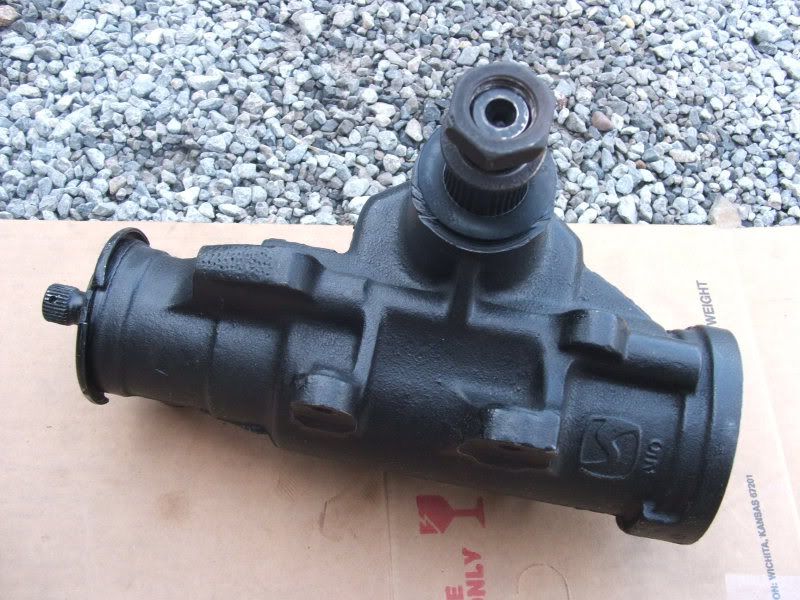
rust-welded to the box/spacer. Since I could not get them out of the box, I had to replace the box with a reman:
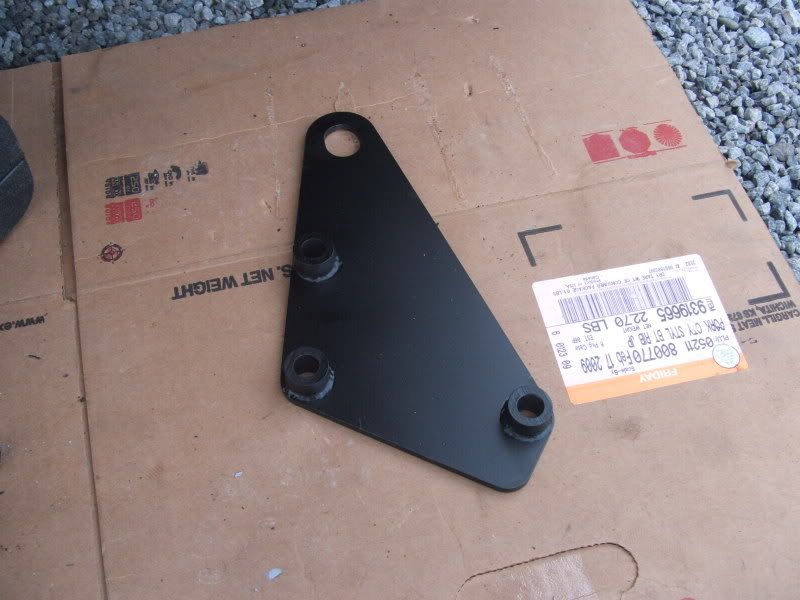
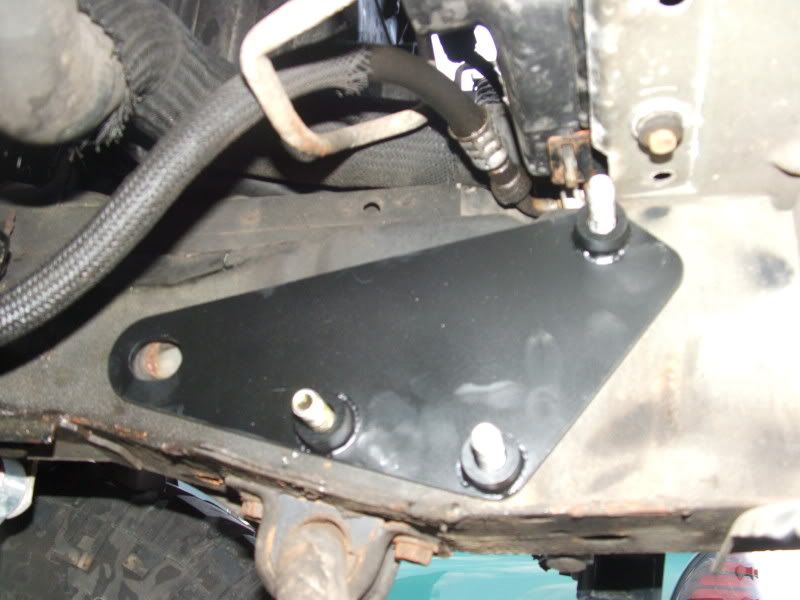
and then order a frame spacer from c-rok:
I went with c-rock because it's steel. The oem spacer is made out of alum. or magnesium and it corrodes to metal,
which left me screwed in the first place. The c-rok spacer acts as a brace and replaces the oem spacer. With the c-rok
spacer and detour's bumper, both sides of my frame are reinforced and i have little to worry about tearing the box off our
cardboard frames.
It has been a week and now i'm continuing the install. I installed the steering box and it's ready to go. Let's resume by
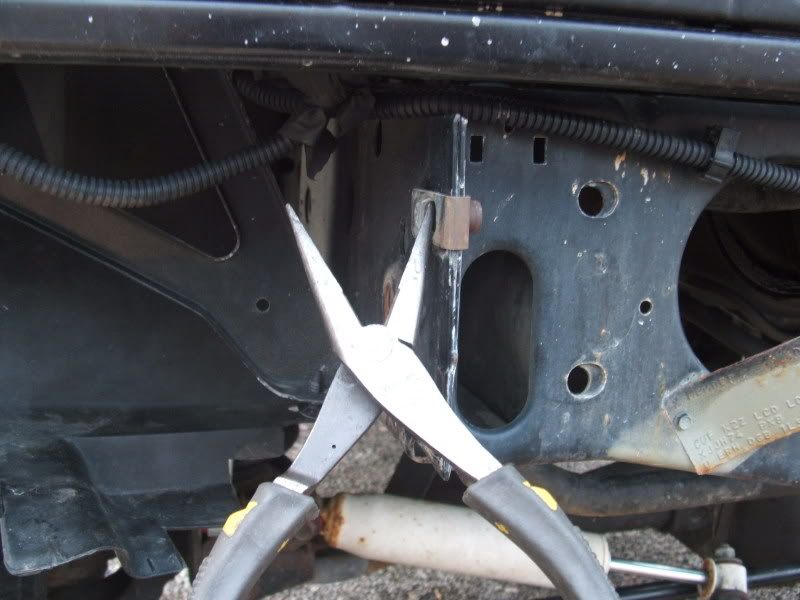
removing the nut clips on the end of the frame, that held the bumper on. You remember the six bolts you removed?
These are the nuts for them. Pop them off anyway you please..
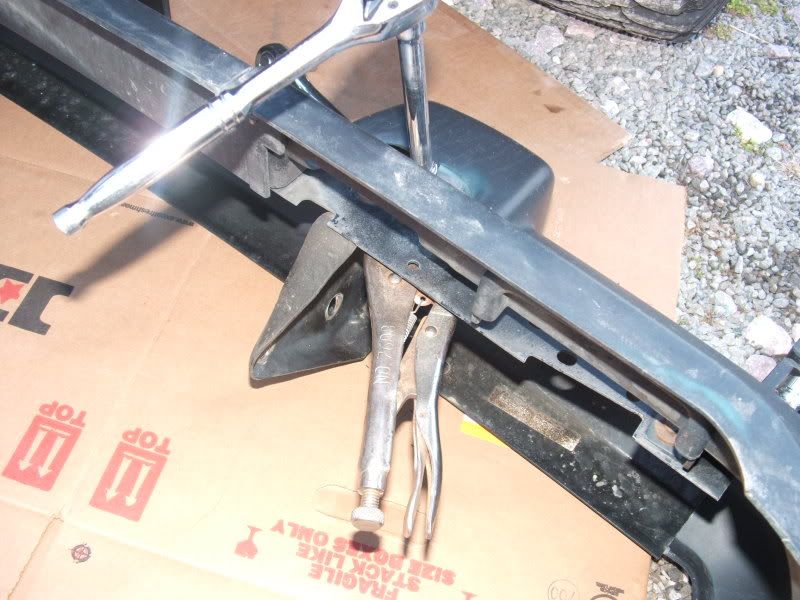
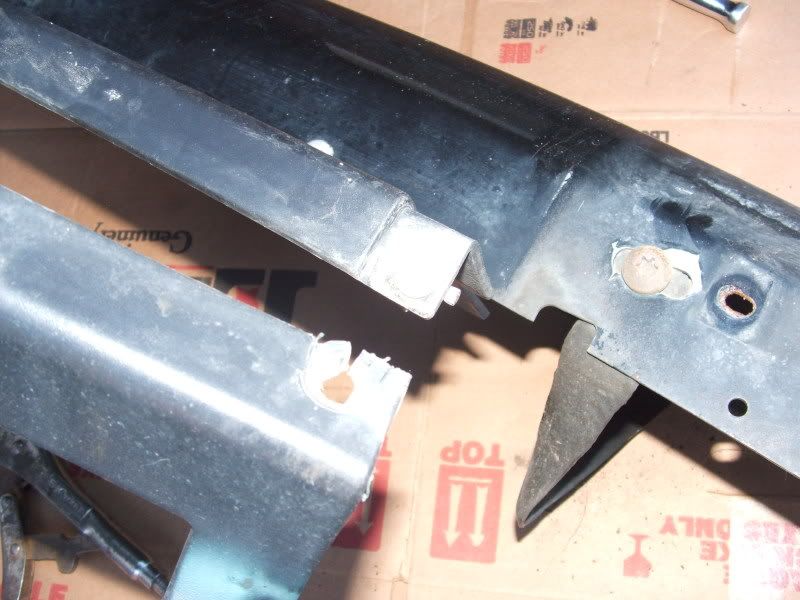
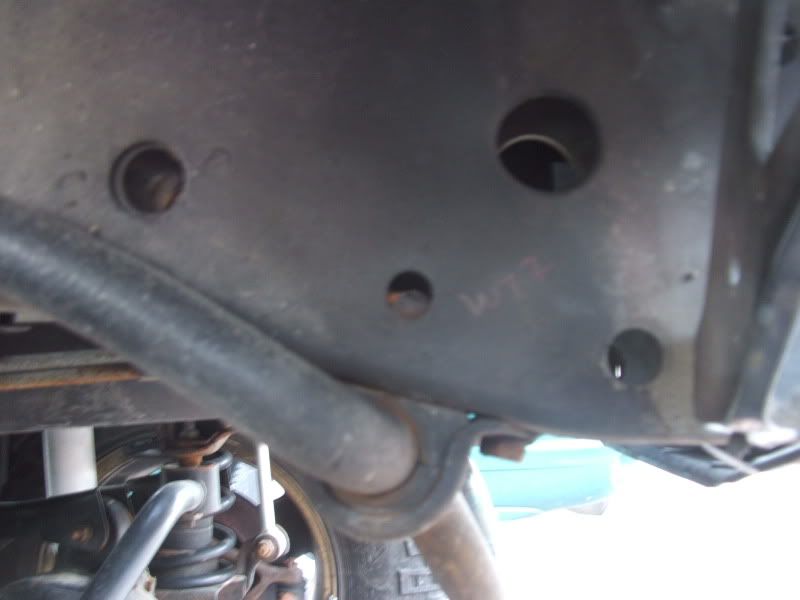
Now it's time to slide the detour's bumper onto the frame but I decided to check the bolt holes first. Good thing I did cuz
look what I found:
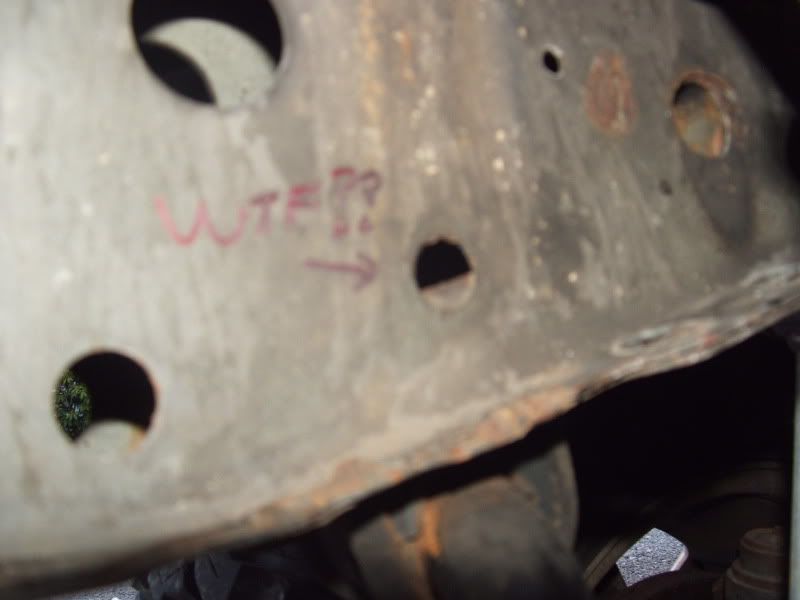
Whoever rebuilt the front end didn't do it perfectly. The bolt holes were blocked 1/2 way by the nutsert for the sway bar
brackets.
Both sides too.....
I did not panic. I have another trusty tool upstairs that can easily take care of this minor setback:
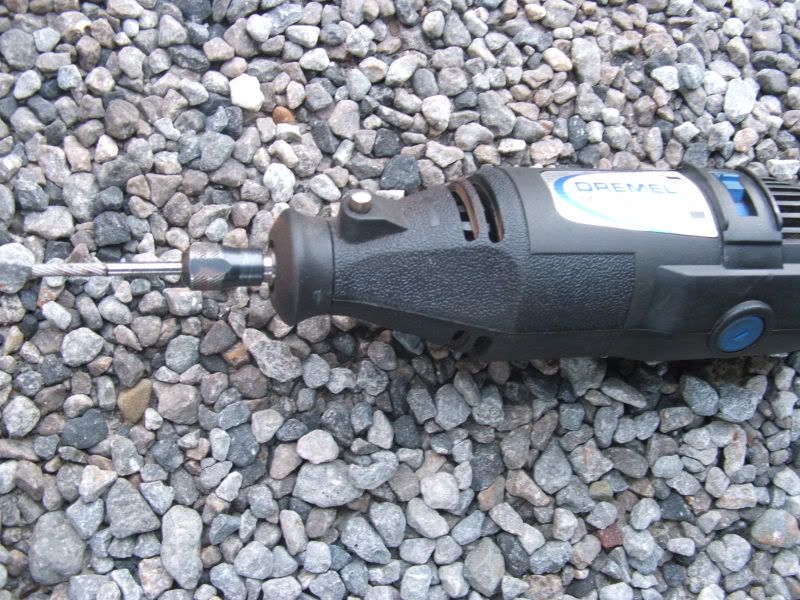
Yeah baby! POWER TOOLS!.....well sorta....
the....screw it, just tear it...
Ok that's off and so is the other side. Let's go check out the bumper and see how it's drying..
Nice
Back to the bumper. Mine came with this bling bling low rider flap or whatever it's called. Garbage really. Not need either.
Let's take that off.
..and throw it away...literally.
Now comes the time where you have to remove the three steering box bolts. I was expecting to breeze through this with
ease but of course nothing ever goes as planned. I ended up snapping two of the three steering box bolts. They were
rust-welded to the box/spacer. Since I could not get them out of the box, I had to replace the box with a reman:
and then order a frame spacer from c-rok:
I went with c-rock because it's steel. The oem spacer is made out of alum. or magnesium and it corrodes to metal,
which left me screwed in the first place. The c-rok spacer acts as a brace and replaces the oem spacer. With the c-rok
spacer and detour's bumper, both sides of my frame are reinforced and i have little to worry about tearing the box off our
cardboard frames.
It has been a week and now i'm continuing the install. I installed the steering box and it's ready to go. Let's resume by
removing the nut clips on the end of the frame, that held the bumper on. You remember the six bolts you removed?
These are the nuts for them. Pop them off anyway you please..
Now it's time to slide the detour's bumper onto the frame but I decided to check the bolt holes first. Good thing I did cuz
look what I found:
Whoever rebuilt the front end didn't do it perfectly. The bolt holes were blocked 1/2 way by the nutsert for the sway bar
brackets.
Both sides too.....
I did not panic. I have another trusty tool upstairs that can easily take care of this minor setback:
Yeah baby! POWER TOOLS!.....well sorta....
Thread Starter
CF Veteran
Joined: Oct 2007
Posts: 3,883
Likes: 6
From: W-PA
Year: 2001
Model: Cherokee
Engine: 4.0
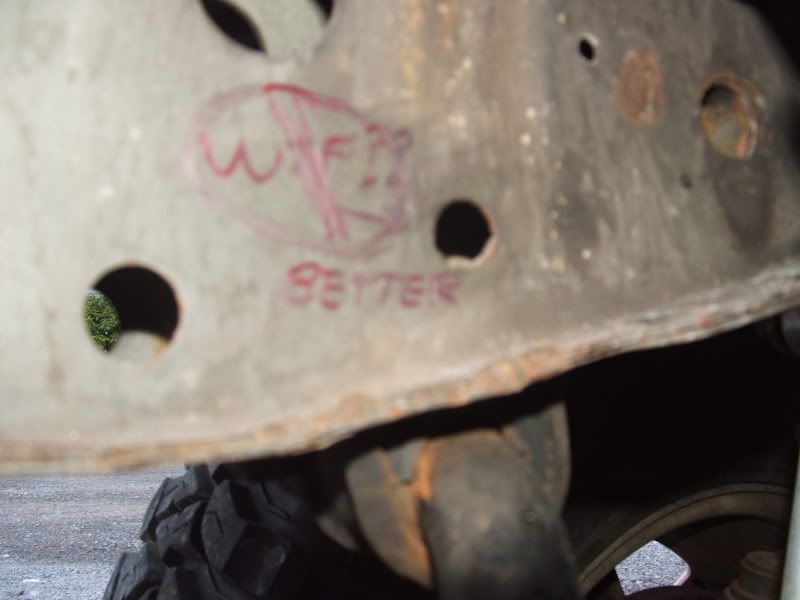
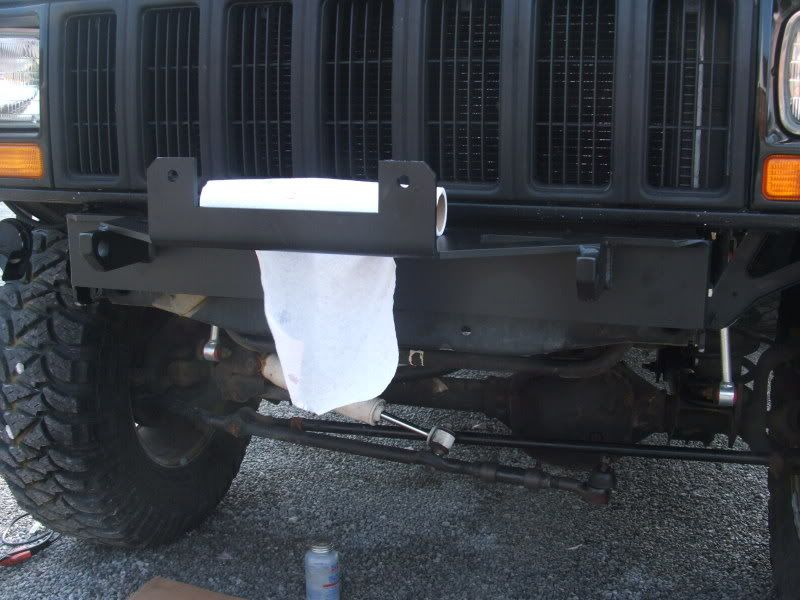
After a bit of dremeling, the holes were clear for insertion:
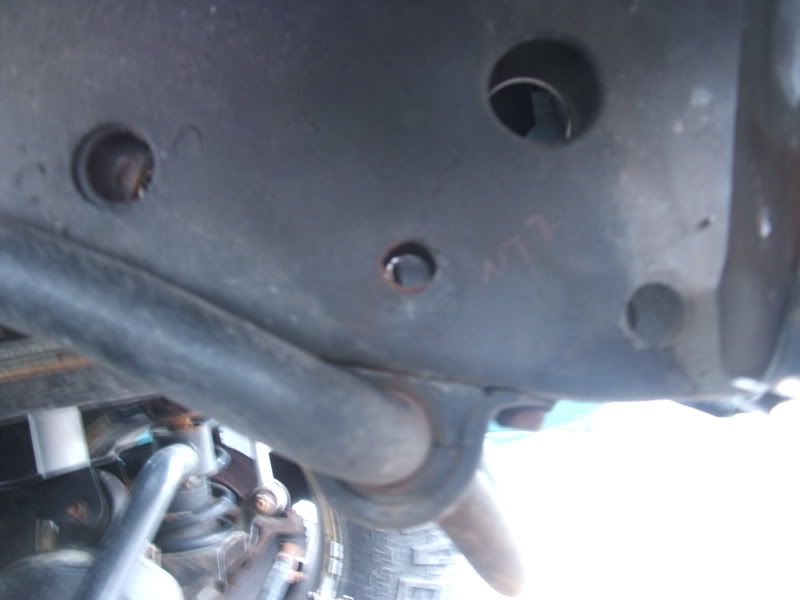
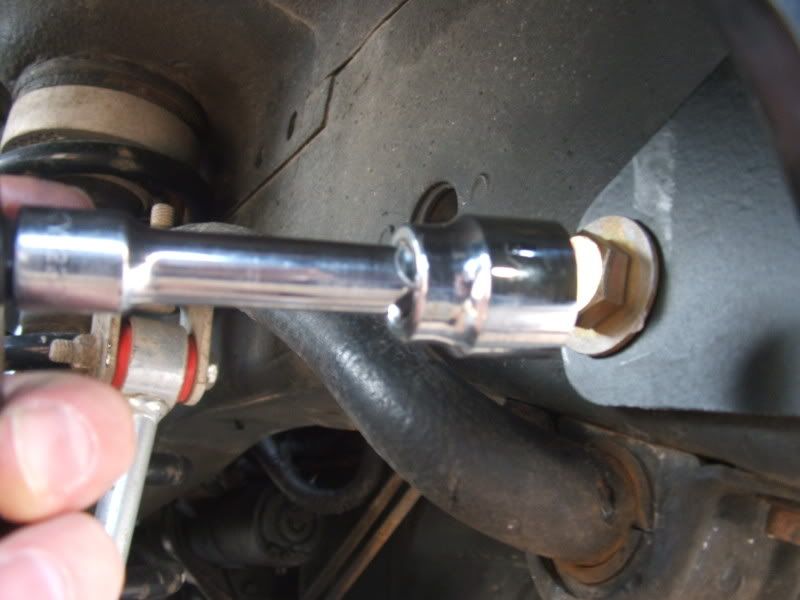
Now let's take the bumper and slide it on the frame, inserting one bolt per side to hold it in place.
After it's reunited with the jeep, insert two more bolts on the passenger side, and the three steering box bolts on the
driver's side.
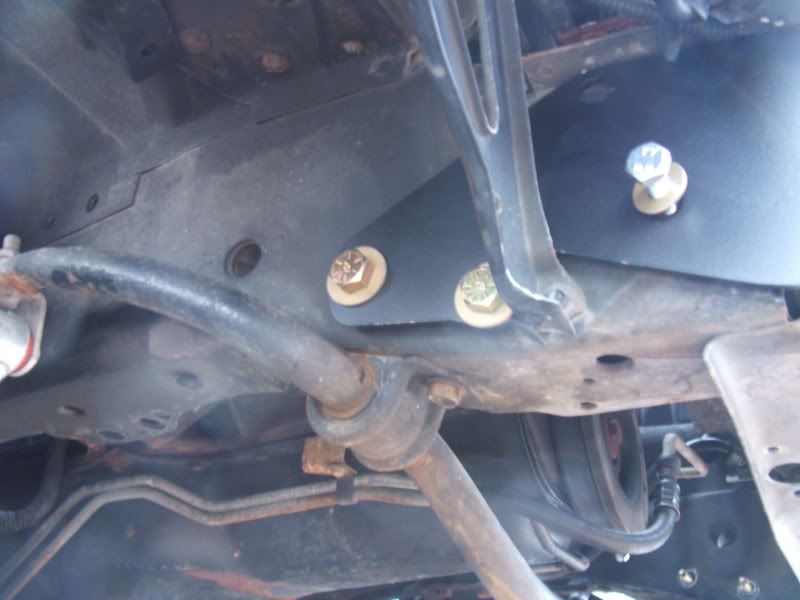
Let's start off by tightening the bolts closest to you, near the front:
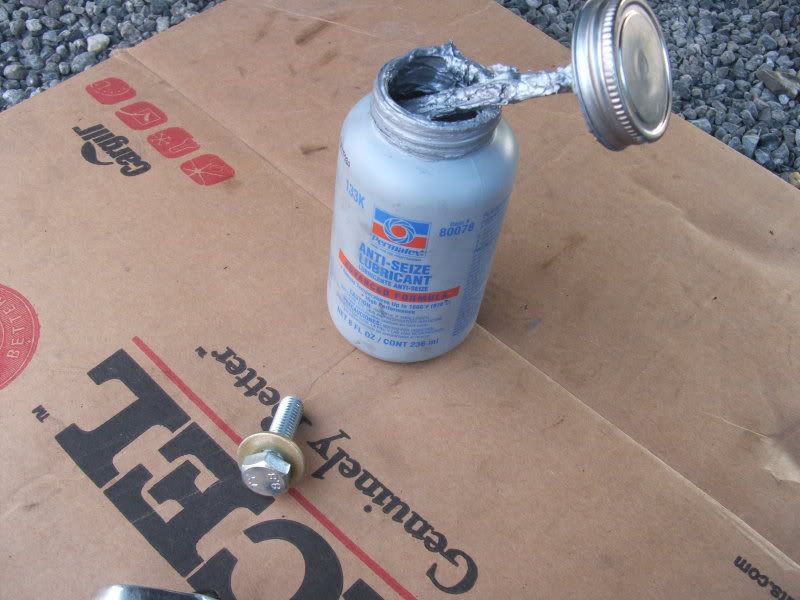
I chose to use some anti-sieze on the threads. It'll save my **** later on.
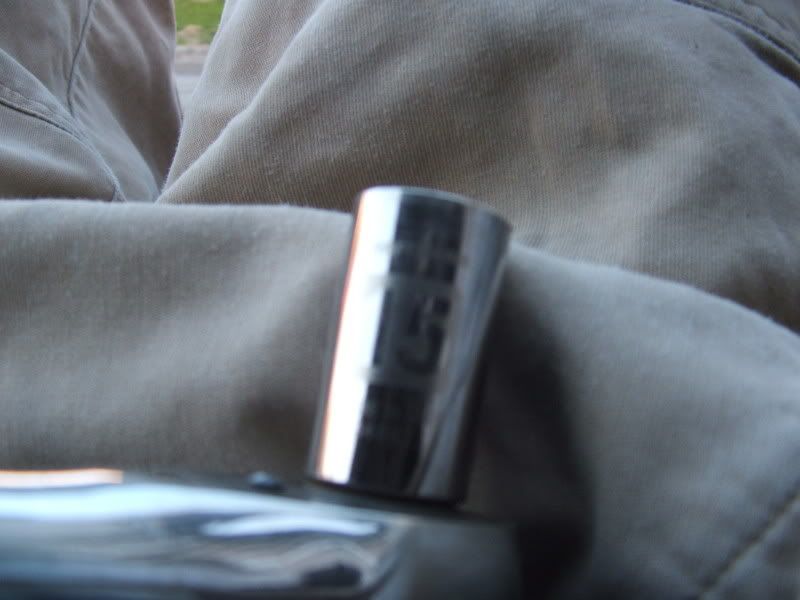
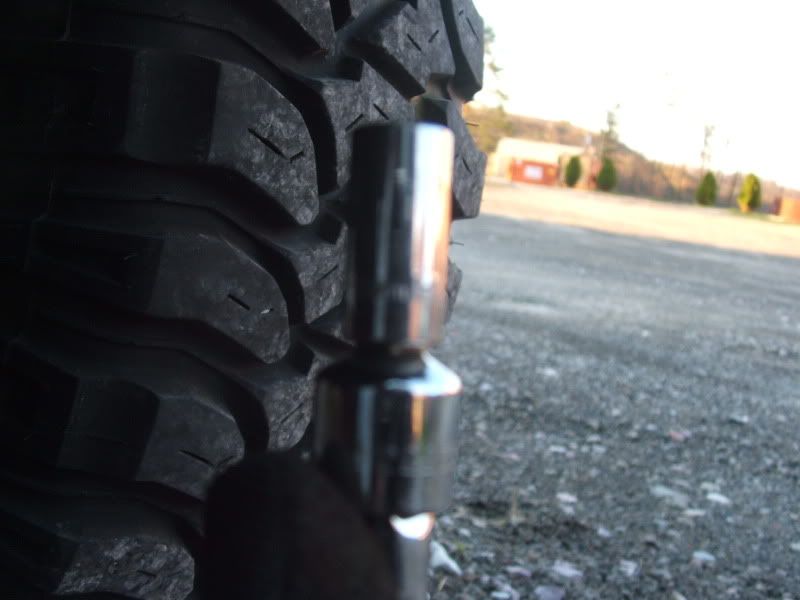
Now we need to pour some more extenze drink on the trusty tool to get it long again and stick a socket on it.
This is what size you need and i'm not bothering taking another picture of the socket...
Tighten clockwise..
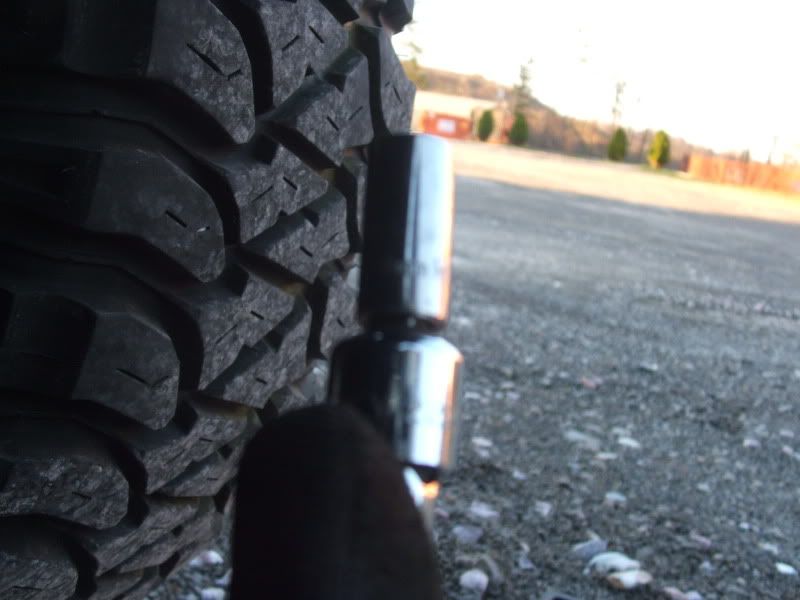
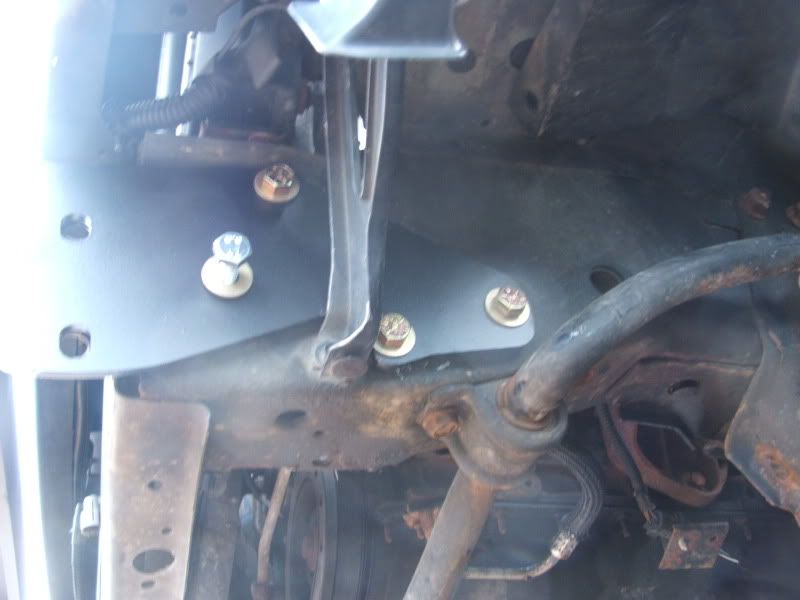
After getting those two bolts on both sides, move onto the passenger side two rear bolts. You will need the same tool
again, and i found out it's called a socket wrench, or rachet. I still call it my trusty tool.
and of course, the size socket you need...
Now let's take the bumper and slide it on the frame, inserting one bolt per side to hold it in place.
After it's reunited with the jeep, insert two more bolts on the passenger side, and the three steering box bolts on the
driver's side.
Let's start off by tightening the bolts closest to you, near the front:
I chose to use some anti-sieze on the threads. It'll save my **** later on.
Now we need to pour some more extenze drink on the trusty tool to get it long again and stick a socket on it.
This is what size you need and i'm not bothering taking another picture of the socket...
Tighten clockwise..
After getting those two bolts on both sides, move onto the passenger side two rear bolts. You will need the same tool
again, and i found out it's called a socket wrench, or rachet. I still call it my trusty tool.
and of course, the size socket you need...
Thread Starter
CF Veteran
Joined: Oct 2007
Posts: 3,883
Likes: 6
From: W-PA
Year: 2001
Model: Cherokee
Engine: 4.0
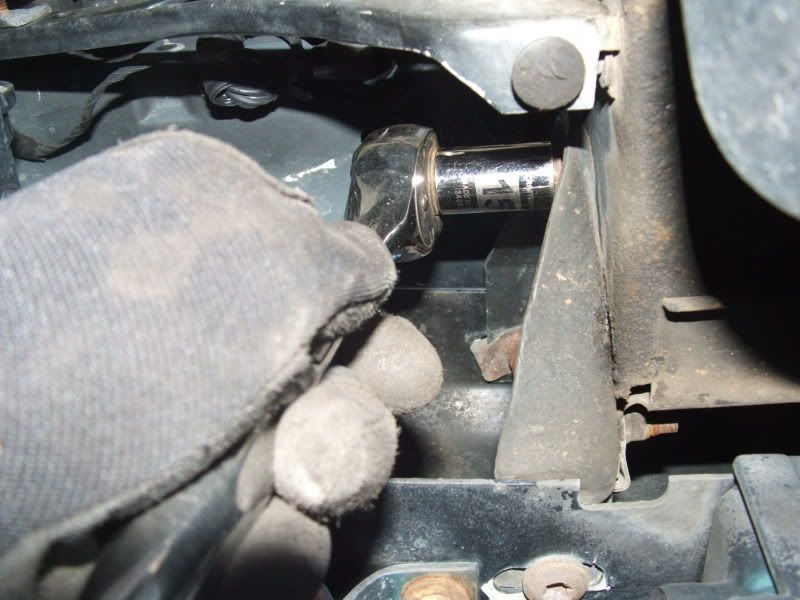
This bolt has those tricky nuts on the other side that fooled us earlier. We will need the same size open end wrench to
overcome troublemaker..
Tighten them up and now it's the steering box bolts. You will need this size:
I had to install my c-roke brace and steering box, and you will be doing pretty much the same thing with your box and
spacer..
Again, tighten the steering box bolts clockwise and TIGHT. I dunno the factory torque specs on these bolts, nor do I
care. I just put them super freakin tight with some blue locktight. They aren't going anywhere.
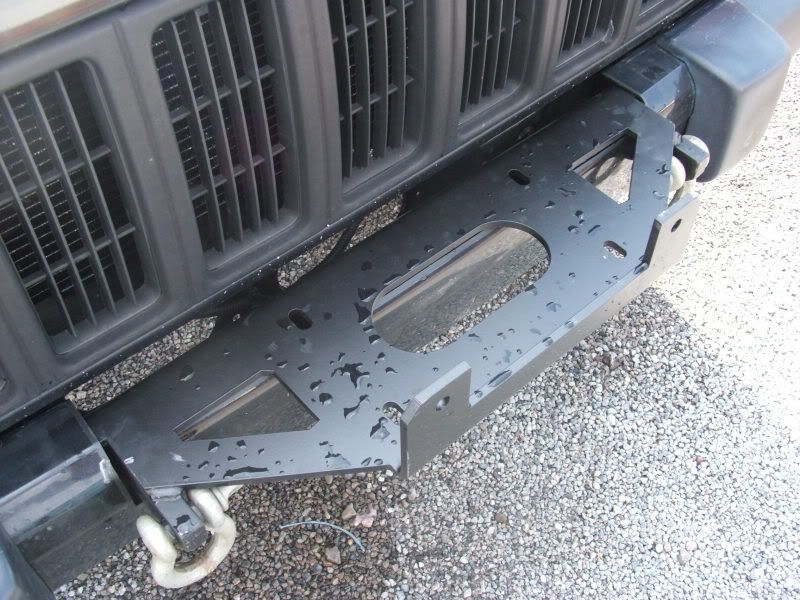
Now we are pretty much done but before we sit back and check out the new winch bumper, let's see what the scorecard
is showing:
Yup, the bumper won 6-0. That's how many times i struck my head on the newly extended winch bumper that just
happens to extend right over your head (if your jeep is high enough). It hurt.....bad.
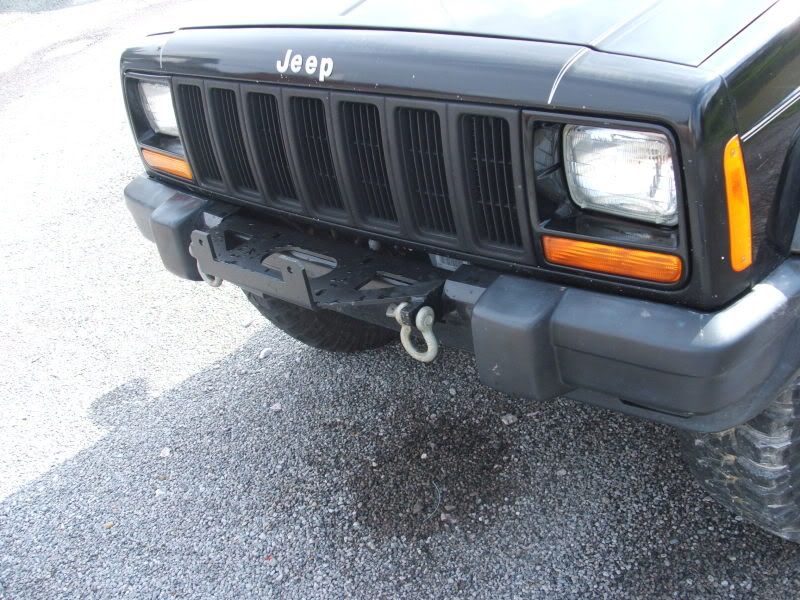
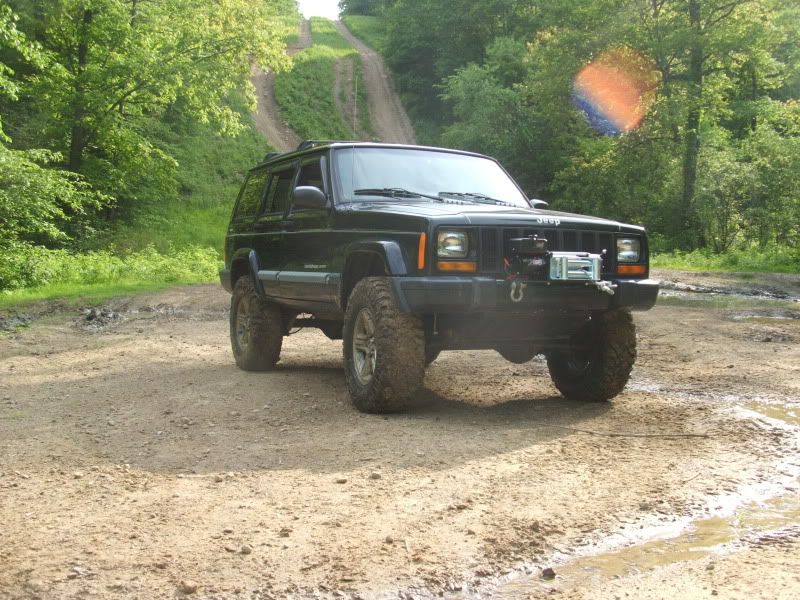
After retreiving an ice pack from the freezer, we can now stand back and check out our new accessory added to our
jeep:
A paper towel holder:
the only one on the market today.
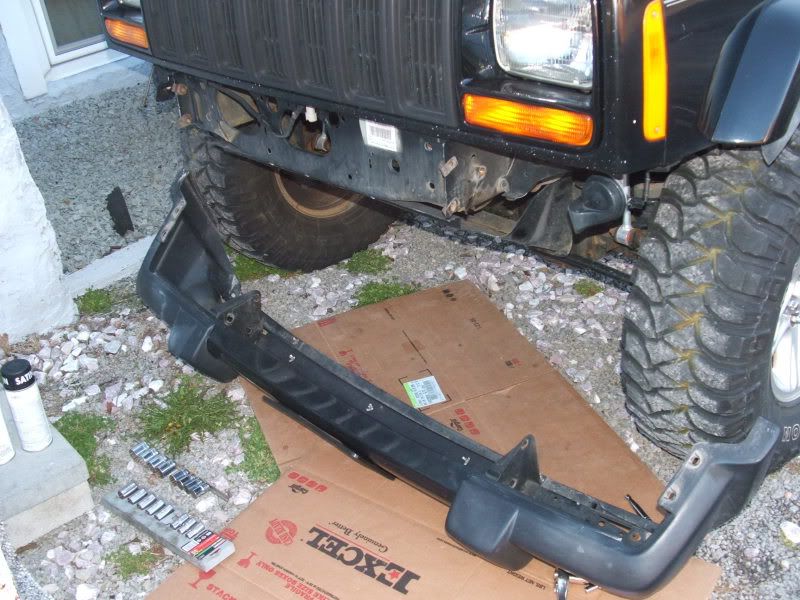
This project is not completed yet. You are only half done. Now you have to decide whether you wanna re-use your factory bumper or modify an aftermarket bumper to fit on it. I chose to go with my factory bumper cuz i'm cheap.
I was gonna give you a write-up on how to cut it but my gf was a little ticked seeing her camera covered in grease and dirt from my hands during the installation of the paper towel holder. "It happens" i told her but that ended up with no camera to use. I did manage to sneak a few completed shots. Don't tell her please...shh!
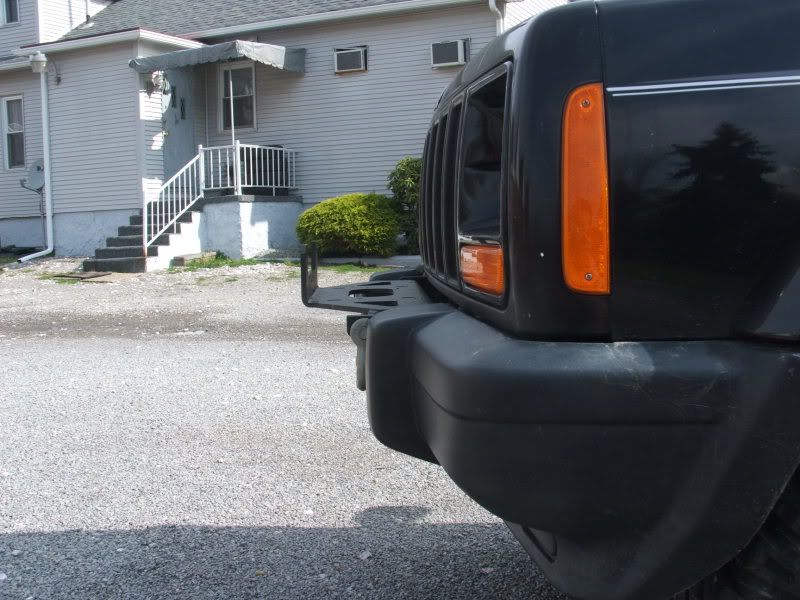
You can see the big gap below the bumper from when we threw away that center piece. I am in the process of cutting the end caps to shorter so they line up with that center section. It'll give me more ground clearance too.
How far it sticks out and what my head battled against...
Well, that's that. I hope this helps enough to prevent you guys from installing the bumper upside down or something.
overcome troublemaker..
Tighten them up and now it's the steering box bolts. You will need this size:
I had to install my c-roke brace and steering box, and you will be doing pretty much the same thing with your box and
spacer..
Again, tighten the steering box bolts clockwise and TIGHT. I dunno the factory torque specs on these bolts, nor do I
care. I just put them super freakin tight with some blue locktight. They aren't going anywhere.
Now we are pretty much done but before we sit back and check out the new winch bumper, let's see what the scorecard
is showing:
Yup, the bumper won 6-0. That's how many times i struck my head on the newly extended winch bumper that just
happens to extend right over your head (if your jeep is high enough). It hurt.....bad.
After retreiving an ice pack from the freezer, we can now stand back and check out our new accessory added to our
jeep:
A paper towel holder:
the only one on the market today.
This project is not completed yet. You are only half done. Now you have to decide whether you wanna re-use your factory bumper or modify an aftermarket bumper to fit on it. I chose to go with my factory bumper cuz i'm cheap.
I was gonna give you a write-up on how to cut it but my gf was a little ticked seeing her camera covered in grease and dirt from my hands during the installation of the paper towel holder. "It happens" i told her but that ended up with no camera to use. I did manage to sneak a few completed shots. Don't tell her please...shh!
You can see the big gap below the bumper from when we threw away that center piece. I am in the process of cutting the end caps to shorter so they line up with that center section. It'll give me more ground clearance too.
How far it sticks out and what my head battled against...
Well, that's that. I hope this helps enough to prevent you guys from installing the bumper upside down or something.

Thread
Thread Starter
Forum
Replies
Last Post
NM-XJ
Stock XJ Cherokee Tech. All XJ Non-modified/stock questions go here
18
Oct 23, 2018 04:21 PM
98JGC826
Stock Grand Cherokee Tech. All ZJ/WJ/WK Non-modified/stock questions go here!
2
Sep 3, 2016 08:10 PM
frado2jr
Stock XJ Cherokee Tech. All XJ Non-modified/stock questions go here
14
Sep 15, 2015 10:20 AM
Sandyman
Stock XJ Cherokee Tech. All XJ Non-modified/stock questions go here
1
Sep 10, 2015 09:21 AM
Currently Active Users Viewing This Thread: 1 (0 members and 1 guests)