
The Unnamed

Thread Starter
Senior Member
Joined: Nov 2010
Posts: 976
Likes: 5
From: Cloquet, MN
Year: 2000 Ltd.
Model: Cherokee
Engine: 4.0L I6
I found out a week later that I shot myself in the foot with the regear on the D35. The next weekend I tore into the front axle. I got the shafts pulled, oil drained etc. Everything except pulling the carrier and pinion. I went in to eat dinner and had a face palm moment. It dawned on me that I couldn't regear the D30 because the carrier break was at 3.73.  That left me with a couple options. I didn't want to put a front truetrac in right now because of the cost, so I could:
1. Regear the rear axle back to 3.55 and put the front back together.
2. Spend $75 or $100 and get a 3.73 open carrier (and either put the XJ back together and/or wait until one showed up.)
3. Spend $390 and get the truetrac (and wait until it shows up.)
I decided to go with option #3. I REALLY didn't want to put the old gears back in the D35, and buying an open carrier would be pissing money down the drain. I might find a used one but then I'd either be putting the Jeep back together to rip it apart later, or leaving it apart until I got the parts. I could get a Truetrac from Summit in a couple days so that's what I went with.
Install went smoother than the D35. I ended up replacing the inner pinion bearing and race (bent the cage pulling the old one off) and put new carrier bearings in. A tip for anyone doing this that reads this, use the coupon codes for Advance Auto Parts. The one I used saved $20 on a $50 purchase. Paid for two extra bearings that I ground out with a die grinder to use as fit-up bearings.
Got it all back together and all seem to be well. I've hear of people having the front pull because of a defective unit, but mine runs true. I tested the rear unit by parking half on a dirt shoulder and punching it, and it seems to work as advertised. Now I just have to find another job (lost mine the day after I started installing front unit) so I can afford to head up north and try these babies out in some dirt!
That left me with a couple options. I didn't want to put a front truetrac in right now because of the cost, so I could:1. Regear the rear axle back to 3.55 and put the front back together.
2. Spend $75 or $100 and get a 3.73 open carrier (and either put the XJ back together and/or wait until one showed up.)
3. Spend $390 and get the truetrac (and wait until it shows up.)
I decided to go with option #3. I REALLY didn't want to put the old gears back in the D35, and buying an open carrier would be pissing money down the drain. I might find a used one but then I'd either be putting the Jeep back together to rip it apart later, or leaving it apart until I got the parts. I could get a Truetrac from Summit in a couple days so that's what I went with.
Install went smoother than the D35. I ended up replacing the inner pinion bearing and race (bent the cage pulling the old one off) and put new carrier bearings in. A tip for anyone doing this that reads this, use the coupon codes for Advance Auto Parts. The one I used saved $20 on a $50 purchase. Paid for two extra bearings that I ground out with a die grinder to use as fit-up bearings.
Got it all back together and all seem to be well. I've hear of people having the front pull because of a defective unit, but mine runs true. I tested the rear unit by parking half on a dirt shoulder and punching it, and it seems to work as advertised. Now I just have to find another job (lost mine the day after I started installing front unit) so I can afford to head up north and try these babies out in some dirt!
Thread Starter
Senior Member
Joined: Nov 2010
Posts: 976
Likes: 5
From: Cloquet, MN
Year: 2000 Ltd.
Model: Cherokee
Engine: 4.0L I6
Thanks for the comments! I think I'm pretty much caught up now. I'll post updates as things progress. It's a bit of a slow build, but I'm not in any hurry.
Thread Starter
Senior Member
Joined: Nov 2010
Posts: 976
Likes: 5
From: Cloquet, MN
Year: 2000 Ltd.
Model: Cherokee
Engine: 4.0L I6
Ha, how could I forget about my hi-idle switch!
So because the XJ's were a police offering there's a pin on the ECM that can be grounded to make it idle at 1000 RPM. I decided I wanted to hook this up for future winching operations, but also faster warmup in the winter!
I mounted the switch on the dash. For me it's right behind the steering wheel so it's not really noticed while driving.
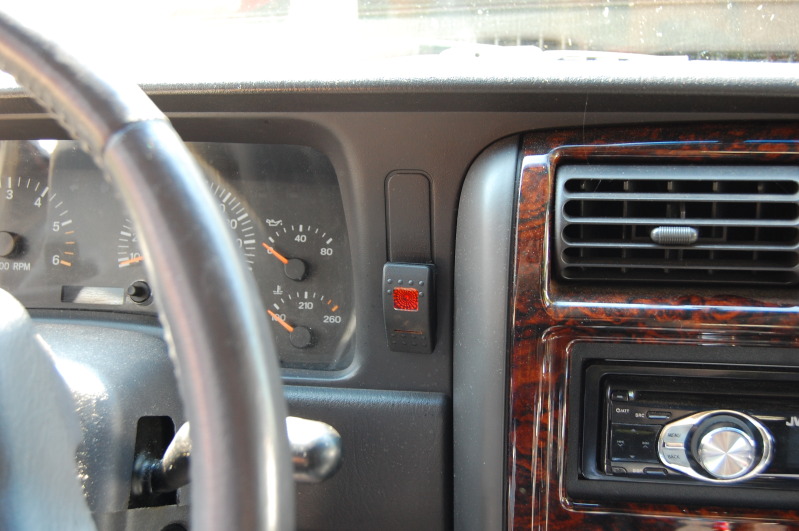
I had to do this one in a different way though from the aux. light switches. The original switch I ordered was a SPST but I found that while there was a 12V potential on the wire to be grounded, as soon as it was grounded, no current flowed. This made having the switch light up when it was "on" a bit difficult. I ended up getting a DPST switch. The way I have it wired the bar across the bottom lights up when ever the vehicle lights are on. When the switch is turned on then the top lights up. I wanted to see where the switch was at night, but not be blinded by it, and I also wanted it to be obvious if the switch was on. I don't have any pictures of how I wired it so I'll try to explain.
The bar light on the bottom is connected to the dash lights and turns on when ever the vehicle lights are on. One side of the DP is the ground loop for the ECM. The other is used for the light. Power is taken from the cigarette lighter circuit, run through the other half of the DP, and then run through the circuit for the top switch light. It's a bit convoluted but it works. Basically when the switch is activated it closes the circuit between the ECM pin and ground, and also closes the circuit for the main light on the switch to turn it on. The bar light in the switch will dim with the dash lights, but the main light does not dim so it's always easily seen.
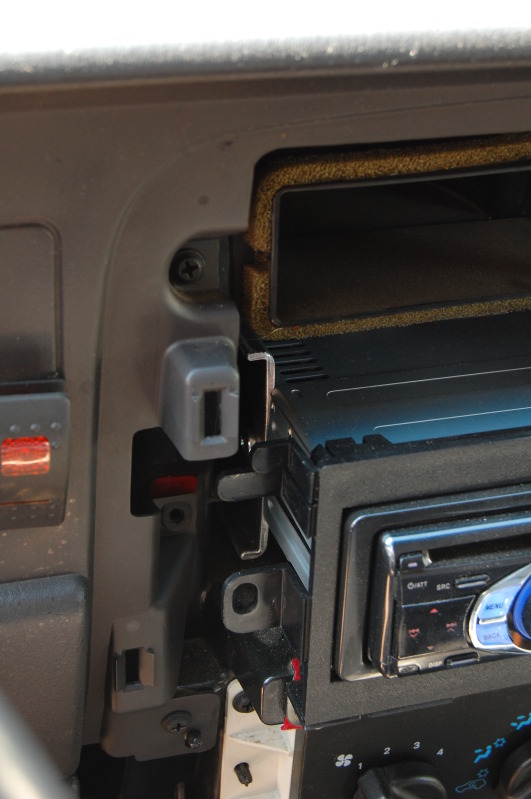
I also forgot about my radio and backup lights.
I put an aftermarket single DIN radio in but there's no support for the back of it. I couldn't have that so I made supports. Took pieces of aluminum and formed them to fit the 1.5 DIN slot.
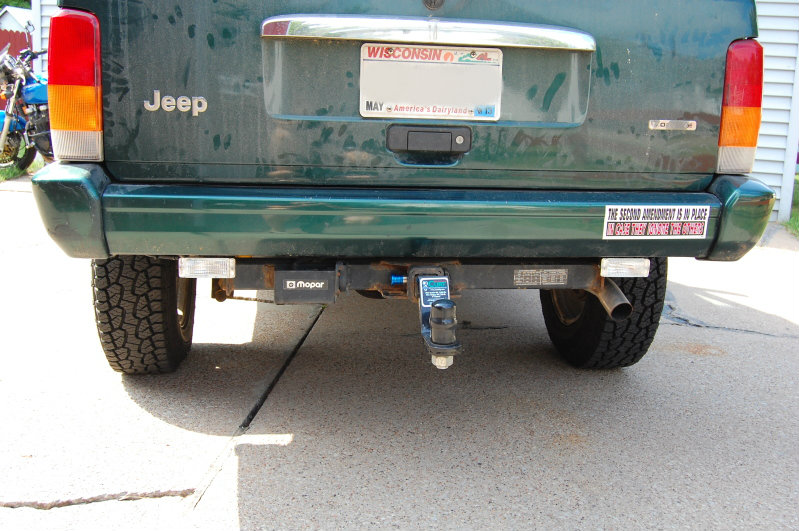
I got tired of not being able to see when I'm backing up, particularly when camping or wheeling at night, so I added some lights. They're designed to me mounted to a trailer hitch, but I just drilled the holes out a little in the brackets and mounted them to the bumper bolts.
So because the XJ's were a police offering there's a pin on the ECM that can be grounded to make it idle at 1000 RPM. I decided I wanted to hook this up for future winching operations, but also faster warmup in the winter!
I mounted the switch on the dash. For me it's right behind the steering wheel so it's not really noticed while driving.
I had to do this one in a different way though from the aux. light switches. The original switch I ordered was a SPST but I found that while there was a 12V potential on the wire to be grounded, as soon as it was grounded, no current flowed. This made having the switch light up when it was "on" a bit difficult. I ended up getting a DPST switch. The way I have it wired the bar across the bottom lights up when ever the vehicle lights are on. When the switch is turned on then the top lights up. I wanted to see where the switch was at night, but not be blinded by it, and I also wanted it to be obvious if the switch was on. I don't have any pictures of how I wired it so I'll try to explain.
The bar light on the bottom is connected to the dash lights and turns on when ever the vehicle lights are on. One side of the DP is the ground loop for the ECM. The other is used for the light. Power is taken from the cigarette lighter circuit, run through the other half of the DP, and then run through the circuit for the top switch light. It's a bit convoluted but it works. Basically when the switch is activated it closes the circuit between the ECM pin and ground, and also closes the circuit for the main light on the switch to turn it on. The bar light in the switch will dim with the dash lights, but the main light does not dim so it's always easily seen.
I also forgot about my radio and backup lights.
I put an aftermarket single DIN radio in but there's no support for the back of it. I couldn't have that so I made supports. Took pieces of aluminum and formed them to fit the 1.5 DIN slot.
I got tired of not being able to see when I'm backing up, particularly when camping or wheeling at night, so I added some lights. They're designed to me mounted to a trailer hitch, but I just drilled the holes out a little in the brackets and mounted them to the bumper bolts.
Thread Starter
Senior Member
Joined: Nov 2010
Posts: 976
Likes: 5
From: Cloquet, MN
Year: 2000 Ltd.
Model: Cherokee
Engine: 4.0L I6
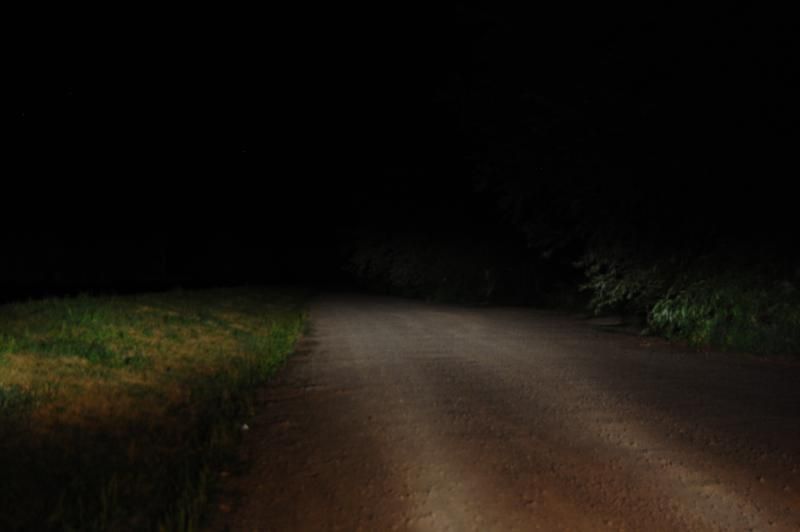
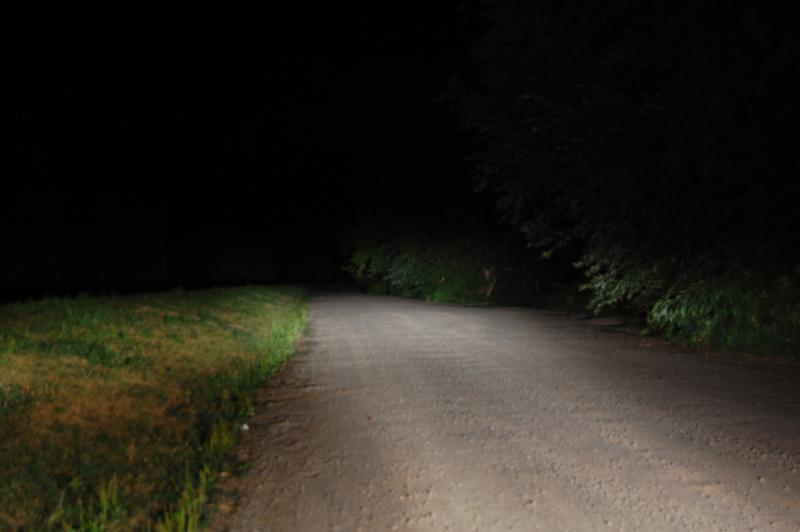
Alright, so I FINALLY got out at night and took some pictures to compare the various states of light output on the front of the XJ. Pictures are taken with identical camera settings.
This is low beams only.

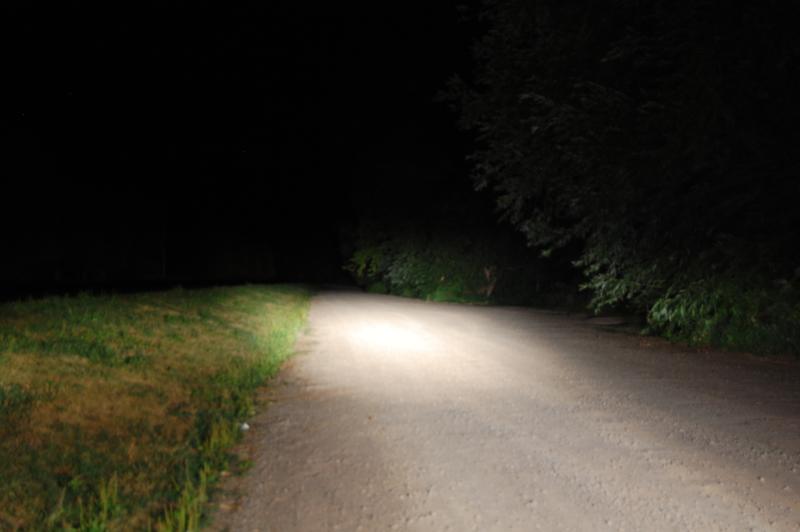
This is high beams only.
This is high beams with the driving lights.
This is high beams, driving lights, and roof lights.
This is low beams and roof lights.

And just to get a side-by-side here's the low beams only again.
This picture doesn't do the reverse lights justice, but they are AWESOME.

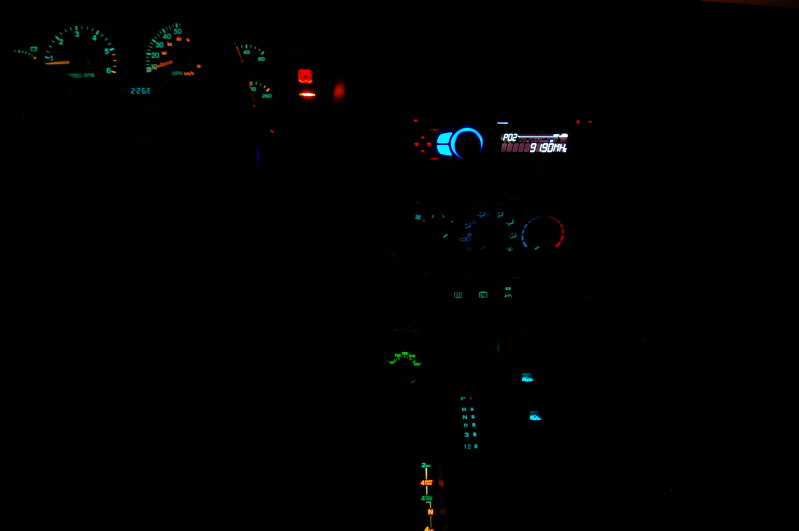
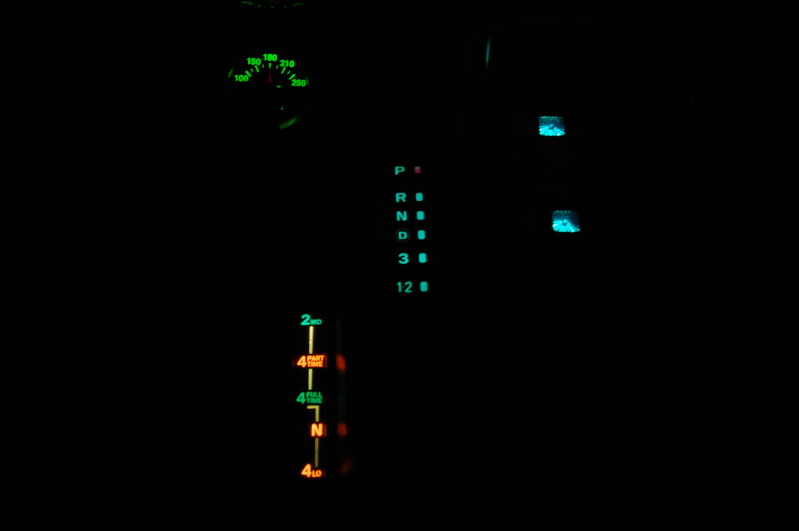
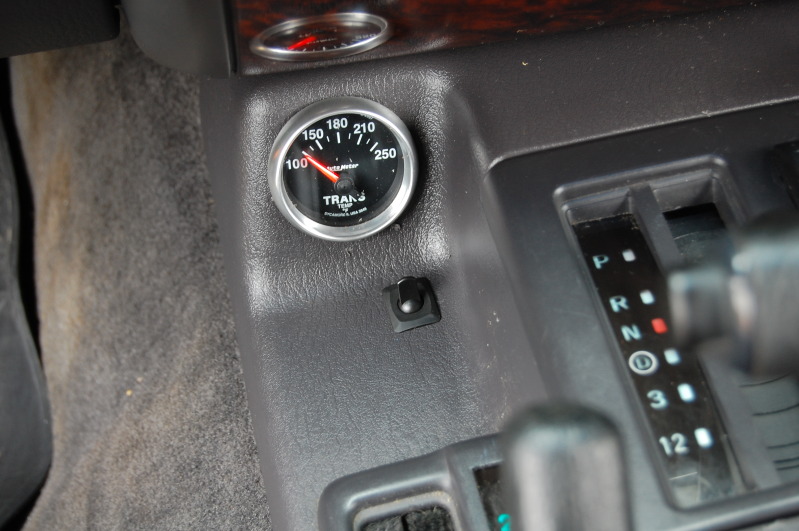
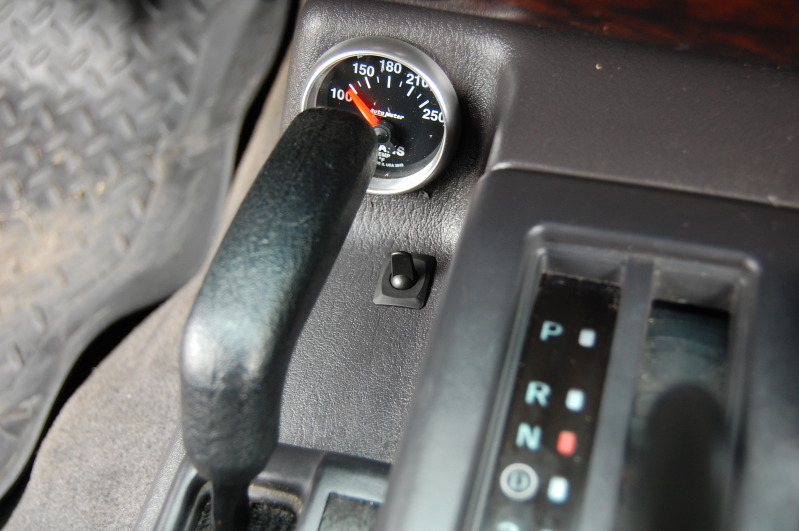
I also took a couple shots of the light switches and trans temp gauge. The gauge looks more green in the pictures than it does to the naked eye for some reason.
This is low beams only.
This is high beams only.
This is high beams with the driving lights.
This is high beams, driving lights, and roof lights.
This is low beams and roof lights.
And just to get a side-by-side here's the low beams only again.
This picture doesn't do the reverse lights justice, but they are AWESOME.
I also took a couple shots of the light switches and trans temp gauge. The gauge looks more green in the pictures than it does to the naked eye for some reason.
Thread Starter
Senior Member
Joined: Nov 2010
Posts: 976
Likes: 5
From: Cloquet, MN
Year: 2000 Ltd.
Model: Cherokee
Engine: 4.0L I6
I finally got around to installing the second temp sending unit for my trans gauge. Installed the second one in the return line to the trans to I can get an idea how well the OEM aux cooler is working. Sorry the picture isn't better. Camera battery died immediately after taking it, lol.
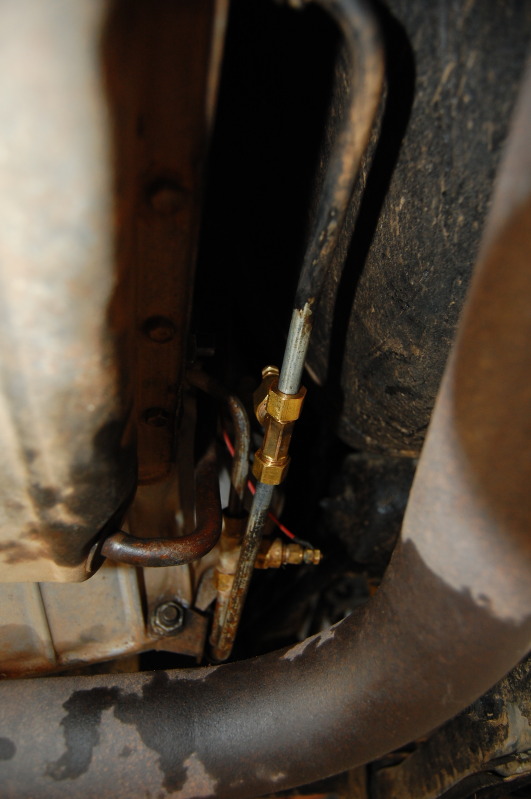
I installed a switch in front of my gauge to switch between the two sensors. Flip the switch forward for fluid going forward to the coolers, and flip it back for fluid returning to the trans.
Now I have to wait until I can get it hot to see how it works. So far driving around town I've only been able to get it up to about 150* and the return line is maybe 10* cooler. I'm not sure how the radiator cooler is affecting the operation though. It will warm the fluid up to the temp of the coolant exiting the radiator, but I don't know what temperature is. It sure as heck is lower than 210 but I don't think I'm going to see much difference until the ATF gets hotter than what the radiator cools it to. The true test will be when I get get the trans up to 180* or 200*.
Thread Starter
Senior Member
Joined: Nov 2010
Posts: 976
Likes: 5
From: Cloquet, MN
Year: 2000 Ltd.
Model: Cherokee
Engine: 4.0L I6
I've been playing around with my in/out ATF temperatures and have found that when the temp is around 150-180* the cooler(s) don't dn squat. I haven't gotten it over 200* to see how that does, but the other day I did get the fluid from the torque converter up to 180* and the return line might have been as cool as 165*. I decided that the OEM aux. cooler wasn't going to cut it so I opted for a larger cooler. I like the B&M 70264 and 70268 coolers but being that I'm out of work I'm not about to drop $65 on a cooler. I skipped over to the local JY and spent a couple hours looking at the different coolers I could scavenge. What I went with is the OEM cooler from a mid 90's Chevy 2500 pickup. It's got "Lone" stamped on it as the manufacturer, but it's the same size and design as the B&M 70264. It even has the open plates for flowing cold oil with less back pressure. I didn't take any pictures of just the cooler unfortunately, but here's a pic of it installed on the donor truck from inside the engine bay.

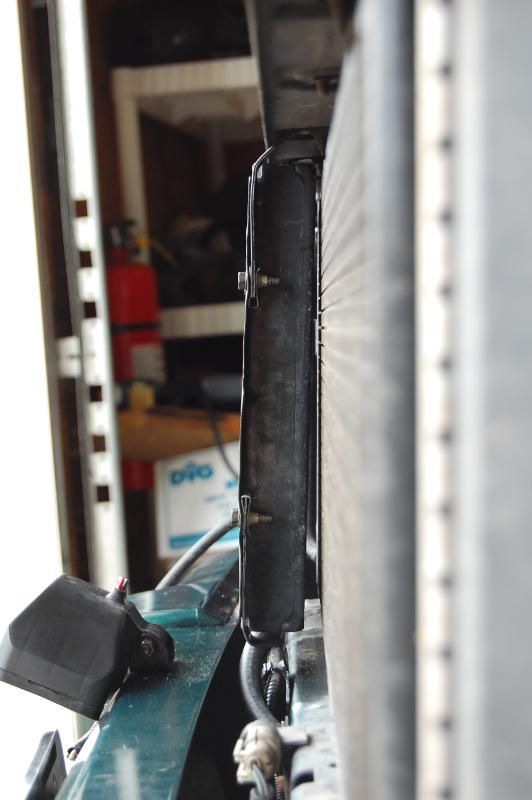
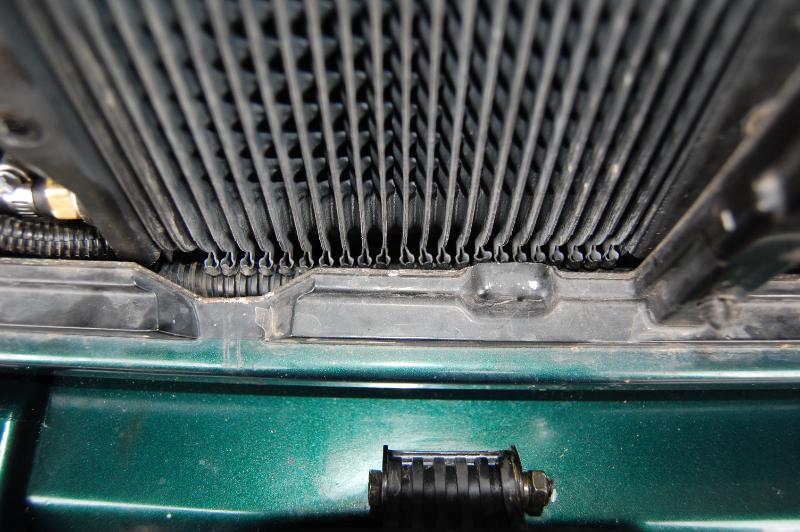
I don't have any in-process pics so here's what it looks like installed on the jeep. The OEM unit isn't in front of the engine fan so when you're driving slow you're not really getting any air flow through it. I mounted this one to be directly in front of the engine fan so it gets more air flow, even if I'm not moving.
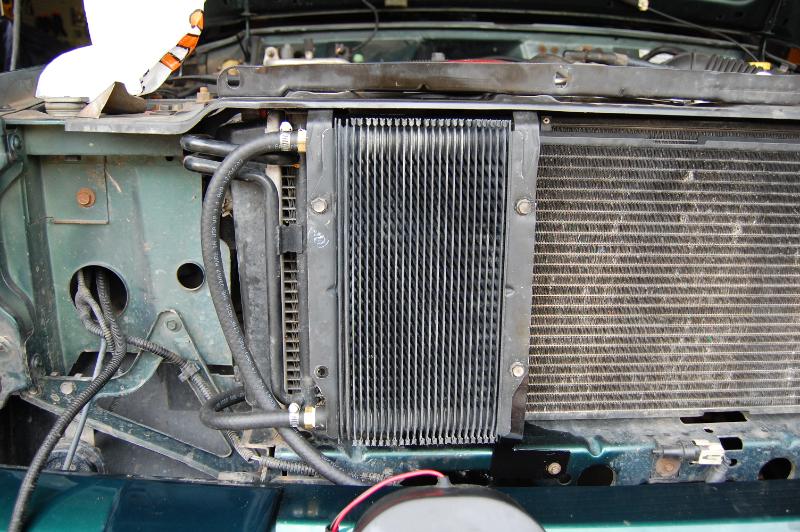
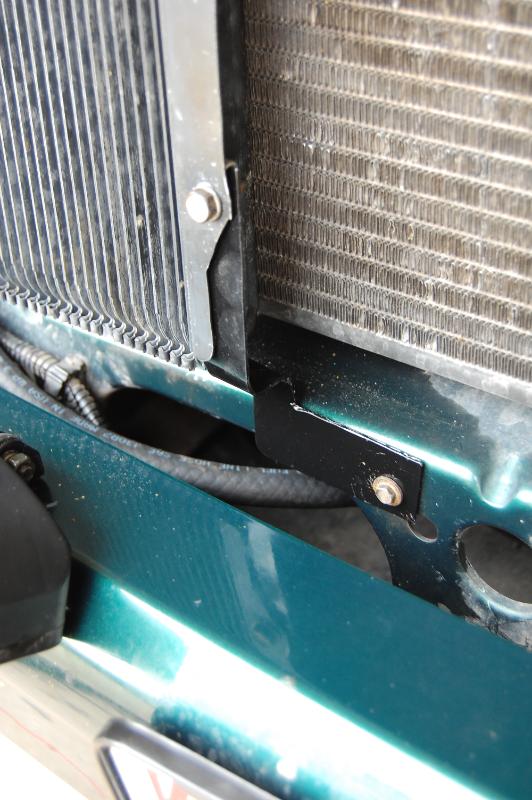
I cut up the Chevy OEM bracket that ran from the cooler to the radiator/grill support and bent the legs to attach to the bolts that hold the sheet metal angle that the front clip bolts to.
On the bottom I cut a piece of steel and attached the inboard side of the cooler to the OEM tranny cooler mounting screw.
I set the brackets to hold the cooler at least 1/8 inch away from the A/C condenser.
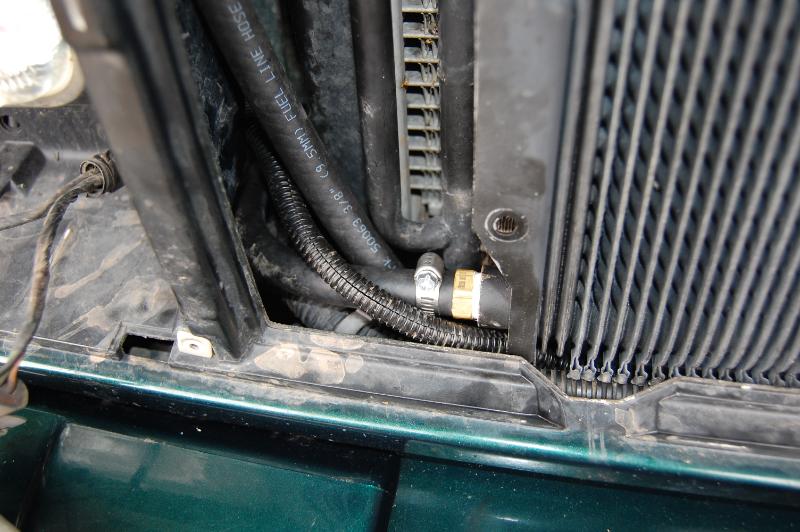
Here's a couple pics of the hose routing.
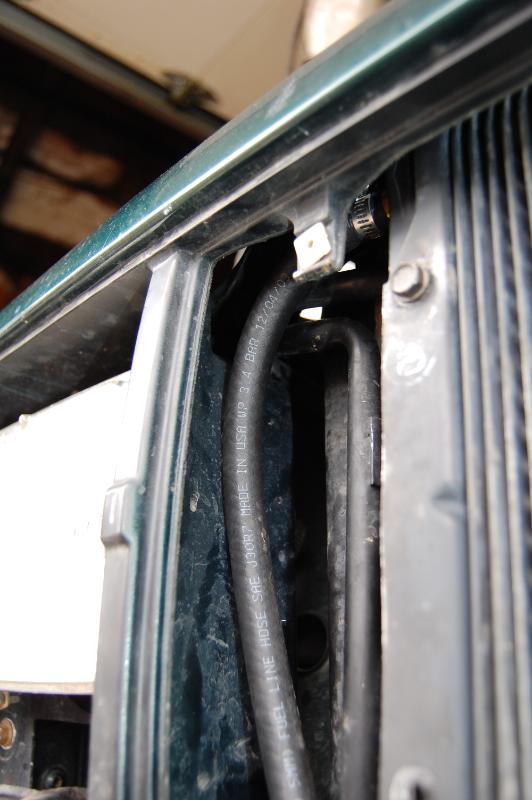
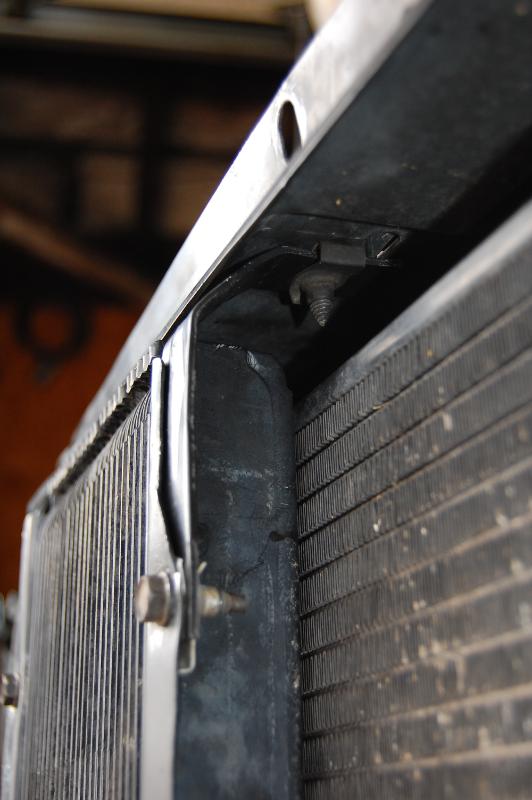
Clearance at the top with the clip back on.

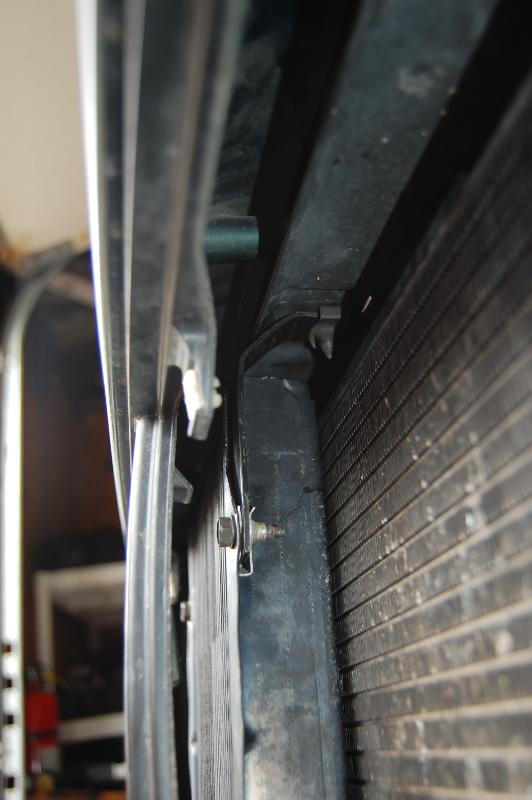
And clearance and the bottom.
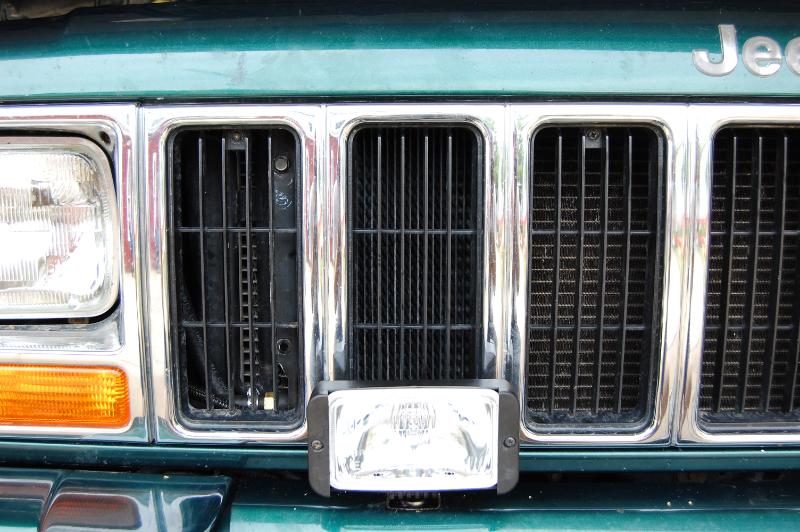
The biggest issue I ran into was how to run the wires for the driving lights. With the cooler in place I had no room to run the wires through the grill and down like I had previously. What I ended up doing was removing the wire loom from the wires and shrink wrapping them to protect them. Then I spread the "corners" of the cooler plates to open a gap to feed the wires through. I'll have to see how this holds up to heat/vibration but it's the best I could come up with.

And the final product.
I don't have any in-process pics so here's what it looks like installed on the jeep. The OEM unit isn't in front of the engine fan so when you're driving slow you're not really getting any air flow through it. I mounted this one to be directly in front of the engine fan so it gets more air flow, even if I'm not moving.
I cut up the Chevy OEM bracket that ran from the cooler to the radiator/grill support and bent the legs to attach to the bolts that hold the sheet metal angle that the front clip bolts to.
On the bottom I cut a piece of steel and attached the inboard side of the cooler to the OEM tranny cooler mounting screw.
I set the brackets to hold the cooler at least 1/8 inch away from the A/C condenser.
Here's a couple pics of the hose routing.
Clearance at the top with the clip back on.
And clearance and the bottom.
The biggest issue I ran into was how to run the wires for the driving lights. With the cooler in place I had no room to run the wires through the grill and down like I had previously. What I ended up doing was removing the wire loom from the wires and shrink wrapping them to protect them. Then I spread the "corners" of the cooler plates to open a gap to feed the wires through. I'll have to see how this holds up to heat/vibration but it's the best I could come up with.
And the final product.
Last edited by Northwoods Snowman; Jul 24, 2012 at 11:12 AM.
Thread Starter
Senior Member
Joined: Nov 2010
Posts: 976
Likes: 5
From: Cloquet, MN
Year: 2000 Ltd.
Model: Cherokee
Engine: 4.0L I6
So I tried to post this yesterday but I guess it didn't take. This is the second time I've had posts disappear on me...
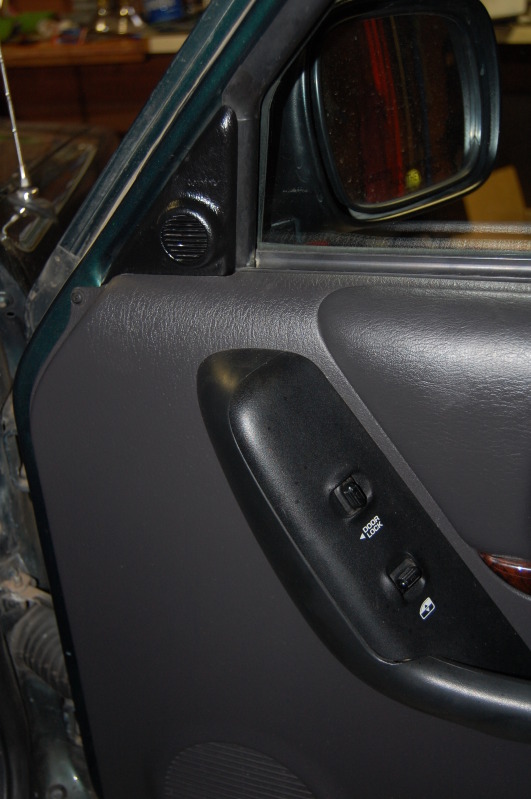
I went to the JY yesterday looking for the sub/amp box that goes under the driver seat in Subarus but struck out. It wasn't a total bust trip though. XJ's seem to rotate through my local JY on a regular basis. I went over to have a look yesterday at some that had been moved and spotted one that hadn't been there before. First thing to catch my eye was the infinity door tweeters. Grabbed those. Then in the process of trying to clear out the back to get the rear seat up for the amp I notice this guy sitting in the back calling my name begging me to take it home:
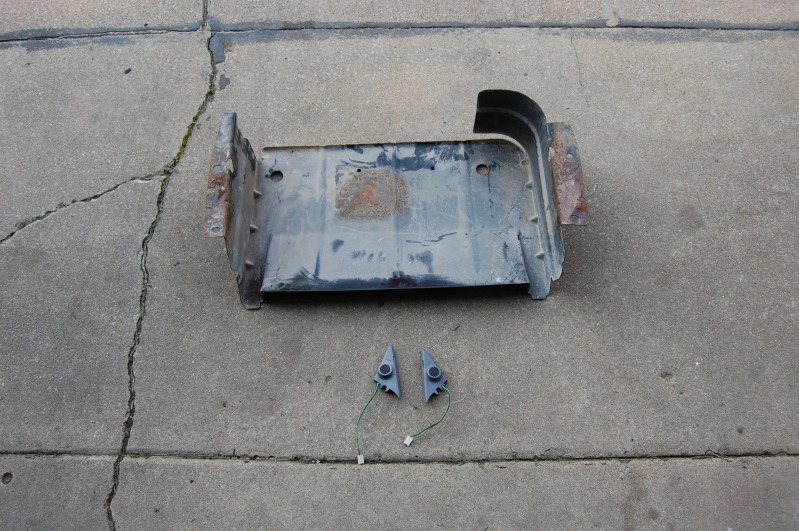
I was super pumped when I saw it. I've been looking for one for a 97+ XJ for two years since I bought mine. A $20 bill later and it's in my garage getting cleaned up today for install.
The amp was a bust. After I got it out I realized that I don't have the wiring harness to plug it in in my Jeep so I left it there. As for the speakers I have the charcoal interior in my Jeep so the light grey tweeters don't really go well. To my rescue came a can of black Kyrlon Fusion paint. I think they came out rather well....
I went to the JY yesterday looking for the sub/amp box that goes under the driver seat in Subarus but struck out. It wasn't a total bust trip though. XJ's seem to rotate through my local JY on a regular basis. I went over to have a look yesterday at some that had been moved and spotted one that hadn't been there before. First thing to catch my eye was the infinity door tweeters. Grabbed those. Then in the process of trying to clear out the back to get the rear seat up for the amp I notice this guy sitting in the back calling my name begging me to take it home:
I was super pumped when I saw it. I've been looking for one for a 97+ XJ for two years since I bought mine. A $20 bill later and it's in my garage getting cleaned up today for install.
The amp was a bust. After I got it out I realized that I don't have the wiring harness to plug it in in my Jeep so I left it there. As for the speakers I have the charcoal interior in my Jeep so the light grey tweeters don't really go well. To my rescue came a can of black Kyrlon Fusion paint. I think they came out rather well....
 If you find any more of the Tweeters ever, I'd be totally interested!
Thread Starter
Senior Member
Joined: Nov 2010
Posts: 976
Likes: 5
From: Cloquet, MN
Year: 2000 Ltd.
Model: Cherokee
Engine: 4.0L I6
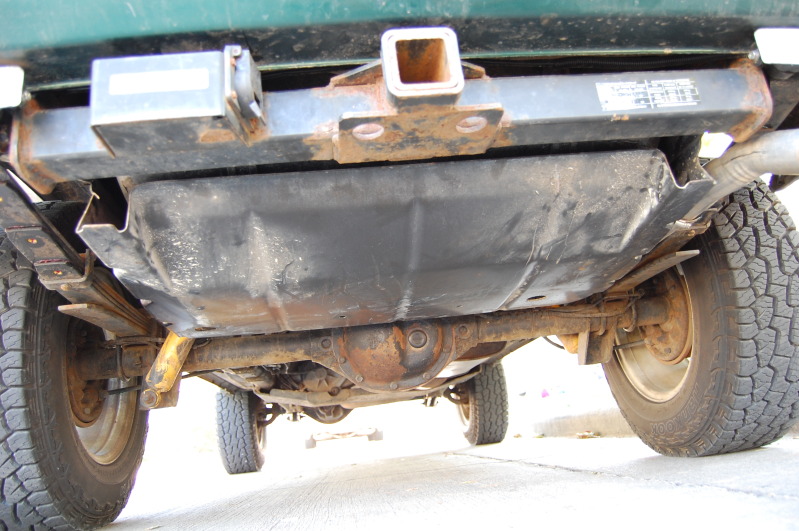
Skid plate is on.
Also been playing around with an idea for hood vents. I'm kind of stuck though. I don't want to cut up the hood unless I know they'll work, but I can't really develop them further with out being able to mount them. I think I'm going to have to see if I can get any interest in buying ones like this so I can buy the equipment I need to properly (professionally) make them. Tools are only a few hundred dollars, but when you don't have a job it's a bit hard to swing for my own personal use only.
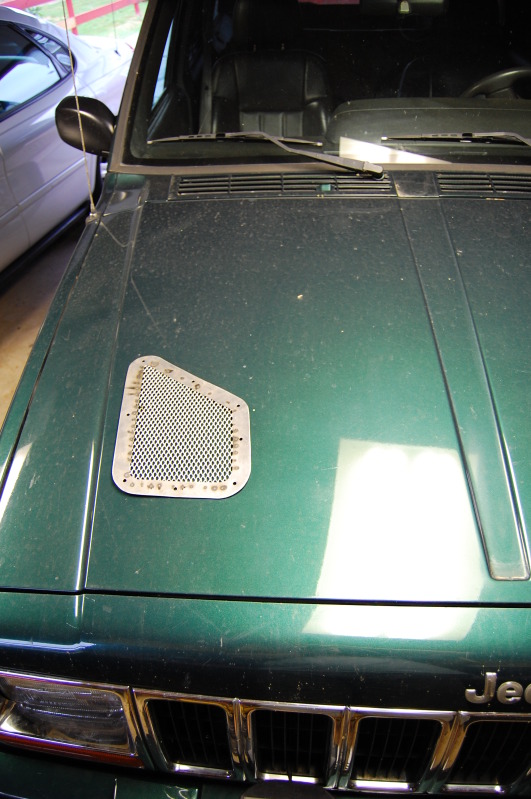
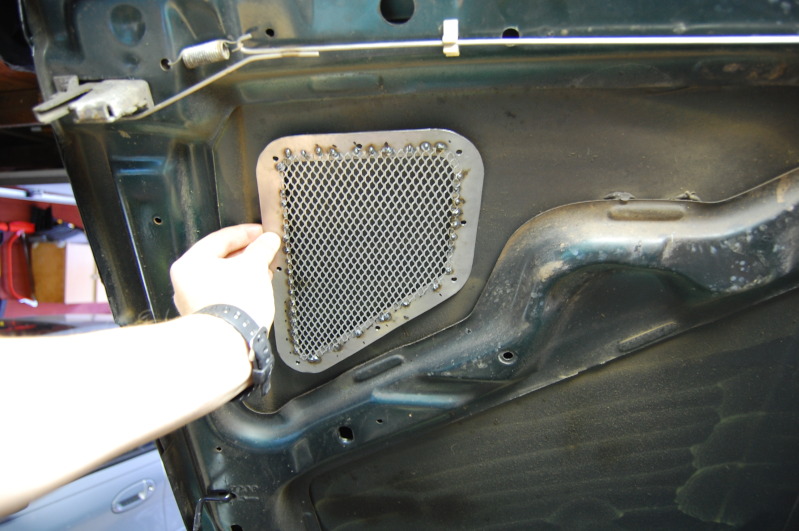
Also been playing around with an idea for hood vents. I'm kind of stuck though. I don't want to cut up the hood unless I know they'll work, but I can't really develop them further with out being able to mount them. I think I'm going to have to see if I can get any interest in buying ones like this so I can buy the equipment I need to properly (professionally) make them. Tools are only a few hundred dollars, but when you don't have a job it's a bit hard to swing for my own personal use only.

Junior Member
Joined: Jan 2012
Posts: 70
Likes: 0
Hey man nice jeep. I like the hood vents. The only thing I can think of is that they would be more effective if you mounted them on the back of the hood. Like closer to the windshield. That way the cool air coming in from the front can push the hot air out the back. To answer your question about effectiveness: they do help quite a bit. Mine lowered my engine temp by around 10* on a hot day
Thread Starter
Senior Member
Joined: Nov 2010
Posts: 976
Likes: 5
From: Cloquet, MN
Year: 2000 Ltd.
Model: Cherokee
Engine: 4.0L I6
Hey man nice jeep. I like the hood vents. The only thing I can think of is that they would be more effective if you mounted them on the back of the hood. Like closer to the windshield. That way the cool air coming in from the front can push the hot air out the back. To answer your question about effectiveness: they do help quite a bit. Mine lowered my engine temp by around 10* on a hot day
I think the best scenario would be four vents, two in front and two in the rear. I've been thinking about trying to get a box/pan break to form the drip trays and try to sell the vents but don't know if there would be enough of a market for them. If I did that I could also make some to fit the rear. I haven't even installed any on my XJ yet. Not sure if my concept will work and I don't want to find out after I cut holes in my nice hood. Need to pick up a straight one at the JY and cut that up, but haven't had the money to spend on that and the brake, so the project is on hold.
Last edited by Northwoods Snowman; Oct 9, 2012 at 03:22 PM.