When you click on links to various merchants on this site and make a purchase, this can result in this site earning a commission. Affiliate programs and affiliations include, but are not limited to, the eBay Partner Network.
Thanks! I do to. We try to take a day trip there at least once a month or so. A storm came through while we were at the Fisherman's Wharf and left us an incredible view.
Originally Posted by Silentj
You'll be fine to start the lift process before the frame stiffeners. The only thing that would impact this, would be if you're doing a long arm. Tires need to come off anyway to weld it up. You'll need to drop the crossmember as well when you do the center section, so have an extra jack available to support the transmission.
Alright cool, I reckon I may go ahead and get started on it this weekend then.
I placed an order for some bar pin eliminators from Zone Offroad today. Looks like a decent product and they keep the shock in the same orientation as factory. The interior LED lights should be waiting on me when I get home today, thanks akasnajo and One Way Light.
4wheelparts delivered my replacement tire this week. I was finally relieved about the whole situation... and then I saw that they mounted it with black letters out instead of white letters out like the rest. I know this is minor and it could be the spare that'll sit on the roof and never be seen, but it's just one little thing that would irritate me knowing they don't all match. They said I could take it to a local shop and send them the invoice and they would reimburse me... so we'll see how that goes.
You'll want to rotate that spare with the rest of tires. If you don't, you'll run a chance of dry rot with it always baking in the sun. Just my opinion though.
You'll want to rotate that spare with the rest of tires. If you don't, you'll run a chance of dry rot with it always baking in the sun. Just my opinion though.
also, if he ever puts in an lsd or locker all tires need to have very similar wear in order to not damage them.
Nice Jeep-
Nice thing is they are easy to work on so while there's still the "learning curve" you'll be surprised at how much you'll be able to do yourself on your XJ.
Word of advice- if you think you may want to "upgrade" something further down the road, save your time and money and do it now. One thing I've learned from builds, and as I slowly look across my stuffed garage, is to do it once the way you want it. Seems like it costs more but in the long run it's a savings
The Rubicon lifts are a pretty good product and mine installed very easily. Good luck on your build!!
Made some good progress today. Got it up on jack stands and got a start on the rear lift. Broke all 4 bar pin bolts, so that'll be fun. From the research I've done taking an air hammer to it is the best way to go. I've got the rear axle free and I'll start on removing the leaf springs tomorrow. I'm embarrassed to say that the part that gave me the most trouble was removing the tab for the brake line that holds it to the bracket. For whatever reason that took me quite a while, everything else has gone pretty smooth. Onto the pics...
I did a mock up and put the front tire on, I love the way it looks. So here's my preview:
You'll want to rotate that spare with the rest of tires. If you don't, you'll run a chance of dry rot with it always baking in the sun. Just my opinion though.
Originally Posted by SatiricalHen
also, if he ever puts in an lsd or locker all tires need to have very similar wear in order to not damage them.
Good point, I've never thought about rotating the spare with the other tires. Makes sense though, no point in having 4 worn out tires and 1 brand new one.
Originally Posted by AceWhite
Nice Jeep-
Nice thing is they are easy to work on so while there's still the "learning curve" you'll be surprised at how much you'll be able to do yourself on your XJ.
Word of advice- if you think you may want to "upgrade" something further down the road, save your time and money and do it now. One thing I've learned from builds, and as I slowly look across my stuffed garage, is to do it once the way you want it. Seems like it costs more but in the long run it's a savings
The Rubicon lifts are a pretty good product and mine installed very easily. Good luck on your build!!
Thanks for the advice. I'm already feeling pretty accomplished just with the little bit of work that I have done so far. Up to this point an oil change would have been pushing my mechanical skills (slight exaggeration, but you get the point). For the most part, what I have done so far is me waiting and trying to do it right the first time, which is why I went with RE instead of RC, these polished wheels instead of steelies and I'll be doing the SYE and shaft instead of the transfer case drop. I'll do my best to keep that mindset through the rest of the build.
Yesterday I got the passenger side leaf spring out and had the common "front leaf bolt seized to the bushing" problem. I went ahead and ordered 6 OEM bolts and 2 nuts from the dealership to be here tomorrow. So this evening I'll take a saws all to the stuck bolt. I may go ahead and install the LEDs from Onewaylight as well, I'm looking forward to seeing how those turn out.
Subbed! Nice clean platform to work with! Gunmetal pearl is one of my favorite colors on an Xj. Not to mention mines that color too!
You'll learn a lot working on your XJ. I know I have, and still am. If you can install a lift, you can pretty much handle most repairs and upgrades.
Thanks! I appreciate the kind words. I love gunmetal pearl as well, it's just a unique color.
So I screwed up this time. I read threads and watched videos on that leaf spring bolt and went to take the sawsall to it this afternoon. I guess I thought I had more room, but I ended up cutting it off flush. So now I'm left with nothing to get a bite on. I sat there for a while staring and wondering what I had done. I guess I'm going to try to take an extractor to it and see what I can do. The leaf spring is out though... so I guess that's a plus
An extractor might work if you can get a good bite on it. If that doesn't work, you can cut into the bottom of that pocket to access the welded nut from the back side. Heat up the weld nut, break it free, and replace with a new one. If you cut it like the below picture, everything is still structurally sound. You wouldn't need to weld a patch back in.
Shaping up to be an awesome build! Love the polished alloys
Thanks! I love the way they turned out.
Originally Posted by TFitzPat87
An extractor might work if you can get a good bite on it. If that doesn't work, you can cut into the bottom of that pocket to access the welded nut from the back side. Heat up the weld nut, break it free, and replace with a new one. If you cut it like the below picture, everything is still structurally sound. You wouldn't need to weld a patch back in.
Dude, this was a life saver! Thanks for the input. I went home and did this last night, I feel so much better about it.
Here's how it went:
I drilled some holes in each corner to mark out where I wanted to cut...
That turned out to be a laughable effort and I came out with this hack job
Its ugly as hell, but it works. I didn't have a 21mm socket, so I'm going to go pick one of those up today; as well as another nut from the dealership when I pick up the bolts that should be in today.
^^^Awesome! You'll want to get it nice and hot before you try and break it free so it hopefully breaks free easy. I came across that when preparing for my lift, and was ready to cut if I needed to. Luckily it worked out and everything came out fairly easy. On the thread I found, the guy said he didn't patch it and it had been that way for years. If you can weld, it wouldn't hurt anything to patch it, but you should be fine without it.
Looks like you had the bolt super close to being free. Extractor may have gotten it out since it was so close, but you're into it now!
EDIT: Slap some paint on there when you're all done.
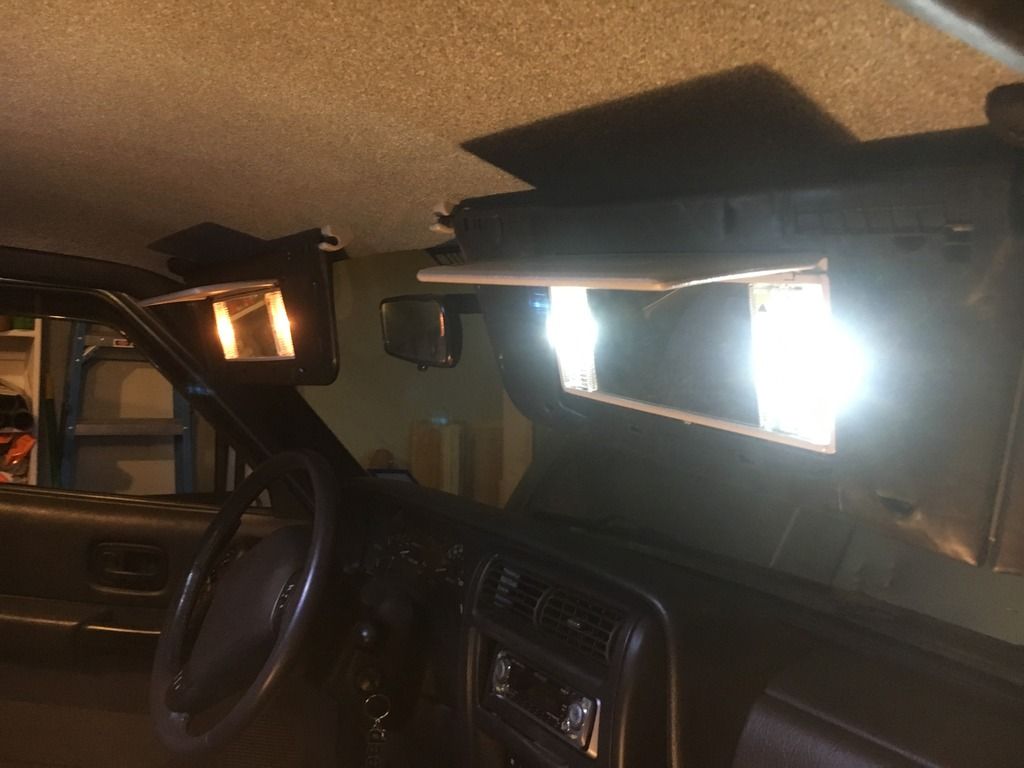
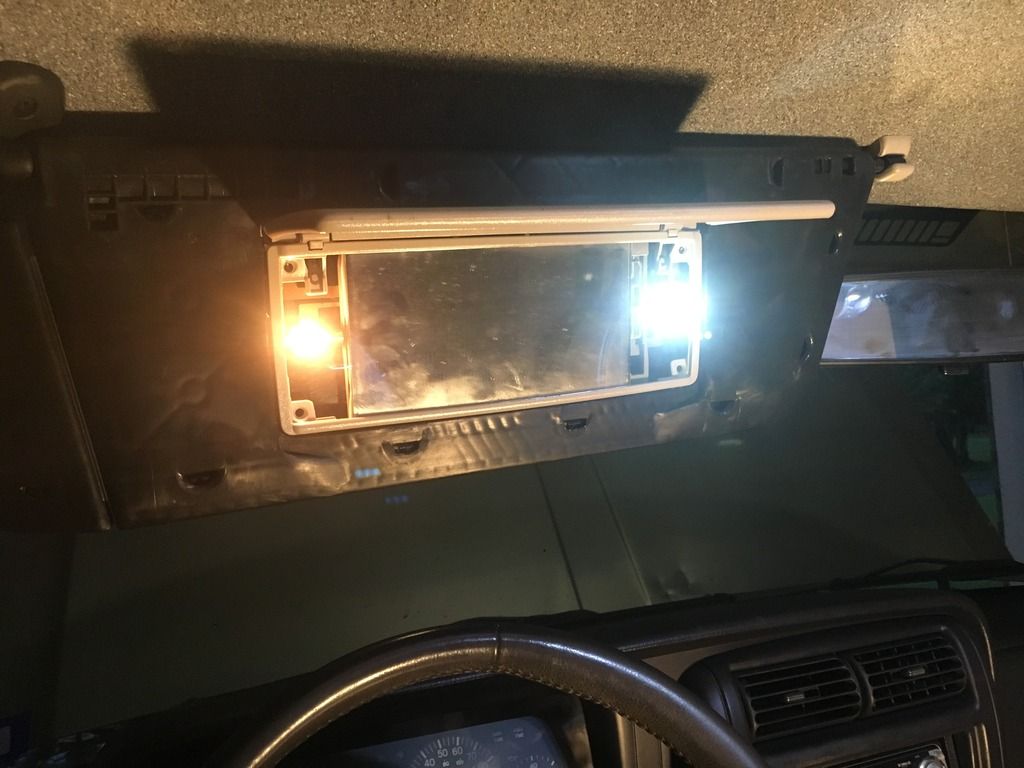
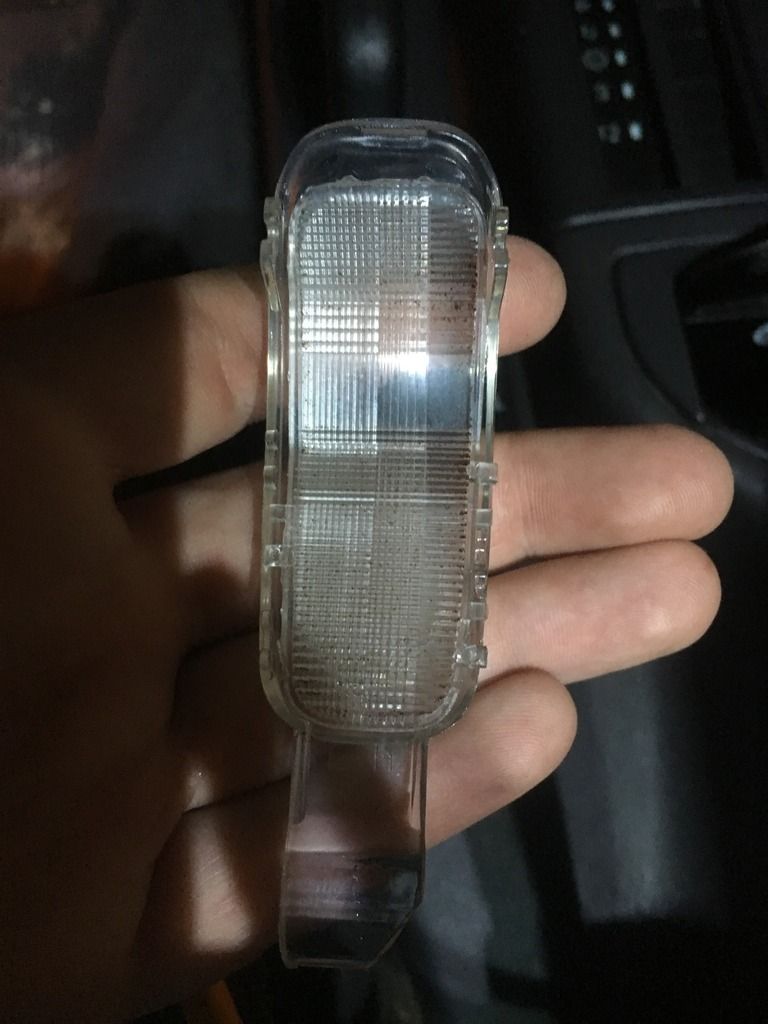
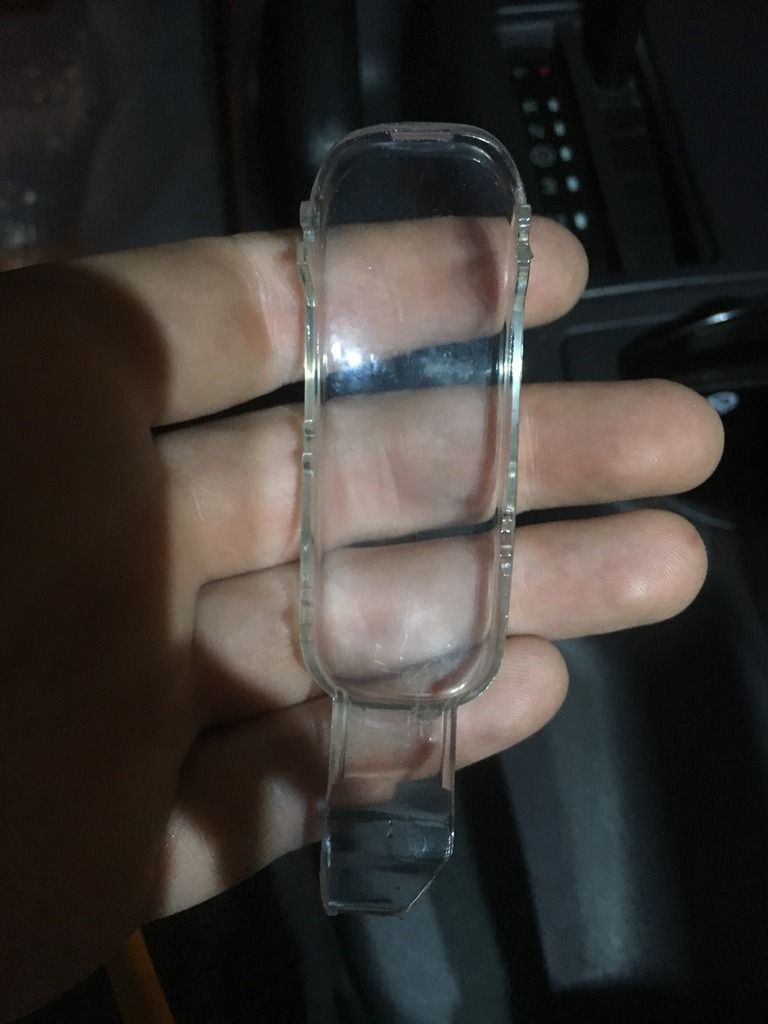
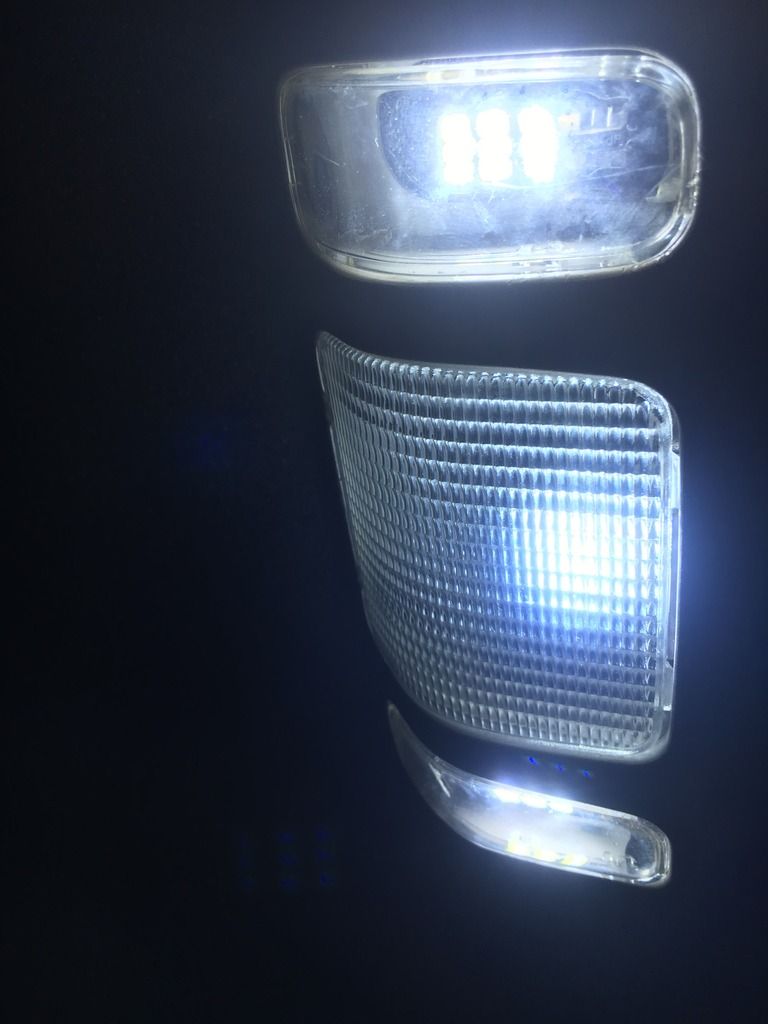
I changed out the interior lights to LEDs last night. By far my favorite thing that I have done. Anyone who is on the fence about this... best $30 I've spent on this thing so far. The product is very nicely packaged, each lighting "area" is separated and labeled and has good, clear instructions. So check out Onewaylight. I'll try to get some better pictures later.
And I pulled apart the plastic pieces that give the light a pattern (no idea what this is called) and tossed 'em. Now the map light covers/buttons are completely clear. I think it turned out pretty cool.
Well a 21mm wrench didn't do it either, I guess it's not the same size as the bolt. One way or another it's coming out this weekend.
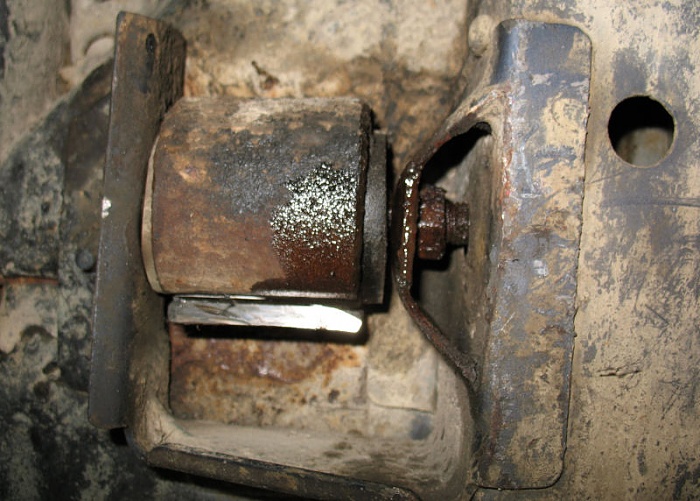
Had another package come in. I'm ordering so much crap I actually have no idea what is being delivered, so it's actuall kind of a fun surprise. Today was BPEs
I changed out the interior lights to LEDs last night. By far my favorite thing that I have done. Anyone who is on the fence about this... best $30 I've spent on this thing so far. The product is very nicely packaged, each lighting "area" is separated and labeled and has good, clear instructions. So check out Onewaylight. I'll try to get some better pictures later.
And I pulled apart the plastic pieces that give the light a pattern (no idea what this is called) and tossed 'em. Now the map light covers/buttons are completely clear. I think it turned out pretty cool.
were did you get tese part # love to do this to mine
 06-24-2016, 03:07 PM