
Project "Hippo"...black 99 XJ


Thread Starter
CF Veteran
Joined: Jan 2011
Posts: 1,894
Likes: 4
From: Las Vegas
Year: 1999
Model: Cherokee
Engine: 4.0
Here is my SYE installation.
Parts
>SYE (Rugged Ridge) package from Adam's Driveshaft complete with new custom driveshaft.
Addition tools needed
>10mm 12 points socket
>1 1/8 socket
>Gear Puller #27078 (loaner from Autozone)
>Lock-ring Pliers (craftsman #47386, Must have tool!)
Here's a very good video
AA SYE write up worth reading
http://www.4x4xplor.com/SYE-CV.html
1)Engage 4Lo
2)Jack up rear end
3)Remove rear driveshaft
4)Drain fluid

5)Disconnect front driveshaft from TC yoke
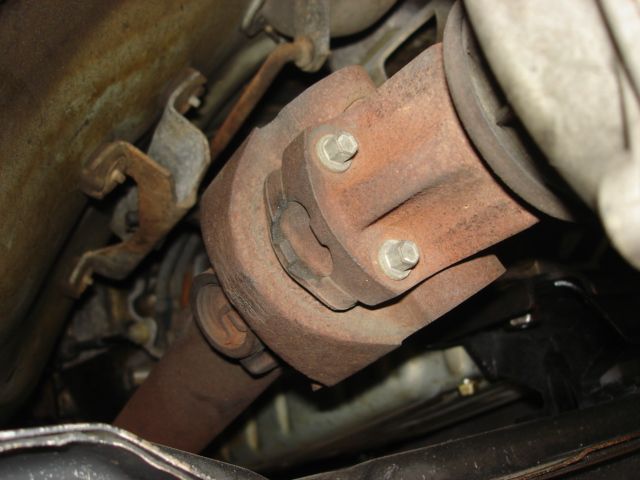
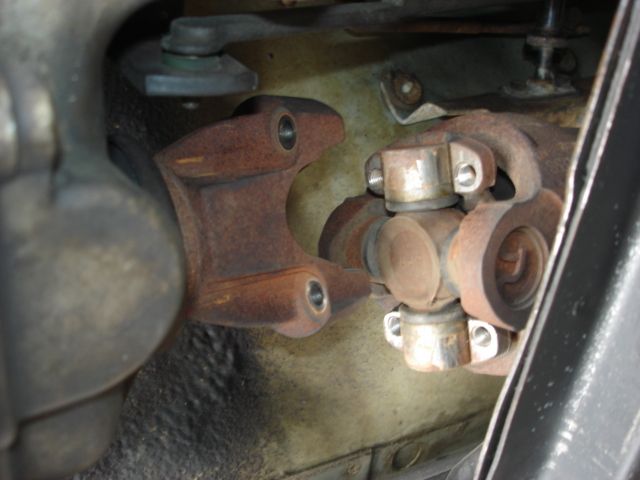
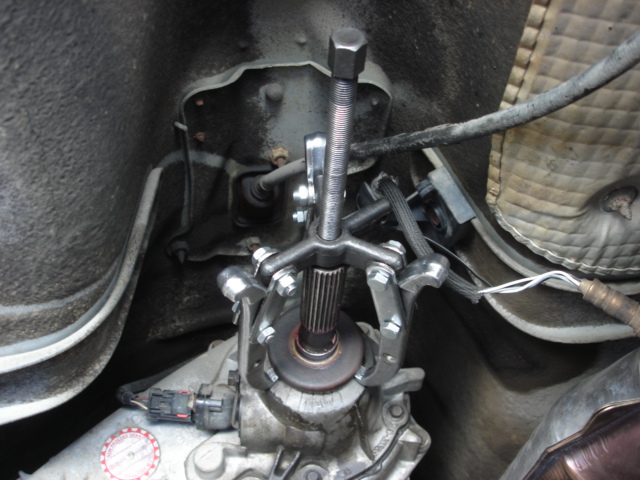
6)Remove dust shield using gear puller
Removed
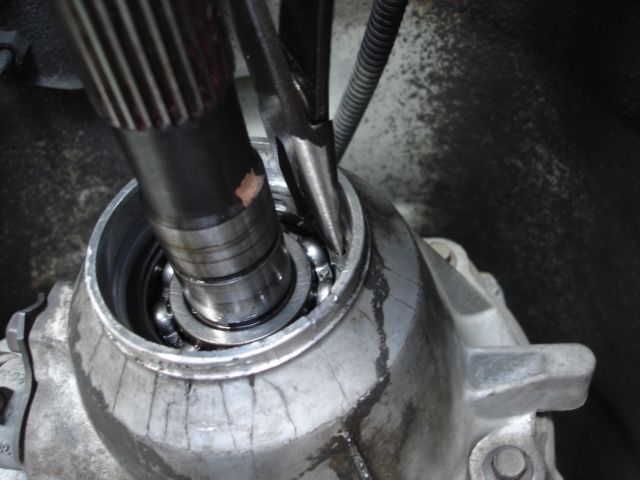
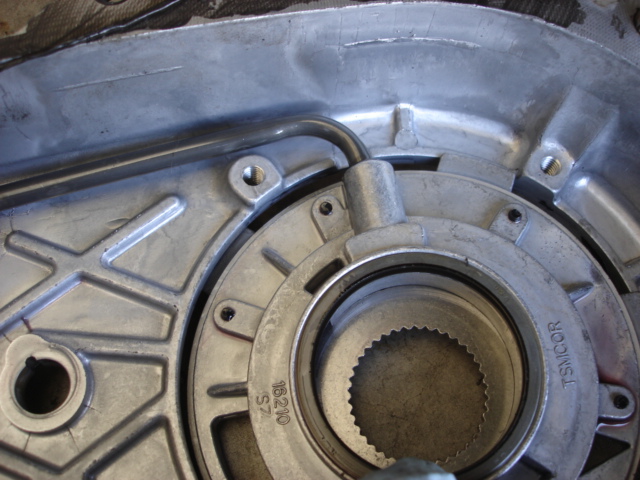
7)Remove lock ring (craftsman #47386, best $15 i've spent)
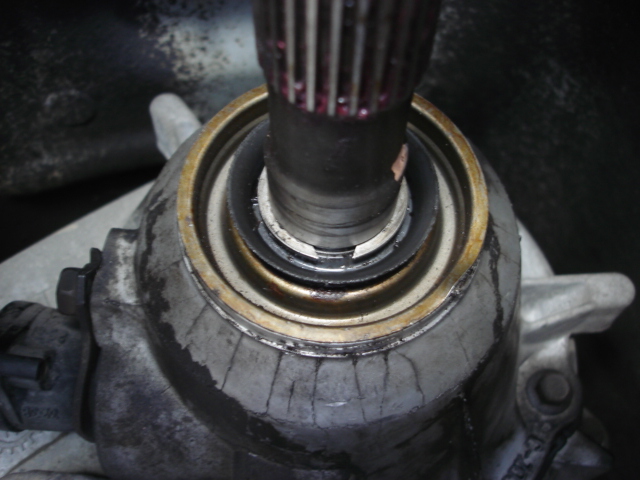
Removed
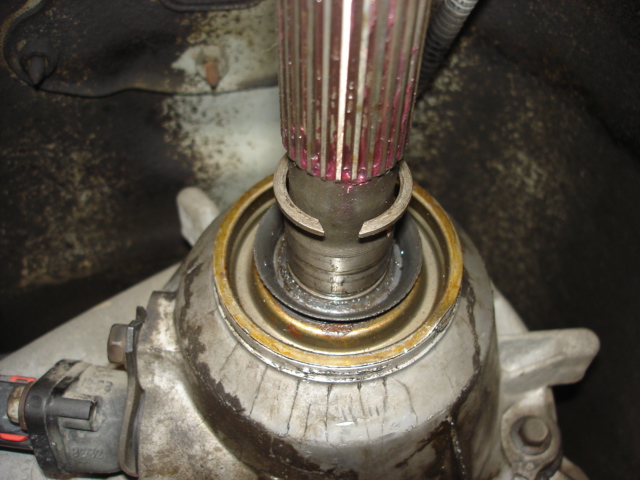
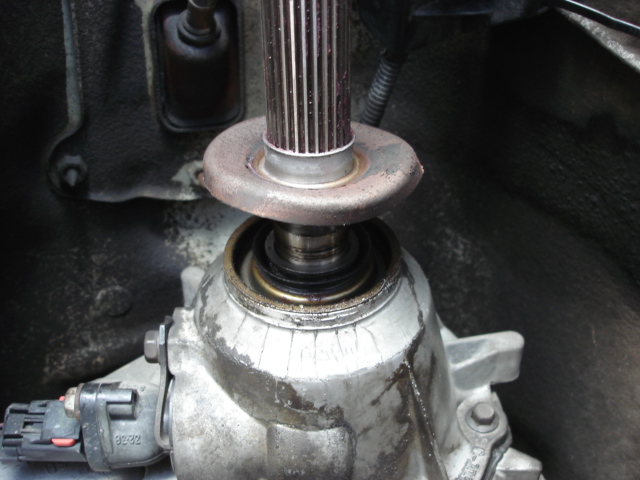
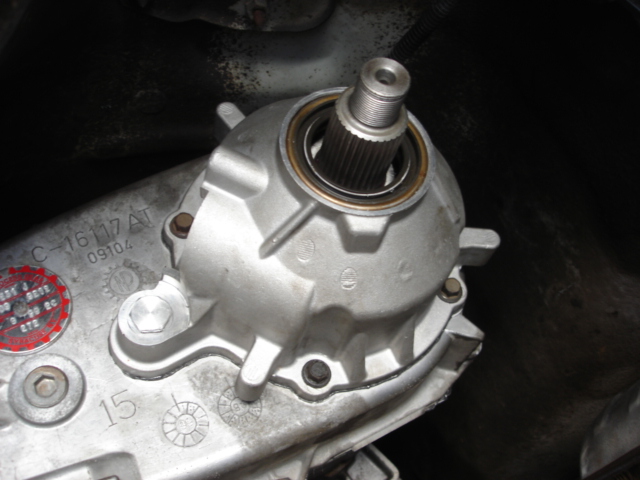
8)Remove oil seal (don't worry about the tail housing, will be replacing it with new provided tail housing)
9)Remove two more lock rings (i find it easier to use a needle nose pliers for the outer lock ring)
10)Remove speedometer gears
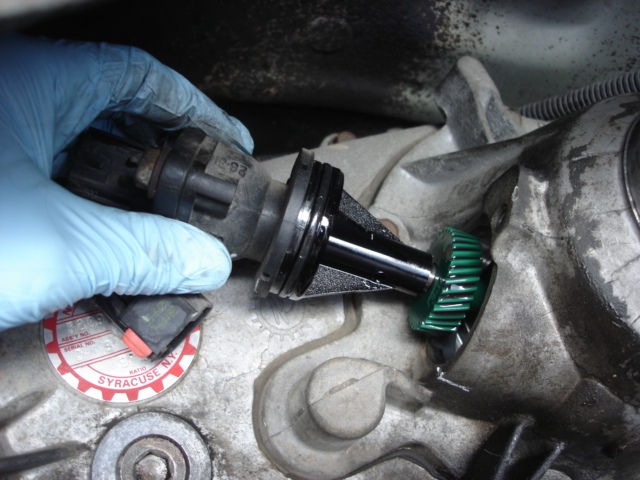
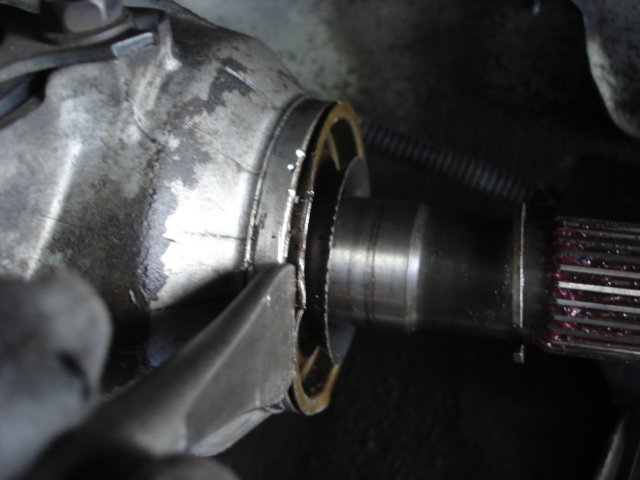
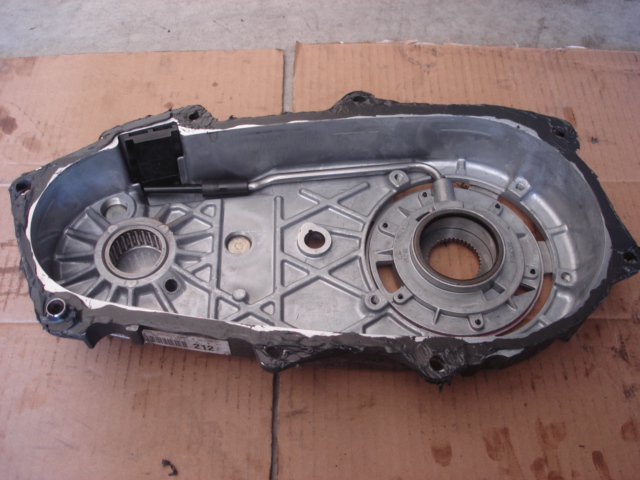
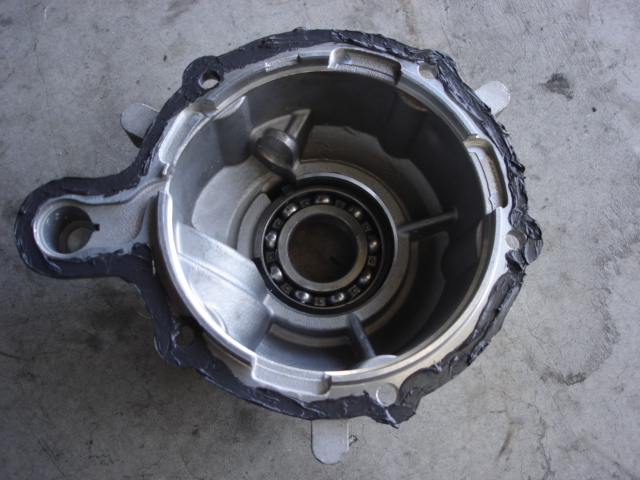
11)Remove tail housing
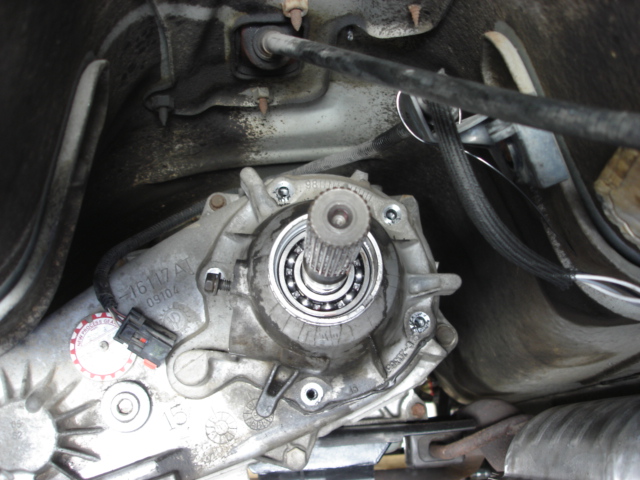
Tail housing removed
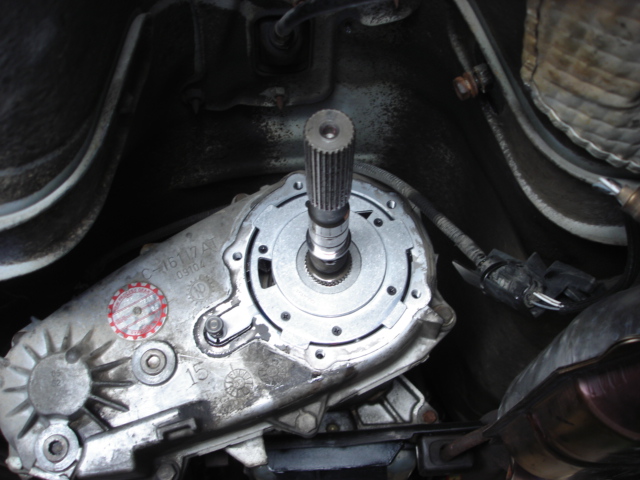
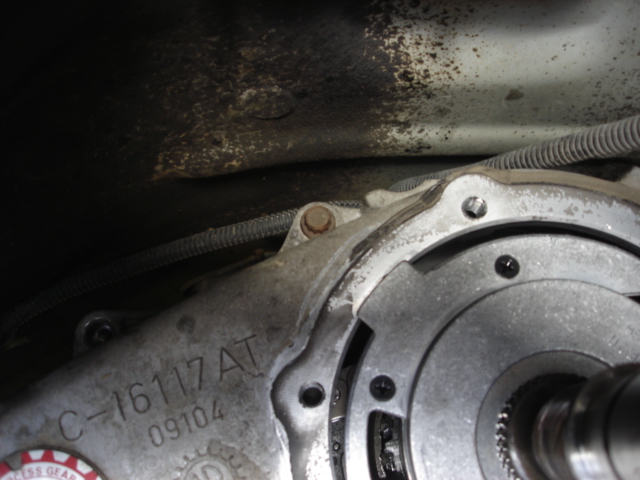
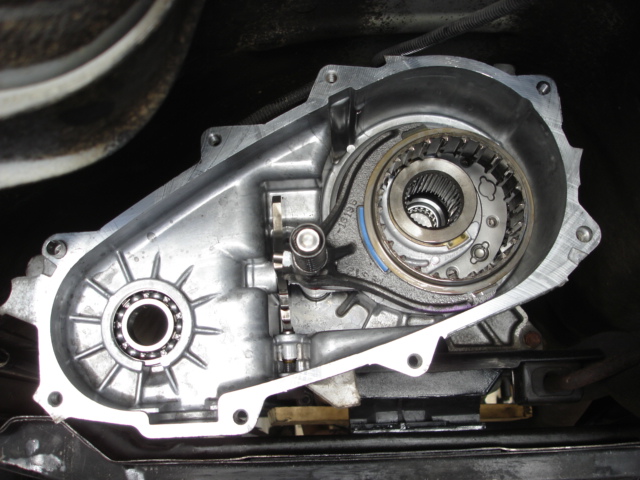
12)Remove main case
(top bolt uses a 10mm 12 points socket)
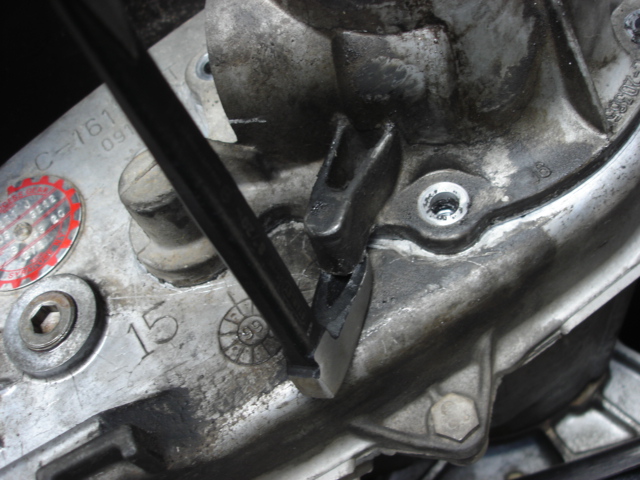
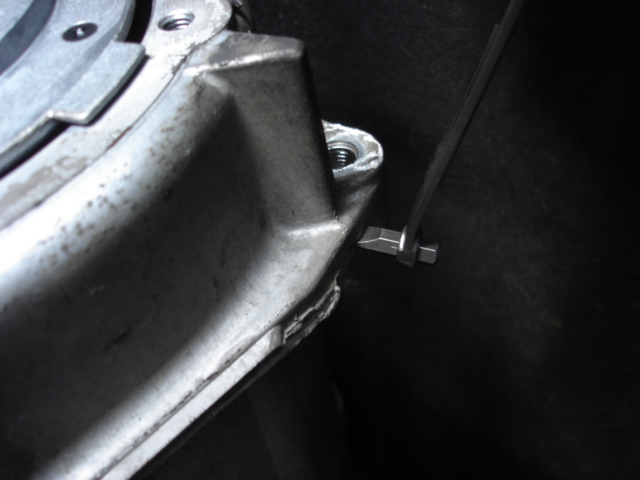
My homemade pry tool
(There is 2 pry locations on the top left and bottom right of the case)
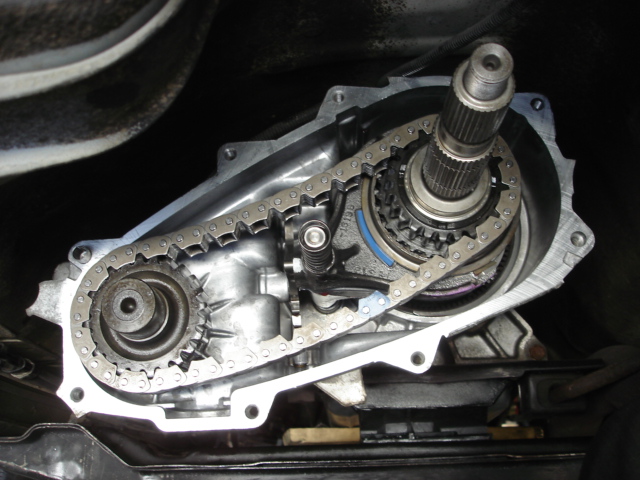
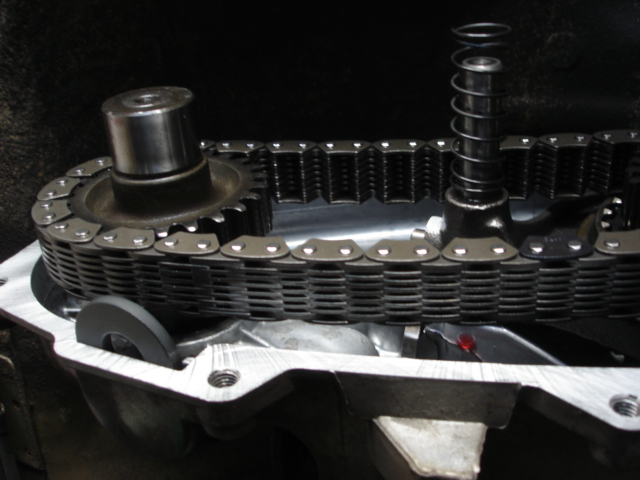
Main Case and oil pump assembly Removed
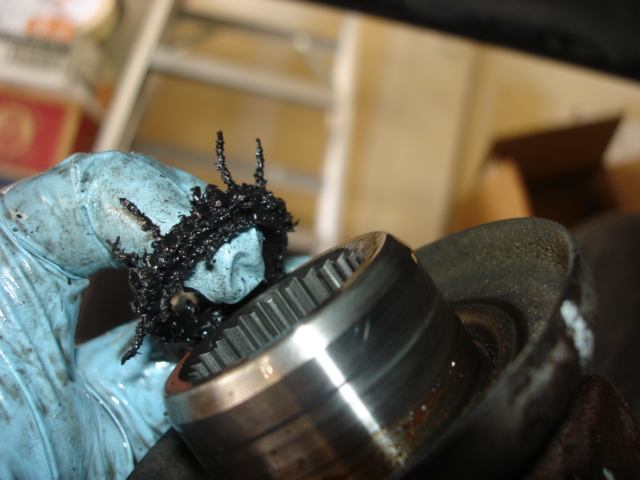
13)Remove magnet and spring for safe keeping
14)Remove from yoke (with a little wiggle if should come out)
My fubar star washer
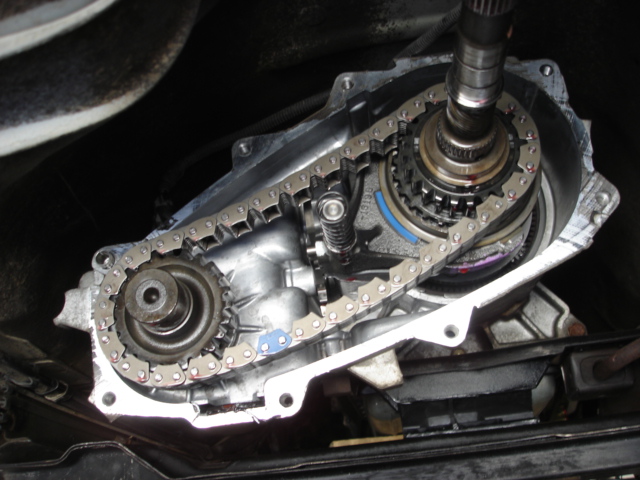
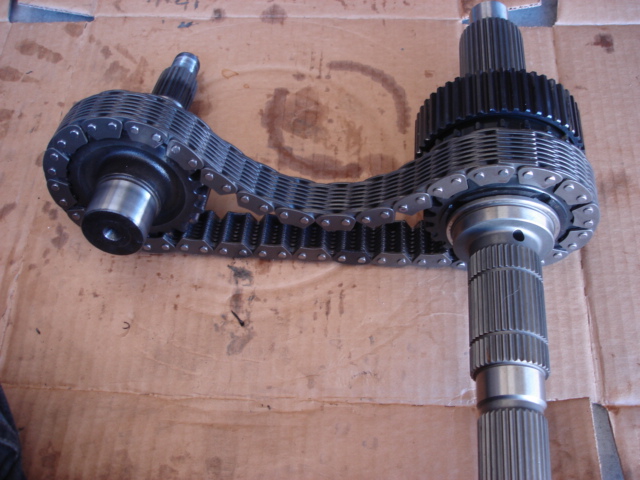
15)Remove chain and gear assembly as one piece
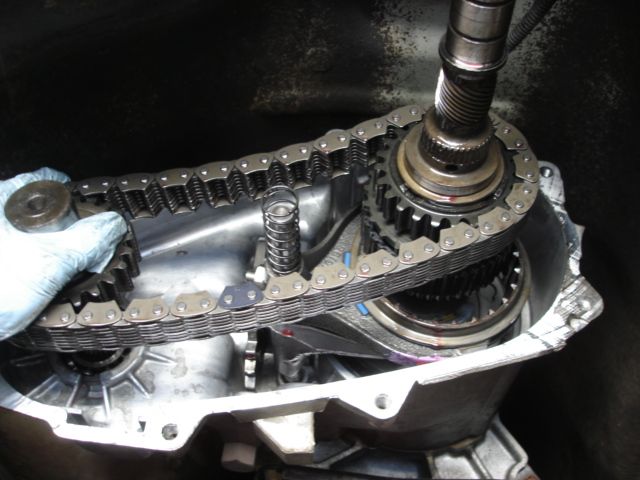
Gear assembly removed

Cleaned!
.....
Parts
>SYE (Rugged Ridge) package from Adam's Driveshaft complete with new custom driveshaft.
Addition tools needed
>10mm 12 points socket
>1 1/8 socket
>Gear Puller #27078 (loaner from Autozone)
>Lock-ring Pliers (craftsman #47386, Must have tool!)
Here's a very good video
AA SYE write up worth reading
http://www.4x4xplor.com/SYE-CV.html
1)Engage 4Lo
2)Jack up rear end
3)Remove rear driveshaft
4)Drain fluid
5)Disconnect front driveshaft from TC yoke
6)Remove dust shield using gear puller
Removed
7)Remove lock ring (craftsman #47386, best $15 i've spent)
Removed
8)Remove oil seal (don't worry about the tail housing, will be replacing it with new provided tail housing)
9)Remove two more lock rings (i find it easier to use a needle nose pliers for the outer lock ring)
10)Remove speedometer gears
11)Remove tail housing
Tail housing removed
12)Remove main case
(top bolt uses a 10mm 12 points socket)
My homemade pry tool
(There is 2 pry locations on the top left and bottom right of the case)
Main Case and oil pump assembly Removed
13)Remove magnet and spring for safe keeping
14)Remove from yoke (with a little wiggle if should come out)
My fubar star washer
15)Remove chain and gear assembly as one piece
Gear assembly removed
Cleaned!
.....
Last edited by BotakBeng; Apr 11, 2012 at 08:21 PM.
Thread Starter
CF Veteran
Joined: Jan 2011
Posts: 1,894
Likes: 4
From: Las Vegas
Year: 1999
Model: Cherokee
Engine: 4.0
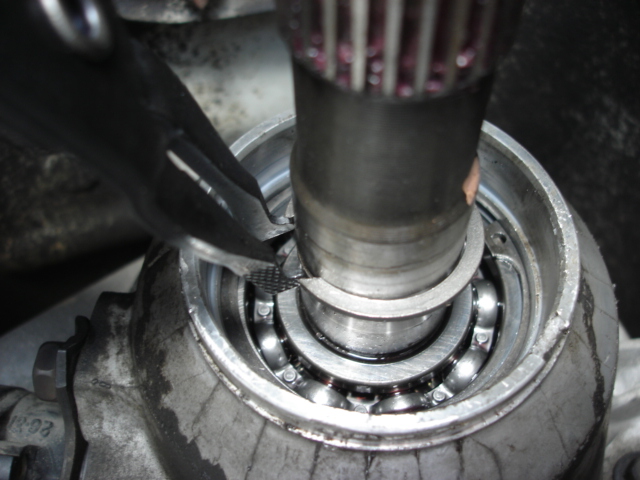
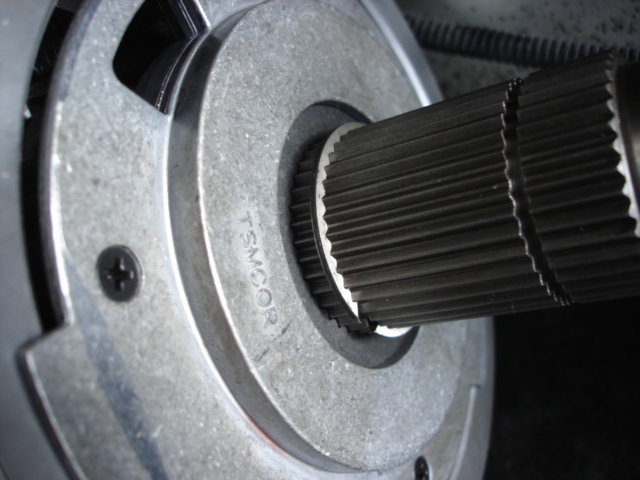
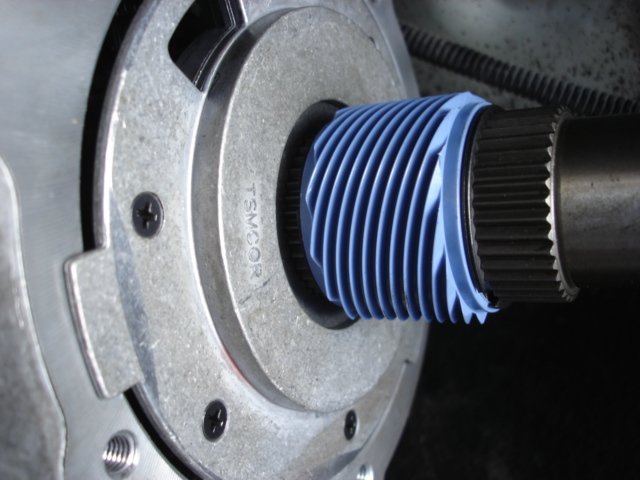
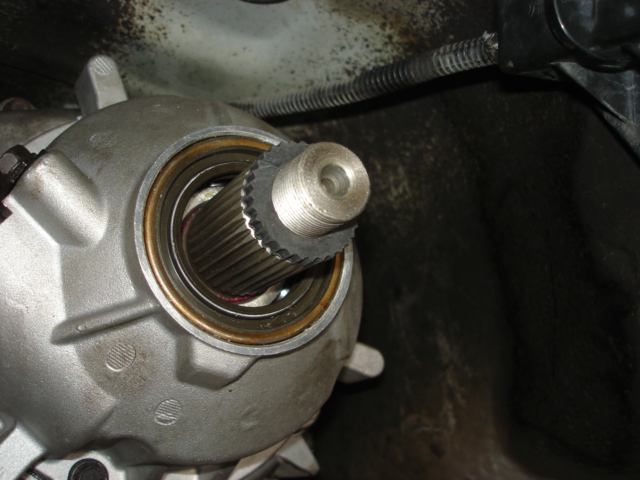
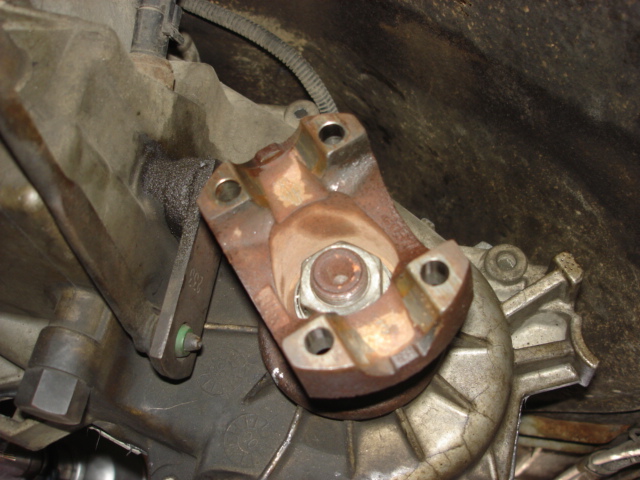
16)Remove gear/shaft lock ring
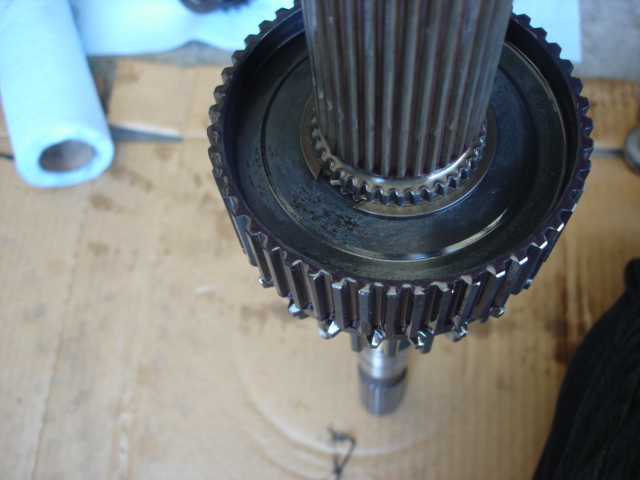
Lock ring removed....with factory shaft

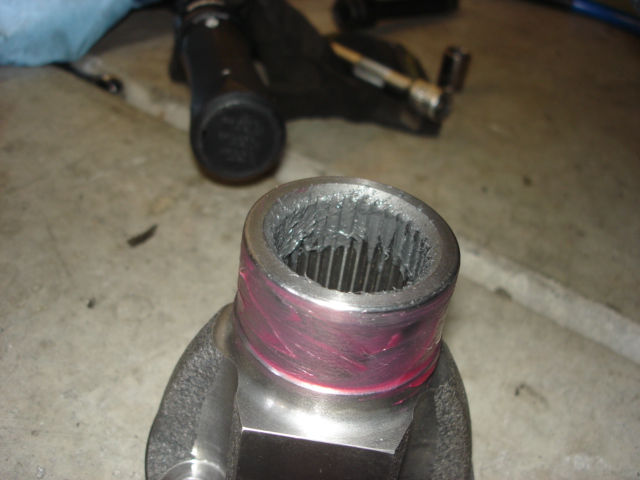
17)Swap factory shaft with new SYE shaft

Making sure the lock ring is in place
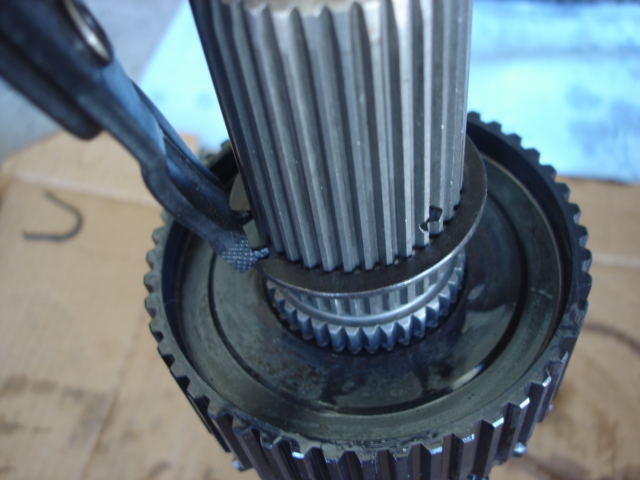
Completed gear assembly with new SYE shaft
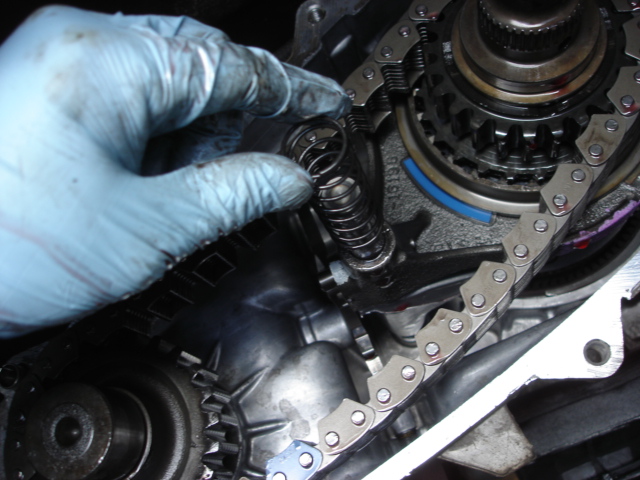
18)Install new chain and gear assembly
19)Install cleaned magnet and spring
Before installing, is best to do a trial fit w/out rtv (my outshaft was not within spec and wouldn't allow me to install the tail housing...you know the rest of the story ).
).
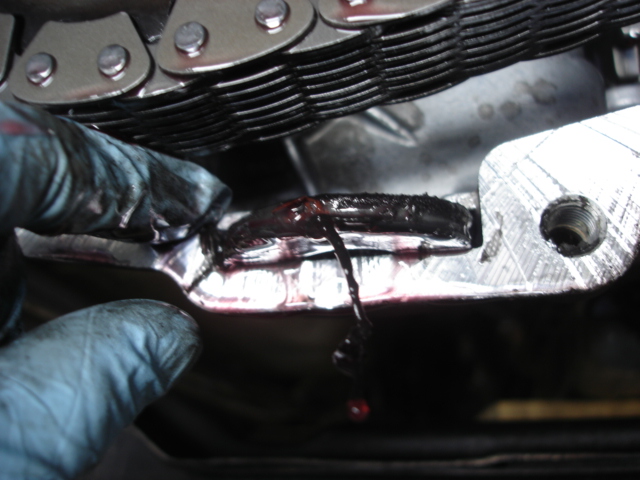
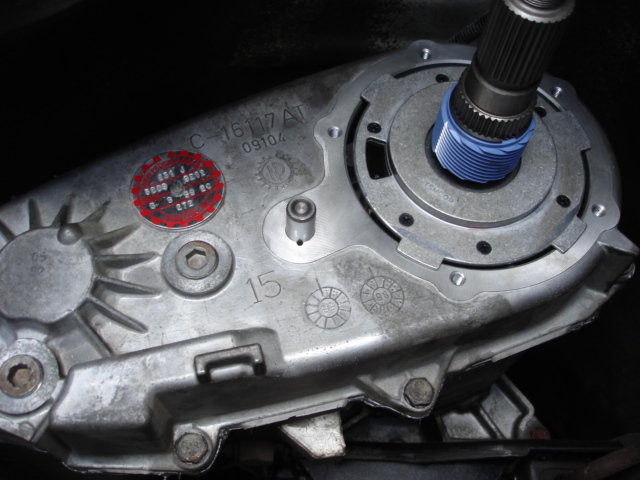
20)Install main case together with oil pump assembly as a unit (i find it easier that way) using ultra black rtv
Make sure the o-ring is intact
21)Torque main case bolts to spec
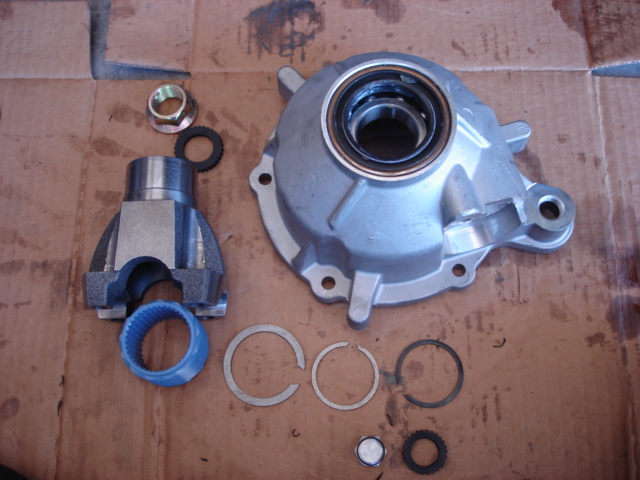
Heres whats left
Only 1 large and 2 small lock ring need to be used. If there is a 2nd large ring....its just an extra.
22)Install speedometer drive gears with provided lock rings
Installed
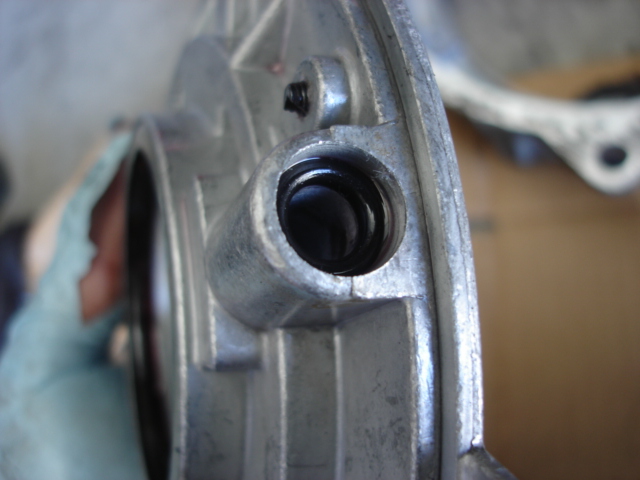
23)Install plug. Make sure you apply a good amount of tread sealant.
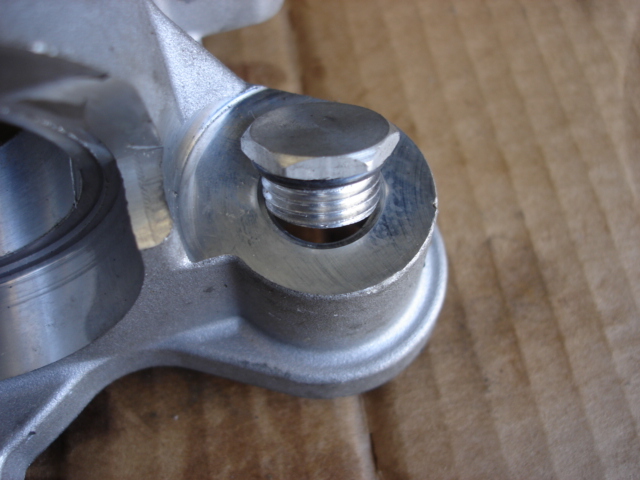
Ready to install
New tail housing installed and torqued to spec
24)Install new rubber star washer
Lube yoke and some rtv on the inside
Installed
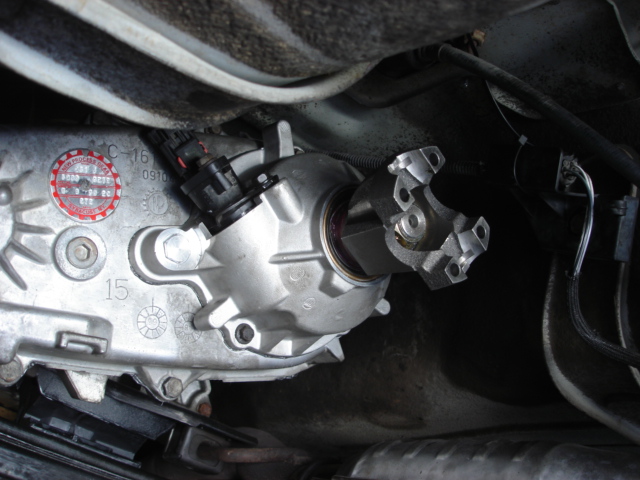
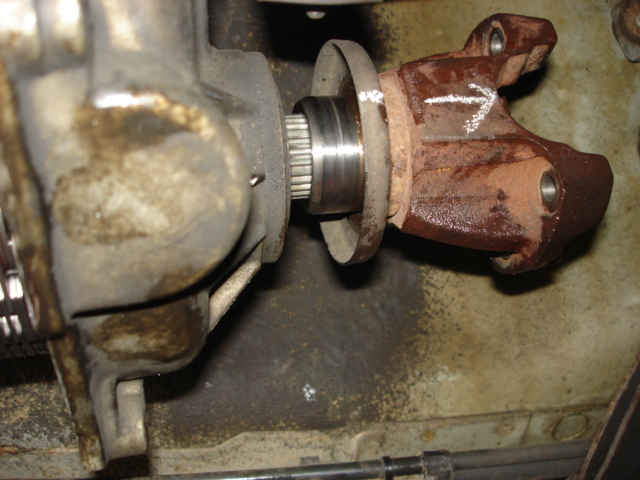
25)Install front yoke as i did with my rear
26)Torque yoke nuts to spec
Done!
Lock ring removed....with factory shaft
17)Swap factory shaft with new SYE shaft
Making sure the lock ring is in place
Completed gear assembly with new SYE shaft
18)Install new chain and gear assembly
19)Install cleaned magnet and spring
Before installing, is best to do a trial fit w/out rtv (my outshaft was not within spec and wouldn't allow me to install the tail housing...you know the rest of the story
20)Install main case together with oil pump assembly as a unit (i find it easier that way) using ultra black rtv
Make sure the o-ring is intact
21)Torque main case bolts to spec
Heres whats left
Only 1 large and 2 small lock ring need to be used. If there is a 2nd large ring....its just an extra.
22)Install speedometer drive gears with provided lock rings
Installed
23)Install plug. Make sure you apply a good amount of tread sealant.
Ready to install
New tail housing installed and torqued to spec
24)Install new rubber star washer
Lube yoke and some rtv on the inside
Installed
25)Install front yoke as i did with my rear
26)Torque yoke nuts to spec
Done!
Last edited by BotakBeng; May 2, 2012 at 08:11 PM.
Thread Starter
CF Veteran
Joined: Jan 2011
Posts: 1,894
Likes: 4
From: Las Vegas
Year: 1999
Model: Cherokee
Engine: 4.0
Next is to install my new custom driveshaft
Adam's Driveshaft
Here are some pics of Adam's DS i got yesterday together with Rugged Ridge SYE.
http://www.adamsdriveshaft.com/buy_online
Much heavier than stock....beefy.
Don't know much about his product but James (owner) seems to know quite a bit about 4x4 (saw him getting his hands dirty when i pick up my parts)...has quite a workshop and own a few cherokees himself.
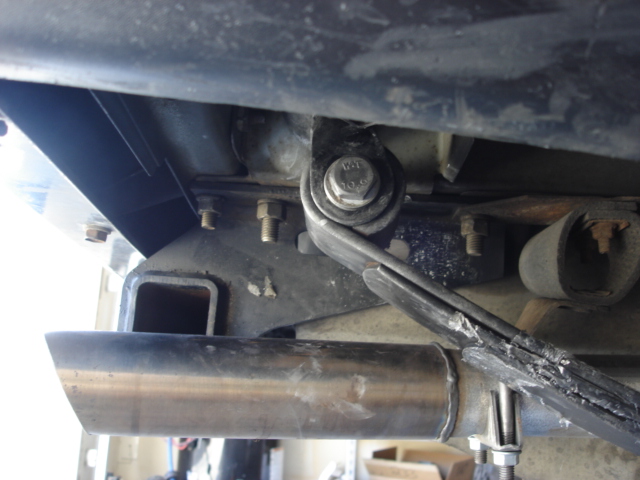
Adam's vs Stock
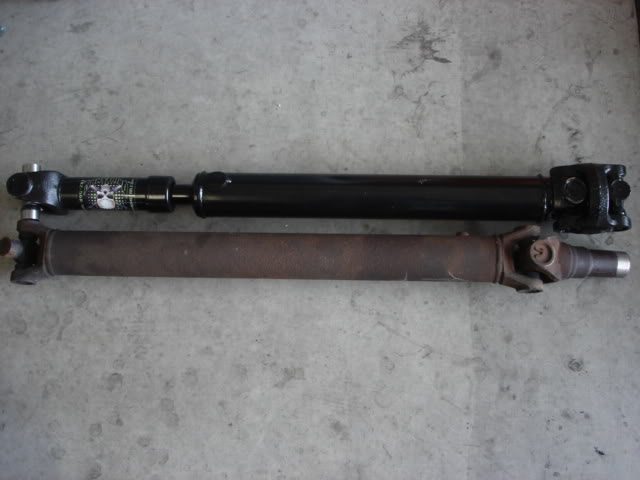
Adam's vs Stock Front DS (for those who plan on using a front DS from an auto XJ)
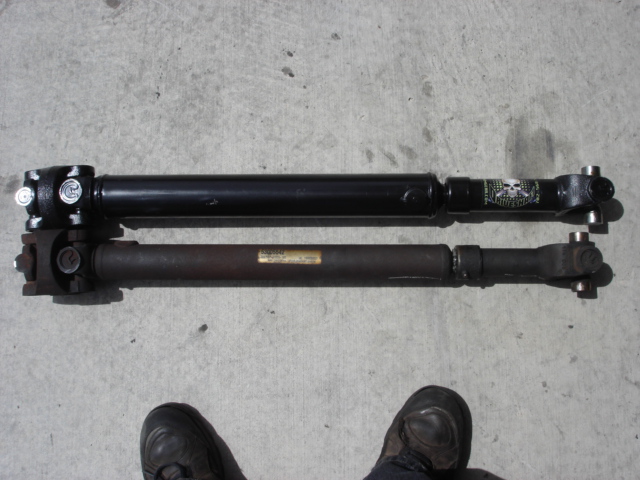

Comparing Adam's and Stock Front DS, there's about 1" difference.
Here are some specs for those who are thinking about using a stock front DS from a Jeep.
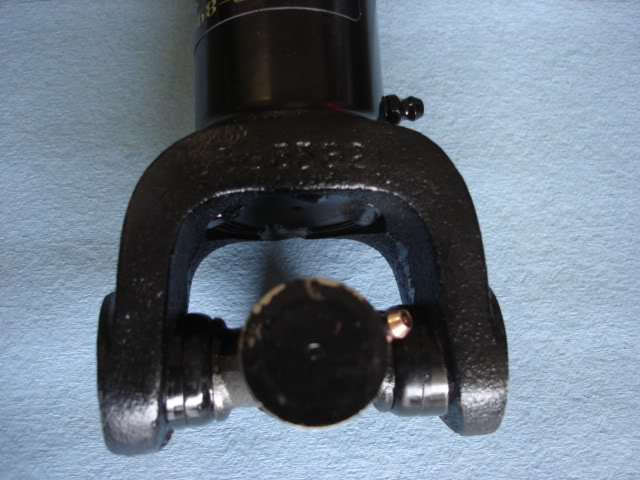
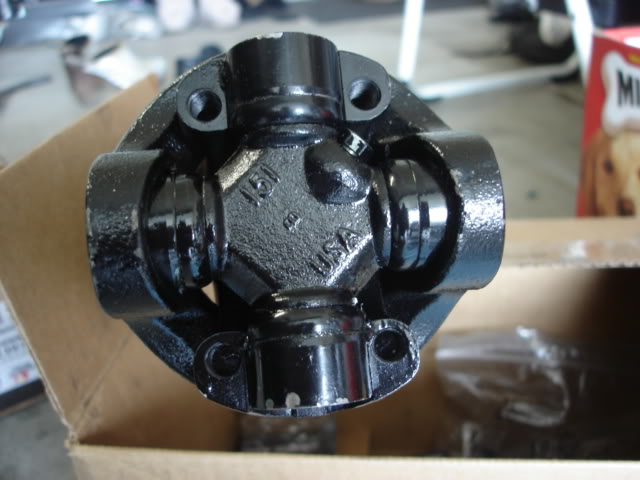
U-joint (Spicer ?)
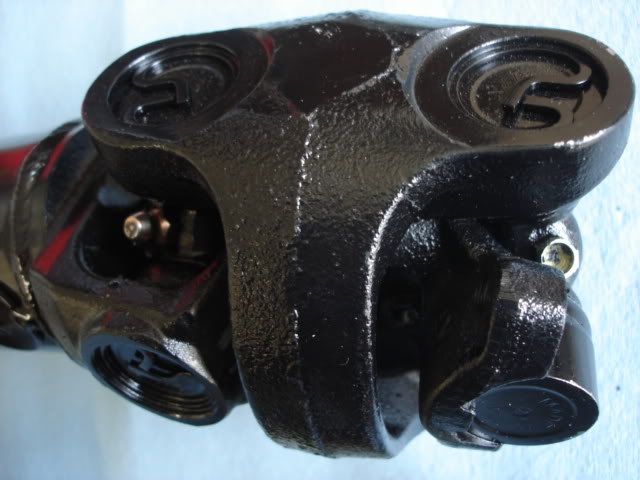
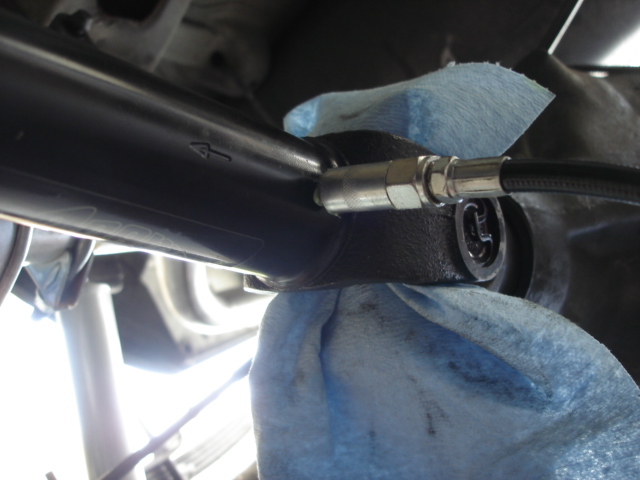
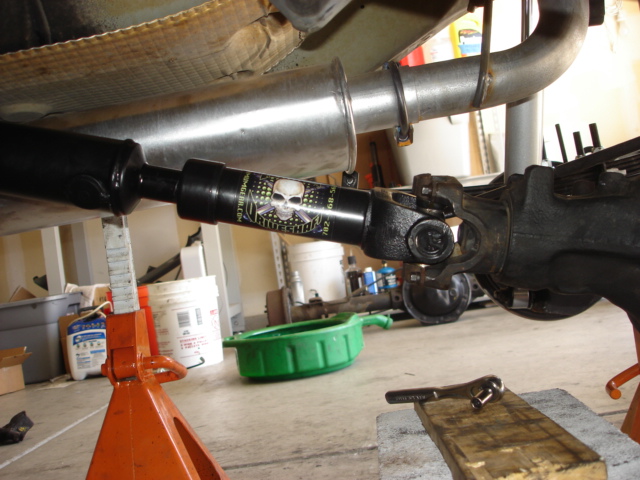
Good time to shift TC back to 4Hi and transmission to N so as to allow the rear yoke to move freely while installing the provided yoke/driveshaft bolts.
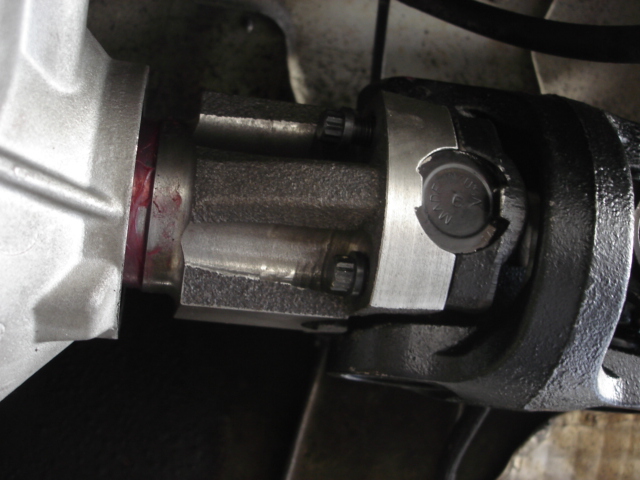
I started with the TC end (Gear wrench ftw)
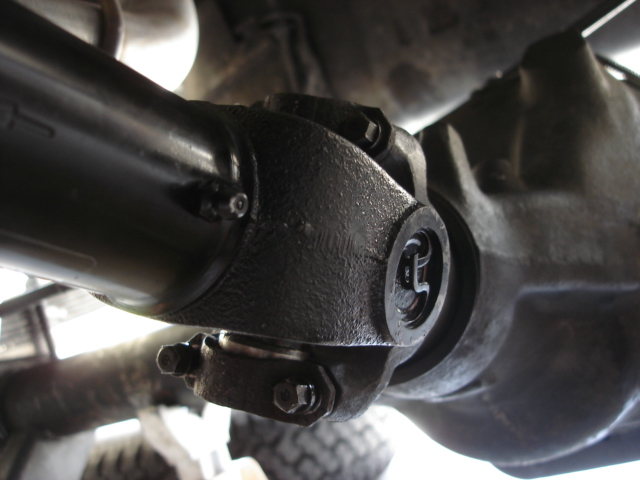
Axle end
Torque down bolts with transmission back in P.
Greased up (it came greased but when i took some pics of it fully compressed, some grease was lost)
MISSION ACCOMPLISHED!!!
Just for comparison, here is how a stock XJ Auto front DS would be
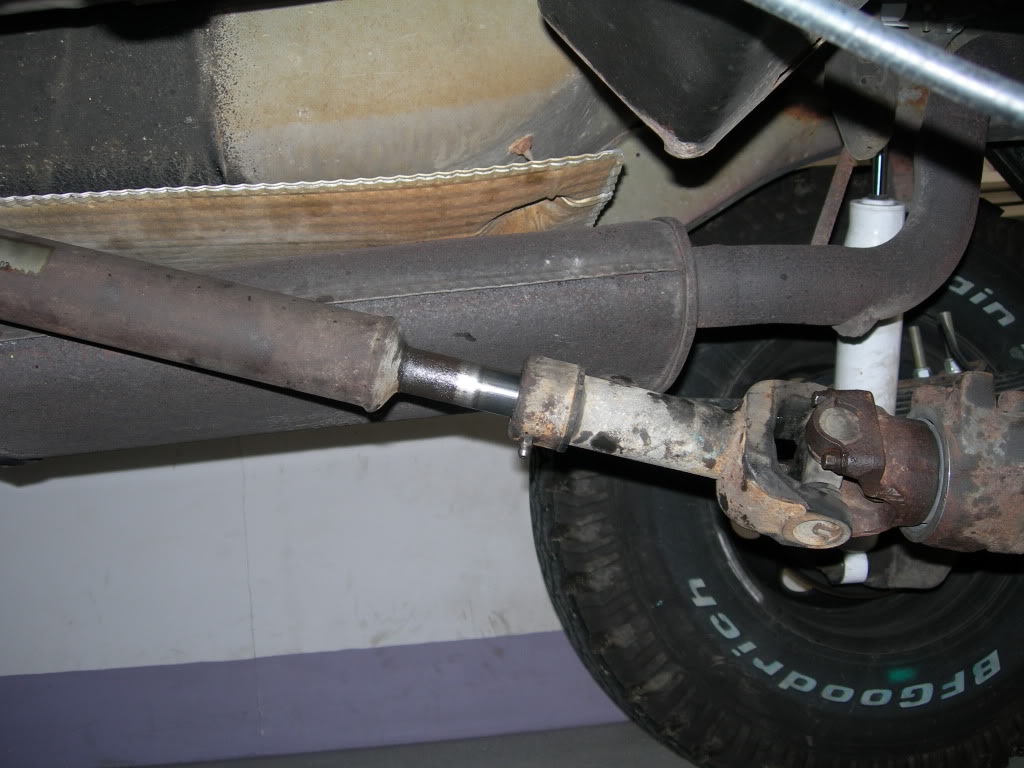
Pic copied from sanchezcruz build.
Adam's Driveshaft
Here are some pics of Adam's DS i got yesterday together with Rugged Ridge SYE.
http://www.adamsdriveshaft.com/buy_online
Much heavier than stock....beefy.
Don't know much about his product but James (owner) seems to know quite a bit about 4x4 (saw him getting his hands dirty when i pick up my parts)...has quite a workshop and own a few cherokees himself.
Adam's vs Stock
Adam's vs Stock Front DS (for those who plan on using a front DS from an auto XJ)
Comparing Adam's and Stock Front DS, there's about 1" difference.
Here are some specs for those who are thinking about using a stock front DS from a Jeep.
Here is a chart that lists all the drive shaft length for the xjs and zjs. You WILL need a longer one! I went with one of the longest ones available...33"... And I still only have about 2" of slip left in the driveshaft. I found one on eBay for $30 and repainted it and put new u joints in it. For a grand total of $250 for a full SYE and DriveShaft! And it has given me nothing but smiles!!!!
These are measurements UJOINT TO UJOINT
BOLD ONES ARE LONGEST
XJ 87/88 2.5 Automatic 27.950 53003912
XJ 89/93 2.5 Automatic 27.970 53005540
XJ 89/01 2.5 Manual 25.310 53005541
XJ 89/01 4.0 Automatic 30.660 53005542
XJ 89/01 4.0 Manual 29.250 53005543
XJ 89/00 4.0 Manual 27.080 Export 53005544
XJ 89/00 4.0 Automatic 28.620 Export 53005545
XJ 87/88 4.0 Automatic Export 53005260 *
XJ 95/01 Diesel 27.640 Export 52098208
ZJ 1993 4.0 Automatic 30.530 52098341
ZJ 93/95 5.2 Automatic 32.870 w/o CV 53008427
ZJ 94/95 5.2 A500 30.625 w/o CV 52087805
ZJ 94/95 4.0 A500 w/o CV 52098790
ZJ 93/96 4.0 Manual 52098344
ZJ 93/96 4.0, 5.2 31.875 w/ 231, 242 52087805
ZJ 93/95 4.0 Manual 30.000 w/231 52088090
ZJ 93/96 5.2 33.000 w/ 231 53008427
ZJ 96/98 5.2, 5.9 31.250 w/ 249 & Model 30 52098379
ZJ 1996 5.2 Automatic 32.875 w/ 249 & Model 30 52098501
ZJ 96/98 4.0 33.000 w/ 242 52098707
ZJ 96/97 4.0 Automatic 31.250 52098850
ZJ 1996 5.2 Automatic 30.750 w/ 249 & Model 30 52099246
ZJ 96/98 4.0 33.500 w/ 249 52099260
__________________
U-joint (Spicer ?)
Good time to shift TC back to 4Hi and transmission to N so as to allow the rear yoke to move freely while installing the provided yoke/driveshaft bolts.
I started with the TC end (Gear wrench ftw)
Axle end
Torque down bolts with transmission back in P.
Greased up (it came greased but when i took some pics of it fully compressed, some grease was lost)
MISSION ACCOMPLISHED!!!
Just for comparison, here is how a stock XJ Auto front DS would be
Pic copied from sanchezcruz build.
Last edited by BotakBeng; Apr 11, 2012 at 09:50 AM.
CF Veteran
Joined: Nov 2011
Posts: 1,314
Likes: 0
From: Las Vegas, NV - St. George, UT
Year: 1996
Model: Cherokee
Engine: 4.0
Excellent write up. I just need space to do this when the time comes!
I went to high school with James kids. And he lives a street over from my parents.
Planning to re gear?
I went to high school with James kids. And he lives a street over from my parents.
Planning to re gear?
Thread Starter
CF Veteran
Joined: Jan 2011
Posts: 1,894
Likes: 4
From: Las Vegas
Year: 1999
Model: Cherokee
Engine: 4.0
I'm guessing he will give you a great deal huh?
I'm gonna hit the trail and go from there.....should be on the road by end of the week (still working on some little stuff)
I'll join you (if you don't mind trailing with a complete newbie) if you are heading out.
Thread Starter
CF Veteran
Joined: Jan 2011
Posts: 1,894
Likes: 4
From: Las Vegas
Year: 1999
Model: Cherokee
Engine: 4.0
Junior Member
Joined: Oct 2011
Posts: 95
Likes: 5
From: Delevan, Ny
Year: 2001
Model: Grand Cherokee
Engine: 4.0L I6
Thank you!
I'm not really sure (bear in mind, i'm a complete newbie) but if my understanding is right, it has something to do with pinion angle (causing vibration).
Here is a little reading material.
I sure hope someone with more experience can chime in.
I'm not really sure (bear in mind, i'm a complete newbie) but if my understanding is right, it has something to do with pinion angle (causing vibration).
Here is a little reading material.
I sure hope someone with more experience can chime in.
Thread Starter
CF Veteran
Joined: Jan 2011
Posts: 1,894
Likes: 4
From: Las Vegas
Year: 1999
Model: Cherokee
Engine: 4.0
When you install a lift, it's best to install shims to adjust your pinion angle so that it points directly at the transfer case yoke....there are a few other ways to do this , but this is the easiest way.....dropping the transfer case is another way but it's a crap shoot ,,,I did that with my old XJ and I still had vibrations until I added shims to the rear and eliminated most of the vibrations....live and learn....now I am going with an SYE and shaft set up, 6* shims, and no transfer case drop......don't need to drop the TC with an SYE...


Copied from http://www.4xshaft.com/driveline101.html
Last edited by BotakBeng; Apr 9, 2012 at 10:55 PM.

Member
Joined: Apr 2012
Posts: 202
Likes: 1
From: VA
Year: 1999
Model: Cherokee
Engine: 4.0L I6
Thanks for taking the time to share your build. I just got a 99 xj and yours is like the perfect guide for building a reliable rig. I wouldn't know how to do half of what needs to be done without your pictures and the excellent links you provided, I'm definitely here for the duration.
I'll probably buy allot of my parts based off of your recommendations, please keep the honest reviews up, you have no idea how valuable that is to someone who is completely new to all of this.
I'll probably buy allot of my parts based off of your recommendations, please keep the honest reviews up, you have no idea how valuable that is to someone who is completely new to all of this.
Thread Starter
CF Veteran
Joined: Jan 2011
Posts: 1,894
Likes: 4
From: Las Vegas
Year: 1999
Model: Cherokee
Engine: 4.0
Thanks for taking the time to share your build. I just got a 99 xj and yours is like the perfect guide for building a reliable rig. I wouldn't know how to do half of what needs to be done without your pictures and the excellent links you provided, I'm definitely here for the duration.
I'll probably buy allot of my parts based off of your recommendations, please keep the honest reviews up, you have no idea how valuable that is to someone who is completely new to all of this.
I'll probably buy allot of my parts based off of your recommendations, please keep the honest reviews up, you have no idea how valuable that is to someone who is completely new to all of this.
Just passing along what i've read and learn from people who has put in alot of work.
Thread Starter
CF Veteran
Joined: Jan 2011
Posts: 1,894
Likes: 4
From: Las Vegas
Year: 1999
Model: Cherokee
Engine: 4.0
Did a little DIY alignment and took the Jeep out for a drive ..... damn, is been a month since i drove her.
Here are some write-ups on DIY Alignment
>http://project-jk.com/jeep-jk-write-...-end-alignment
>http://jeep-xj.info/HowtoAlignment.htm
For anyone who is interested in Steering and Suspension Basic and the Effect of Lift, read this (by gojeepin)
>http://mysite.verizon.net/res108eps/...ion-basics.pdf
First impression....How the do i get in
  ...and that's before my 32" tires
Loving it tho.
>Drives straight as an arrow
>As many has mentioned, the rear suspension is STIFF as hell (ROUGH country huh)
I'm hoping to get a softer ride as the springs break in.
Shackle angle could be one of the reason
Getting an alignment and tires mounted tomorrow.
Pics coming up....
Here are some write-ups on DIY Alignment
>http://project-jk.com/jeep-jk-write-...-end-alignment
>http://jeep-xj.info/HowtoAlignment.htm
For anyone who is interested in Steering and Suspension Basic and the Effect of Lift, read this (by gojeepin)
>http://mysite.verizon.net/res108eps/...ion-basics.pdf
First impression....How the
do i get in ...and that's before my 32" tires Loving it tho.
>Drives straight as an arrow
>As many has mentioned, the rear suspension is STIFF as hell (ROUGH country huh)
I'm hoping to get a softer ride as the springs break in.
Shackle angle could be one of the reason
Getting an alignment and tires mounted tomorrow.
Pics coming up....
Last edited by BotakBeng; Apr 16, 2012 at 11:38 PM.
CF Veteran
Joined: Nov 2011
Posts: 1,314
Likes: 0
From: Las Vegas, NV - St. George, UT
Year: 1996
Model: Cherokee
Engine: 4.0
Originally Posted by BotakBeng
Thx bro.
I'm guessing he will give you a great deal huh?
I'm gonna hit the trail and go from there.....should be on the road by end of the week (still working on some little stuff)
I'll join you (if you don't mind trailing with a complete newbie) if you are heading out.
Wish I was heading out. It is no where ready to see dirt yet. And I will have to bug James to give me a deal on parts.
Hopefully by the end of next month it will be ready.

