
View Poll Results: Grille color


Multiple Choice Poll. Voters: 7. You may not vote on this poll
Project: Clockwork Orange


Thread Starter
Member
Joined: Sep 2009
Posts: 136
Likes: 0
From: Colorado Springs, CO
Year: 2000
Model: Cherokee
Engine: 4.0
Thanks. had a fair amount of time, and not a lot of cash for other stuff, so i just took my time.
There is a lot more going on in the interior which I haven't gotten to yet in the thread, but its coming.
There is a lot more going on in the interior which I haven't gotten to yet in the thread, but its coming.
CF Veteran
Joined: Feb 2011
Posts: 1,048
Likes: 0
From: Georgia
Year: 2004
Model: Grand Cherokee (WJ)
Engine: 4.0 Inline 6
I like the orange xj's. I think they look cool. I have a craving to do mine either desert tan or lime green. My paint is still in good shape so it may be a while before that happens.
Did you re-wire the whole interior or what was the deal with that? Just curious.
Did you re-wire the whole interior or what was the deal with that? Just curious.
Thread Starter
Member
Joined: Sep 2009
Posts: 136
Likes: 0
From: Colorado Springs, CO
Year: 2000
Model: Cherokee
Engine: 4.0
Yeah Mark, it probably looks like I rewired the whole rig, but that is just add on/accessory wiring. Stereo, VHF and UHF radios, lights, siren, power, etc.
I am doing things a bit different on my electrical, audio, and switching setup. I will get into it more later in the thread, but I am removing the stock stereo, and replacing it with a 7" tablet, which will provide audio, Navigation, mapping, etc, as well as control all of my accessory lights and such via Bluetooth.
Hammered- I wasn't sure about the color initially, but the longer I look at it, the more I like it. Just need to get the damn thing done, and get it out in the world. It's currently sitting on jack stands with no axles.
As for my digit, that poor thing has had more than it's share of abuse. That is the second time I have crushed/ripped the end off of it. And yeah, it stung a bit...
CF Veteran
Joined: Feb 2011
Posts: 1,048
Likes: 0
From: Georgia
Year: 2004
Model: Grand Cherokee (WJ)
Engine: 4.0 Inline 6
Gotcha. Putting the high powered radios in like the fire and police have. I guess I should have picked up on that seeing how it is a search and rescue vehicle. I am slow sometimes...
Thread Starter
Member
Joined: Sep 2009
Posts: 136
Likes: 0
From: Colorado Springs, CO
Year: 2000
Model: Cherokee
Engine: 4.0
Getting back to it...
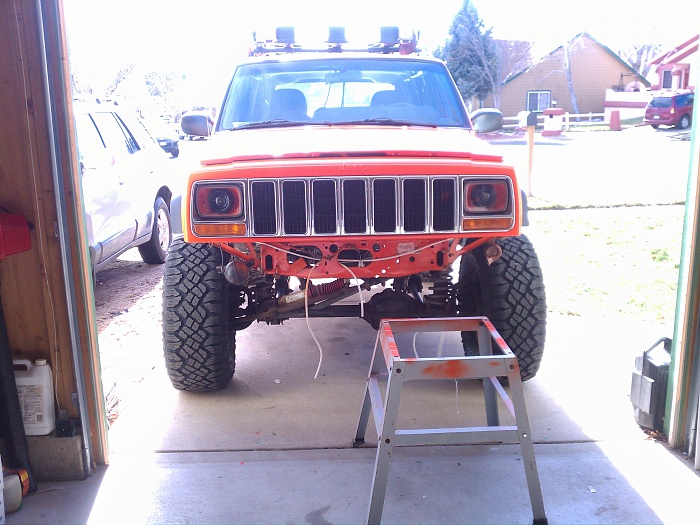
After about three weeks of the reconfigured digit fiasco, I got to a point where I could at least attempt to work on the Jeep. So, I continued to try to get the headlights set up.
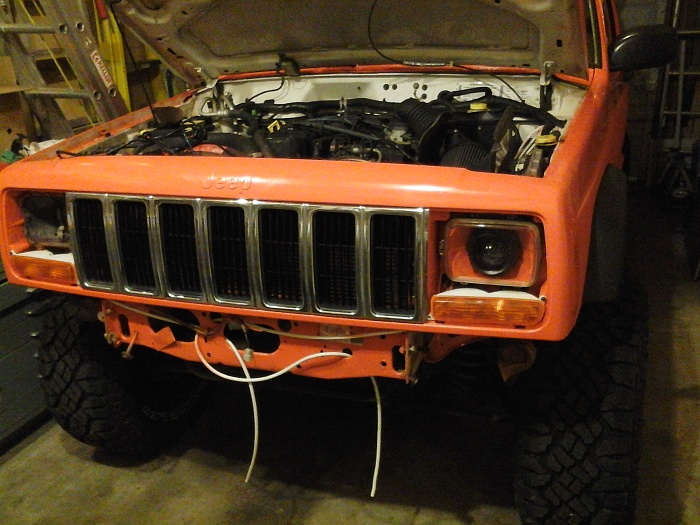
I wont go into a lot of detail, as this mod has been covered several times, but I got some AutoPal phenolic housings, heated them apart, dremeled out the back for the H2 projectors to fit in, then machined some backing plates to cover the hole and center the projector, adjusted and leveled everything, reinstalled the lenses and sealed it all up with silicone. I think I spent about $80 total on the housings, projectors, and HID's. The difference from the stock pitiful halogens is unreal.
At some point in the future, I will probably build or buy some LED headlights, but this is a fairly inexpensive solution to MUCH better than stock lights.
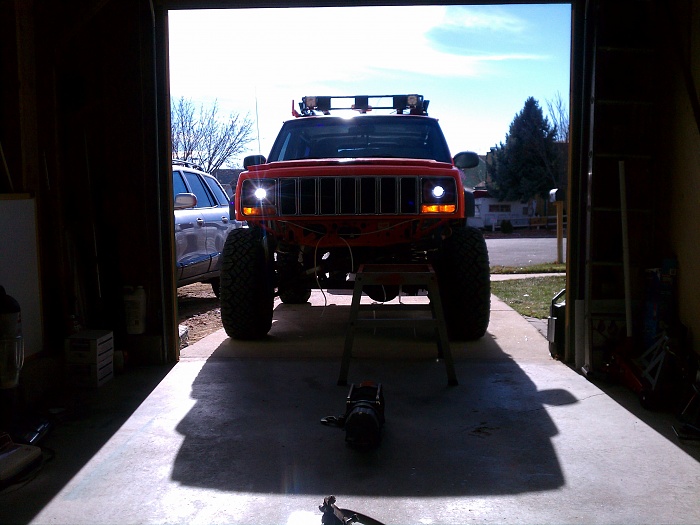
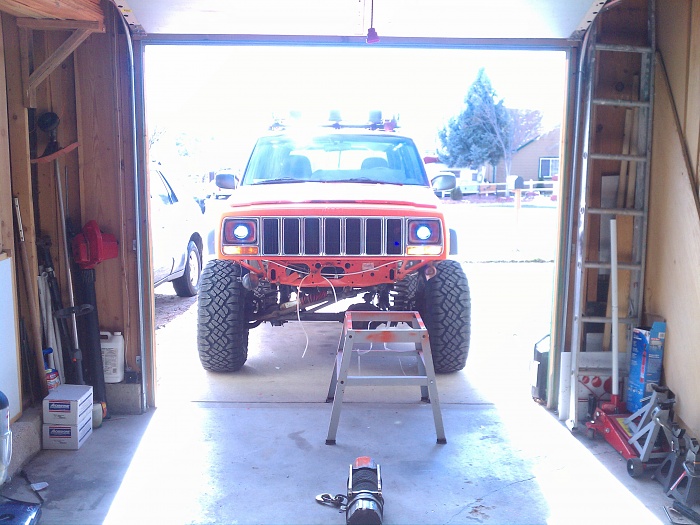
There are really only two downsides to this setup. The HID's do take 15 seconds or so to fully warm up, and reach their full brightness. Not a big deal to me.
Second, and more important, is when you decide that a great place to mount your half-height HID ballast would be behind your ECM in the engine compartment- don't forget that your washer bottle is RIGHT on the other side of that inner fender that you are drilling through.
So, I goobed up a much longer screw with some urethane dum dum sealant, and ran it into the new "drain" I created in my washer bottle. So far so good. Otherwise, I will have a washer bottle with about a 1/2 cup capacity...
After about three weeks of the reconfigured digit fiasco, I got to a point where I could at least attempt to work on the Jeep. So, I continued to try to get the headlights set up.

I wont go into a lot of detail, as this mod has been covered several times, but I got some AutoPal phenolic housings, heated them apart, dremeled out the back for the H2 projectors to fit in, then machined some backing plates to cover the hole and center the projector, adjusted and leveled everything, reinstalled the lenses and sealed it all up with silicone. I think I spent about $80 total on the housings, projectors, and HID's. The difference from the stock pitiful halogens is unreal.


At some point in the future, I will probably build or buy some LED headlights, but this is a fairly inexpensive solution to MUCH better than stock lights.

There are really only two downsides to this setup. The HID's do take 15 seconds or so to fully warm up, and reach their full brightness. Not a big deal to me.
Second, and more important, is when you decide that a great place to mount your half-height HID ballast would be behind your ECM in the engine compartment- don't forget that your washer bottle is RIGHT on the other side of that inner fender that you are drilling through.
So, I goobed up a much longer screw with some urethane dum dum sealant, and ran it into the new "drain" I created in my washer bottle. So far so good. Otherwise, I will have a washer bottle with about a 1/2 cup capacity...
Thread Starter
Member
Joined: Sep 2009
Posts: 136
Likes: 0
From: Colorado Springs, CO
Year: 2000
Model: Cherokee
Engine: 4.0
With the lights going, I tried doing what I could on the new D30 for the front. Burned in the track bar bracket, and added some extra gussets (some of which would have to come out later due to clearance probs).
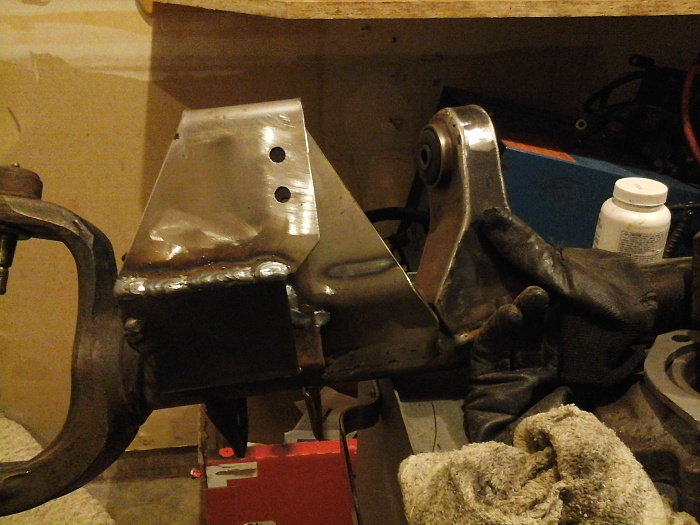
I wrestled some WJ knuckles and caliper brackets off an '03 from the JY, brought them to work, and blasted the goo off with the Hotsy. Then I took them to a friends, and cleaned them up some in his sandblast cabinet to prep them to weld on the spacers.
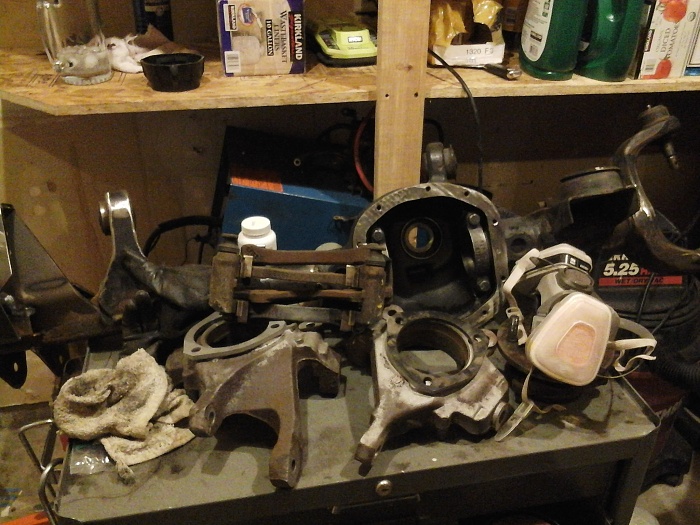
Otherwise, basically it was buying a whole bunch of stuff (WJ balljoints, 2001 TJ hub bearings, WJ TRE's, tie rod/drag link, Akebono calipers, 2002 Explorer Sport Trac rotors, etc).
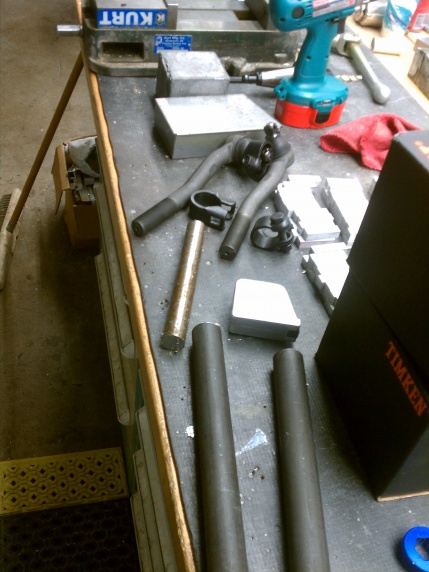
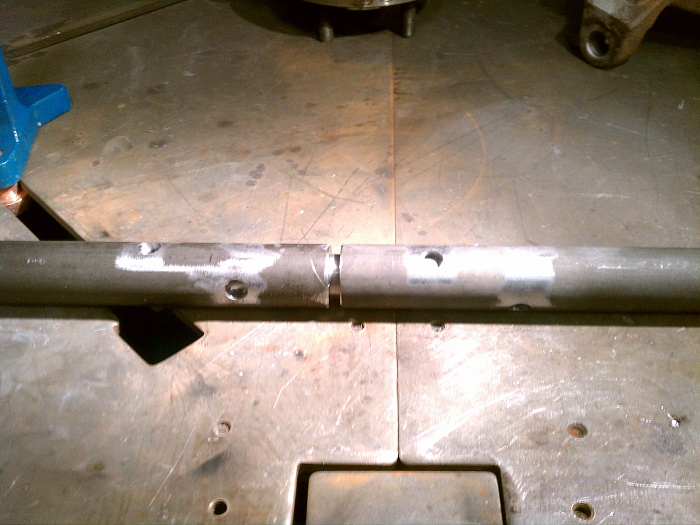
Next was to rework the TR to the correct length. Again, going the inexpensive route, I bought a new stock TR tube from RockAuto for $13, and cut it down to work. It is still plenty beefy, at about 1.25" OD, and .25 wall.
I cut about 5" out of the center.

Then I turned a piece of scrap stock down to just fit inside the tube, and then drilled three through holes in each side, for rosettes.


I wrestled some WJ knuckles and caliper brackets off an '03 from the JY, brought them to work, and blasted the goo off with the Hotsy. Then I took them to a friends, and cleaned them up some in his sandblast cabinet to prep them to weld on the spacers.


Otherwise, basically it was buying a whole bunch of stuff (WJ balljoints, 2001 TJ hub bearings, WJ TRE's, tie rod/drag link, Akebono calipers, 2002 Explorer Sport Trac rotors, etc).
Next was to rework the TR to the correct length. Again, going the inexpensive route, I bought a new stock TR tube from RockAuto for $13, and cut it down to work. It is still plenty beefy, at about 1.25" OD, and .25 wall.
I cut about 5" out of the center.
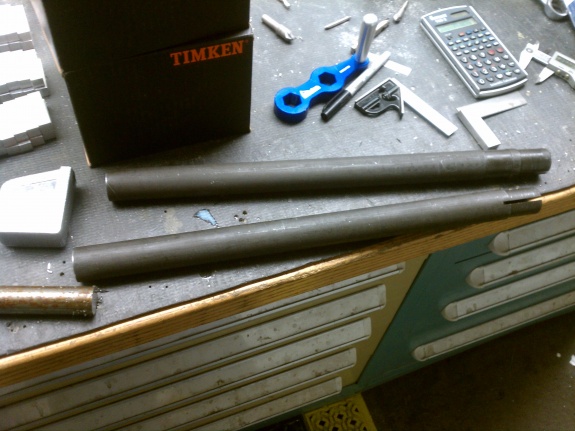
Then I turned a piece of scrap stock down to just fit inside the tube, and then drilled three through holes in each side, for rosettes.
Last edited by mntnresq; May 11, 2014 at 12:29 PM.
Thread Starter
Member
Joined: Sep 2009
Posts: 136
Likes: 0
From: Colorado Springs, CO
Year: 2000
Model: Cherokee
Engine: 4.0
Then I zapped it all back together.
Once it was all welded, ground smooth, and painted, you can hardly tell where it went together.
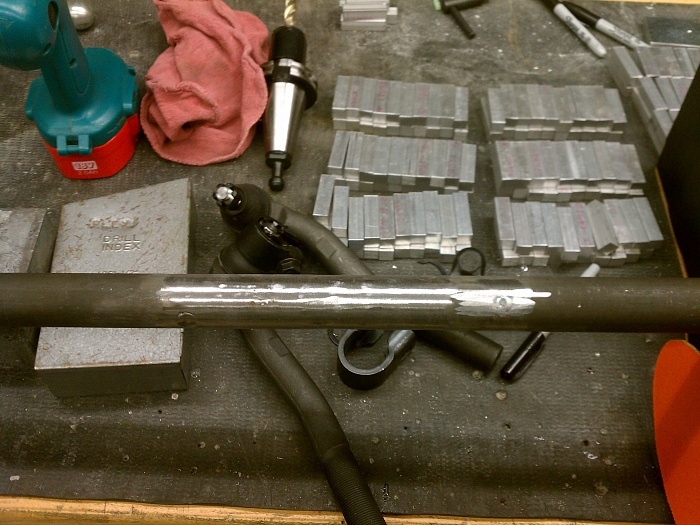
I still have to do the same with the drag link, but that will wait until I get the new axle swung under the rig, so I can verify the length first.
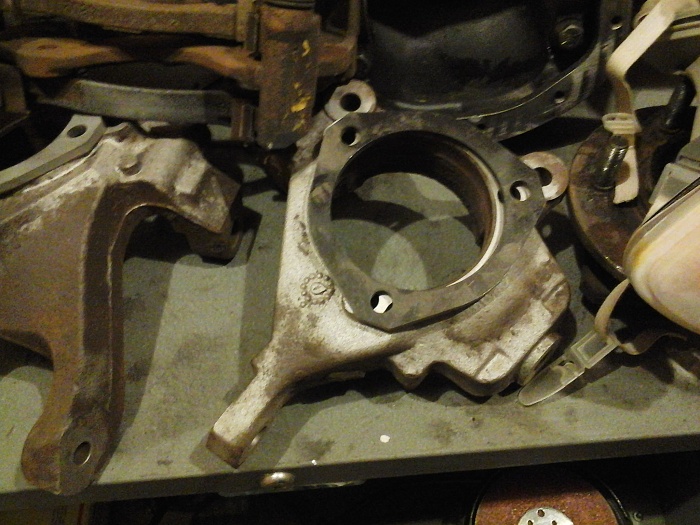
Up next was to prep the knuckles for the swap, by burning on the JKS hub bearing spacers.
For the OTK setup, you can basically go at this two ways- go with GM 1-ton stuff, which is 7/8" and you can just reverse- ream your knuckles from the top, or you can stick with the WJ TRE's, and and machine them for some OTK flip inserts. I went the latter, for a couple reasons-
To really get the clearances needed (esp with my 15" wheels) you need to use a semi-custom offset GM HD TRE. Again, being that I really have no desire to go thrash my rig for fun, they would prob last for the rest of my life; but I more like the idea of being able to walk into about any auto parts store on Earth and ask for a new WJ TRE, and get one. Heims never entered my consideration.
The second, again is cost. A good reamer for the GM's is about $100-150, that you will use once to set up your knuckles, then it decorates a drawer in your toolbox for eternity.
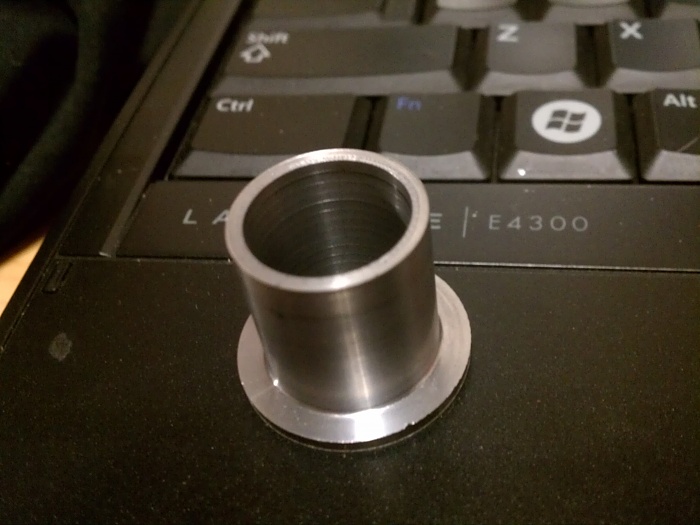
So, being the cheapo, and horrible perfectionist that I am (bad combo BTW), I designed and made my own inserts. Most of the flip inserts I have seen out there are designed to go in from the top down, with a lip which locates the insert in the drilled knuckle on top, along with the major diameter of the TRE. They then get welded on to be secure. But, the extra length also makes it that often you cannot get the castle nut far enough on the threads to put in a cotter pin. The outer diameter of the insert is also about the same size as the castle nut, so if you manage to break your welds, you could potentially pull the nut and all through the knuckle, and suddenly have a big problem.
I built mine flipped, so they insert from the bottom, and the lip is large enough to more than cover the nut. They are also counter bored into the knuckle, so they are the same length as the thickness of the knuckle. I did the counterbore oversize, to give me room to weld them around the edge, and keep it flush. Even if the weld breaks, they can really only spin in the hole, and not pull through, resulting in death, or at least major embarrassment.

Once it was all welded, ground smooth, and painted, you can hardly tell where it went together.

I still have to do the same with the drag link, but that will wait until I get the new axle swung under the rig, so I can verify the length first.
Up next was to prep the knuckles for the swap, by burning on the JKS hub bearing spacers.
For the OTK setup, you can basically go at this two ways- go with GM 1-ton stuff, which is 7/8" and you can just reverse- ream your knuckles from the top, or you can stick with the WJ TRE's, and and machine them for some OTK flip inserts. I went the latter, for a couple reasons-
To really get the clearances needed (esp with my 15" wheels) you need to use a semi-custom offset GM HD TRE. Again, being that I really have no desire to go thrash my rig for fun, they would prob last for the rest of my life; but I more like the idea of being able to walk into about any auto parts store on Earth and ask for a new WJ TRE, and get one. Heims never entered my consideration.
The second, again is cost. A good reamer for the GM's is about $100-150, that you will use once to set up your knuckles, then it decorates a drawer in your toolbox for eternity.
So, being the cheapo, and horrible perfectionist that I am (bad combo BTW), I designed and made my own inserts. Most of the flip inserts I have seen out there are designed to go in from the top down, with a lip which locates the insert in the drilled knuckle on top, along with the major diameter of the TRE. They then get welded on to be secure. But, the extra length also makes it that often you cannot get the castle nut far enough on the threads to put in a cotter pin. The outer diameter of the insert is also about the same size as the castle nut, so if you manage to break your welds, you could potentially pull the nut and all through the knuckle, and suddenly have a big problem.
I built mine flipped, so they insert from the bottom, and the lip is large enough to more than cover the nut. They are also counter bored into the knuckle, so they are the same length as the thickness of the knuckle. I did the counterbore oversize, to give me room to weld them around the edge, and keep it flush. Even if the weld breaks, they can really only spin in the hole, and not pull through, resulting in death, or at least major embarrassment.


Thread Starter
Member
Joined: Sep 2009
Posts: 136
Likes: 0
From: Colorado Springs, CO
Year: 2000
Model: Cherokee
Engine: 4.0
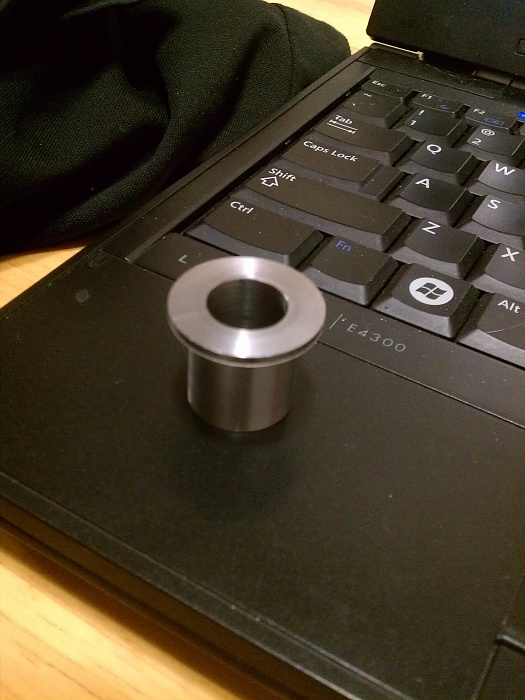
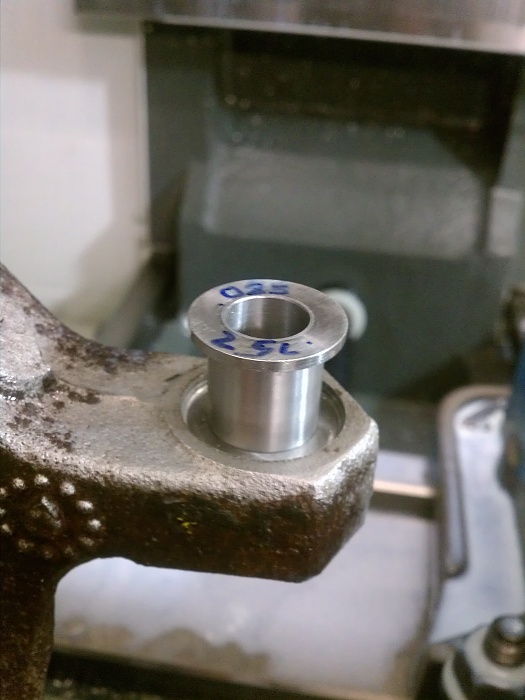
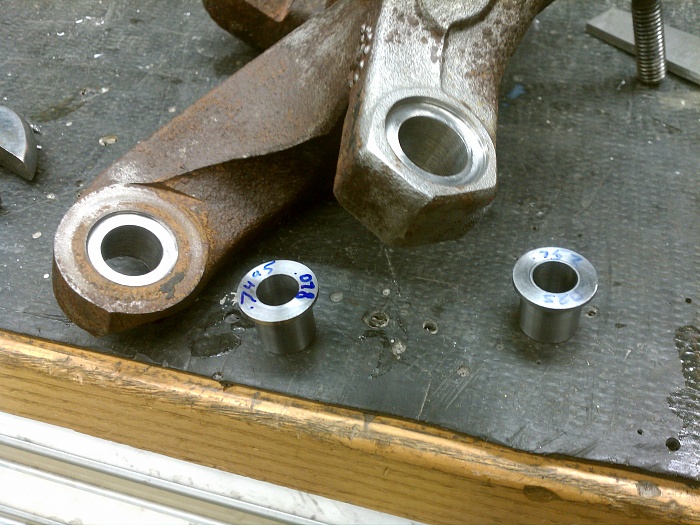
Just some shots of the process-
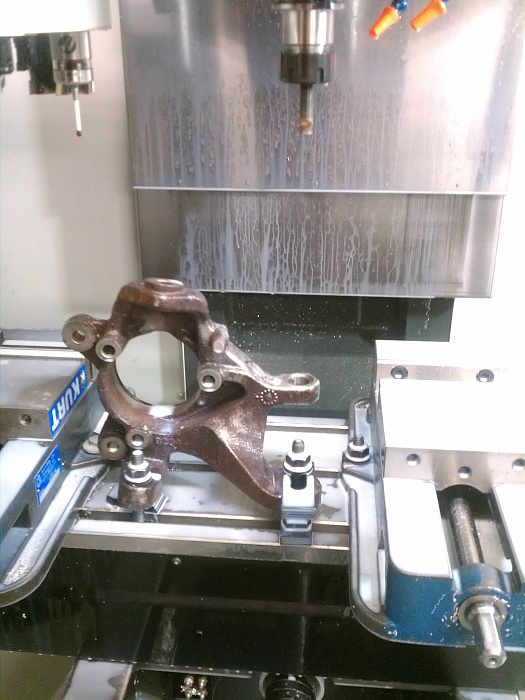

I sized everything for a major interference fit, as I was concerned a press fit might distort the insert enough to throw the taper off.


I sized everything for a major interference fit, as I was concerned a press fit might distort the insert enough to throw the taper off.


Thread Starter
Member
Joined: Sep 2009
Posts: 136
Likes: 0
From: Colorado Springs, CO
Year: 2000
Model: Cherokee
Engine: 4.0
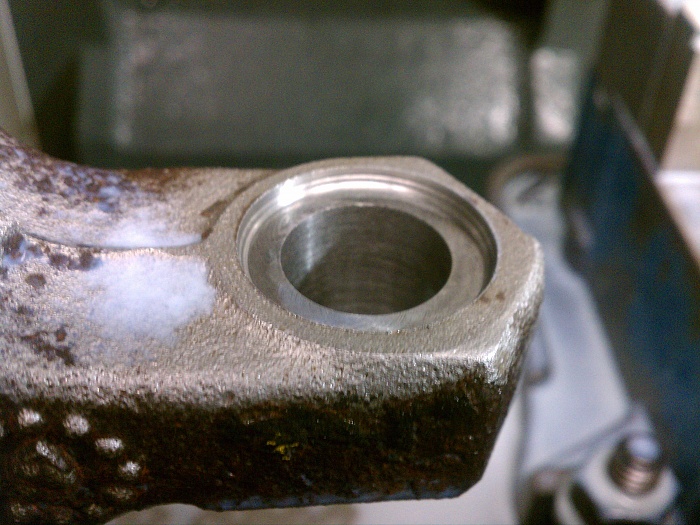
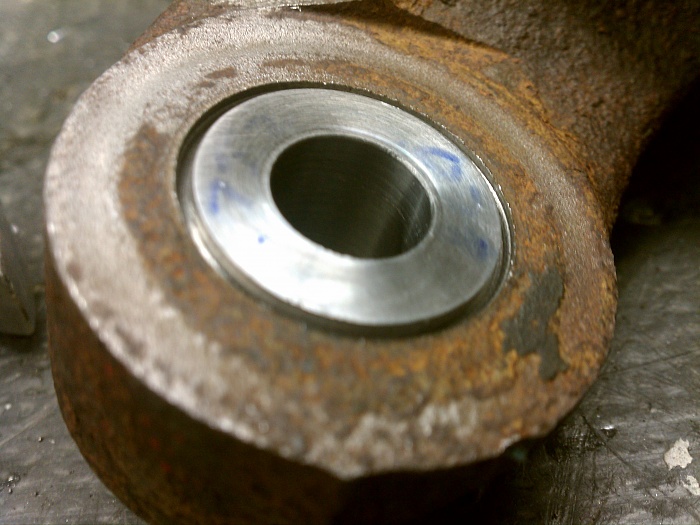
They look totally different sizes, but it's just an optical illusion because the upper arm is closer to the camera.
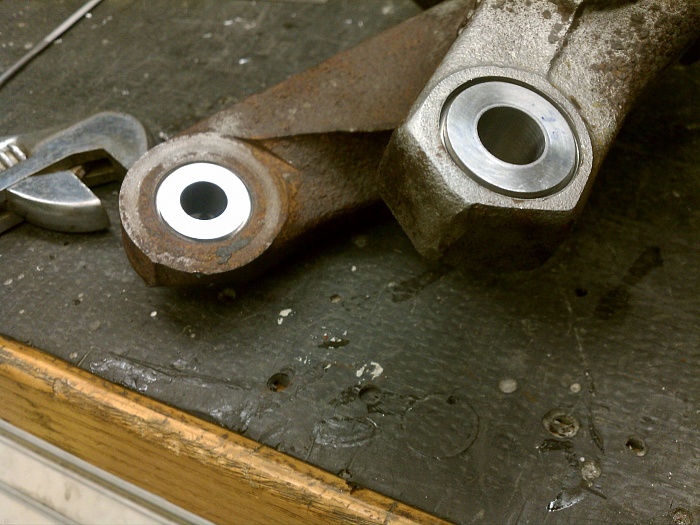
Once they were pressed, then welded around the perimeter and cleaned up, they were bomber.
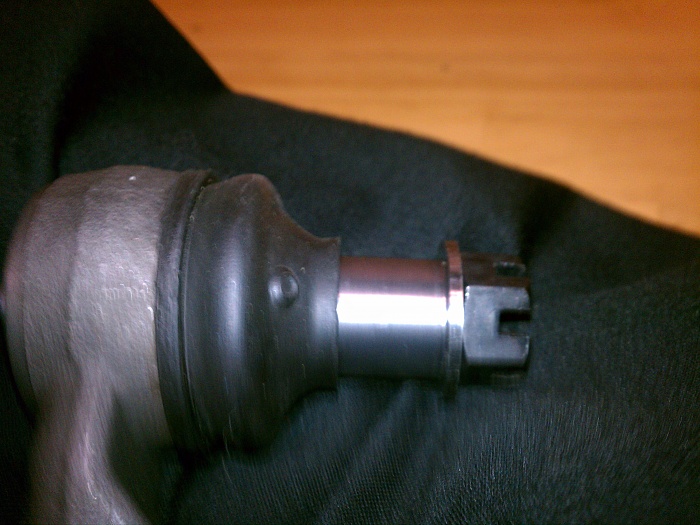
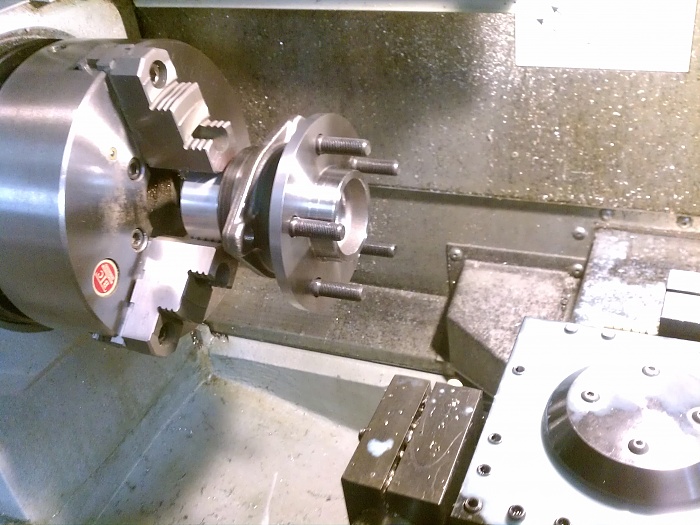
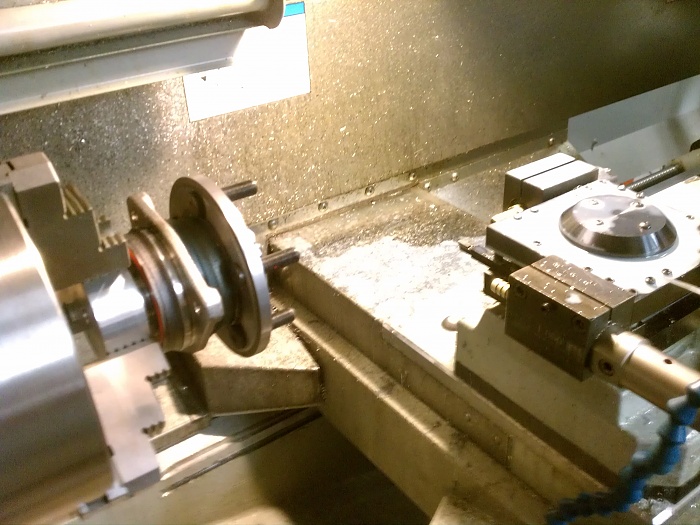
Once those were all done, and ready, I had to turn down the outer diameter of the hub bearings a few thousandths to fit inside the hat of the Sport Trac rotors. First, I had to spin a dummy shaft adapter to hold, and drive the hub so I could cut it.
Then, I put it together, experimented with the setup of the front end, and made some changes where needed to be able to have everything clear, lock to lock. When it was all happy, it got a healthy dose of the aerosol bedliner as well, with some accents.
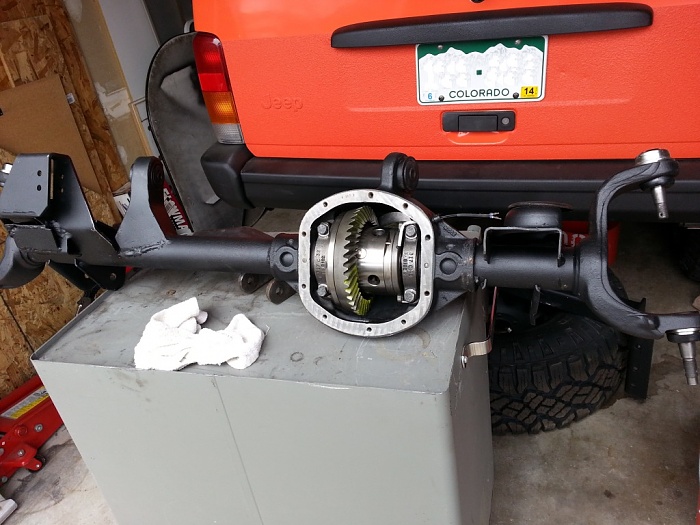
The gears are 4.56, same as before, but now with an Eaton E-locker in the middle. Shafts are stock for now.

Once they were pressed, then welded around the perimeter and cleaned up, they were bomber.

Once those were all done, and ready, I had to turn down the outer diameter of the hub bearings a few thousandths to fit inside the hat of the Sport Trac rotors. First, I had to spin a dummy shaft adapter to hold, and drive the hub so I could cut it.


Then, I put it together, experimented with the setup of the front end, and made some changes where needed to be able to have everything clear, lock to lock. When it was all happy, it got a healthy dose of the aerosol bedliner as well, with some accents.

The gears are 4.56, same as before, but now with an Eaton E-locker in the middle. Shafts are stock for now.
Last edited by mntnresq; May 11, 2014 at 12:39 AM.


Thread Starter
Member
Joined: Sep 2009
Posts: 136
Likes: 0
From: Colorado Springs, CO
Year: 2000
Model: Cherokee
Engine: 4.0
I'm still trying to catch this thread up with where I am now..
So, after getting the axle put together, I started looking at the front suspension.
I am swapping the current RE 5.5" short arm, for a RC long-arm upgrade. It is beefy, well built and fits my needs well. Some people love to bash RC and their stuff, but what you get for the price, and the way they guarantee it, I don't think you can beat it.
The fact that it is a radius arm setup doesn't really bother me either. Again, I'm not out flexing the crap out of my rig for fun, so it should be fine. If it ever becomes an issue, I already have a plan to convert to a full 4-link.
However, there is one thing I don't like about the way their crossmember/CA mount setup goes. With the crossmember and mounts being all one piece, if I ever had to swap the trans or something, I basically had to drop the front end too. An even bigger issue I discovered when I started taking my rig apart.
The new RC crossmember mounts primarily through the existing crossmember mounting holes, which have blind nuts welded inside the "frame" rail. When I pulled mine out, I found they were basically all stripped. There wasn't much more than good faith holding my trans up.
Needless to say, I wasn't about to strap my entire front axle to those. So, I decided to mod the RC crossmember to make the center section removable.
This helps me two ways. I can drop the center section, if the trans needs to come out. The other, is I can mount the outers where the CA's mount, more solidly (weld it). After some thought and taking some measurements, I had a plan.
I cut it on both sides, 1" in from the CA mount. That gave the best mix of room to work out bolting it back together, and clearances for the exhaust and drive shaft.
It was hard to pull the trigger on chopping up the brand new X member...
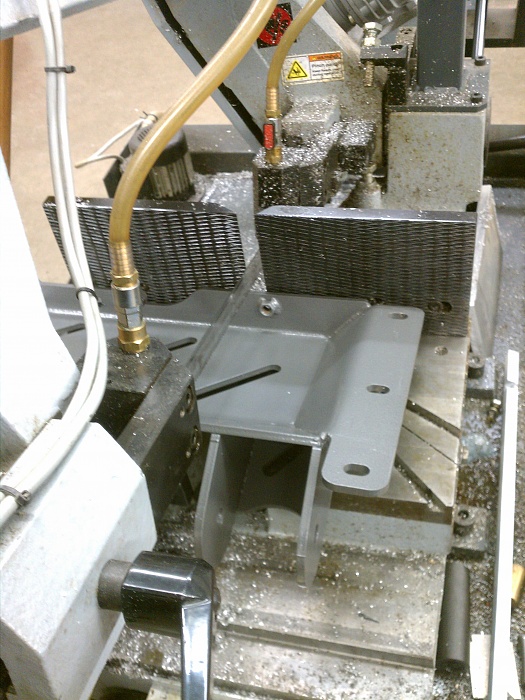
After sectioning, I ground it to prep for welding.
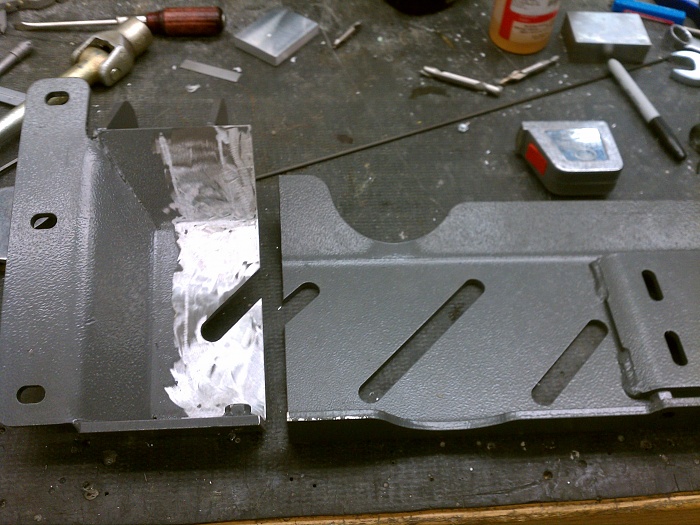
Then I cut some 3/8" x 4" flat stock to match the contour and overlap the joint. They were tacked into place, then the whole X-member was clamped and tacked back together, and all the bolt holes were drilled. Then I split it back apart.
After double- checking the alignment of everything, it was bolted all back together, and fully welded. I went back and filled all the joints, and ground everything smooth.
So, after getting the axle put together, I started looking at the front suspension.
I am swapping the current RE 5.5" short arm, for a RC long-arm upgrade. It is beefy, well built and fits my needs well. Some people love to bash RC and their stuff, but what you get for the price, and the way they guarantee it, I don't think you can beat it.
The fact that it is a radius arm setup doesn't really bother me either. Again, I'm not out flexing the crap out of my rig for fun, so it should be fine. If it ever becomes an issue, I already have a plan to convert to a full 4-link.
However, there is one thing I don't like about the way their crossmember/CA mount setup goes. With the crossmember and mounts being all one piece, if I ever had to swap the trans or something, I basically had to drop the front end too. An even bigger issue I discovered when I started taking my rig apart.
The new RC crossmember mounts primarily through the existing crossmember mounting holes, which have blind nuts welded inside the "frame" rail. When I pulled mine out, I found they were basically all stripped. There wasn't much more than good faith holding my trans up.
Needless to say, I wasn't about to strap my entire front axle to those. So, I decided to mod the RC crossmember to make the center section removable.
This helps me two ways. I can drop the center section, if the trans needs to come out. The other, is I can mount the outers where the CA's mount, more solidly (weld it). After some thought and taking some measurements, I had a plan.
I cut it on both sides, 1" in from the CA mount. That gave the best mix of room to work out bolting it back together, and clearances for the exhaust and drive shaft.
It was hard to pull the trigger on chopping up the brand new X member...


After sectioning, I ground it to prep for welding.

Then I cut some 3/8" x 4" flat stock to match the contour and overlap the joint. They were tacked into place, then the whole X-member was clamped and tacked back together, and all the bolt holes were drilled. Then I split it back apart.

After double- checking the alignment of everything, it was bolted all back together, and fully welded. I went back and filled all the joints, and ground everything smooth.
Last edited by mntnresq; May 11, 2014 at 09:27 PM.
Thread Starter
Member
Joined: Sep 2009
Posts: 136
Likes: 0
From: Colorado Springs, CO
Year: 2000
Model: Cherokee
Engine: 4.0
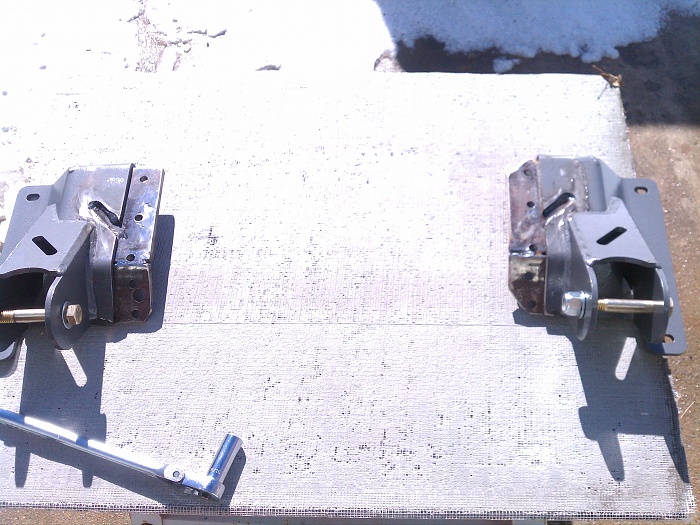
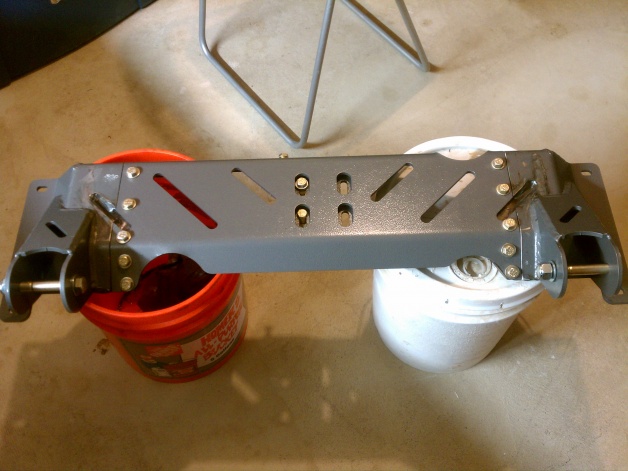
Next was a bit more grinding, and then put it back together again. It is held together with 10- 3/8" Grade 8 bolts and nuts.
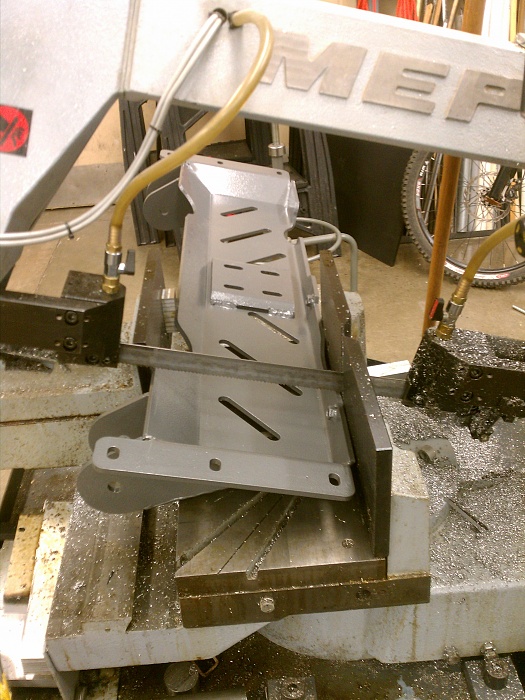
The T/C skidplate which bolts on the the back of the RC crossmember also bridges the joint on the driver side. After the last assy, I welded the nuts on the back of the outers, cleaned it all up and repainted.
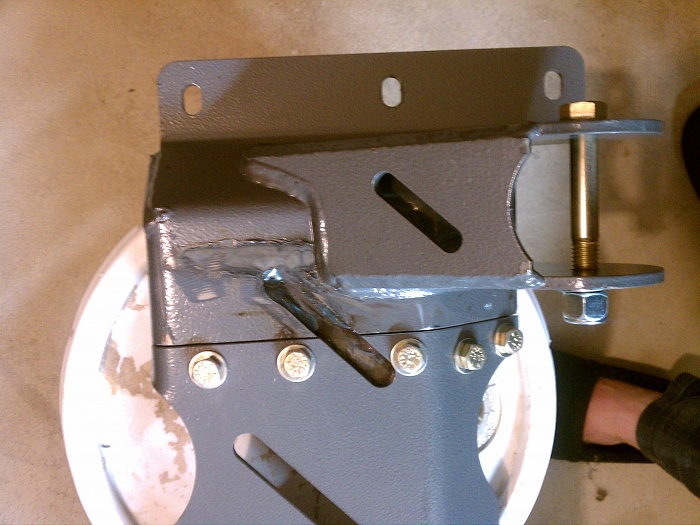
I thought about countersinking, and using flat head hex cap screws, but that would reduce the amount of metal in the connection, and I really don't think it will ever be an issue for me, as far as dragging the heads across rocks.

Not really sure why they didn't just make them this way to begin with.
For mounting, the plan is to both bolt and weld the outers. I drilled the stripped nutserts in the frame, and re-tapped them to a 7/16"-18. I also have a set of HD Offroad Engineering's frame stiffeners that I put on the truck, so I should have more than enough meat to weld the CA mounts to. For now, the xmember is bolted and just holding up the trans (old suspension is still in place), until I can finish fully welding the frame stiffeners on, since they are tacked for now. I have a buddy with a lift, so I will limp it to his place when I am ready, and finish burning it all in, since overhead welding on your back 8" from your face isn't the must fun.
The T/C skidplate which bolts on the the back of the RC crossmember also bridges the joint on the driver side. After the last assy, I welded the nuts on the back of the outers, cleaned it all up and repainted.

I thought about countersinking, and using flat head hex cap screws, but that would reduce the amount of metal in the connection, and I really don't think it will ever be an issue for me, as far as dragging the heads across rocks.
Not really sure why they didn't just make them this way to begin with.
For mounting, the plan is to both bolt and weld the outers. I drilled the stripped nutserts in the frame, and re-tapped them to a 7/16"-18. I also have a set of HD Offroad Engineering's frame stiffeners that I put on the truck, so I should have more than enough meat to weld the CA mounts to. For now, the xmember is bolted and just holding up the trans (old suspension is still in place), until I can finish fully welding the frame stiffeners on, since they are tacked for now. I have a buddy with a lift, so I will limp it to his place when I am ready, and finish burning it all in, since overhead welding on your back 8" from your face isn't the must fun.
Last edited by mntnresq; May 11, 2014 at 10:18 PM.