Project "Can't Get Right"

Thread Starter
Member
Joined: Feb 2012
Posts: 141
Likes: 0
From: O'fallon, MO
Year: 1992
Model: Cherokee
Engine: I6
Hey all! Like so many others, I have finally decided to start my build thread. My attempt is to use lots of pics and a little humor, however neither are my strong suit! I will be attempting to get the first few things done in the next couple of weeks, then I will be taking a little hiatus until December when I will be finishing it up. I hope you like what I have done, and I welcome any suggestions or ideas as I go along!
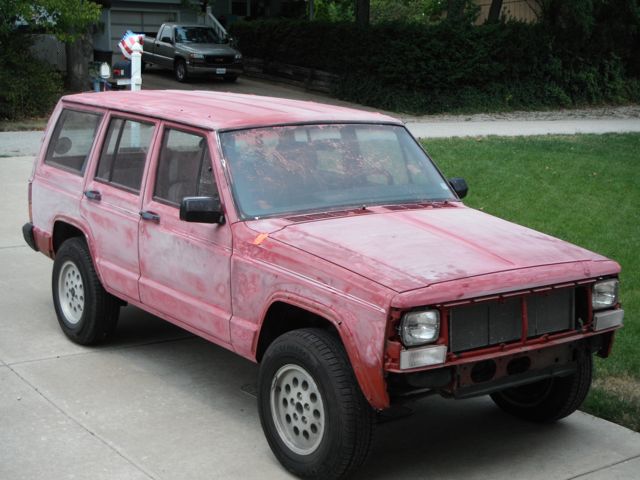
So here she is:
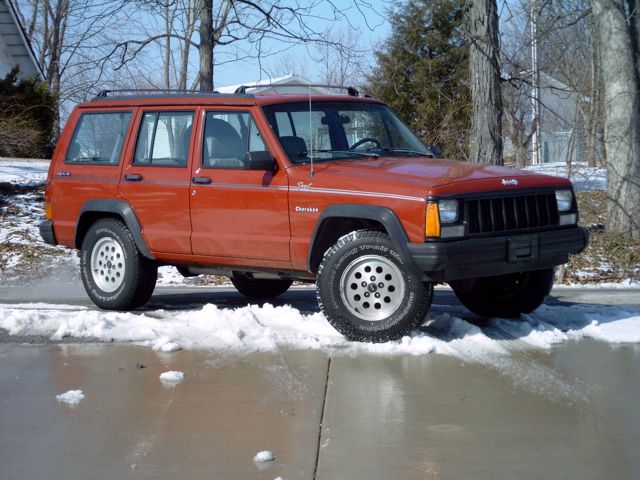
I bought her from a coworker a couple years ago as a daily driver. $2000 and she was mine...
1992 XJ Sport
2xx,xxx miles
NP231
I6
runs like a top
AC doesn't work (bummer, get's hot in the midwest)
Chrysler rear end?
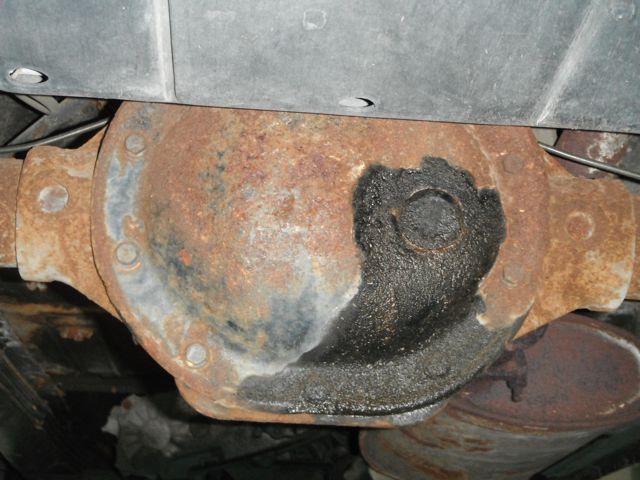
I think so! Guess I got lucky!

So since I am computer illiterate, I will fire this one down range and make sure I did it correctly, then I will hit you guys back up and get some more pics and details locked in. Hope you enjoy my build!
So here she is:
I bought her from a coworker a couple years ago as a daily driver. $2000 and she was mine...
1992 XJ Sport
2xx,xxx miles
NP231
I6
runs like a top
AC doesn't work (bummer, get's hot in the midwest)
Chrysler rear end?
I think so! Guess I got lucky!
So since I am computer illiterate, I will fire this one down range and make sure I did it correctly, then I will hit you guys back up and get some more pics and details locked in. Hope you enjoy my build!
Thread Starter
Member
Joined: Feb 2012
Posts: 141
Likes: 0
From: O'fallon, MO
Year: 1992
Model: Cherokee
Engine: I6
So here is my short and long term build list...
Short Term:
Long Term:
So without any further gabbing, here we go....
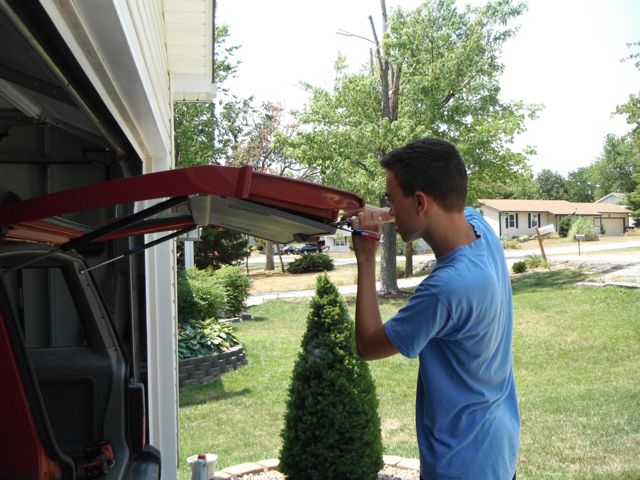
I started with body prep. I asked (forced under penalty of death) my new step-son to help me out. I guess threatening bread and water for a month worked. Actually he was very willing, most teenage boys like to tear things apart, it's the putting back together part that may elicit some resistance!
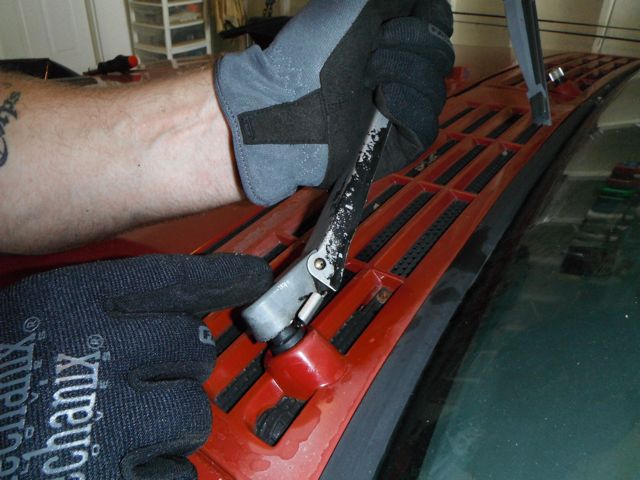
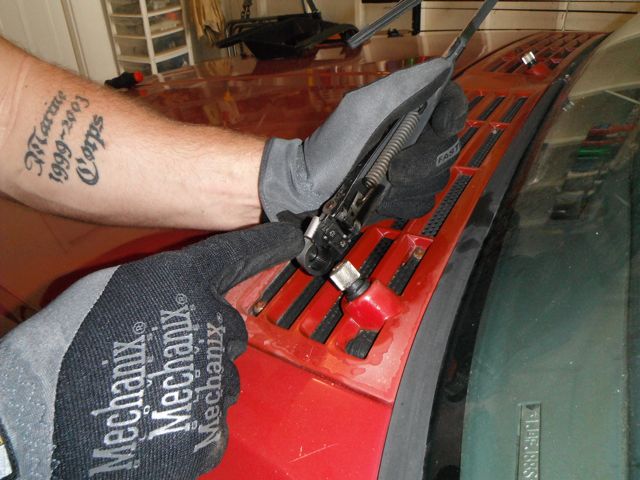
Started with the wiper arms and all the badging. wiper arms came off easily as long as you lift them off of the glass and then slide the little metal retainer. The rear has a retainer as well, just a lot smaller.
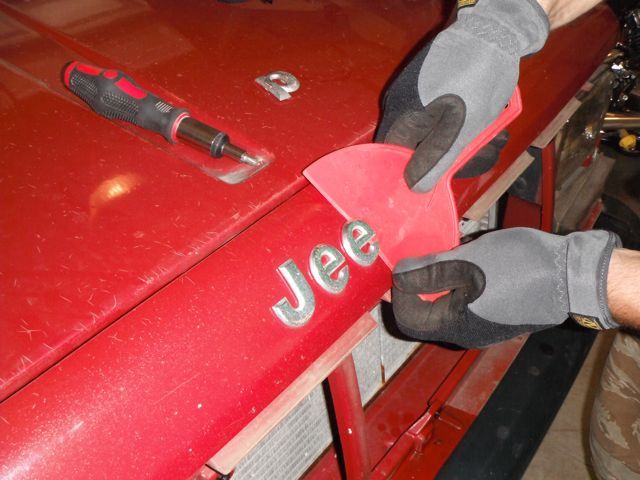
Next the badging... it was SO hot here, they just peeled right off with a little help...
Removed the whatchyamacallit at the top of the hood, will be repainting both pieces later.
So far so good, next will be I'll be working on the body while the SS(stepson for short) removes the door panels and old speakers.... stay tuned folks...
Short Term:
- Remove bumpers and fenders
- Body prep for Monstaliner DIY paint job
- Cut out fenders for eventual lift and flares (still on the fence about Bushwackers)
- Replace all four stock speakers
- Drink a beer
- Repair sagging headliner, again, this time with the correct adhesive spray
- Build a rear storage box for trail goodies
- Tint all the way around
- Angry eyes (I know, I know, but I think they rock!)
- Interior odds n ends.... (burned out bulbs, improved cup holders, etc)
- Actually take it off road
- Drink another beer
- Fix all the things I broke while attempting to do the above mods....
Long Term:
- 4.5" RE short arm lift
- Tires and Soft 8's (leaning towards Duratrac based on the reviews here)
- Bumpers (REALLY like the Protofab front bumper, not sure yet)
- Roof rack of some sort
- Off-road lights.... considering A-piller mounts from Detours
- Drink another beer
- Work my butt off paying off the credit card that I will inevitably rack up... (if your reading this, sorry honey)
So without any further gabbing, here we go....
I started with body prep. I asked (forced under penalty of death) my new step-son to help me out. I guess threatening bread and water for a month worked. Actually he was very willing, most teenage boys like to tear things apart, it's the putting back together part that may elicit some resistance!
Started with the wiper arms and all the badging. wiper arms came off easily as long as you lift them off of the glass and then slide the little metal retainer. The rear has a retainer as well, just a lot smaller.
Next the badging... it was SO hot here, they just peeled right off with a little help...
Removed the whatchyamacallit at the top of the hood, will be repainting both pieces later.
So far so good, next will be I'll be working on the body while the SS(stepson for short) removes the door panels and old speakers.... stay tuned folks...
Thread Starter
Member
Joined: Feb 2012
Posts: 141
Likes: 0
From: O'fallon, MO
Year: 1992
Model: Cherokee
Engine: I6
Right on man, I have done a bit of work already, but way behind the power curve on getting it on here... I will be playing catch up over the next week or so to get the thread up to speed with what I am actually working on... got a lot of pics... more to come!
Thread Starter
Member
Joined: Feb 2012
Posts: 141
Likes: 0
From: O'fallon, MO
Year: 1992
Model: Cherokee
Engine: I6
Hey all! More pics!
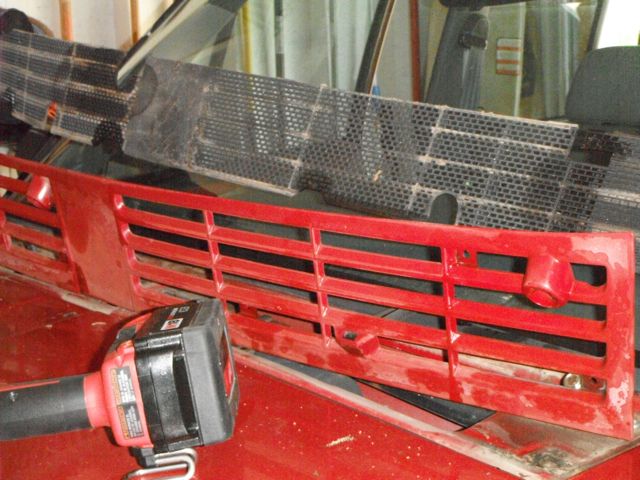
Grill removal, will be repainting these later along with the badging...

SS removed the front door panels, and rear hatch panel... removed speakers... (got his first lesson in those stupid door panel fasteners....)

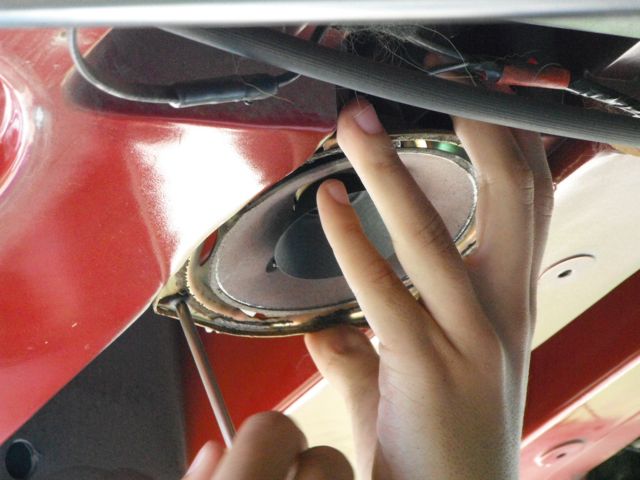
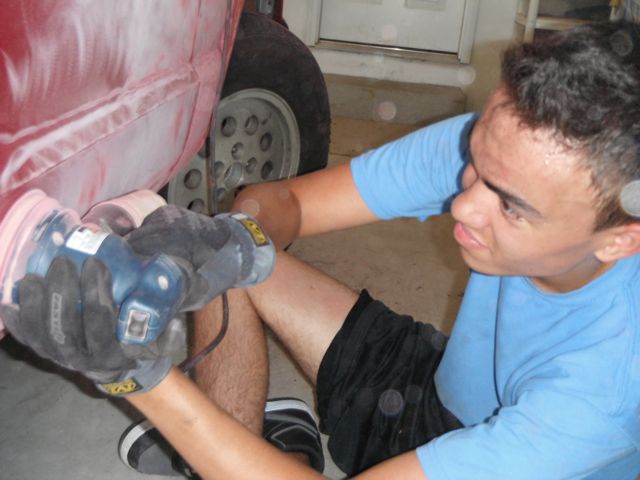
Began sanding the body.... I am using Gator ultra-power 80 grit paper on a palm sander... will do the entire exterior, wash, and wipe down with MEK/Acetone prior to Monstaliner application
I went with 80 grit, not sure if that was a good idea or not... the website gives a pretty vague answer on how to prep, and since I began the prep stage before I received the kit, I'm not sure if 80 is good... we shall see...
Grill removal, will be repainting these later along with the badging...
SS removed the front door panels, and rear hatch panel... removed speakers... (got his first lesson in those stupid door panel fasteners....)
Began sanding the body.... I am using Gator ultra-power 80 grit paper on a palm sander... will do the entire exterior, wash, and wipe down with MEK/Acetone prior to Monstaliner application
I went with 80 grit, not sure if that was a good idea or not... the website gives a pretty vague answer on how to prep, and since I began the prep stage before I received the kit, I'm not sure if 80 is good... we shall see...
Thread Starter
Member
Joined: Feb 2012
Posts: 141
Likes: 0
From: O'fallon, MO
Year: 1992
Model: Cherokee
Engine: I6
So I placed the Monstaliner order on Monday morning... the guy said they would get it out asap, but due to being closed the whole end of the week for the 4th, they had a lot of orders to get out... He said I should receive it before the weekend, but it's 11 am Friday and no brown truck yet.... we shall see...
Junior Member
Joined: Jun 2012
Posts: 53
Likes: 0
From: Milwaukee, WI
Year: 2001
Model: Cherokee
Engine: 4.0L
i used 80 grit also.. I'm painting my parts... I'm hoping it turns out good.
Trending Topics
Thread Starter
Member
Joined: Feb 2012
Posts: 141
Likes: 0
From: O'fallon, MO
Year: 1992
Model: Cherokee
Engine: I6
Thread Starter
Member
Joined: Feb 2012
Posts: 141
Likes: 0
From: O'fallon, MO
Year: 1992
Model: Cherokee
Engine: I6
I just received an email saying I will get my order Tuesday the 18th, I will be posting my progress with it...
Thread Starter
Member
Joined: Feb 2012
Posts: 141
Likes: 0
From: O'fallon, MO
Year: 1992
Model: Cherokee
Engine: I6
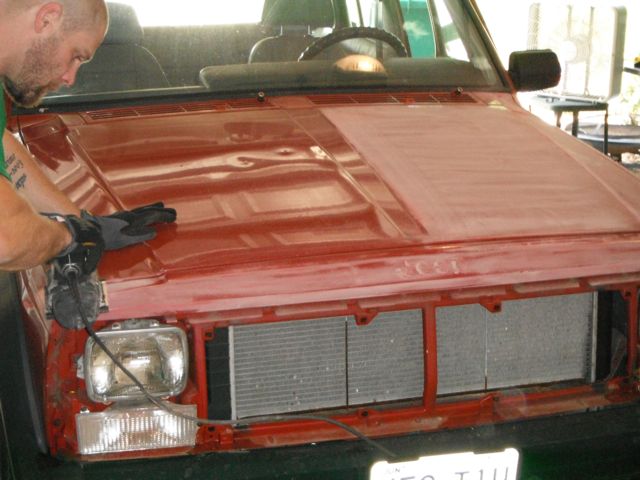
More body prep, continued with the sanding and fender removal. We used brute strength to pull out the wheel well liners, and a reciprocating saw to cut the old fender mounts out...
Meanwhile, shot the wiper arms, badging, and grill parts with a half dozen coats of self etching primer and black satin paint...
Meanwhile, shot the wiper arms, badging, and grill parts with a half dozen coats of self etching primer and black satin paint...
Thread Starter
Member
Joined: Feb 2012
Posts: 141
Likes: 0
From: O'fallon, MO
Year: 1992
Model: Cherokee
Engine: I6
We basically finished the first stage of the body prep. I will have to wash it and wipe it down with MEK the day before I get the Monstaliner. I will probably find a few spots that need to be hit again with sanding...
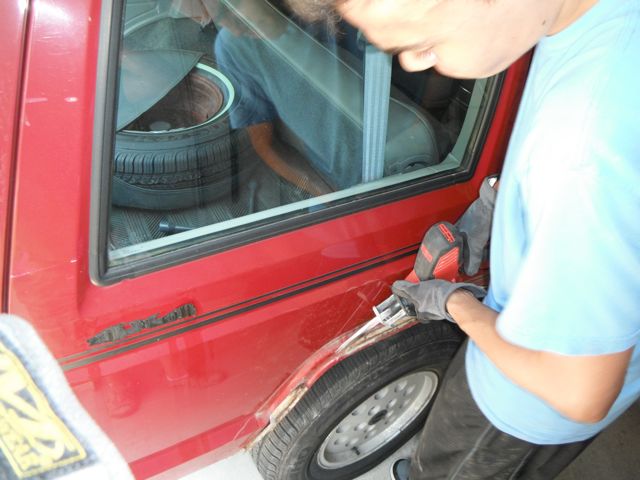
Next came the bumper removal... what a pain that was.... I prepped everything with PB Blaster, but some bolts just don't want to cooperate. Tried heating them to the point of turning red with a torch, still didn't help... ended up breaking a couple off, will have to address that later when I get my new bumpers in...
Busted 2 on the right rear...

and one on the left rear...
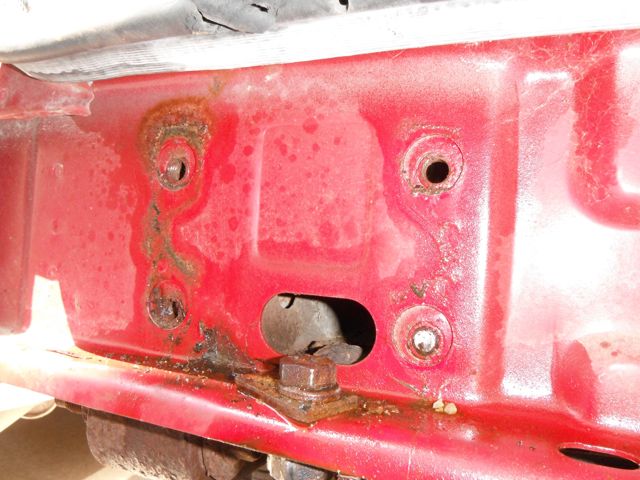

well that really sucked... Guess my rusty bolt removing skills will need improvement... but a 92 XJ will give me plenty of opportunities... stay tuned...
Next came the bumper removal... what a pain that was.... I prepped everything with PB Blaster, but some bolts just don't want to cooperate. Tried heating them to the point of turning red with a torch, still didn't help... ended up breaking a couple off, will have to address that later when I get my new bumpers in...
Busted 2 on the right rear...
and one on the left rear...
well that really sucked... Guess my rusty bolt removing skills will need improvement... but a 92 XJ will give me plenty of opportunities... stay tuned...
Thread Starter
Member
Joined: Feb 2012
Posts: 141
Likes: 0
From: O'fallon, MO
Year: 1992
Model: Cherokee
Engine: I6
removed the stock roof rack and had more rusty bolt problems... will probably have to plug these completely before paint... not sure yet, and advice would be appreciated...
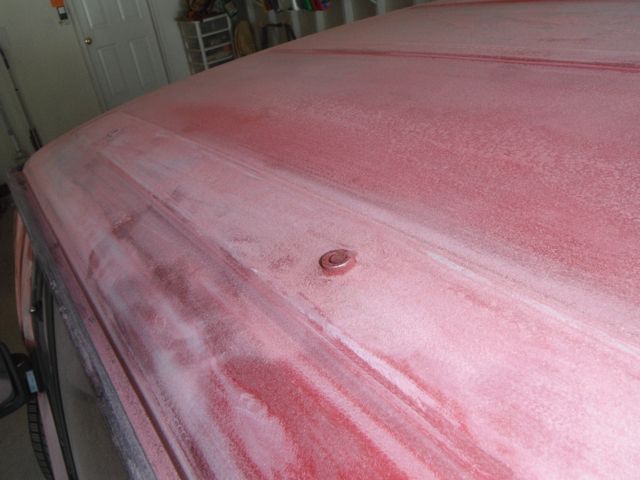
more exterior pics courtesy of the Misses...
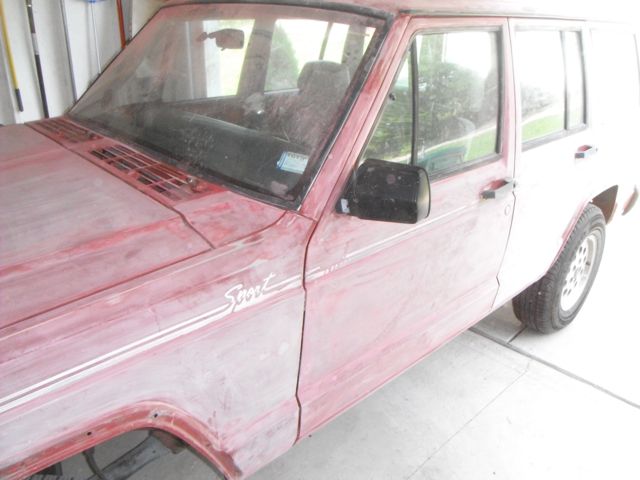
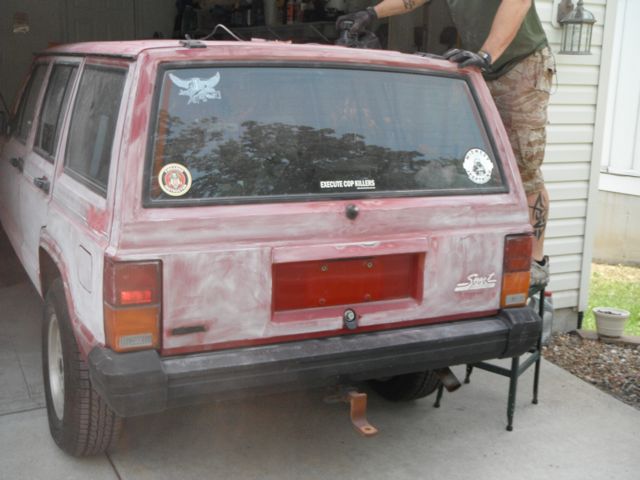
She's getting there... slowly but surely...
more exterior pics courtesy of the Misses...
She's getting there... slowly but surely...