Project "Can't Get Right"
 07-14-2012, 09:21 AM
#16
Member
Thread Starter
Join Date: Feb 2012
Location: O'fallon, MO
Posts: 141
Likes: 0
Received 0 Likes
on
0 Posts
Year: 1992
Model: Cherokee
Engine: I6
*WARNING* WHAT YOU ARE ABOUT TO SEE IS THE WRONG WAY TO DO IT!
So I decided to dive in and cut the fenders for several reasons. First, I wanted to get them cut BEFORE I painted, second, I plan on buying Bushwacker flares anyway, and third everyone seems to slap tires on and then magically have problems with rubbing so they end up trimming... The problem here is I cut WAY to deep on the right rear and cut through the pinch weld. The following is a lesson on what not to do, I guess I only exist as a warning to others as how NOT to do something... oh well..
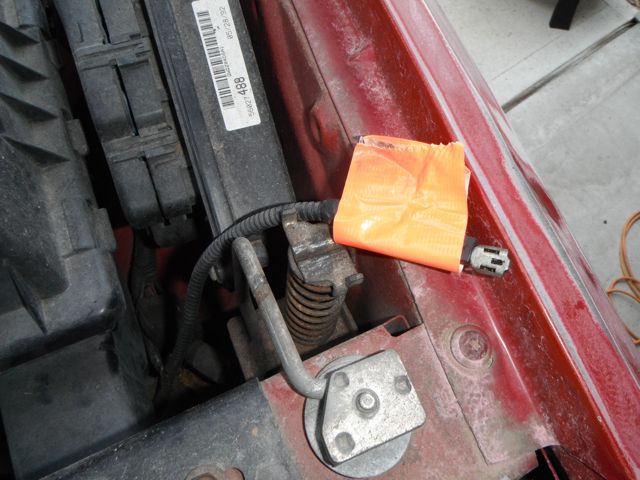
Disconnected the horn wire, pulled it up topside and marked with a piece of orange duct tape so even a dummy like me can find it again...
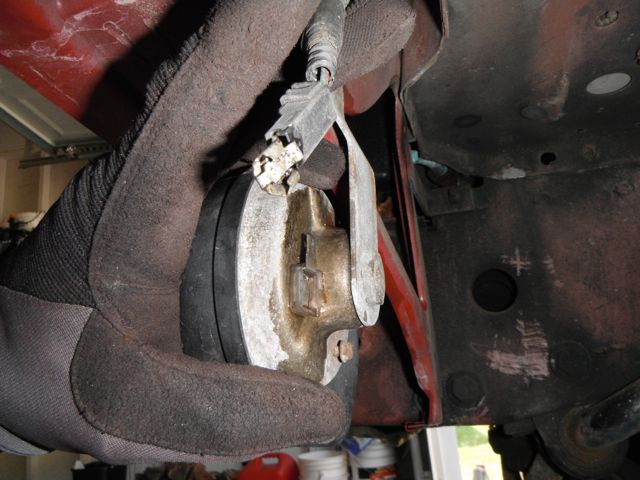
Drivers side fender support removed... ended up just using a cut-off disc on the top end (sorry no pic)...
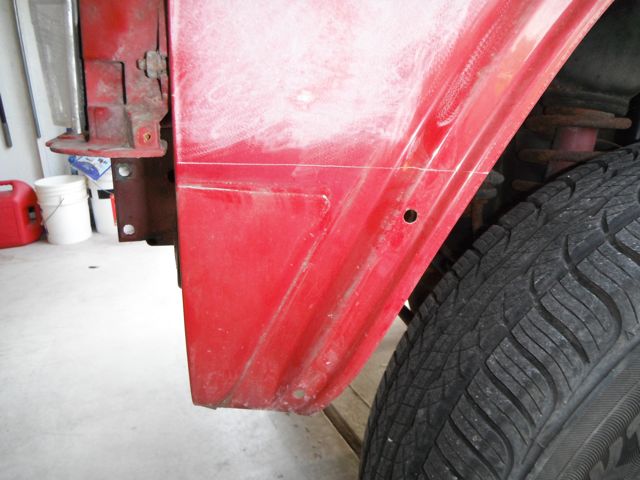
Marked the driver's side fender, flush with the bottom of the side marker lights, then just continued around the fender equally... This was fairly straight forward and simple compared to the rear...
Cut with cutting disc on an angle grinder, then used a Dremel with a reinforced cutting disc to cut the curves...

So I decided to dive in and cut the fenders for several reasons. First, I wanted to get them cut BEFORE I painted, second, I plan on buying Bushwacker flares anyway, and third everyone seems to slap tires on and then magically have problems with rubbing so they end up trimming... The problem here is I cut WAY to deep on the right rear and cut through the pinch weld. The following is a lesson on what not to do, I guess I only exist as a warning to others as how NOT to do something... oh well..
Disconnected the horn wire, pulled it up topside and marked with a piece of orange duct tape so even a dummy like me can find it again...
Drivers side fender support removed... ended up just using a cut-off disc on the top end (sorry no pic)...
Marked the driver's side fender, flush with the bottom of the side marker lights, then just continued around the fender equally... This was fairly straight forward and simple compared to the rear...
Cut with cutting disc on an angle grinder, then used a Dremel with a reinforced cutting disc to cut the curves...
 07-14-2012, 09:36 AM
#17
Member
Thread Starter
Join Date: Feb 2012
Location: O'fallon, MO
Posts: 141
Likes: 0
Received 0 Likes
on
0 Posts
Year: 1992
Model: Cherokee
Engine: I6
Front fenders completed... I have not reattached the horn yet, will do that later. Attached the black vacuum thingy with two zip ties under the radiator, will be good enough for now...
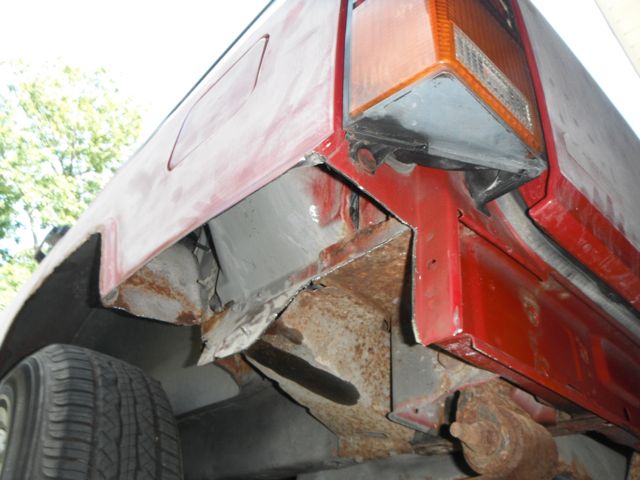
Now on to the rear... this is where my lack of cut-off disc prowess really shines... I started with the passenger rear, this was lucky because I didn't realize how the gas tank filler neck went behind the driver's side rear fender and might have screwed it up... I decided to cut high on the rear as well due to all the rust, and this might help my departure angle, will really depend on the bumper...
Began cutting... same method, cut-off disc/angle grinder...
07-14-2012, 09:40 AM
#18
Senior Member
Join Date: May 2010
Location: Johnson County, Kansas
Posts: 701
Likes: 0
Received 1 Like
on
1 Post
Year: 1995
Model: Cherokee
Engine: 4.0 HO
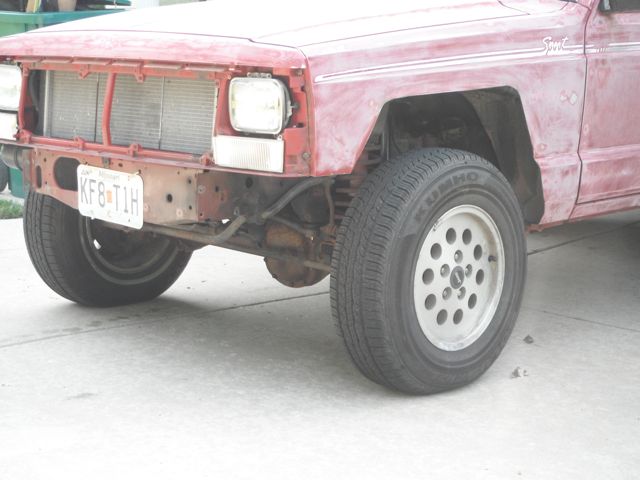
I am digging this thread! Keep it up. My 95 lived in missouri until this year and I broke off sooo many bolts. Just punch out your broken bumper bolts and use a regular bolt and nut.
Last edited by muffinman; 07-14-2012 at 09:43 AM.
07-14-2012, 09:53 AM
#19
Member
Thread Starter
Join Date: Feb 2012
Location: O'fallon, MO
Posts: 141
Likes: 0
Received 0 Likes
on
0 Posts
Year: 1992
Model: Cherokee
Engine: I6
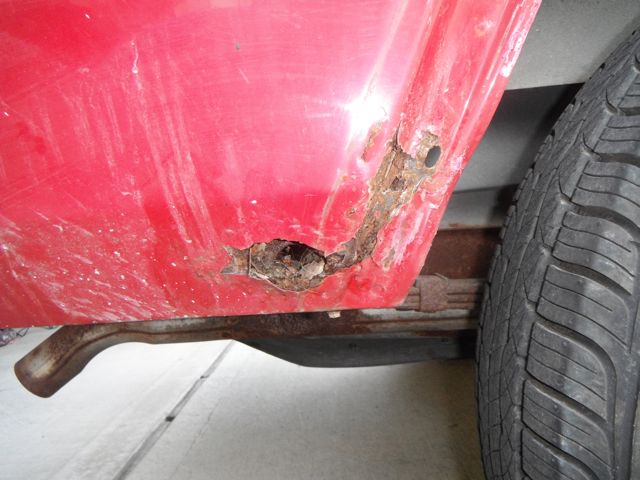
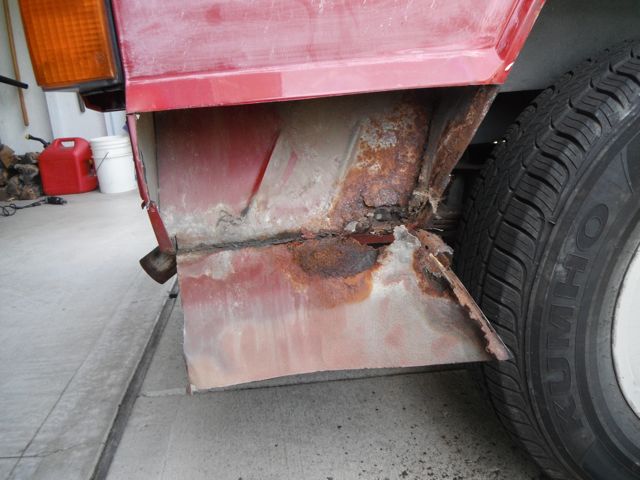
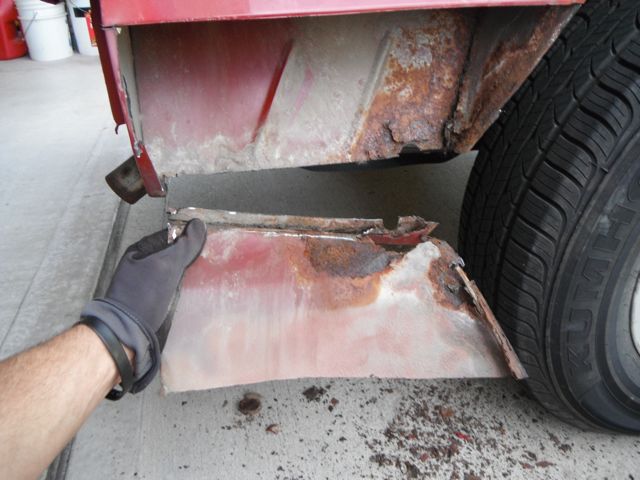
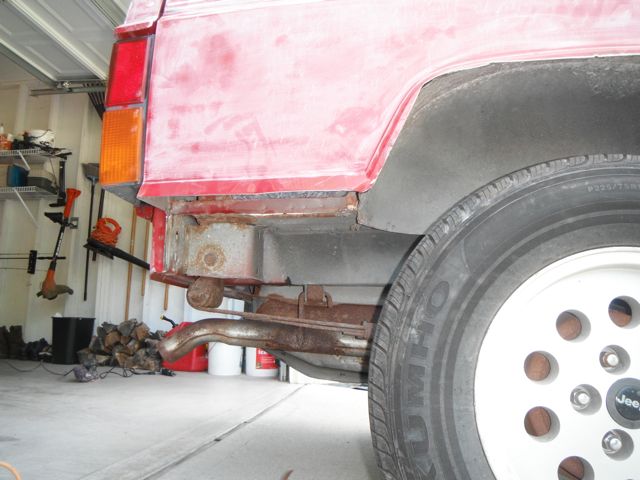
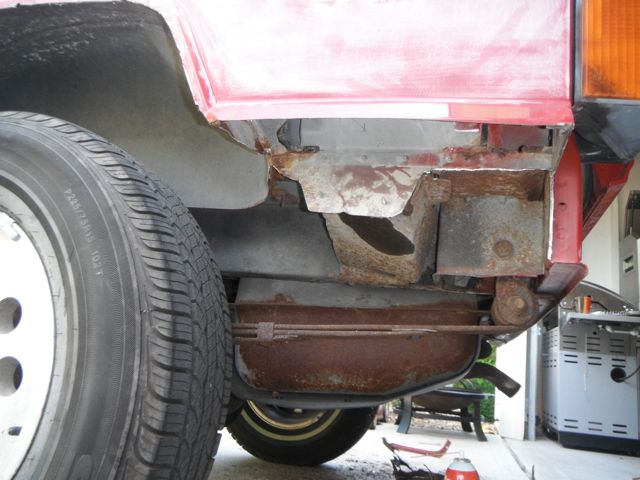
If your really observant you might have noticed that I showed this pics in the wrong order, so here are the cuts I made to the right rear fender which went horribly wrong... gonna have to figure out a way to close up those pinch welds or something... also, will need to fill in the void I created by cutting off that las large section of the lower fender, if you lay down and look up you can see right into the space behind that useless little cubby in the back cargo area...
Rear fender cuts....


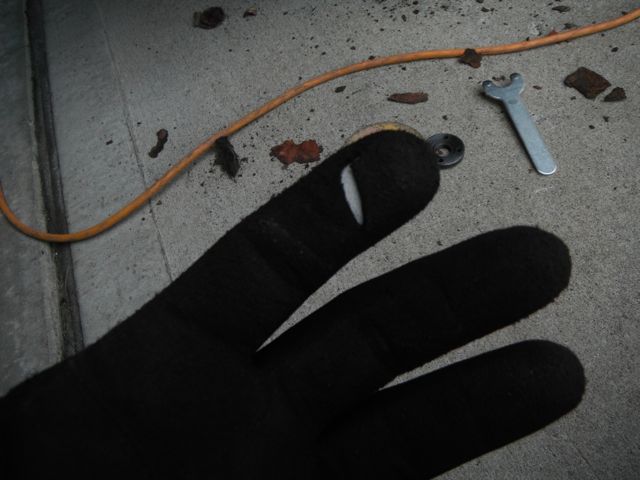
Then, to add injury to insult, I grabbed the cutting disc while it was still moving and sliced right through my gloves and into my tender little finger... this is after i bandaged it up... that sucker went right through all the layers of skin in right into the meat... to lazy to go get stitches...
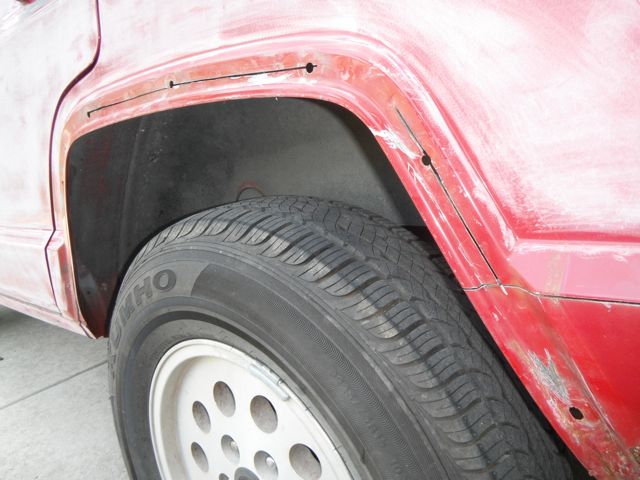
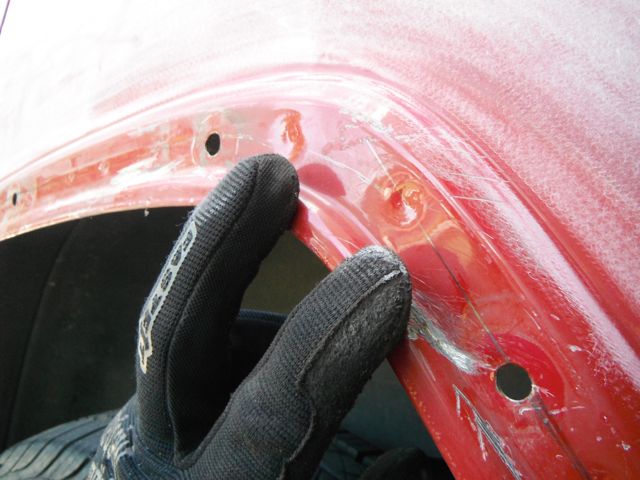
So when I got to the driver's side, I actually used some grey matter and lined it out... If you basically follow the old mounting holes, and the pinch weld spots (pointed to them) you will be ok....
Rear fender cuts....
Then, to add injury to insult, I grabbed the cutting disc while it was still moving and sliced right through my gloves and into my tender little finger... this is after i bandaged it up... that sucker went right through all the layers of skin in right into the meat... to lazy to go get stitches...
So when I got to the driver's side, I actually used some grey matter and lined it out... If you basically follow the old mounting holes, and the pinch weld spots (pointed to them) you will be ok....
07-14-2012, 09:56 AM
#20
Member
Thread Starter
Join Date: Feb 2012
Location: O'fallon, MO
Posts: 141
Likes: 0
Received 0 Likes
on
0 Posts
Year: 1992
Model: Cherokee
Engine: I6
Thanks brother! Will do! Yeah, I will definitely use that idea. Keep 'em coming, need all the help I can get....
07-14-2012, 10:03 AM
#21
Member
Thread Starter
Join Date: Feb 2012
Location: O'fallon, MO
Posts: 141
Likes: 0
Received 0 Likes
on
0 Posts
Year: 1992
Model: Cherokee
Engine: I6
I trimmed around the fuel filler neck, it's not pretty but this will suffice for now... I will revisit this later...
Nest time I will do a little more research and better looky-looky before I start cutting away like an idiot....

Nest time I will do a little more research and better looky-looky before I start cutting away like an idiot....
 07-14-2012, 10:11 AM
#22
Member
Thread Starter
Join Date: Feb 2012
Location: O'fallon, MO
Posts: 141
Likes: 0
Received 0 Likes
on
0 Posts
Year: 1992
Model: Cherokee
Engine: I6
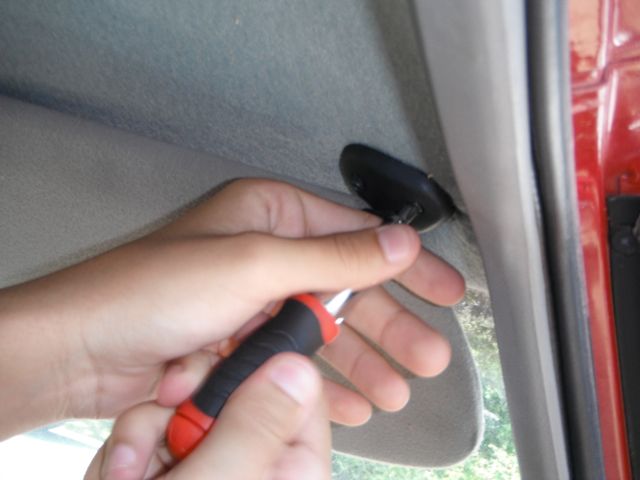
I also removed the drip rail guards... not sure if that was a good idea or not. Maybe someone with a roof rack can tell me if they did that or if they think that will cause a problem... Again, this will all be painted...

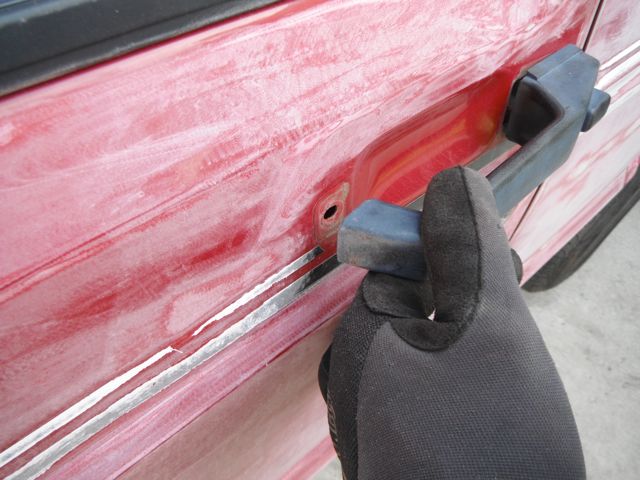
Also, was going to remove the door handles, and again the rusted bolt fairy kicked my butt... I will probably just leave them all on and tape around them, then go back and use Krylon satin black on them... I will have to fix this, thinking about the ol' trusty JB Weld.... any tips are welcome here...
I hate rusted bolts...
07-14-2012, 10:37 AM
#23
Member
Thread Starter
Join Date: Feb 2012
Location: O'fallon, MO
Posts: 141
Likes: 0
Received 0 Likes
on
0 Posts
Year: 1992
Model: Cherokee
Engine: I6
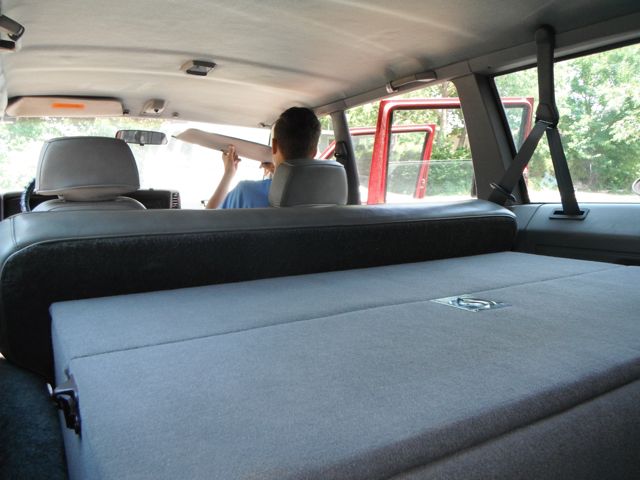
Well I am now looking for little things to get done while I painfully wait for the paint to show up... patience is not my strong suit. Again, I dragged the stepson out to the garage to help out. This time to repair the headliner (again I might add) and build some sort of storage box for the rear cargo area...
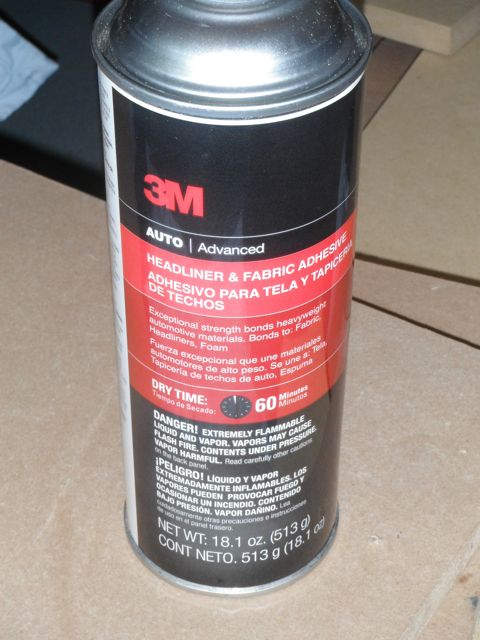
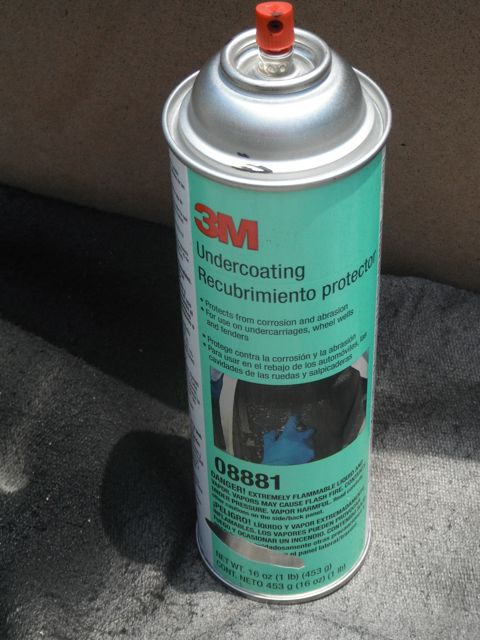
Went to O'reilly's and picked up (what I think) is the correct adhesive spray... Last time I did this, I think I used the regular stuff and it lasted about a month. We shall see....
Since my headliner material was still good (bought new stuff last time) I basically pulled it out of the Jeep and pulled it back to the front without completely detaching it... again, not sure if I will regret this later or not...
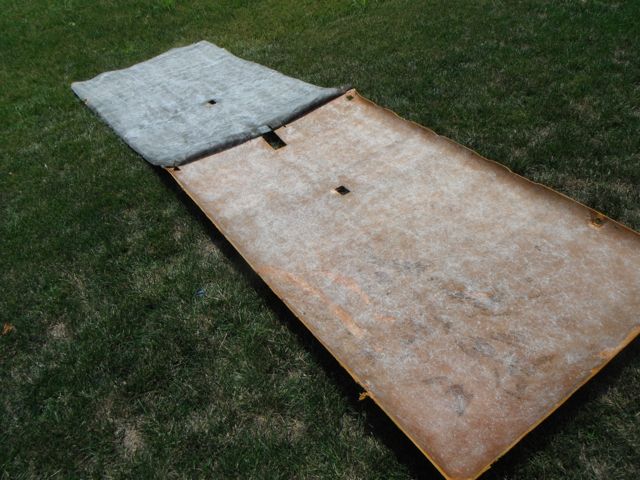
I basically followed the directions on the can, and actually put about 6 coats on both sides, in different directions, using a total of 2 cans... within about 45 minutes I carefully pressed it down with the help of the Misses and the SS... It looks good, but I am really hesitant to get to excited... also I accidentally oversprayed a little through the hole for the front and it looks like someone sneezed on it... of course right in front above the rear view mirror where you can see it....
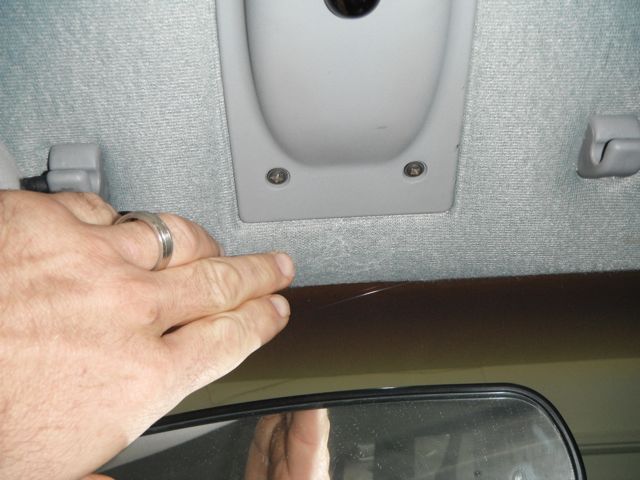
What is that.... hair gel?

Went to O'reilly's and picked up (what I think) is the correct adhesive spray... Last time I did this, I think I used the regular stuff and it lasted about a month. We shall see....
Since my headliner material was still good (bought new stuff last time) I basically pulled it out of the Jeep and pulled it back to the front without completely detaching it... again, not sure if I will regret this later or not...
I basically followed the directions on the can, and actually put about 6 coats on both sides, in different directions, using a total of 2 cans... within about 45 minutes I carefully pressed it down with the help of the Misses and the SS... It looks good, but I am really hesitant to get to excited... also I accidentally oversprayed a little through the hole for the front and it looks like someone sneezed on it... of course right in front above the rear view mirror where you can see it....
What is that.... hair gel?
07-14-2012, 10:55 AM
#24
Member
Thread Starter
Join Date: Feb 2012
Location: O'fallon, MO
Posts: 141
Likes: 0
Received 0 Likes
on
0 Posts
Year: 1992
Model: Cherokee
Engine: I6
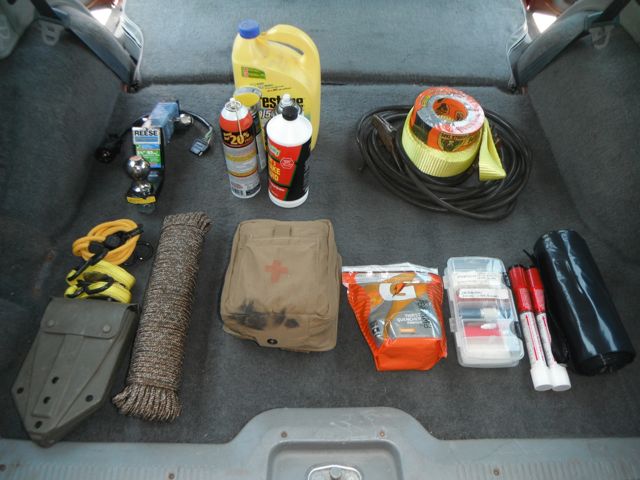
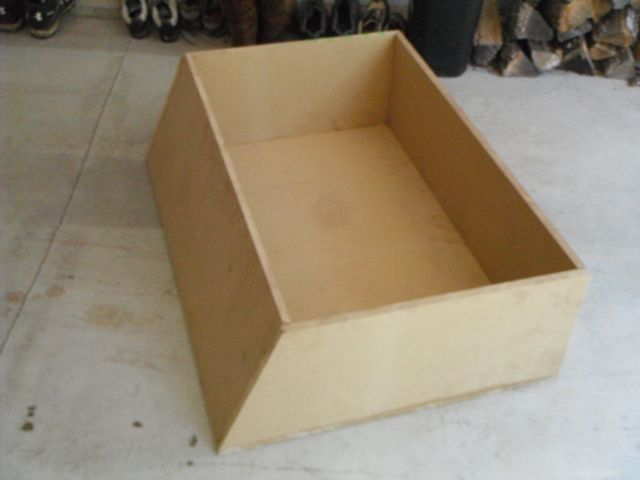
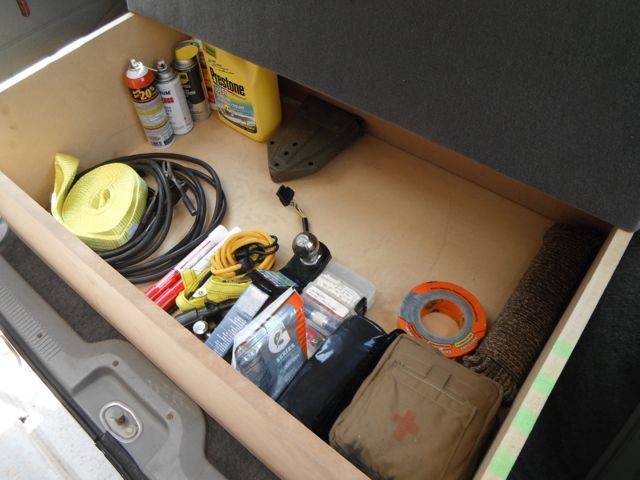
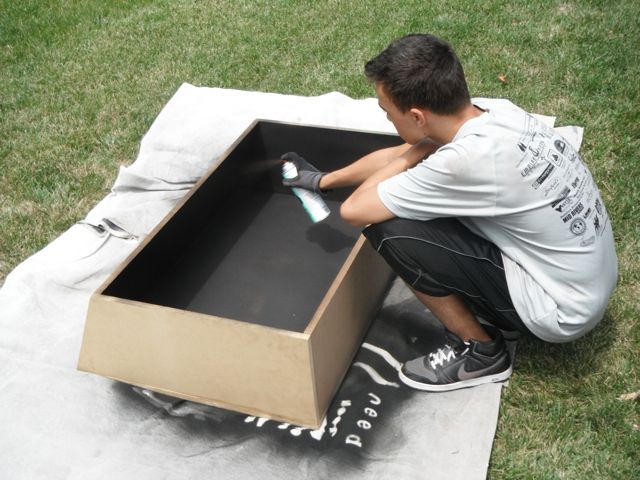
The next project is a storage box for misc. trail gear. I started by laying out just a few items I will keep in there, originally thinking I would build a box with dividers, but then I realized I wanted an open box in the event I had large items... I probably went about this completely backwards as you will see, and I would bet every teenager in my neighborhood could build a better box than me... this is basically a speaker box that doesn't hold speakers... so bear with me, and maybe you can find something you like, or offer tips as to how I could have done it better....
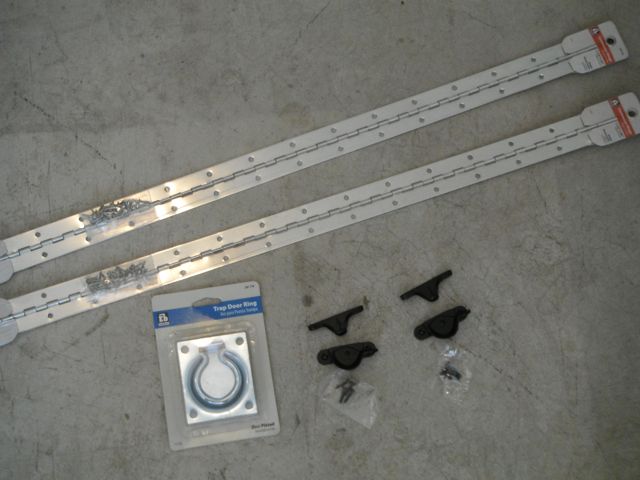
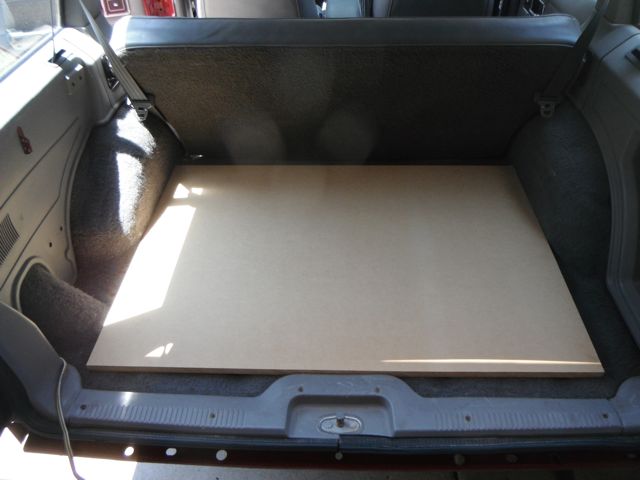
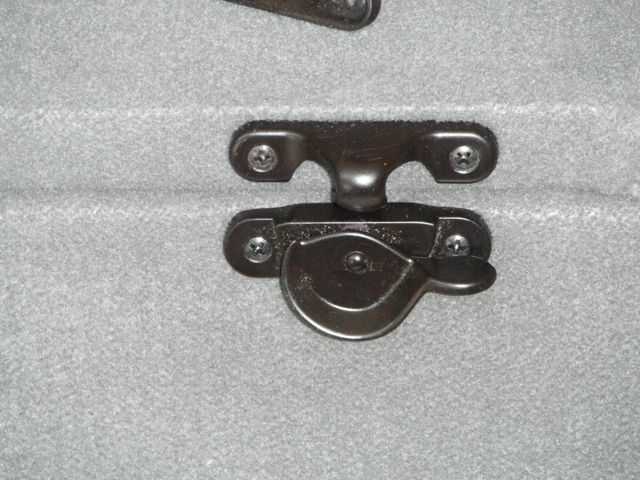
Purchased 3/4 MDF, a couple piano hinges (wouldn't use those next time), a trap door handle, and some window sash latches (would probably choose something different next time). Measured the area and made my cuts.... went back and trimmed the edge just a bit, wanted it snug but then realized I need a little space to account for the thickness of the carpet that will be added later...
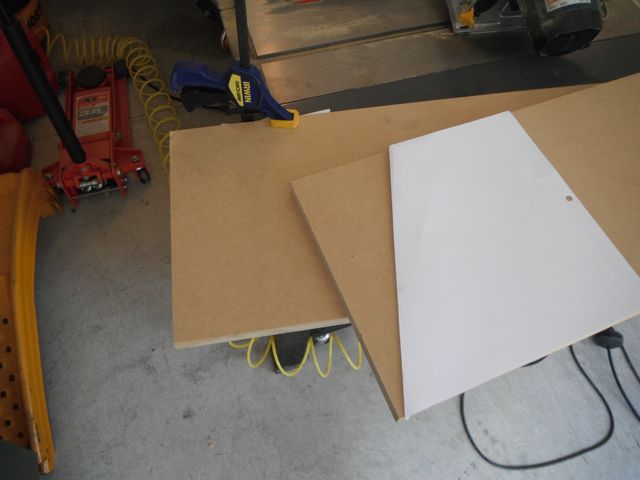
I don't have a protractor (must add that to the Christmas list I guess) so I ghetto rigged a template and cut the side pieces...
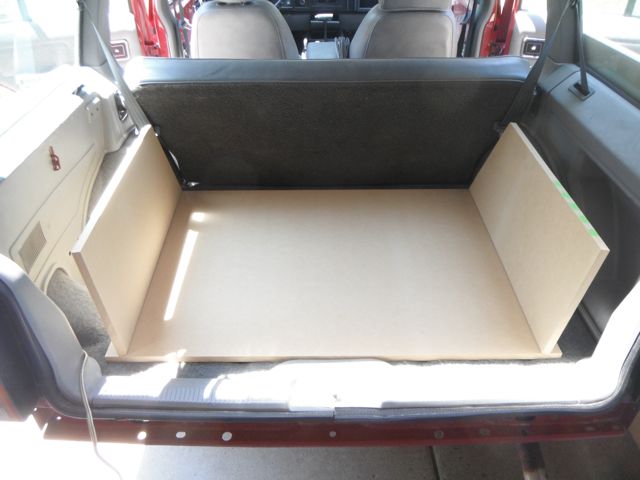
Next will be the front and back pieces and assembly... standby to standby...
Purchased 3/4 MDF, a couple piano hinges (wouldn't use those next time), a trap door handle, and some window sash latches (would probably choose something different next time). Measured the area and made my cuts.... went back and trimmed the edge just a bit, wanted it snug but then realized I need a little space to account for the thickness of the carpet that will be added later...
I don't have a protractor (must add that to the Christmas list I guess) so I ghetto rigged a template and cut the side pieces...
Next will be the front and back pieces and assembly... standby to standby...
Last edited by Motiv8er; 07-18-2012 at 07:13 PM.
07-14-2012, 11:07 AM
#25
Member
Thread Starter
Join Date: Feb 2012
Location: O'fallon, MO
Posts: 141
Likes: 0
Received 0 Likes
on
0 Posts
Year: 1992
Model: Cherokee
Engine: I6
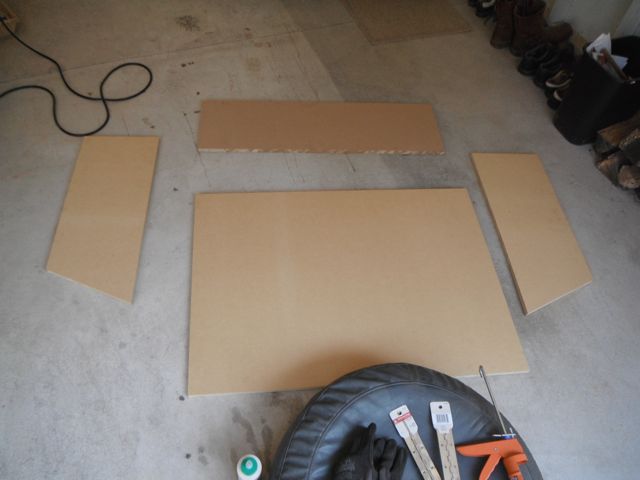
Measured and cut the front and back pieces, assembled using the strongest wood glue I could find, and 1 3/4" brads with an air powered brad nailer...

Went together fairly well, needed a hand from the Misses to hold the parts together...
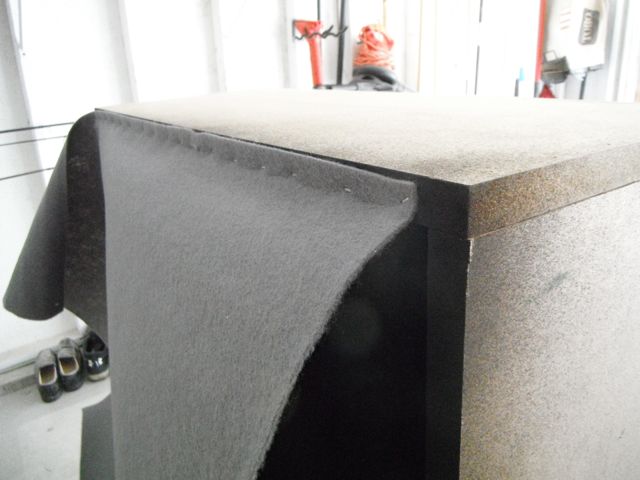
Measured and cut 2 pieces for the top, carpeted them with some generic auto carpeting from the local O'reilly's, used a standard staple gun. Then attached the first piano hinge on what will be the underside. This is where I began doing stuff out of order (I was making this up as I went along) I should have bedlined all the boards, as well as mortice out the part for the trap door handle (it will become apparent later why). Either way, things still went fairly well...
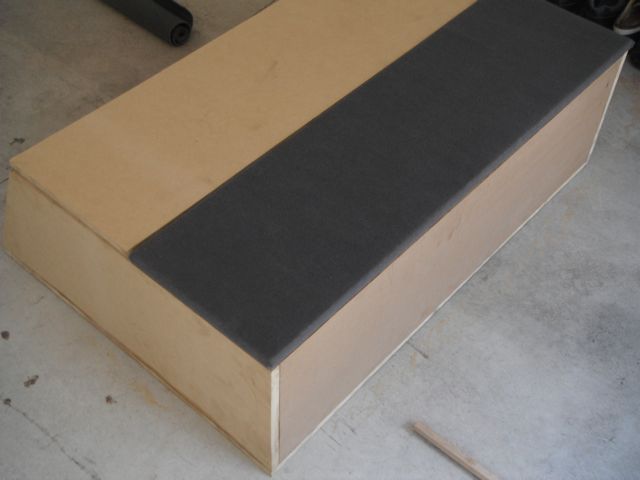
Next I will attach the lid to the box... I end up taking it back off to bedline the inside, then after it dried I carpeted the outside and reattached the lid... Also added the trap door handle. Stay tuned...
Went together fairly well, needed a hand from the Misses to hold the parts together...
Measured and cut 2 pieces for the top, carpeted them with some generic auto carpeting from the local O'reilly's, used a standard staple gun. Then attached the first piano hinge on what will be the underside. This is where I began doing stuff out of order (I was making this up as I went along) I should have bedlined all the boards, as well as mortice out the part for the trap door handle (it will become apparent later why). Either way, things still went fairly well...
Next I will attach the lid to the box... I end up taking it back off to bedline the inside, then after it dried I carpeted the outside and reattached the lid... Also added the trap door handle. Stay tuned...
07-14-2012, 11:15 AM
#26
Member
Thread Starter
Join Date: Feb 2012
Location: O'fallon, MO
Posts: 141
Likes: 0
Received 0 Likes
on
0 Posts
Year: 1992
Model: Cherokee
Engine: I6
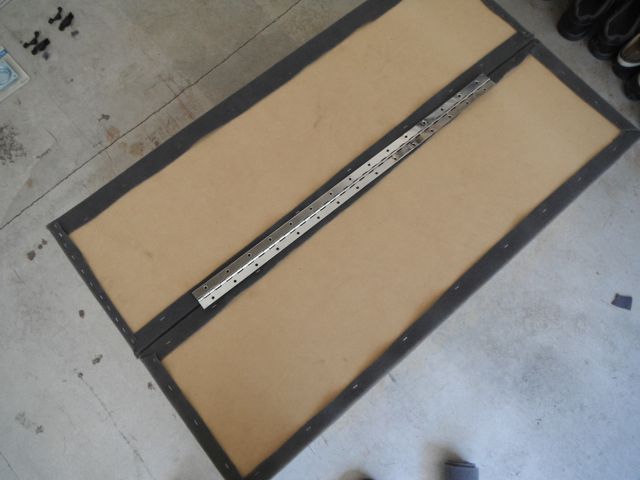
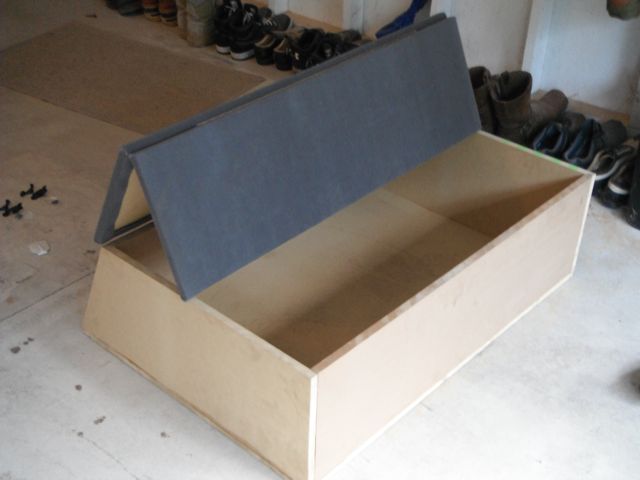
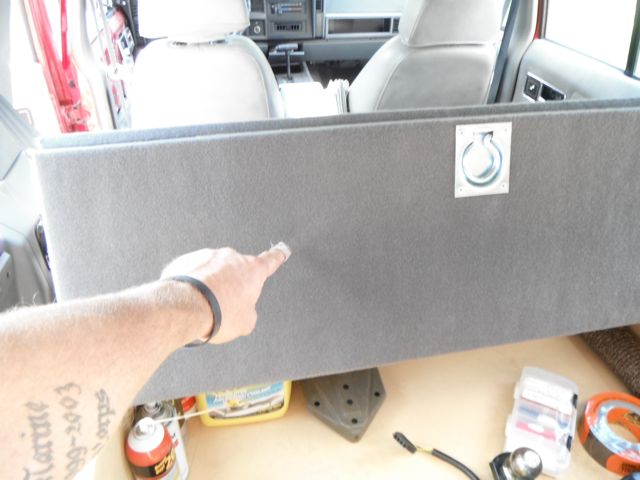
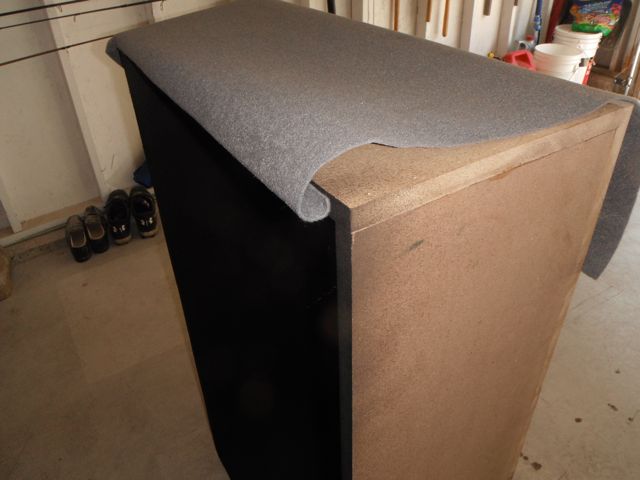
Attached lid, then removed, bedlined the inside, attached trap door handle, reattached.... as you can see a little proper prior planning would have helped out here... oh well, I enjoyed building this box...
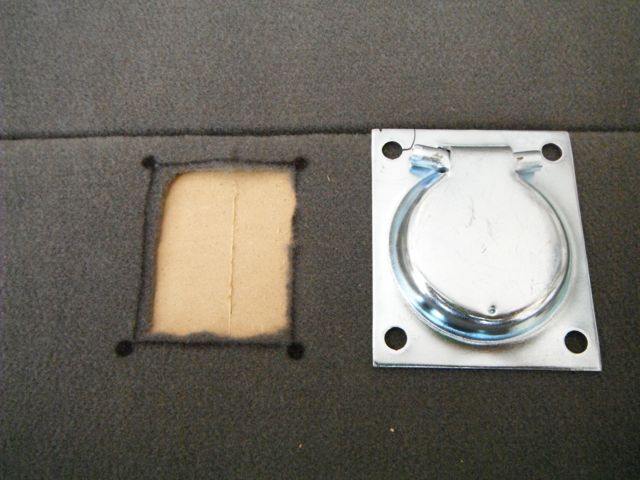
awesome little product...
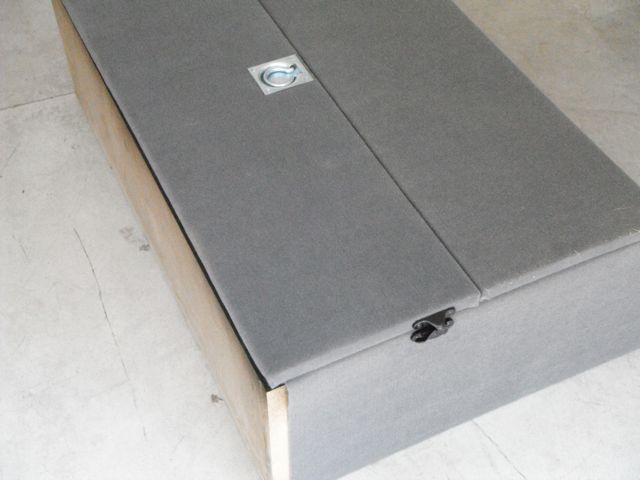
I attached the handle in that location because of the way the hinges operate... if I had put it at the front of the lid, it would have made it awkward to operate.... stay tuned...
awesome little product...
I attached the handle in that location because of the way the hinges operate... if I had put it at the front of the lid, it would have made it awkward to operate.... stay tuned...
07-14-2012, 11:23 AM
#27
Member
Thread Starter
Join Date: Feb 2012
Location: O'fallon, MO
Posts: 141
Likes: 0
Received 0 Likes
on
0 Posts
Year: 1992
Model: Cherokee
Engine: I6
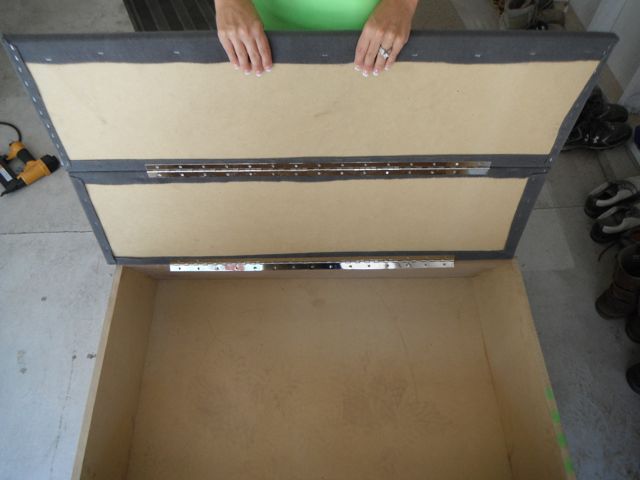
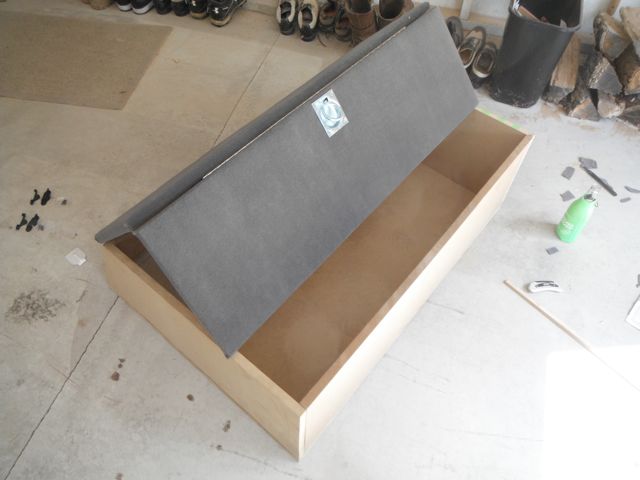
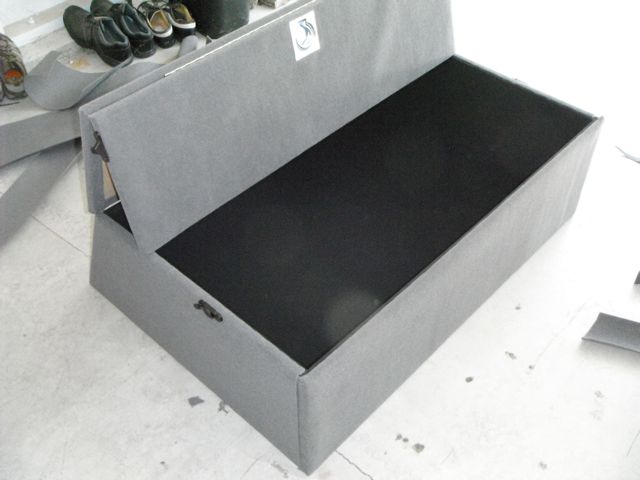
Checked for fit, then continued with bedlining and carpet...
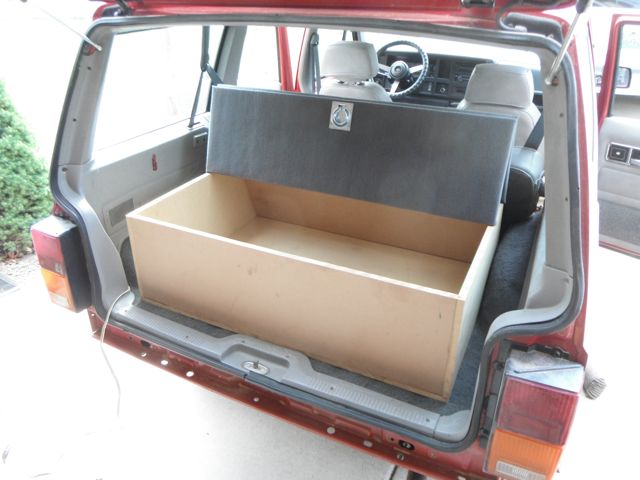
I am seriously thinking about installing the rear panel speakers in the lid here, and wiring it with an amp attached to the box behind the seat, that way when we go camping/tailgating you can open the back hatch and prop the lid up like this and have tunes....
I ended up buying 2 pair of Polk Audio 5 1/2" marine grade speakers to replace the stock ones the SS took out.... they ended up sounding pretty good considering I am running it off of an aftermarket but basic head unit... I don't need a competition system, but do want to give them some more juice, so I will be looking for a modest 4 channel amp.
Last edited by Motiv8er; 07-14-2012 at 12:04 PM. Reason: misspelled words
 07-14-2012, 11:41 AM
#29
Member
Thread Starter
Join Date: Feb 2012
Location: O'fallon, MO
Posts: 141
Likes: 0
Received 0 Likes
on
0 Posts
Year: 1992
Model: Cherokee
Engine: I6
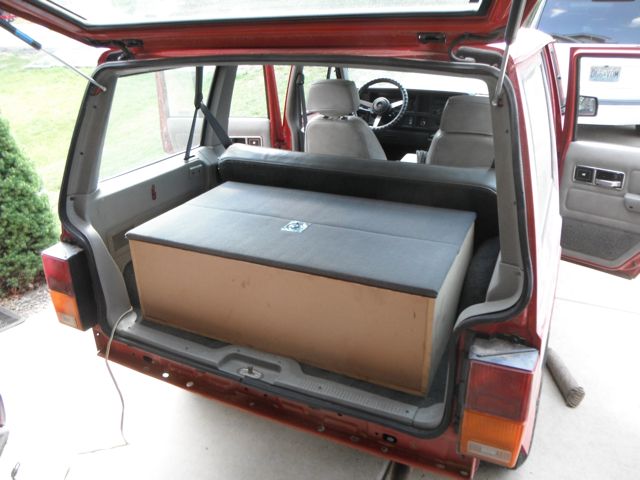
Final product, I am pretty happy with it... Still trying to decide how I will anchor it down, it is heavy but trail running will have it bouncing all over the place... I also might add handles on either side to make it easier to pull in and out... The window sash locks didn't work as well as I had hoped... will revisit that...
Forgot to add this photo when doing the headliner.... I wanted to put some gentle pressure on it overnight while the adhesive cured... I used those stupid extra pillows from our bed, not sure what they are used for because every night we just throw them on the floor.... Yeah, she wasn't real happy when she saw this.....
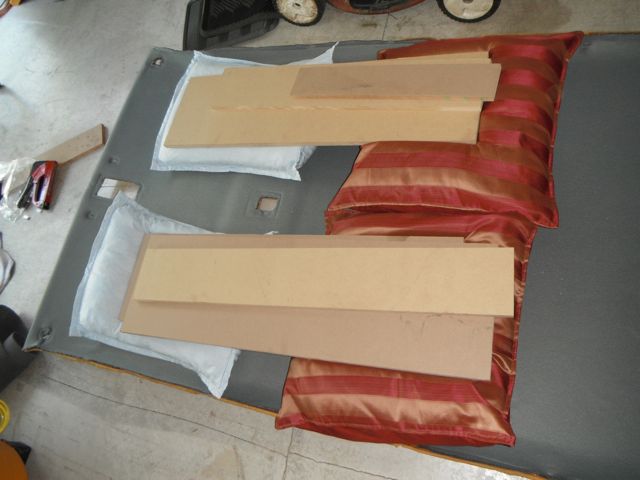
Yeah, REALLY not happy... sorry honey... I might catch a beatin' next time I pull that stunt...

Forgot to add this photo when doing the headliner.... I wanted to put some gentle pressure on it overnight while the adhesive cured... I used those stupid extra pillows from our bed, not sure what they are used for because every night we just throw them on the floor.... Yeah, she wasn't real happy when she saw this.....
Yeah, REALLY not happy... sorry honey... I might catch a beatin' next time I pull that stunt...
07-14-2012, 02:20 PM
#30
Member
Thread Starter
Join Date: Feb 2012
Location: O'fallon, MO
Posts: 141
Likes: 0
Received 0 Likes
on
0 Posts
Year: 1992
Model: Cherokee
Engine: I6
Found a couple more pics of the headliner re-install
Got a lot of help from my Stepson... he's pretty handy...
Got a lot of help from my Stepson... he's pretty handy...