
Introducing project 'Grape Ape'

Thread Starter
Senior Member
Joined: Jan 2012
Posts: 648
Likes: 1
From: Port Richey, FL
Model: Cherokee
Engine: 4.0
I guess I never finished posting on the last part. I ended up finishing up the next day. Dash gauge reads around 195 and has hit as high as 210 with the a/c on. No leaks from the tranny cooler, so I consider it a successful job.
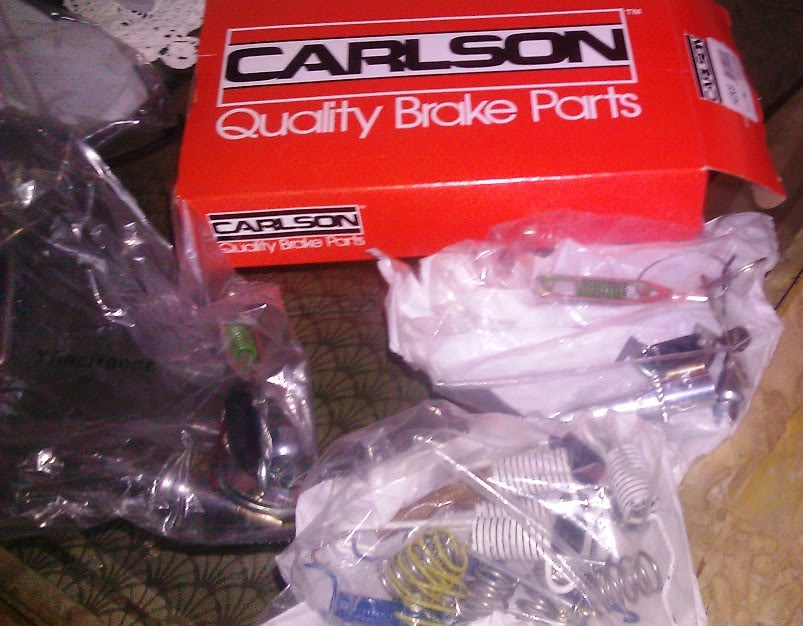
However, the left rear wheel cylinder let go causing the the brake to stick. So, I decided to replace everything on both sides the shoes were close and everything has to be close to 14 years old. Ordered everything from Amazon since I'm a Prime member saving me a ton on shipping. Got the drums and shoes, waiting on the complete hardware kit to arrive today. Decided to clean and paint the drums with BBQ grill paint to fend off rust for a little while. That's about it for now. Went with Raybestos PG series drums and shoes.


However, the left rear wheel cylinder let go causing the the brake to stick. So, I decided to replace everything on both sides the shoes were close and everything has to be close to 14 years old. Ordered everything from Amazon since I'm a Prime member saving me a ton on shipping. Got the drums and shoes, waiting on the complete hardware kit to arrive today. Decided to clean and paint the drums with BBQ grill paint to fend off rust for a little while. That's about it for now. Went with Raybestos PG series drums and shoes.
Thread Starter
Senior Member
Joined: Jan 2012
Posts: 648
Likes: 1
From: Port Richey, FL
Model: Cherokee
Engine: 4.0
Well, the brakes are done. Rear brakes were non-existent! After I got the drums off, I could not believe all the sand and mud caked in. Should'a taken a pic, but I forgot. I hosed 'em down real well and they were shot.
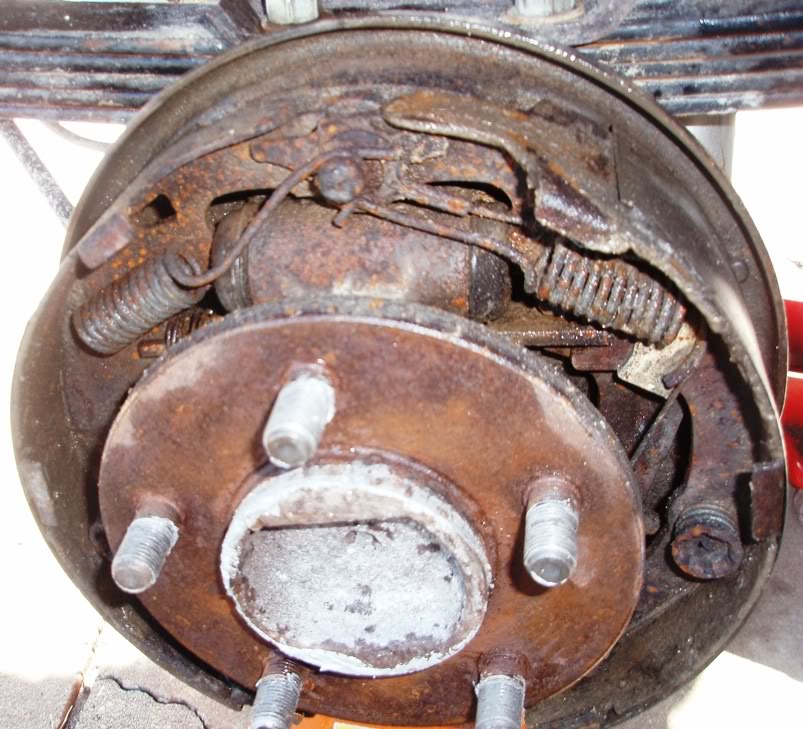

The passenger side was worse, cables and springs had rusted to the point of snapping. Sorry I didn't take a pic!
The driver side hard line was seized so I had to go buy a hard line and bend it. Easy enough. Once all the hardware was out, I wire wheeled everything best as i could, cleaned up, and then sprayed the backing plate with that black rust converting paint. After that, I followed up with the same BBQ grill paint on it and the wheel cylinders to prolong any new corrosion.

Then I put all the new hardware, cylinders, shoes, and drums on. I adjust the shoes until there was a little drag on them. Big difference. Of course, that would because I went from no back brakes to having back brakes. Has reasonable stopping power now.
Got a little crazy with the anti-seize, but this gets wet and muddy.

That was my Saturday. Sunday I drained the tranny fluid for the 3rd time, except this time I also pulled the pan and replaced the screen/filter. Not too terribly difficult and was worth the effort. Shifts seem more positive in all gears. Very minor sludging around the screen and magnets. Very little metal for 165k. I don't claim to no anything about automatics, but it seemed acceptable for the year/mileage/condition of fluid when I first started draining.
The passenger side was worse, cables and springs had rusted to the point of snapping. Sorry I didn't take a pic!
The driver side hard line was seized so I had to go buy a hard line and bend it. Easy enough. Once all the hardware was out, I wire wheeled everything best as i could, cleaned up, and then sprayed the backing plate with that black rust converting paint. After that, I followed up with the same BBQ grill paint on it and the wheel cylinders to prolong any new corrosion.
Then I put all the new hardware, cylinders, shoes, and drums on. I adjust the shoes until there was a little drag on them. Big difference. Of course, that would because I went from no back brakes to having back brakes. Has reasonable stopping power now.
Got a little crazy with the anti-seize, but this gets wet and muddy.
That was my Saturday. Sunday I drained the tranny fluid for the 3rd time, except this time I also pulled the pan and replaced the screen/filter. Not too terribly difficult and was worth the effort. Shifts seem more positive in all gears. Very minor sludging around the screen and magnets. Very little metal for 165k. I don't claim to no anything about automatics, but it seemed acceptable for the year/mileage/condition of fluid when I first started draining.


Thread Starter
Senior Member
Joined: Jan 2012
Posts: 648
Likes: 1
From: Port Richey, FL
Model: Cherokee
Engine: 4.0
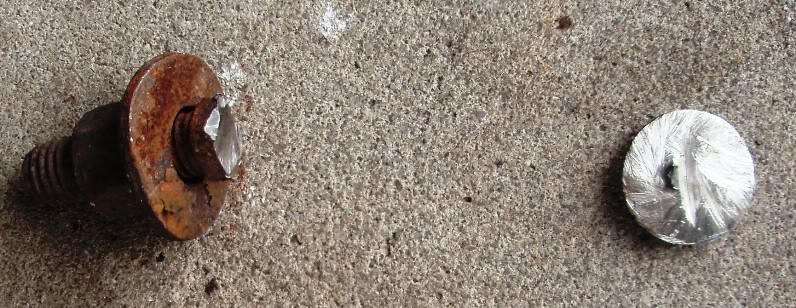
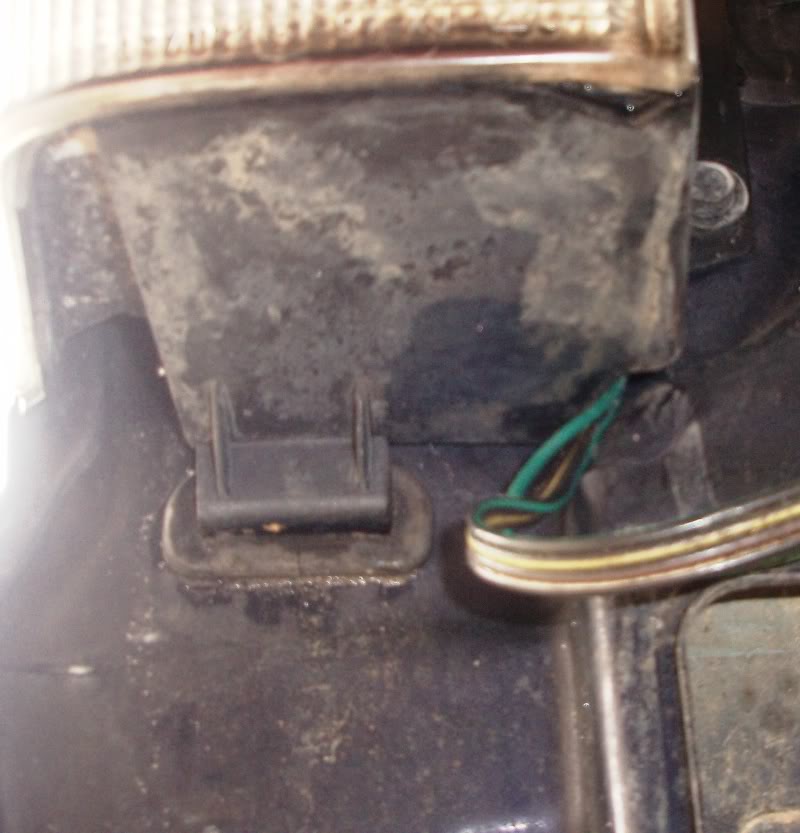
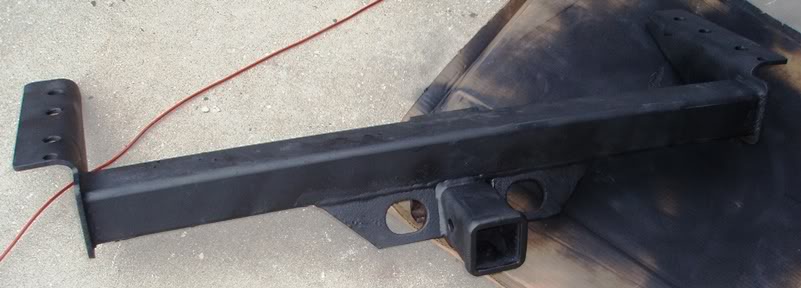
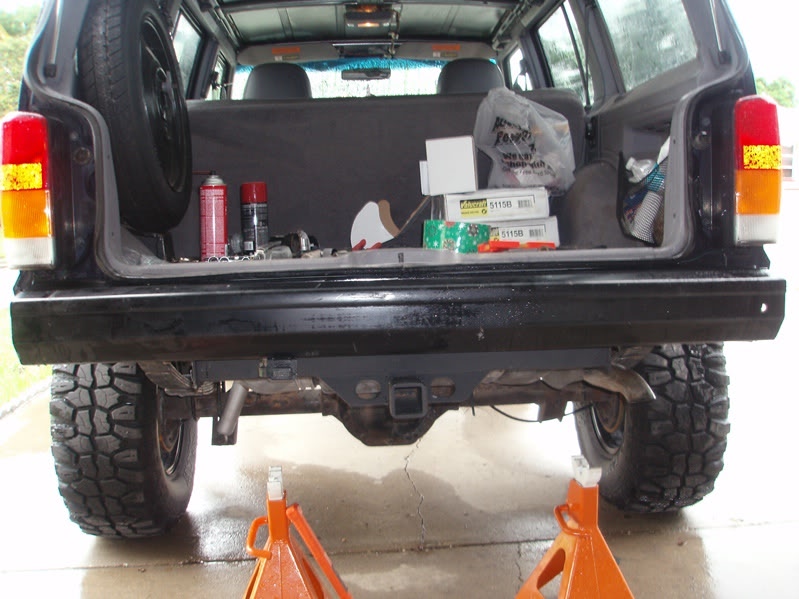
Got started on this yesterday. The whole reason for this is because I got stuck a couple weeks back and when I was getting snatched out we pulled the receiver bolts right through the uniframe rails. I tried removing the receiver and all the bolts just spun. I could see where getting the rear bumper off could be a real biznatch. Luckily, I have an air ratchet which made it a breeze! Once the bumper was off, I was then able to get the brackets off to reveal the channel down the unibody. To no surpise, there were no nut strips in there. U-haul had just bolts in there, so it's no wonder it pulled through and I couldn't get it out. I ended up having to use my cut-off wheel and a few discs to cut the bolts out. After everything was out, I hammered the metal back into place as best I could. I then took my grinder and a heavy wire wheel, cleaned everything up, and coated with rust stop black. While everything was off, I relocated the trailer wiring box behind the tail light as it was just hanging behind what would have been the bumper cap which is now gone. Going to finish putting back together today if weather permits. I also removed, cleaned, and painted the hatch striker assembly as it was beginning to rust.


Thread Starter
Senior Member
Joined: Jan 2012
Posts: 648
Likes: 1
From: Port Richey, FL
Model: Cherokee
Engine: 4.0
Ok, finally got around to finishing this. I used my jackstands to center and hold that sucka up there because I'm solo and it's heavy! Didn't fight me too much going back in and lining up. Nice thing is that the shield for the gas tank and the exhaust hanger are now installed where they should be. Whomever installed these originally, just used sheet metal screws.


I also cleaned up the latch.

Wouldn't you know it. I had to go to the store and my left front caliper seized up. Oh well, time for new front brakes now.
Not gonna say much, it's so straight forward of a job.


At this rate, this thing's gonna be practically brand new! Yikes.
I also cleaned up the latch.
Wouldn't you know it. I had to go to the store and my left front caliper seized up. Oh well, time for new front brakes now.
Not gonna say much, it's so straight forward of a job.
At this rate, this thing's gonna be practically brand new! Yikes.
Thread Starter
Senior Member
Joined: Jan 2012
Posts: 648
Likes: 1
From: Port Richey, FL
Model: Cherokee
Engine: 4.0
Well, we went on a fun group ride Sunday. Debby has been dumping rain since Saturday so I knew a front recovery option was going to be a necessity. Turns out I never got stuck, but hey, you never know!
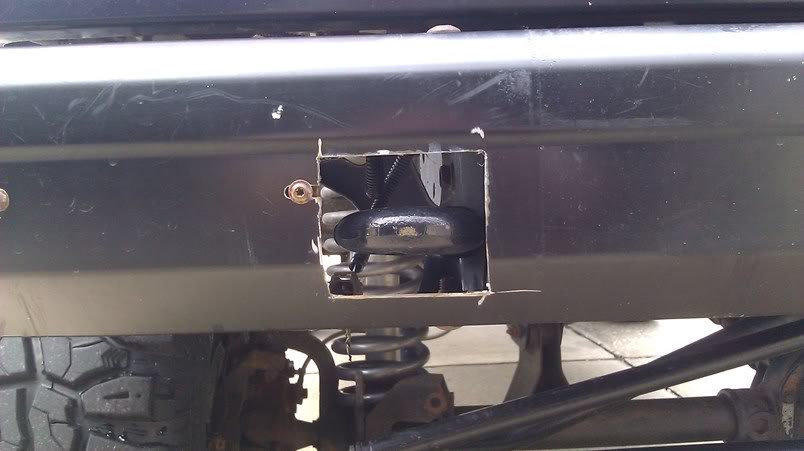
We all know how weak most everything is to mount to so I came up with an idea that I am sure has been done, but I never looked. I had bought a hook from HF so it was time to put it into use. 1st, I removed the front bumper. Next I removed the lower front bumper bracket bolt and nut-clip, replaced them with the hook and one of the hook mounting bolts. I then drilled through bracket and frame-rail so I could mount the 2nd bolt. The access hole was a little small to get my wrench in, so I opened that up as well. Once the hook was mounted nice and tight, I eyed up where it should be from the front, installed the bumper, then used my cut-off wheel to make an access hole to the hook. I still have to clean it up, paint, and add some of the black door trim stuff so it won't cut into a strap.
I went to the local u-pullit yard this past saturday to get a TCU and the harness. That went well, so I decided to see what else I could find. I was able to score a D-window with a 32x11.50-15 which will work nicely as an emergency spare. I also found, on the same truck, a front skid plate which I am going to clean up and mount. Got the tire, wheel, and skid for $42. Score!


A tree branch broke my tail light last night, so I will be heading back to grab one of those!
We all know how weak most everything is to mount to so I came up with an idea that I am sure has been done, but I never looked. I had bought a hook from HF so it was time to put it into use. 1st, I removed the front bumper. Next I removed the lower front bumper bracket bolt and nut-clip, replaced them with the hook and one of the hook mounting bolts. I then drilled through bracket and frame-rail so I could mount the 2nd bolt. The access hole was a little small to get my wrench in, so I opened that up as well. Once the hook was mounted nice and tight, I eyed up where it should be from the front, installed the bumper, then used my cut-off wheel to make an access hole to the hook. I still have to clean it up, paint, and add some of the black door trim stuff so it won't cut into a strap.
I went to the local u-pullit yard this past saturday to get a TCU and the harness. That went well, so I decided to see what else I could find. I was able to score a D-window with a 32x11.50-15 which will work nicely as an emergency spare. I also found, on the same truck, a front skid plate which I am going to clean up and mount. Got the tire, wheel, and skid for $42. Score!
A tree branch broke my tail light last night, so I will be heading back to grab one of those!
Junior Member
Joined: Apr 2012
Posts: 42
Likes: 0
From: tampa, fl
Year: 1996
Model: Grand Cherokee
Engine: 4.0
Got started on this yesterday. The whole reason for this is because I got stuck a couple weeks back and when I was getting snatched out we pulled the receiver bolts right through the uniframe rails. I tried removing the receiver and all the bolts just spun. I could see where getting the rear bumper off could be a real biznatch. Luckily, I have an air ratchet which made it a breeze! Once the bumper was off, I was then able to get the brackets off to reveal the channel down the unibody. To no surpise, there were no nut strips in there. U-haul had just bolts in there, so it's no wonder it pulled through and I couldn't get it out. I ended up having to use my cut-off wheel and a few discs to cut the bolts out. After everything was out, I hammered the metal back into place as best I could. I then took my grinder and a heavy wire wheel, cleaned everything up, and coated with rust stop black. While everything was off, I relocated the trailer wiring box behind the tail light as it was just hanging behind what would have been the bumper cap which is now gone. Going to finish putting back together today if weather permits. I also removed, cleaned, and painted the hatch striker assembly as it was beginning to rust.


yep im the reason for upgrade...

Thread Starter
Senior Member
Joined: Jan 2012
Posts: 648
Likes: 1
From: Port Richey, FL
Model: Cherokee
Engine: 4.0
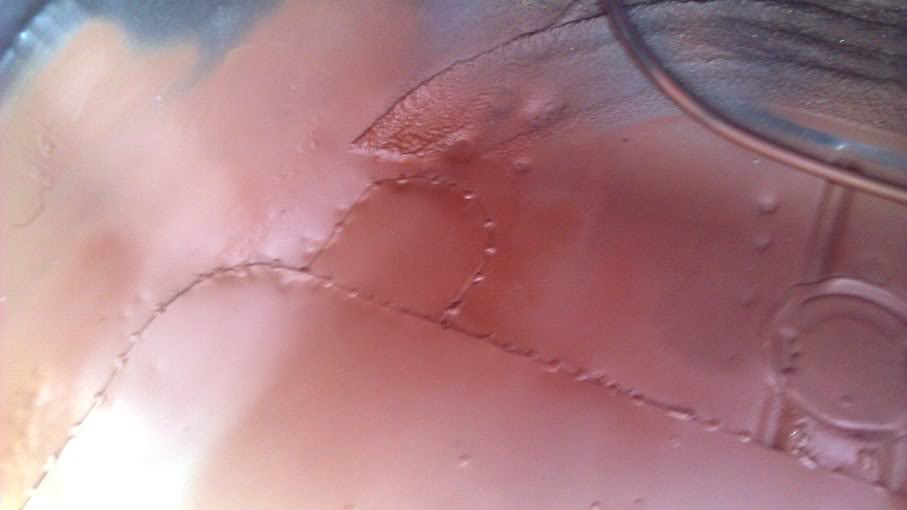
Been a while, so I thought I'd throw in my latest update. I got her buried in a deep water hole a couple weeks back, so that seemed like the perfect opportunity pull the carpet. Well, doin that exposed some bad floor pan rot on the passenger side. After a couple posts in some of the local groups sites, I got someone with a welder to give me a hand trying to patch it. Sheet metal is a ***** to weld it looks like as it can burn right through as I saw first hand. We prepped the area, cut out the bad areas with round cuts, primed, tacked in place, drilled small holes, weld filled them, cleaned everything up with a flap disc, primered the whole area, sealed all seams with caulk, and then painted inside, undercoated the outside. I was happy with the results. I can't see it leaking or failing. I did find out that even with gloves on, the flap-disc wins.

Here's a couple quick snaps of the process.


Here's a couple quick snaps of the process.
Thread Starter
Senior Member
Joined: Jan 2012
Posts: 648
Likes: 1
From: Port Richey, FL
Model: Cherokee
Engine: 4.0
Time for another update. I haven't had the cash to really do any upgrades (Life of a parent!) but my Dad was nice enough to give me the prerunner bumpers off of his Ranger. So, I decided to go about seeing what I could do to make them work. I took off the stock bumper to see what I had to work with as far as mounting points go. I noticed just inside each frame rail was 2 holes. Combine them with the mounting points for the factory and I figure I'd have something decent to work with. Ran down to one of the local shops to see what they had as far a scrap to work with and I came across some box steel I thought would work nice. I had them cut me two pieces and home I went. I mocked them up, got all my mounting holes to the body, and proceeded to drill baby drill! That was much easier to drill than I thought. Pilot holes, then ran my step bit from there. Primed them, painted them, and let the sit overnight. I then mounted them and used my jack stands to mock up the bumper. I got it about where I thought i would like it, marked the holes, and drilled them. I got it all mounted up, but daylight was fading so I wasn't able to adjust it. My level said level to ground, but as you can see from the front shot, it's a little high on the passenger side. There's enough adjustment to cover for that, so I am not worried. Didn't turn out too bad. I've only got the $15 I paod for the steel, so it's cheap! The rear comes next. Stay tuned...
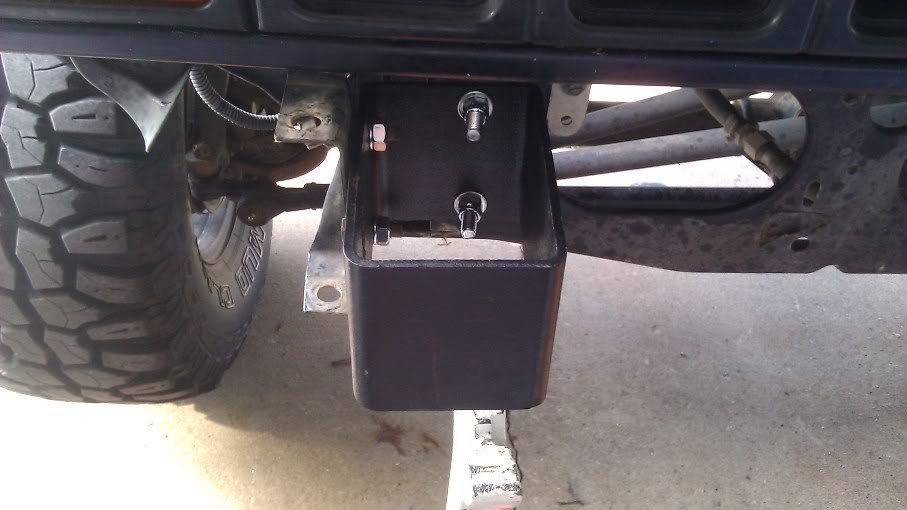
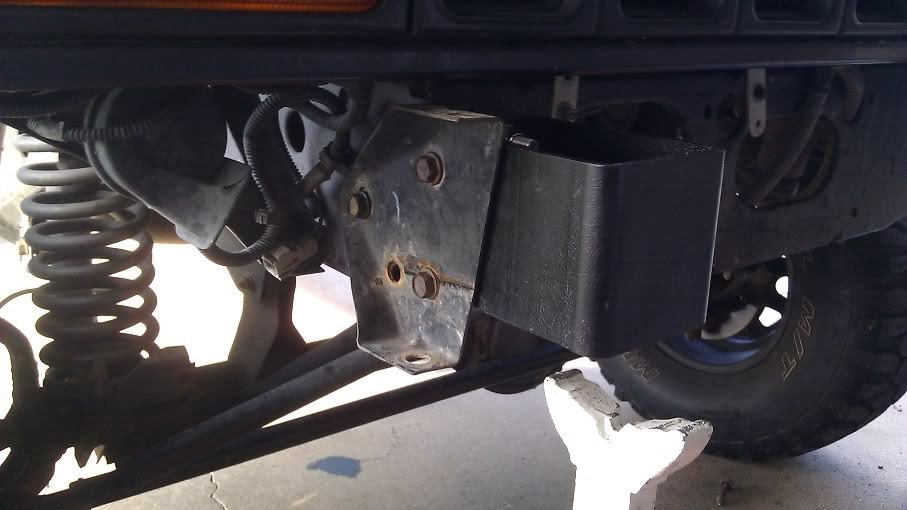
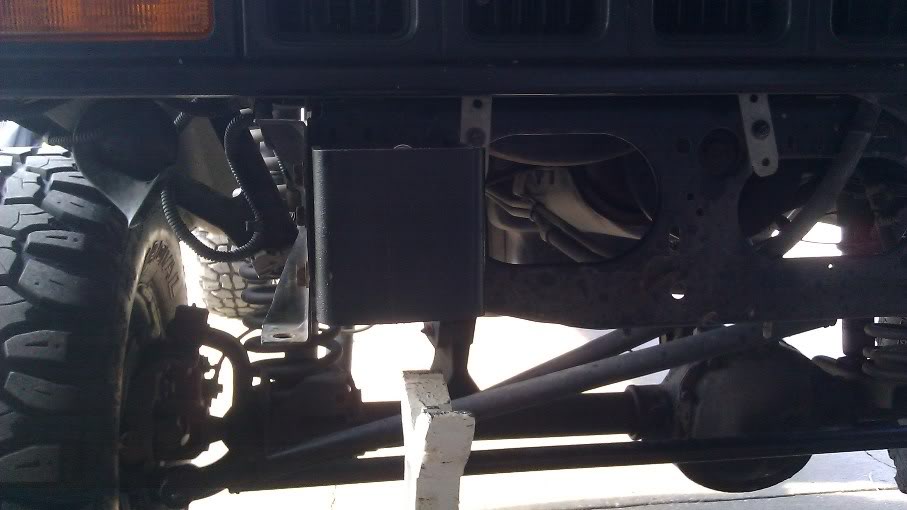

My Dad also gave me the 7" Bosch lights that were mounted to it as well. Still have to mount and wire those!
My Dad also gave me the 7" Bosch lights that were mounted to it as well. Still have to mount and wire those!