When you click on links to various merchants on this site and make a purchase, this can result in this site earning a commission. Affiliate programs and affiliations include, but are not limited to, the eBay Partner Network.
Not much of a build anymore, the Jeep just keeps going on. I've had the clutch pedal flopping around for too long now, the only problem is other projects take priority.
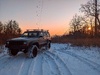
With the recent weather we've had on the east coast, I decided to make the most of it and exercise free will. So I quickly prepped my XJ with an oil change and some rudimentary insulation.
I cut cardboard to fit the rear windows.
I separated the front and rear with a blanket hung from the passenger grab handles. The idea was to crack a front window just enough to let some air exchange and reduce humidity, without letting all the heat out. Plus, I got a bit of privacy. Not shown is all the other gear that I threw in the back.
I gave it a test run at home the night before I left. It only got into the 20's, but it was a decent proof of concept.
On my first night, it indicated -4*f on the dash. You'd have never guessed it was that cold with how well the 4.0L started right up.
And the odometer! I crossed 185k indicated on the odometer that matches the engine and transmission mileage. The body itself will cross 300k total in the next few hundred miles!
With two sleeping pads, two sleeping bags, and two blankets, I slept quite snug. Too snug, I overslept past what I intended!
Leaving the "Campsite". Being 40 minutes from the slopes gave both me and the Jeep time to warm up! Thankfully it wasn't going to stay that cold all day.
The drive up to Snowshoe was beautiful.
Conditions were great the two days I was there. Friday wasn't crowded, and it snowed all day on Saturday.
Leaving the lot Friday night.
On Saturday, I woke up to a much warmer and snowier morning.
The only downside was that this was my XJ's first real drive on salted roads.
Oh, also as part of my prep, I installed window shades so that I could leave the window cracked, but not get too much wind and snow in the interior. They arrived just in time to be installed before I left. I can't say I love the look, but they work well!
So today on my first day back I spent a LOT of time spraying down the undercarriage, the engine bay, inside the frame rails, into the door drains, bumpers, etc etc. Anywhere I could think of salt getting to, I soaked in water. Hopefully that will be enough to clean it up and prevent rust.
I've avoided giving it a coat of Fluid Film like I put on my other trucks I drove on salted roads because it makes working on the vehicle such a dirty affair. This summer/fall, it'll get a deep soak in the stuff so that such a deep wash isn't an immediate necessity.
On a whim the other day, I took a look at my local junkyards stock and realized that I needed to run there ASAP. By running the VINs of the XJs in the yard, I found one of them was a factory manual transmission. Here's the link to the tool I use to check online before I go. I read that it only went down to around 1998, but I've had luck down to 1996.
I found this beat to crap '96 2 door manual RWD ready to give up some parts.
Yes, the door latch was apparently held in place by tin roofing.
But, the final hard to find piece of the puzzle is now in hand! A manual transmission crossmember and another, better condition trans mount adapter.
Getting this last major part (besides a D35 auto 4x4 driveshaft and an ECU) has gotten me preparing for this swap to finally happen again. So, I've kept the momentum up by preparing the parts to swap.
I mean for less than $20 total, it's hard to not replace these things
The shifter bushing was definitely overdue. The bushing has deteriorated so bad that the shifter ball has begun to eat into the bottom of the housing.
Also, this is when I found out that the AX15 actually doesn't have a breather tube. Just this little breather jiggler behind the shift tower, and some apparently don't even have that.
Remove the top cap and this is what the barb looks like. Not ideal for attaching a hose, so I'm trying to find something better.
So far the leading candidate are these old aluminum valve stems I have laying around. Not sure this will be what ends up on the jeep but it's a good option.
I took my pick of the shifter handles I had on hand and gave it a quick cleanup. It got an electrolysis bath to remove rust, and the shift ball was polished and filed down to remove sharp edges and wear from decades of use. Then it got masked off for paint.
The cheap rebuild kit actually was pretty decent. The smaller shift bushing that goes into the gear selector was a better fit on the shift rails than the shifter handle, but it's working well.
And here it is, the shifter reinstalled. Backwards.
It shifts quite nicely now. I'm thinking I'll just install it as is rather than do a teardown and inspection.
Some reviews of the rebuild kits mentioned that the larger shift bushing was a bit too tall and needed to be sanded down to fit. This setup went together easy, but when I tried to fix my mistake and install the shifter correctly I had a bear of a time getting it out.
It's a small detail, but I knocked down the peak of the lockout tab with a file. This made installing and removing the lock ring much, much easier.
I installed the new pedal pads. Not much else to say about it. They fit nice.
This is a detail piece, but I'd like to have a good stock looking shift boot. I also grabbed the shifter out of that junkyard '96 to get a decent shift lever that didn't have the threads broken off, and it came with the '96 down shift boot.
The damaged '97+ bezel and torn boot are on the left, and the much better condition '96- on the right. I've seen a few people say they cut and glued together the '97+ automatic shift bezel to the '96- XJ (and TJ) shift boot retaining ring.
I didn't grab that ring from the yard by mistake, but rather than go back, I decided to make one myself.
I grabbed a file off of Thingiverse and put my new 3D printer to use.
I gave all the hardware off of the 2WD Michigan XJ a bath in Evaporust. Nice, clean, and ready for install.
I don't think I mentioned it before, but I bought a few new parts over the summer. The flywheel was on closeout - $30. The clutch I bought as a Sachs unit, but it's stamped LUK on the friction surface.
Does anyone know if it's unsafe to run the ~1.5" shorter manual front driveshaft on my automatic? The current driveshaft is nearly fully collapsed, and this manual spec shaft has about 3" of travel. By the numbers... it should work for light daily driving use. I'd like to give it a test run and make sure it doesn't cause vibrations, so that I have the least amount of questions when the swap is complete.
While driving home a few weeks ago, at night, in the rain, I was cut off by someone coming the opposite direction who couldn't wait to turn left.
Thankfully, the damage to the unibody was pretty limited. Unfortunately, it was a private security vehicle and there would be no sort of negotiation with them, I'd have to go through insurance. I needed a win, and I wanted the money, so I took the gamble on potentially getting a salvage title.
Fighting the insurance was a nightmare, and they tried to total my Jeep, But eventually I outlasted them and received a cash payout for the highest repair quote that came in at about $2,800. So now I'm taking that money and I'm going to try give my Jeep what it deserves - a fresh coat of paint and a thorough exterior refresh. My plan is to try and control the process as best I can, with someone else spraying the paint.
Thankfully the damage was mostly limited to bolt on items - the bumper, header panel, the fender and its support brackets took the brunt of the damage. I unbolted what I could and got to work doing my own body repair. Here's the before.
And after a bit of work with a ratchet strap and tree, some C clamps, and a hammer and makeshift dolly, I got it back out to something workable. Now to bolt good parts back on.
For the header panel, I didn't want a new production plastic item I couldn't find any local and every partout had them gone in 60 seconds, so I grabbed one off eBay from DeadJeep.com. Unfortunately, it was damaged in shipping and had some cracks that weren't there in the listing. I know this is pretty nitpicky, but I'm trying to make it better than it was before the accident!
But for a beautiful moment in time, it looked mostly like it hadn't been in an accident.
Deadjeep called me up after a message or two on eBay and was profusely apologetic. They said it would take a few days to find one in the same color and condition, until they heard that I didn't really care about the paint color since it was getting repainted. They got one out the same day. And it's BEAUTIFUL. That's incredible customer service and I'd definitely recommend them to anyone!
For the bumper, bumper ends, and fender, I went with new parts due to difficulty in finding decent used pieces. The prices on eBay are incredible. I paid $105 for a new fender and $75 for the bumper shipped to my door from Evan Fischer. The bumper ends were $65 shipped off Rockauto - basically the same price as eBay, but I was able to combine shipping with other items.
I'm going to change things up a bit on the lighting side. I grabbed some factory replacement fog lights off Rockauto for $52. I know there's more effective fog lights out there, but let's be honest, it's sort of like the overhead console: this is for looks and to upgrade to as many less common factory parts as possible. I'm also going to swap over to clear turn signals to see if I like the look. Those were a whopping $20. The LED bulbs are for the reverse lights.
And it's back on the road.
I have a bit more work to do before taking it to get painted. The area I repaired needs to be primed to protect it from rusting out, this was only a test fit/assembly. I'll replace some of the seam sealer at the cowl while I'm at it.
If anyone has tips for a repaint, I'm all ears.
The basic plan is to make sure the paint shop only has to paint. I'll get a paintless dent repair done in order to ensure there's no bondo used. Then I'll disassemble everything I can so that there is as little masking as possible for the shop to handle. So the header panel will be disassembled and the new fender left uninstalled, and I'll remove everything else I can - the plastic fenders, bumper ends, taillights, plastic cowl cover panel, windows and trim, etc.
Sounds like you have a good plan. I would find the paint shop you want to use and buy them lunch. Talk with them about what you want and how you are attempting to make there job easier and your outcome better. See what they say about it. You may be able to learn what you can do to make it better for you and them with minimal effort.
I'm also going to swap over to clear turn signals to see if I like the look.
I like the look on my black '00. So much so that I sourced tail lights that got rid of the amber too.
What kind of bulbs do you run?
Cause if you are just using regular 3157's and 194's on mine the amber showed thru.
Kinda destroying the look IMO.
LED's, which I could have cared less about, solved that problem but then issues with how the turn signals worked and the 194's in the side markers popped up.
Turned out there had to use non polarity LED's.
Ralph, if you ever decide you want the all clear tail lights now for sale on eBay, you let me know. I'll happily buy those red/clear ones off of you.
I found a set for sale while I was visiting friends in Michigan over the Labor Day weekend. Unfortunately, they were attached to an entire Jeep, and the seller was uninterested in my offer to trade stock tail lights and cash prior to selling the whole thing.
Between the accident and said visit, I've jumped right back into some projects I'd been ignoring for a good long while.
One of my friends up there picked up this very nice, low mileage '98 TJ 4.0 manual some time back. Since I was in town, we decided to go 'froadin. This thing is almost stock other than the winch and rock rails, which we made good use of! We had a blast, and my friend was not afraid to absolutely send it up some climbs, using momentum to make up for the lack of traction. I was much more restrained since I didn't want to break someone elses Jeep, but we had a bunch of fun nonetheless.
The front sway bar on a TJ is pretty beefy. No wonder sway bar disconnects are virtually required on those, look how little articulation he gets!
This was my first time driving off road with a manual, and it was so much fun! It got me motivated to tear apart my AX15 and check its condition before installing it into my Jeep.
I watched a few videos and printed out the factory service manual section, but it really is hard to overstate just how easy it was to get the box down to this.
On the whole, it looks to be in perfectly serviceable condition. While I probably could have ran it as is, I didn't want to get it all installed only to find a major issue.
I have no idea why there are several grinder marks all around the input shaft. I'm not sure what possible for someone needing to do this, but they're small and more shallow than the clutch splines, so I'm, going to run it.
The reverse gear, being unsynchronized, got the worst of it. But the first gear synchro was pretty rough as well. I'm thinking someone was aggressively shifting back and forth off road trying to get unstuck. As a reminder, this gearbox left the factory in an XJ, and I got it out of a YJ. I'm sure it didn't have the easiest life.
What else is going on? Well, since I'm about to open a can of two part epoxy paint to prevent rust on the areas I previously repaired from the accident, I'm lining up some other parts to paint as well. The ZJ transfer case skid and the filler neck cover panel both were a bit crusty, so they got an electrolysis bath. The header panel support bracket is currently getting the same treatment. I'll probably give these another round of chemical rust removal immediately prior to paint.
Once the manual swap is done, I figure there will be a substantial reduction in the cooling needs of the whole powertrain. The automatic transmission is sort of a double whammy - it makes the engine work harder to put power to the ground, and a lot of that sapped power goes into heating the transmission fluid, which you then also have to cool off. Plus, removing the cooler lines will free up some additional space around the radiator.
So, once the manual swap is done, I plan to do a Volvo 2 speed fan swap. As part of that, I'll be swapping on the alternator and AC compressor bracket off of a YJ. This is appealing for a bunch of reasons.
Deletes the fan mount pulley and lowers the profile of the whole assembly.
Doesn't involve cutting up a good XJ fan bracket to do so, and has better belt routing/wrapping
Raises the alternator 5" and can fit a larger alternator without modifications
Since I'll then be able to fit a 160 amp Durango alternator with no other mods, I plan to. The Volvo fan should consume about 30 amps when running steady, and the fog lights about 10 amps, so I'm basically adding as much alternator capacity as I am adding full load electrical draw. I don't think I'll ever need both the fog lights and the radiator fan running on high constantly... but I'll be ready! Plus I still plan to get a hitch mounted winch at some point.
If I'm going to install a bigger alternator, I'll also need to upgrade my alternator wire at least. I learned that you can put a Megafuse in the stock PDC, so this should come out looking very clean. This isn't my picture, but an example of what I intend to do. That will get rid of the fusible link alternator cable, and be a very clean way to upgrade the size of my battery cables.
And once the manual swap is done, I'll be ready to install the 242HD I've had tucked away for years.
During a previous disassembly of the 242HD, I didn't have the right snap ring pliers and fought them a lot. This lead to several oopsie daisy moments. All the snap rings got a bit stretched, plus, I made a small divot in the front output shaft bearing surface. When I was visiting the yard to grab a part for the accident repair, I saw a WJ that had just one day left in the yard before the entire row went to the crusher. I peeked under it and sure enough, it had an NP242HD, and sure enough, the front output yoke was removed. I showed up the next day and managed to recover the front output just before they hoisted it into the crush pile.
Since after seeing 5 or more of these NP242HDs that all had their front outputs removed, I had to look elsewhere for the front output. Turns out a regular 242 front output won't work and had a lot of fore/aft slop.
All the dings in the yoke are because of a key difference in the heavy duty V8 cases. The front output yoke has some of the splines machined away and the yoke becomes a press fit onto the output shaft. On a regular 242, remove the yoke nut and the yoke practically falls off. So to get this V8 front yoke off of the NP247, I had to make liberal use of the hammer. I was wondering if I had forgotten a snap ring inside the case for a while because this was such a PITA.
Other than the splines machined away, the standard NP242 and the V8 NP247 front outputs are identical down to the part number in the forging.
I'll probably put further updates on the 242HD transfer case in the thread I made for that subject.
Ralph, if you ever decide you want the all clear tail lights now for sale on eBay, you let me know. I'll happily buy those red/clear ones off of you.
I found a set for sale while I was visiting friends in Michigan over the Labor Day weekend. Unfortunately, they were attached to an entire Jeep, and the seller was uninterested in my offer to trade stock tail lights and cash prior to selling the whole thing.
The Jeep is now ready to go back together for the time being. I am thinking I want to have it available to drive for a bit of exploration at the end of September, so it won't be getting painted immediately.
I have pretty much wrapped up the part of the paint repair/resto that I planned to do at home. Like I said last time, the cowl seam sealer was a bit worse for wear. Since I was opening up a can of 2 part epoxy paint anyways, I did some additional resto and repaint.
This is the before. Old, cracked seam sealer with surface rust starting underneath,
I scrubbed the rust away with phosphoric acid, wire brushes, and sandpaper, then painted 2 part epoxy primer, then squished in a bit extra seam sealer.
After letting that cure while I was away for the weekend, today I put down some Rustoleum "tool box red" paint. Close enough for an area you won't see and the sun won't shine on.
The crash damaged area got the same epoxy primer and enamel paint, but no need for seam sealer.
I trued it up about as well as I could at home. All the bracketry lines up well.
I'll let the paint cure and harden up for a few days. It won't take long to put together, so right now it's just a waiting game.
I finally got tired of justifying endless delays and got my Jeep back together.
I spent a fair bit of time cleaning and painting a bunch of parts that weren't part of the accident repair. Then I "had" to wait for the paint to cure. Rustoleum is pretty tough, if you give it enough time and heat to harden before putting it into service.
The new bumper didn't have much paint on the backside, so it got some paint too. I refinished the wipers, the header panel bracket, fender bracket, and finally painted the center section of the chin spoiler to match the new bumper ends.
To give the gas line cover panel the best chance of surviving in the wheelwell, I used the two part epoxy primer on it, then rustoleum, then some undercoating on top of that. Hopefully it'll take a long time to wear through all of that!
I also rolled the Jeep out into the sun to heat things up. I'm not looking forward to taking it back down to this point again for the final paint.
But, I have some vacation plans and want my Jeep fully functional. So it got thrown back together and immediately pressed to work. A three hour drive to pick up some furniture was the first drive after it was all put together again.
I should finally get the last part needed for my transmission rebuild today. I might try to get that done this week before taking off on another Jeep adventure this weekend.
Unfortunately, the new body panels aren't yet painted red, just the underlying structure has been dealt with. So it's still black and blue from getting hit in the face lol! I've been spending a lot of time on little odds and ends.
I had a creaky steering column that had been bothering me for a while. I guess I left a nut loose the last time I had the dash out. Tightening that up completely fixed it.
Every time I take off plastic parts now, I'm adding fabric tape between any hidden contact surfaces. I'm on an NVH crusade, despite everyone telling me it's a waste of time on a cheap old brick like the XJ. I don't know where I got a roll of this stuff years ago, but it's definitely helped cut down on squeaks.
Remember the 2 door hinges with the missing plastic levers? Someone posted a file on thingiverse to replace them. 1 hour of print time later and for less than a dollar's worth of filament, I have two new seat levers.
Here's a before and after from the Thingiverse link, since I didn't take my own pictures.
I also replaced my wiper arm bushings. It was annoying, but a pretty easy project. Just don't get the wiper arms crossed up with the arms disconnected!
This made a small but noticeable improvement in cutting down on the wiper slop.
A rear speaker went out. I'd been using whatever old speakers from both XJs still worked in the rear since the rebuild, and they were underwhelming. Pretty much any aftermarket speaker is going to be an upgrade.
I also threw in some DEI speaker baffles. When I ordered them as weather seals for the front door speakers, they accidentally sent me two sets, so this was as much about clearing out my shelves as it was about improving sound!
I lowered the headliner a bit and shoved in some polyfill insulation I found in a dumpster at work. No idea if this will make an improvement, but it was free after all.
And lastly... sigh. Brand new parts don't last 5 years these days, while the originals I threw out were probably sealing fine, just stiff.
Last week I took a much needed vacation of camping and generally disconnecting from society. I hopped in the Jeep and drove up to go camping with a friend in Shenendoah National Park, then up to the Dolly Sods Wilderness Area, before coming back down to the Mt. Rogers Recreational Area and Greyson Highlands State Park. I hiked most days and barely had any cell service. Fantastic!
The trek was over 1,000 miles and unfortunately, some ****** have developed in my XJs armor. Nothing that left me stranded, but a few things that require worrying about or addressing. I'll go in order of importance and level of concern.
CPS failure potentially looming. Once again, I felt a couple two-three shudder/clunks come through the driveline, just like the last time my CPS was failing. This NTK brand (original Tier 1 supplier) CPS has been on my Jeep for just over a year. At least now I carry an 11mm swivel head ratcheting wrench for topside CPS removal. Not going to do anything about this yet, other than clean some grounds or the like. I carry a spare with me.
Overheating. On long grades, coolant temps got to uncomfortable levels. The highest I saw was 224* on a low speed 2nd gear hill... when it was 68* outside. This should be a total non-issue for the XJ cooling system. Later during the trip, I thought maybe the heater core bypass valve was contributing by not having enough flow restriction, letting too much coolant bypass the radiator. Setting it back to the normal route through the heater core didn't make much of a difference. On longer highway grades, I have never had any issues. I'm blaming the fan clutch for this one. I installed a Hayden 2625 fan clutch just a few years ago. If I didn't already have parts and plans to try out the Volvo fan, I would get another fan clutch with visibly different construction.
Axle U-Joint failure looming. A few times recently, I have heard a rhythmic clunk coming from the front center or right side when turning left at higher loads. I took a look at the suspension and found red rust dust all around the passenger side front axle U-joint.
Leaf spring bushing failure. I've known about this one for a while, but while I'll have the XJ apart AGAIN and my shop press in action, I'll finally deal with this one too.
HVAC check valves. Long high throttle pulls up grades resulted in my AC losing vacuum and all airflow going to defrost. And guess what! The defrost door seems jammed shut again. How I love the XJs HVAC system! I'll look for leaking check valves or vacuum hoses.
Rear Wiper Switch. Something gave up on it, the switch action feels like crap and doesn't have the usual 2 stage detents. I'll swap in a spare.
So let's see... I'm going to blame 4 out of 6 problems I encountered on a 25 year old Jeep, on new replacement parts that were installed within the last 5 years. It's so hard to buy good components for older vehicles. We just don't make good parts anymore and I'm so tired of it. I'm sure cheap knock off parts have always been an issue, but it really does seem like these days you literally cannot source a truly OEM grade replacement part no matter the price. And that's seriously depressing.
Anyways, build threads are worthless without pics.
I've made a few jokes now about how my Jeep got into a fight, and that's why his face is all black and blue.
In front of an abandoned barn near Mt Rogers.
The bad U-Joint.
The engine/trans/odometer crossed 194,000 right as I pulled into my neighborhood.
And a screenshot of the OBD code reader showing nearly the peak coolant temp I saw during my travels.
I tore deeper into the AX15 and I'm left wondering if I even want to keep going with this transmission. I'm definitely not the first person to tear this thing apart and so far my impression is that someone just threw together the worst parts they had. The issues I've found so far.
Shavings and chips throughout the case. Some of these were dry, as if it was just machine shop chips thrown into blind holes.
Came out of a YJ, but the part number and transfer case clocking is for a 97+ XJ. Just a sign of a questionable, and probably hard, life.
Mismatched bolts on the bellhousing. Not a real problem per se, but further evidence of the lack of care when it was torn apart.
Input shaft looks to have had some angle grinder action as previously shown.
First gear damage
retainer plate damage
missing a snap ring on the 3-4 slider between the input shaft and main shaft
3-4 synchro rings in kit don't match what's in transmission (common issue)
Here's how far I've torn it down.
Here the 1st gear damage I missed on my first inspection, before I ordered a rebuild kit. The matching gear on the countershaft has barely any wear like this, so I'm wondering if they aren't originally from different AX15s.
Two snap rings should have fell out of the 3-4 slider between the input shaft and the main shaft.
The wear on the bottom edge of the retainer plate is hard to explain as it's not quite axial to the gear shafts.. Maybe it wasn't tightened down in a previous rebuild?
The asymmetrical syncros appear to be updated parts for the 3-4 syncros, but I am not sure if they'll play nice without also changing the slider as well?
How does a brass syncro eat into the fifth gear slider? I am not certain. Maybe someone resting their hand on the shifter while driving down the highway?
The previously shown cuts on the input shaft. Only one is shown but there are several all around the shaft at this point.
I can tear apart the 2wd transmission I have, but I know that one was grinding just driving around the yard, and know it came out of an XJ that was abused.
The first gear can't be bought on it's own as far as I can tell. And if these are the issues I've found, what else will I find as I dig deeper? And what else could I miss when doing the rebuild?
At this point, buying a "better condition" AX15 might be cheaper and easier. I was patient and scored a lower mileage replacement one for my factory ax15 Jeep (which was notching and clunky when I bought it stock in 2013 with 129K). I'm pretty sure the replacement came out of a TJ but it shifts WAY better than my old one. I paid $800 for it too.
I think Novak still will sell a literal "brand new one" but last time I checked, the price had increased but I think it was still less than $2K.