
Alright, got a little more accomplished. Ball joints in, exhaust done, knuckles and pitman arm drilled for 1 Ton steering. Hopefully, I'll find the time to get the front axle all back together.


Quote:
Thank you Sir. Me too!Originally Posted by TX RamRod
Subscribed. I'm enjoying your build so far, I look forward to seeing more progress.
Quote:
mines barley big enough to fit my jeep and have any room to work
I hear that. I've been there. As a kid my Farher and I started working on cars outside. Built our first hot rod in a tent garage. When my Wife and I was looking for a house, a good sized garage was a priority.Originally Posted by cleenrob
jelly of the garagemines barley big enough to fit my jeep and have any room to work
I hit a couple of stumbling blocks today, but managed to get a little more done.
First, I put the new chromoly axles together. The drivers side u joint had a couple of catchy spots in it on one side. I knocked it apart and ordered a new u joint. Looks like the XJ won't be rolling this weekend. I probably could've picked up a u joint at the parts store, but I have plenty to do while I wait for it to show up.
Next, I installed the freshly drilled knuckles on both sides. Since I couldn't put the drivers side axle in, I just put the new axle, hub assembly, rotors, calipers, and shoes on the passenger side. That all went well.
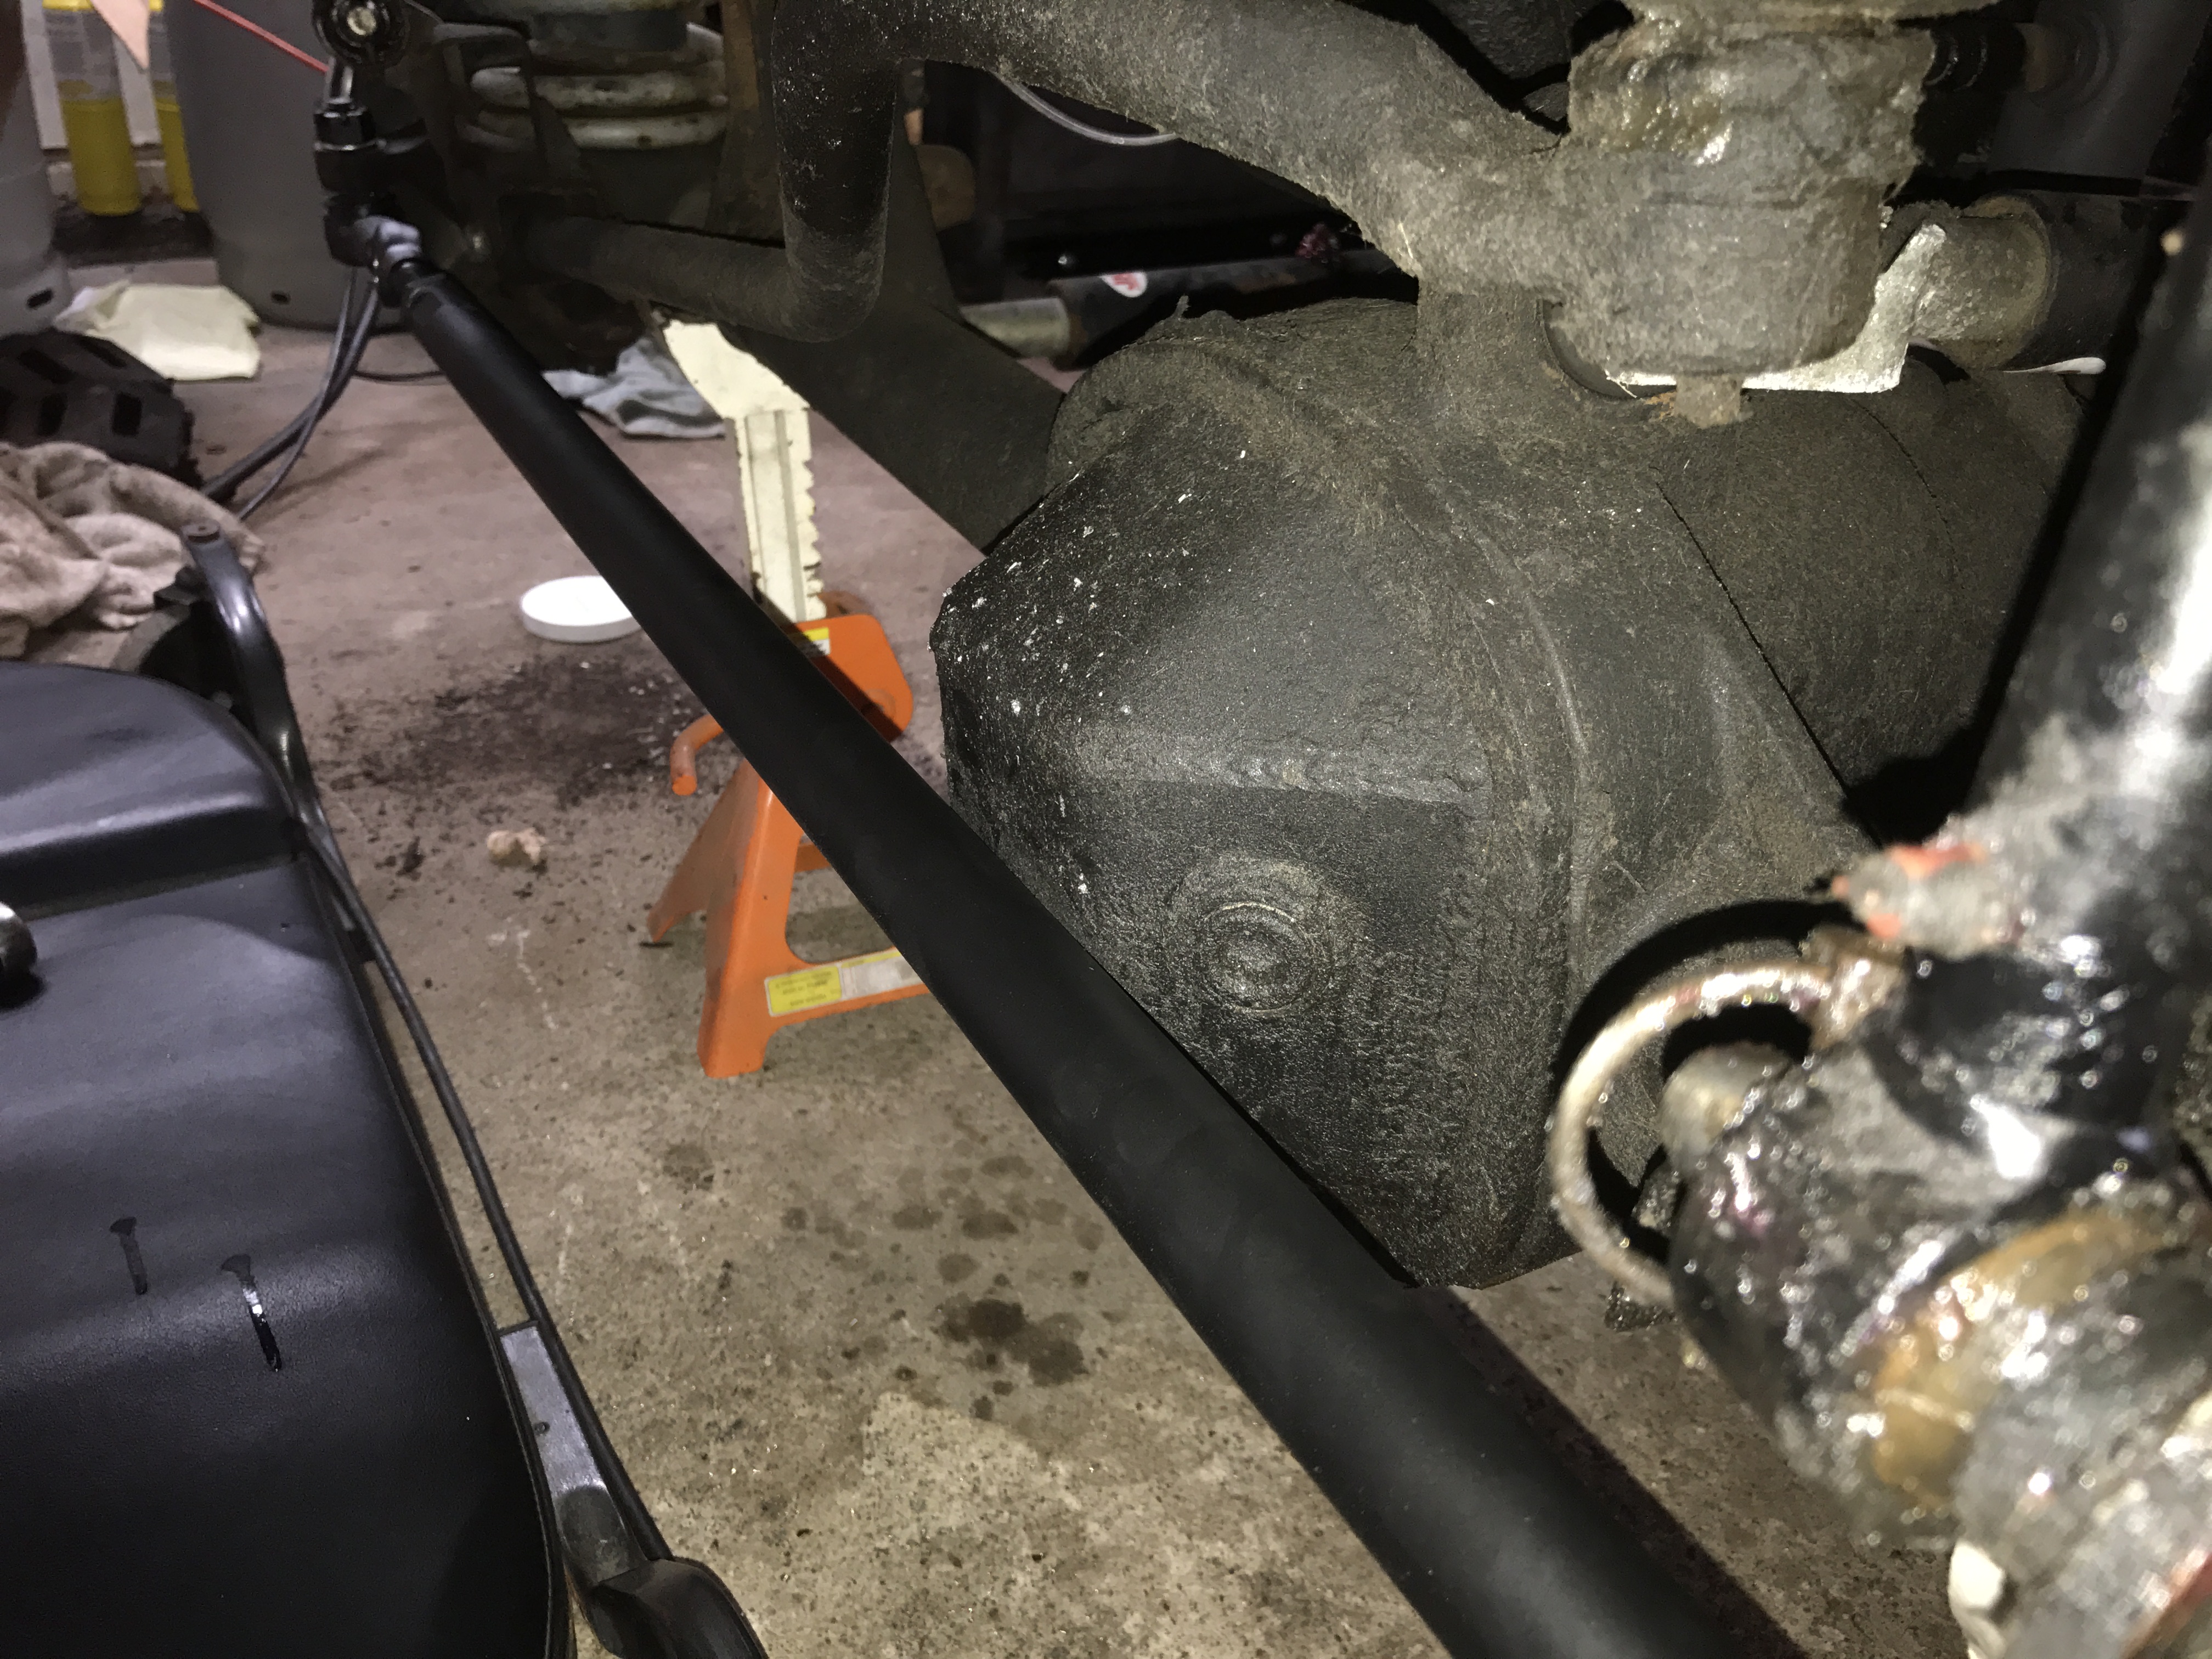
Then, I moved on to the 1 Ton steering. I put the Tie rod in to check the spacing for the poly spacers. That's when I realized that the tie rod was hitting the diff cover while turning in one direction, and the track bar mount bolt in the other direction. I emailed a Frank at Serious and he told me the after market diff covers that came on the XJ are deeper than stock. I ordered a Riddler cover to correct this issue. Im going to replace the track bar bolt with a button head.
Next, I installed the new adjustable track bar and started pulling the diff cover. This is when I found that whoever put the diff cover on stripped out two of the Allen heads. It went from a five minute job to over an hour. Somehow, I managed to get both bolts out without destroying the threads.
The u joint should be here tomorrow. Who knows when the Riddler cover will show up?Hopefully, I'll drive this thing out of the garage one of these days...
First, I put the new chromoly axles together. The drivers side u joint had a couple of catchy spots in it on one side. I knocked it apart and ordered a new u joint. Looks like the XJ won't be rolling this weekend. I probably could've picked up a u joint at the parts store, but I have plenty to do while I wait for it to show up.
Next, I installed the freshly drilled knuckles on both sides. Since I couldn't put the drivers side axle in, I just put the new axle, hub assembly, rotors, calipers, and shoes on the passenger side. That all went well.
Then, I moved on to the 1 Ton steering. I put the Tie rod in to check the spacing for the poly spacers. That's when I realized that the tie rod was hitting the diff cover while turning in one direction, and the track bar mount bolt in the other direction. I emailed a Frank at Serious and he told me the after market diff covers that came on the XJ are deeper than stock. I ordered a Riddler cover to correct this issue. Im going to replace the track bar bolt with a button head.
Next, I installed the new adjustable track bar and started pulling the diff cover. This is when I found that whoever put the diff cover on stripped out two of the Allen heads. It went from a five minute job to over an hour. Somehow, I managed to get both bolts out without destroying the threads.
The u joint should be here tomorrow. Who knows when the Riddler cover will show up?Hopefully, I'll drive this thing out of the garage one of these days...


The new U joints came today. I reassembled the drivers side axle. Feels great now. Had a little extra time so I mounted the compressor for the lockers.


1 Ton steering in, Riddler cover installed, compressor under rear seat, air lines run to diffs. Next project is wiring the compressor and locker switches.


Pulled the seats out to run the wires for the locker switches Also rigged up a washer fluid bottle out of a small coolant reservoir. I just used a small hole saw to drill for the motor.


Seasoned Member
awtta be funny to see the back passengers face when you kick the compressor on. lol
Build is going well.
Build is going well.
Quote:
Build is going well.
Ha! Only rear passenger will most likely be a dog. Thank you.Originally Posted by Krakker
awtta be funny to see the back passengers face when you kick the compressor on. lolBuild is going well.
Cut and fold done. Bumpers, skids, frame stiffeners, sliders, truss, C reinforcements, and snorkel on the way. Trying to make Rausch Creek on the 25th. Stay tuned.


CF Veteran
I like where you mounted the compressor.
Quote:
Thank you. Seemed like the logical spot.Originally Posted by Desertfox1023
I like where you mounted the compressor.


