
Another DD XJ Build

CF Veteran


Joined: May 2013
Posts: 2,624
Likes: 302
From: Asheville, NC
Year: 1999
Engine: 4.0
That's a lot of rear suspension travel for the lift height you're at. 2.5" right? Super impressive.
Is that a IRO double shear track bar mount? I would have thought the 3/4" drop would be too much for that low of a lift. Those control arms look sweet - I was planning to run some RE adjustables with my planned "upcountry" lift, but those look tempting. IRO's, right? I really liked the stuff I've bought from them - their track bars are legit.
Jealous of your rig so far! I want to take a similar approach with my two-door, but the rust is so superficial that I can't bring myself to cut out the original shackle boxes to get that kind of travel. I wanted to do it to my last rig, but that had rusty quarters (not nearly as bad as yours) which I cut and folded. Even with a nice, custom fab'd bumper, I never liked the look. I dig the way you fixed yours - wish I would have gone that route with the no-lift boxes too.

Thread Starter
Member
Joined: Jun 2017
Posts: 107
Likes: 0
Year: 2001
Model: Cherokee(XJ)
Engine: 4.0
Yeah lift is an advertised 2.5", although I never actually measured to verify. In addition to the relocation brackets out back I am running longer shackles, although those really only served to level the thing back out after the bumper went on. Did I mention that this bumper is absurdly heavy?
I've been quite happy with the no lift barckets, although they've only seen road duty so far. The only thing I kind of wish I had done was weld nuts to the back side of them. As is, it is a real pain to get a wrench back there if you ever needed to adjust them. Luckily I guessed right the first time and my angle looks pretty good.
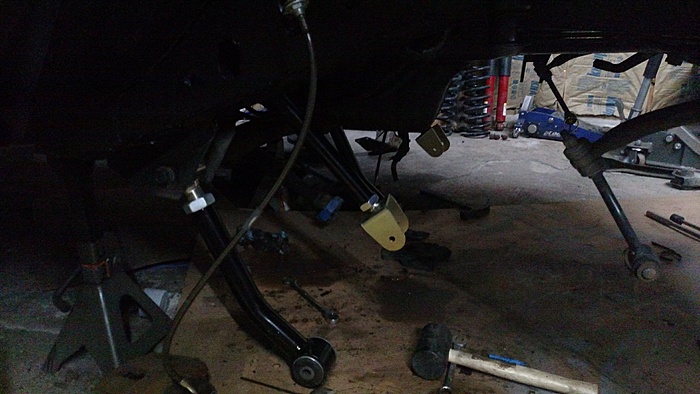
IRO arms and track bar mount. As it sits my track bar does need to be lowered a little to get into parallel with the drag link. I'm hoping that since it is already a heim with about a half inch misalignment spacer this mount will get it just right.
I've never much cared for the look of a cut and fold myself, and it wouldn't have worked with this bumper anyway.
I've been quite happy with the no lift barckets, although they've only seen road duty so far. The only thing I kind of wish I had done was weld nuts to the back side of them. As is, it is a real pain to get a wrench back there if you ever needed to adjust them. Luckily I guessed right the first time and my angle looks pretty good.
IRO arms and track bar mount. As it sits my track bar does need to be lowered a little to get into parallel with the drag link. I'm hoping that since it is already a heim with about a half inch misalignment spacer this mount will get it just right.
I've never much cared for the look of a cut and fold myself, and it wouldn't have worked with this bumper anyway.
Thread Starter
Member
Joined: Jun 2017
Posts: 107
Likes: 0
Year: 2001
Model: Cherokee(XJ)
Engine: 4.0
Today began the next phase of the build. This being everything under the front end. As usual I managed to find a way to project creep by deciding that as long as the axle was out I would go ahead and do the rear main and oil pan gasket as well as throwing in a trans cooler.
While in the process of pulling the axle I did go ahead and throw one of the gamblers on that is still wrapped in the 31x10.5 tire it came with to actually measure for bump stops. Turns out I only need 2" of stop to avoid rubbing. My stock stops have fallen apart so I'll be going a little back woods and just bolt a couple of hockey pucks to the spring plates. I also verified that I am shock limited even on stock arms.
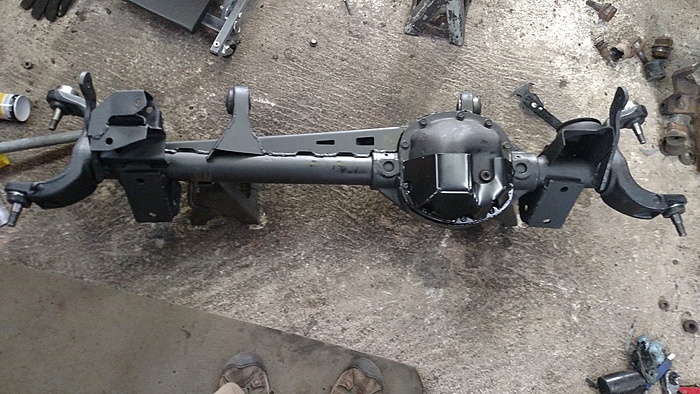
At any rate the axle is out and mostly stripped. Jcr baby truss is mocked up and the axle cleaned off for welding.

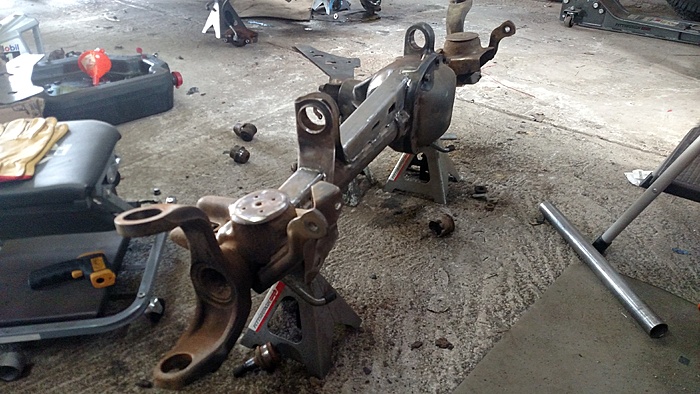
Of course the one socket I don't have is the one I need for the lower ball joint nuts so the knuckles will have to wait until later.
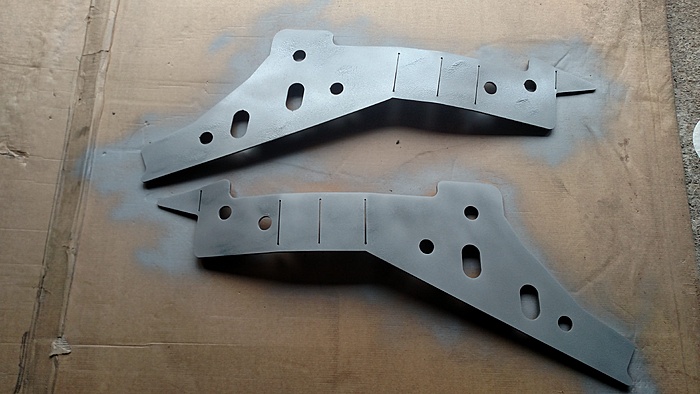
Held the jcr frame rail stiffeners up and to make sure that they are in fact precut to clear my bumper tie ins. That is the biggest reason I went with jcr for the front. I have HD for mid and rear, but the fronts would have required additional cutting to clear. One nice thing about HD is that I have a couple 1/4" spacers left over from the shackle bracket install that happen to be almost perfect for lca skids. A little bit of grinding on a couple corners is all the need to fit.
While in the process of pulling the axle I did go ahead and throw one of the gamblers on that is still wrapped in the 31x10.5 tire it came with to actually measure for bump stops. Turns out I only need 2" of stop to avoid rubbing. My stock stops have fallen apart so I'll be going a little back woods and just bolt a couple of hockey pucks to the spring plates. I also verified that I am shock limited even on stock arms.
At any rate the axle is out and mostly stripped. Jcr baby truss is mocked up and the axle cleaned off for welding.

Of course the one socket I don't have is the one I need for the lower ball joint nuts so the knuckles will have to wait until later.
Held the jcr frame rail stiffeners up and to make sure that they are in fact precut to clear my bumper tie ins. That is the biggest reason I went with jcr for the front. I have HD for mid and rear, but the fronts would have required additional cutting to clear. One nice thing about HD is that I have a couple 1/4" spacers left over from the shackle bracket install that happen to be almost perfect for lca skids. A little bit of grinding on a couple corners is all the need to fit.
Thread Starter
Member
Joined: Jun 2017
Posts: 107
Likes: 0
Year: 2001
Model: Cherokee(XJ)
Engine: 4.0
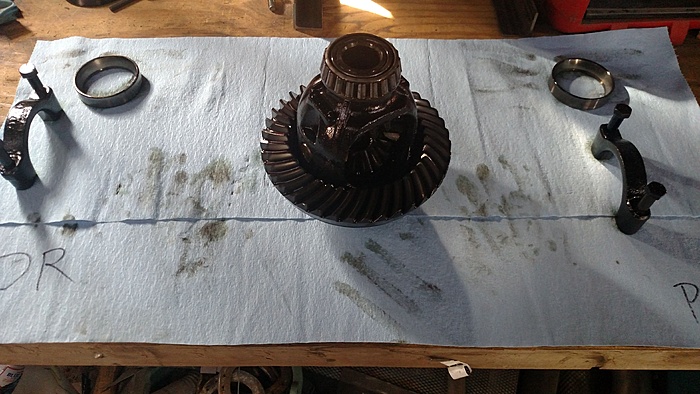
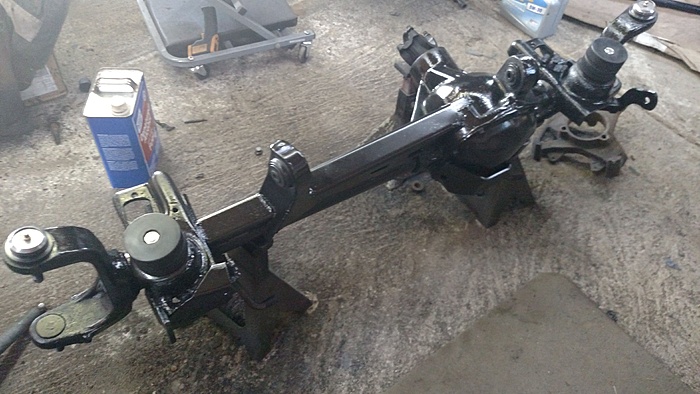
Slowly progressing through the build. Exteior of the axle is pretty much finished.
Bushings and ball joints didn't turn out to be nearly as bad to replace as I had been expecting. Just have to be a little creative with the rentable tool.

Control arm skids and upper mount boxing done.
Out for locker install which I hope to get to this afternoon.
With everything finally out of the way I got to marking for the stiffeners.

Bushings and ball joints didn't turn out to be nearly as bad to replace as I had been expecting. Just have to be a little creative with the rentable tool.

Control arm skids and upper mount boxing done.

Out for locker install which I hope to get to this afternoon.

With everything finally out of the way I got to marking for the stiffeners.
Thread Starter
Member
Joined: Jun 2017
Posts: 107
Likes: 0
Year: 2001
Model: Cherokee(XJ)
Engine: 4.0
Axle is finally done, until it goes back under the xj anyway. While in the process of replacing my inner axle seals I found something interesting.

That is a nicely formed RTV o ring. I will say it seemed to be doing a good job, these seals weren't leaking, but since it was possible that I cooked one of the seals when welding on the truss I replaced them anyway.
Locker install itself was pretty simple. Hardest part was driving the new cross pin back in.
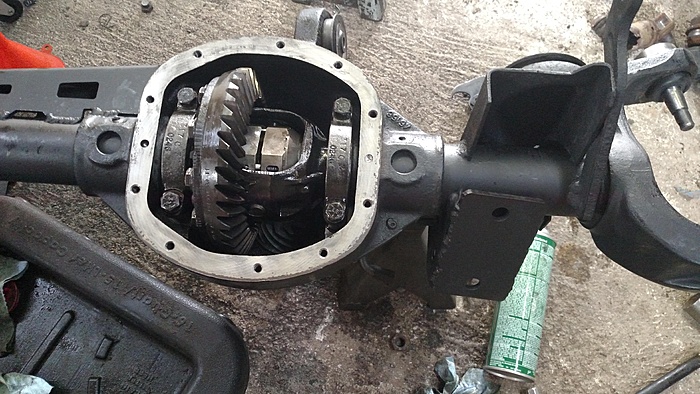
D30 now with more beef.
No after pics here, but frame rail stiffeners are in. Here they are with a nice heaping of weld-thru primer.

Gonna try to get out there at lunch to seal up the seams so all that will be left is the rear main/oil pan gasket before the axle goes back in and I wrap this phase.
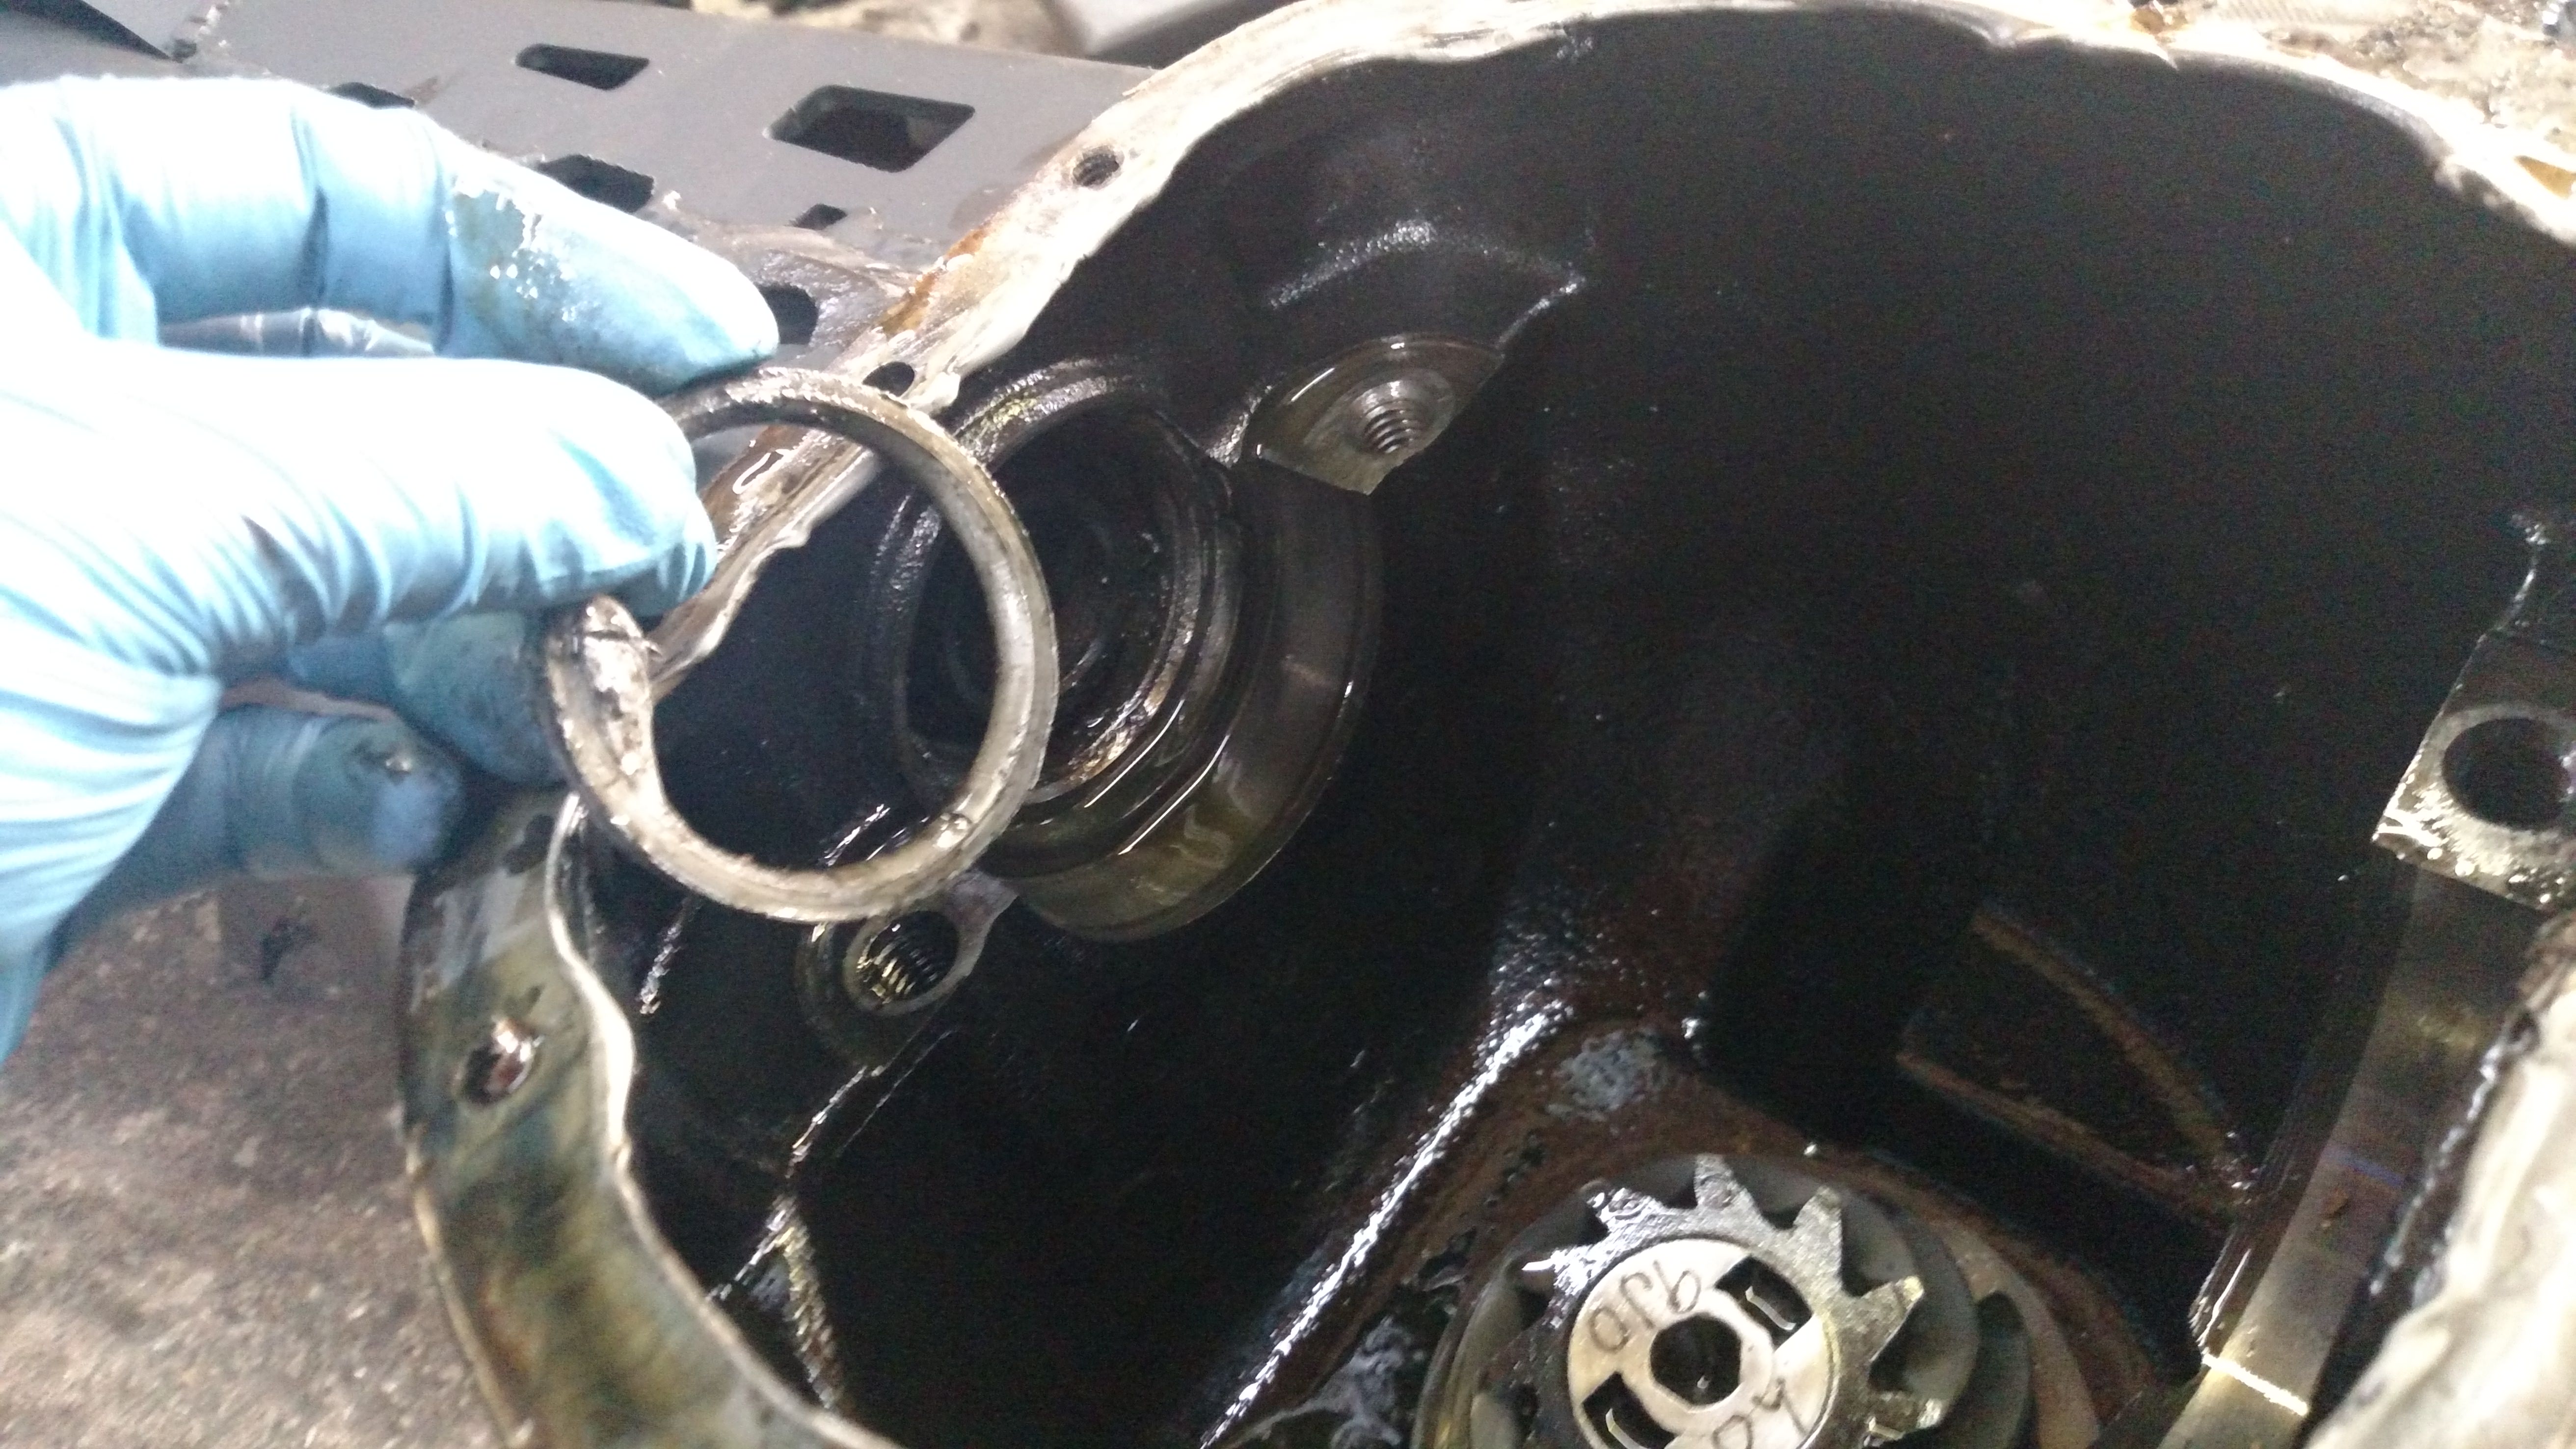
That is a nicely formed RTV o ring. I will say it seemed to be doing a good job, these seals weren't leaking, but since it was possible that I cooked one of the seals when welding on the truss I replaced them anyway.
Locker install itself was pretty simple. Hardest part was driving the new cross pin back in.

D30 now with more beef.

No after pics here, but frame rail stiffeners are in. Here they are with a nice heaping of weld-thru primer.


Gonna try to get out there at lunch to seal up the seams so all that will be left is the rear main/oil pan gasket before the axle goes back in and I wrap this phase.
Thread Starter
Member
Joined: Jun 2017
Posts: 107
Likes: 0
Year: 2001
Model: Cherokee(XJ)
Engine: 4.0
Big goopy mess, but seam sealing is done.
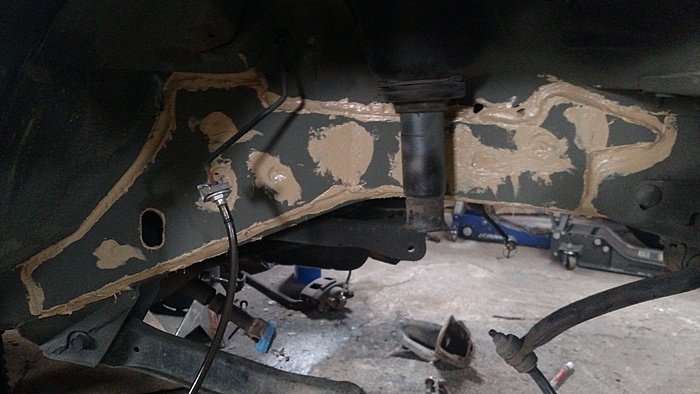
Rear main and oil pan gasket are also done. What a pain in the *** that was. Not many pictures of this because, well I got very dirty so wasn't gonna reach for my phone. I did however snag a pic of the rear lower bearing.
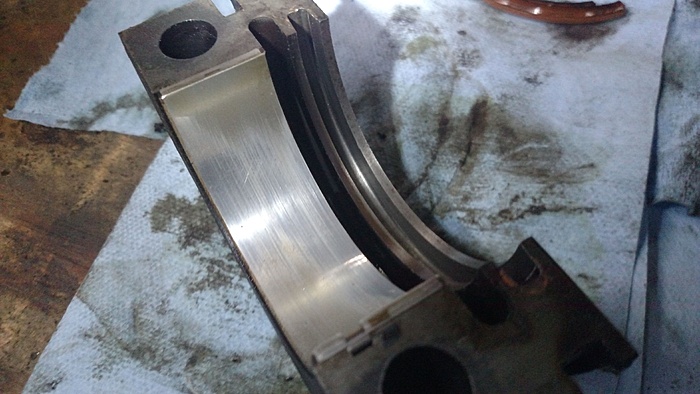
Considering it's a 200k motor with unknown history it seems ok. The rod bearings are definitely a bit loose, got a bit of play fore and aft on all 6, but this is why I have a spare waiting to get rebuilt. Otherwise everything looks pretty good. All my pistons still have skirts and my cam still has lobes, so winning in my book.
Thread Starter
Member
Joined: Jun 2017
Posts: 107
Likes: 0
Year: 2001
Model: Cherokee(XJ)
Engine: 4.0
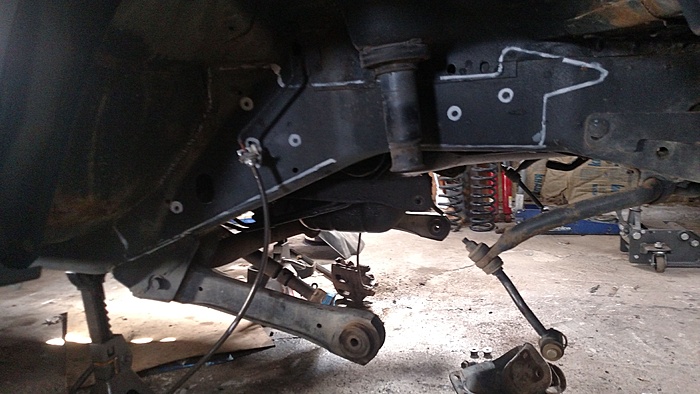
Well I was really hoping to have the axle back in last night, but after having to modify my track bar mount to fit around the frame rail stiffener and having to make a new stud plate for the same I ran out of time. I am however torquing 4 bolts away from putting the axle back under.
I'm a little sad that the guys over at IRO didn't consider that people might be running stiffeners. This meant that I had to notch the lower mounting holes since it now sits a bit farther outboard than it would have otherwise. I'm less surprised that the original stud plate that goes through the frame rail wasn't long enough to get proper thread engagement.
Made myself some hillbilly bump stops.
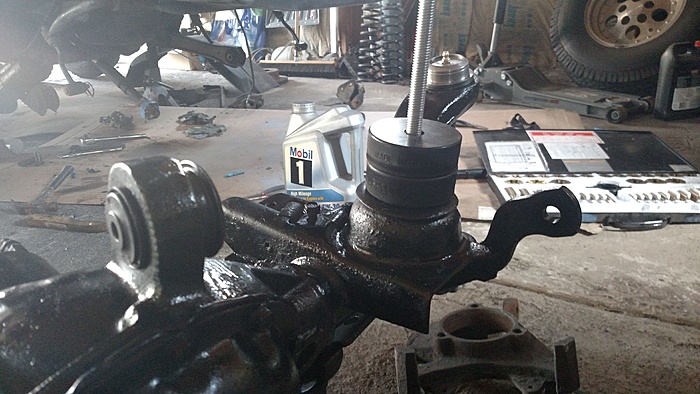
Then finally got the new arms set to a base length, starting at the stock eye to eye length and will adjust as needed, before loosely bolting them in.
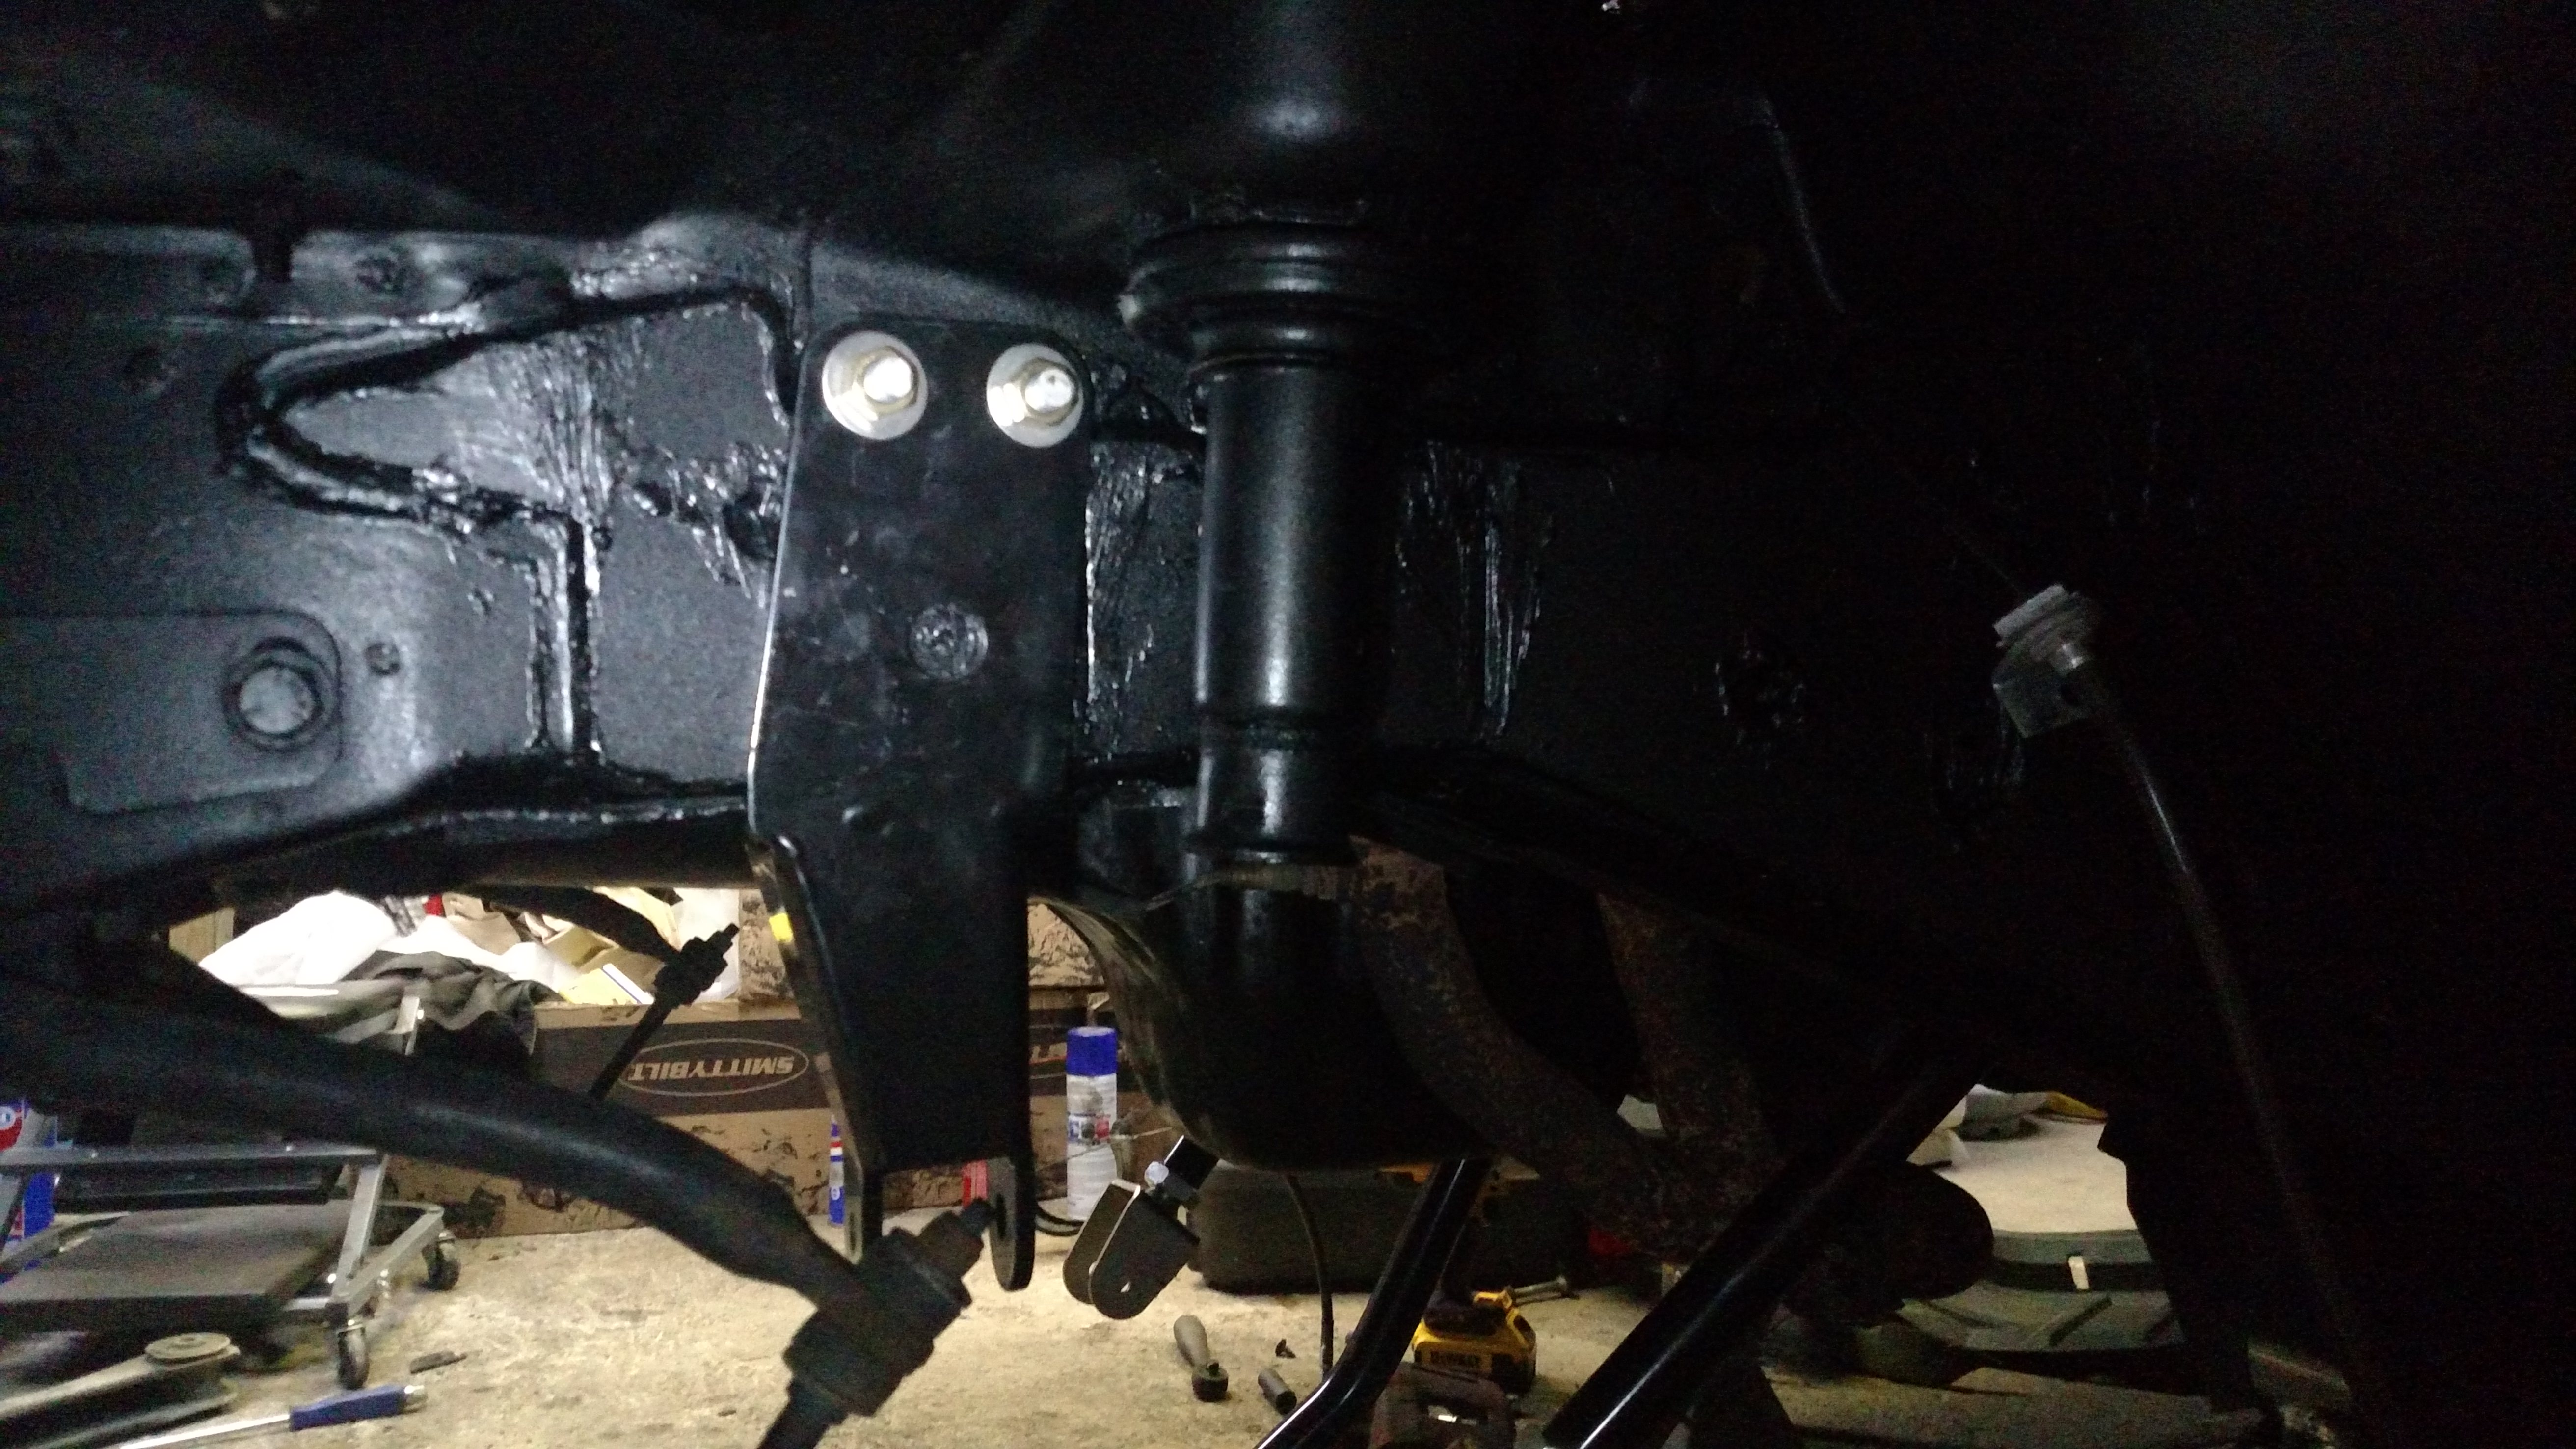
I'm a little sad that the guys over at IRO didn't consider that people might be running stiffeners. This meant that I had to notch the lower mounting holes since it now sits a bit farther outboard than it would have otherwise. I'm less surprised that the original stud plate that goes through the frame rail wasn't long enough to get proper thread engagement.
Made myself some hillbilly bump stops.


Then finally got the new arms set to a base length, starting at the stock eye to eye length and will adjust as needed, before loosely bolting them in.

Thread Starter
Member
Joined: Jun 2017
Posts: 107
Likes: 0
Year: 2001
Model: Cherokee(XJ)
Engine: 4.0
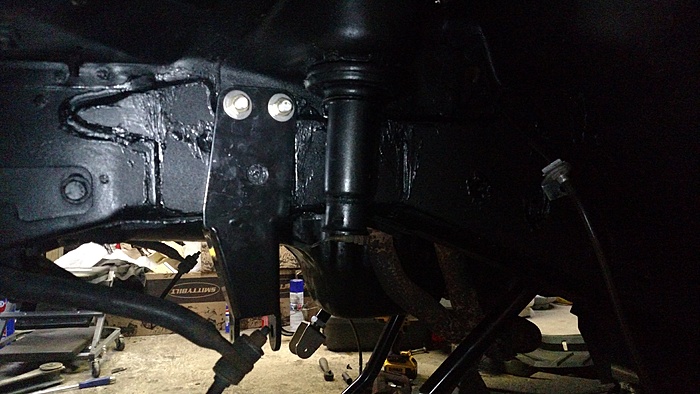
Not a lot of pictures here since I was focused on getting this back together now that both of my other vehicles are broken. It's back on the ground though and has a super dead battery so back on the ground was as far as I got.
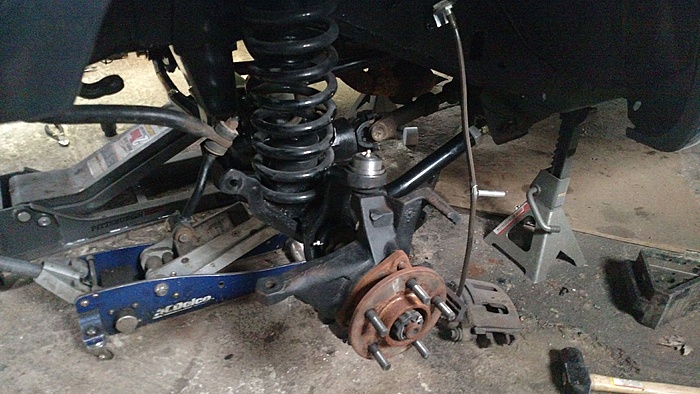
Here is an in progress pic.
Nothing really special or out of the ordinary on reassembly.
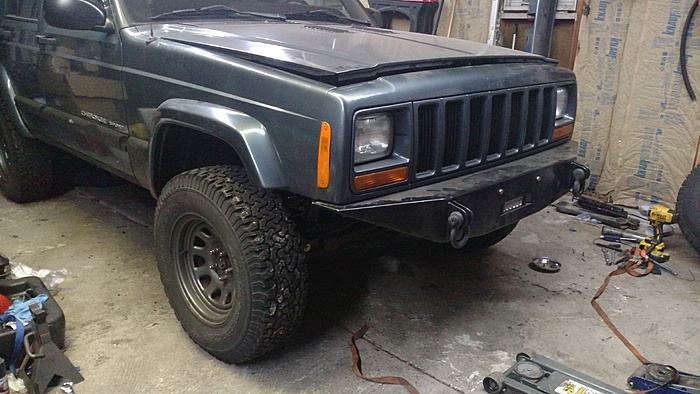
Back on the ground.
Just need to jump it and make sure it isn't pissing oil then take it for a test drive. Sadly there isn't any place close to properly test the locker.
Here is an in progress pic.

Nothing really special or out of the ordinary on reassembly.
Back on the ground.

Just need to jump it and make sure it isn't pissing oil then take it for a test drive. Sadly there isn't any place close to properly test the locker.
Thread Starter
Member
Joined: Jun 2017
Posts: 107
Likes: 0
Year: 2001
Model: Cherokee(XJ)
Engine: 4.0
Test drive completed and everything thing seems to be in order. I am a little concerned about how much quieter it is running now. Nothing I did should have affected that.
Thread Starter
Member
Joined: Jun 2017
Posts: 107
Likes: 0
Year: 2001
Model: Cherokee(XJ)
Engine: 4.0
That's the only part of the process that makes any sense, but short of the rear cap being loose or re-torquing the girdle tightening up the rest of the caps it doesn't make seem logical. For now I'll continue not looking the gift horse in the mouth.

CF Veteran
Joined: Oct 2017
Posts: 1,382
Likes: 4
Model: Cherokee
Interesting to say the least but hey if your vitals check out and no signs of any thing going wrong then just continue putting gas through it

Senior Member
Joined: Feb 2018
Posts: 534
Likes: 2
From: Kentucky
Year: 1999
Model: Cherokee(XJ)
Engine: 4.0L I-6
So, did you tighten all of the rod caps before you put the girdle back on? I'm getting ready to do my main bearing seal and pan gasket. So it was rough even with the axle out? I'm going to be doing it with the axle still in!!!
Thread Starter
Member
Joined: Jun 2017
Posts: 107
Likes: 0
Year: 2001
Model: Cherokee(XJ)
Engine: 4.0
Only cap I torqued was the rear one I removed, probably would have been a decent idea to at least check the torque on all of them...
The hardest part of the job was getting the upper half of the rear main in. It takes patience and callused fingers wouldn't hurt either. Otherwise it is just finicky. I did pull the starter as well since the pan was hanging up on it when I was trying to put it back in.
The hardest part of the job was getting the upper half of the rear main in. It takes patience and callused fingers wouldn't hurt either. Otherwise it is just finicky. I did pull the starter as well since the pan was hanging up on it when I was trying to put it back in.
Thread Starter
Member
Joined: Jun 2017
Posts: 107
Likes: 0
Year: 2001
Model: Cherokee(XJ)
Engine: 4.0
Not a whole lot going on with the xj for now. I did stop being lazy and got around to swapping injectors.
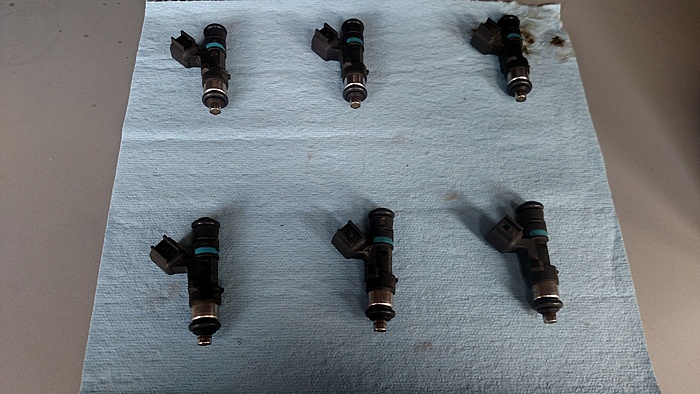
These are the stock injectors from my mustang that I've had sitting in a box in the corner for years. Before I started I thought they were closer in physical size than they actually ended up being so this wasn't quite as bolt in as I had hoped. I had to get a little creative bending up some tabs to hold down the fuel rail, but they're in there now.
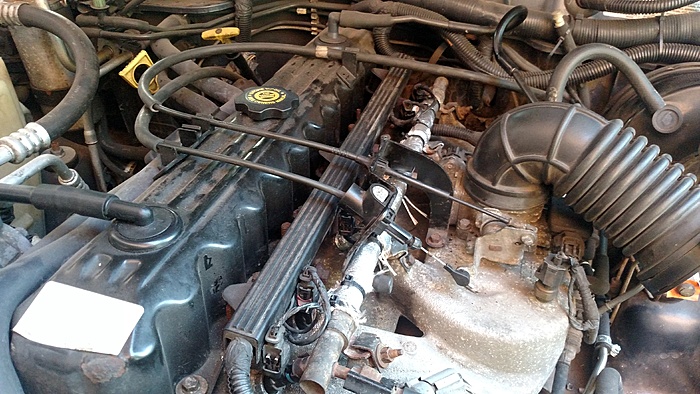
Also had some reflective insulation laying around from another project so added some to the rail and #3 and #4 injectors.
While I was in there I decided I'd go ahead and start getting a feel for what I'd need to do to get my second battery tray in.
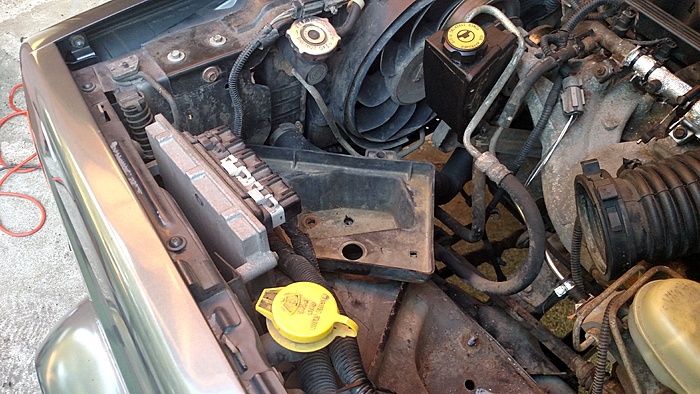
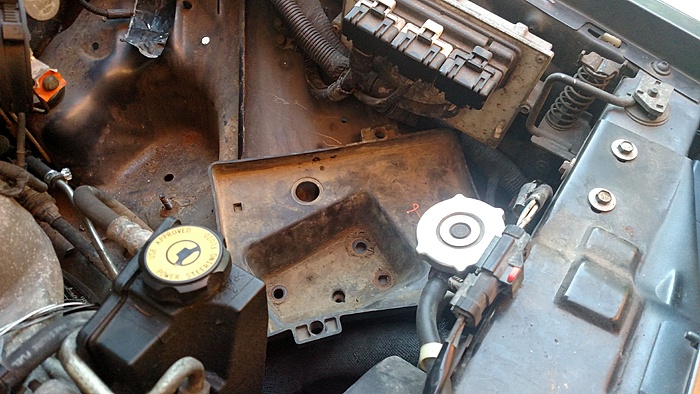
I knew from other write ups that the ecu would need to get flipped out of the way, but it kinda looked to me like there may be some clearance issues around the power steering res as well.
Last edited by indianaXJones; May 23, 2018 at 07:46 AM.