Another DD XJ Build
 02-21-2018, 02:08 PM
#1
Member
Thread Starter

Join Date: Jun 2017
Posts: 107
Likes: 0
Received 0 Likes
on
0 Posts
Year: 2001
Model: Cherokee(XJ)
Engine: 4.0
Hey all. Been lurking for a while, but now that I'm actually getting into a real build up of my XJ I figured it was time to start a thread for it. I'll also use this as my introduction since I'm not much of a forum poster and see no reason to create a bunch of threads.
A bit about me. I'm a life long car guy with a tendency of not knowing when to leave things alone. As a result I've ended up building a V6 Mustang to be a turny car with some boost to make up for the lack of power and an old Datsun pickup with an engine swap and boost to make it dumb. Then one day after selling my last daily driver I decided to try something new and go after an old flame with an XJ.
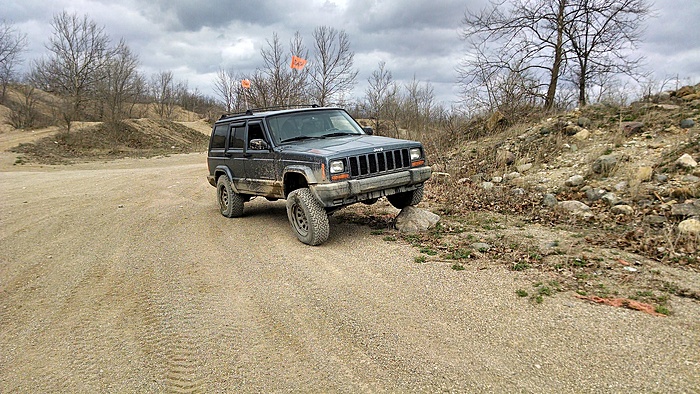
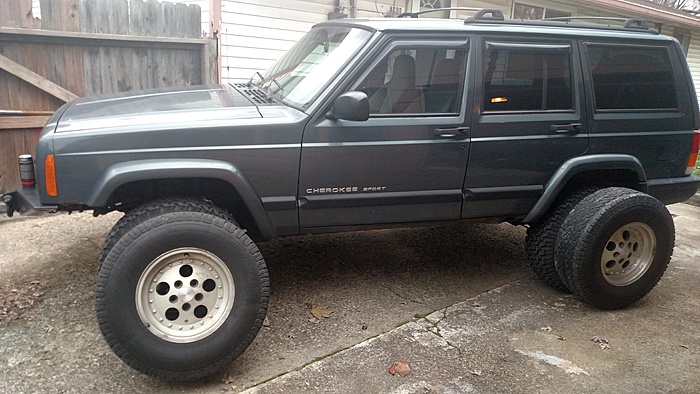
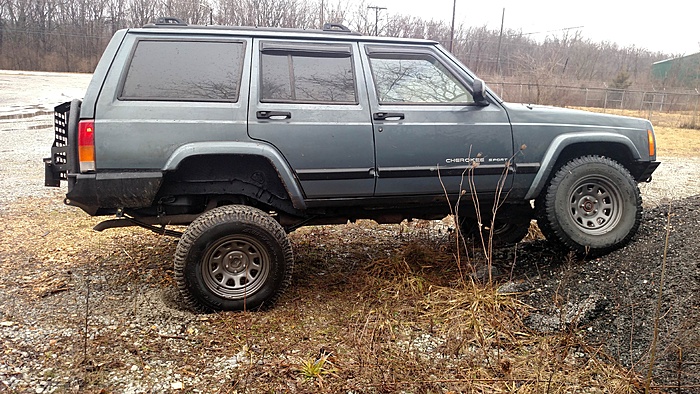
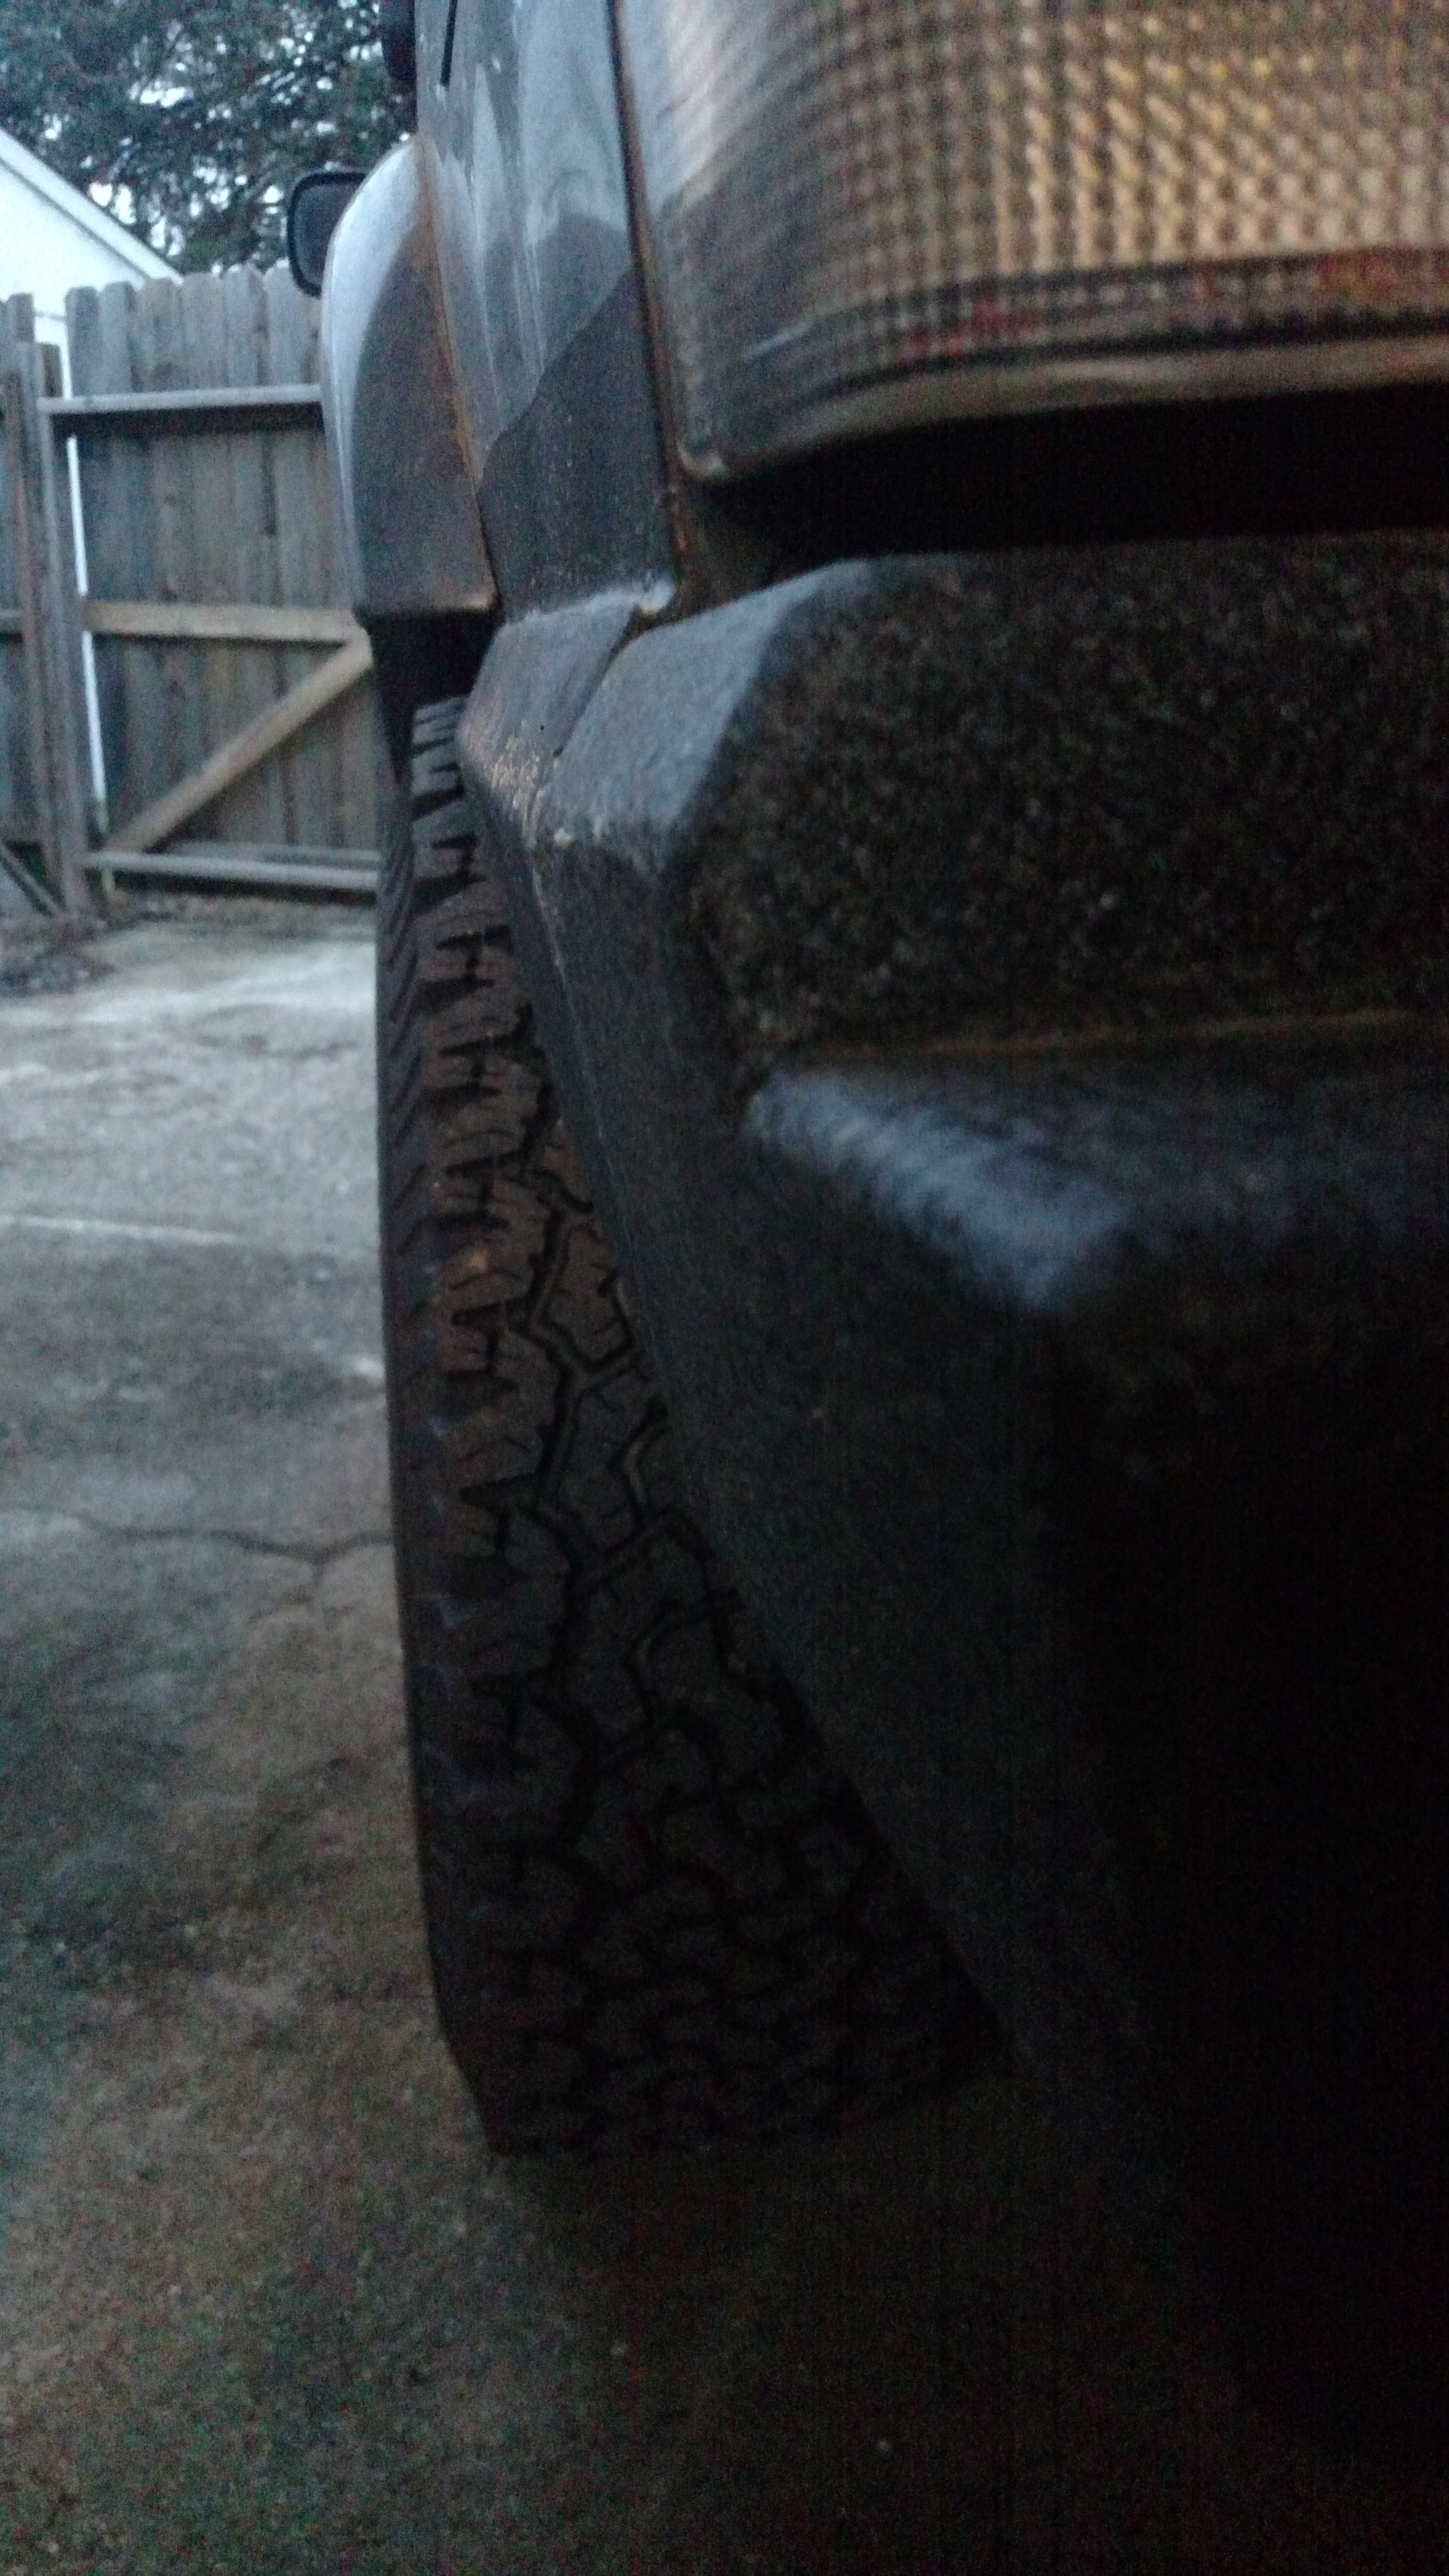
A little over a year ago I picked up an '01 sport with about 180k on the clock and mostly stock other than sagging AAL and spacers up front with some 30" KOs wrapped around some D windows.
Roughly how she sat when I got her.
Initially I caught it up on some maintenance and swapped the old AALs and spacers for new packs and coils (2.5") as well as throwing on an adjustable track bar and ZJ tierod.
That brings me to now where I have an actual build planned, and as it happens started. My plan is 3 phases of build with some mini projects sprinkled in between. I'm just wrapping up phase one, so its highlights will be condensed in the few posts to follow, but the plan is listed below.
Phase 1
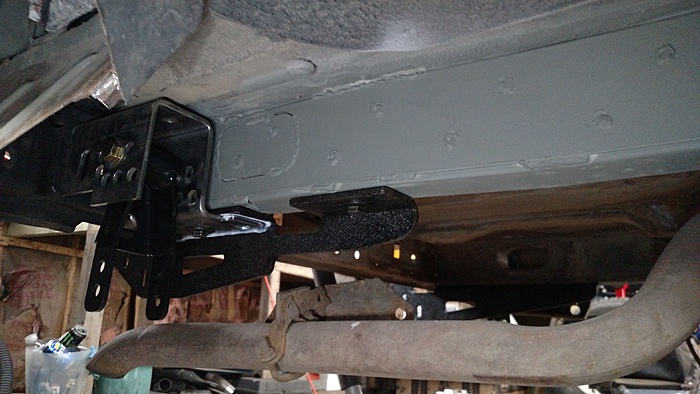
- Rear frame rail stiffeners
- No lift shackle relocation boxes
- Bumper/tire carrier
- Clean and paint the underside of the rear section
- Extended brake line
Phase 2
- Mid section frame rail stiffeners
- replace rocker panels
- Patch floor pans
- Sound deadening
- Clean/paint
Phase 3
- Front frame rail stiffeners
- Short arms
- Front locker
- Axle seals
- Paint all of the tings
- Extended brake lines
Long term plan is to make this into a capable overlanding rig that can double as a mild/moderate wheeling toy. As part of that goal there will be several other mods not listed in the above phases, mostly because they shouldn't actually require the xj be removed from service to do them. These other mods include, but are not limited to, dual battery, roof rack and removable sleeping platform.
A bit about me. I'm a life long car guy with a tendency of not knowing when to leave things alone. As a result I've ended up building a V6 Mustang to be a turny car with some boost to make up for the lack of power and an old Datsun pickup with an engine swap and boost to make it dumb. Then one day after selling my last daily driver I decided to try something new and go after an old flame with an XJ.
A little over a year ago I picked up an '01 sport with about 180k on the clock and mostly stock other than sagging AAL and spacers up front with some 30" KOs wrapped around some D windows.
Roughly how she sat when I got her.

Initially I caught it up on some maintenance and swapped the old AALs and spacers for new packs and coils (2.5") as well as throwing on an adjustable track bar and ZJ tierod.
That brings me to now where I have an actual build planned, and as it happens started. My plan is 3 phases of build with some mini projects sprinkled in between. I'm just wrapping up phase one, so its highlights will be condensed in the few posts to follow, but the plan is listed below.
Phase 1
- Rear frame rail stiffeners
- No lift shackle relocation boxes
- Bumper/tire carrier
- Clean and paint the underside of the rear section
- Extended brake line
Phase 2
- Mid section frame rail stiffeners
- replace rocker panels
- Patch floor pans
- Sound deadening
- Clean/paint
Phase 3
- Front frame rail stiffeners
- Short arms
- Front locker
- Axle seals
- Paint all of the tings
- Extended brake lines
Long term plan is to make this into a capable overlanding rig that can double as a mild/moderate wheeling toy. As part of that goal there will be several other mods not listed in the above phases, mostly because they shouldn't actually require the xj be removed from service to do them. These other mods include, but are not limited to, dual battery, roof rack and removable sleeping platform.
 02-21-2018, 02:24 PM
#2
Member
Thread Starter
Join Date: Jun 2017
Posts: 107
Likes: 0
Received 0 Likes
on
0 Posts
Year: 2001
Model: Cherokee(XJ)
Engine: 4.0
Phase 1 started out pretty light while I was waiting on some of the bigger parts to arrive.
Got the old busted steering spacer swapped out.
Put on some vents just in time for winter.

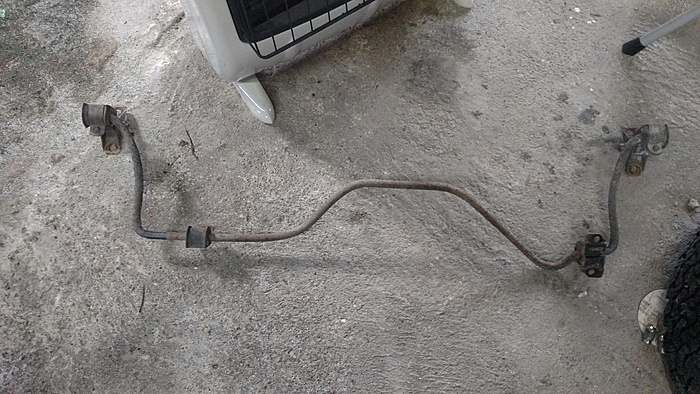
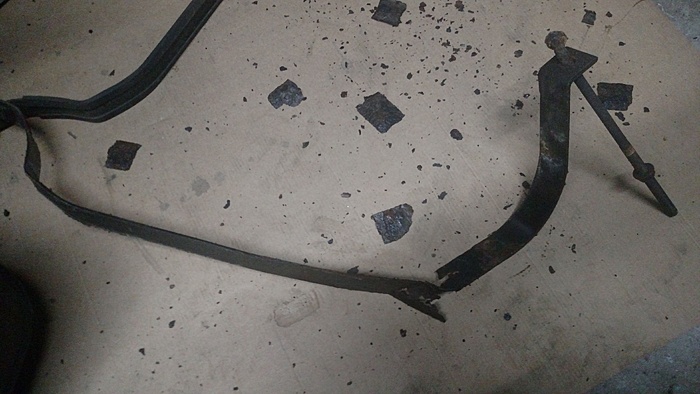
Pulled the rear sway and factory hitch.
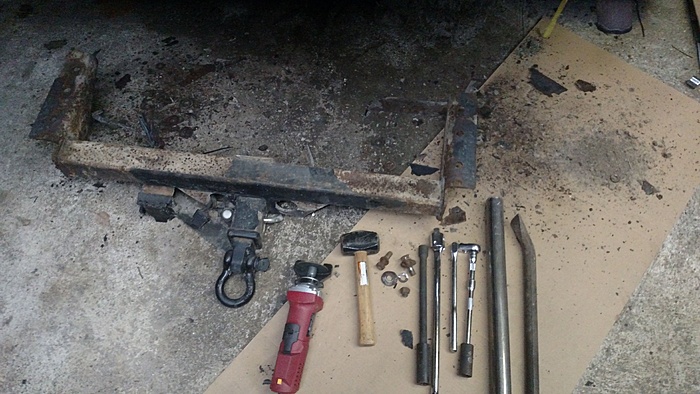
I was able to properly remove half of the hitch bolts, snapped 3 and had to cut one.
Then parts started rolling in.
Picked up a stand warmer with the intention of rebuilding and swapping in before a trip I'm planning for the fall.
And snagged a set of Gamblers to take over daily duty. The D windows will get wrapped in some 31s for trail duty.
Got the old busted steering spacer swapped out.

Put on some vents just in time for winter.

Pulled the rear sway and factory hitch.


I was able to properly remove half of the hitch bolts, snapped 3 and had to cut one.
Then parts started rolling in.


Picked up a stand warmer with the intention of rebuilding and swapping in before a trip I'm planning for the fall.

And snagged a set of Gamblers to take over daily duty. The D windows will get wrapped in some 31s for trail duty.
 02-21-2018, 02:55 PM
#4
Member
Thread Starter
Join Date: Jun 2017
Posts: 107
Likes: 0
Received 0 Likes
on
0 Posts
Year: 2001
Model: Cherokee(XJ)
Engine: 4.0
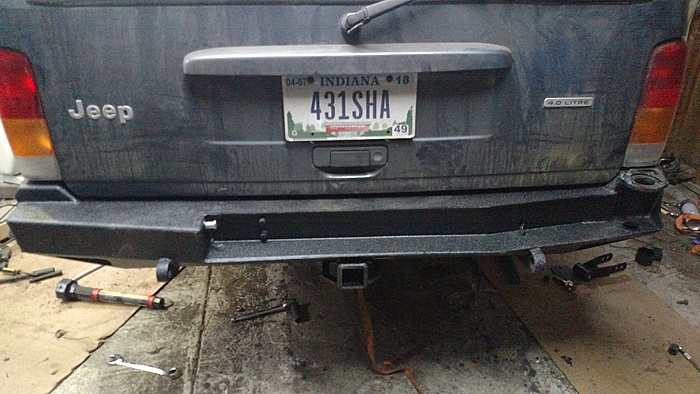
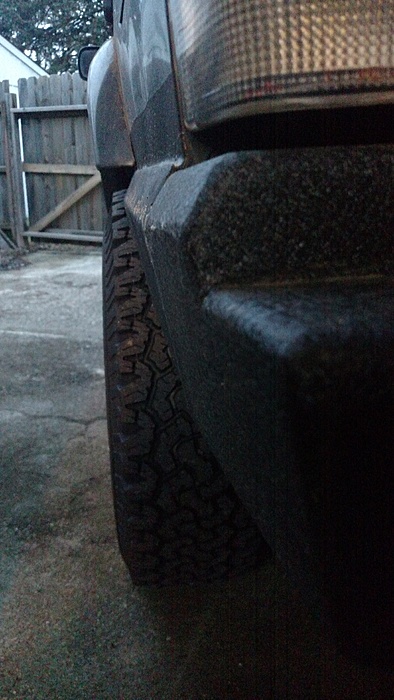
Time for the real fun to begin. First step was removing the old bumper and pulling the tank.
Zero ****s were given.
But what kind of a project would this be if there weren't some surprises?

I feel like the tank would have shortly removed itself.
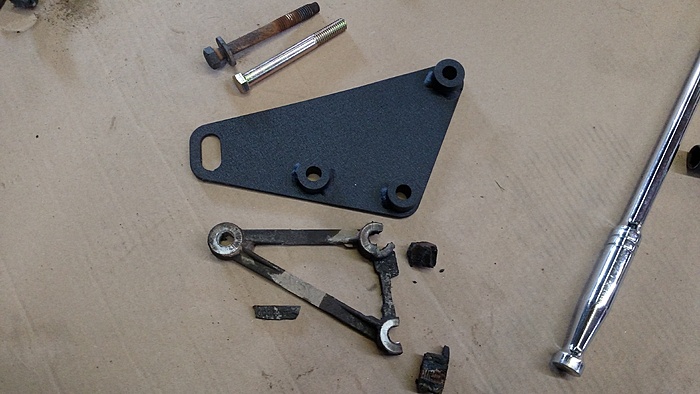
Cutting out the old shackle boxes revealed another surprise.
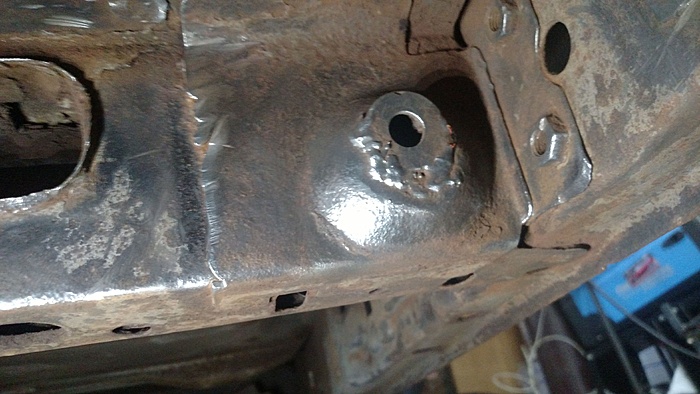
Seemed the PO had buggered up the old nut and replaced it with a washer to keep the bolt centered before welding the head of the bolt to the stock box. So that had to get cut out and replaced with a new captive nut and some new sheet metal.
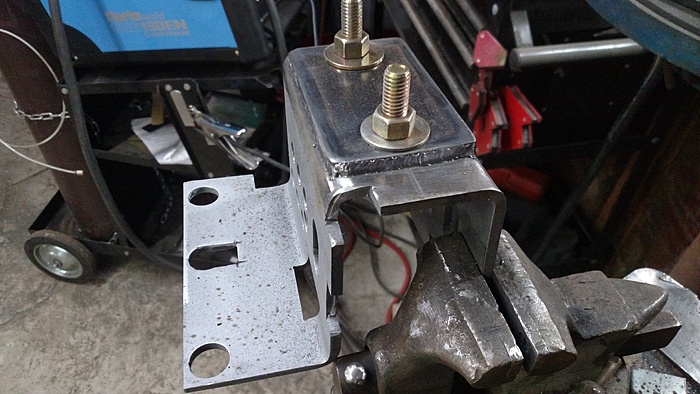
Moved on to a quick test feel of the new boxes and bumper brackets.
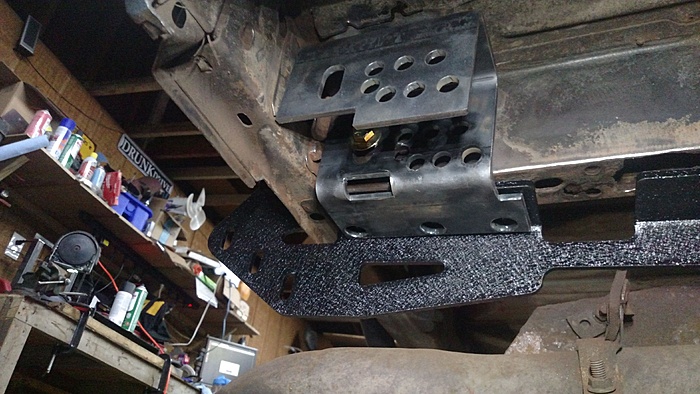
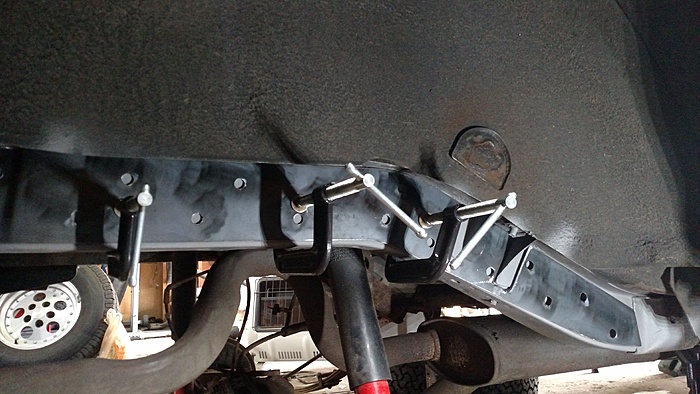
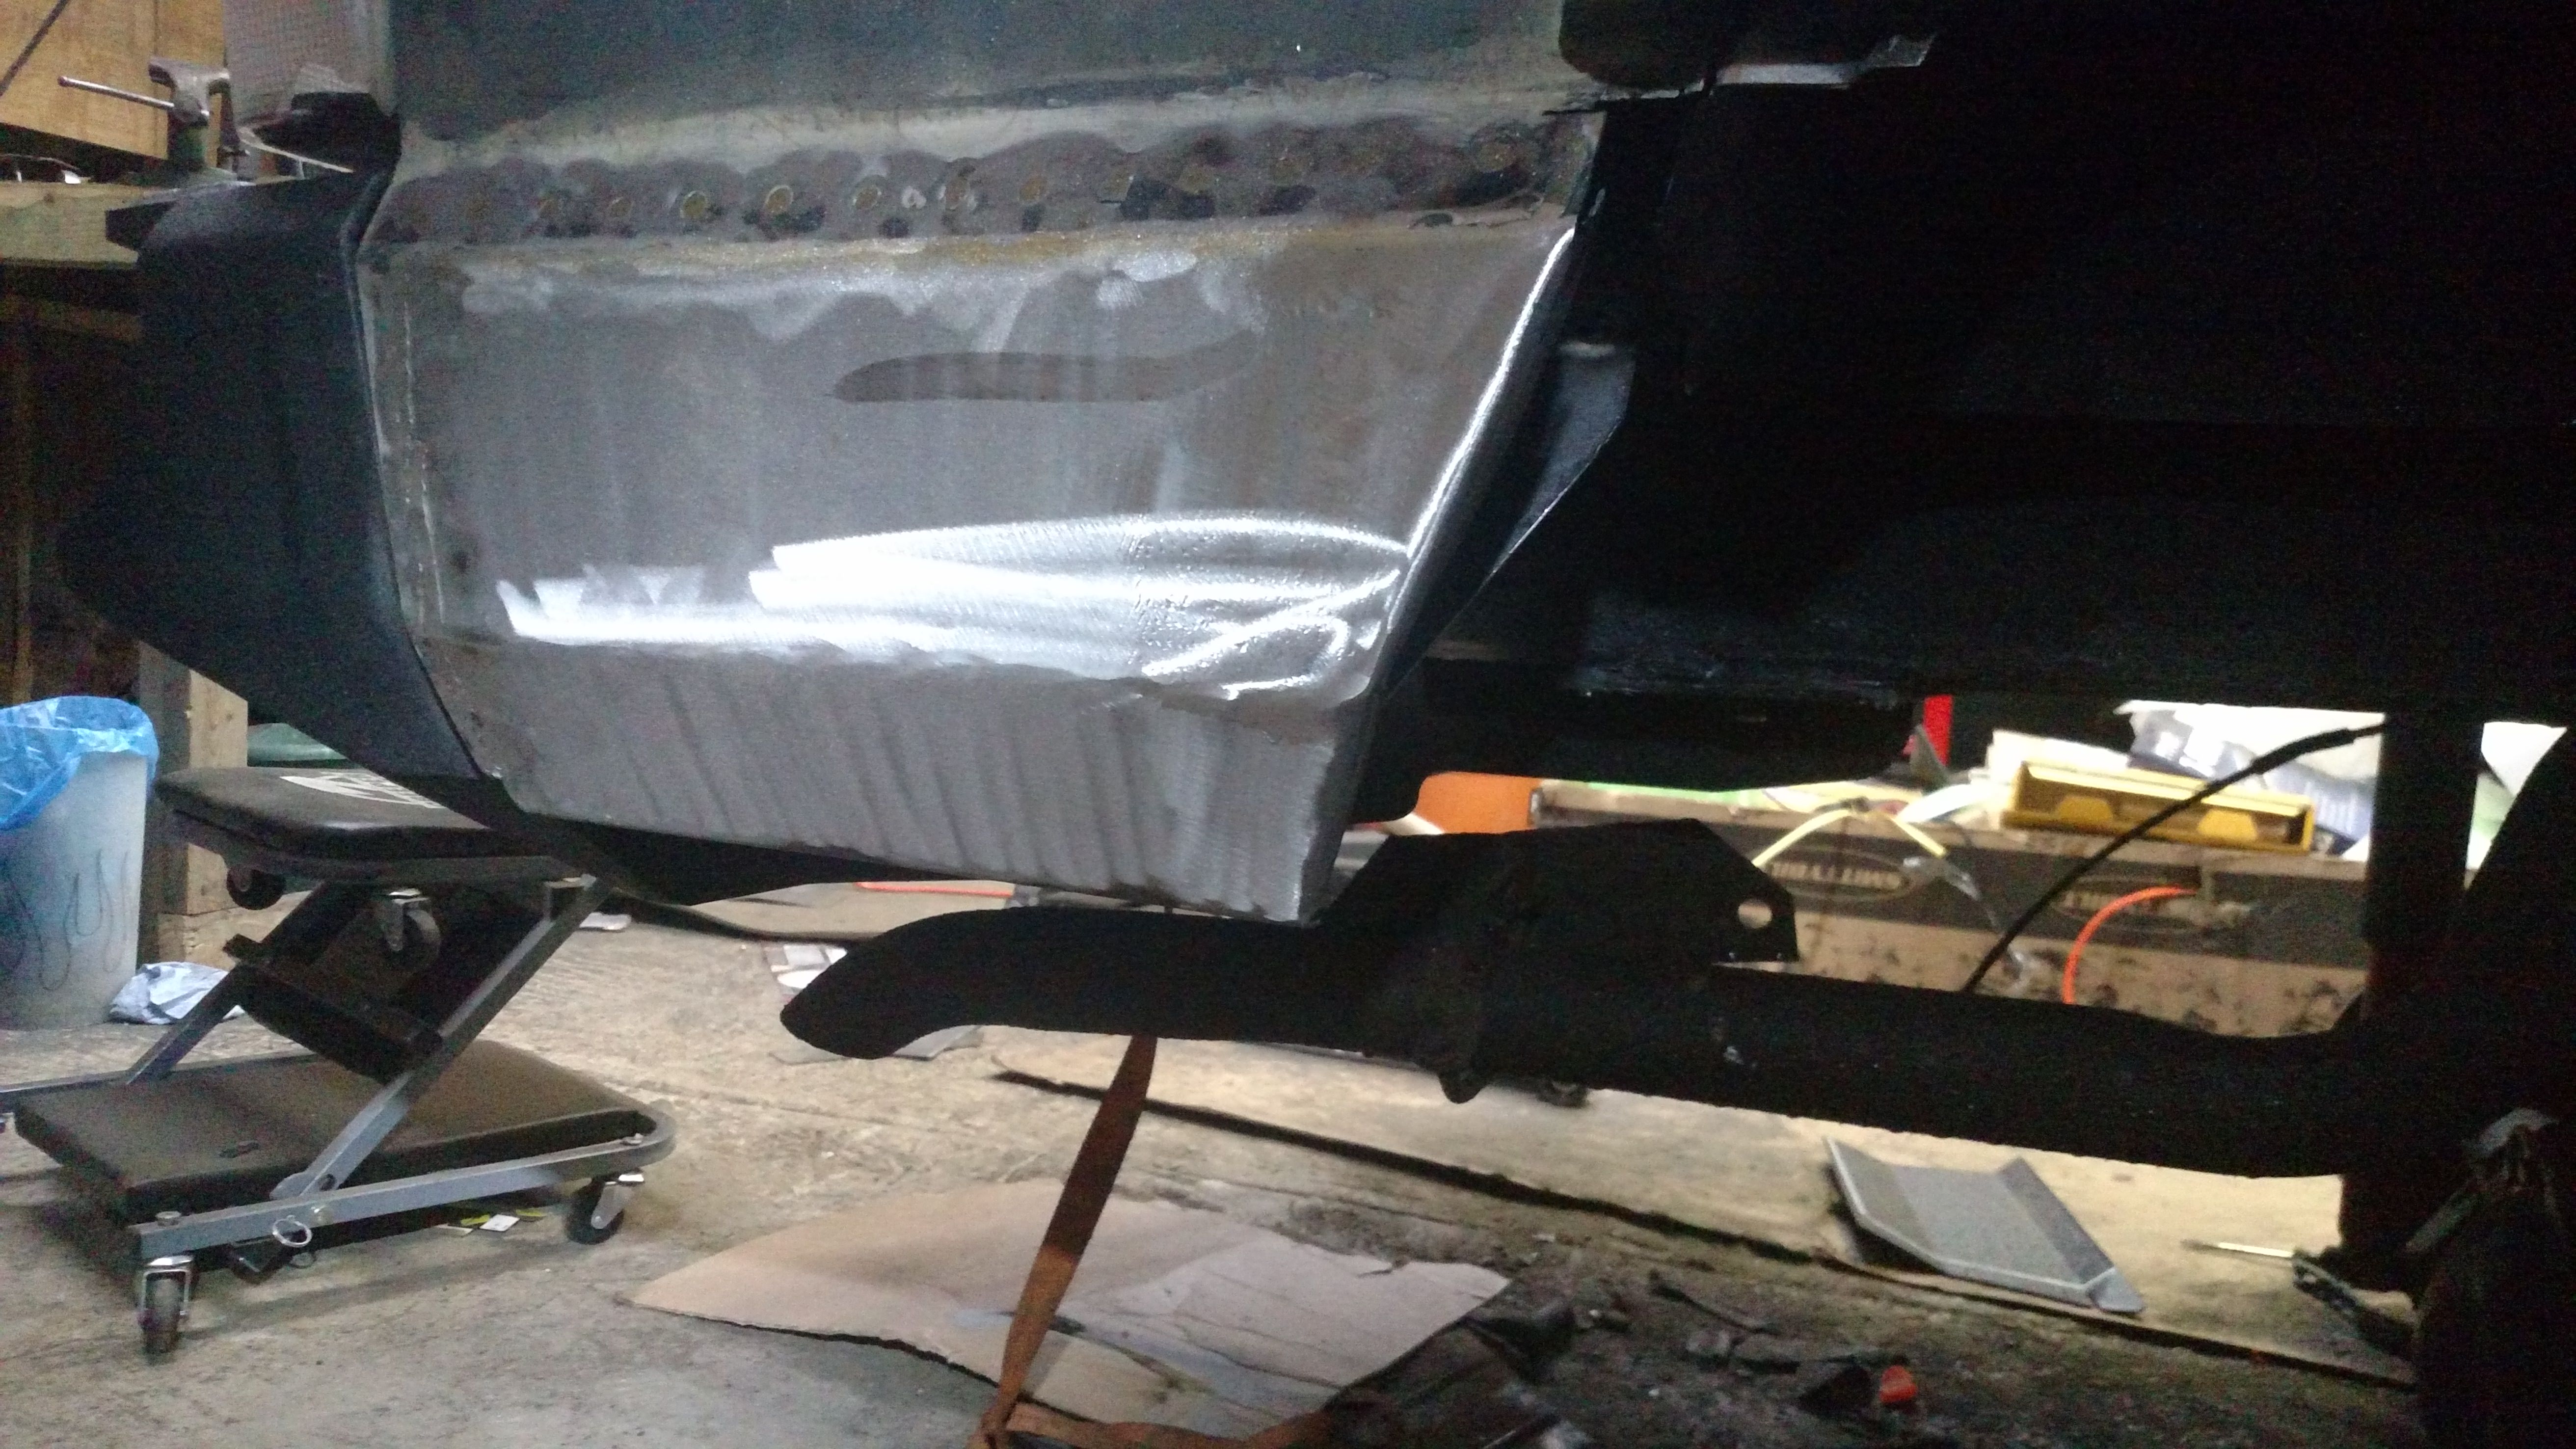
Getting the frame rail stiffeners burned in.
Spacer added to accommodate the added thickness of the bumper brackets.
In for a last test fit.
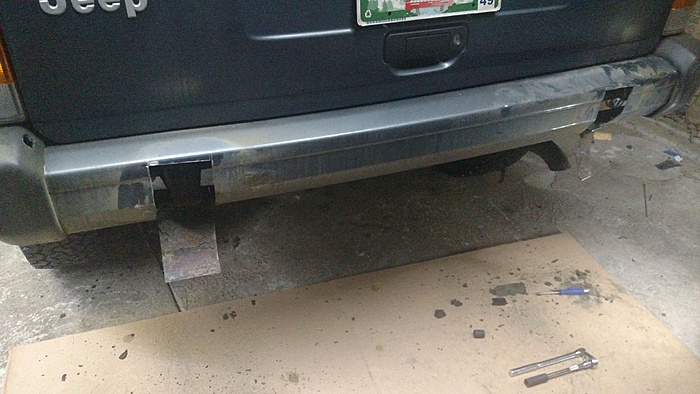
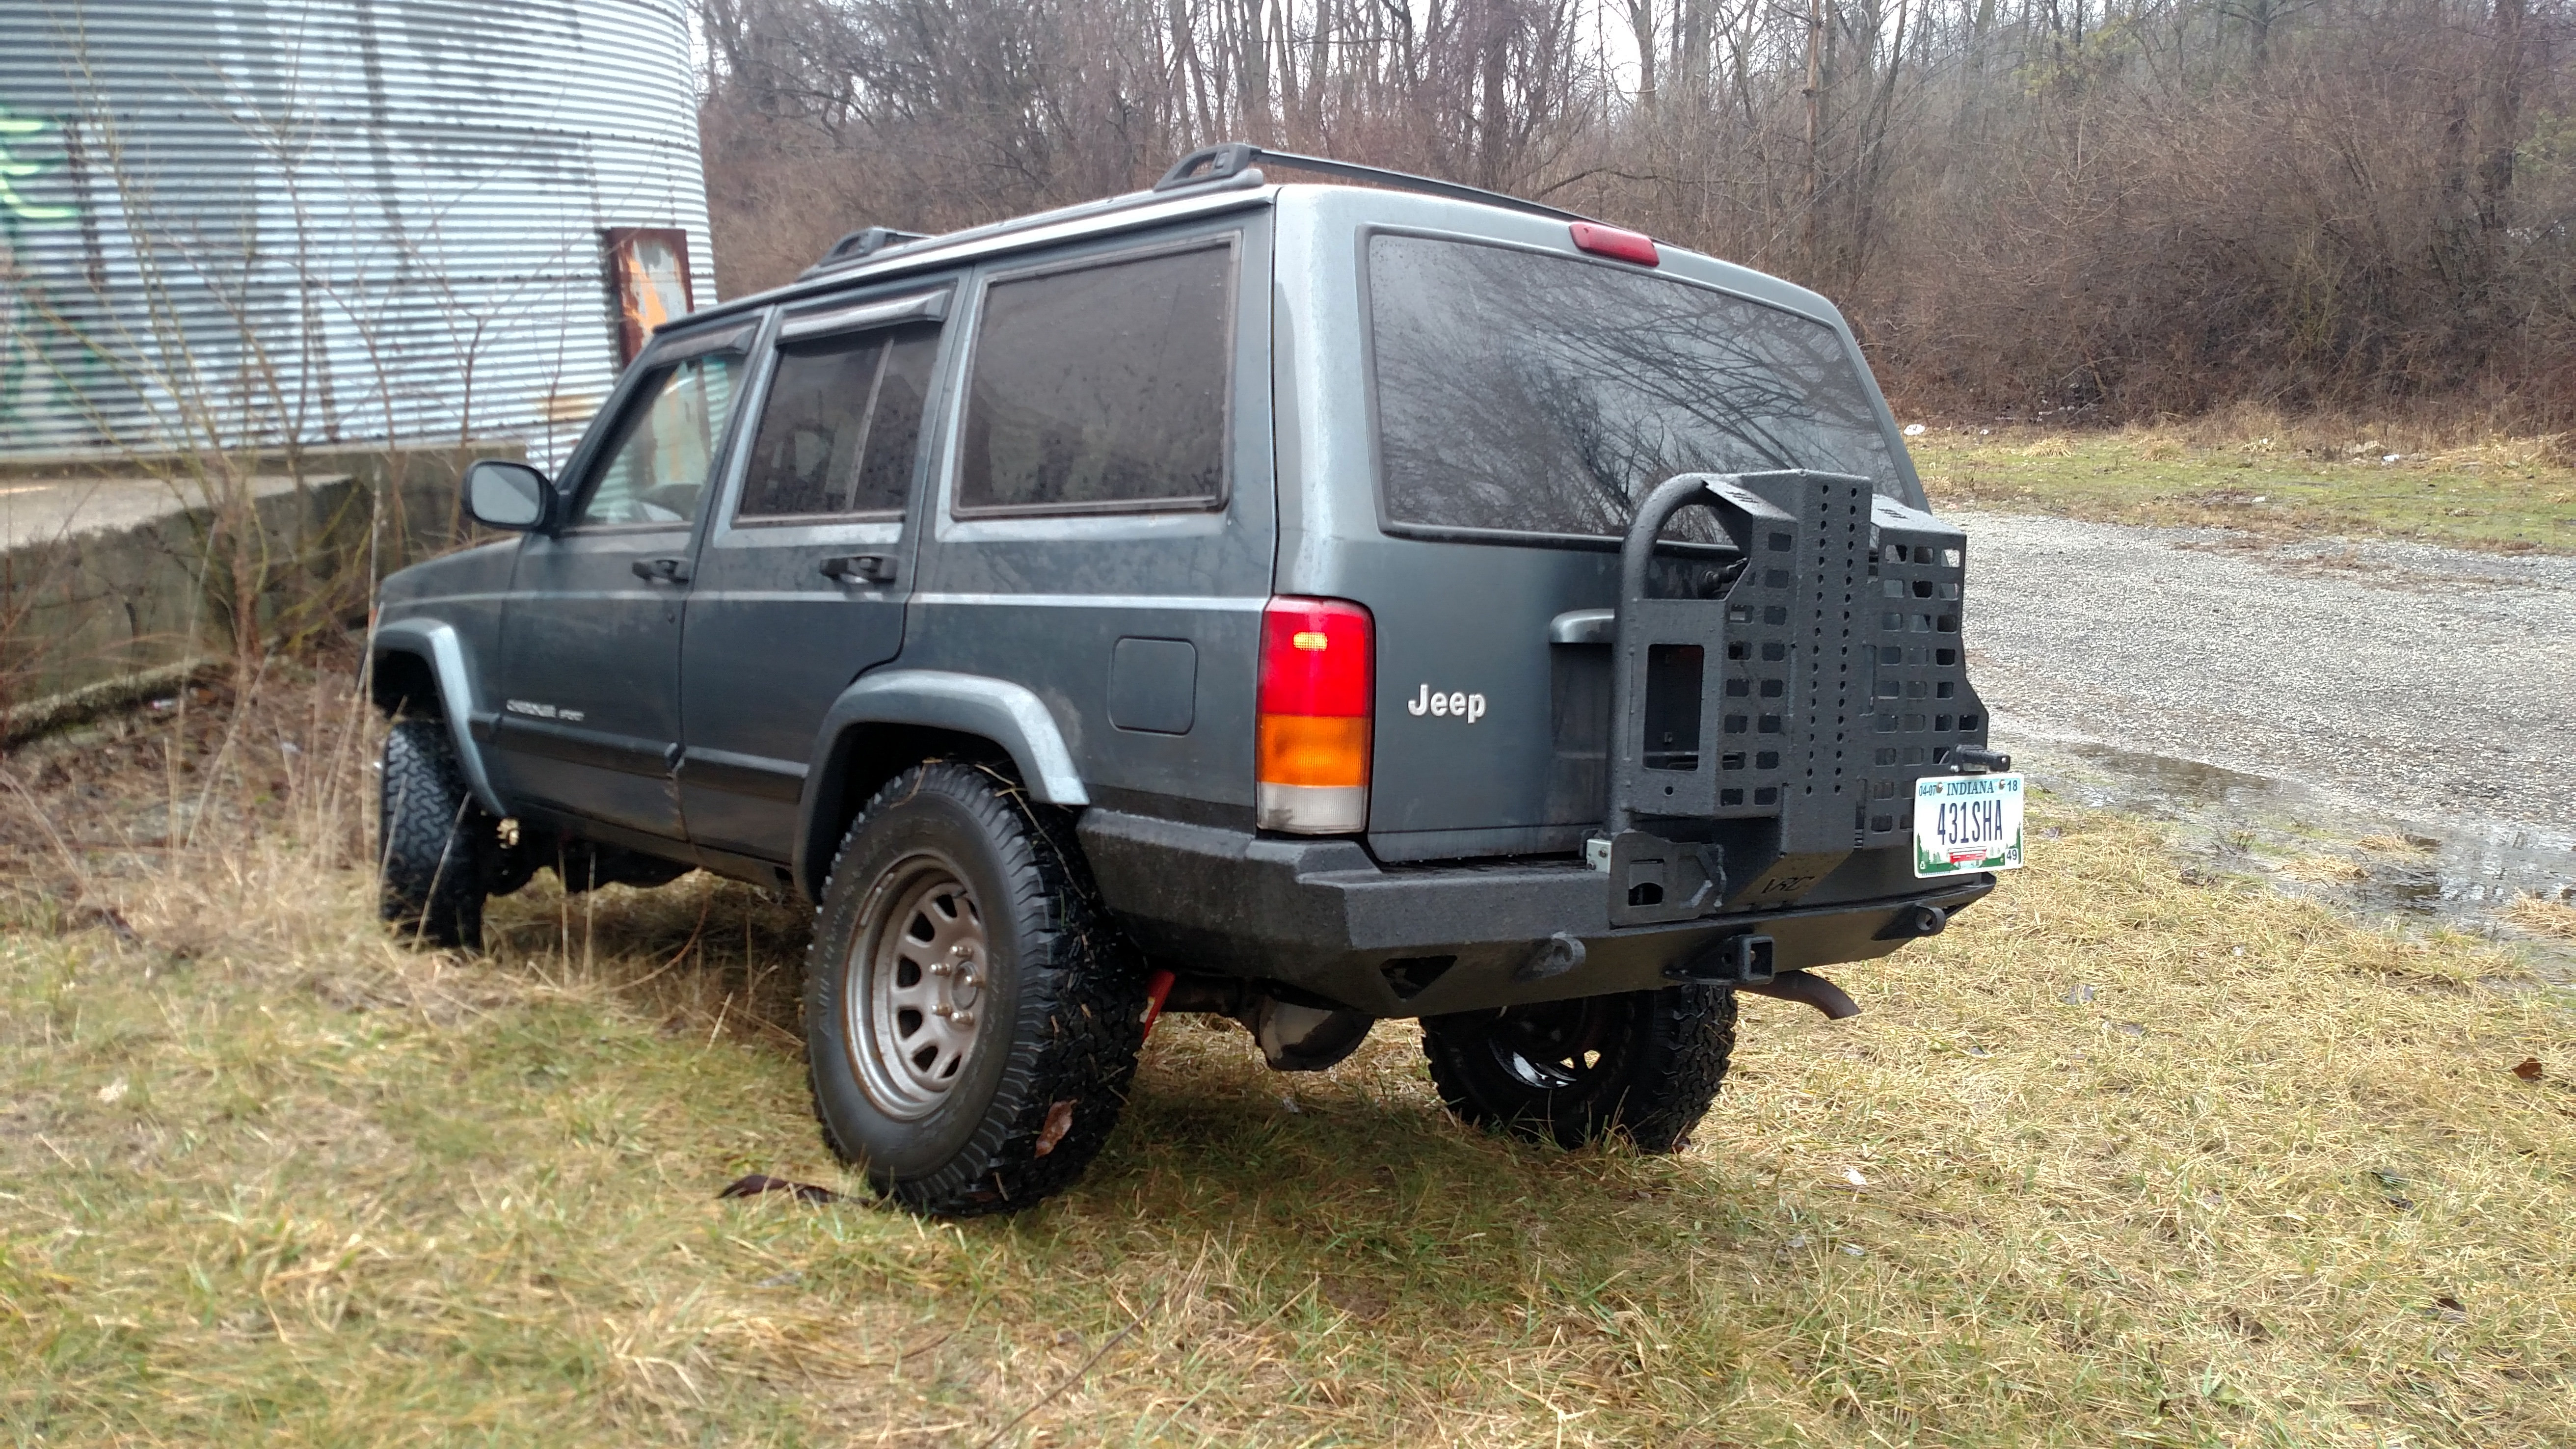
Bumper going on.
Then the tire carrier.
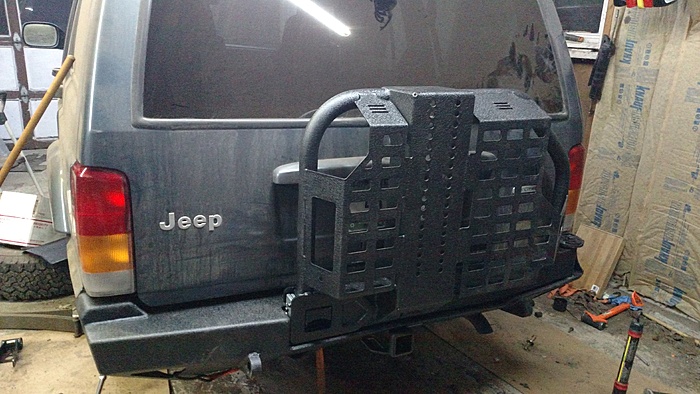
Despite the general low ratings this bumper receives, for the price its really hard to pass up. I will say that installation is a giant pain and the adjuster cam for the tire carrier sucks. Still for the money, its not terrible.
Zero ****s were given.

But what kind of a project would this be if there weren't some surprises?


I feel like the tank would have shortly removed itself.

Cutting out the old shackle boxes revealed another surprise.

Seemed the PO had buggered up the old nut and replaced it with a washer to keep the bolt centered before welding the head of the bolt to the stock box. So that had to get cut out and replaced with a new captive nut and some new sheet metal.
Moved on to a quick test feel of the new boxes and bumper brackets.

Getting the frame rail stiffeners burned in.


Spacer added to accommodate the added thickness of the bumper brackets.

In for a last test fit.

Bumper going on.

Then the tire carrier.


Despite the general low ratings this bumper receives, for the price its really hard to pass up. I will say that installation is a giant pain and the adjuster cam for the tire carrier sucks. Still for the money, its not terrible.
02-21-2018, 03:30 PM
#5
Member
Thread Starter
Join Date: Jun 2017
Posts: 107
Likes: 0
Received 0 Likes
on
0 Posts
Year: 2001
Model: Cherokee(XJ)
Engine: 4.0
After this initial dump updates will become a bit more infrequent. I should note that this first phase has taken me about 3 weeks since I'm limited to a couple nights during the week and one day on the weekends when I don't have other things going on.
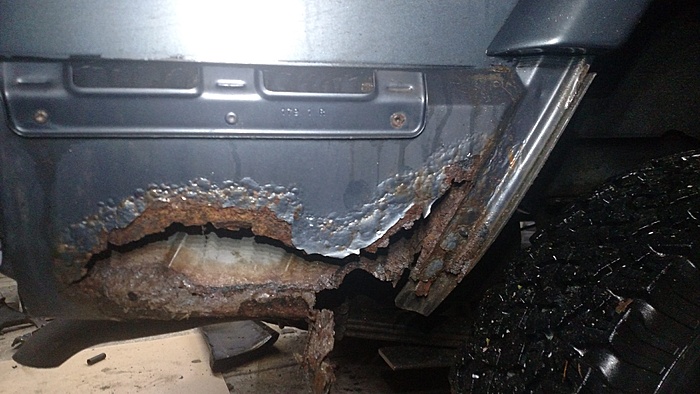
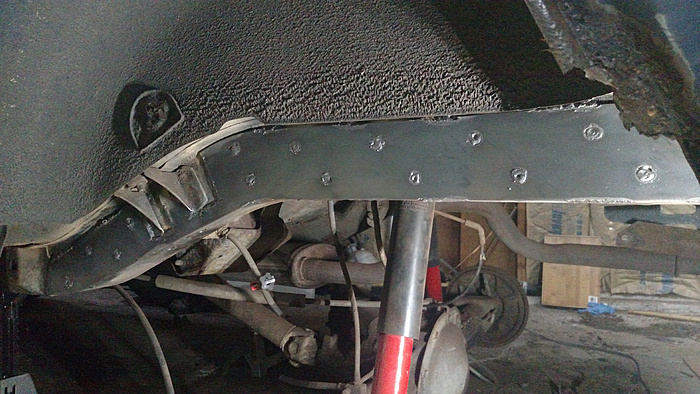
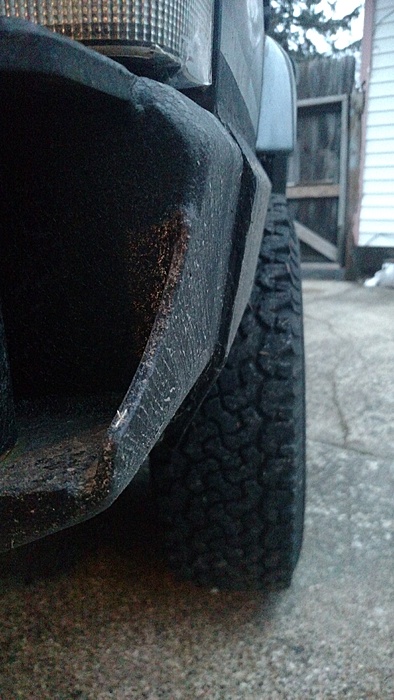
With the bumper and shackle boxes installed it was time to start working on patch panels. It is here that I'll point out that I don't have the patients for body work, so lucky me that because the new bumper came with armor plates for the corners I didn't have to take the time to make these perfect.
Anyway, starting to make panels using 16ga.
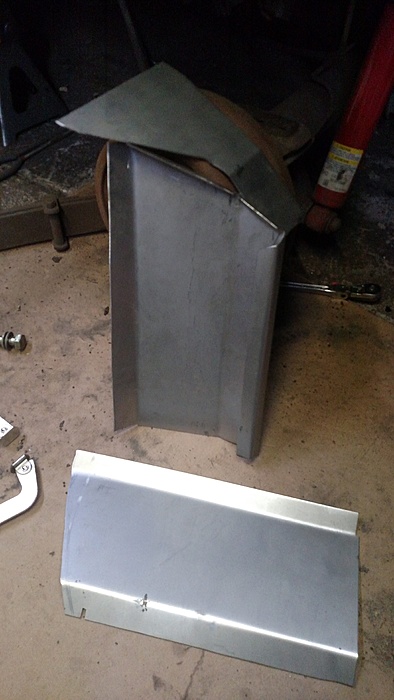
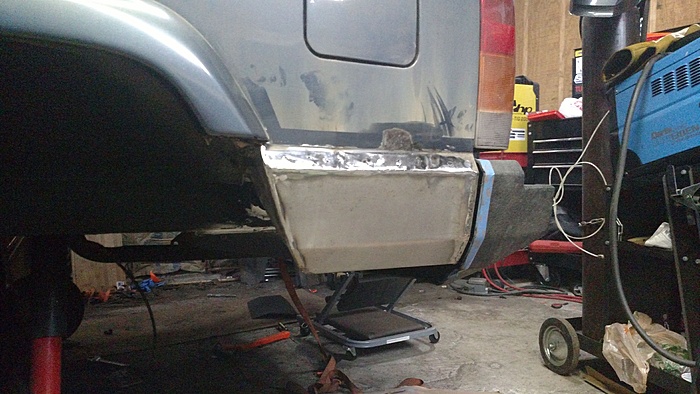
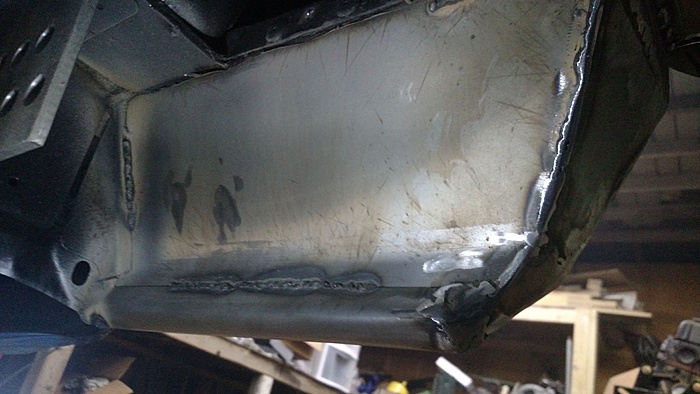
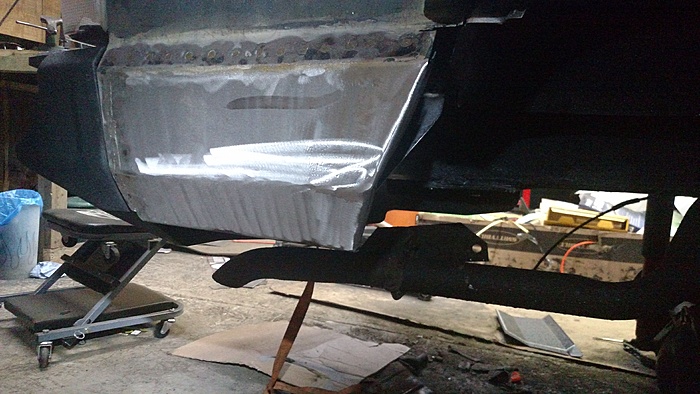
With all of the panels made and welded in I topped them off with a liberal application of seam sealer before painting.
Fast forward a couple of days and everything is back together and mostly complete. I do still need to get a couple of studs on the tire carrier before I'll be able to get the tire on. That's another issue with this bumper, the studs that came with it suck. Destroyed two of them trying to get them installed and the other stripped out the hole and had to be tacked on.

Testing out the new shackle brackets.

With the bumper and shackle boxes installed it was time to start working on patch panels. It is here that I'll point out that I don't have the patients for body work, so lucky me that because the new bumper came with armor plates for the corners I didn't have to take the time to make these perfect.
Anyway, starting to make panels using 16ga.


With all of the panels made and welded in I topped them off with a liberal application of seam sealer before painting.
Fast forward a couple of days and everything is back together and mostly complete. I do still need to get a couple of studs on the tire carrier before I'll be able to get the tire on. That's another issue with this bumper, the studs that came with it suck. Destroyed two of them trying to get them installed and the other stripped out the hole and had to be tacked on.
Testing out the new shackle brackets.

Trending Topics
02-22-2018, 02:38 PM
#9
Member
Thread Starter
Join Date: Jun 2017
Posts: 107
Likes: 0
Received 0 Likes
on
0 Posts
Year: 2001
Model: Cherokee(XJ)
Engine: 4.0
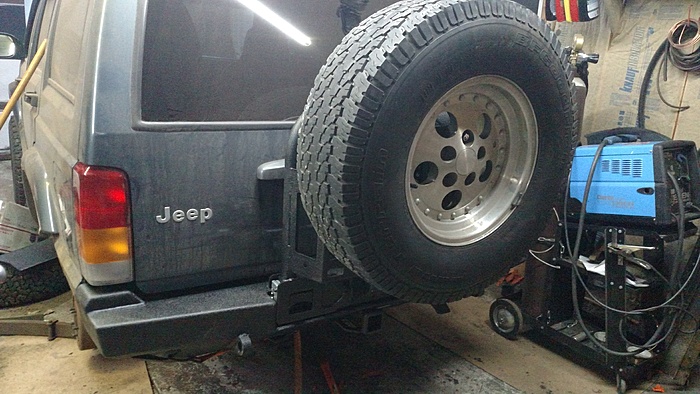
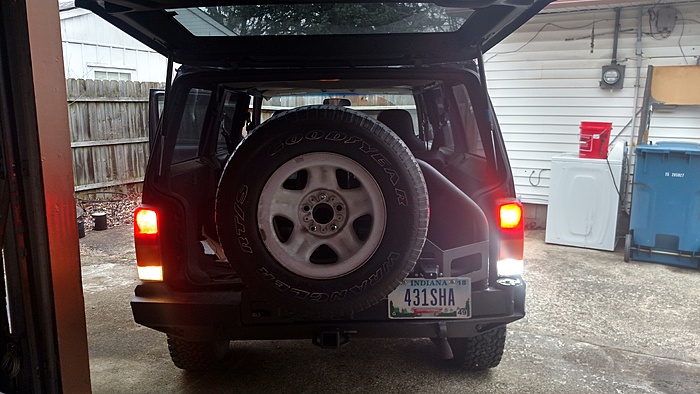
Thanks everyone. I managed to get the studs installed and tire carrier on and well, the factory sized spare looks tiny hanging off the back end. Got some feelers out on local parts groups to see if I can find a matching full size spare.
I am noticing even with the now longer shackles I'm sitting a tiny bit lower out back than in the front, opposite of how it sat prior to starting this project. So this bumper is probably a bit too heavy for the springs I've got. For now I have enough adjustment in the shackles and boxes to level it out, but long term I'll likely have to upgrade or add a leaf to support the additional weight I'm putting in it.
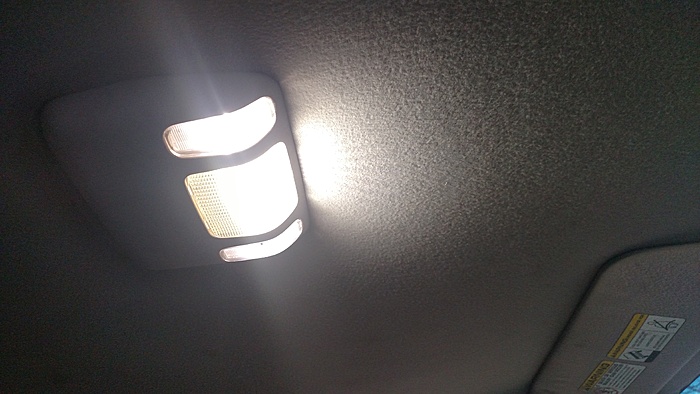
Also found last night that I have a brake light out so shiny new LEDs will be going in tonight.
I am noticing even with the now longer shackles I'm sitting a tiny bit lower out back than in the front, opposite of how it sat prior to starting this project. So this bumper is probably a bit too heavy for the springs I've got. For now I have enough adjustment in the shackles and boxes to level it out, but long term I'll likely have to upgrade or add a leaf to support the additional weight I'm putting in it.
Also found last night that I have a brake light out so shiny new LEDs will be going in tonight.
 02-22-2018, 09:26 PM
#11
Member
Thread Starter
Join Date: Jun 2017
Posts: 107
Likes: 0
Received 0 Likes
on
0 Posts
Year: 2001
Model: Cherokee(XJ)
Engine: 4.0
Have a friend handy and it honestly wouldn't be that bad of an install. I'm a stubborn mule that likes doing things the hard way, so the install was kind of a pain. Expect to need to do some additional clearancing of the adjustment holes on the brackets to get the fit perfect. Since I did the install by myself once it was up and bolted on there was no way I was taking it back off to open up the holes on the driver's side bracket, so for now my bumper sits 1/8-1/4" off center.
If you do order this bumper it may or may not include new nut strips. Mine did. However they do not have the bump for the passenger rail exhaust mount so getting the bolts started is supposed to be a hassle. In my case that section of the rail had rotted out anyway so I replaced it with a nice flat piece.
In other news I got my LED brake and reverse lights in. Hard to tell the difference behind the red lenses, but the reverse lights are quite a bit brighter.
And as long as I was at it.

If you do order this bumper it may or may not include new nut strips. Mine did. However they do not have the bump for the passenger rail exhaust mount so getting the bolts started is supposed to be a hassle. In my case that section of the rail had rotted out anyway so I replaced it with a nice flat piece.
In other news I got my LED brake and reverse lights in. Hard to tell the difference behind the red lenses, but the reverse lights are quite a bit brighter.

And as long as I was at it.

 03-18-2018, 12:49 AM
#13
Member
Thread Starter
Join Date: Jun 2017
Posts: 107
Likes: 0
Received 0 Likes
on
0 Posts
Year: 2001
Model: Cherokee(XJ)
Engine: 4.0
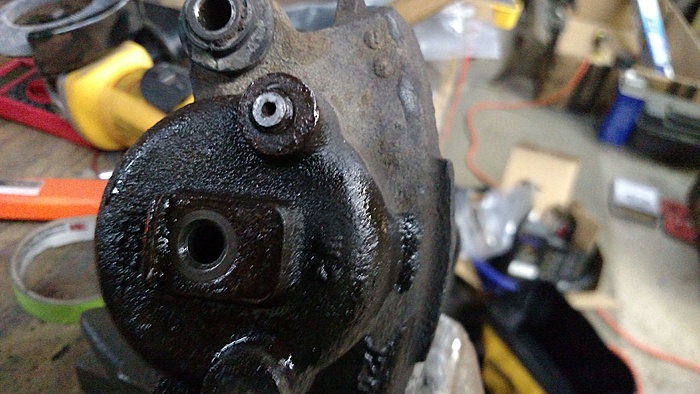
figured I'd get some more done on the xj. The plan was to swap out the rear diff cover, change the oil filter housing o rings and get the new front brake lines installed. Ended up swapping the diff cover, installing the new brake lines, one new hard line fitting and a caliper.
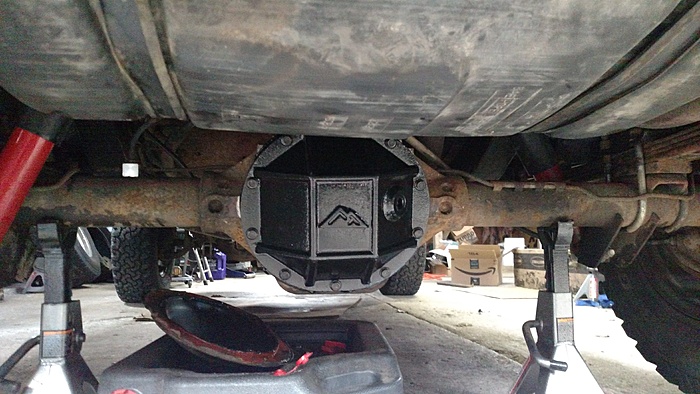
Part of my doing this today is that I'm planning to hit up the jy tomorrow to snag an extra front axle and wanted to verify my gearing.
Just a little longer. At some point I'll likely add a throttle return spring to these to these to keep them up out of the way while allowing them to stretch when flexing out.
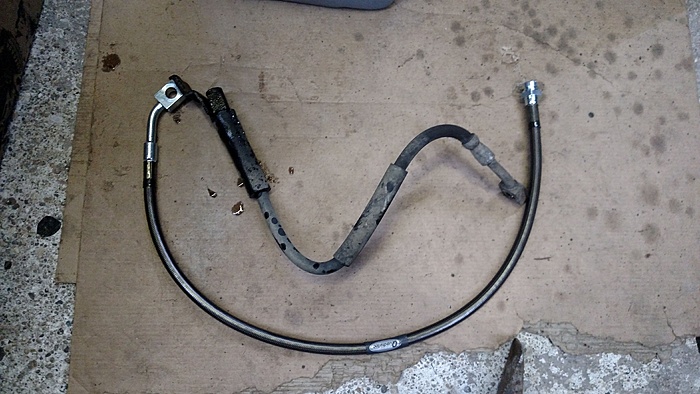
This is about the time things went sideways. Starting with the fitting that rusted itself to the hard line.
Luckily there was plenty of extra line to be able to just cut the hard line back and put on a new fitting. Although it did mean busting out my least favorite tool, the dreaded cheap double flare tool.
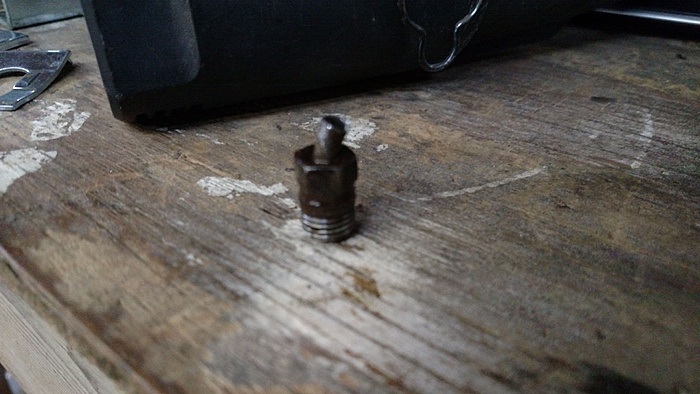
**** continued to go off when I set out to bleed the brakes.
This is where I should have gone to the Google machine to find out that calipers for this thing are practically free, but instead I first actually tried to extract that sheared bleeder. Then when I saw how cheap the calipers were I became quite sad I spent any time trying.
I did attempt to remove the oil filter adapter, but of course the bolt that holds it on is too close to the frame rail to get a ratchet on and after nearly killing myself when the doubled wrench let go I decided it isn't leaking enough for me to care. I'll try again when I pull the axle.
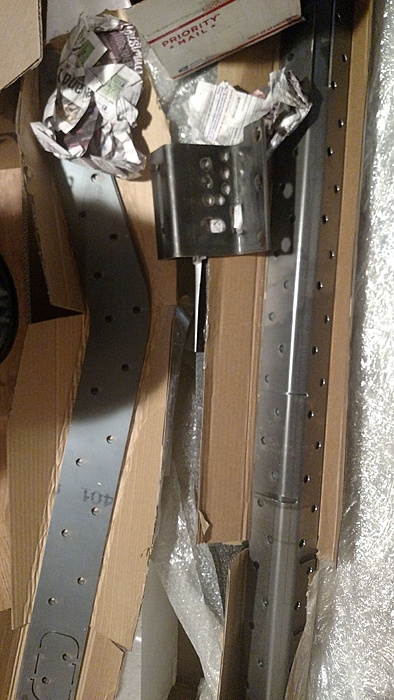
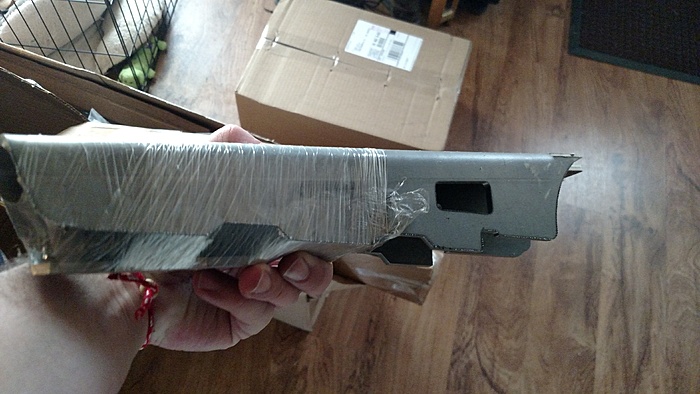
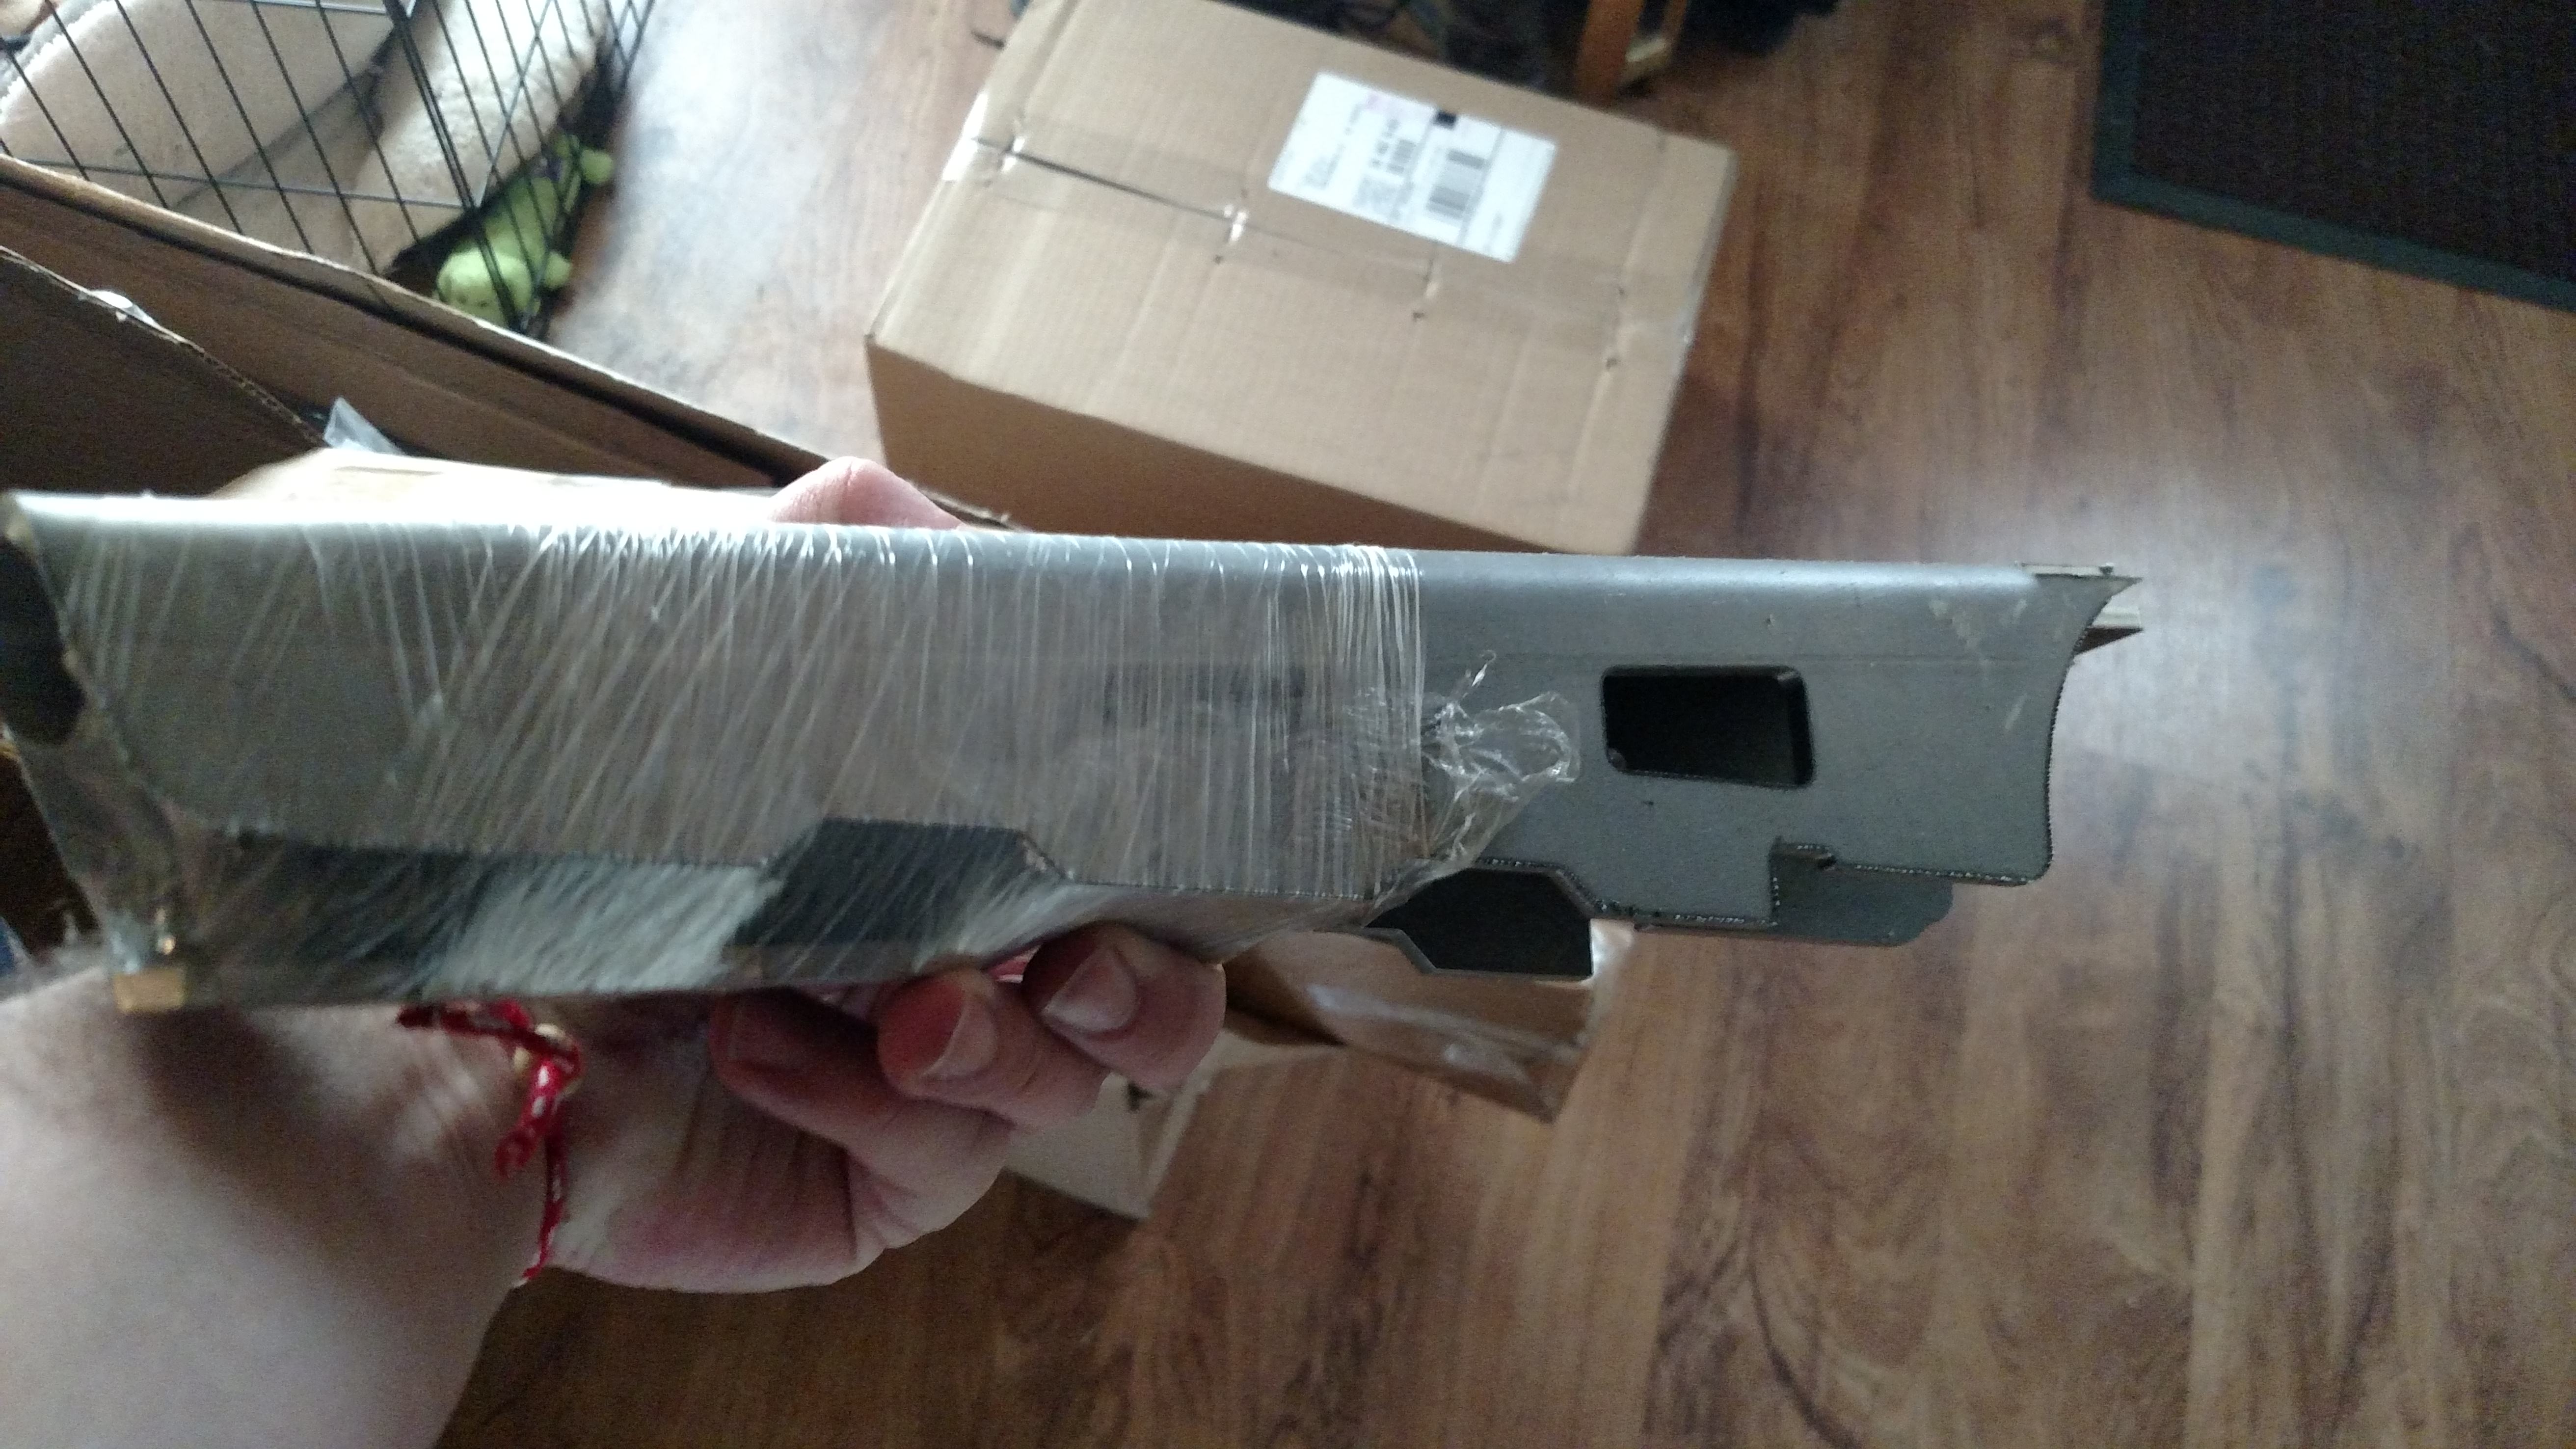
I also received several other parts including this baby truss that is smaller than expected.
And just something amusing.

Part of my doing this today is that I'm planning to hit up the jy tomorrow to snag an extra front axle and wanted to verify my gearing.

Just a little longer. At some point I'll likely add a throttle return spring to these to these to keep them up out of the way while allowing them to stretch when flexing out.
This is about the time things went sideways. Starting with the fitting that rusted itself to the hard line.

Luckily there was plenty of extra line to be able to just cut the hard line back and put on a new fitting. Although it did mean busting out my least favorite tool, the dreaded cheap double flare tool.
**** continued to go off when I set out to bleed the brakes.

This is where I should have gone to the Google machine to find out that calipers for this thing are practically free, but instead I first actually tried to extract that sheared bleeder. Then when I saw how cheap the calipers were I became quite sad I spent any time trying.
I did attempt to remove the oil filter adapter, but of course the bolt that holds it on is too close to the frame rail to get a ratchet on and after nearly killing myself when the doubled wrench let go I decided it isn't leaking enough for me to care. I'll try again when I pull the axle.
I also received several other parts including this baby truss that is smaller than expected.
And just something amusing.
 03-29-2018, 07:10 AM
#14
Member
Thread Starter
Join Date: Jun 2017
Posts: 107
Likes: 0
Received 0 Likes
on
0 Posts
Year: 2001
Model: Cherokee(XJ)
Engine: 4.0
Well I have all of the parts for phase 3 of the build. I'll be reordering the phases since I don't really want to rip out the interior and the ball joints are starting to make noise. To that end I have a giant pile of parts. If the forecast stands for next week I'll start tearing it apart then.
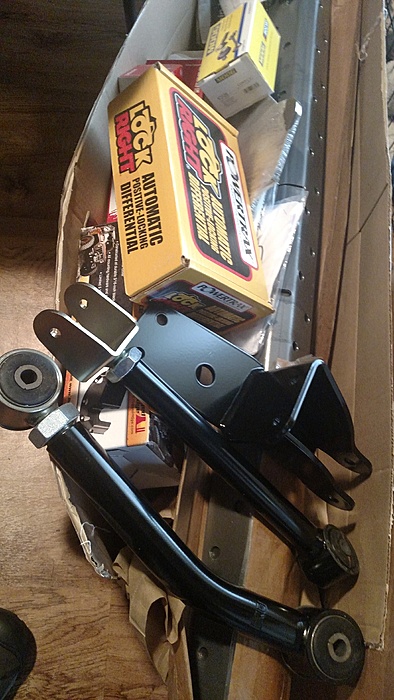
Those lower arms are beastly large.
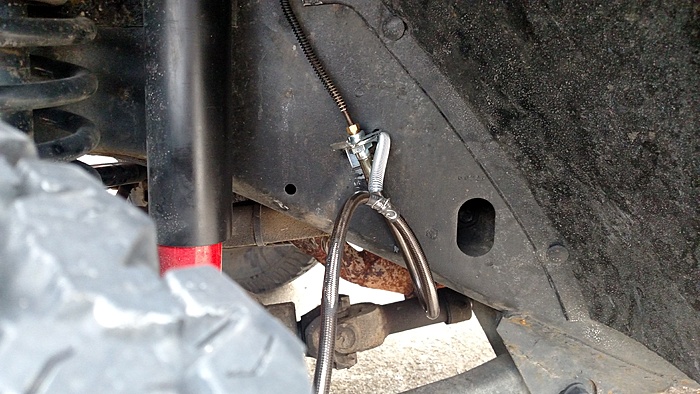
I did end up getting a spring on the front brake lines. Sadly not before rubbing the outer sheathing off one of the lines.

Those lower arms are beastly large.
I did end up getting a spring on the front brake lines. Sadly not before rubbing the outer sheathing off one of the lines.
 03-30-2018, 05:37 PM
#15
Member
Thread Starter
Join Date: Jun 2017
Posts: 107
Likes: 0
Received 0 Likes
on
0 Posts
Year: 2001
Model: Cherokee(XJ)
Engine: 4.0
Went back to the flex spot and disconnected the bar this time. Wanted to get some before shots to see if I get noticably more droop with the new arms.
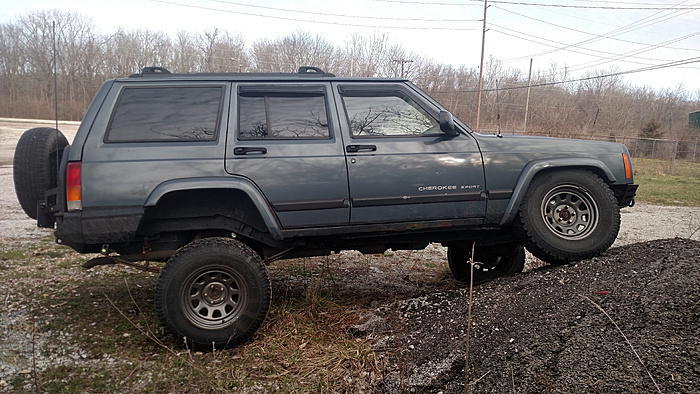
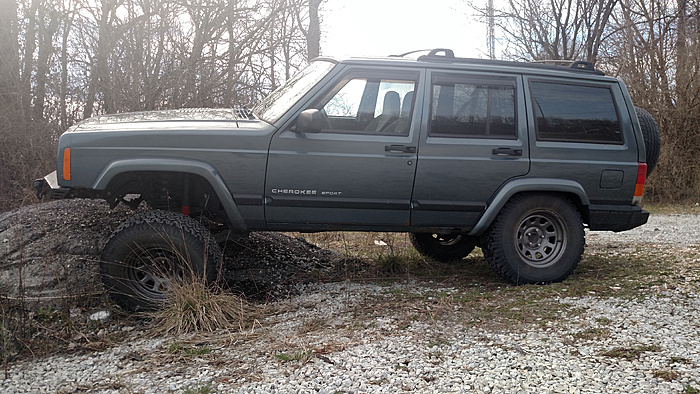
If I were smart I would have taken some measurements for bump stops, but I didn't.

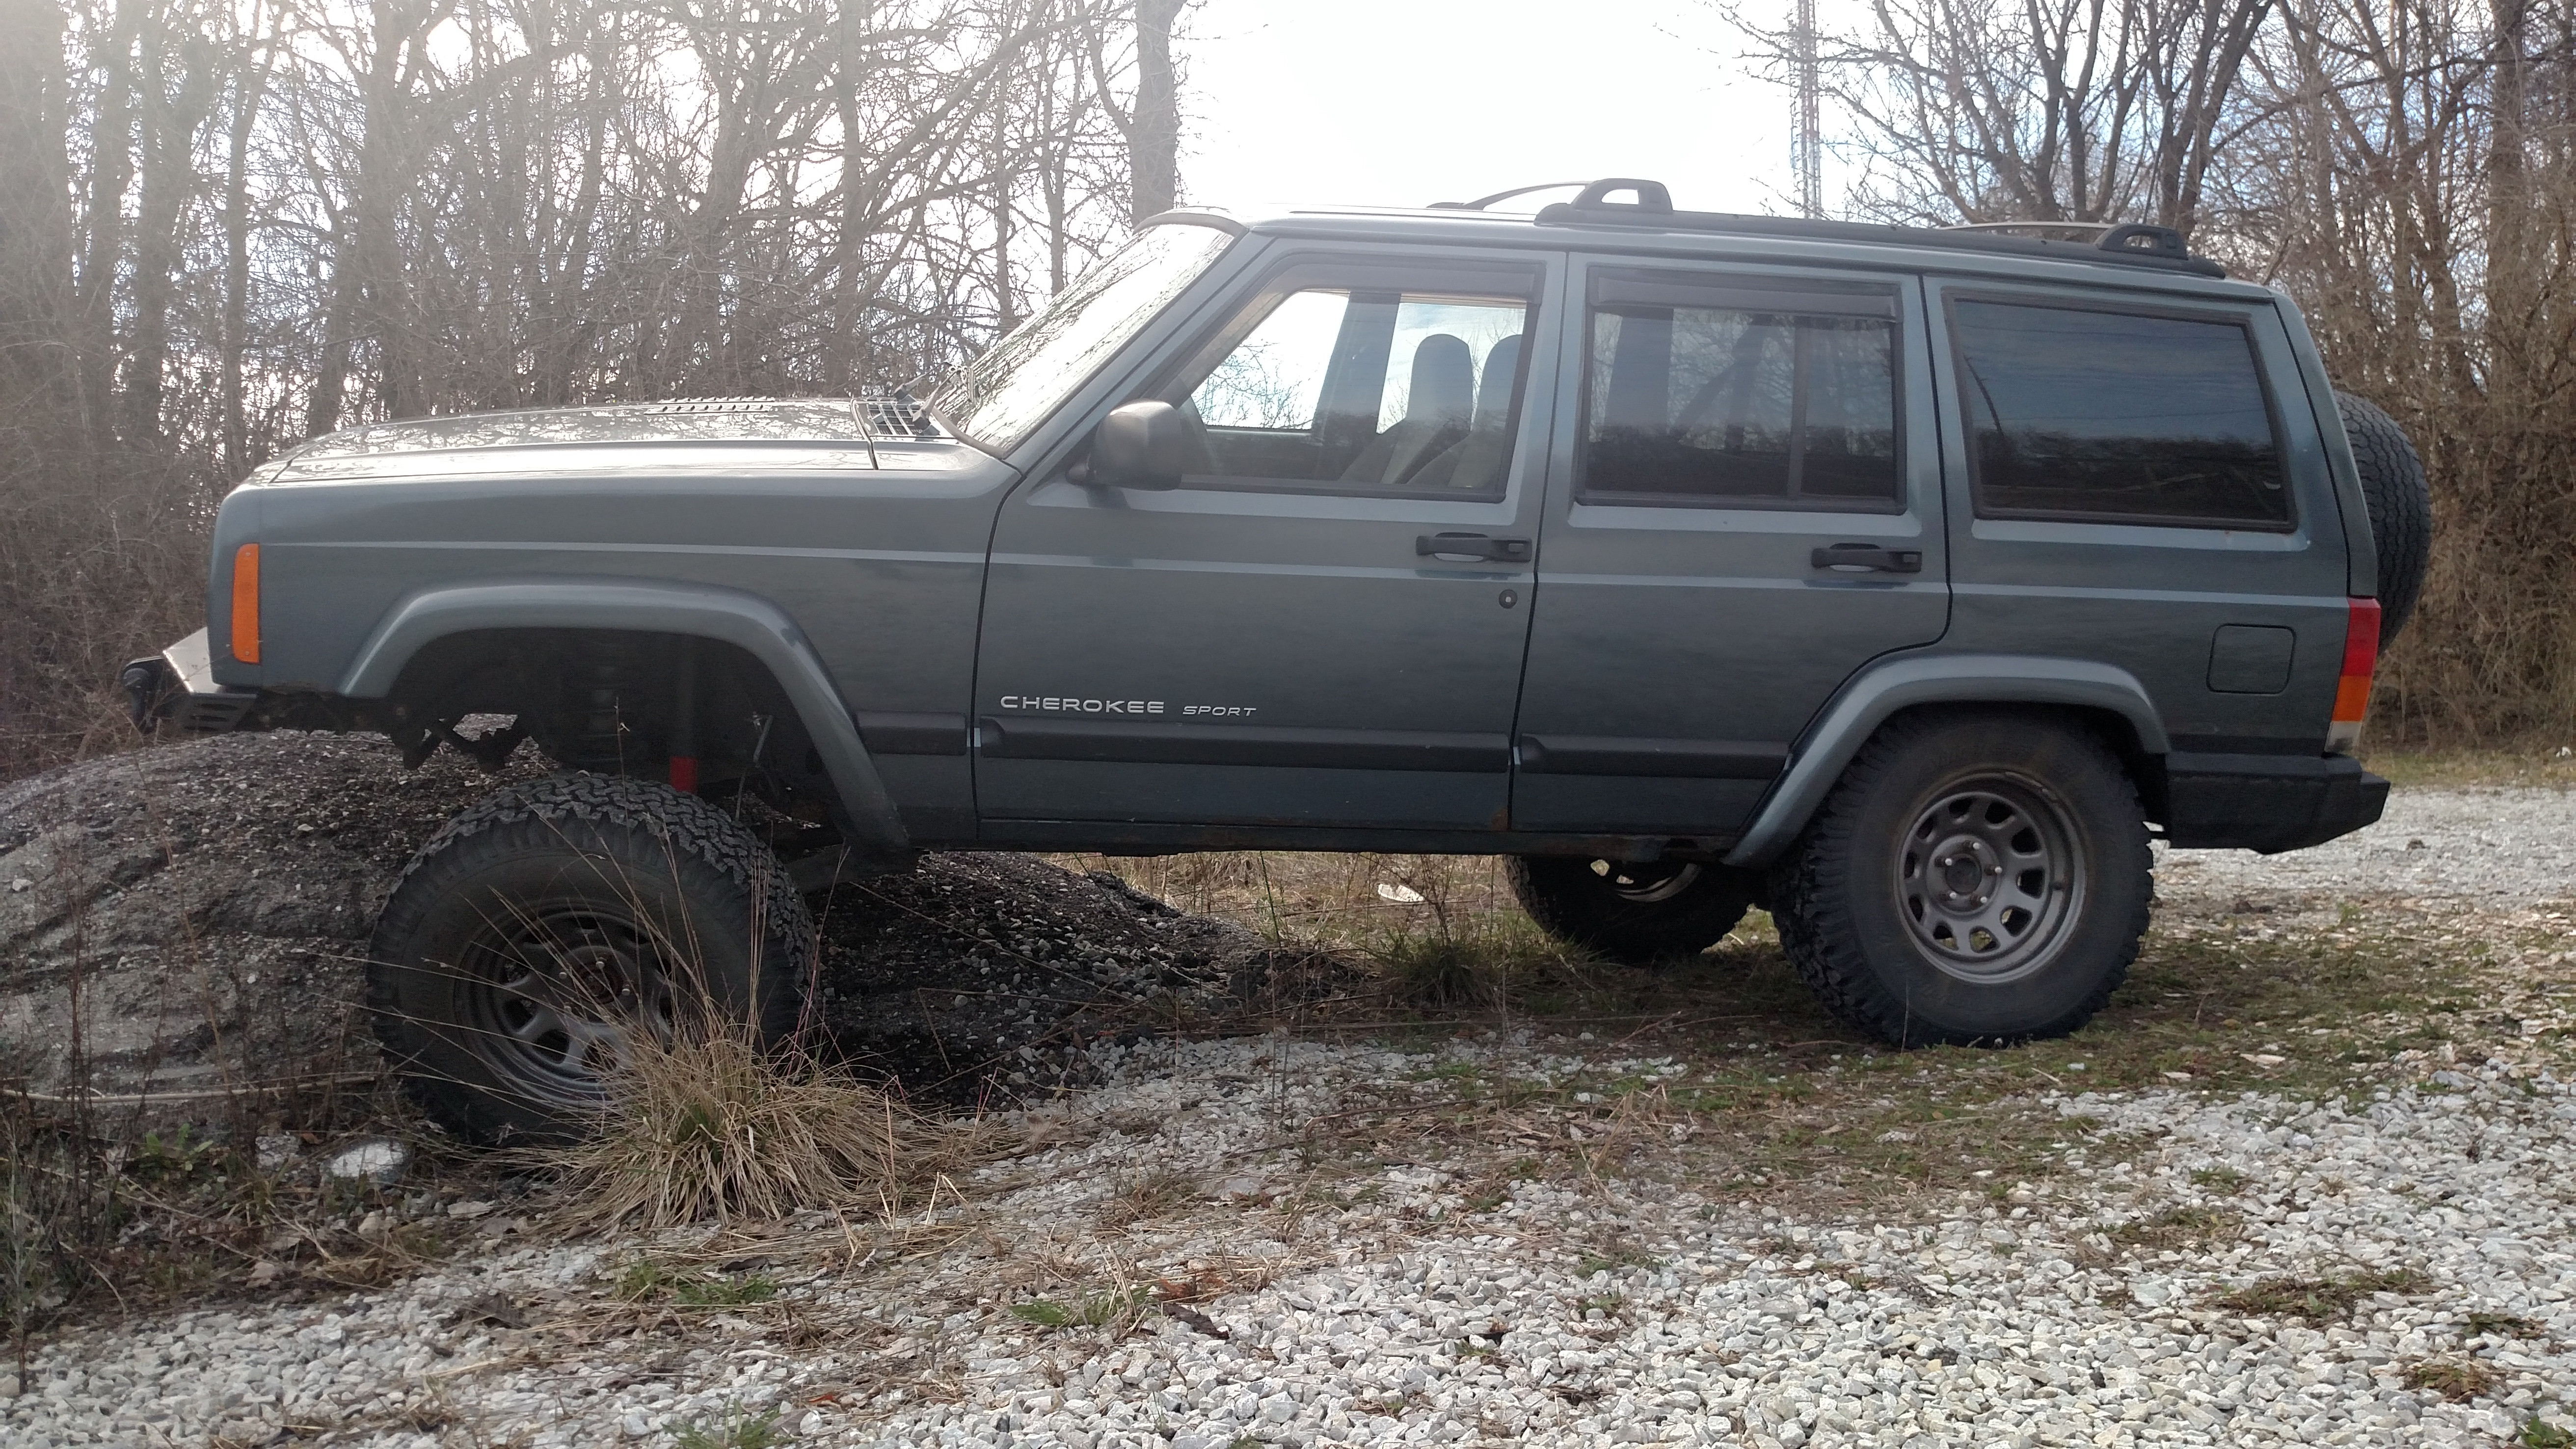
If I were smart I would have taken some measurements for bump stops, but I didn't.