
1987 Wagoneer Limited

Thread Starter
Seasoned Member
Joined: Jan 2011
Posts: 303
Likes: 4
From: Austin
Year: 1987
Model: Wagoneer
Engine: 4.0
Alright, this is for my records:
9/5/11
Start Auto-RX de-sludge program
Changed oil to Advance Auto Parts conventional 10W-30
Changed oil filter to Purlator L14619
Odometer 194,672
Avg 12mpg (short distance, in town driving)
Cyl PSI
1 135
2 145
3 150
4 141
5 138
6 150
(not bad for a 24 year old vehicle, eh?)

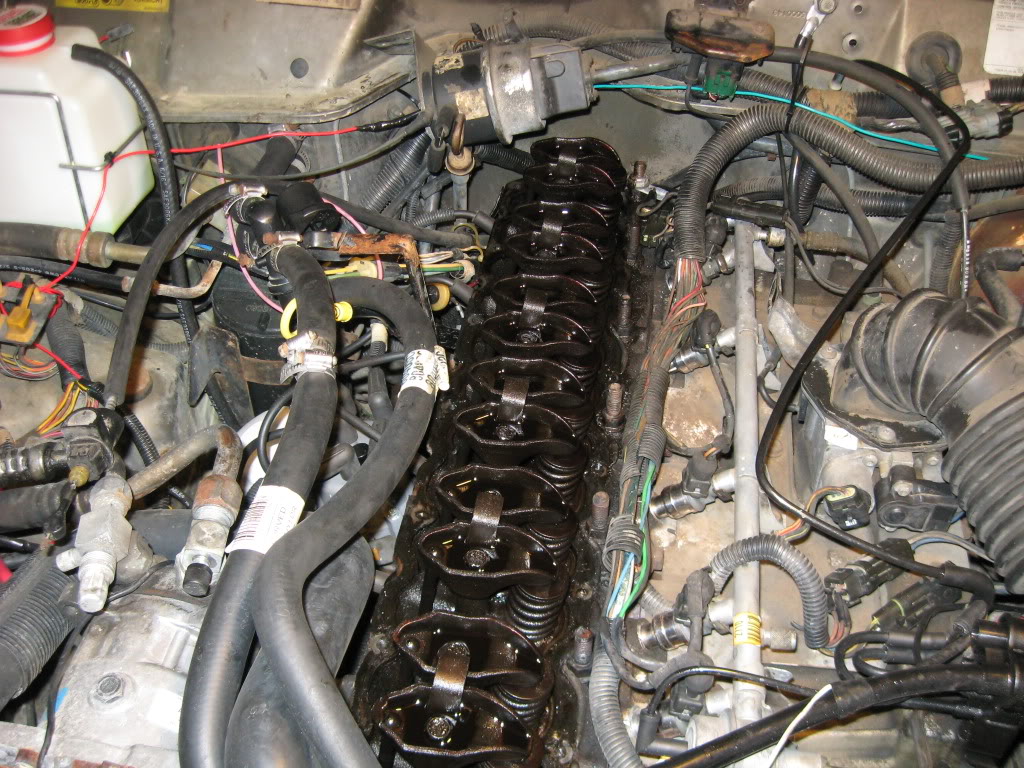
Was going to change valve cover gasket and take pictures, but ran out of time. These'll have to do for documentation purposes.
Through the oil fill port:
9/5/11
Start Auto-RX de-sludge program
Changed oil to Advance Auto Parts conventional 10W-30
Changed oil filter to Purlator L14619
Odometer 194,672
Avg 12mpg (short distance, in town driving)
Cyl PSI
1 135
2 145
3 150
4 141
5 138
6 150
(not bad for a 24 year old vehicle, eh?)
Was going to change valve cover gasket and take pictures, but ran out of time. These'll have to do for documentation purposes.
Through the oil fill port:
Thread Starter
Seasoned Member
Joined: Jan 2011
Posts: 303
Likes: 4
From: Austin
Year: 1987
Model: Wagoneer
Engine: 4.0
Thread Starter
Seasoned Member
Joined: Jan 2011
Posts: 303
Likes: 4
From: Austin
Year: 1987
Model: Wagoneer
Engine: 4.0
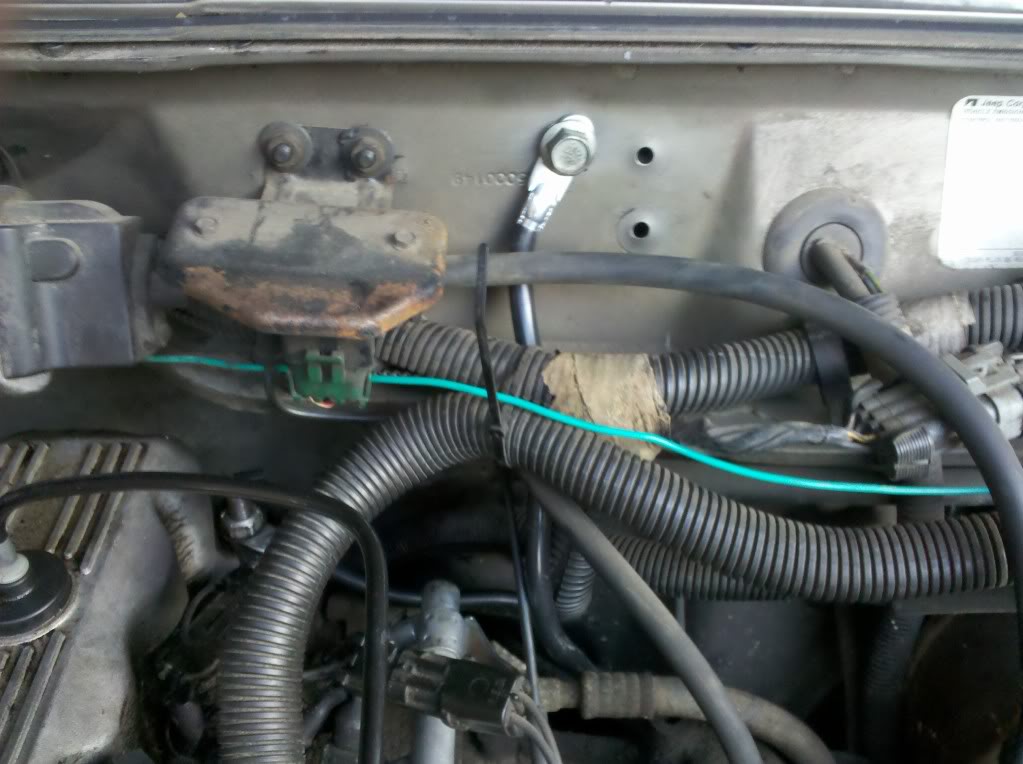
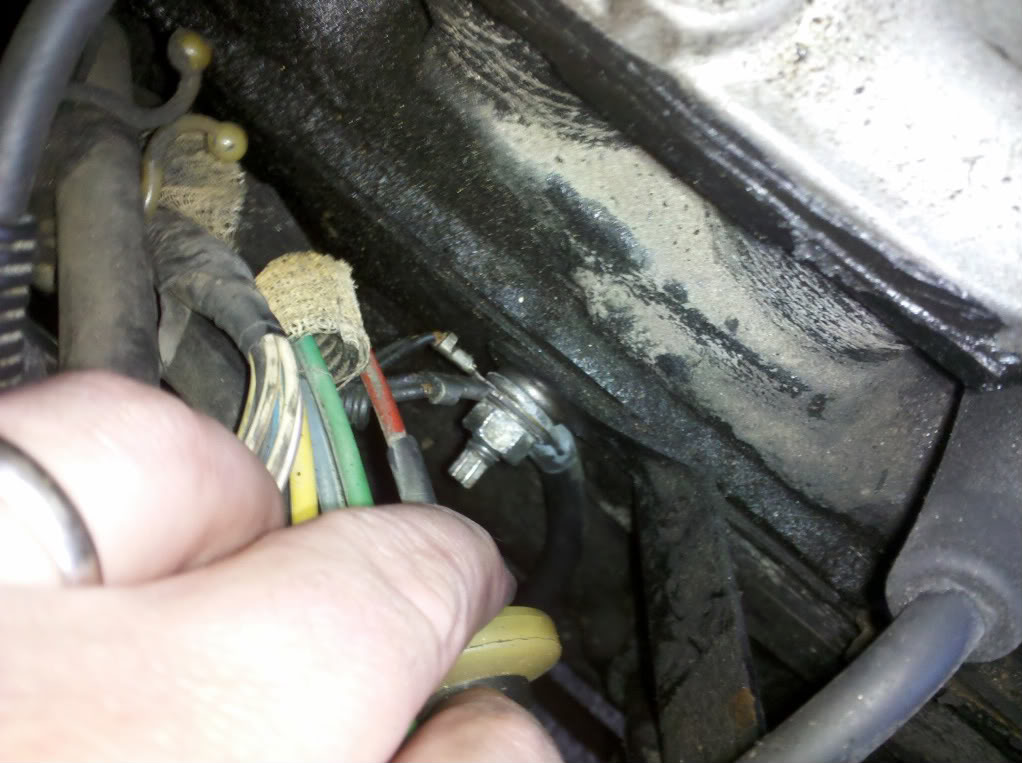
Took a look at the rear leafs (leaves? Leafesses? A flock of leaf?) and they're starting to sag. My wife grew up with the vehicle and it holds sentimental value to her, so I'm not going to do anything too extreme to it (so I need a second XJ, right ? ). Either replace stock or maybe 3", but for sure not higher. Just wanna dick around, learn the vehicle, and get it in great shape. The electrical connectors under the hood are very brittle and I'd like to replace the harness....but I haven't been able to come up with a suitable replacement...
? ). Either replace stock or maybe 3", but for sure not higher. Just wanna dick around, learn the vehicle, and get it in great shape. The electrical connectors under the hood are very brittle and I'd like to replace the harness....but I haven't been able to come up with a suitable replacement...
Thread Starter
Seasoned Member
Joined: Jan 2011
Posts: 303
Likes: 4
From: Austin
Year: 1987
Model: Wagoneer
Engine: 4.0
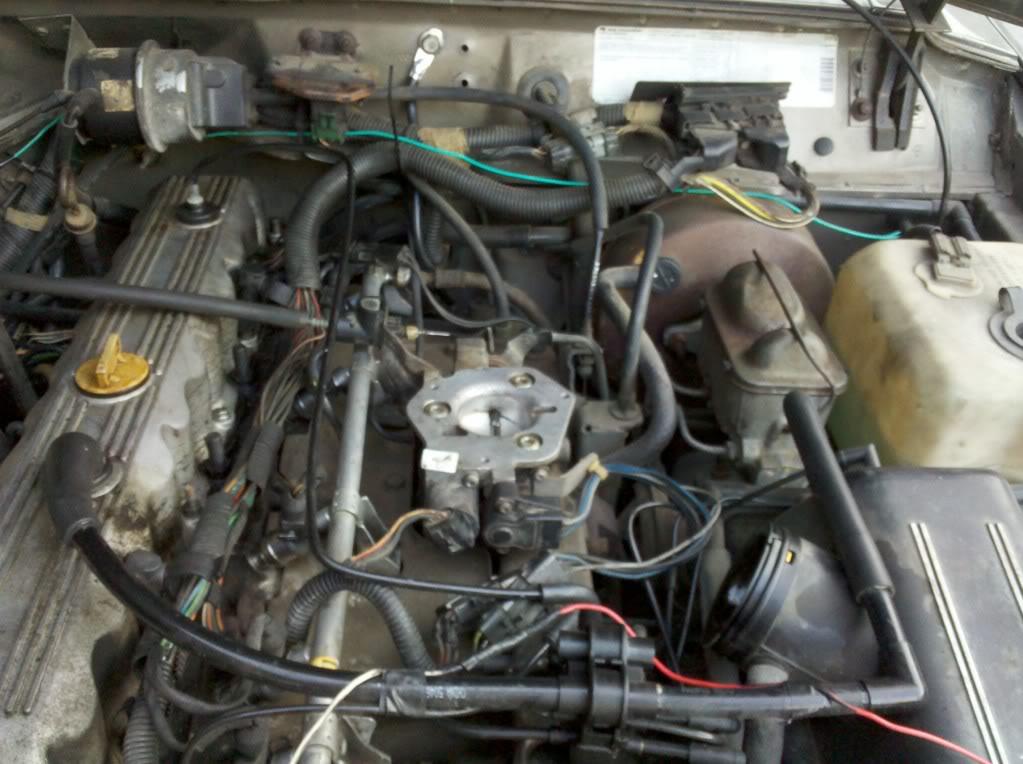
I guess I never did show that, did I? I went to the JY and pulled one from a non-Renix system, but just couldn't get it to work. Would have required moving a fuse block, etc, and I really didn't have the time/desire to make that work...maybe later.
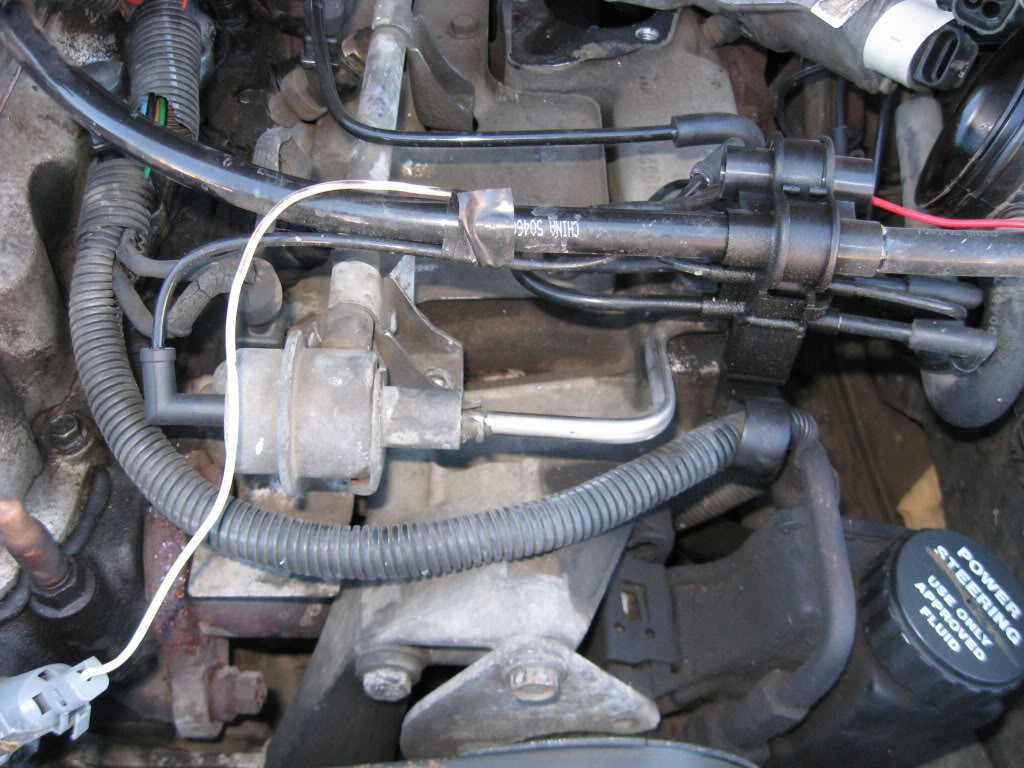
Picked up this guy from Advanced for $13 and mounted it where the old expansion tank was (remove the old tank bracket first).

A little bending and re-bending to get the tank low enough to not hit the hood...
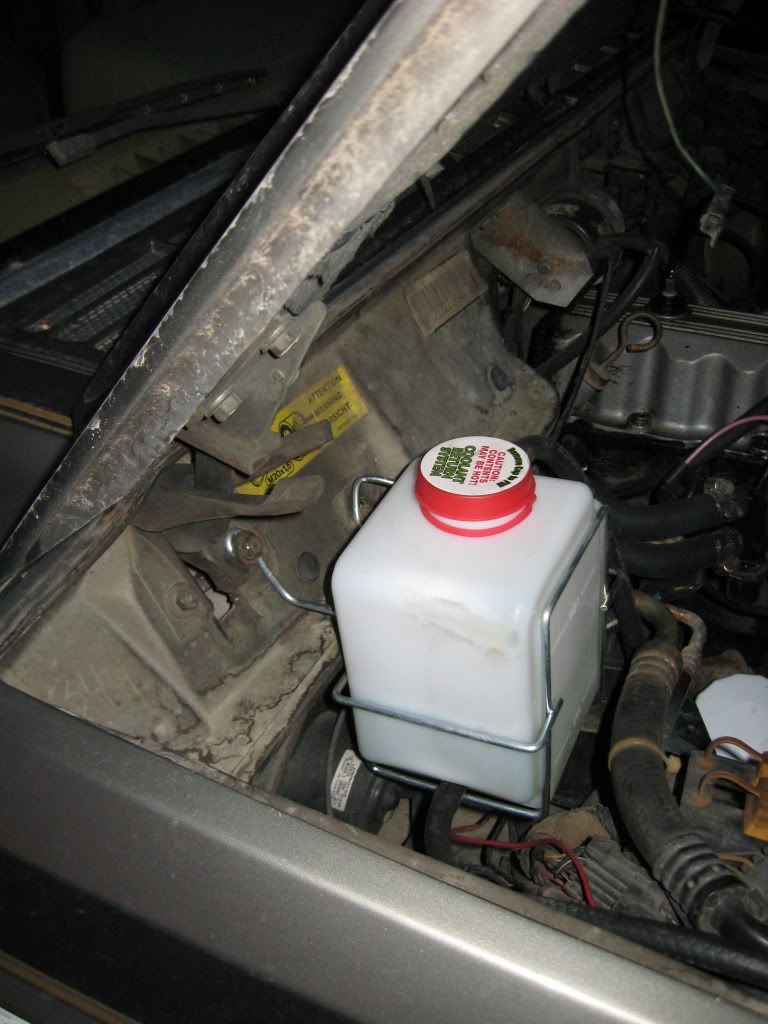
Use the included plastic thingy and twist ties to route the hose

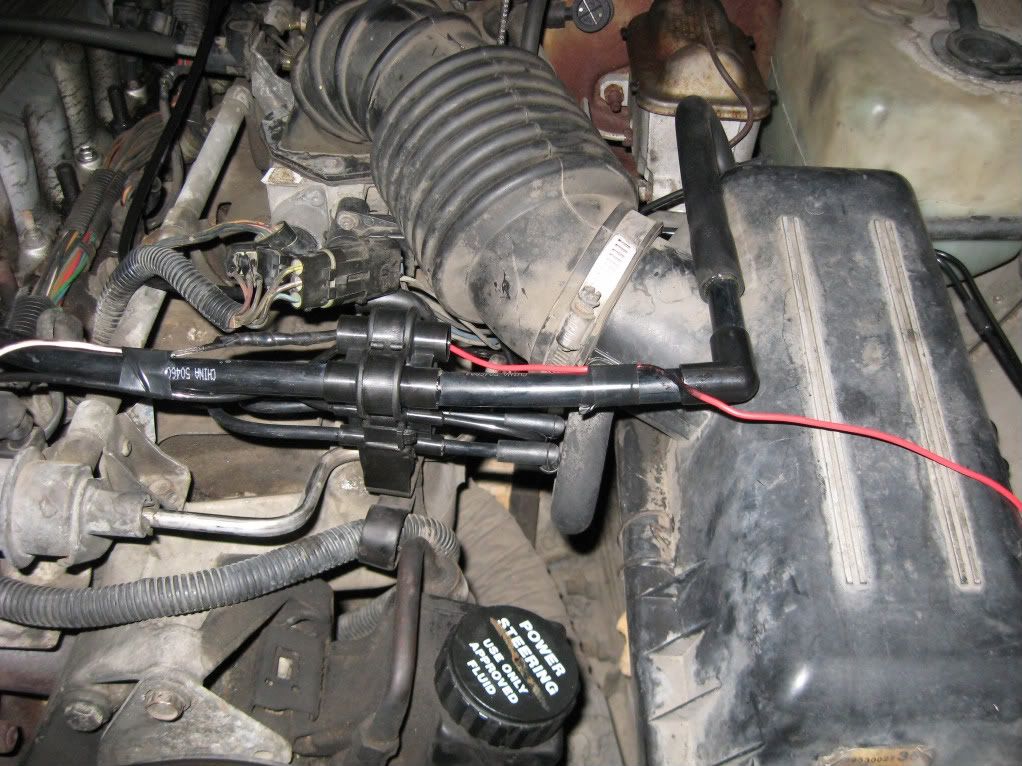
Also, here are the new vacuum tubes.

Picked up this guy from Advanced for $13 and mounted it where the old expansion tank was (remove the old tank bracket first).
A little bending and re-bending to get the tank low enough to not hit the hood...
Use the included plastic thingy and twist ties to route the hose
Also, here are the new vacuum tubes.
Thread Starter
Seasoned Member
Joined: Jan 2011
Posts: 303
Likes: 4
From: Austin
Year: 1987
Model: Wagoneer
Engine: 4.0
1/11/12 197,313
Had a leaky injector and parked the Waggy just after my last post.
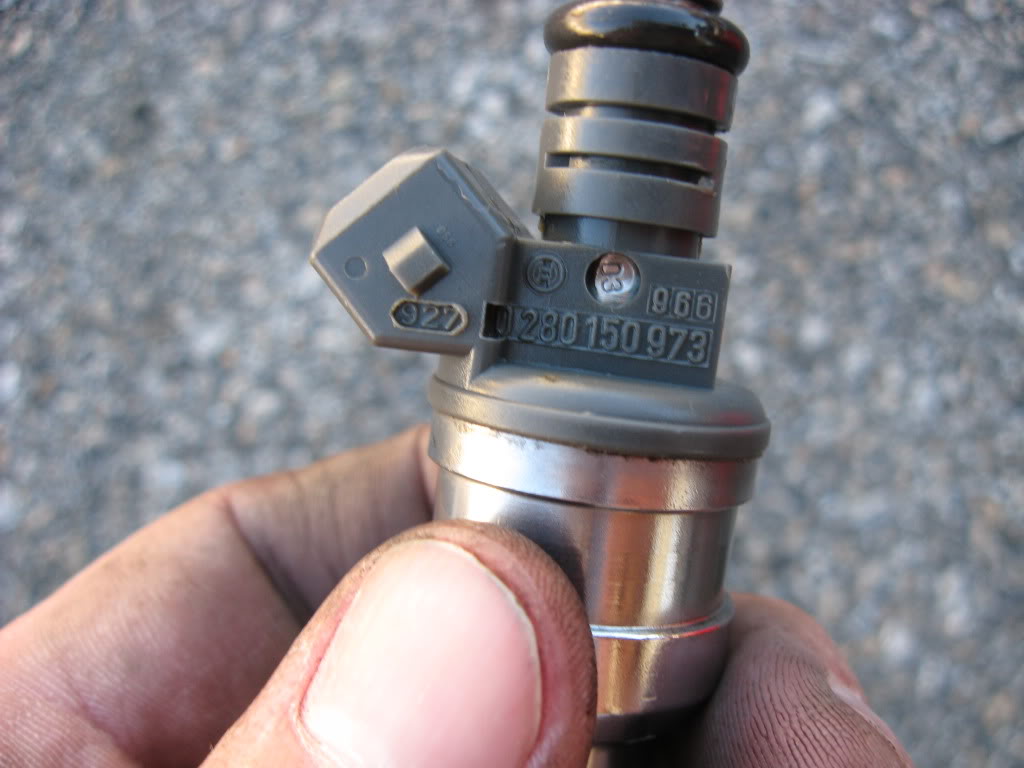
I hadn't seen a RENIX specific fuel injector write-up, so I thought I'd document what I did.
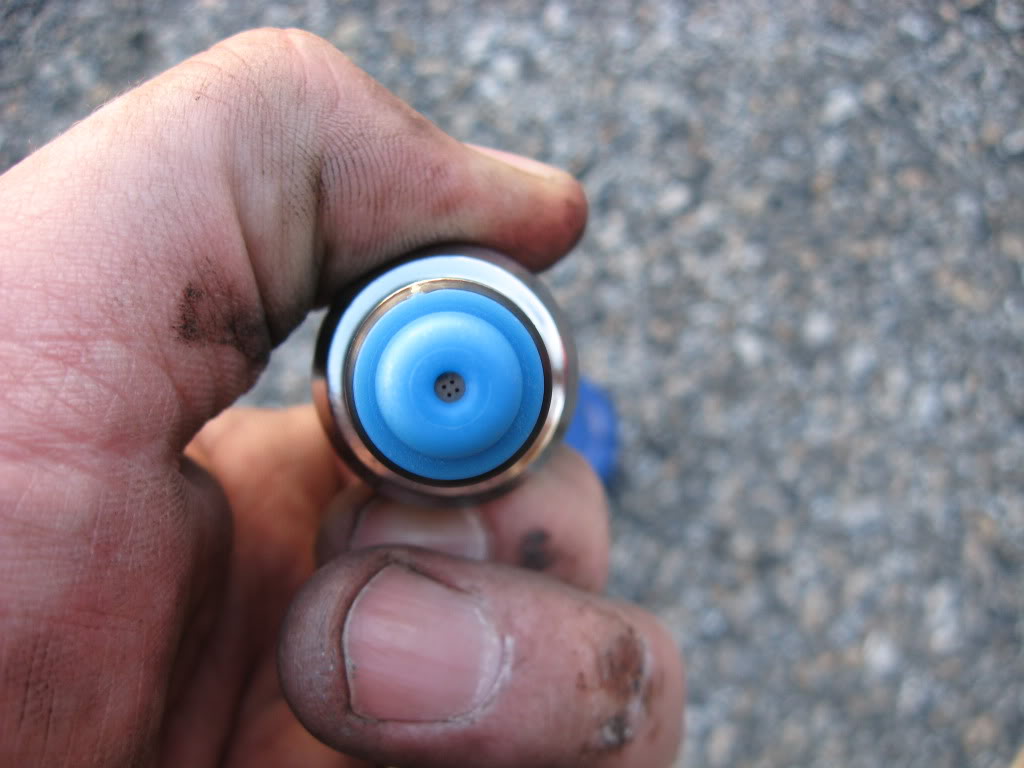
My company just closed its doors, so while looking for work, we could do with one car. Picked up a set of Bosch 973's from Precision Fuel Injectors. $89.99 for 6 reman'd 19lb four hole injectors. There was a little hiccup getting them here, but I'm more than satisfied with my purchase.
Loosely followed this thread.
Leaky injector
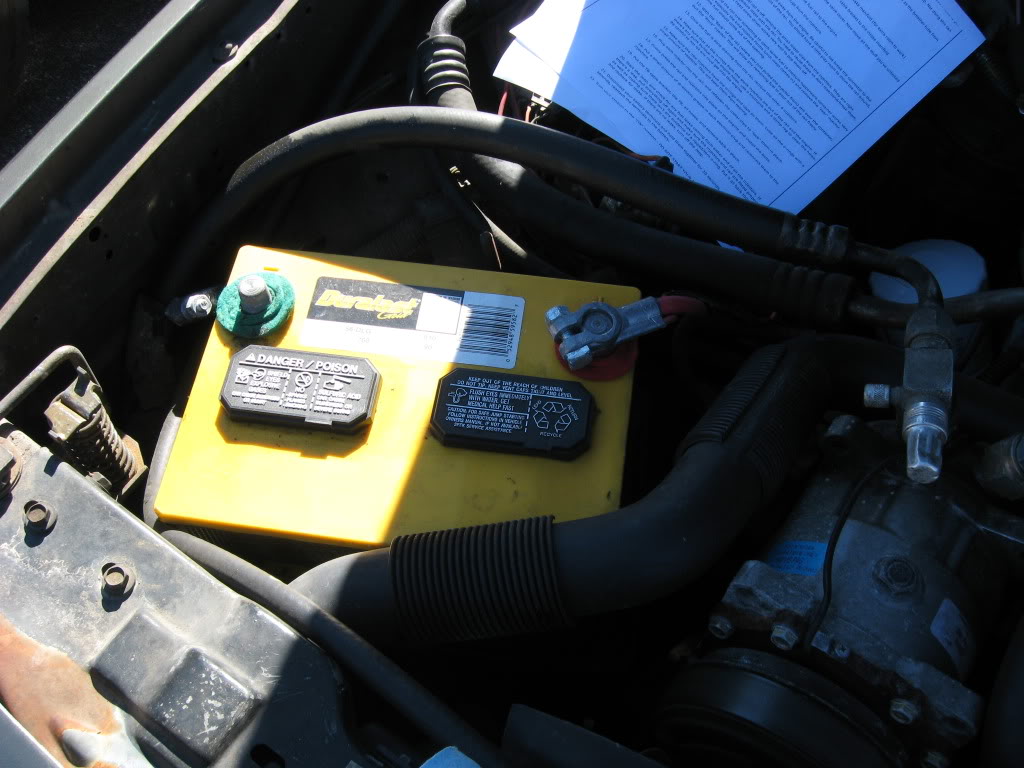
Disconnect battery
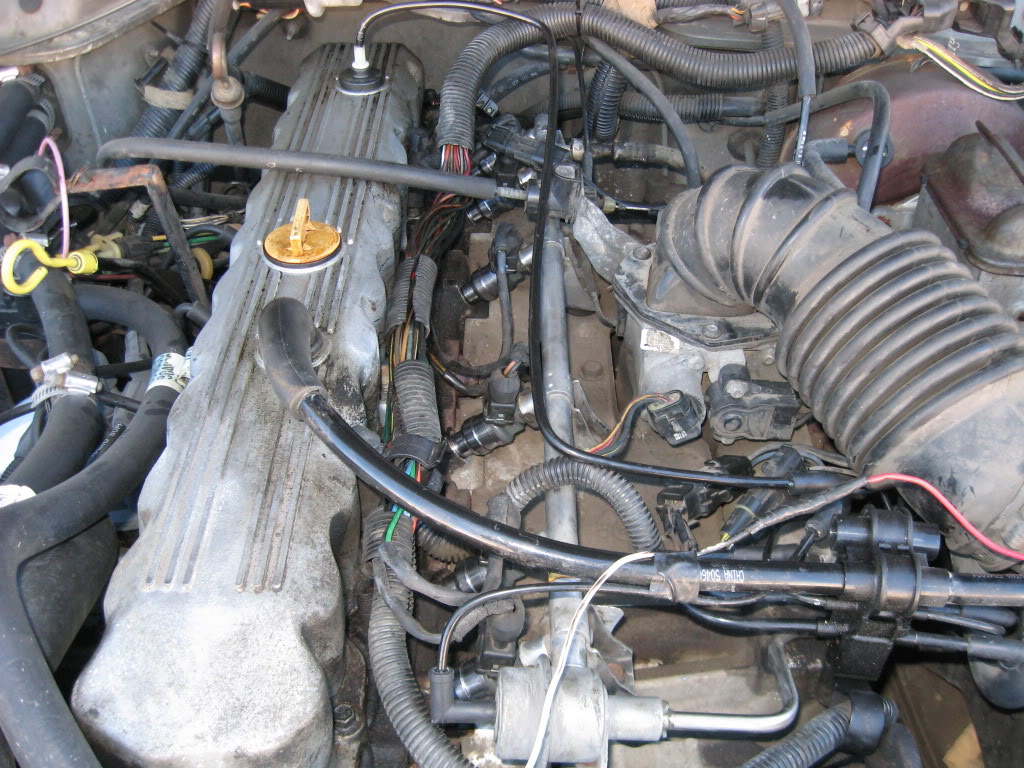
Pop the tube from throttle body to air box off
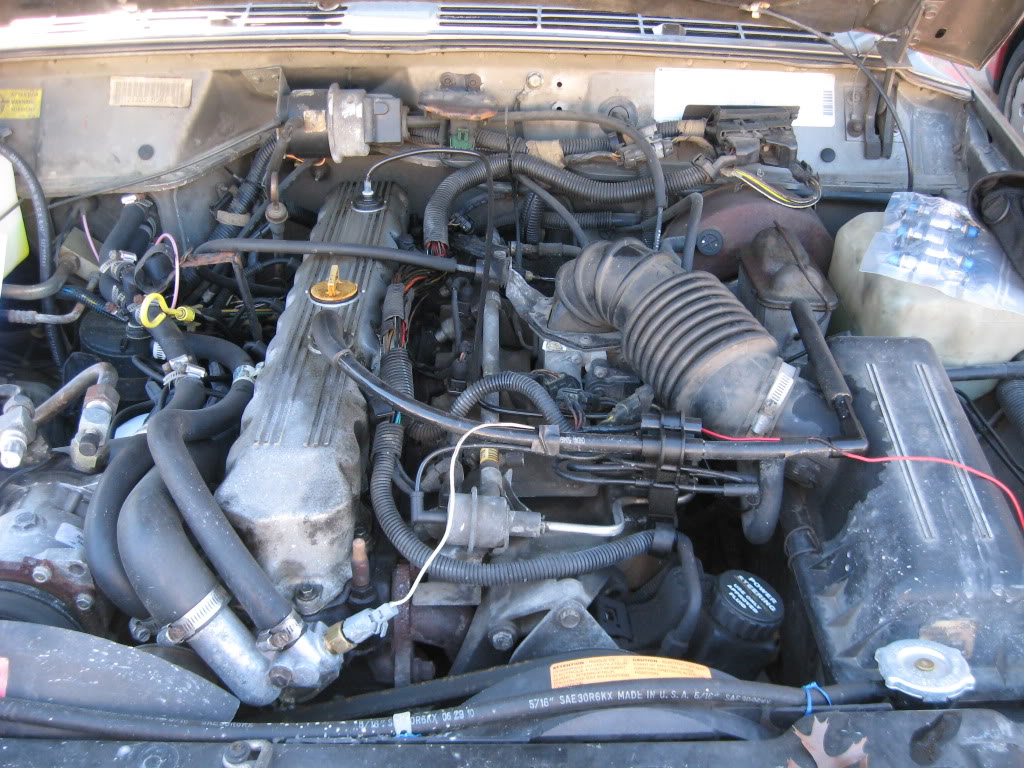
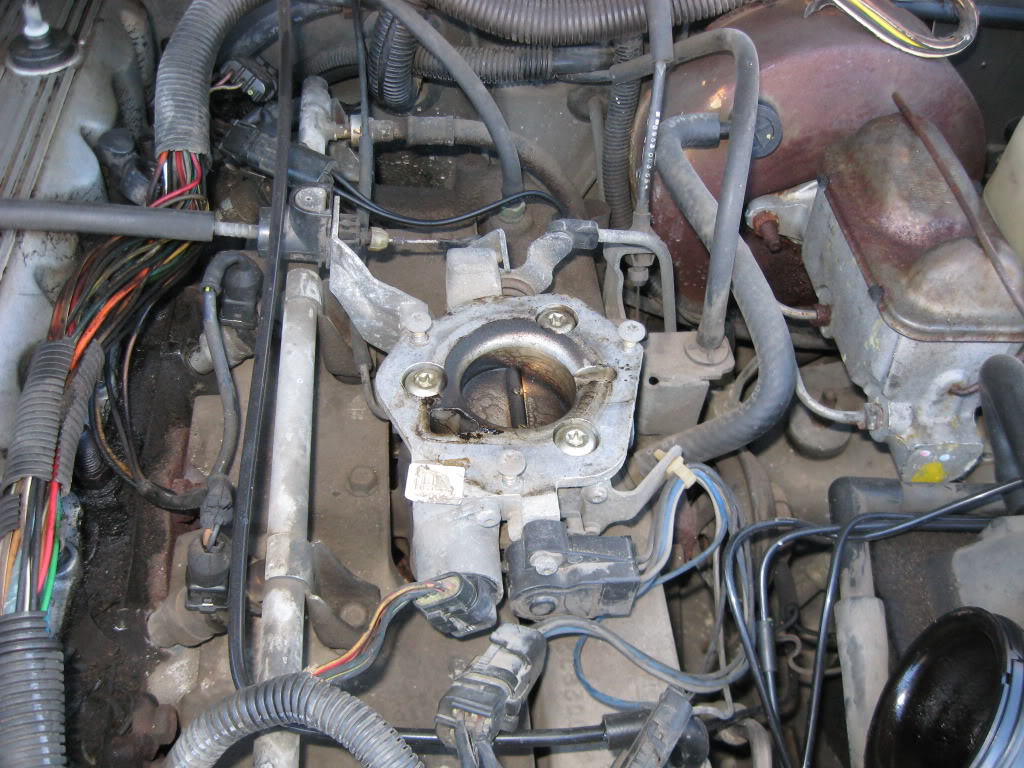
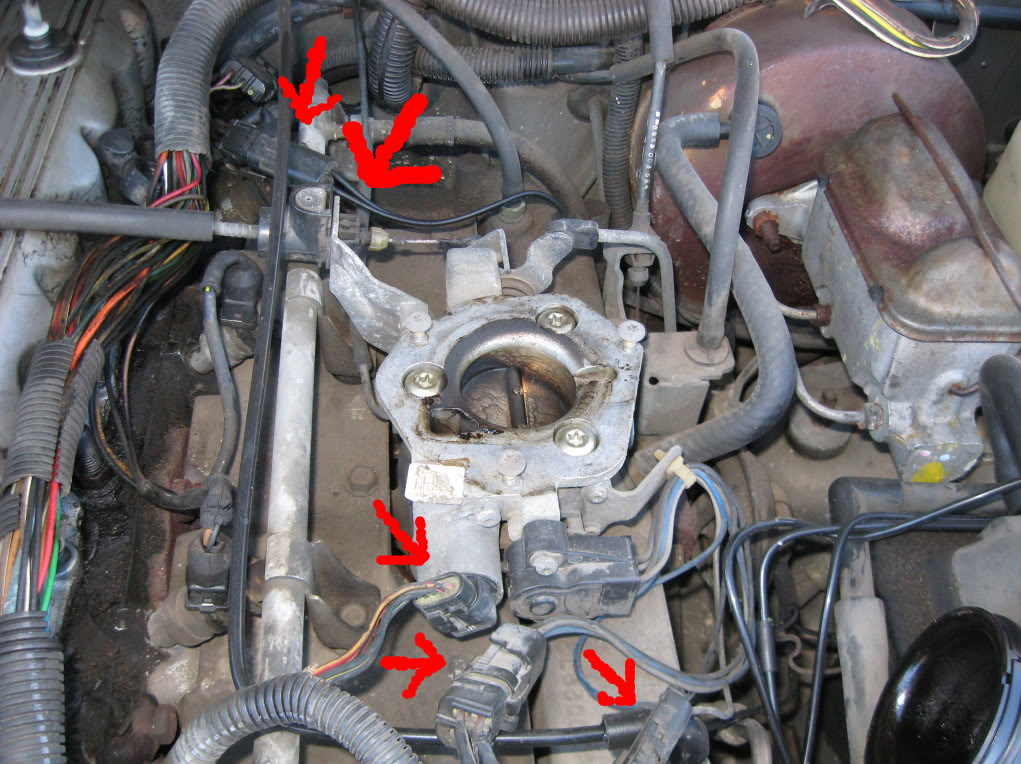
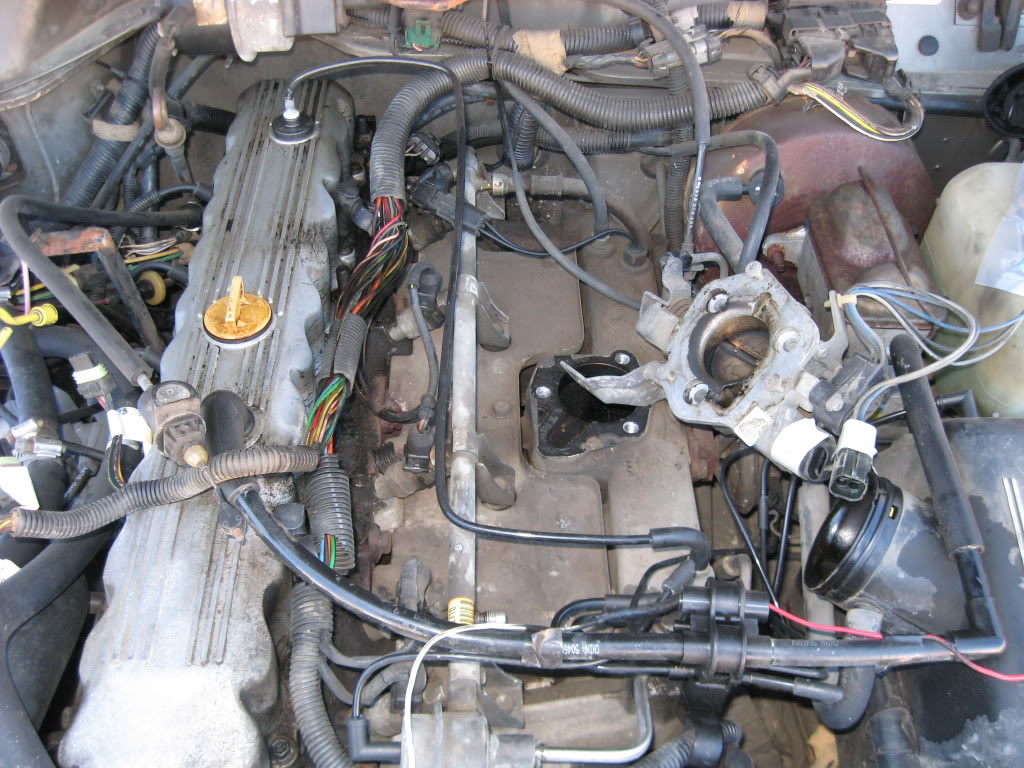
Trying to gain some room to get the rail off, take the throttle body off. Remove 3 Torx screws, disconnect cable indicated by big arrow, and disconnect 4 sensors. Remember to label everything with masking tape.
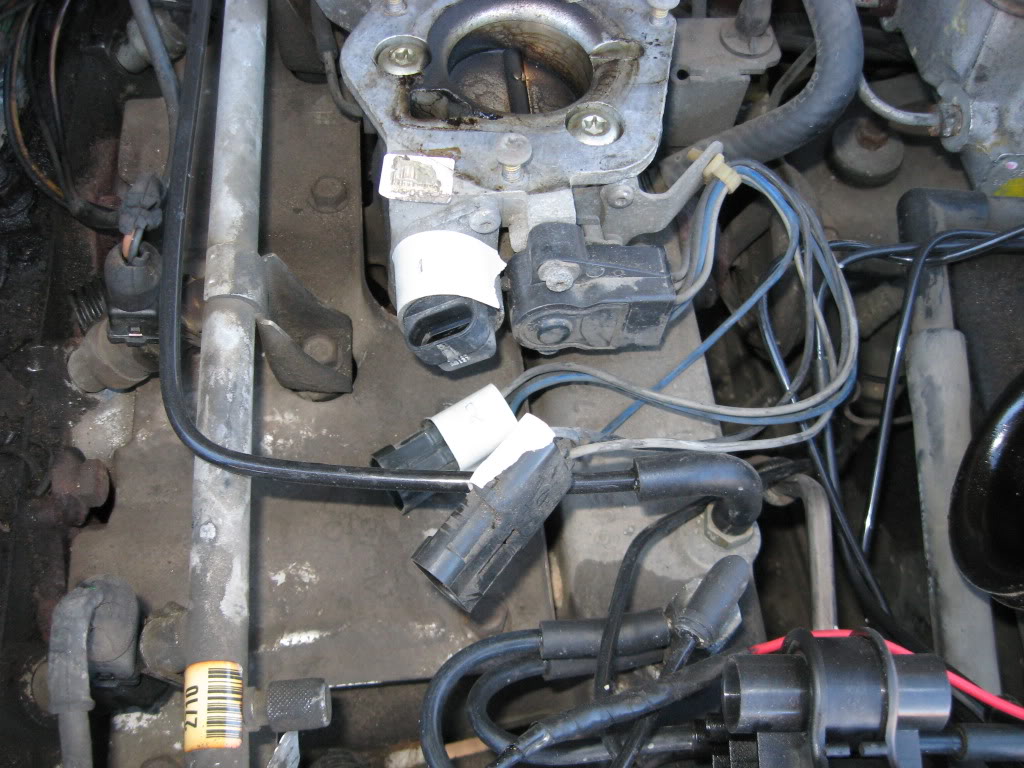
Lotsa room
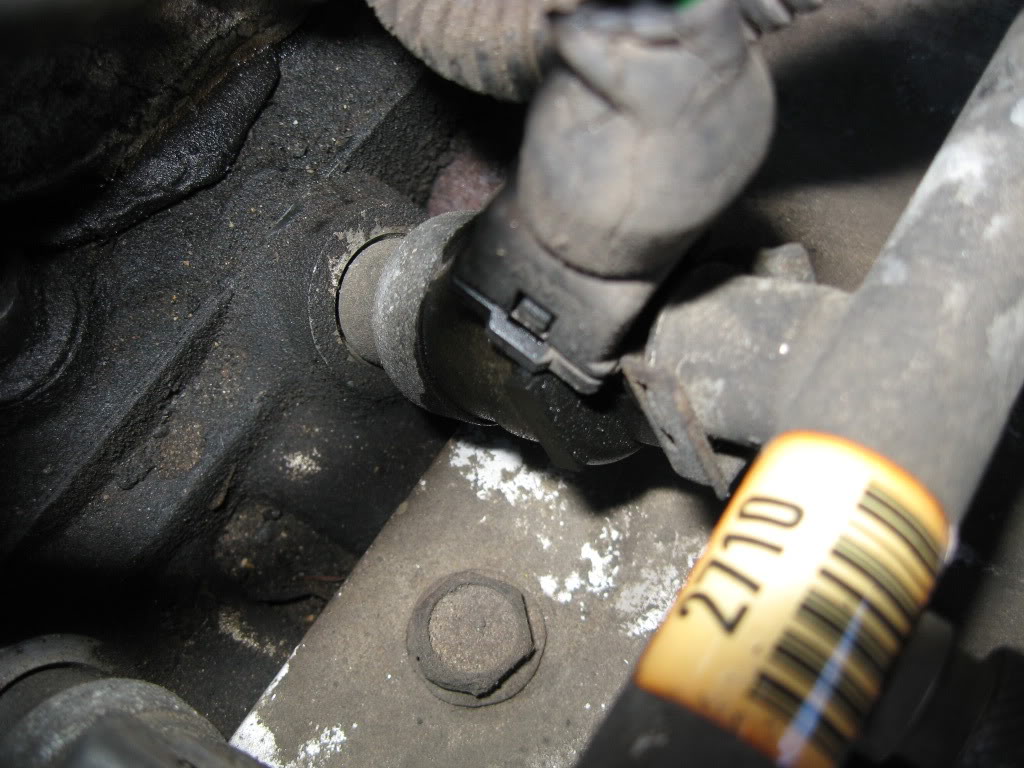
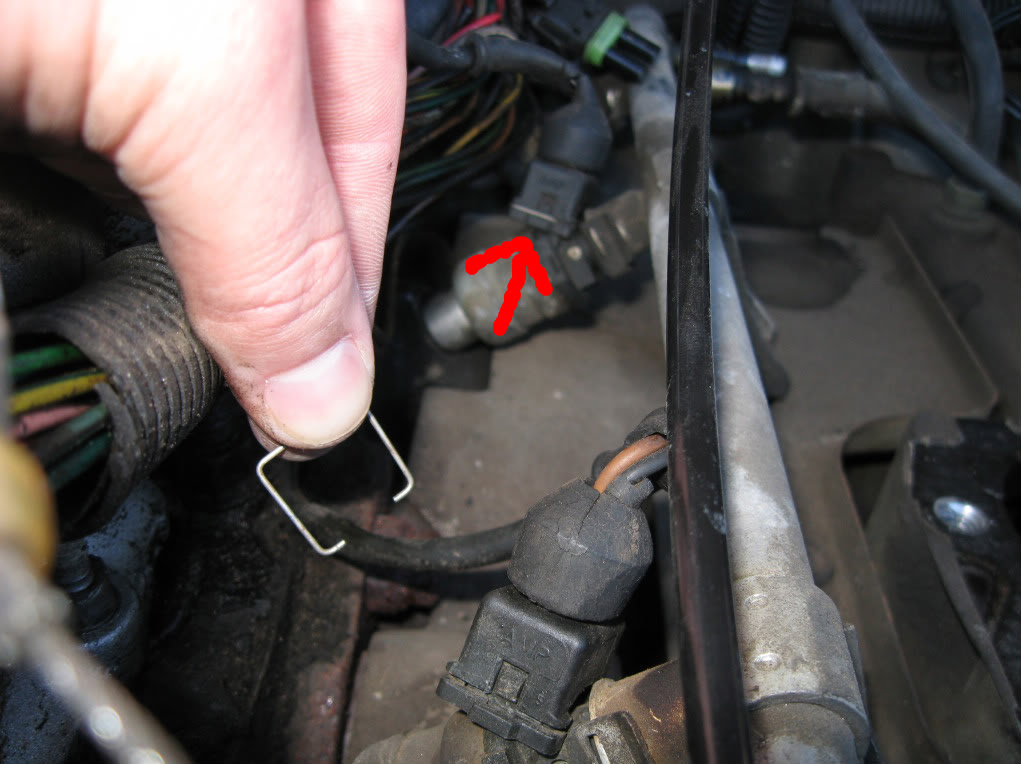
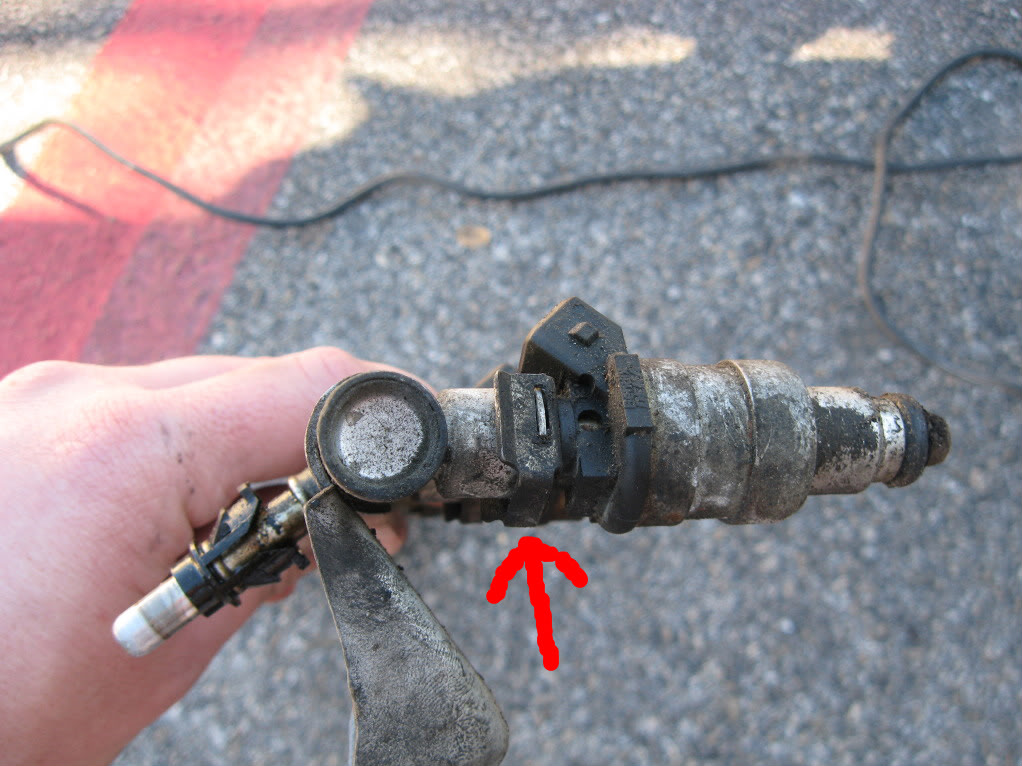
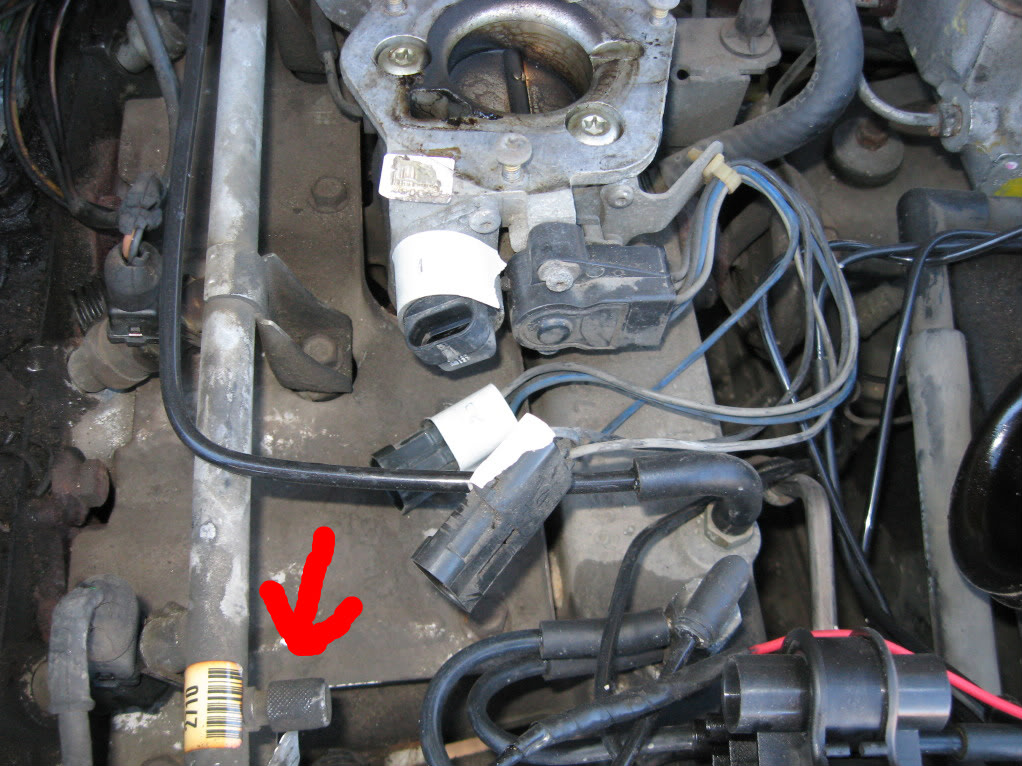
Disconnect the plug from each injector, making sure to label everything. There is a metal clip that needs to be removed before the plug comes off. A small flat-blade does the trick. Keep them.
Arrow indicates installed clip
Remove the 4 bolts that hold the rail in. Disconnect the front and rear fuel lines. Simply pinch the plastic pieces and pull the line. I had the o-ring for the rear line come out. Just re-installed it.
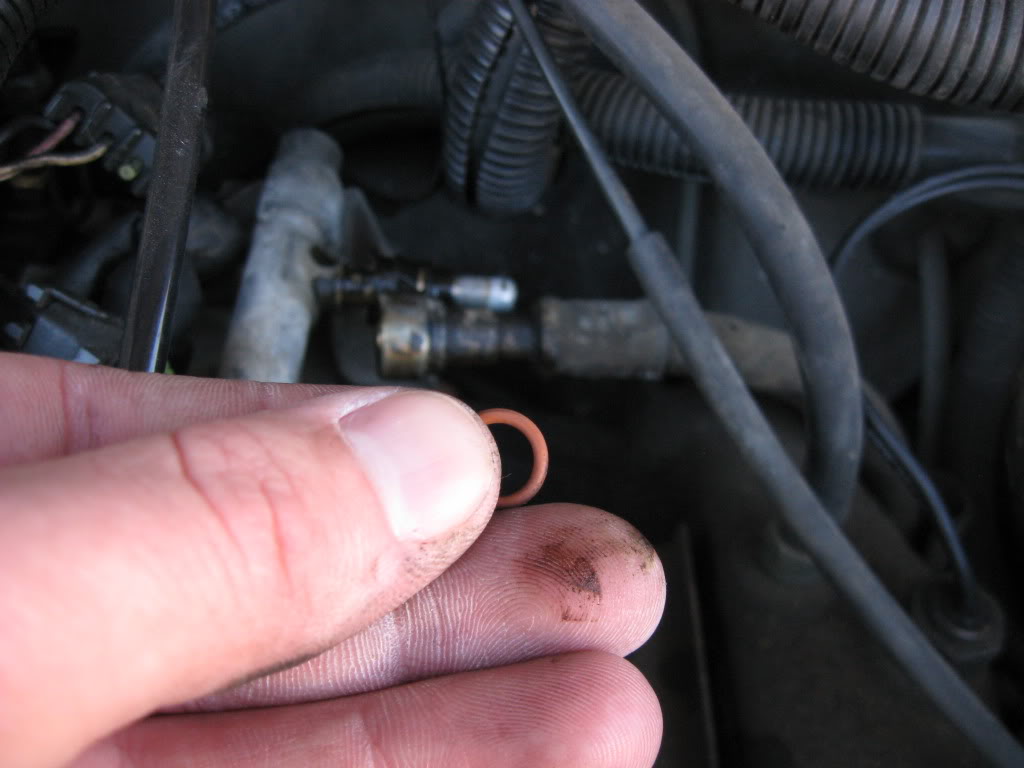
Disconnect the vacuum line from the fuel regulator and the front fuel line. I got mine to disconnect, but couldn't remove it until I removed the rail.
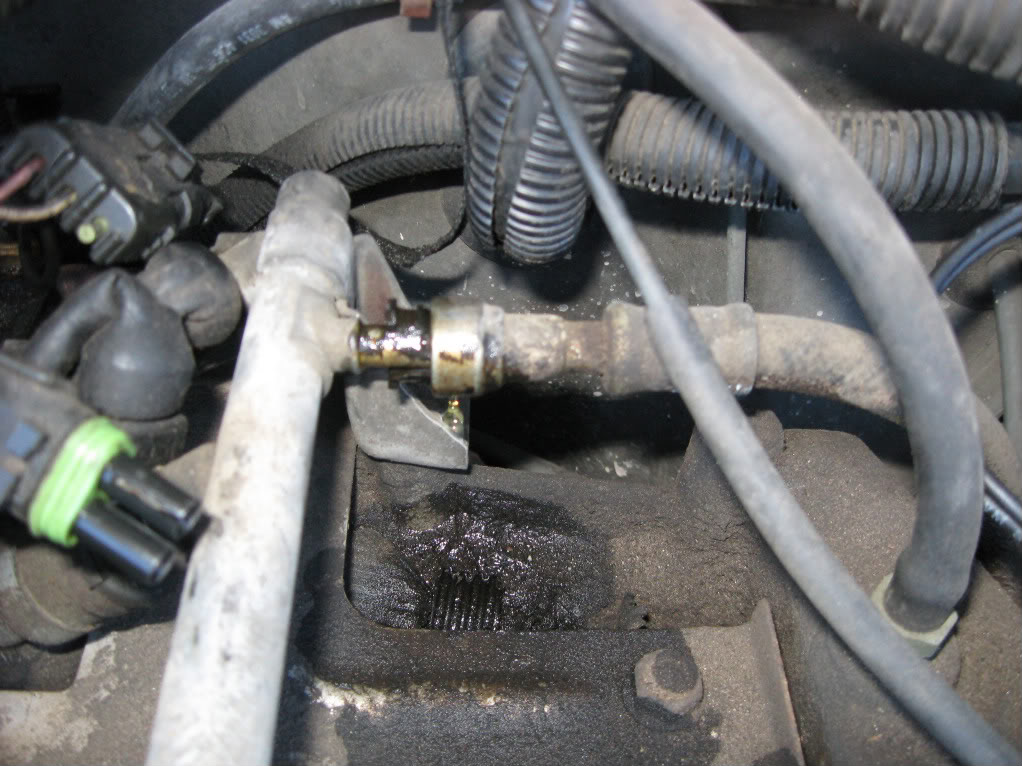
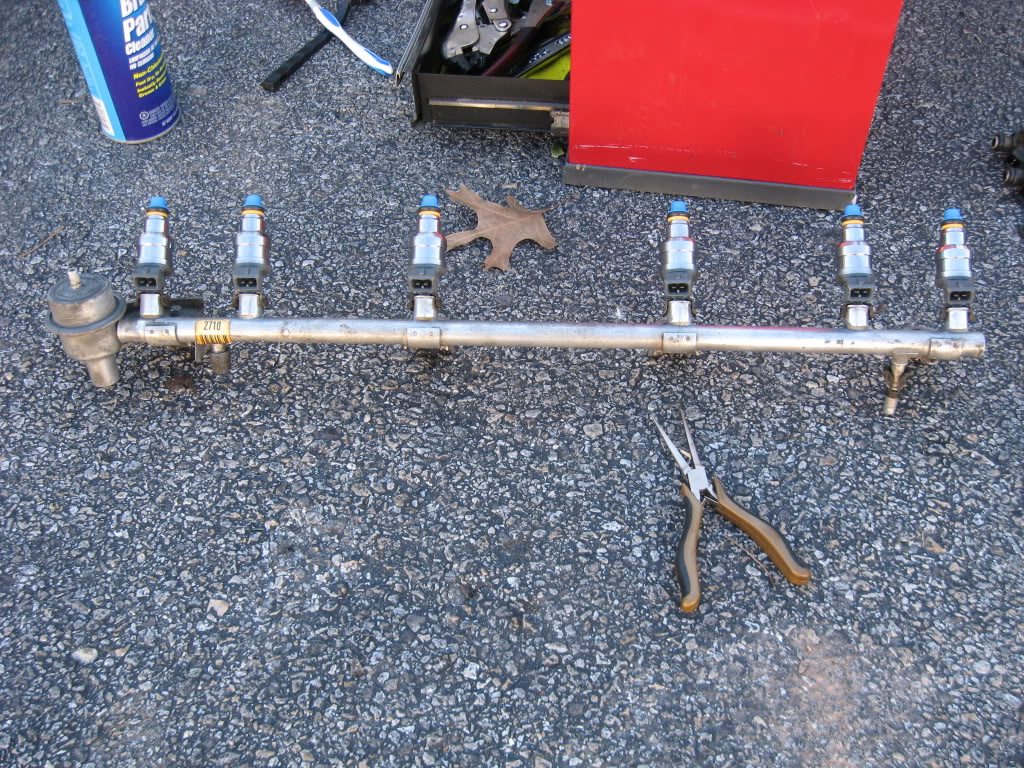
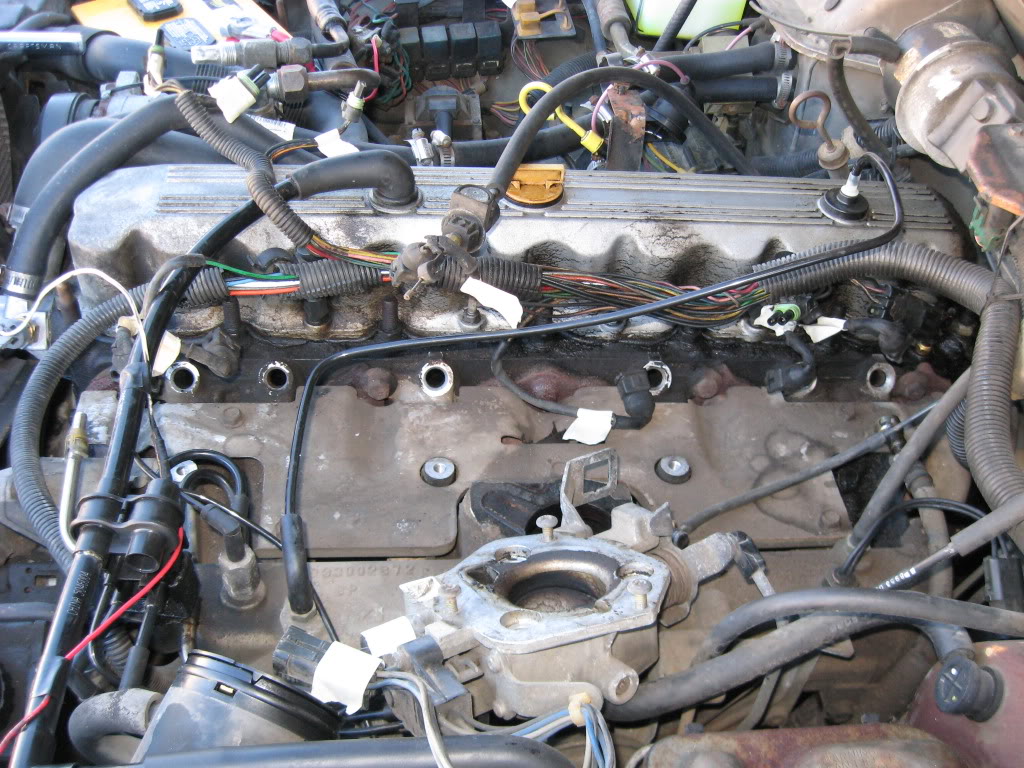
Carefully wiggle the fuel rail until all 6 injectors come loose. Make sure their o-rings come out with them.
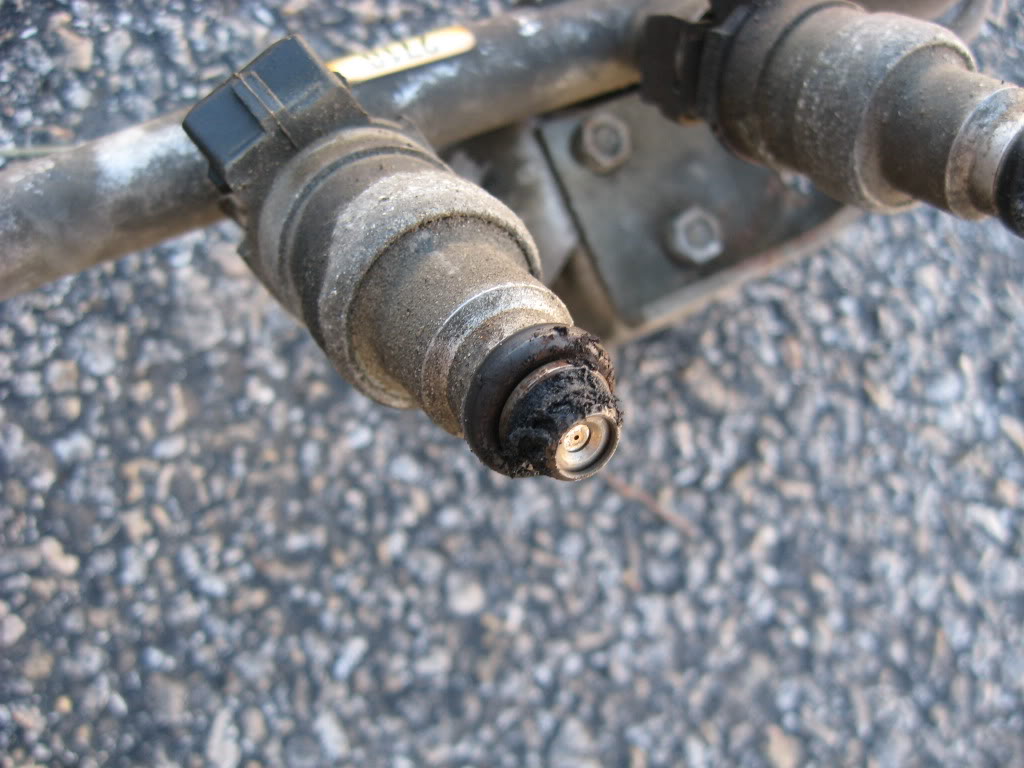
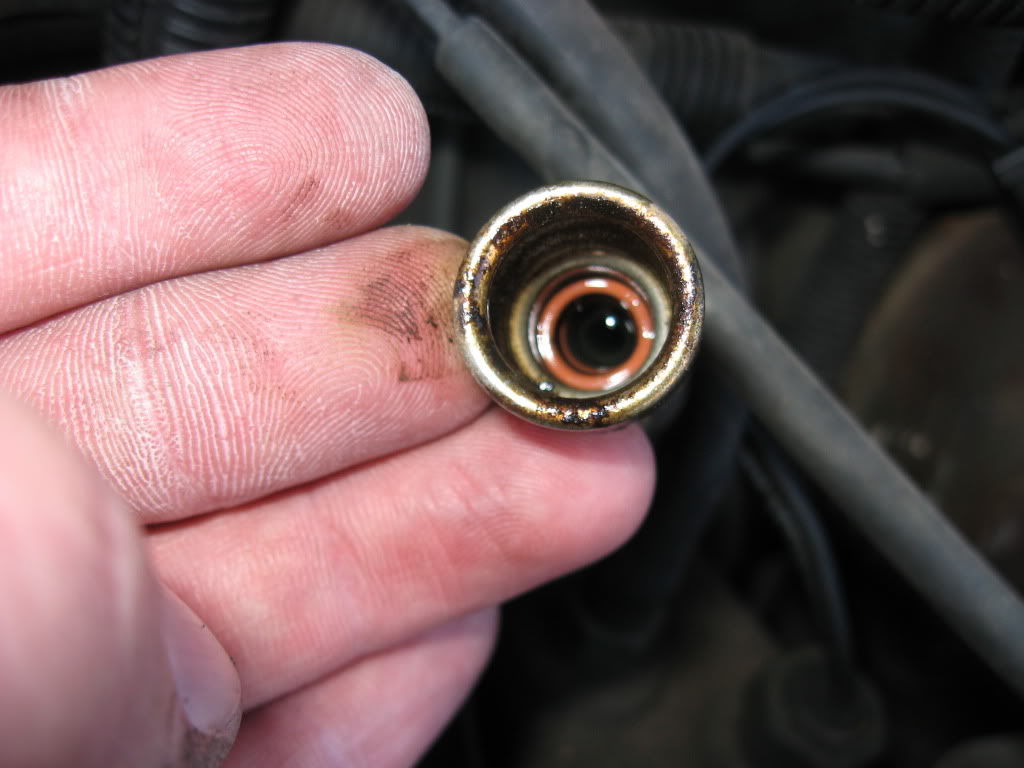
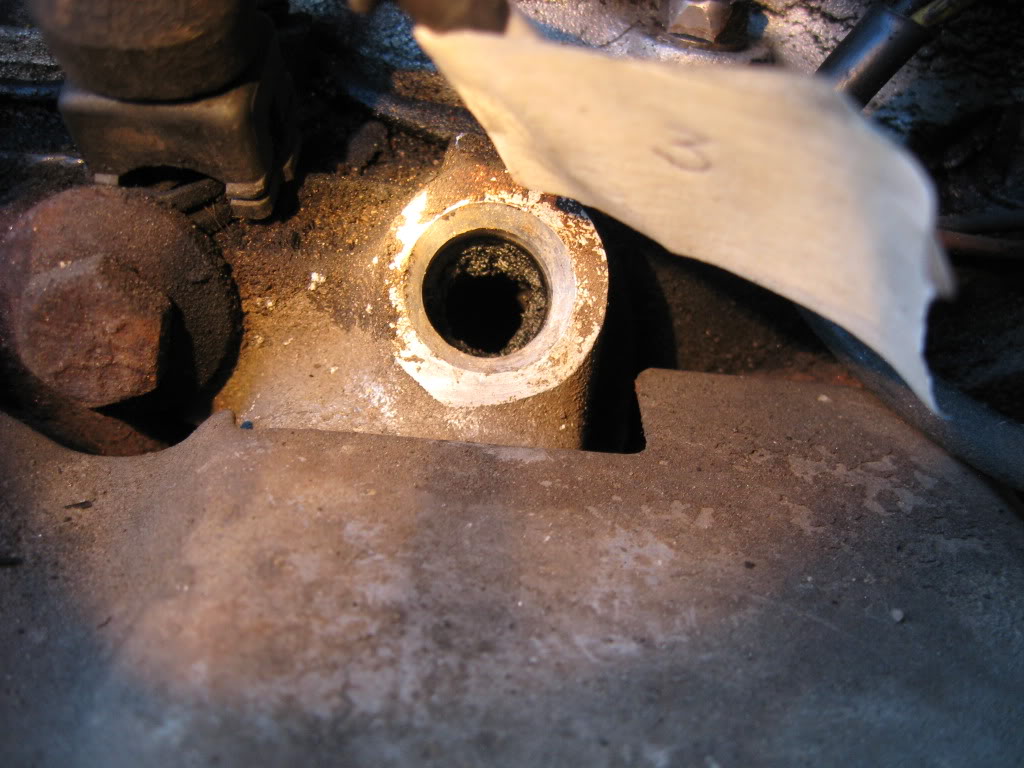
Pretty gunked up in the ports in the head. Broke out the shop vac and scraped them clean. Don't let any of that crap fall into the head. Bad joo-joo.
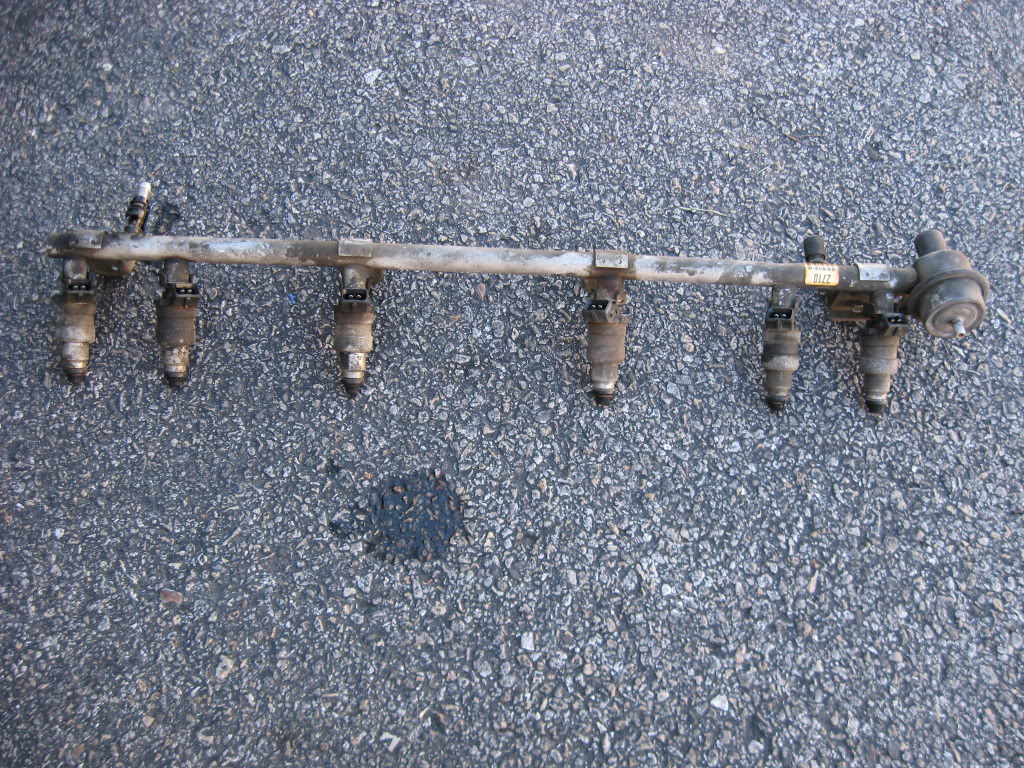
Remove the metal clips holding the injector to the fuel rail. Keep them and clean them.
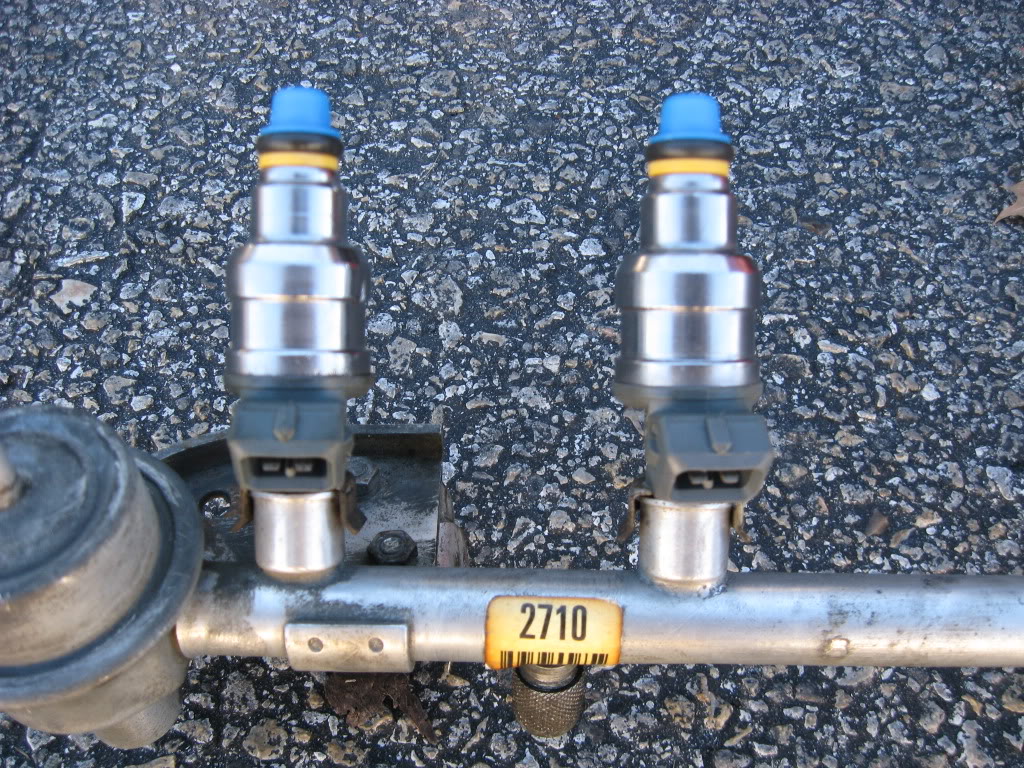
I cleaned up the rail, then on to the new injectors.
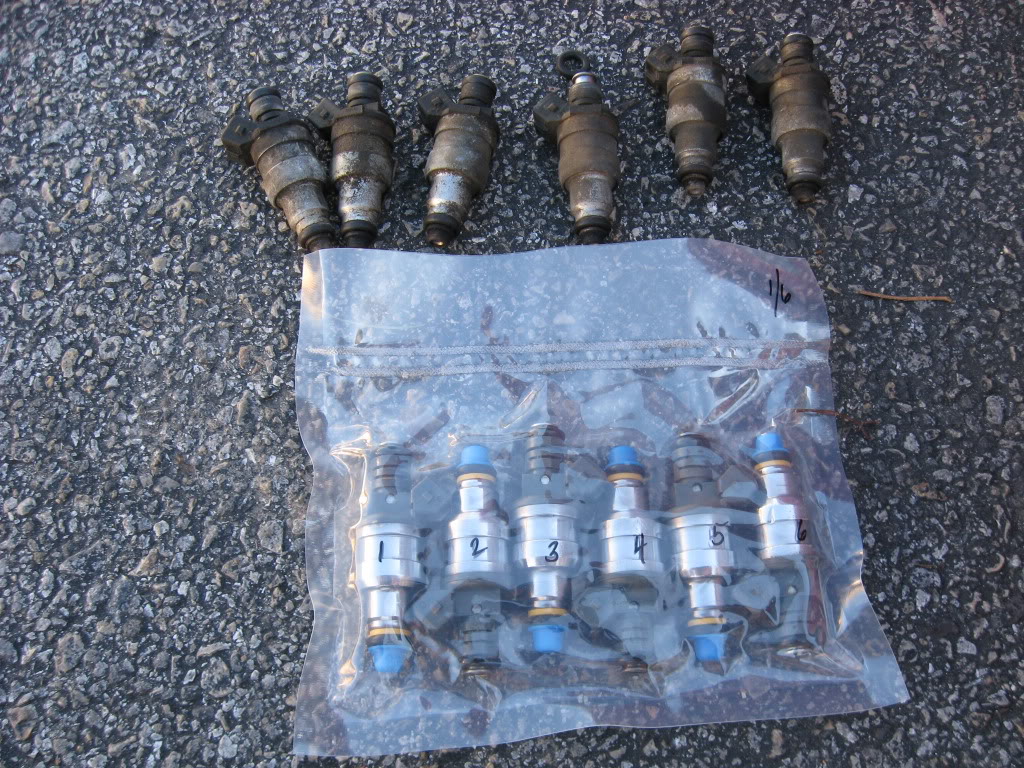
Use some motor oil and lube up the o-rings on both ends. Install on fuel rail.
Prep the holes by cleaning them.
Reverse all steps and reassemble
Reconnect the battery and turn your key to the "on" position. This powers the fuel pump and pressurizes the system. Check for leaks.
Off to the races!
About an hour and a half start to finish.
Had a leaky injector and parked the Waggy just after my last post.
I hadn't seen a RENIX specific fuel injector write-up, so I thought I'd document what I did.
My company just closed its doors, so while looking for work, we could do with one car. Picked up a set of Bosch 973's from Precision Fuel Injectors. $89.99 for 6 reman'd 19lb four hole injectors. There was a little hiccup getting them here, but I'm more than satisfied with my purchase.
Loosely followed this thread.
Leaky injector
Disconnect battery
Pop the tube from throttle body to air box off
Trying to gain some room to get the rail off, take the throttle body off. Remove 3 Torx screws, disconnect cable indicated by big arrow, and disconnect 4 sensors. Remember to label everything with masking tape.
Lotsa room
Disconnect the plug from each injector, making sure to label everything. There is a metal clip that needs to be removed before the plug comes off. A small flat-blade does the trick. Keep them.
Arrow indicates installed clip
Remove the 4 bolts that hold the rail in. Disconnect the front and rear fuel lines. Simply pinch the plastic pieces and pull the line. I had the o-ring for the rear line come out. Just re-installed it.
Disconnect the vacuum line from the fuel regulator and the front fuel line. I got mine to disconnect, but couldn't remove it until I removed the rail.
Carefully wiggle the fuel rail until all 6 injectors come loose. Make sure their o-rings come out with them.
Pretty gunked up in the ports in the head. Broke out the shop vac and scraped them clean. Don't let any of that crap fall into the head. Bad joo-joo.
Remove the metal clips holding the injector to the fuel rail. Keep them and clean them.
I cleaned up the rail, then on to the new injectors.
Use some motor oil and lube up the o-rings on both ends. Install on fuel rail.
Prep the holes by cleaning them.
Reverse all steps and reassemble
Reconnect the battery and turn your key to the "on" position. This powers the fuel pump and pressurizes the system. Check for leaks.
Off to the races!
About an hour and a half start to finish.
Last edited by letinsh; Jan 13, 2012 at 07:30 AM.
Thread Starter
Seasoned Member
Joined: Jan 2011
Posts: 303
Likes: 4
From: Austin
Year: 1987
Model: Wagoneer
Engine: 4.0
Thread Starter
Seasoned Member
Joined: Jan 2011
Posts: 303
Likes: 4
From: Austin
Year: 1987
Model: Wagoneer
Engine: 4.0
2/9/12
Just a couple simple housekeeping things.
Swapped the fan belt - that was an interesting experience. 4 bolts need loosening, then you can turn the adjustment bolt on the power steering pump. The 2 back bolts and the bottom front bolt can be gotten most easily from the bottom, while the top bolt on the front can be gotten from above.
Turning the adjustment bolt can be done from the bottom with a ratchet or from the top with a ratchet with two 6" extensions and a u-joint. PB Blaster makes things easier.
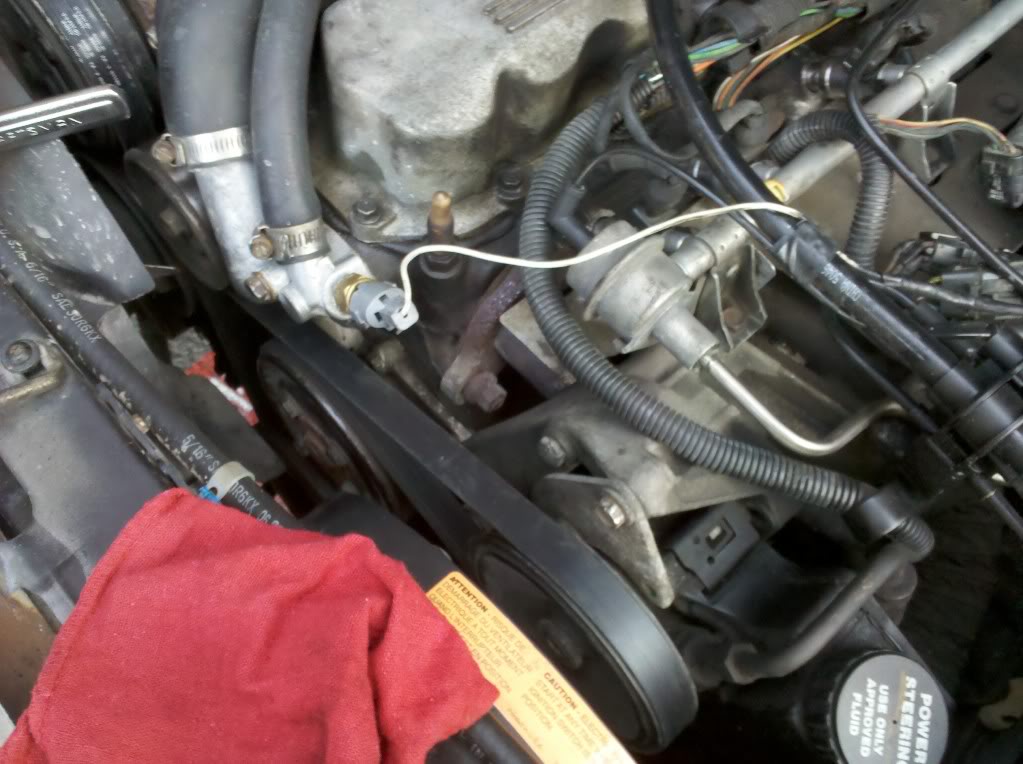
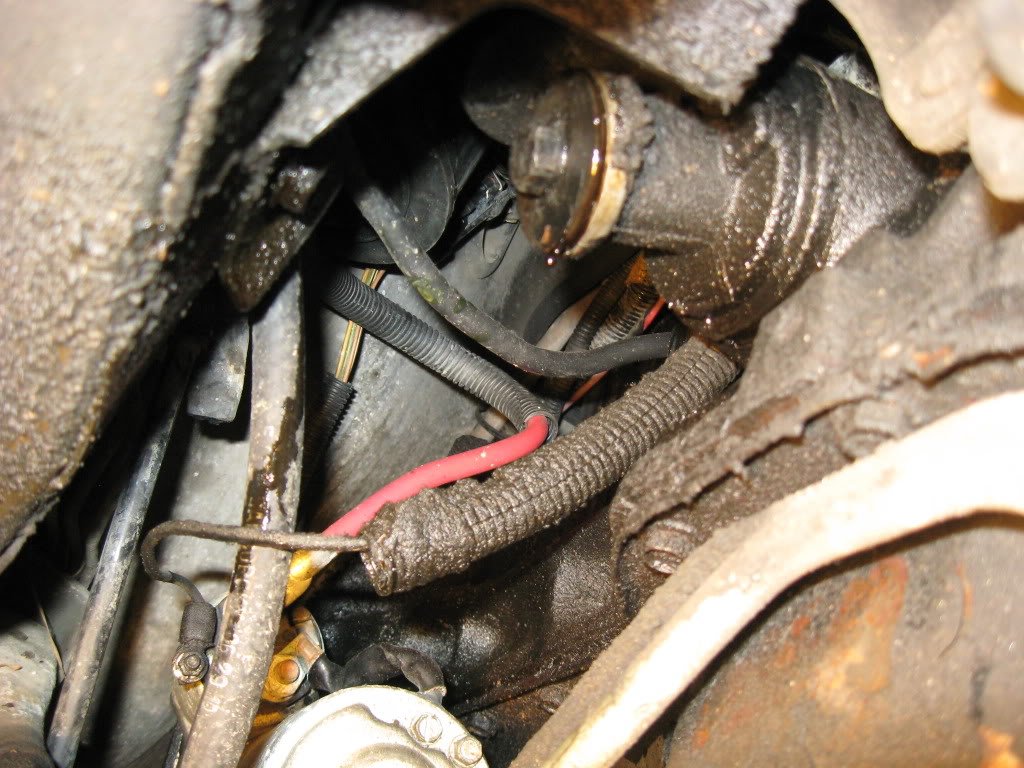
Next, did the old "ground refresh." Swapped the tiny ribbon cable from the head to the firewall with a 19" 4 gage cable. Cleaned the connection with a wire brush and some throttle body cleaner, then put the new one on.
Did the same with the "dip stick" set.
Next, took off the Throttle body and cleaned it up nice and shiny. Also removed the IAC and gave it a good scrubbing. Noticeably smoothed out the idle.
Figuring out the belt was by far the most time consuming part.
Just a couple simple housekeeping things.
Swapped the fan belt - that was an interesting experience. 4 bolts need loosening, then you can turn the adjustment bolt on the power steering pump. The 2 back bolts and the bottom front bolt can be gotten most easily from the bottom, while the top bolt on the front can be gotten from above.
Turning the adjustment bolt can be done from the bottom with a ratchet or from the top with a ratchet with two 6" extensions and a u-joint. PB Blaster makes things easier.
Next, did the old "ground refresh." Swapped the tiny ribbon cable from the head to the firewall with a 19" 4 gage cable. Cleaned the connection with a wire brush and some throttle body cleaner, then put the new one on.
Did the same with the "dip stick" set.
Next, took off the Throttle body and cleaned it up nice and shiny. Also removed the IAC and gave it a good scrubbing. Noticeably smoothed out the idle.
Figuring out the belt was by far the most time consuming part.
Thread Starter
Seasoned Member
Joined: Jan 2011
Posts: 303
Likes: 4
From: Austin
Year: 1987
Model: Wagoneer
Engine: 4.0
2/14/12
I'm trying to slowly get rid of all the fluid leaks. Yesterday it was time to do the distributor mount gasket. Pretty simple procedure, if you don't dick with the crank position while the distributor is out....
Marked and unplugged a couple of the plug wires, as well as the coil wire. Took the cap off and tucked it away.
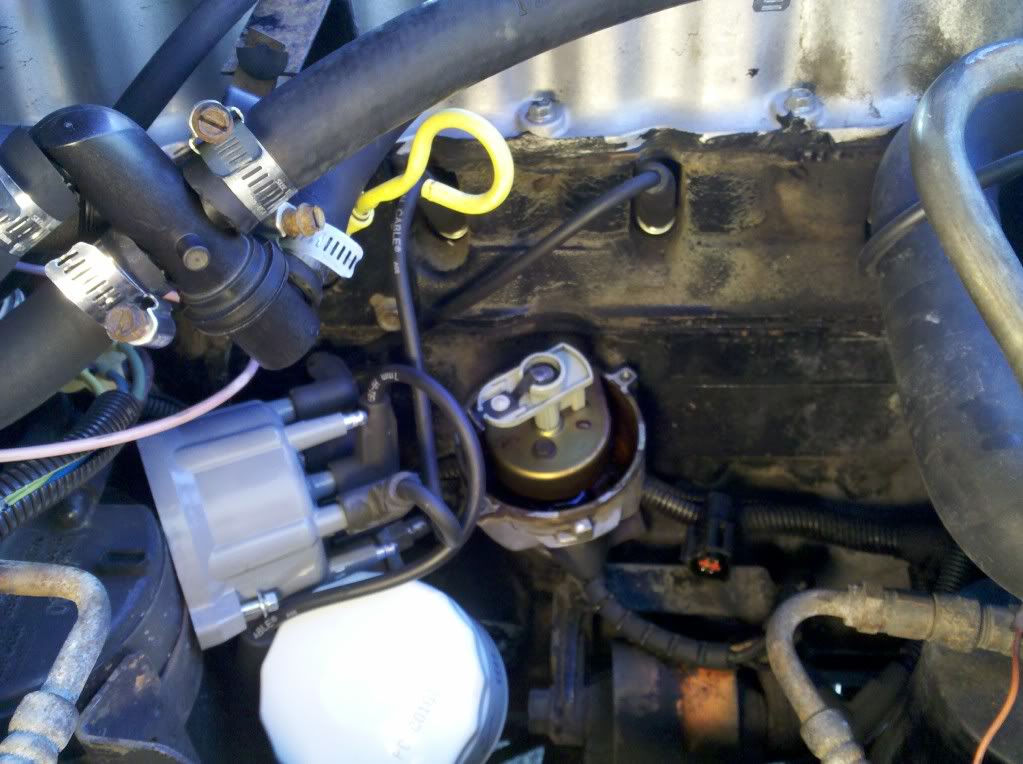
Marked the position of the distributor to the block using white out. Also, position of the rotor to the housing, then removed the bolt (1/2" combination wrench will get it done). Disconnect the cable coming out the the distributor and slowly pull up and out on everything.
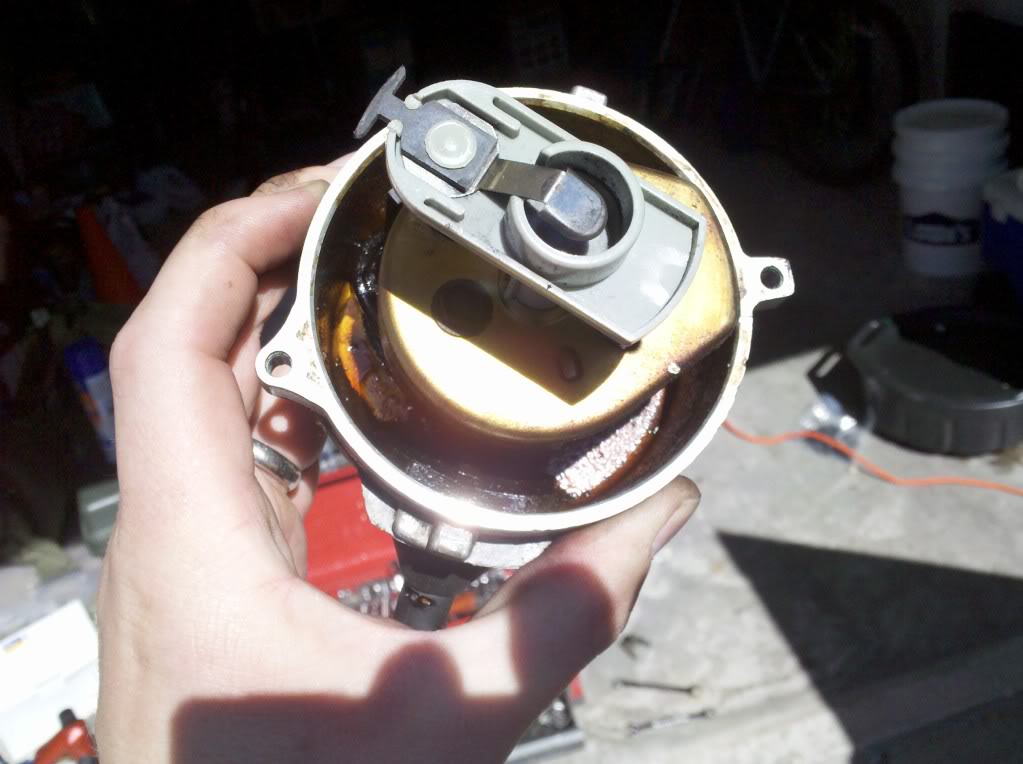
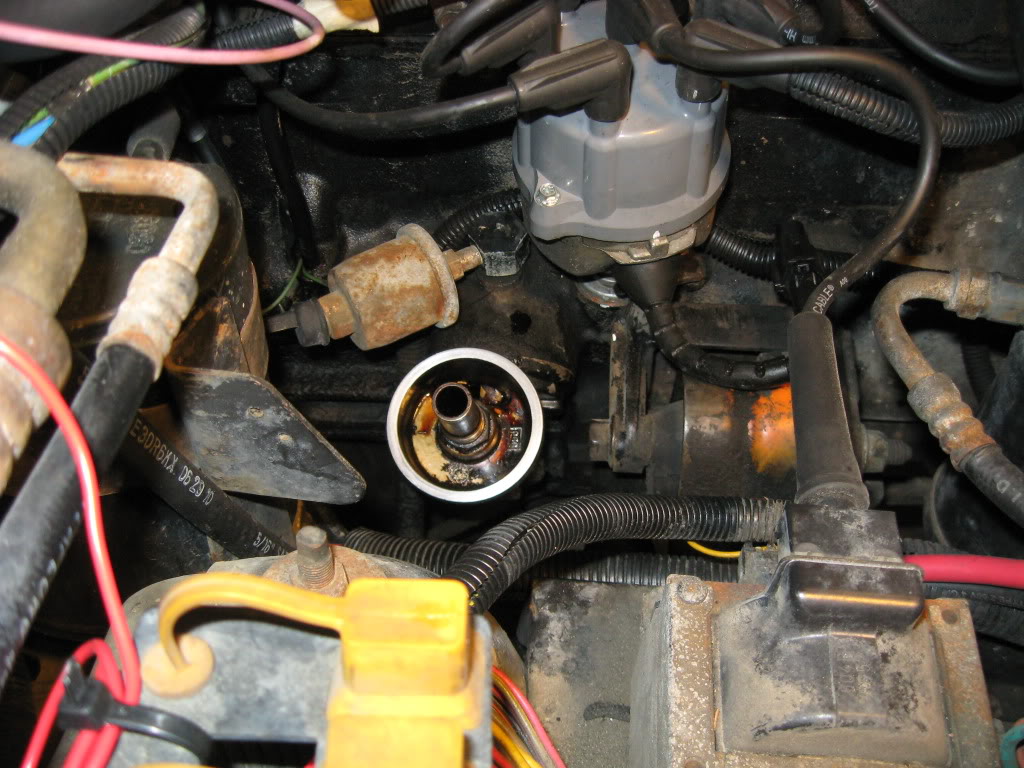
Clean the old gasket from around the hole, clean up the mounting bracket and wipe down the distributor (don't remove your marks....).
I had some sludge in my distributor, but some careful work with q-tips and throttle body cleaner fixed that.
Now, if you were careful, you could just slide everything back in. I, on the other hand, had to locate TDC for the #1 cyl, then do the process. Since it was just me, I pulled the plug and installed my compression gage. Using a ratchet, I rotated the crank once (using markers on the pulley and timing chain cover) and checked if I had generated any pressure. First time there wasn't any, which means that was the exhaust stroke. Once more confirmed by pressure to be TDC on the compression stroke, so off to the races. Turned the oil pump slot in the block with a screwdriver and everything went together just fine, with the rotor pointing at the #1 cyl contact on the cap.
Done and done.
I'm trying to slowly get rid of all the fluid leaks. Yesterday it was time to do the distributor mount gasket. Pretty simple procedure, if you don't dick with the crank position while the distributor is out....
Marked and unplugged a couple of the plug wires, as well as the coil wire. Took the cap off and tucked it away.
Marked the position of the distributor to the block using white out. Also, position of the rotor to the housing, then removed the bolt (1/2" combination wrench will get it done). Disconnect the cable coming out the the distributor and slowly pull up and out on everything.
Clean the old gasket from around the hole, clean up the mounting bracket and wipe down the distributor (don't remove your marks....).
I had some sludge in my distributor, but some careful work with q-tips and throttle body cleaner fixed that.
Now, if you were careful, you could just slide everything back in. I, on the other hand, had to locate TDC for the #1 cyl, then do the process. Since it was just me, I pulled the plug and installed my compression gage. Using a ratchet, I rotated the crank once (using markers on the pulley and timing chain cover) and checked if I had generated any pressure. First time there wasn't any, which means that was the exhaust stroke. Once more confirmed by pressure to be TDC on the compression stroke, so off to the races. Turned the oil pump slot in the block with a screwdriver and everything went together just fine, with the rotor pointing at the #1 cyl contact on the cap.
Done and done.
CF Veteran
Joined: Sep 2010
Posts: 1,024
Likes: 0
From: Coos Bay, Or
Year: 1990
Model: Cherokee
Engine: 4.0
Sweet man, looking good! I did the same with the ground strap, but the dipstick ones I need to get too, what did you exactly do? I have yet to do my distributor gasket as well.
Thread Starter
Seasoned Member
Joined: Jan 2011
Posts: 303
Likes: 4
From: Austin
Year: 1987
Model: Wagoneer
Engine: 4.0
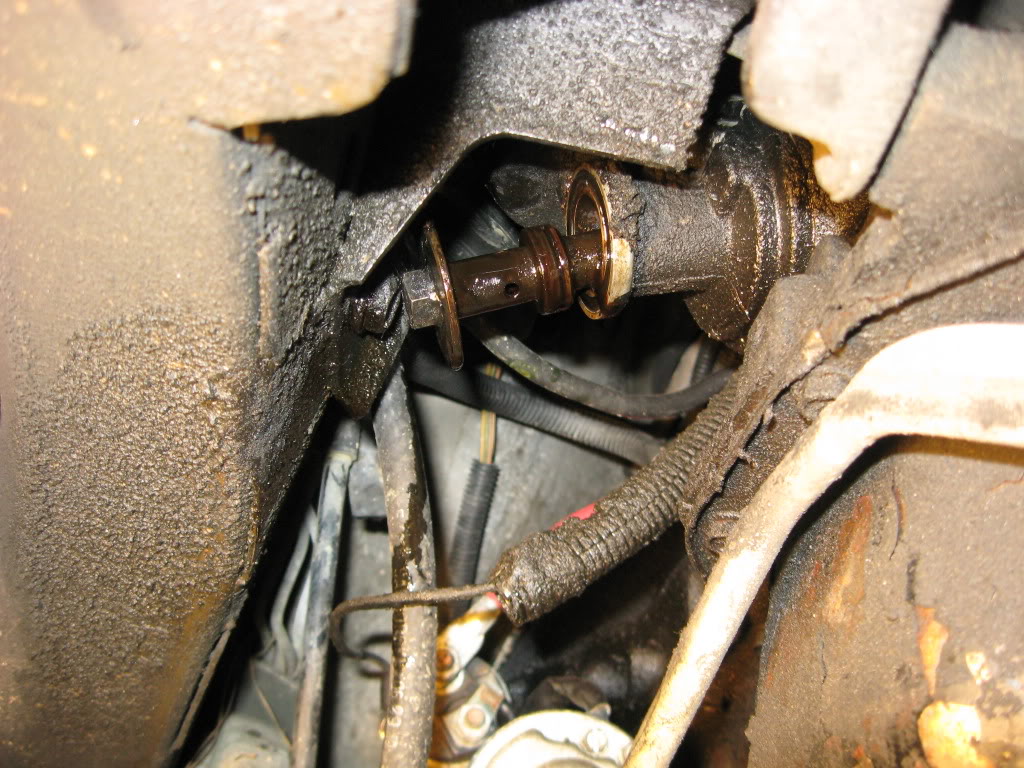
It was no big deal. Stuck the socket on there and started turning. Mine initially backed the stud out of the block. Make sure you don't lose any of the wires that should mount there. Clean the block, stud, and nut (once it comes off the stud) with a wire brush and carb cleaner 'till they're shiny. Reinstall the stud. Clean each eyelet with your brush until they're shiny. You can coat the connection with petroleum jelly (like you would a battery terminal) to keep the water out, or not. Put everything back on and cinch 'er down.
Thread Starter
Seasoned Member
Joined: Jan 2011
Posts: 303
Likes: 4
From: Austin
Year: 1987
Model: Wagoneer
Engine: 4.0
3/11/12
199,340
Oil change Advance Auto Parts conventional 10W-30
Changed oil filter to Purlator L14619
Going through and replacing the gaskets and seals that have been neglected. Trying to get my Waggy drip-free. The goal today was valve cover, oil filter adapter o-rings, rear main, and oil pan. Ambitious, I know. Didn't quite make the rear main or oil pan....some other day, I guess.
First thing I learned was not to jack up your vehicle in prep for the oil pan/rear main before doing the valve cover....I'm 6ft tall, but even so it was difficult swapping that gasket with the Jeep on stands.
Had oil on the bottom of the pan, so a week ago, I sprayed it down with Engine Brite and power washed it, hoping to pinpoint the leak. The two I could verify was back of the valve cover and filter adapter.
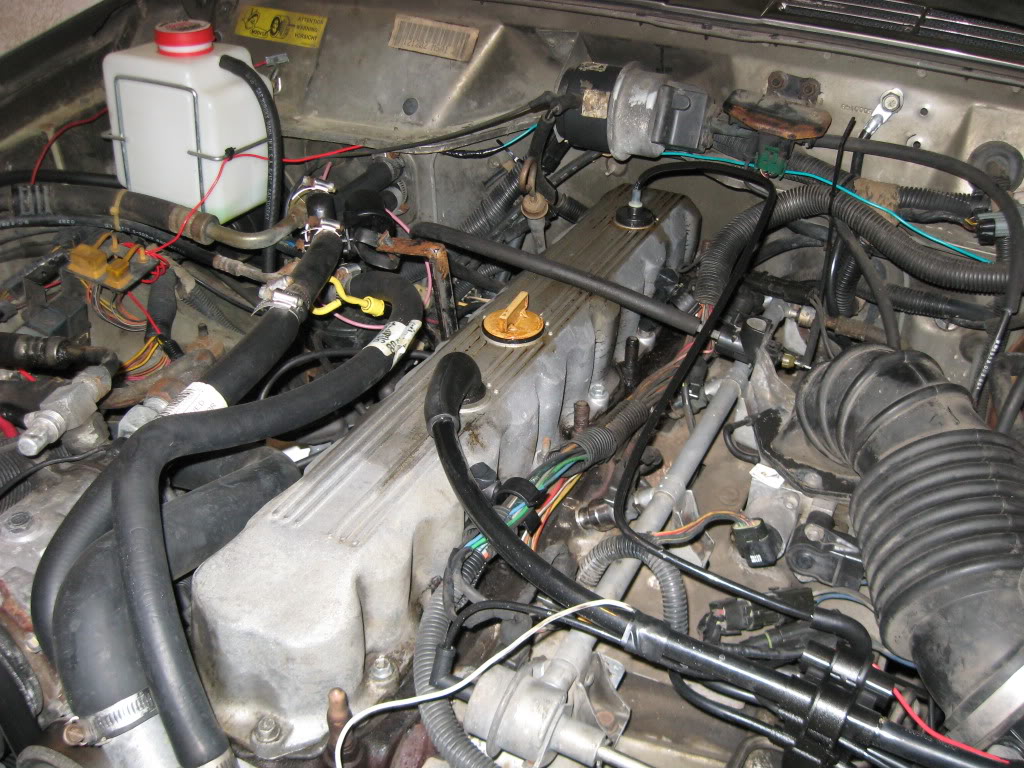
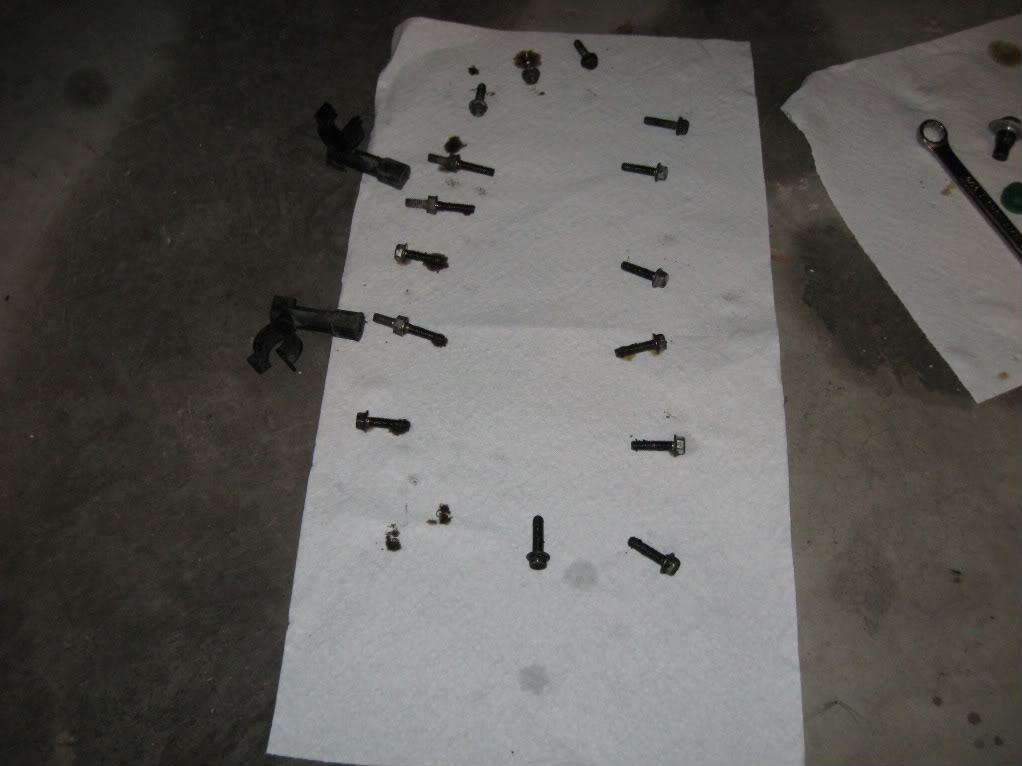
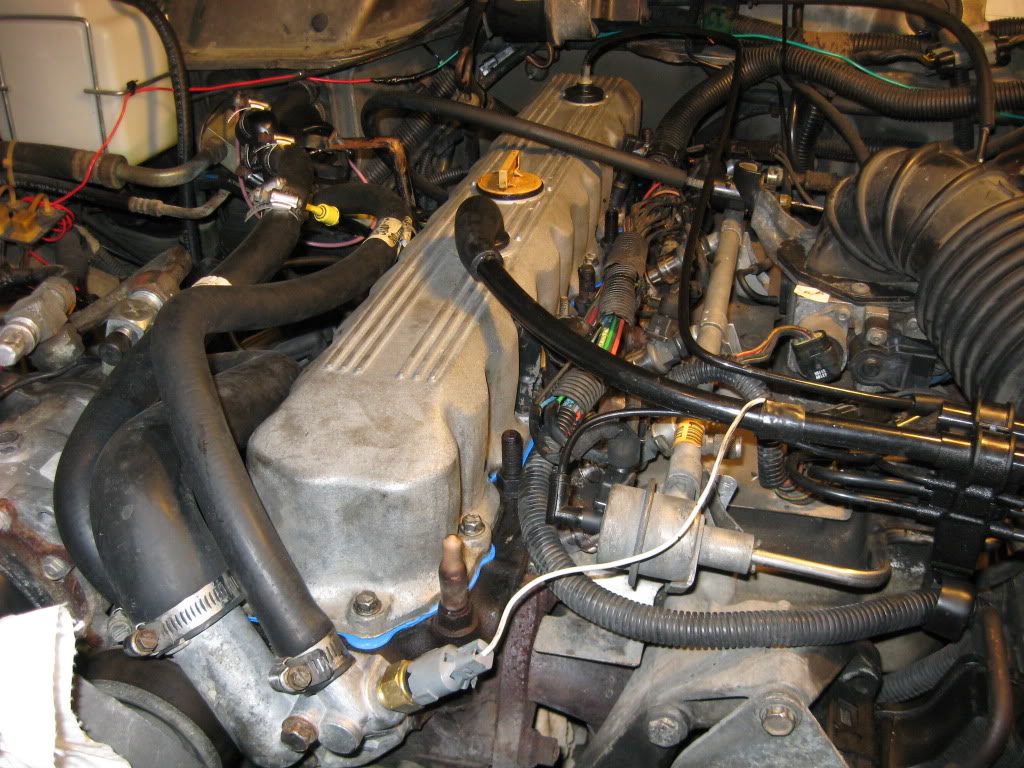
Disconnected the cruise control cable and the two CCV tubes from the valve cover. Took out all the bolts and the 3 studs and laid them out in their proper order.
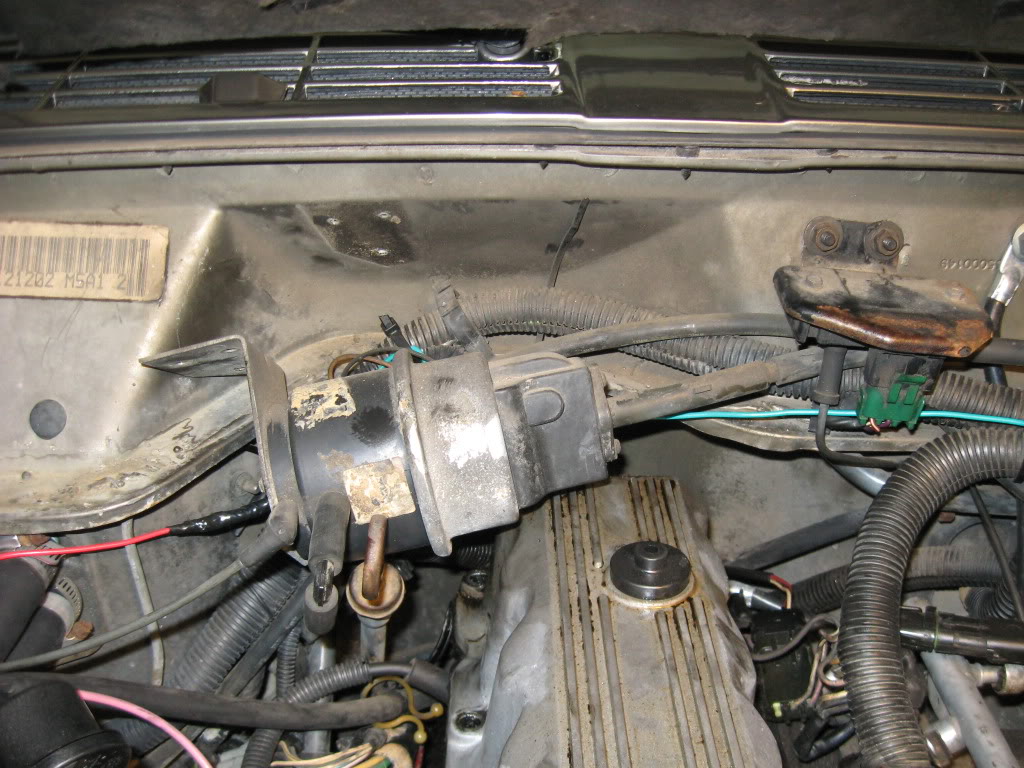
Had to remove the three screws holding this thingy to the firewall so I would have enough clearance to get the valve cover off.
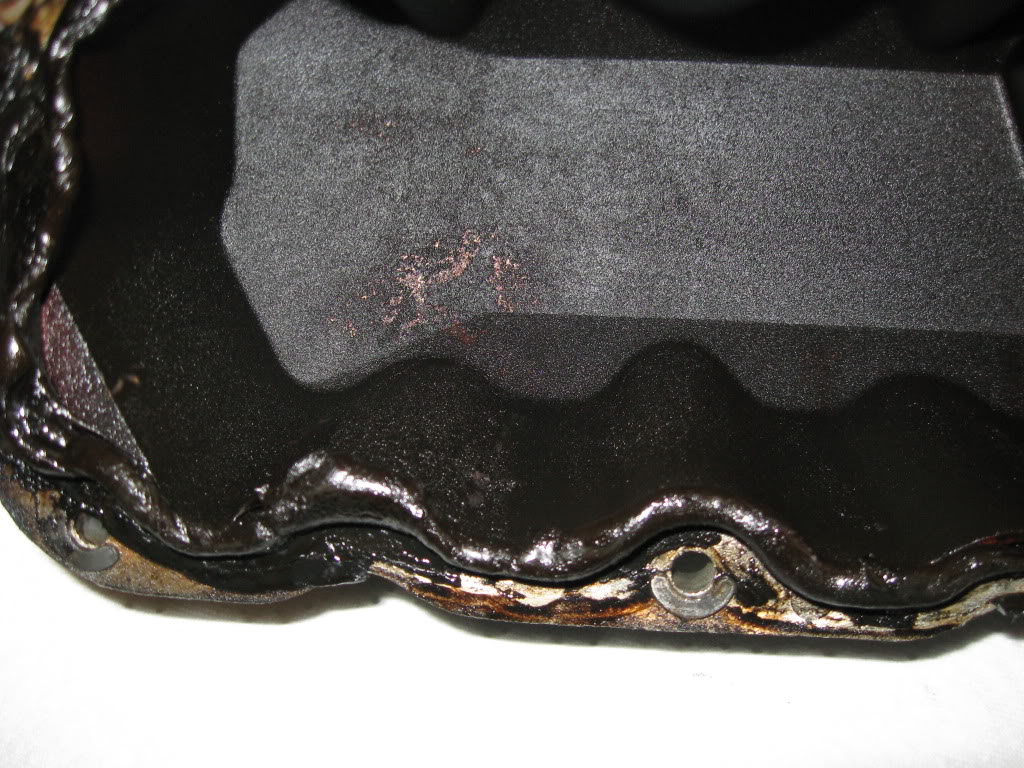
The last time this was done, the gasket was made with a thick bead of RTV....a real PITA to get off....
Scraped it clean and then used brake cleaner to ensure gasket surface was ready to go.
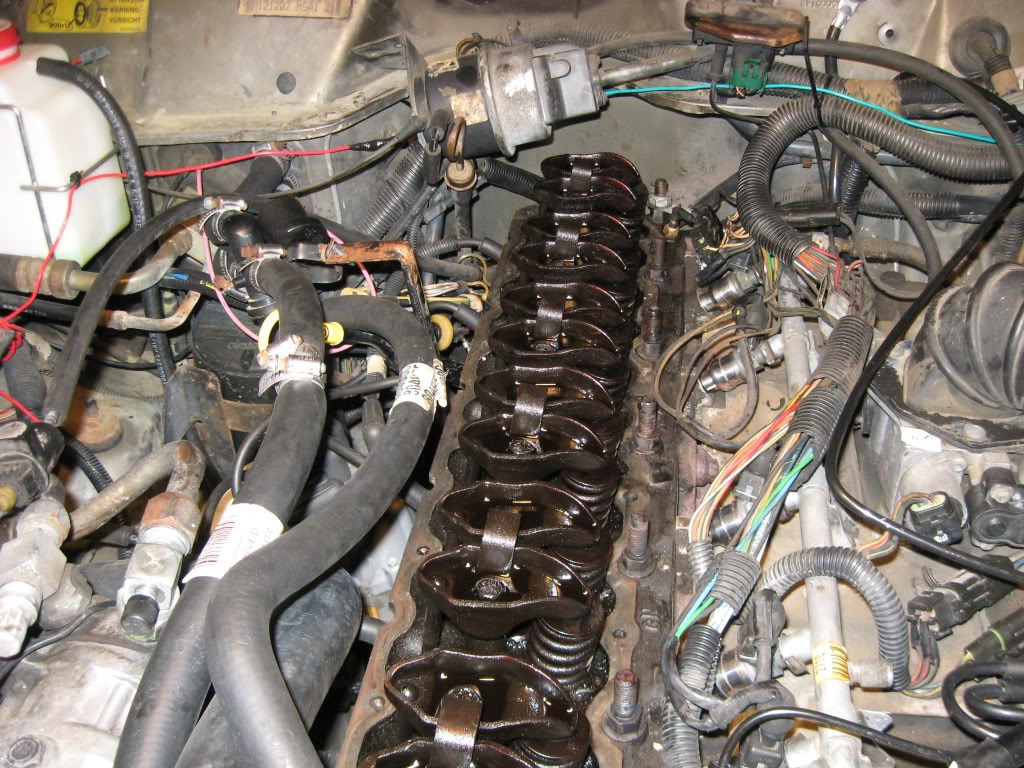
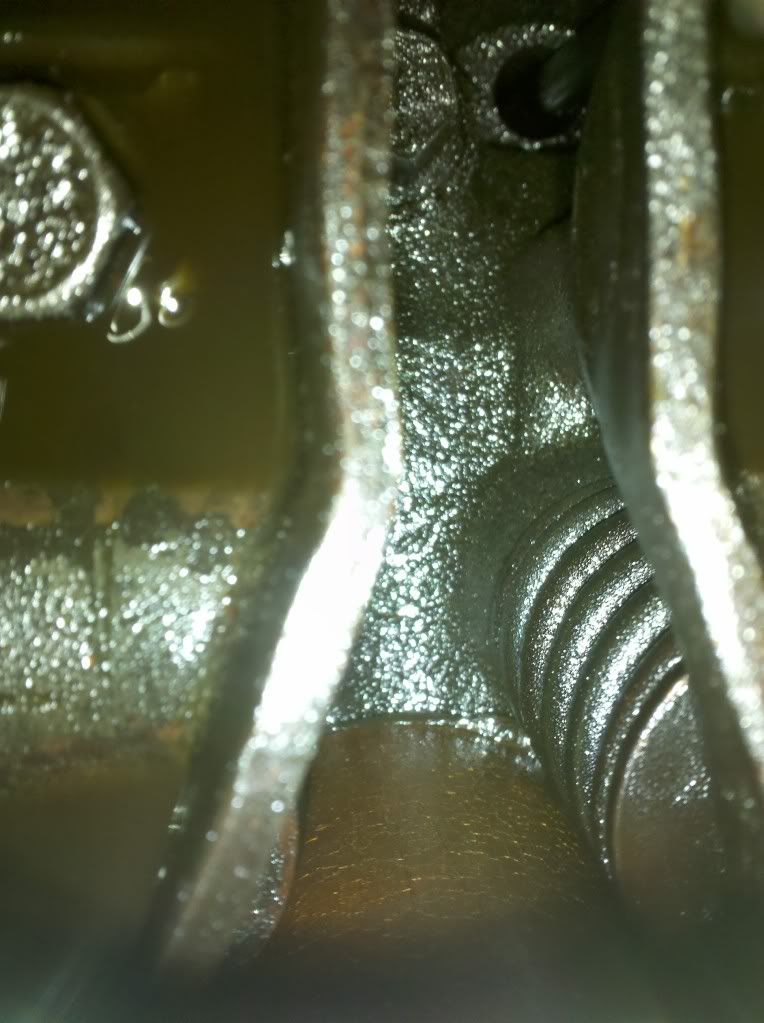
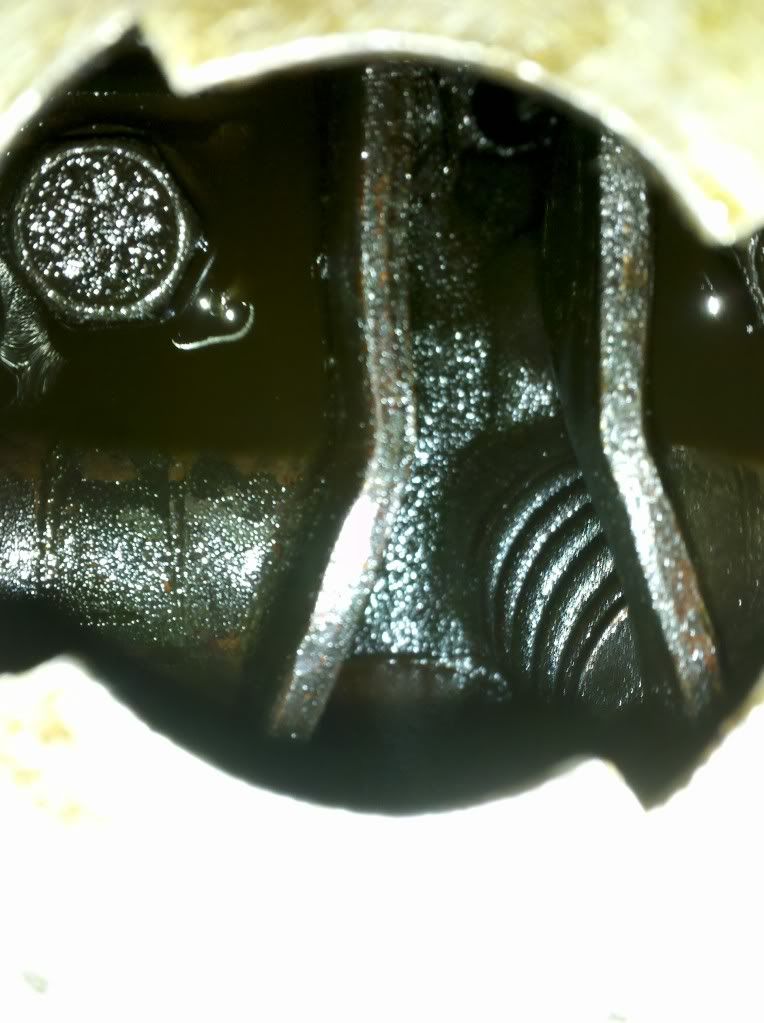
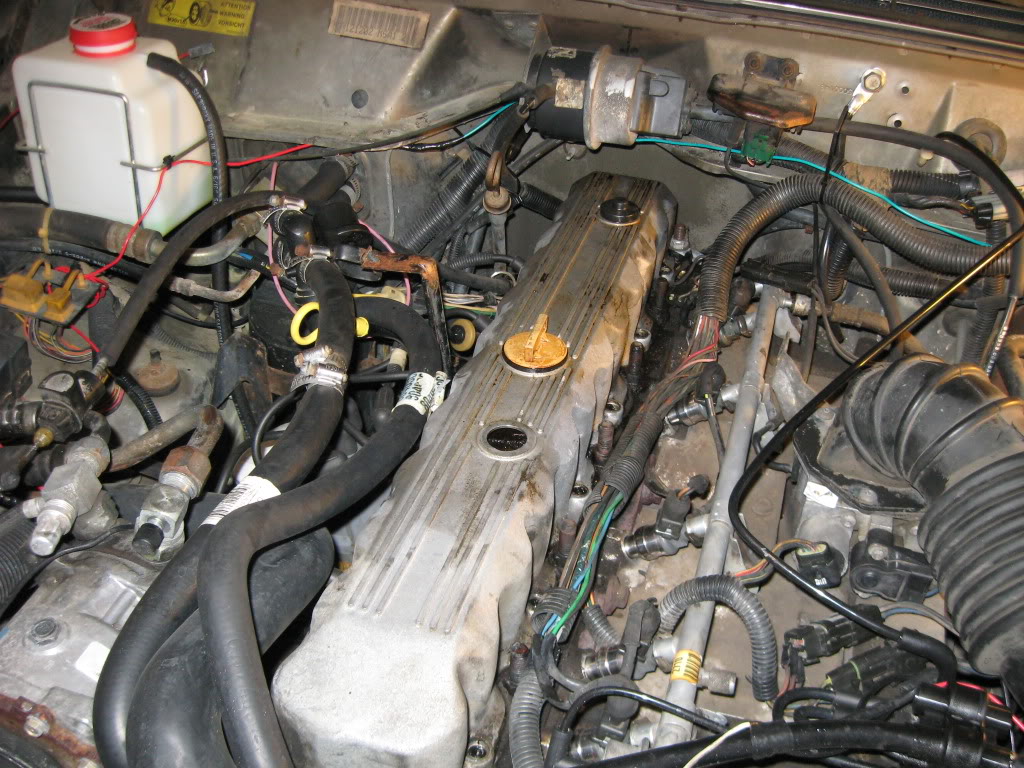
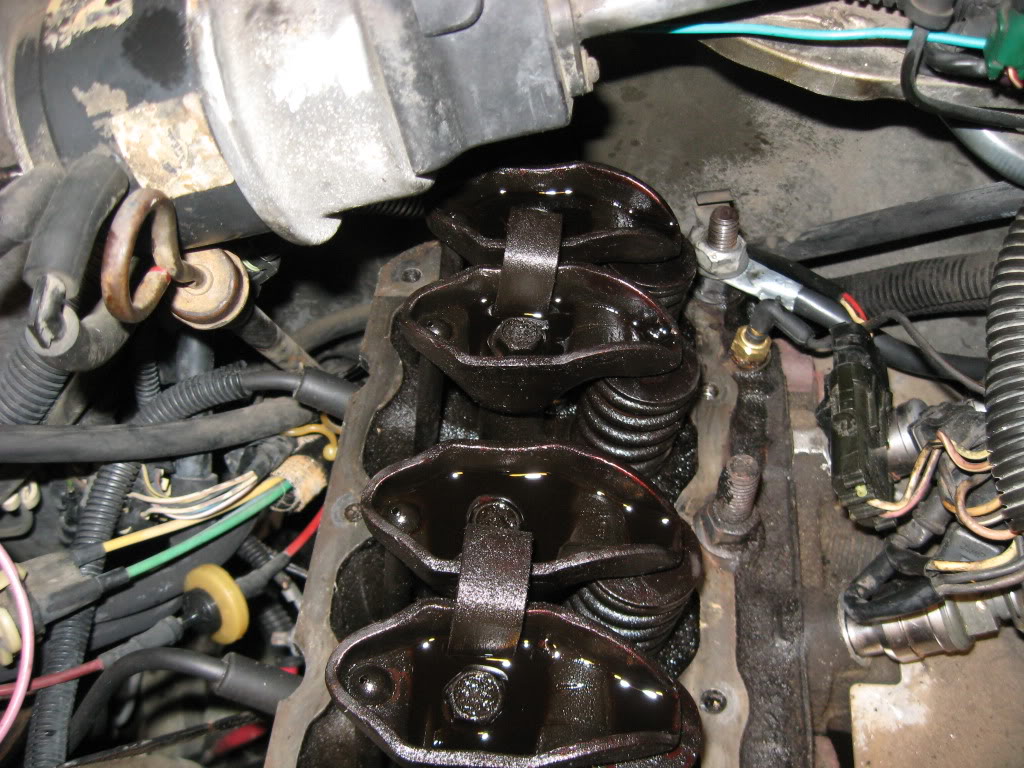
Random pics to document condition:
Valve cover itself took about an hour with a brass brush, 2 cans of brake cleaner and a roll of paper towels to clean. Took off the little snorkel intake thingys that the CCV system connect to and cleaned them. Next time the cover's off, I'll cut 'em and drill the vent hole as is recommended.

Before I go on, the back bolt is best reached from the driver's side using a socket, a u-joint, then two 6" extensions.
Install new $40 Fel-pro blue gasket sans RTV of any sort, paying attention to the "this side up" markings, then re-installed the cover.
Haynes stated that the bolts/studs should be torqued to 55 in-lbs, but that was barely finger tight (4ish ft-lbs). Found online that some guys recommended 80ish in-lbs (6.66 ft-lbs), so that's what I torqued to. Started with the centre bolts and alternated sides as I worked towards the ends.
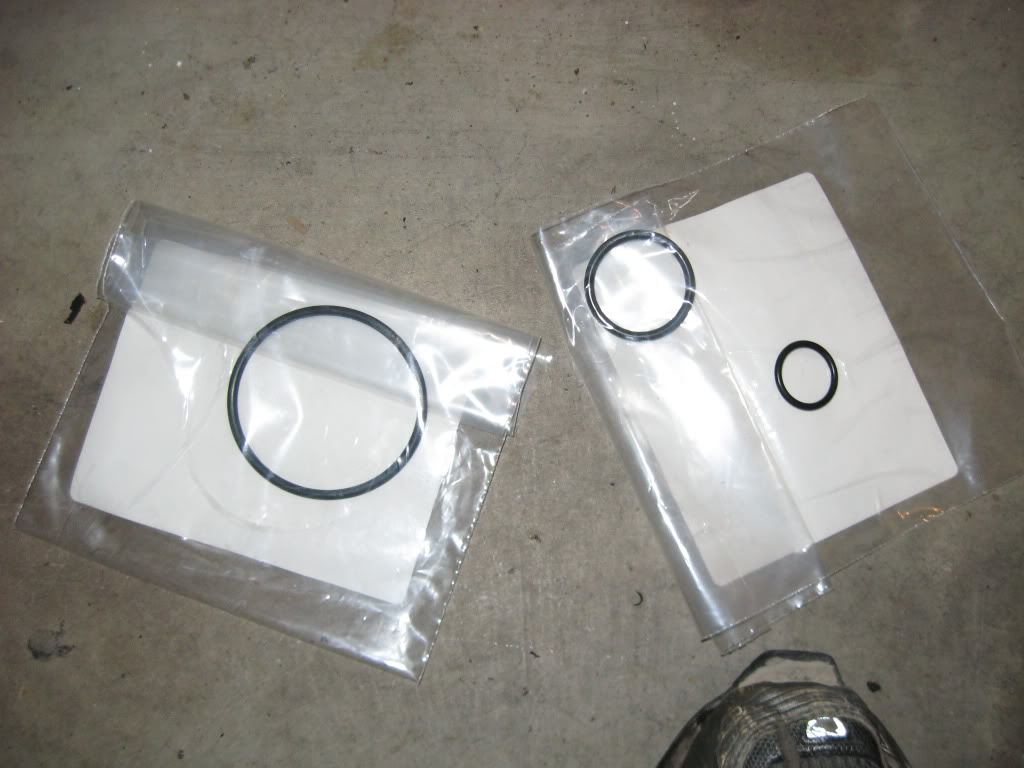
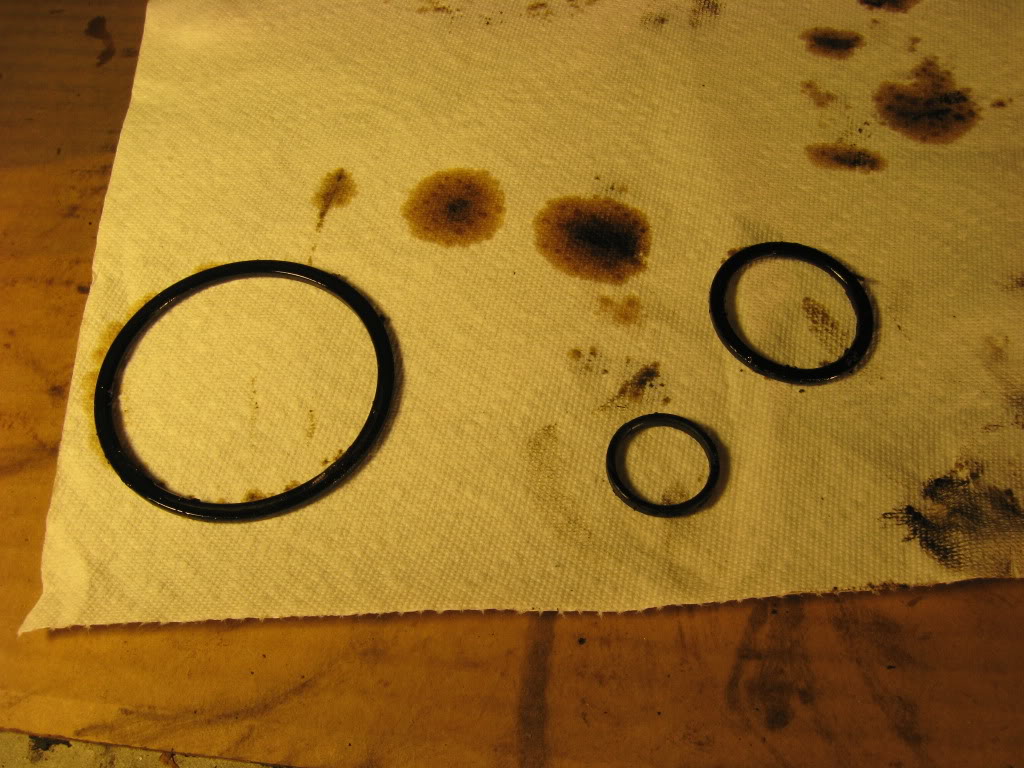
Next, time for the Oil Filter Adapter O-rings. You will need 3 o-rings and I had to go to the dealer for them.
Here are the dealer part numbers (THESE ARE RENIX ONLY PART NUMBERS - HO's have different o-rings):
33002970 o-ring 0.799 x 0.103
33002971 o-ring 1.296 x 0.130
33002972 o-ring Oil Filter AD
Taken from here.

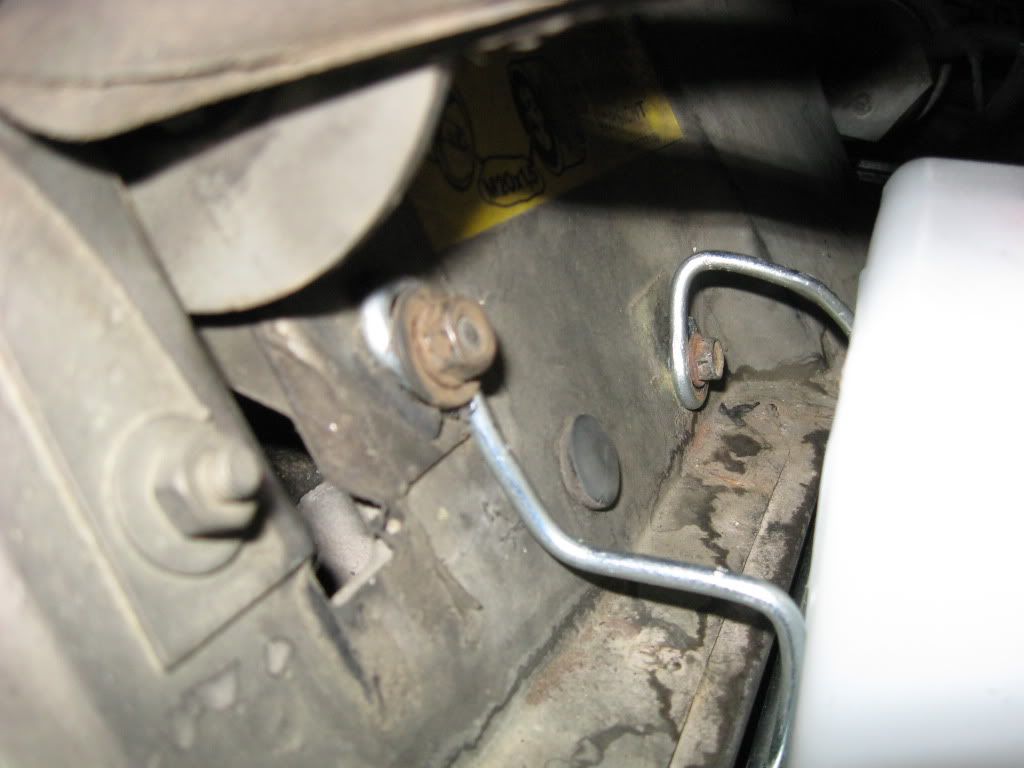
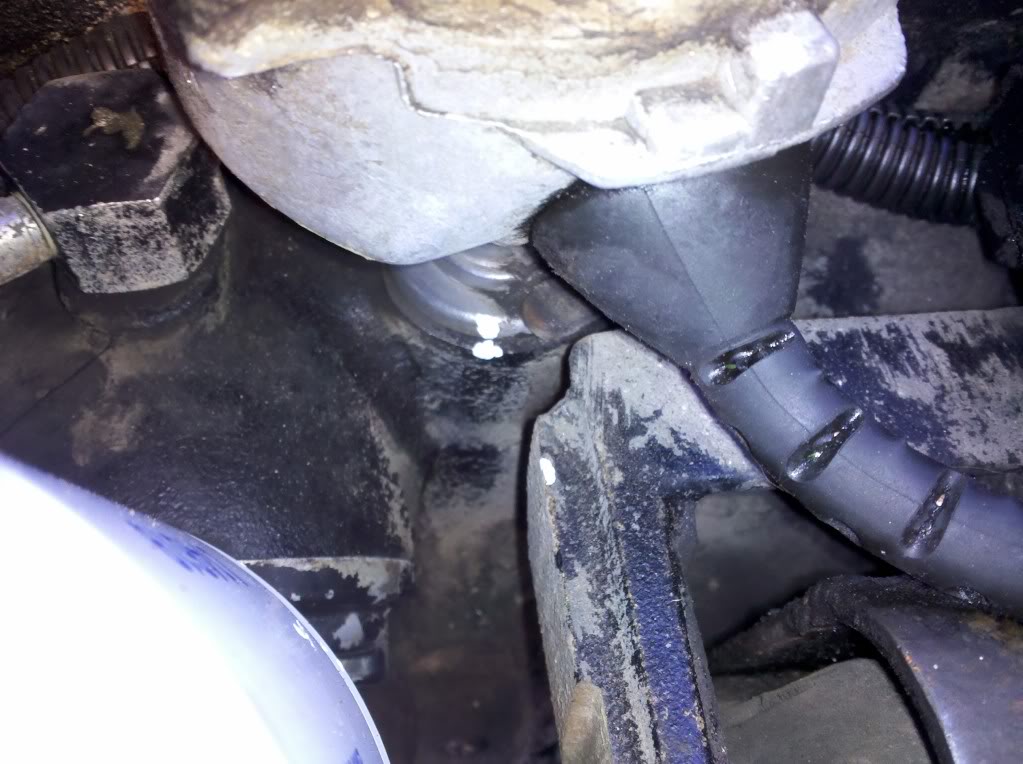
Clearly I'm leaking oil here:
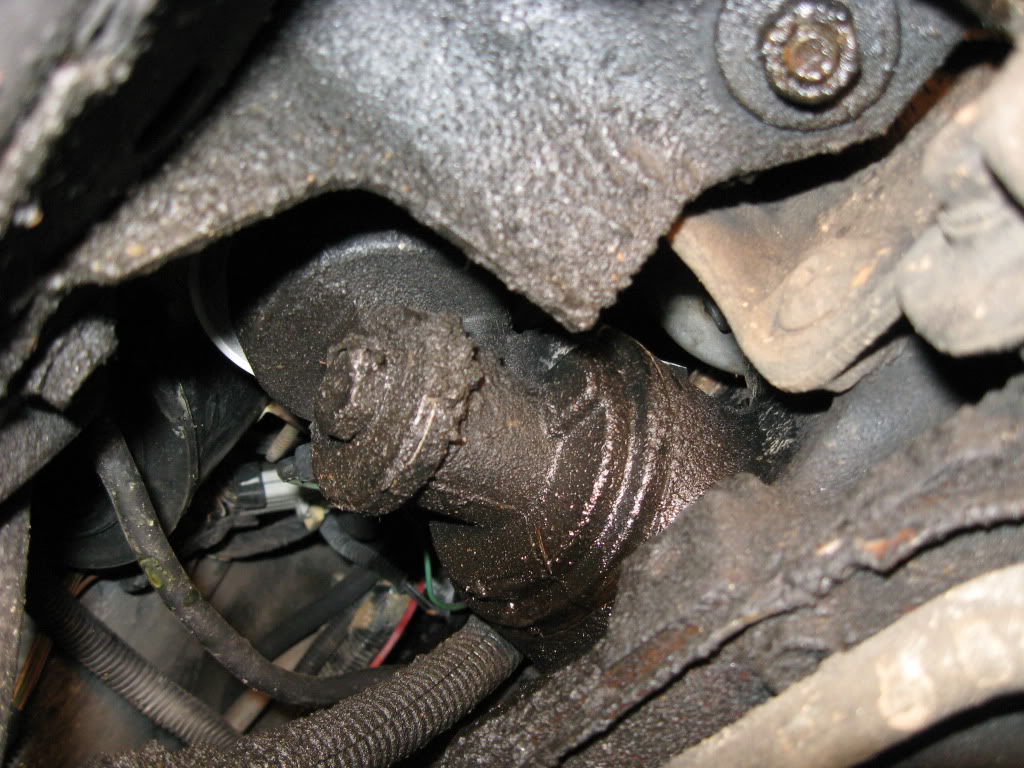
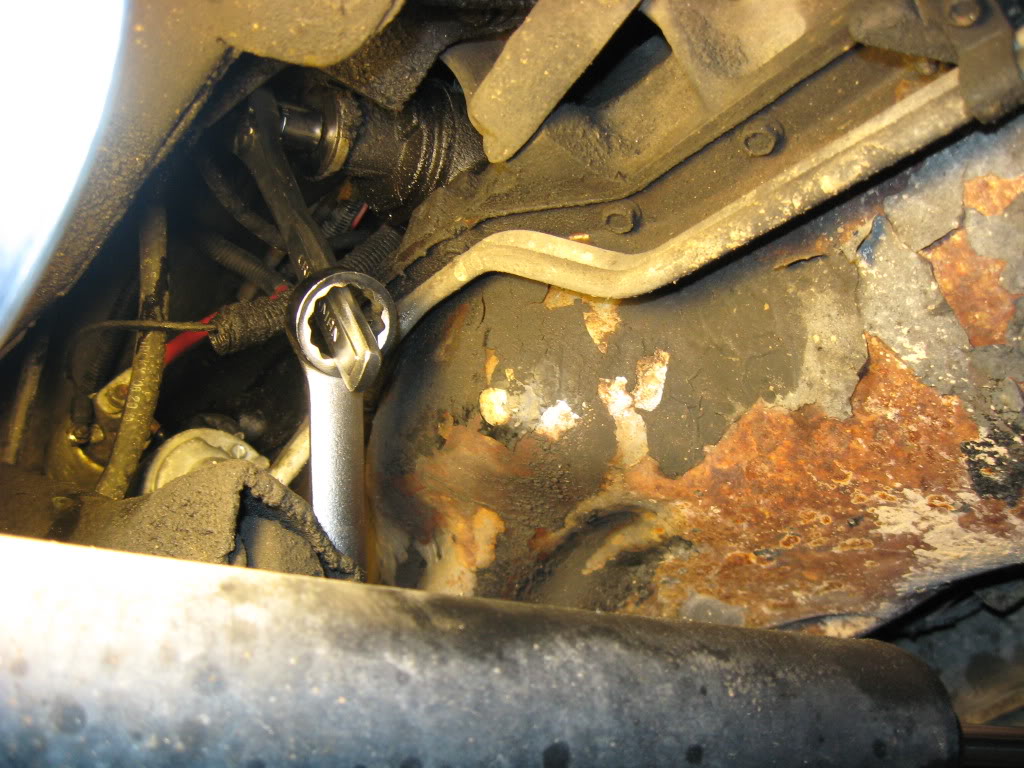
I'm one of the lucky ones that doesn't have to mess around with a T60 torx or an allen head.
5/8" socket and a "breaker bar" got me on the way.
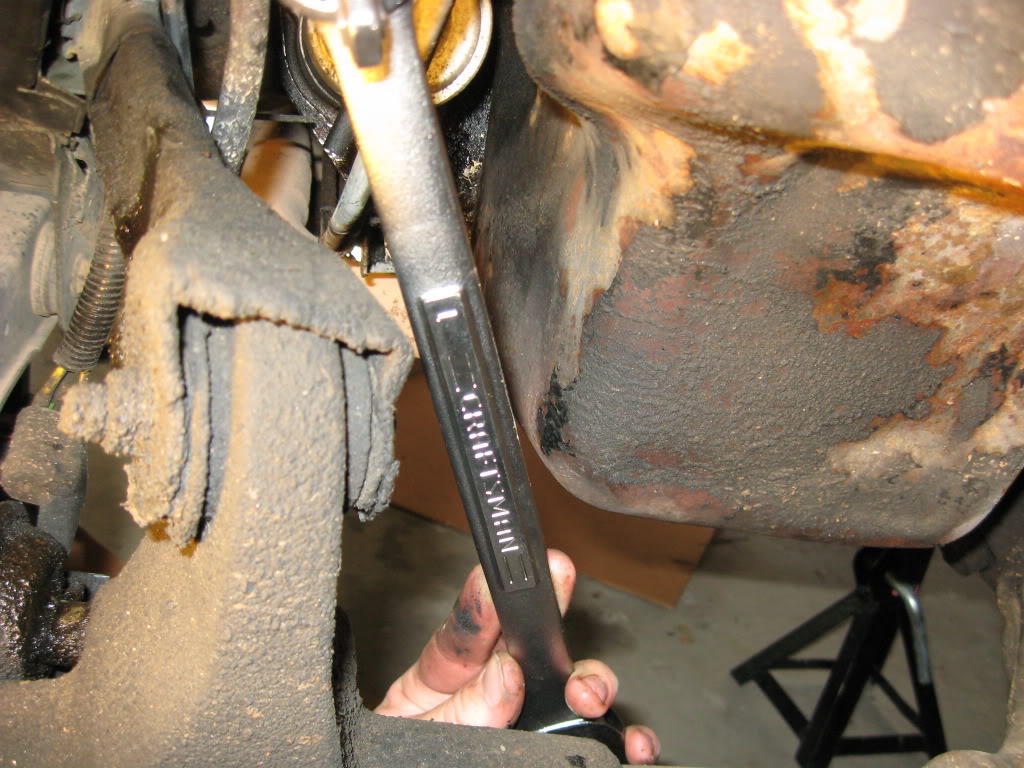
Be sure you've drained your oil and removed your filter. It's also a good idea to soak up the extra oil in that adapter as it will all spill on you when you take it off.

Beware the drips
And remove the bolt.
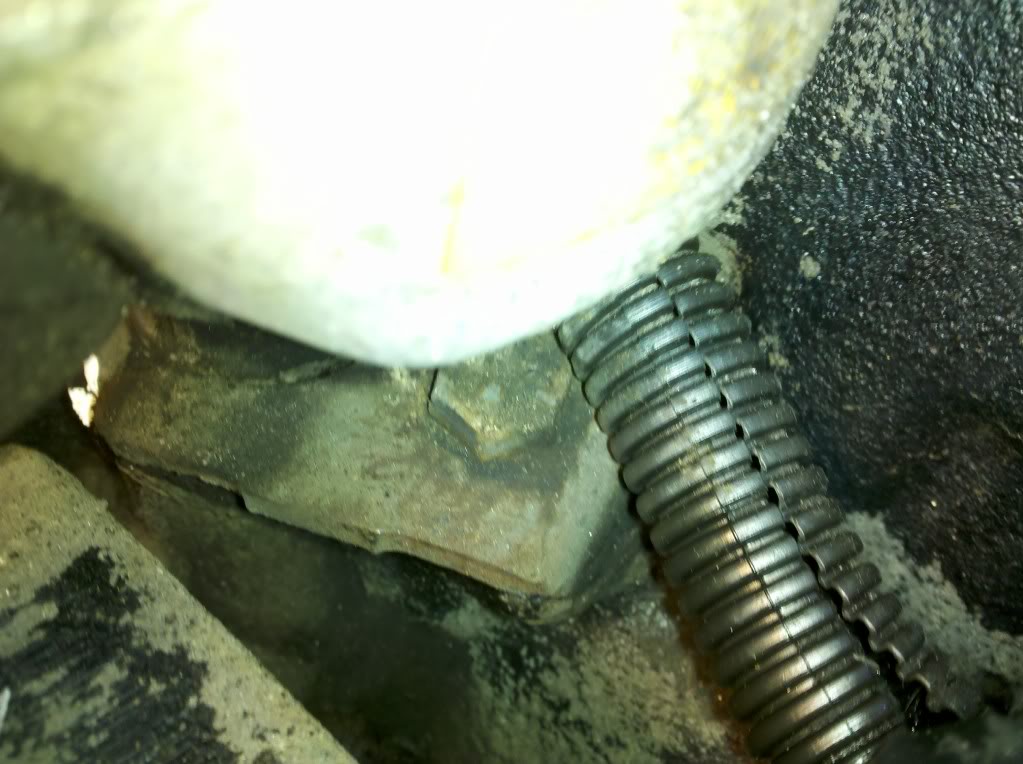
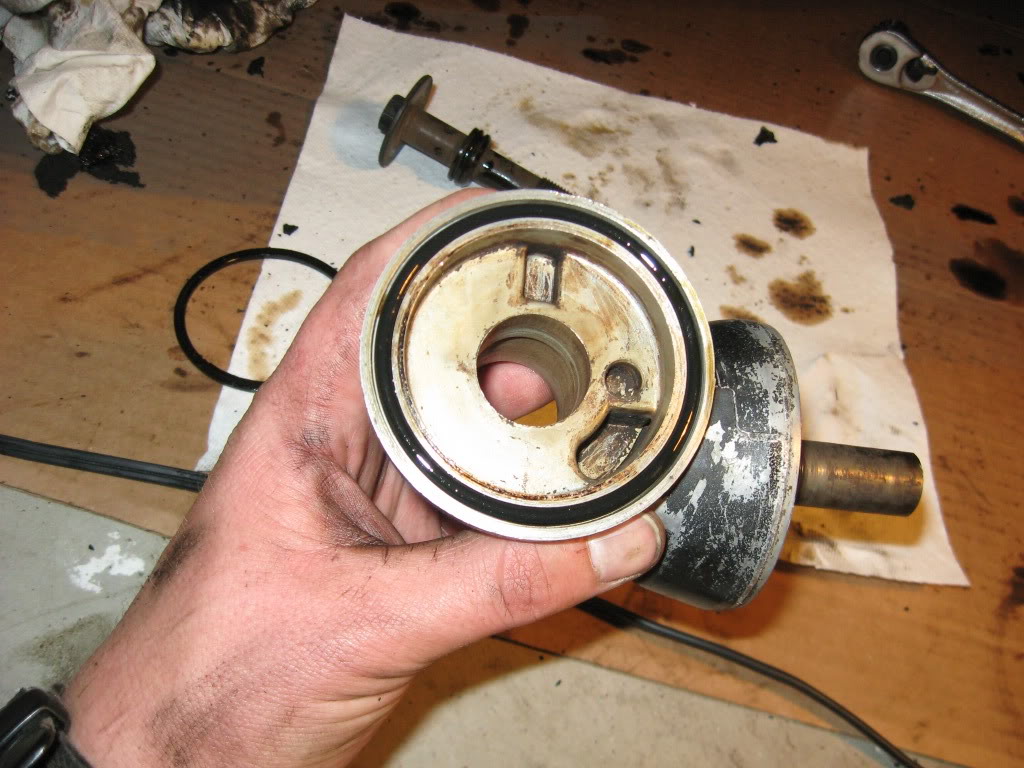
Don't worry about marking the angle of the adapter relative to the block or anything like that. There is a dowel that sticks out from the block and it can only be put on one way.
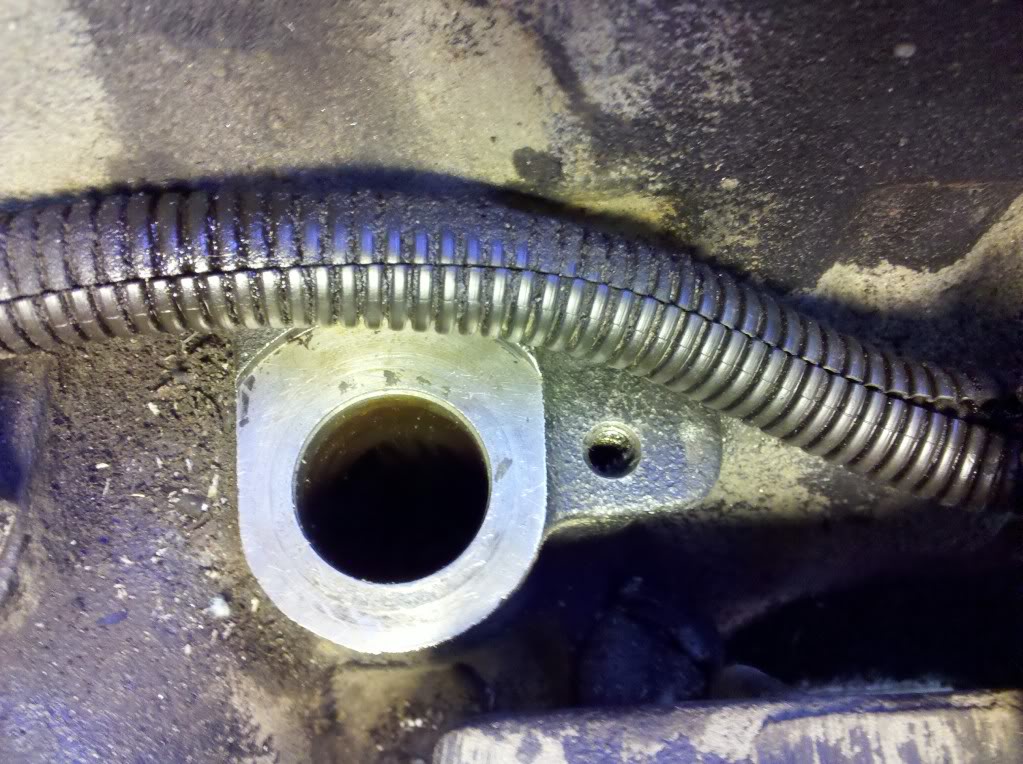
Remove from the block.
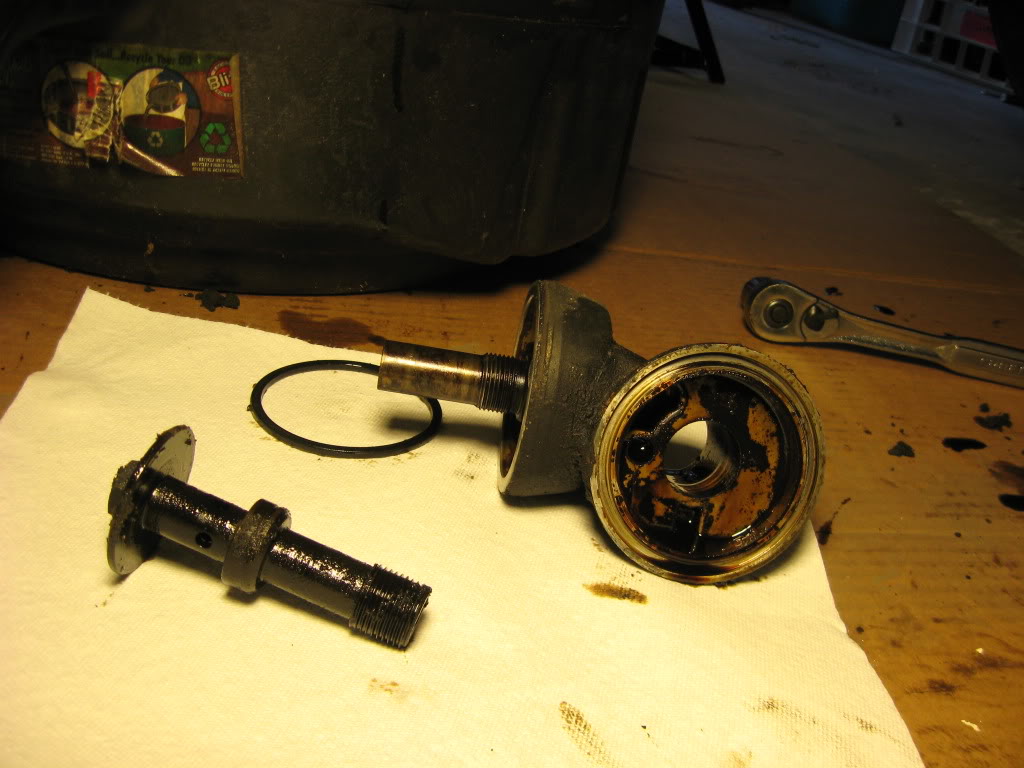
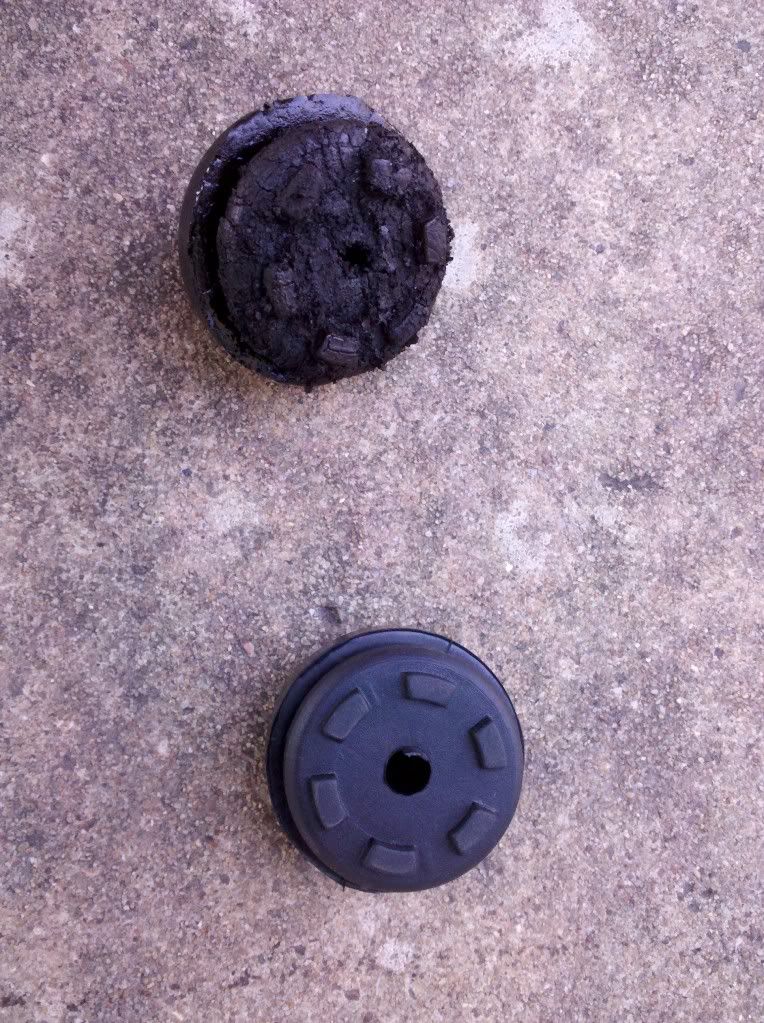
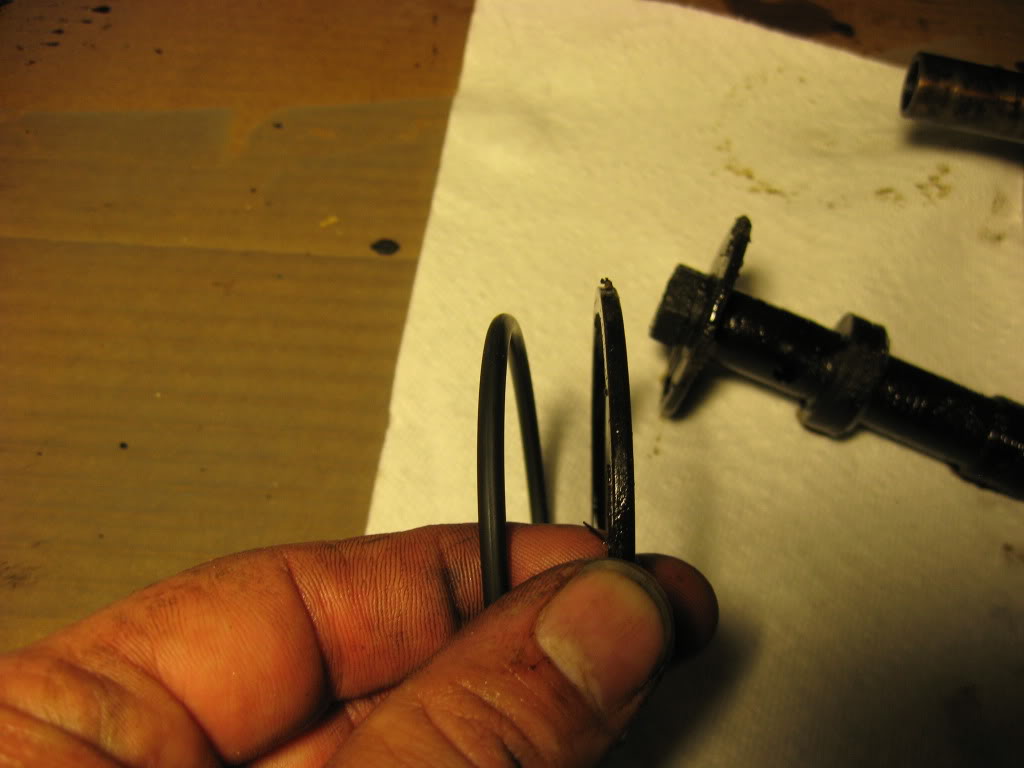
My o-rings were rock hard and squared off. Definitely time to replace.
The new vs the old.
Clean it up, install the new o-rings (lube with oil so as not to roll or tear them as they're installed)
Put it all back together, carefully, and tighten 'er down. I couldn't find a torque spec, so I just kept cranking....
Sun was going down, despite Day Light Savings, so I decided to wait on the rear main and oil pan gasket.
Cleaned everything under the car really well and we'll see if those two fixed my problem....
Cheers.
199,340
Oil change Advance Auto Parts conventional 10W-30
Changed oil filter to Purlator L14619
Going through and replacing the gaskets and seals that have been neglected. Trying to get my Waggy drip-free. The goal today was valve cover, oil filter adapter o-rings, rear main, and oil pan. Ambitious, I know. Didn't quite make the rear main or oil pan....some other day, I guess.
First thing I learned was not to jack up your vehicle in prep for the oil pan/rear main before doing the valve cover....I'm 6ft tall, but even so it was difficult swapping that gasket with the Jeep on stands.
Had oil on the bottom of the pan, so a week ago, I sprayed it down with Engine Brite and power washed it, hoping to pinpoint the leak. The two I could verify was back of the valve cover and filter adapter.
Disconnected the cruise control cable and the two CCV tubes from the valve cover. Took out all the bolts and the 3 studs and laid them out in their proper order.
Had to remove the three screws holding this thingy to the firewall so I would have enough clearance to get the valve cover off.
The last time this was done, the gasket was made with a thick bead of RTV....a real PITA to get off....
Scraped it clean and then used brake cleaner to ensure gasket surface was ready to go.
Random pics to document condition:
Valve cover itself took about an hour with a brass brush, 2 cans of brake cleaner and a roll of paper towels to clean. Took off the little snorkel intake thingys that the CCV system connect to and cleaned them. Next time the cover's off, I'll cut 'em and drill the vent hole as is recommended.
Before I go on, the back bolt is best reached from the driver's side using a socket, a u-joint, then two 6" extensions.
Install new $40 Fel-pro blue gasket sans RTV of any sort, paying attention to the "this side up" markings, then re-installed the cover.
Haynes stated that the bolts/studs should be torqued to 55 in-lbs, but that was barely finger tight (4ish ft-lbs). Found online that some guys recommended 80ish in-lbs (6.66 ft-lbs), so that's what I torqued to. Started with the centre bolts and alternated sides as I worked towards the ends.
Next, time for the Oil Filter Adapter O-rings. You will need 3 o-rings and I had to go to the dealer for them.
Here are the dealer part numbers (THESE ARE RENIX ONLY PART NUMBERS - HO's have different o-rings):
33002970 o-ring 0.799 x 0.103
33002971 o-ring 1.296 x 0.130
33002972 o-ring Oil Filter AD
Taken from here.
Clearly I'm leaking oil here:
I'm one of the lucky ones that doesn't have to mess around with a T60 torx or an allen head.
5/8" socket and a "breaker bar" got me on the way.
Be sure you've drained your oil and removed your filter. It's also a good idea to soak up the extra oil in that adapter as it will all spill on you when you take it off.
Beware the drips
And remove the bolt.
Don't worry about marking the angle of the adapter relative to the block or anything like that. There is a dowel that sticks out from the block and it can only be put on one way.
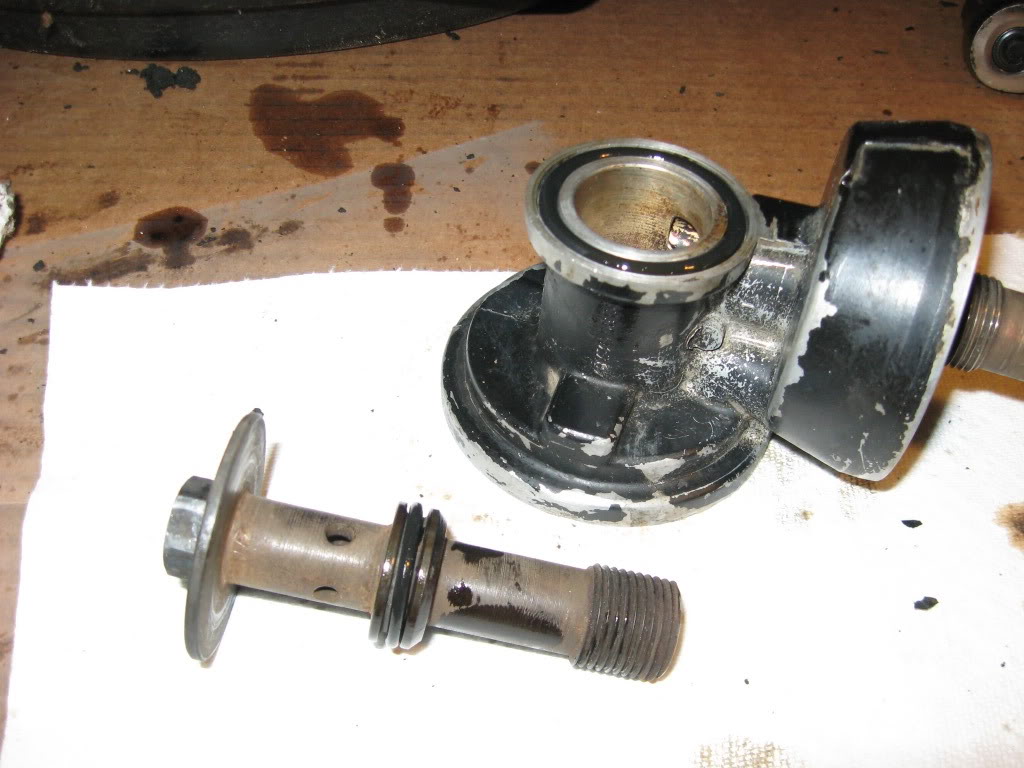
Remove from the block.
My o-rings were rock hard and squared off. Definitely time to replace.
The new vs the old.
Clean it up, install the new o-rings (lube with oil so as not to roll or tear them as they're installed)
Put it all back together, carefully, and tighten 'er down. I couldn't find a torque spec, so I just kept cranking....
Sun was going down, despite Day Light Savings, so I decided to wait on the rear main and oil pan gasket.
Cleaned everything under the car really well and we'll see if those two fixed my problem....
Cheers.
Last edited by letinsh; Mar 12, 2012 at 12:43 AM.