
My Waggie Build...

Thread Starter
CF Veteran
Joined: Apr 2008
Posts: 7,661
Likes: 15
From: Smiths Station, Al
Year: 87
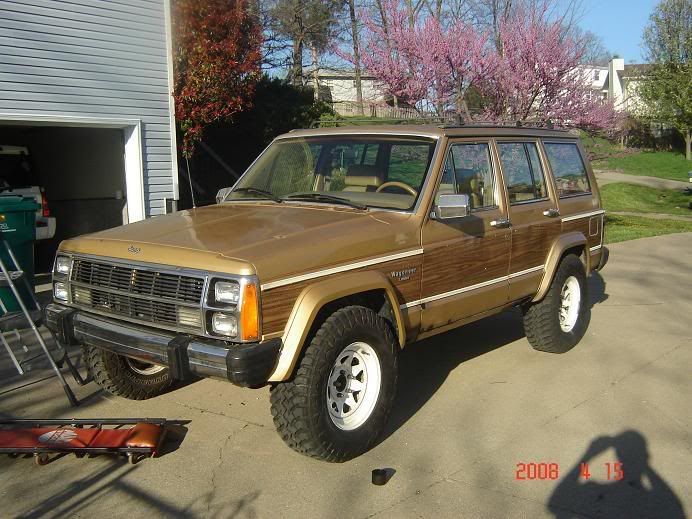
Model: Wagoneer
Engine: 4.0 I6
Heck that was in Sept. I own an 87 you know how it is. Oh yeah my t-pipe with the heater control valve snapped I had to go locate one at a JY.
It is good now. Just having Hot Start issues. Need to reclean the TB and prolly replace the IAC. Although I also think the spring for the Throttle is worn.
It is good now. Just having Hot Start issues. Need to reclean the TB and prolly replace the IAC. Although I also think the spring for the Throttle is worn.

Newbie
Joined: Sep 2009
Posts: 6
Likes: 0
From: Alexandria, Va
Year: 1995
Model: Cherokee
Engine: Stock 4.0
Nice build brother. That is one thing I do not have experience in...Welding. I'm trying to hold all Mods until I get to Ft Knox. I want to rhino line the interior, and build an EXO-Cage exterior. Also want to modify my doors for quick release and be able to remove them next summer.
Newbie
Joined: Dec 2009
Posts: 13
Likes: 0
From: Cleburne, TX
Year: 1991
Model: Cherokee
Engine: 4.0 Litre High Output 6 Cylinder
Love your build up on this waggy man, I have a 1991 Laredo XJ, but it's my daily driver so i can't really tear into it right now, not to mention my son lives with me so most of my money is spent supporting him (He's 6 yrs old) I am looking at buying a 1995 Ford Ranger 5spd from my sister to use as a daily driver so when i get the money I can trail-out my XJ. but you know how that goes, "when i get the money"...especially with having to raise a son...LOL... i'm having the same weird low oil pressure problems, too btw.
-Andy
1991 XJ Cherokee Laredo 4x4...Stock currently
-Andy
1991 XJ Cherokee Laredo 4x4...Stock currently
CF Veteran
Joined: Mar 2009
Posts: 1,160
Likes: 0
Year: 1995
Model: Cherokee
Engine: 4.0
Please tell me you have gone back and replaced those compression fittings on the brake lines!!!!!! I have almost lost a job because I refused to use those. Otherwise great build


Newbie
Joined: Feb 2010
Posts: 11
Likes: 0
From: asbury park, NJ
Year: 1991
Model: Cherokee
Engine: 4.0 inline 6
Did you lift her when you put those tires on? I'm asking because I am torn on weither to do a little trimming and put 31s on or lift 3-4" then put um on.. advice would rock!


Newbie
Joined: Mar 2010
Posts: 7
Likes: 0
From: pontiac
Year: 1987
Model: Cherokee
Engine: 4 liter in line 6
how long and how much did it cost in the end? if its well worth it i might actually commit to it. i've been uneasy to do this to my jeep but am told not to
Member
Joined: Mar 2010
Posts: 164
Likes: 0
From: Greenville, South Carolina
Model: Cherokee
or you could lift 3 -4 inches, trim and mount 35's
 plus re gear and sye and cv driveshaft and ......... hahaha

Newbie
Joined: Sep 2009
Posts: 23
Likes: 0
From: Oaklawn, IL
Year: 1997
Model: Grand Cherokee
Engine: 5.2
No offense, but did you buy a really haggard cherokee, just for the project? I went through every page of this and I am so paranoid at what I am getting myself into. I am looking at 96-99 cherokees in ILLINOIS where we use salt on our roads, and I dont want a rusty mess, where every bold is seized, missing, or corroded.. ahh
CF Veteran
Joined: Jan 2010
Posts: 2,059
Likes: 1
From: Indianola IOWA
Year: 1992
Model: Cherokee
Engine: 4.0
No offense, but did you buy a really haggard cherokee, just for the project? I went through every page of this and I am so paranoid at what I am getting myself into. I am looking at 96-99 cherokees in ILLINOIS where we use salt on our roads, and I dont want a rusty mess, where every bold is seized, missing, or corroded.. ahh

Junior Member
Joined: May 2010
Posts: 62
Likes: 1
From: Orange Beach, AL
Year: 1998
Model: Cherokee
Engine: 4.0
Was having problems with windows not really working well. And I have read some where that XJ's have ground issues so I took out my nasty main ground cable and replaced it with some heavy duty Stryker Ground cable. Jeep loved it everything worked better.
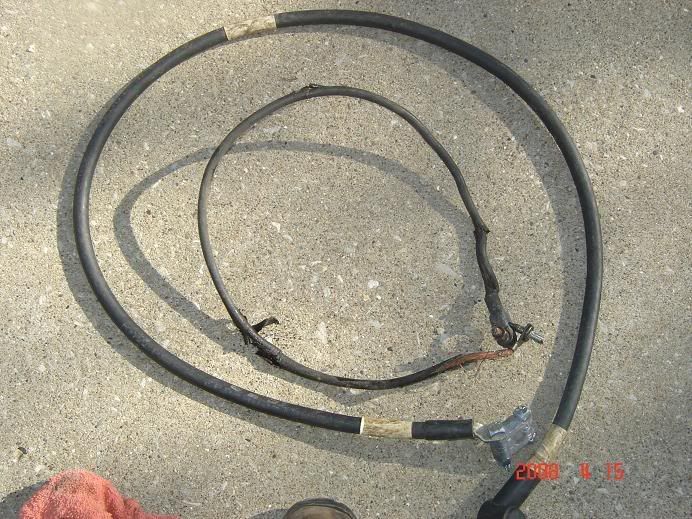
Will finish this build thread here in a lil while
Will finish this build thread here in a lil while
Thread Starter
CF Veteran
Joined: Apr 2008
Posts: 7,661
Likes: 15
From: Smiths Station, Al
Year: 87
Model: Wagoneer
Engine: 4.0 I6
Took the waggies out this past weekend to some private land about 30 min from here.
Got my first bit of real carnage.
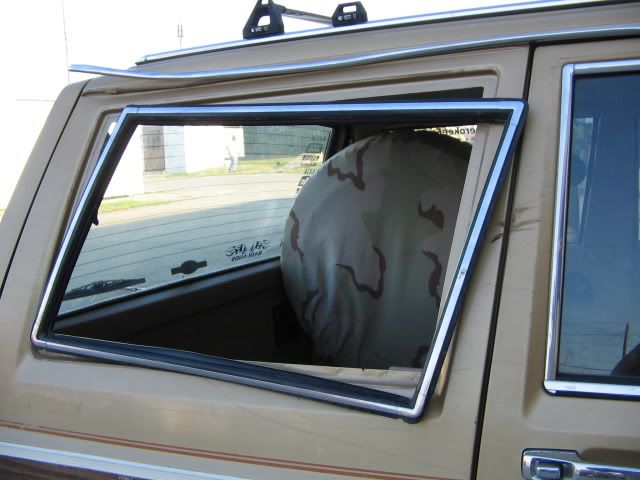
Lost the Rear Passenger side window.
I took a bad line (over confident waggy was running great) And my rear end slid over against a tree. I wasn't too worried about some trail rash and it wasn't on my window. I failed to consider the immense pressure that the window was under and so I pressed the gas and let my roof just slide on the tree. Then A big POP and the window was gone.
Well I considered replacing the window with a JY one and kept thinking I will just be replacing this again soon if I do that. I had seen a set-up I liked at WF OH-Ten and so I decided to experiment with his set-up. Although he had removed the seal and screwed the glass in place.
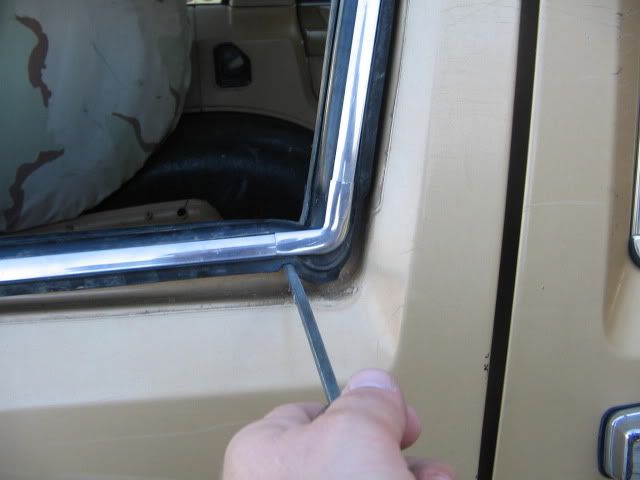
First I removed the rear plastic panel around the window.
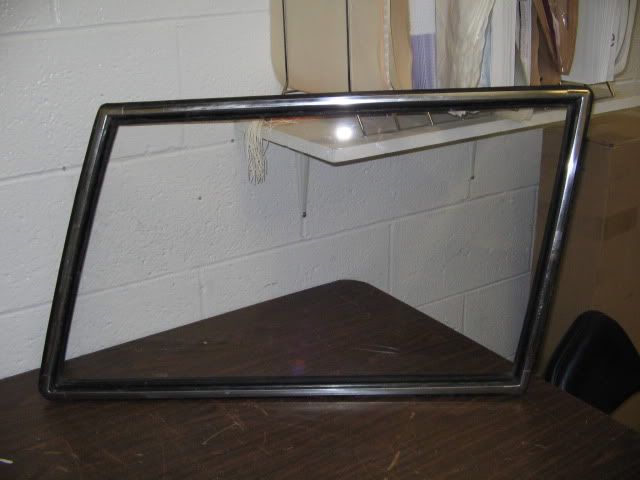
Then worked a flat tip out on the corners to get the seal out.
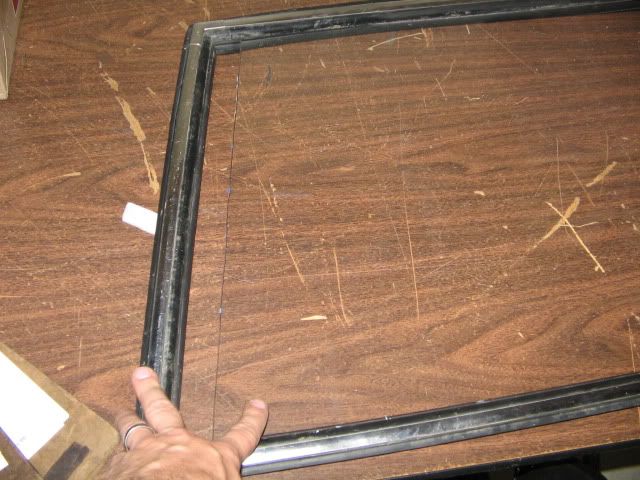
I then just grabbed a piece of Plexi-Glass we had some at our shop so it was free. I am not sure if Plexi is expensive or not so I am not even sure if this mod is worth it. Anyway I just traced with a black sharpie the outline of the window and added about a 1/2 and inch to all the side to compensate for the seal.
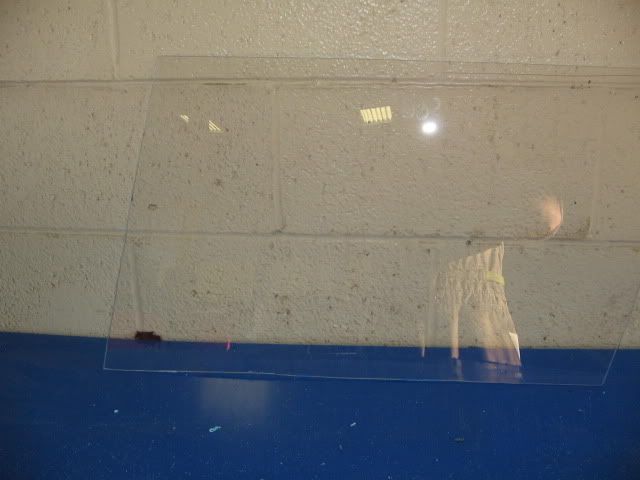
Then cut it out with a Angle Grinder (melting plastic burns wear protective gear)

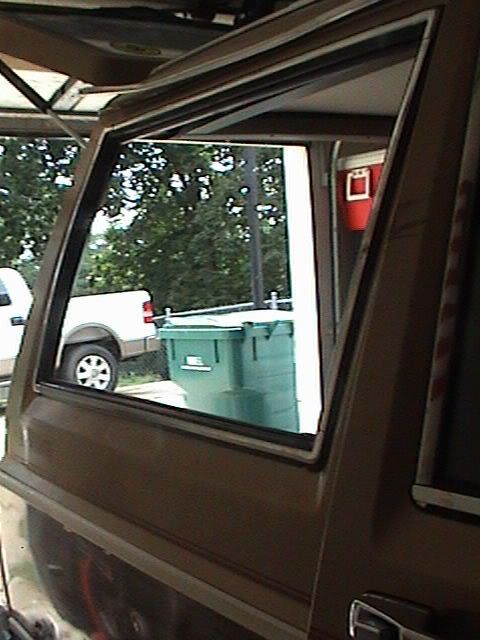
I ripped the blue plastic off and this is what I am left with.
Mind you the window is clear lol
I then started working the window into the seal. It went pretty easy I prolly could have added some soap or what not but Plexi is a lot more flexible than glass so it kinda bent in pretty well.
Next came the slow process of working the glass and seal back into the jeep. With real glass you have to get string soapy water and everything else to get the window back in.
This was just a lil patience since the Plexi will flex and bend. It is Brittle in on the edges so be careful.
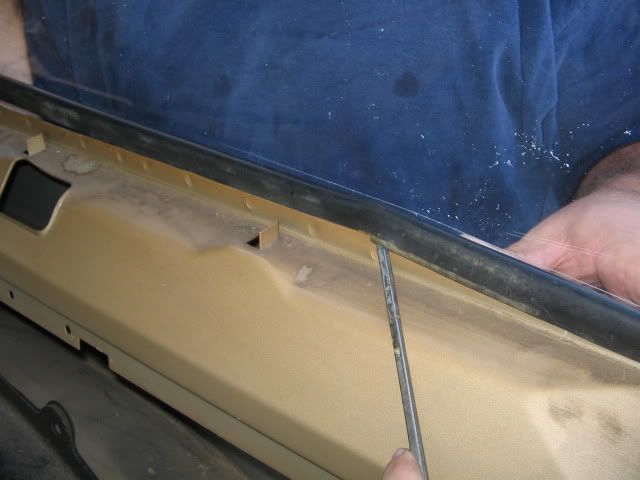
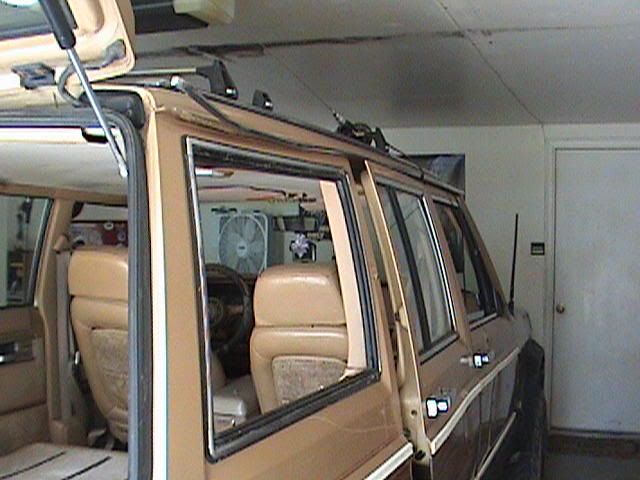
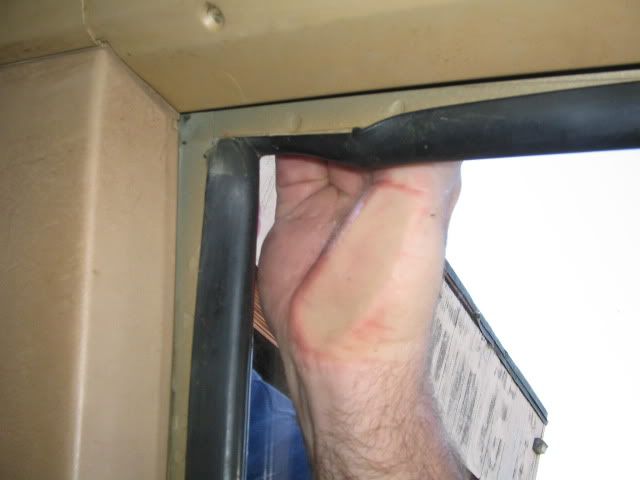
I went if from the side sticking the bottom in the groove then the top and slid it all the way flush the back of the window. Then just worked the seal in with a flat tip. The hardest part was the top corner but I had a buddy to help me get in. Helped to pry from both sides.
Hard corner
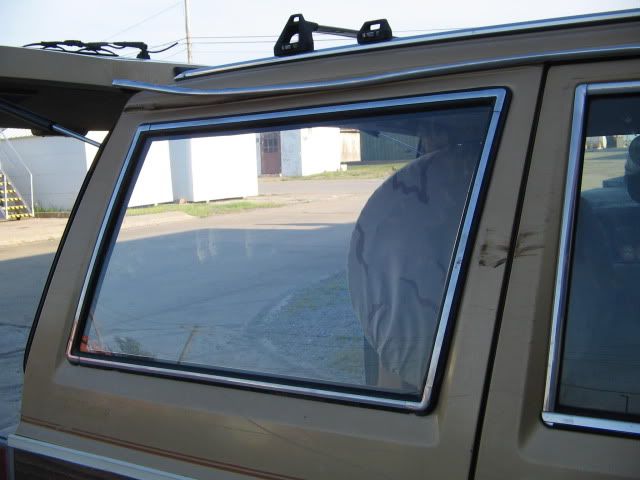
Finished although I want to leak test it. It will prolly leak water still since my Plexi is a lil thinner than the glass. If it leaks I plan to add a small groove of RTV just underneath the seal.
So for anyone that wants to do this It is pretty simple.
Finished
Got my first bit of real carnage.
Lost the Rear Passenger side window.
I took a bad line (over confident waggy was running great) And my rear end slid over against a tree. I wasn't too worried about some trail rash and it wasn't on my window. I failed to consider the immense pressure that the window was under and so I pressed the gas and let my roof just slide on the tree. Then A big POP and the window was gone.
Well I considered replacing the window with a JY one and kept thinking I will just be replacing this again soon if I do that. I had seen a set-up I liked at WF OH-Ten and so I decided to experiment with his set-up. Although he had removed the seal and screwed the glass in place.
First I removed the rear plastic panel around the window.
Then worked a flat tip out on the corners to get the seal out.
I then just grabbed a piece of Plexi-Glass we had some at our shop so it was free. I am not sure if Plexi is expensive or not so I am not even sure if this mod is worth it. Anyway I just traced with a black sharpie the outline of the window and added about a 1/2 and inch to all the side to compensate for the seal.
Then cut it out with a Angle Grinder (melting plastic burns wear protective gear)
I ripped the blue plastic off and this is what I am left with.
Mind you the window is clear lol
I then started working the window into the seal. It went pretty easy I prolly could have added some soap or what not but Plexi is a lot more flexible than glass so it kinda bent in pretty well.
Next came the slow process of working the glass and seal back into the jeep. With real glass you have to get string soapy water and everything else to get the window back in.
This was just a lil patience since the Plexi will flex and bend. It is Brittle in on the edges so be careful.
I went if from the side sticking the bottom in the groove then the top and slid it all the way flush the back of the window. Then just worked the seal in with a flat tip. The hardest part was the top corner but I had a buddy to help me get in. Helped to pry from both sides.
Hard corner
Finished although I want to leak test it. It will prolly leak water still since my Plexi is a lil thinner than the glass. If it leaks I plan to add a small groove of RTV just underneath the seal.
So for anyone that wants to do this It is pretty simple.
Finished