
Rusty Floor Project!!


Thread Starter
Newbie
Joined: Sep 2008
Posts: 29
Likes: 0
Model: Cherokee
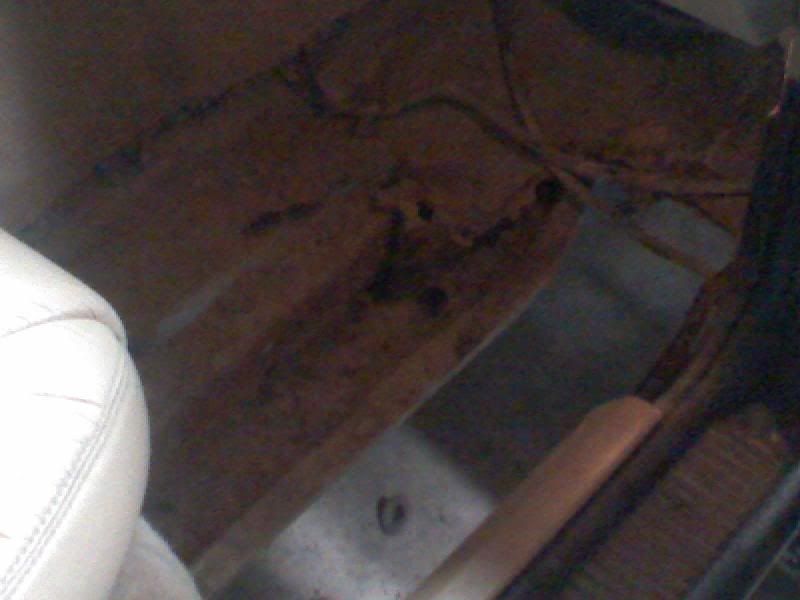
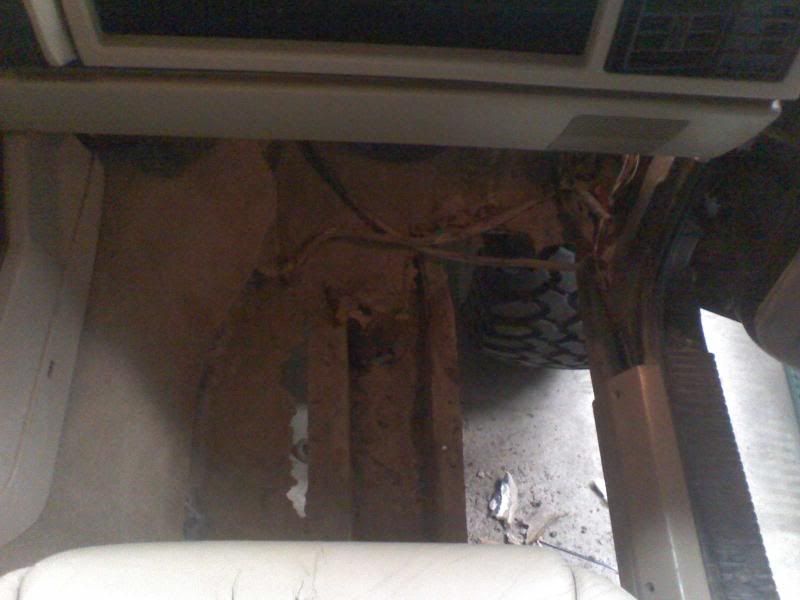
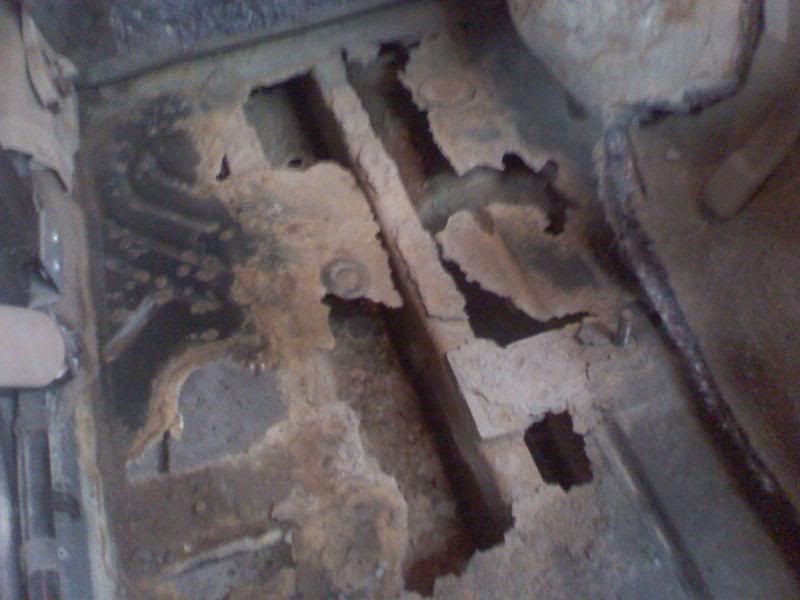
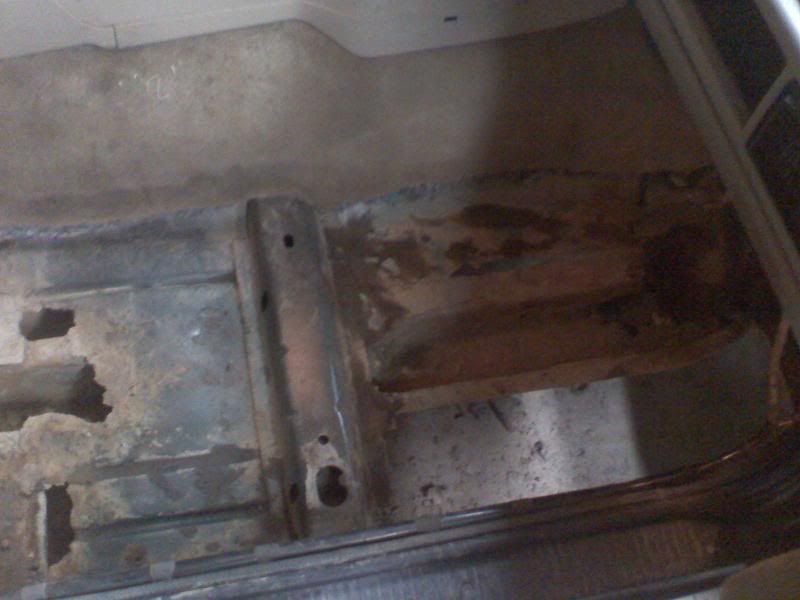
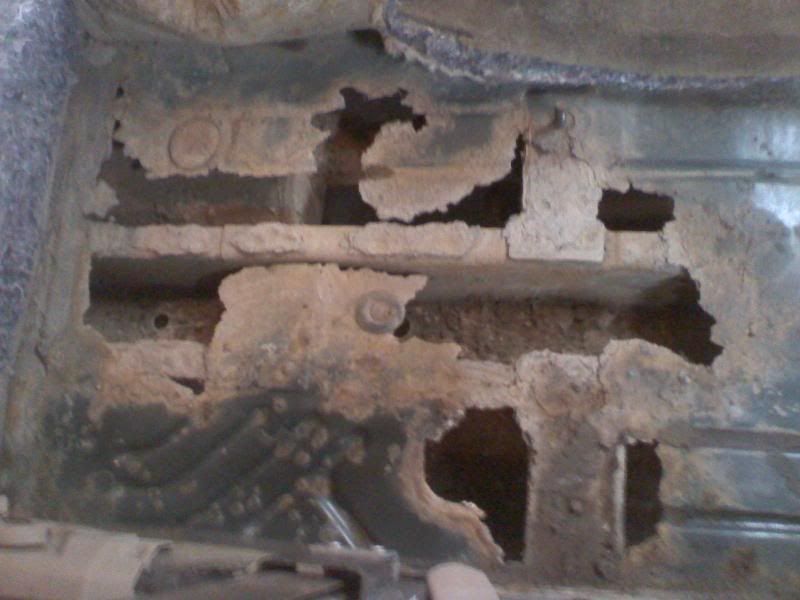
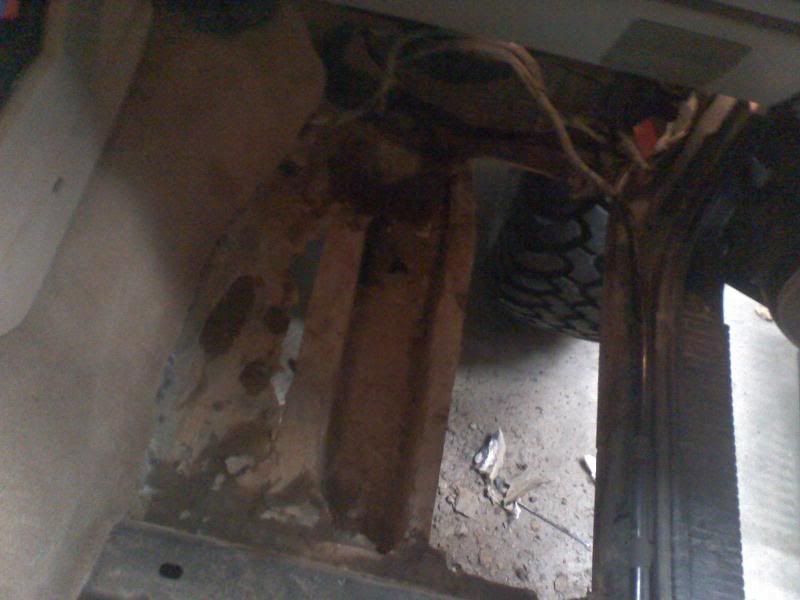
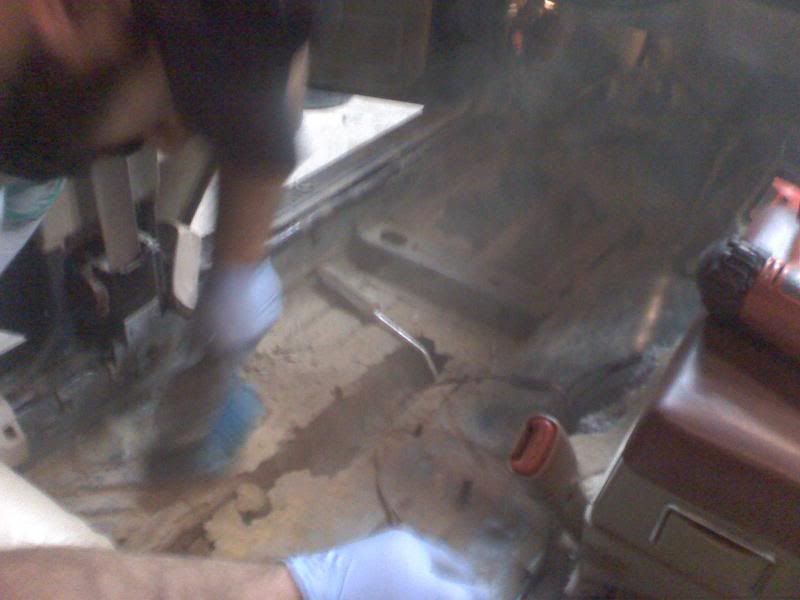
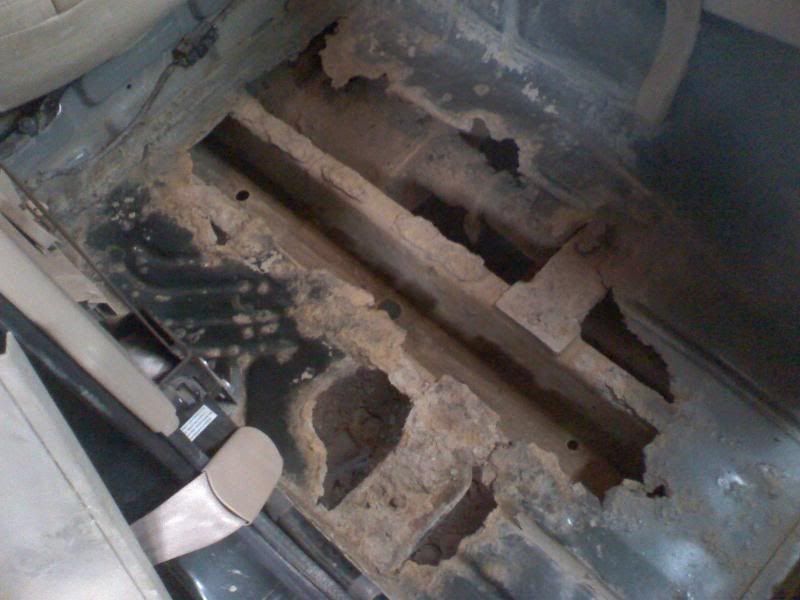
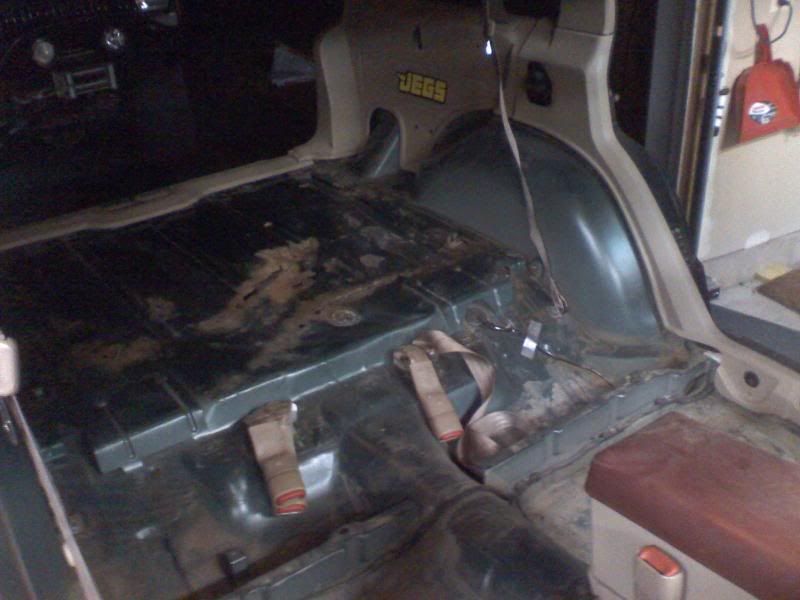
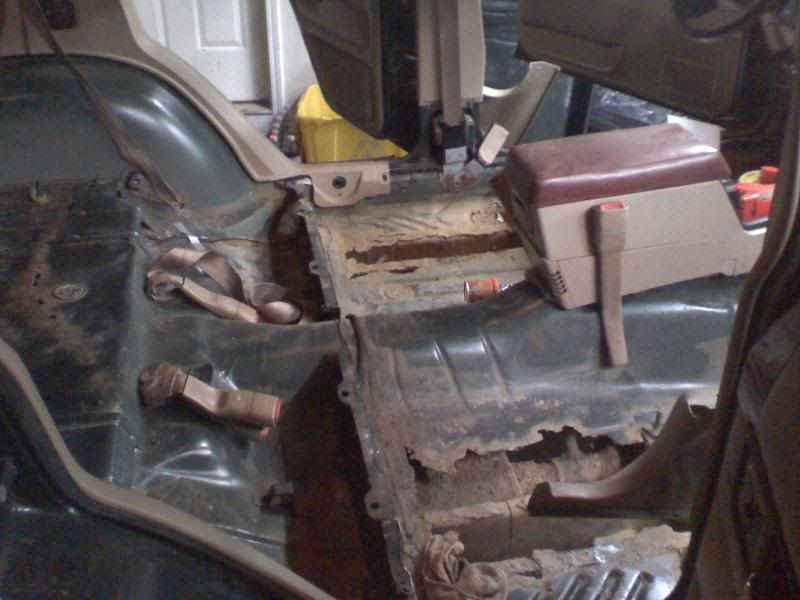
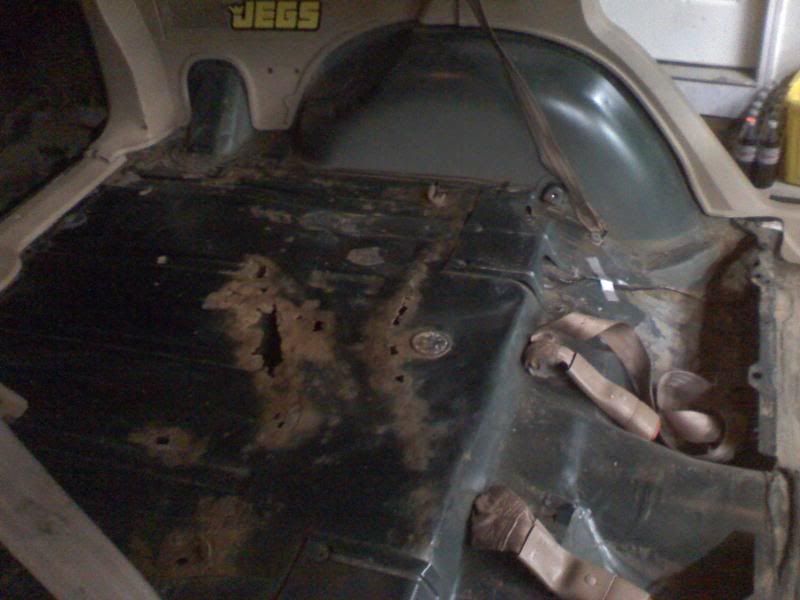
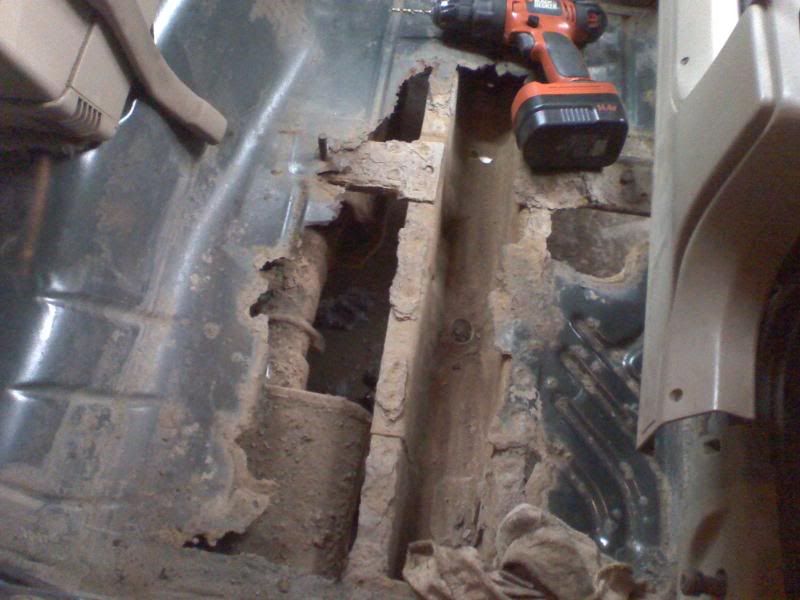
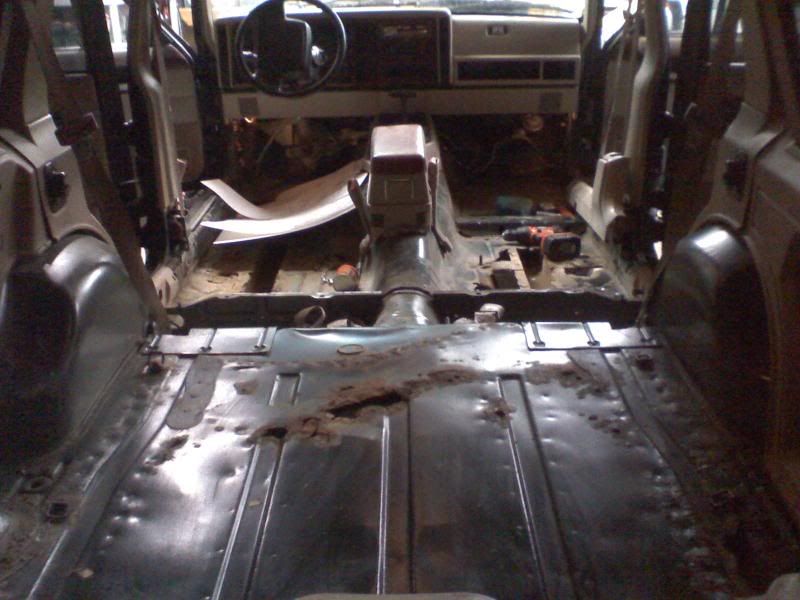
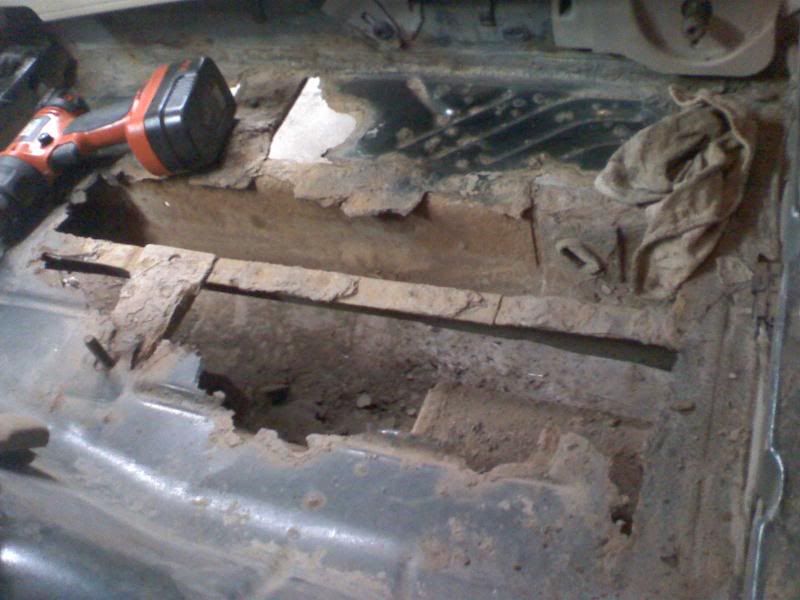
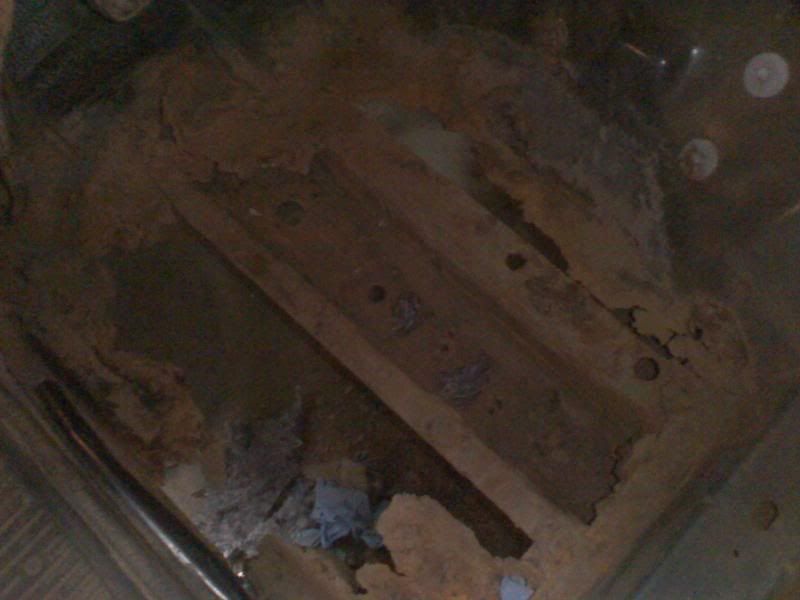
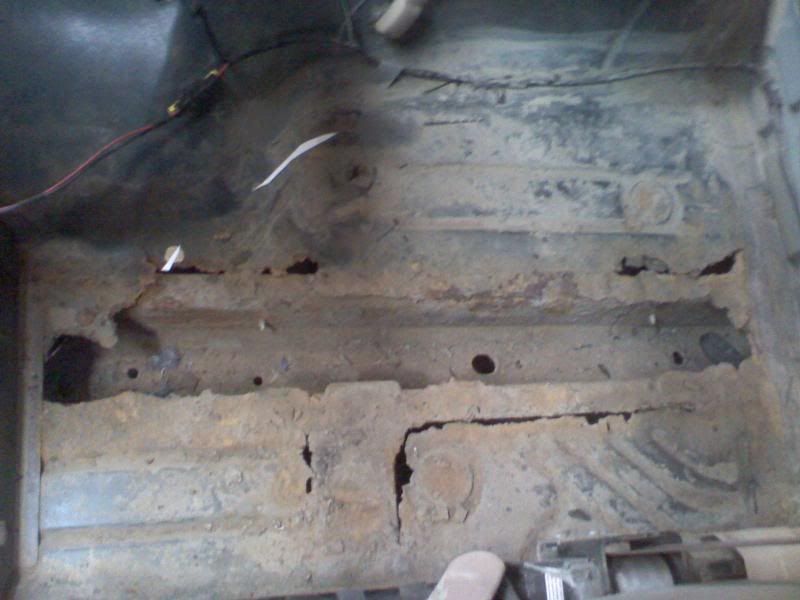
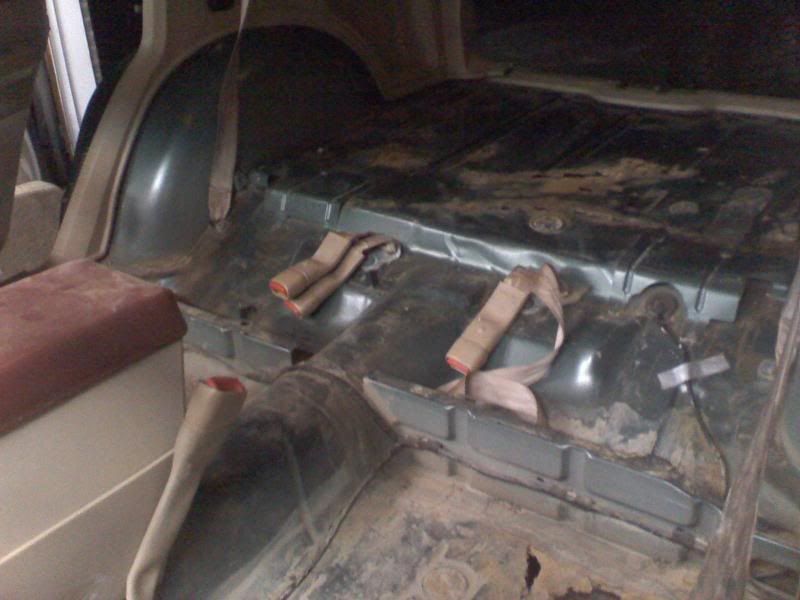
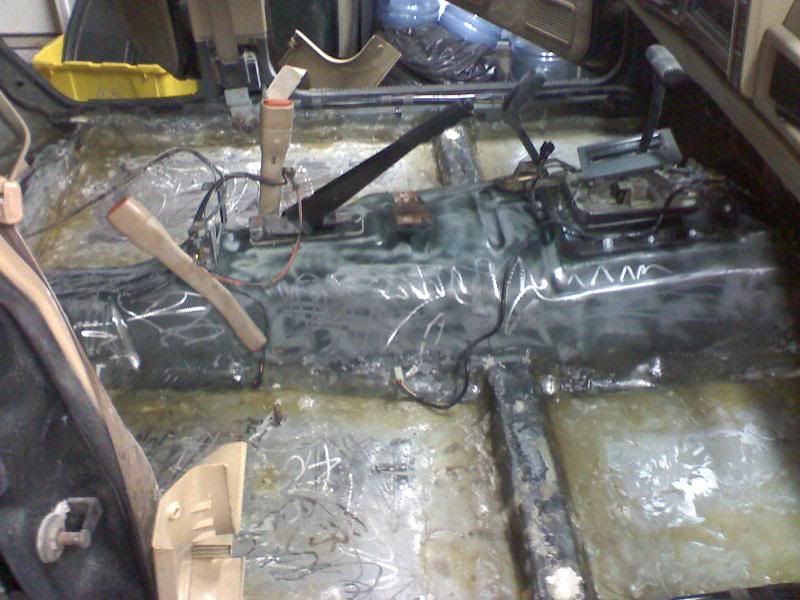
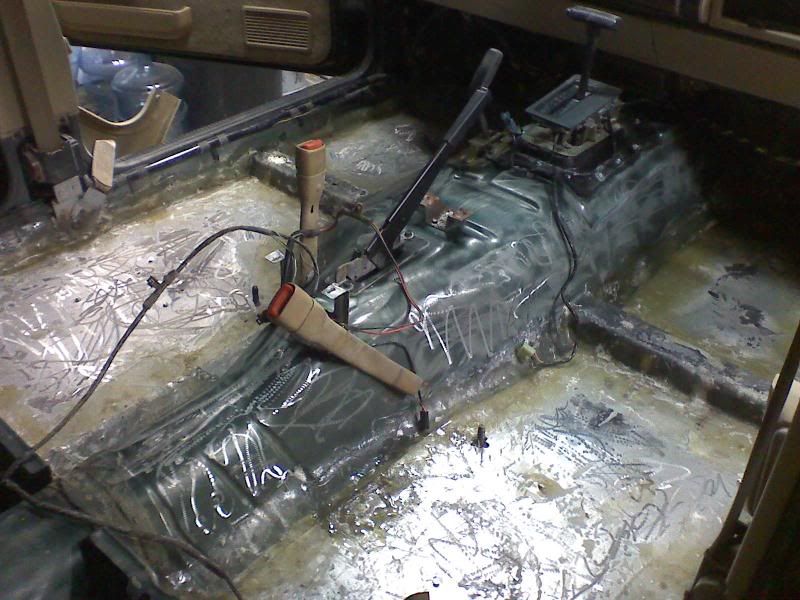
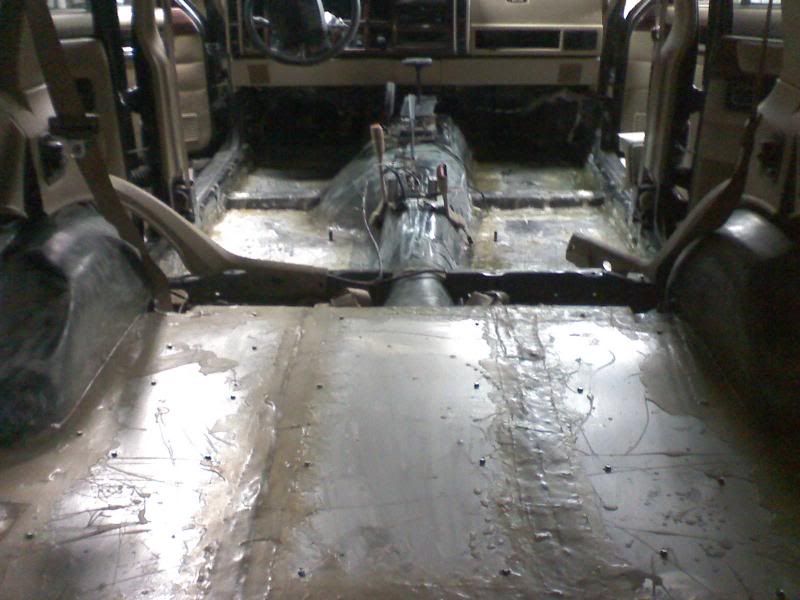
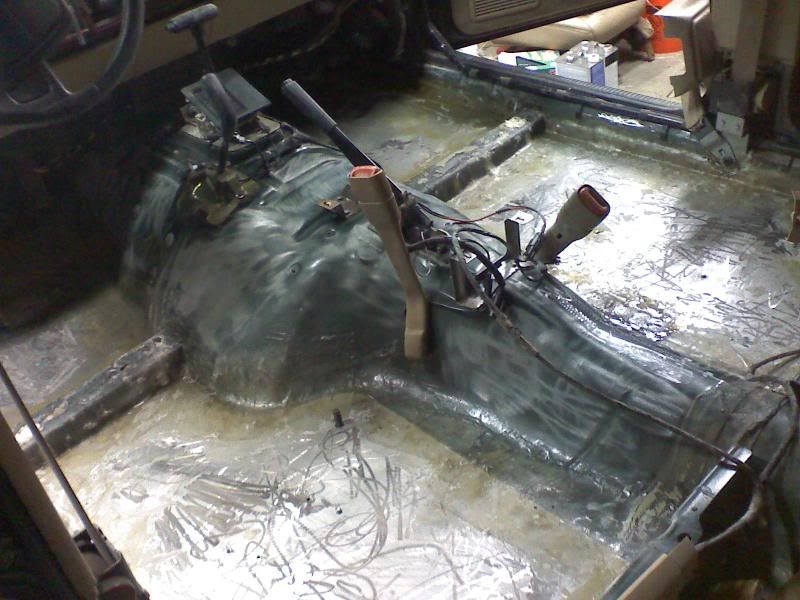
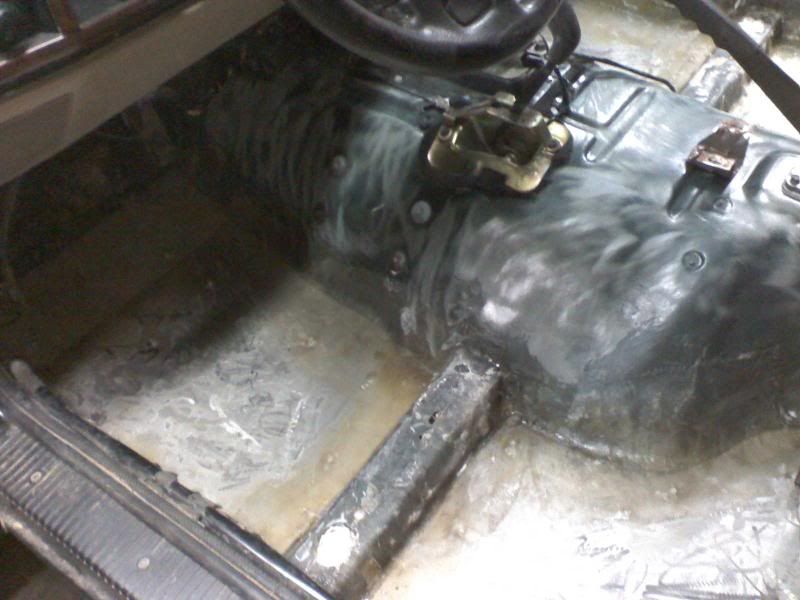
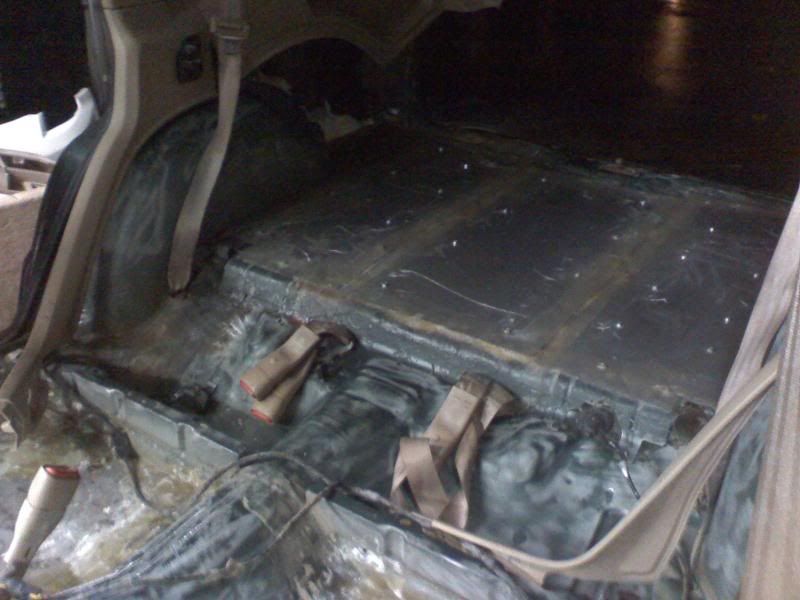
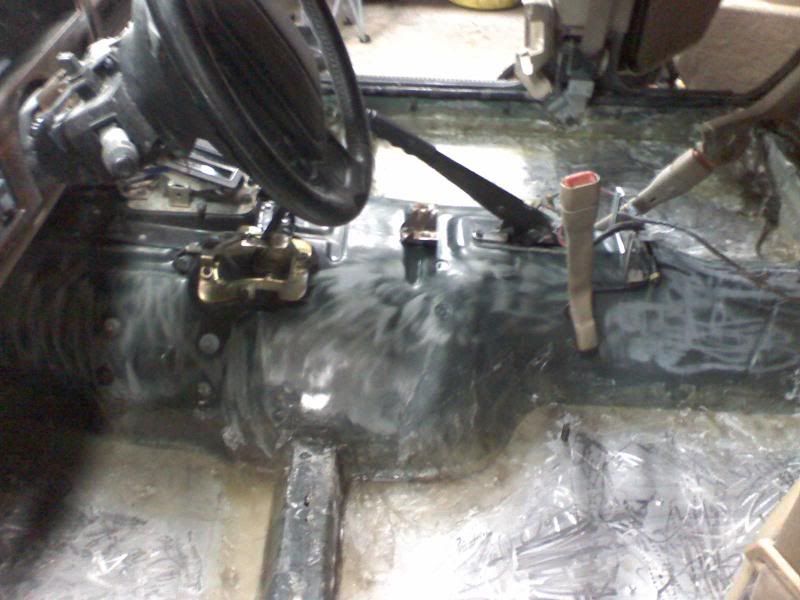
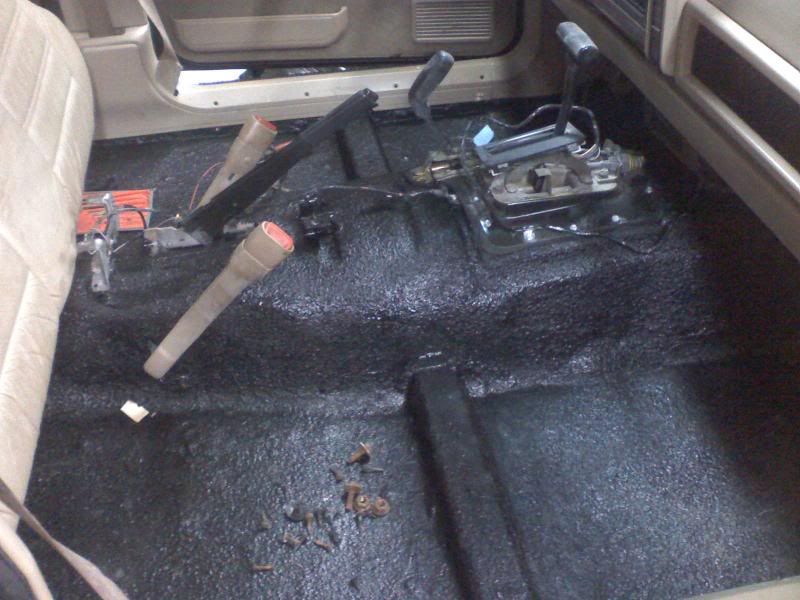
So I decided to pull up my carpeting to go over the rust on my poor XJ and boy was I surprised with how bad it was! Im including the pics of the stripping and clean phase first. Then once it was all cleaned I cut out a templet of 3mm thick SS sheet metal and laid it over the rear trunk area, rear seat floors, and front seat floors. I secured them down with rivets, SS sheet metal screws, and sealed all the seems with fiber glass to make sure it was a water tight seal. After that i sanded everything down and applied 6 layers of Herculiner to the floor to make it easier to clean out and more water friendly. I apologize for not taking more pics with the seats out after we applied the Herculiner. Enjoy!


Thread Starter
Newbie
Joined: Sep 2008
Posts: 29
Likes: 0
Model: Cherokee
Well me and my buddy worked on it after work everyday for about 5 days total... the SS sheet metal, Herculiner, and fiberglass were all about $400 for everything... about $50 in Cobalt bits and cut off wheels to drill/cut through the rusty metal lol
Trending Topics
Thread Starter
Newbie
Joined: Sep 2008
Posts: 29
Likes: 0
Model: Cherokee
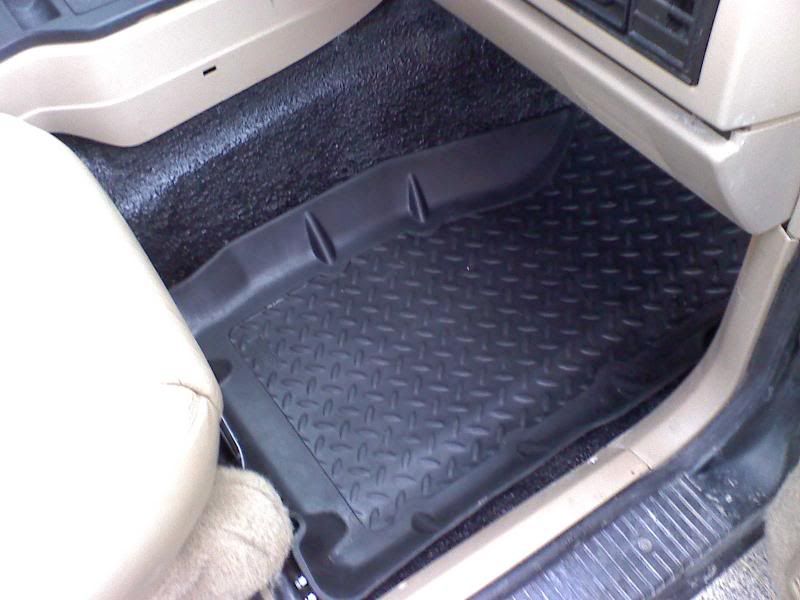
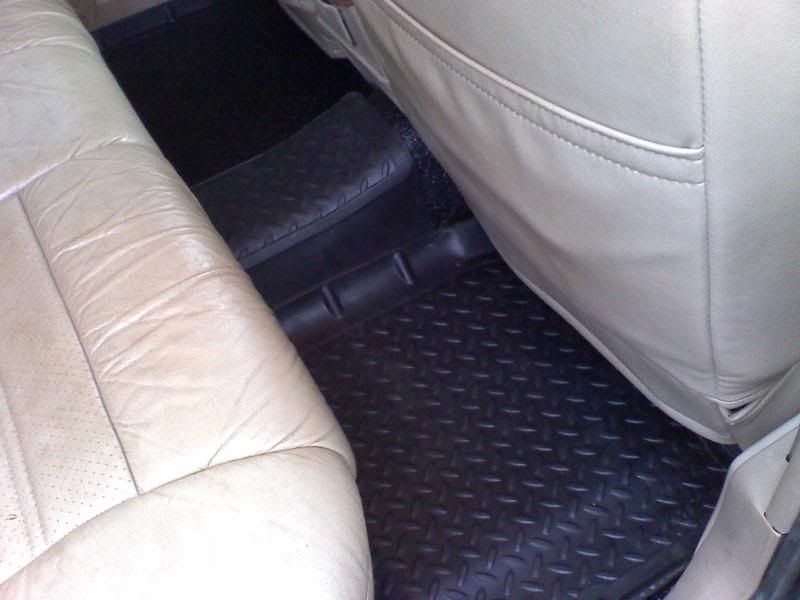
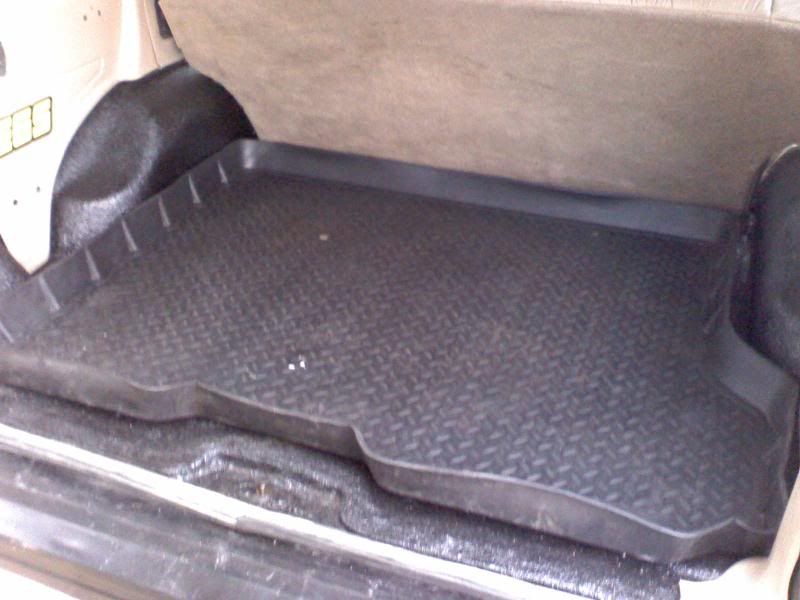
I got the Husky floor mats from Rustysoffroad.com and I still have to finish sealing up everything from underneath with fiberglass and undercoating. I'll post up the pics from underneath when I finish all that. It definitely wont look as pretty from underneath though! lol If I had more time and access to a welder I would have just replaced the whole floor pan! But I did the best I could with what was available to me at the time.


Registered Users
Joined: Jul 2009
Posts: 850
Likes: 0
Year: 91 with lots of 01' parts
Model: Cherokee
Engine: 01' 4.0L
I got the Husky floor mats from Rustysoffroad.com and I still have to finish sealing up everything from underneath with fiberglass and undercoating. I'll post up the pics from underneath when I finish all that. It definitely wont look as pretty from underneath though! lol If I had more time and access to a welder I would have just replaced the whole floor pan! But I did the best I could with what was available to me at the time.

Junior Member
Joined: Jul 2009
Posts: 96
Likes: 0
From: Quantico, VA and West Chester, PA soon to be Pensacola, FL
Year: 1998
Model: Cherokee
Engine: 4.0 L 6 Cyl.
So, that's really legit. wow.
Hell of a job man. I'm digging those rubber mats, thinking I'm gonna have to get some now. Really impressive work. I probably would have been like screw this...now I have an escape hatch if I flip over, and I would have proceeded to wheel it till it exploded.
Hell of a job man. I'm digging those rubber mats, thinking I'm gonna have to get some now. Really impressive work. I probably would have been like screw this...now I have an escape hatch if I flip over, and I would have proceeded to wheel it till it exploded.
Thread Starter
Newbie
Joined: Sep 2008
Posts: 29
Likes: 0
Model: Cherokee
The sheet metal was secured to the existing floor using the self tappers then used the rivets to go along the frame rails... I bought a sweet rivet gun for the project! I love it!