
Rear seat center console

Thread Starter
CF Veteran
Joined: May 2008
Posts: 2,914
Likes: 5
Year: 1987
Model: Comanche
Engine: I6 4.0L
Alright guys how many times have you been driving around with friends or your kids in the back seat and they have no place to put there drinks. It happened to me and it got me thinking and I came up with the idea of making a rear center console with to cup holders. Space was a isseue because lets face it the back seat in our jeeps is pretty small. Anyways I thought over the tunnel would be a good location. Now I know what your thinking "What if I want to get to my jack or put my seat down" well I thought the same thing thats why I made it totally removable.
First I made a cardboard template and figured out how big i wanted it to be and the dimensions of the actual cup holders i went with about 2 3/4 inches deep and a diameter of 3 inches this makes pop bottles and cans a little loose but my main concern was it being able to handle large drinks (i used a large McDonalds cup to test mine) you can adjust the sizes if you want.
Next it became a group effort between me and buddy and his table saw be used 3/8ths inch plywood that we got out of the trash we cut all four sides the top and the bottom then used a couple of 2X2s to reinforce the top and bottom (see pics)
IMPORTANT : I built mine with more complex angles because i had access to tools that cut the angles but this can be done with just right angles but in my oppinion it doesnt look as nice
After we got wood cut we focused on putting the angles on it came out to be about a 15 degree angle
Once we got the angles cut we dry fitted and duct taped it together we ran into a few small problems that just required us to recut one on the sides after we did that it worked and looked great
Now it became the time to cut out the holes for actual cup holders now the best thing to use would be a drill press with a hole saw bit but we didnt have access to one of those so we used a jigsaw and cleaned it up with a dremal with a sanding drum it came out great (do a few practice circles in scrap wood to get the hang of it)
We moved on from there to "final assembly" we used wood glue and small headed finishing nails then used a counter sinking tool to counter sink them (this would be a perfect application for a nail gun)
IMPORTANT : if you want a super clean look before you put in the bottom peice paint it black (see pics)
After letting the glue set up we moved on to painting I just got as close to the color of my center console and leather as i could but you could paint it any color. I did a total of 3 coats
Okay now the fun part PICS! (I only have pics of the finished product)
This is just an overall pic of the whole console
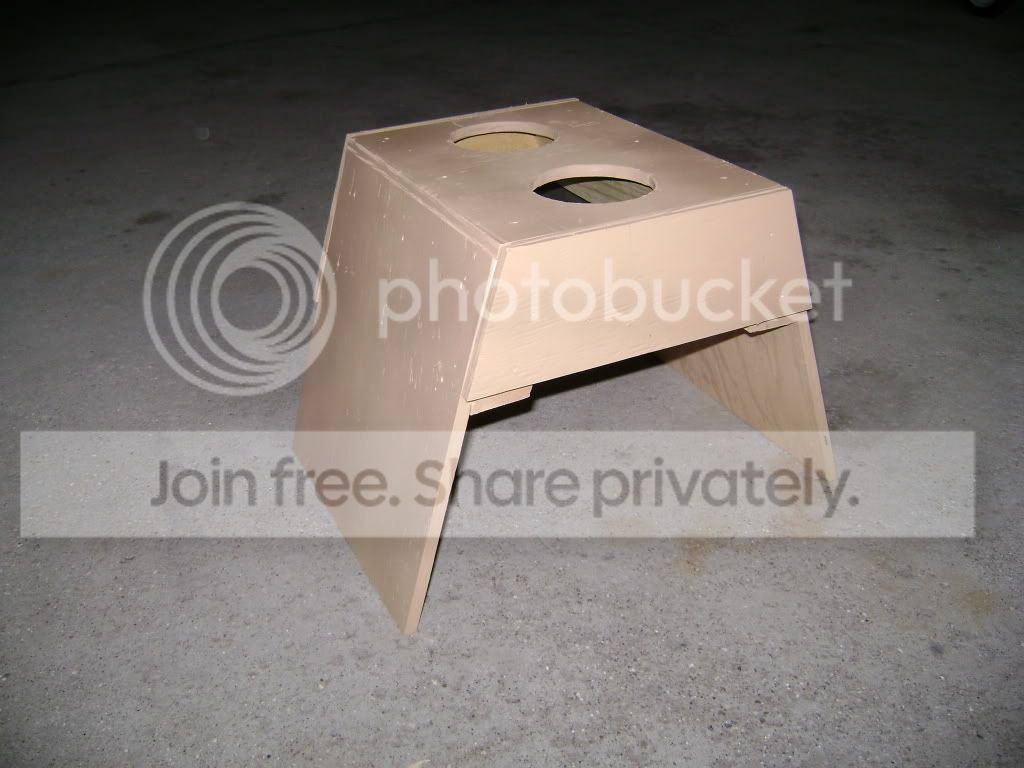
Angled view looking inside to the bottom peice (black) and the sides (wood tone)

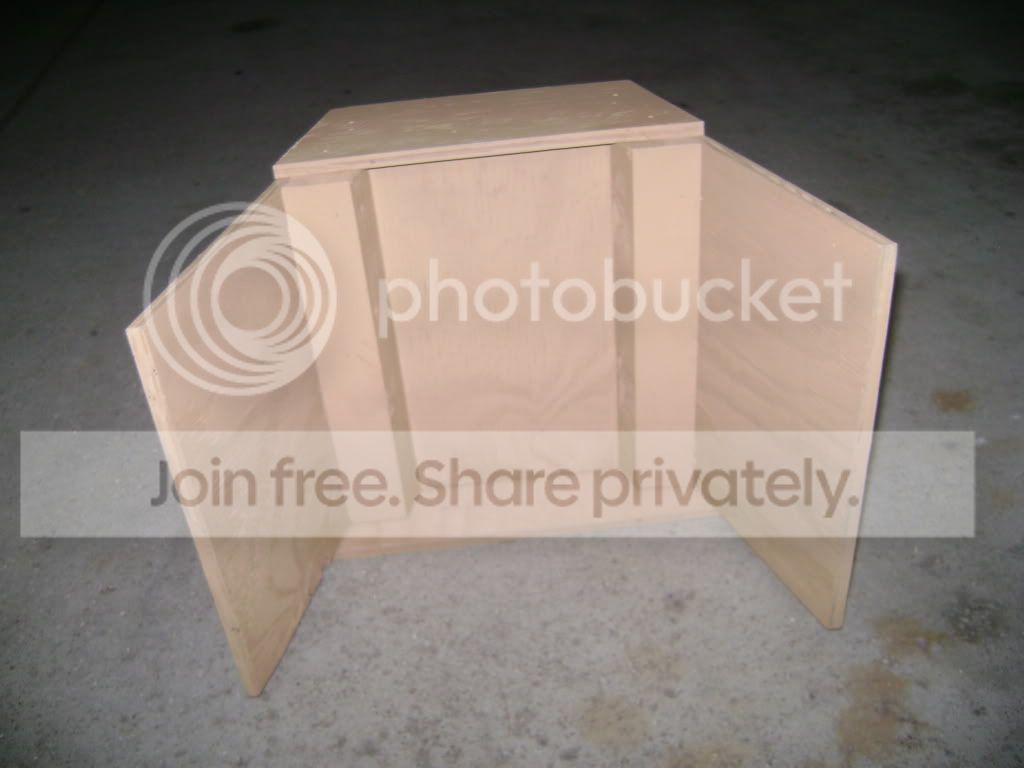
Picture from the bottom looking up the long sides go over the sides of the tunnel and the bottom peice is reinforced custom cut 2x2's
This is a pic looking in at the cup holder itself you can see i forgot (didnt think about) painting the other interior peices if you do this project be sure to do that it makes for a cleaner look

Picture of the console removed and sitting next to my jeep

View of strait down into the cup holders i think the black really makes it pop (haha get it pop)

The following are just some pics with it sitting in its home over the tunnel


Okay on this last pic look very carefully because it is very important if you look at your tunnel it is higher the the back of your factory center colsole then at the front of rear bench seat to adjust for this make your rear center console with one short side (towards the front at the back of the factory console) and one longer side (at the front of the bench seat)

Thanks for reading and if you want to this project and run into any problems PM me and i will try to help
First I made a cardboard template and figured out how big i wanted it to be and the dimensions of the actual cup holders i went with about 2 3/4 inches deep and a diameter of 3 inches this makes pop bottles and cans a little loose but my main concern was it being able to handle large drinks (i used a large McDonalds cup to test mine) you can adjust the sizes if you want.
Next it became a group effort between me and buddy and his table saw be used 3/8ths inch plywood that we got out of the trash we cut all four sides the top and the bottom then used a couple of 2X2s to reinforce the top and bottom (see pics)
IMPORTANT : I built mine with more complex angles because i had access to tools that cut the angles but this can be done with just right angles but in my oppinion it doesnt look as nice
After we got wood cut we focused on putting the angles on it came out to be about a 15 degree angle
Once we got the angles cut we dry fitted and duct taped it together we ran into a few small problems that just required us to recut one on the sides after we did that it worked and looked great
Now it became the time to cut out the holes for actual cup holders now the best thing to use would be a drill press with a hole saw bit but we didnt have access to one of those so we used a jigsaw and cleaned it up with a dremal with a sanding drum it came out great (do a few practice circles in scrap wood to get the hang of it)
We moved on from there to "final assembly" we used wood glue and small headed finishing nails then used a counter sinking tool to counter sink them (this would be a perfect application for a nail gun)
IMPORTANT : if you want a super clean look before you put in the bottom peice paint it black (see pics)
After letting the glue set up we moved on to painting I just got as close to the color of my center console and leather as i could but you could paint it any color. I did a total of 3 coats
Okay now the fun part PICS! (I only have pics of the finished product)
This is just an overall pic of the whole console
Angled view looking inside to the bottom peice (black) and the sides (wood tone)
Picture from the bottom looking up the long sides go over the sides of the tunnel and the bottom peice is reinforced custom cut 2x2's
This is a pic looking in at the cup holder itself you can see i forgot (didnt think about) painting the other interior peices if you do this project be sure to do that it makes for a cleaner look
Picture of the console removed and sitting next to my jeep
View of strait down into the cup holders i think the black really makes it pop (haha get it pop)
The following are just some pics with it sitting in its home over the tunnel
Okay on this last pic look very carefully because it is very important if you look at your tunnel it is higher the the back of your factory center colsole then at the front of rear bench seat to adjust for this make your rear center console with one short side (towards the front at the back of the factory console) and one longer side (at the front of the bench seat)
Thanks for reading and if you want to this project and run into any problems PM me and i will try to help

Senior Member

Joined: Aug 2008
Posts: 549
Likes: 0
From: Austin

Trending Topics
CF Veteran
Joined: Mar 2008
Posts: 2,649
Likes: 3
From: Salem Virginia
Year: 1998
Model: Grand Cherokee (ZJ)
Engine: 4.0
Nice job! You may like on of my other sites www.WoodworkingTalk.com 


Thread
Thread Starter
Forum
Replies
Last Post
xjwolfman
Stock XJ Cherokee Tech. All XJ Non-modified/stock questions go here
8
Aug 26, 2020 12:59 PM
australian_expat
Stock XJ Cherokee Tech. All XJ Non-modified/stock questions go here
4
Sep 2, 2015 09:02 PM
Currently Active Users Viewing This Thread: 1 (0 members and 1 guests)