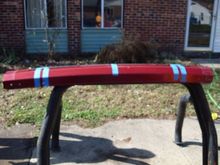
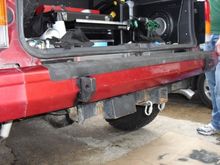
After drilling 9 holes (4 left, 5 right) through the bumper, the lower brackets bolt over it and into lower cross member, sandwiching the bumper between them. The left bracket has the greasable swing arm pinion and the left has the arm lock waiting to be attached.