
Quote:
Yeah I ordered these a while back:Originally Posted by rwdawg2
Are you going to use the rain rail mounts, or what?
http://www.jcroffroad.com/Merchant2/...ry_Code=XJMISC
Hopefully the link works, they mount right in the gutter mounts. Hopefully they're as nice as everyone says. I know I could have built them but they look really nice and the price is right.
For anyone buying these use their coupon code "HIGHFIVE" for 5% off. I'll take every little bit I can. Saved me a whopping $2

ThatJeepGuyXJMJ used then in his baja light bar and they look great! Hopefully they come in soon. I'm waiting on them for my next step. Oh well I have plenty of time to work on other things on the Jeep.
Junior Member
Awesome can't wait to see it.
Kind of what I want to do with mine but I want to integrate some rain rail sliders into it as well.
Kind of what I want to do with mine but I want to integrate some rain rail sliders into it as well.
Quote:
Nice, let me know if you end up building it. I'd love to see it. All the steel and conduit cost me ~$35 and the gutter mounts were $44. Thats only $79! Well worth it when it's said and done. Could be done much cheaper if you did your own gutter mounts somehow. All together it's pretty easy other than the time it takes to build.Originally Posted by rwdawg2
Kind of what I want to do with mine but I want to integrate some rain rail sliders into it as well.
Okay I made some a little progress tonight... I got the JCR gutter mounts in! I'm very happy with the quality and I would defiantly recommend them to anyone looking for a solid inexpensive mount. I will weld them up either tomorrow night or Sunday night depending on available time.
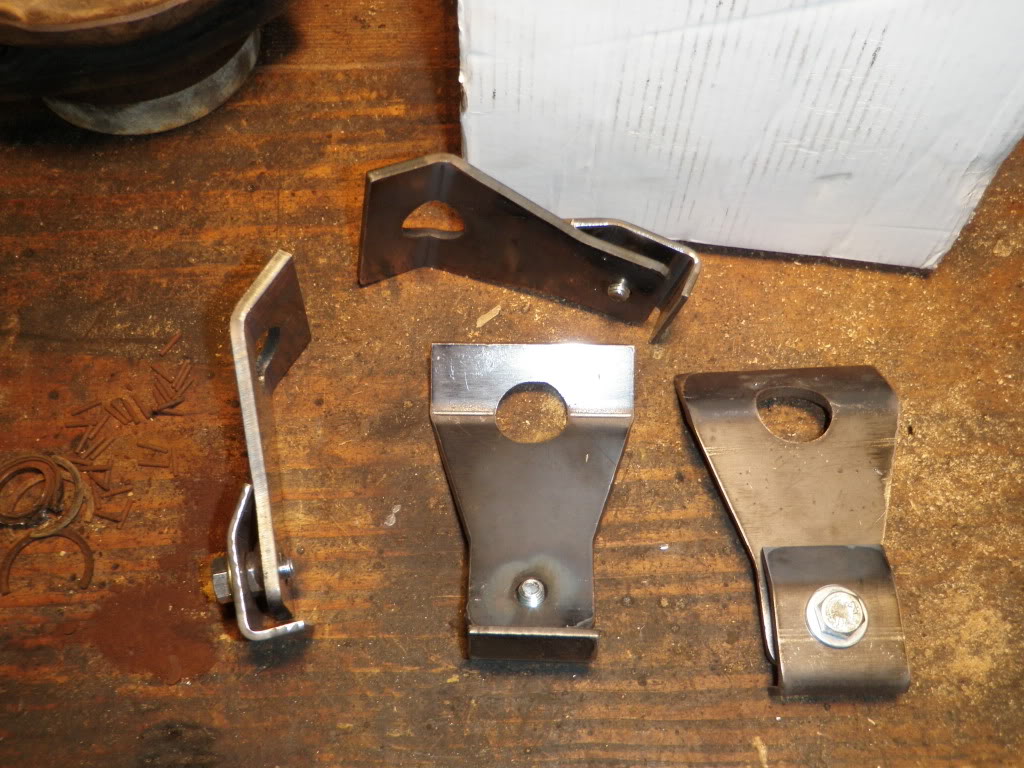
I also finally welded up the tool brackets tonight:
Sorry again for this build taking so long but it will be worth it. This weekend the rack will be on the Jeep for sure. It's getting close to the final couple of steps
I also finally welded up the tool brackets tonight:
Sorry again for this build taking so long but it will be worth it. This weekend the rack will be on the Jeep for sure. It's getting close to the final couple of steps

Banned
Your doing a great job man. Your design is killer. I've never liked these over priced racks that cover just a little over half the roof.
You got space for spare tire and a bunch of other stuff
You got space for spare tire and a bunch of other stuff
That Jeep Guy XJMJ
CF Veteran
close


Apr 28, 2026
- Join DateJun 2009
- LocationMichigan
- Posts:2,610
- Year1987 MJ, 1973 J2000, 1986 XJ, 08 JK
- ModelComanche (MJ)
- Engine4.0L H.O
-
Likes:305
-
Liked:446 Times in 376 Posts
yea buddy lol

Newbie
good work! i know your trying to do this on the cheap, but what would think about 1x1 sqare stock? i drew up my designs and priced all my materials at about $100 bucks
Quote:
Haha just drilled through the bumper. It's a crappy way to do it but it works. I'll be making a new bumper but it works for now.Originally Posted by JGary
Hey man how'd you mount your lights on the grill?
Quote:
There was a guy that did his in square stock. It looks good but I like the tube look. Plus the conduit is SO much cheaper than square stock. If you do it let me know I'd love to see it! Originally Posted by 97JGCL
good work! i know your trying to do this on the cheap, but what would think about 1x1 sqare stock? i drew up my designs and priced all my materials at about $100 bucks
I got my first coat of pain on it this morning!!! Last night I welded the mounts to it and got it al fitted up on top. It looks amazing. I took pictures of the progress I just havn't had time to post the pics yet. It's finally coming together andI hope to have it on by tomorrow. I still havn't decided how to run the light wires to the rack. Any suggestions? Thanks everyone!
Member
Quote:
Haha just drilled through the bumper. It's a crappy way to do it but it works. I'll be making a new bumper but it works for now.
Haha alright, I'd do that but the backs to my KCs come out to far so I'll prolly have to rig up some mountOriginally Posted by HawK_Racing
Haha just drilled through the bumper. It's a crappy way to do it but it works. I'll be making a new bumper but it works for now.

Senior Member
This is awesome, Hawk!! I did the same thing you are, and taught myself to weld. I am still learning, but much better after a bunch of projects.
Quote:
Yeah it shouldn't be hard at all. What kind of KC's do you have? I want 2 pots in the center of the rack then 2 driving lights on the outside. I know KC makes the Daylighter's series that I like but it'd be nicer to have someone's honest opinion about their product.Originally Posted by JGary
Haha alright, I'd do that but the backs to my KCs come out to far so I'll prolly have to rig up some mount
Well this morning these stickers came in the mail! I was excited to get them on. I didn't get a pic of them till night though
 There's another one on the other side too. It looks nice and well worth the $5.
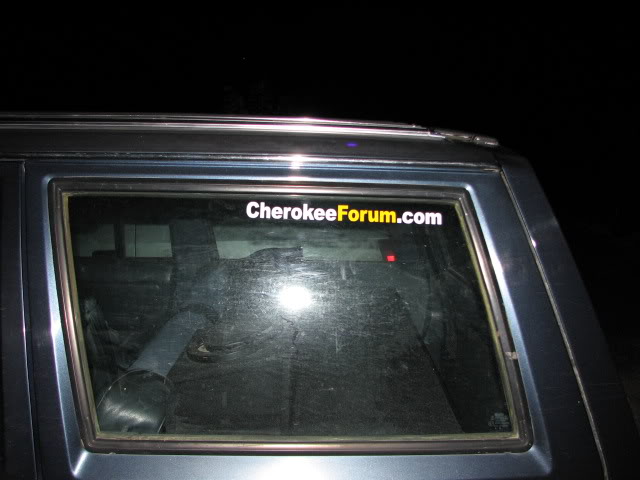
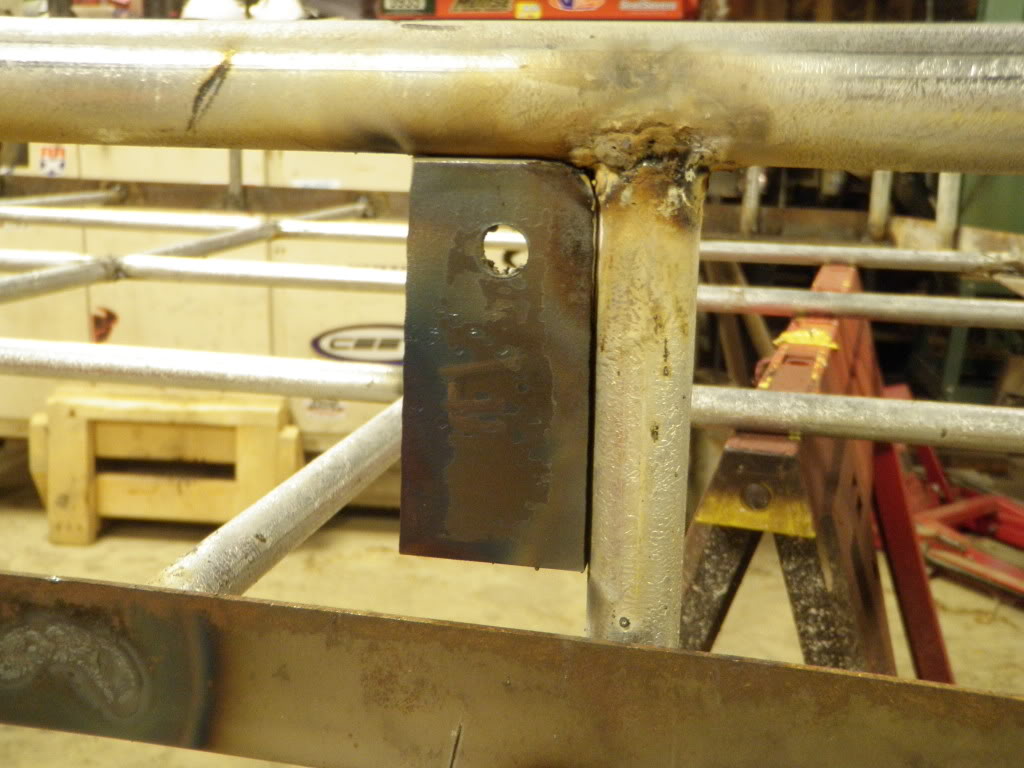
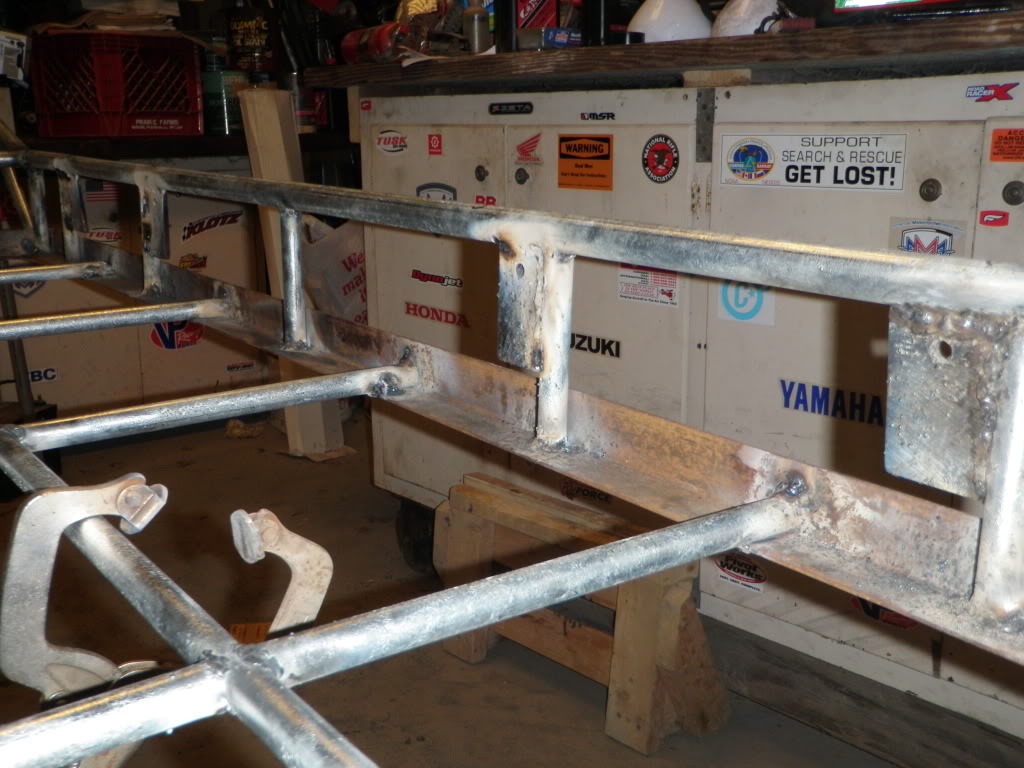
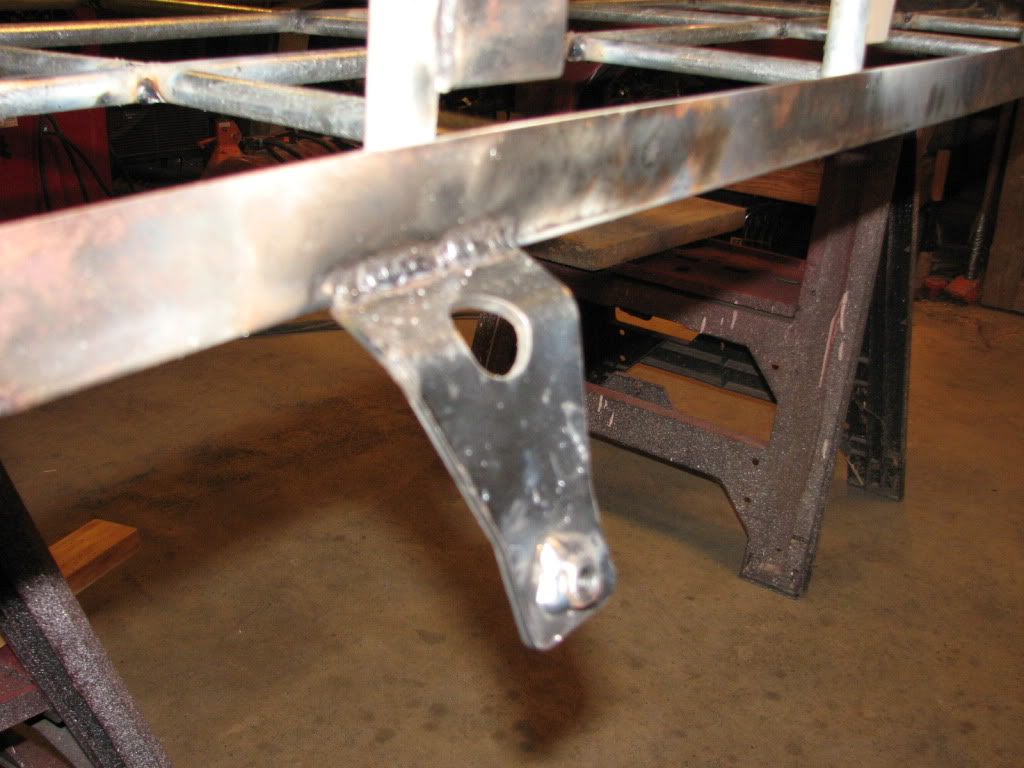
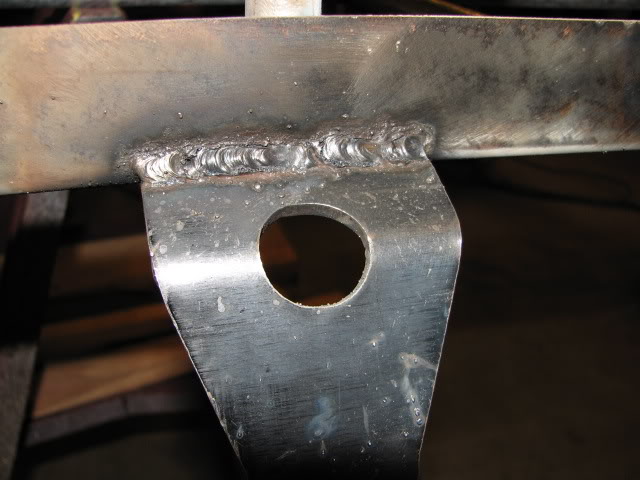
Last night I got some welding done to the rack and here's the JCR brackets welded up. They worked great, no problems at all. I would definitely recommend buying them again. If I were to build another rack I would buy 2 more or a whole another set just for looks.
Here they are welded up. Notice my welding is getting better!
I also welded up back up light tabs just for kicks and giggles but I forgot to take a picture of them
After all the welding was done and I was happy with the product I wire brushed everything and knocked off all the nasty turds and slag metal. Then I wiped the entire rack off in paint thinner:
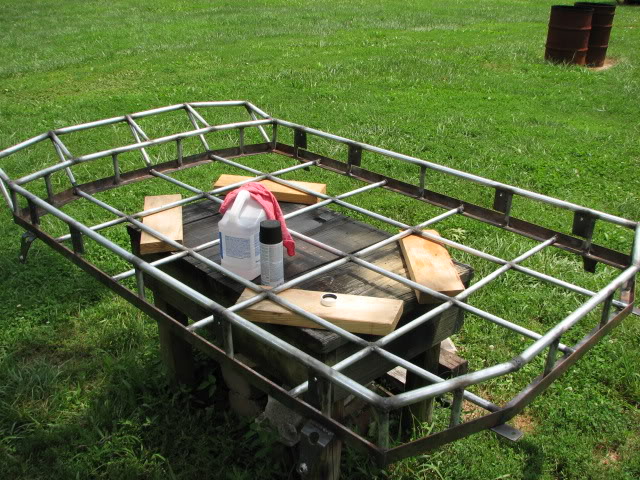
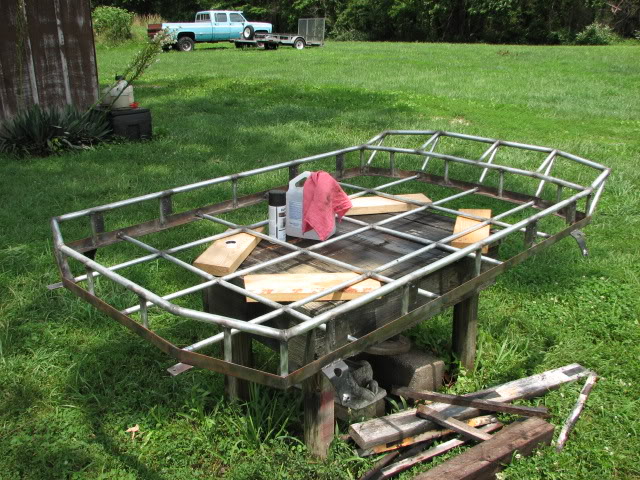
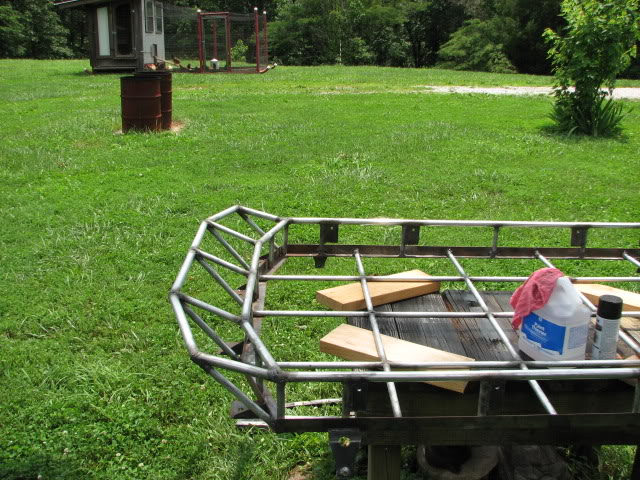
^^ also got a corner shot of our chicken tractor

I got to painting it after wiping it all down. This is what I put up in the shop tonight. As it sits now it has only 2 coats of paint on the top. I haven't yet flipped it over to paint it but I will in the morning before work.
Painted:
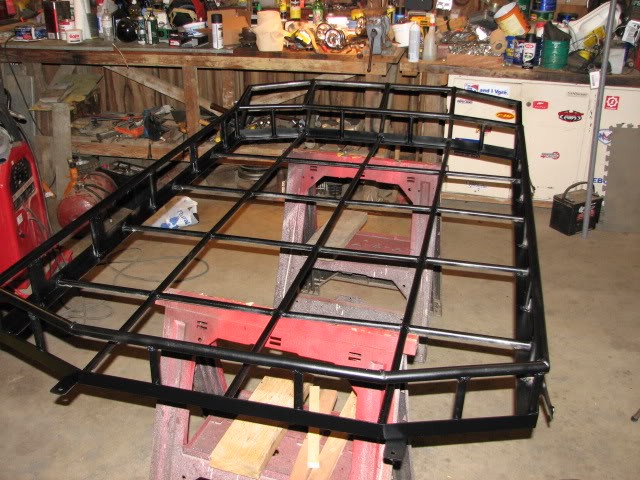
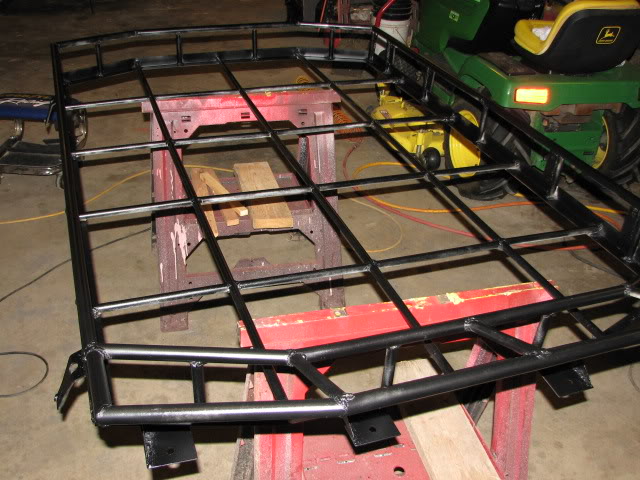
It is all done with Krylon Satin Black spray paint. It's just what was easiest to me. More pics soon to follow I really want to mount this thing up there!