
expedition rig build out

Thread Starter
Senior Member
Joined: Mar 2013
Posts: 639
Likes: 3
From: lake stevens, wa
Year: 1996
Model: Cherokee
Engine: 4.0L
supposed to get a bunch done today, but ended up spending a good chunk of my morning nursing a hangover from my buddy's annual summer kick off bbq.
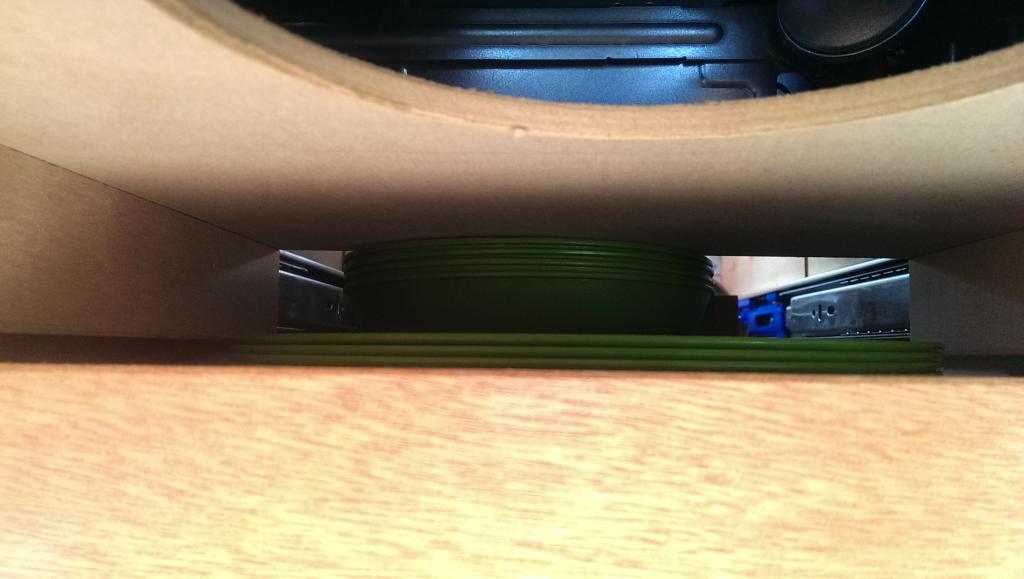
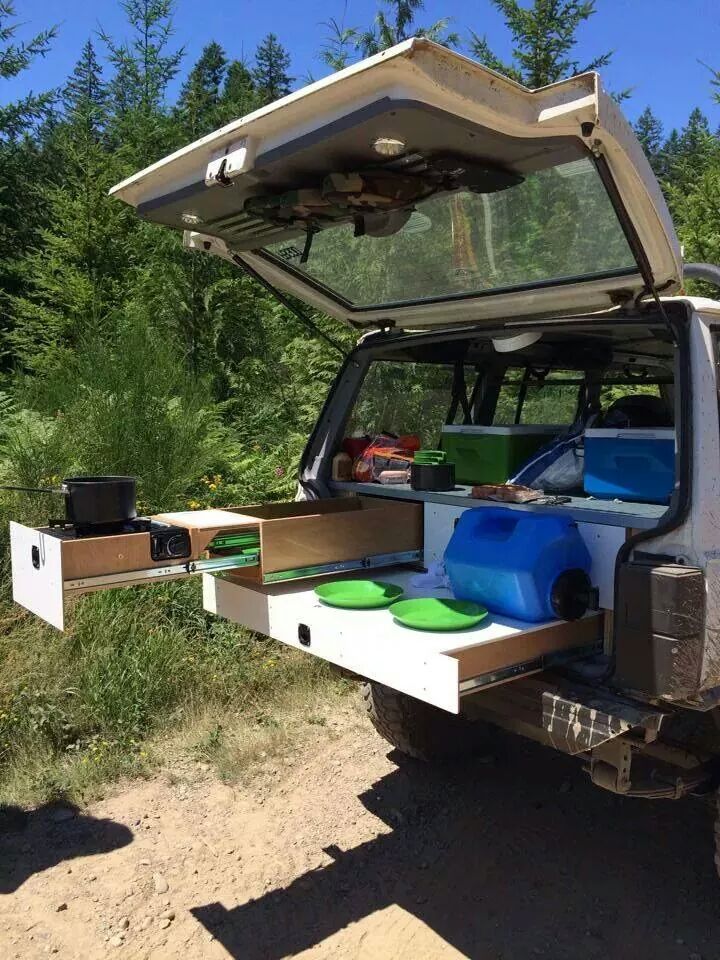
decided to run around and do a bit of shopping tho. first i hit up cabelas for some camp kitchen stuff. 4 plates and 4 bowls stacked up fit under the stove slideout perfectly. lucky coincidence?
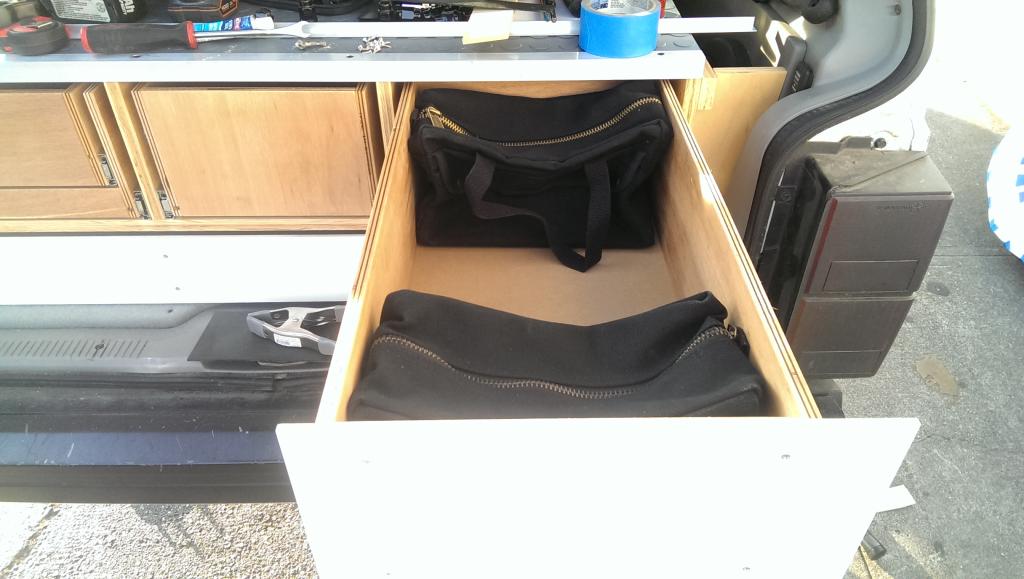
then i hit up a surplus store on the hunt for some pouches to keep my tools in. before i just had them tossed in a drawer, and it was kind of a pain. now everything can be better organized, and easier to take out and use. once again, lucked out on finding something in the perfect size.
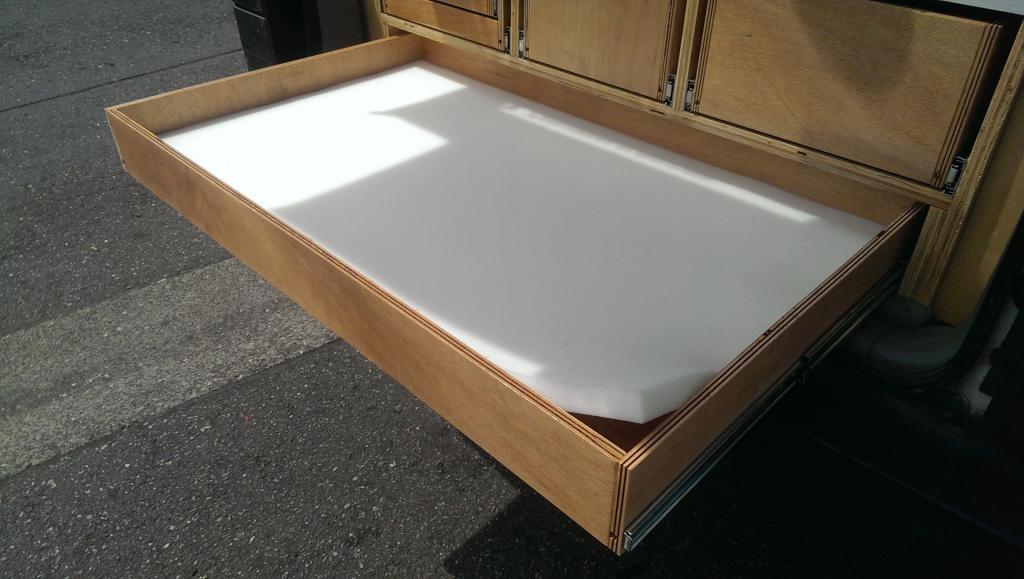
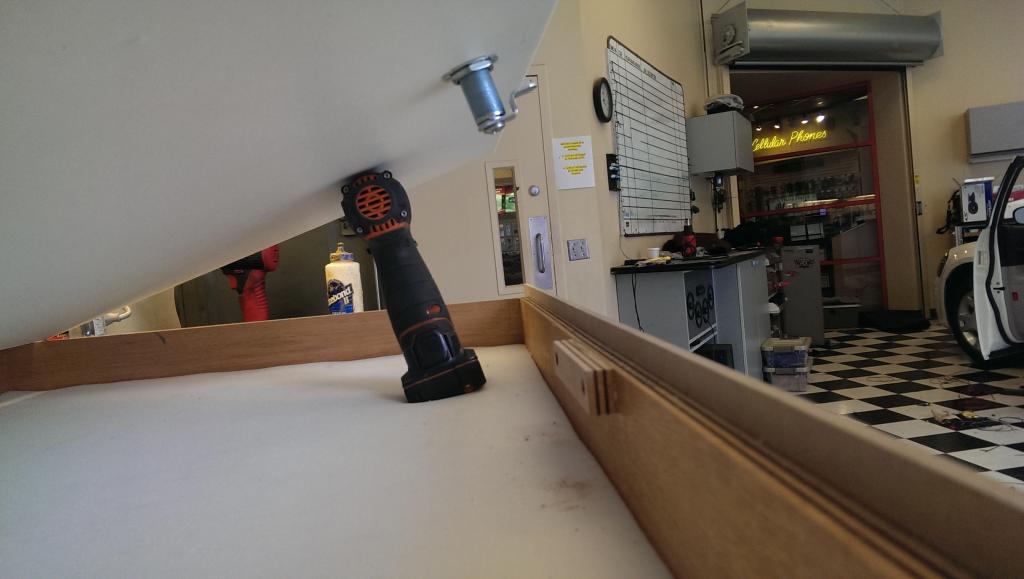
then after a quick stop at home depot, i hit the fabric store by the shop and snagged my first chunk of foam for my bottom drawer. got that glued in first thing
so rewind to home depot.. i wondered around that place for quite a while today trying to decide what i wanted to face my drawers with this go round. looked at sheet metal, counter laminate, plastic sheeting, etc.. but nothing really jumped out. then i got an idea..
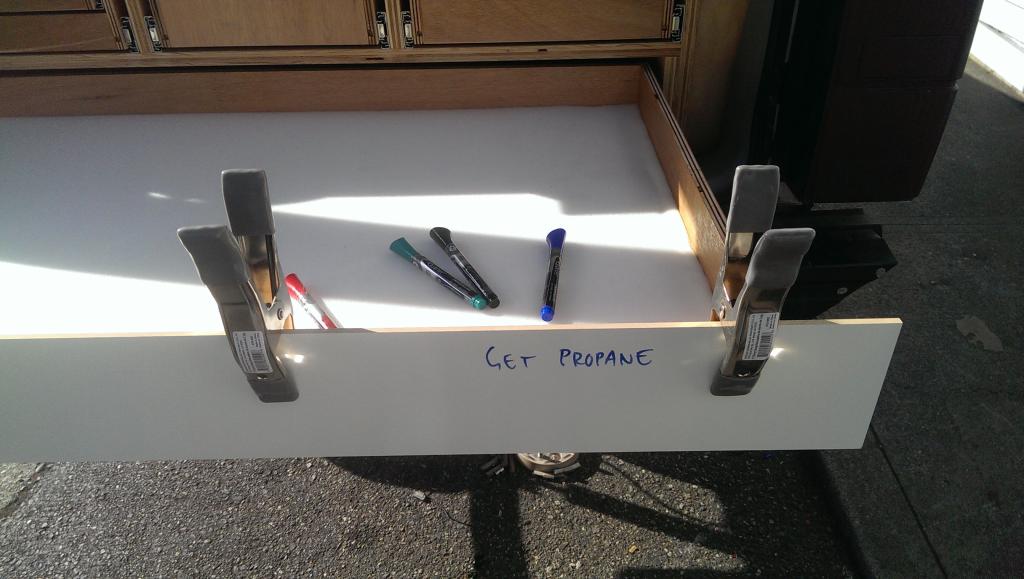
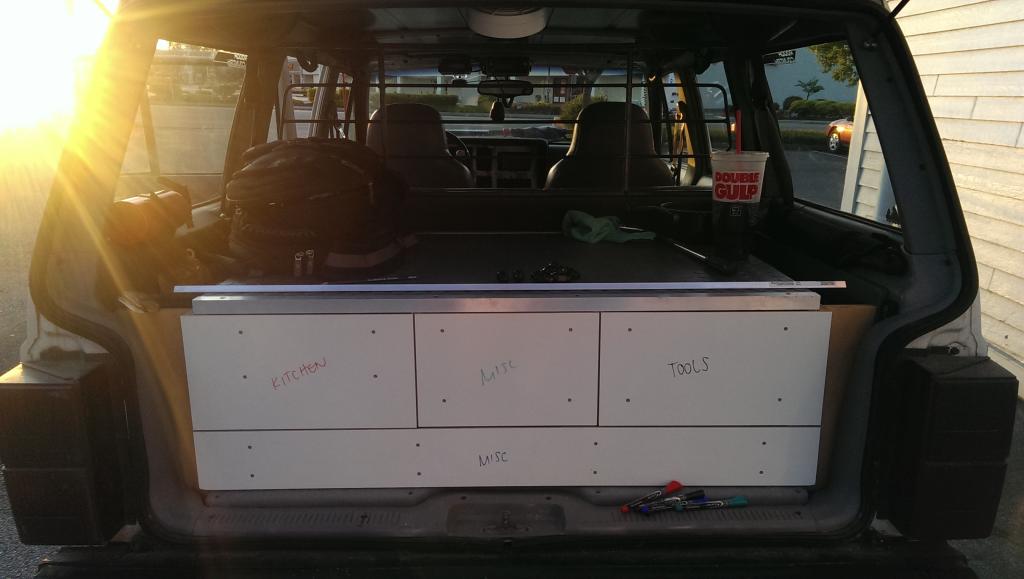
whiteboard material. it's just 1/4" mdf with a glossy white coating on it made for dry erase markers. now if i'm running low on something, i can jot a quick note to myself right there on the drawer! quite pleased with myself, i finished the rest of the drawers in it. gotta admit, this is my favorite part of this whole build right now.. haha
so while i didnt get a lot of actual work done today, i'm ok with it. hopefully i'm gonna toss a few hours into it tomorrow to make up for it.
decided to run around and do a bit of shopping tho. first i hit up cabelas for some camp kitchen stuff. 4 plates and 4 bowls stacked up fit under the stove slideout perfectly. lucky coincidence?
then i hit up a surplus store on the hunt for some pouches to keep my tools in. before i just had them tossed in a drawer, and it was kind of a pain. now everything can be better organized, and easier to take out and use. once again, lucked out on finding something in the perfect size.
then after a quick stop at home depot, i hit the fabric store by the shop and snagged my first chunk of foam for my bottom drawer. got that glued in first thing
so rewind to home depot.. i wondered around that place for quite a while today trying to decide what i wanted to face my drawers with this go round. looked at sheet metal, counter laminate, plastic sheeting, etc.. but nothing really jumped out. then i got an idea..
whiteboard material. it's just 1/4" mdf with a glossy white coating on it made for dry erase markers. now if i'm running low on something, i can jot a quick note to myself right there on the drawer! quite pleased with myself, i finished the rest of the drawers in it. gotta admit, this is my favorite part of this whole build right now.. haha
so while i didnt get a lot of actual work done today, i'm ok with it. hopefully i'm gonna toss a few hours into it tomorrow to make up for it.
Thread Starter
Senior Member
Joined: Mar 2013
Posts: 639
Likes: 3
From: lake stevens, wa
Year: 1996
Model: Cherokee
Engine: 4.0L
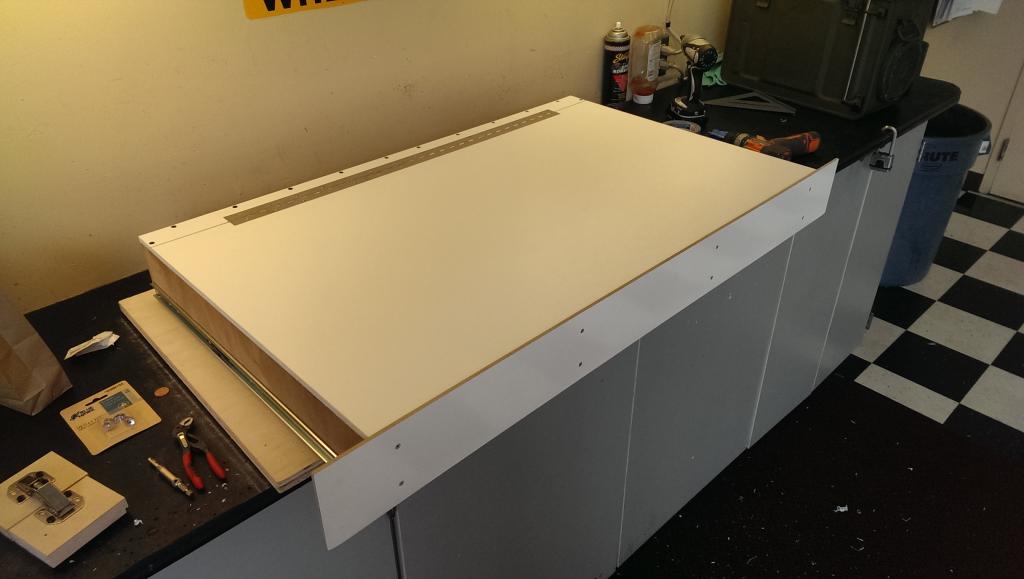
spent a bit more time on it today to get me caught back up to where i wanted to be. first i went down to my local tap plastics and got myself a big chunk of starboard. it's similar to chopping board material, but handles uv a lot better. got a 3/8" piece big enough to cover the bottom drawer of the cabinet. next i tossed a piano hinge on it and mounted it down.
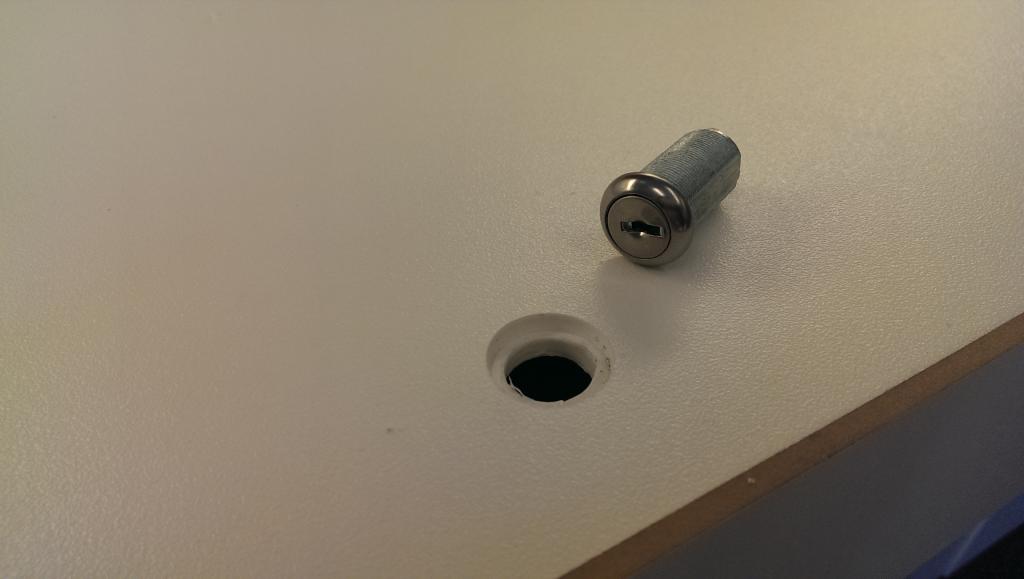
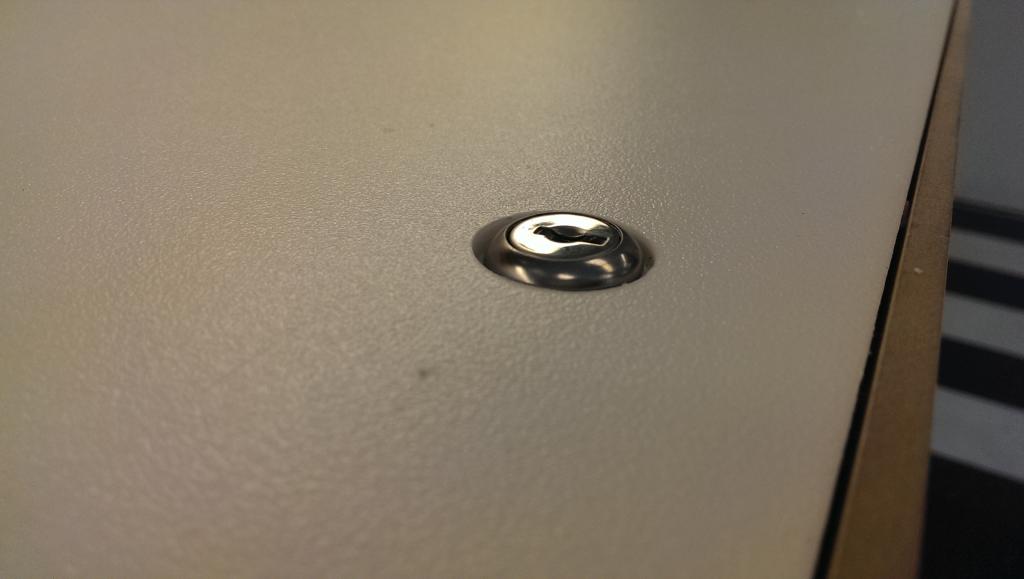
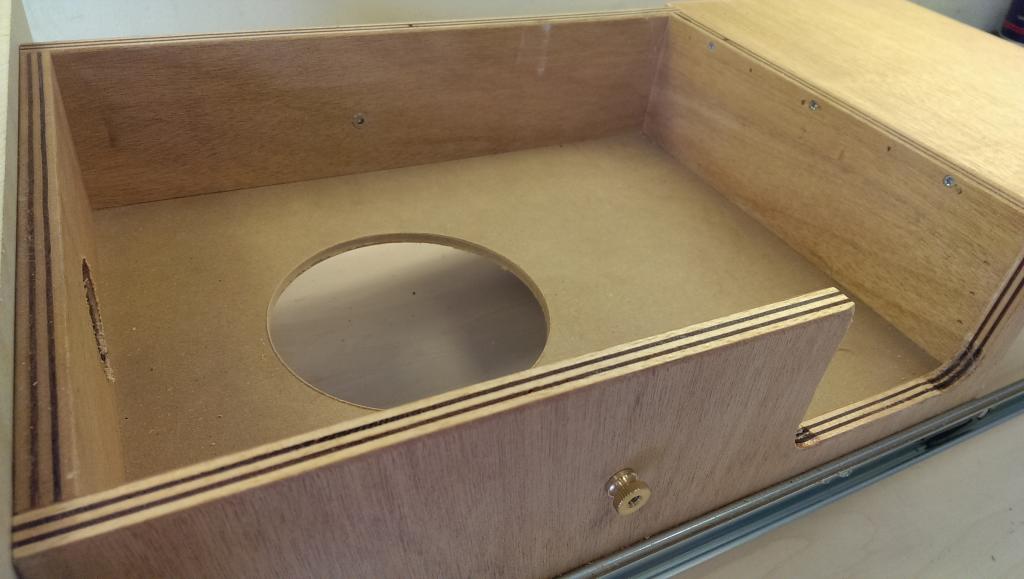
next i set about locking it up.. don't need anything too hardcore, so a simple cylinder lock will do the job here. i decided to flash it up a bit by sinking the head into the lid a bit. no real reason other than "why not"
then i attached the locking tab and attached a strip of plywood for it to slide under
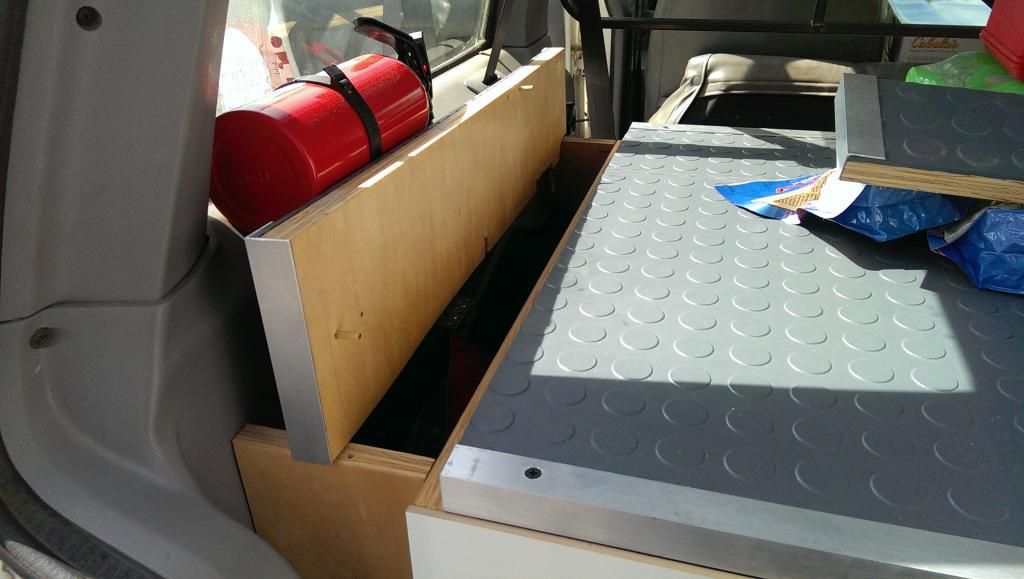
thanks to the top, the drawer can now function as additional counterspace when i'm making up some grub
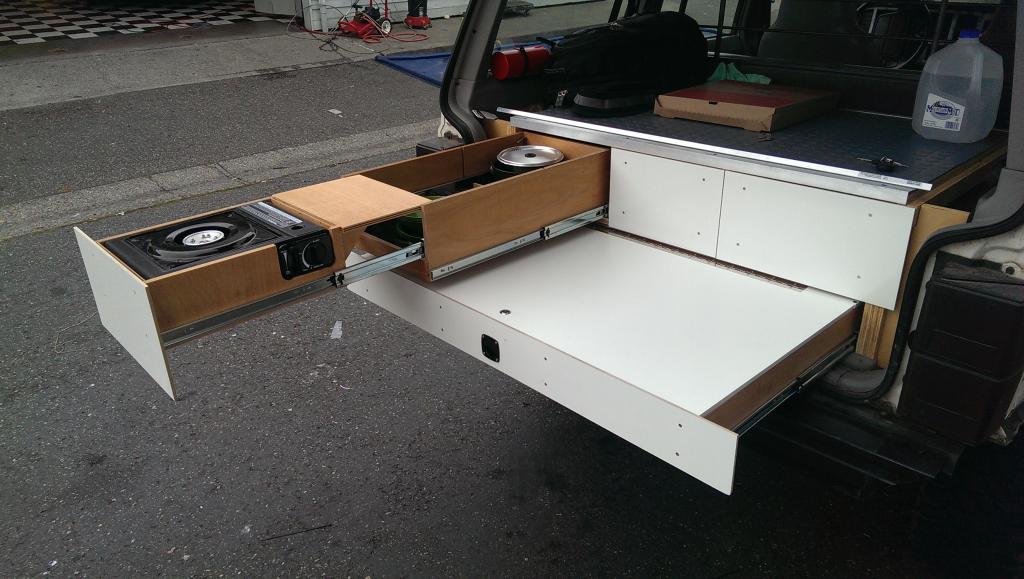
and speaking of the kitchen drawer, i needed to address one major annoyance. the flip over section for the burner had a nasty habit of rattling around as i was driving down the road. to solve this issue, i installed some little ***** that i could attach a piece of bungie rope to help hold it in place. no more rattles

last thing for the day was another piece of the foam under the big drawer lid. now stuff in there should be held nice and snug.
i also installed some simple drawer pulls, but apparently i failed to snag a pic of those all done (you can see one on that stove pic tho.
not much left to do now.. should be wrapped up next sunday, unless i find something else to change. haha
next i set about locking it up.. don't need anything too hardcore, so a simple cylinder lock will do the job here. i decided to flash it up a bit by sinking the head into the lid a bit. no real reason other than "why not"
then i attached the locking tab and attached a strip of plywood for it to slide under
thanks to the top, the drawer can now function as additional counterspace when i'm making up some grub
and speaking of the kitchen drawer, i needed to address one major annoyance. the flip over section for the burner had a nasty habit of rattling around as i was driving down the road. to solve this issue, i installed some little ***** that i could attach a piece of bungie rope to help hold it in place. no more rattles
last thing for the day was another piece of the foam under the big drawer lid. now stuff in there should be held nice and snug.
i also installed some simple drawer pulls, but apparently i failed to snag a pic of those all done (you can see one on that stove pic tho.
not much left to do now.. should be wrapped up next sunday, unless i find something else to change. haha

Senior Member


Joined: Feb 2011
Posts: 664
Likes: 29
From: Arizona
Year: 1996
Model: Cherokee
Engine: 4.0
Kick ***! In doing more work to my cargo area, I or my jeep decided to have me wait. The temps here are getting worse and yesterday it overheated. The upper hose blew off and brown gunky water came out. Rear cargo area will have to wait until I can fix the immediate issue.
Your ideas have inspired me to either re-do or make what I have better using your ideas. Too bad you dont get paid from all these forums. Thanks!
Your ideas have inspired me to either re-do or make what I have better using your ideas. Too bad you dont get paid from all these forums. Thanks!
Thread Starter
Senior Member
Joined: Mar 2013
Posts: 639
Likes: 3
From: lake stevens, wa
Year: 1996
Model: Cherokee
Engine: 4.0L
speaking of fun stuff.. stick a fork in this thing, because it is done!
for starters, i bit of an oops. the problem with the way i happen to do things (just wing it with zero plans) is that sometimes i forget important things along the way and end up having to rebuild stuff.
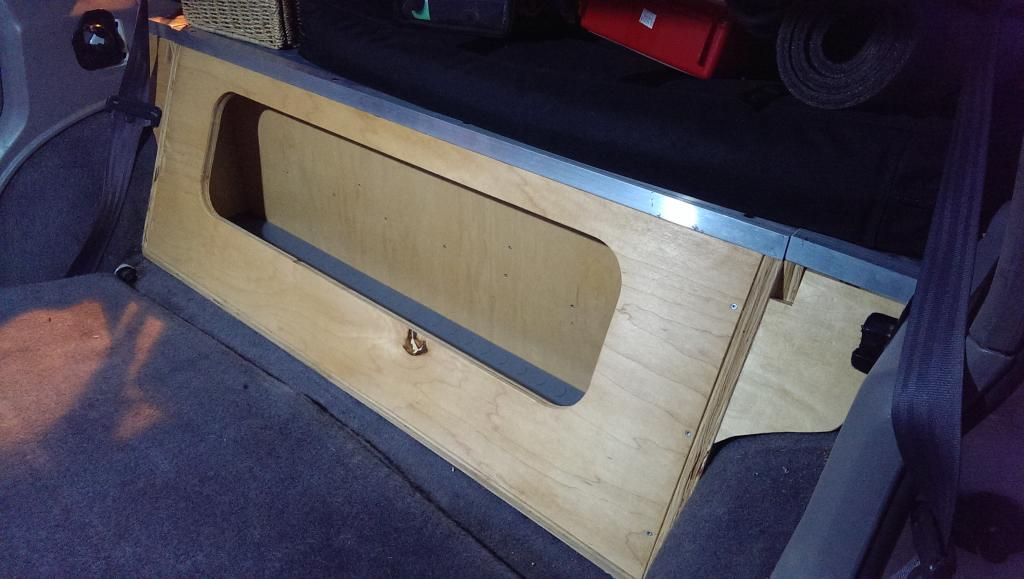
when i first made the cubby cover behind the seat, i failed to notice that i didn't have the main box mounted down. when i popped the seat up against it, i assumed it fit because the seat latched shut. after that, i put the piece aside an proceeded with assembly of the rest of the box. once it was all mounted down and put that cover back in, the seat wouldn't latch. the half an inch screwed me. as a temp fix i just unbolted the seat catches and moved them forward that half an inch. bugged the crap outta me, but my kids needed the seat.
well, today i fixed it.. first i cut out and mounted the wings (and cut some leftover rubber mat for the cubby)
then i installed some cleats to attach the main insert to. with just a few screws holding it in, it will be easy to remove just in case i have a spill in there

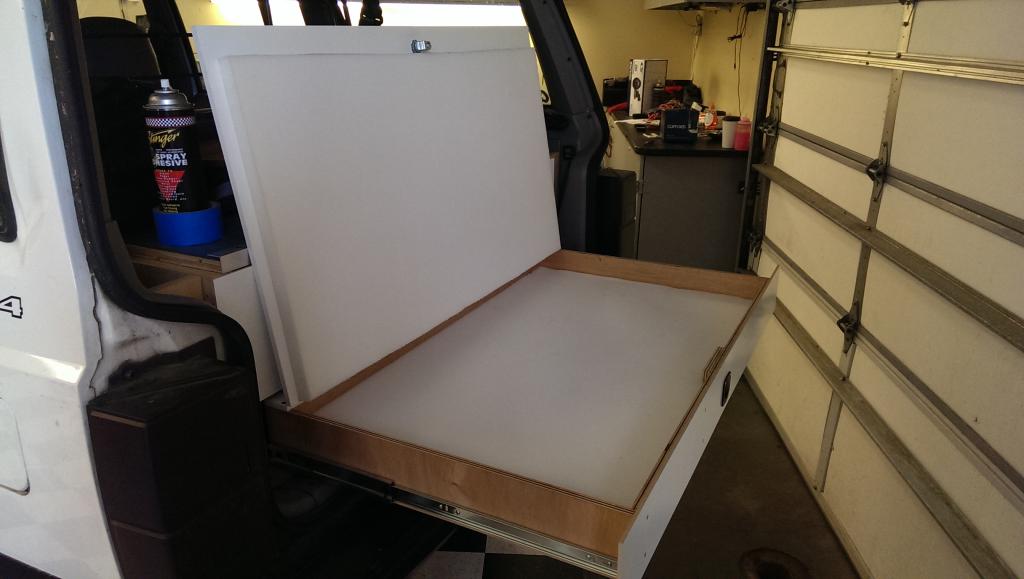
then i made some removable wings for the top sides. i was going to hinge them, but decided to keep it simple and just make them floating pieces instead. i did drill thru and install some dowel pegs to keep them lined up with the rest of the top.

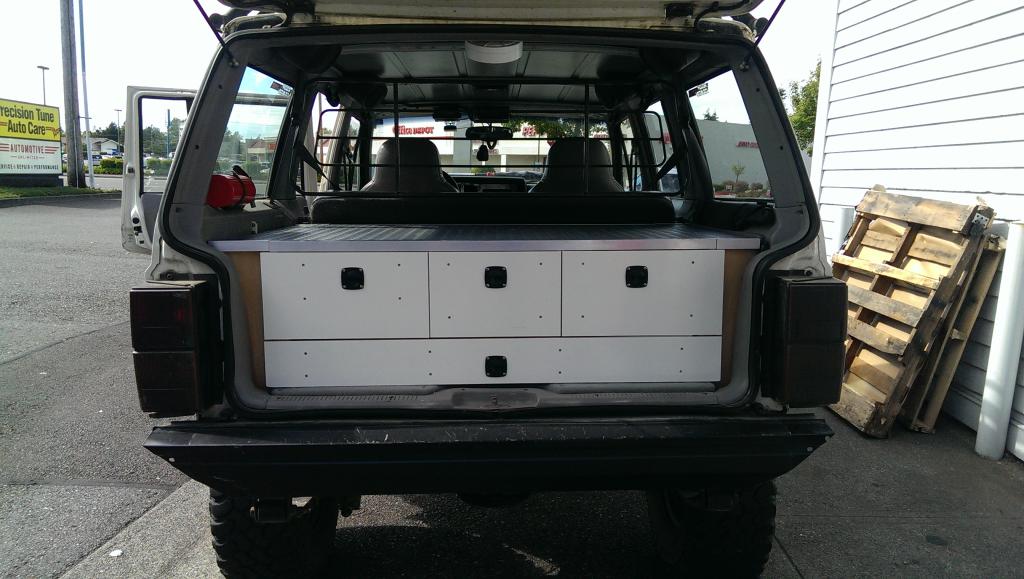
and here's a final shot of the beast all put together. overall i am extremely happy with how it turned out.
on to the next!
for starters, i bit of an oops. the problem with the way i happen to do things (just wing it with zero plans) is that sometimes i forget important things along the way and end up having to rebuild stuff.
when i first made the cubby cover behind the seat, i failed to notice that i didn't have the main box mounted down. when i popped the seat up against it, i assumed it fit because the seat latched shut. after that, i put the piece aside an proceeded with assembly of the rest of the box. once it was all mounted down and put that cover back in, the seat wouldn't latch. the half an inch screwed me. as a temp fix i just unbolted the seat catches and moved them forward that half an inch. bugged the crap outta me, but my kids needed the seat.
well, today i fixed it.. first i cut out and mounted the wings (and cut some leftover rubber mat for the cubby)
then i installed some cleats to attach the main insert to. with just a few screws holding it in, it will be easy to remove just in case i have a spill in there
then i made some removable wings for the top sides. i was going to hinge them, but decided to keep it simple and just make them floating pieces instead. i did drill thru and install some dowel pegs to keep them lined up with the rest of the top.
and here's a final shot of the beast all put together. overall i am extremely happy with how it turned out.
on to the next!
Seasoned Member
Joined: Jul 2011
Posts: 291
Likes: 0
From: Interior of Alaska
Year: 1991
Model: Cherokee
Engine: 4.0 HO
Senior Member
Joined: Feb 2011
Posts: 664
Likes: 29
From: Arizona
Year: 1996
Model: Cherokee
Engine: 4.0
speaking of fun stuff.. stick a fork in this thing, because it is done!
for starters, i bit of an oops. the problem with the way i happen to do things (just wing it with zero plans) is that sometimes i forget important things along the way and end up having to rebuild stuff.
when i first made the cubby cover behind the seat, i failed to notice that i didn't have the main box mounted down. when i popped the seat up against it, i assumed it fit because the seat latched shut. after that, i put the piece aside an proceeded with assembly of the rest of the box. once it was all mounted down and put that cover back in, the seat wouldn't latch. the half an inch screwed me. as a temp fix i just unbolted the seat catches and moved them forward that half an inch. bugged the crap outta me, but my kids needed the seat.
well, today i fixed it.. first i cut out and mounted the wings (and cut some leftover rubber mat for the cubby)

then i installed some cleats to attach the main insert to. with just a few screws holding it in, it will be easy to remove just in case i have a spill in there
then i made some removable wings for the top sides. i was going to hinge them, but decided to keep it simple and just make them floating pieces instead. i did drill thru and install some dowel pegs to keep them lined up with the rest of the top.
and here's a final shot of the beast all put together. overall i am extremely happy with how it turned out.

on to the next!
for starters, i bit of an oops. the problem with the way i happen to do things (just wing it with zero plans) is that sometimes i forget important things along the way and end up having to rebuild stuff.
when i first made the cubby cover behind the seat, i failed to notice that i didn't have the main box mounted down. when i popped the seat up against it, i assumed it fit because the seat latched shut. after that, i put the piece aside an proceeded with assembly of the rest of the box. once it was all mounted down and put that cover back in, the seat wouldn't latch. the half an inch screwed me. as a temp fix i just unbolted the seat catches and moved them forward that half an inch. bugged the crap outta me, but my kids needed the seat.
well, today i fixed it.. first i cut out and mounted the wings (and cut some leftover rubber mat for the cubby)
then i installed some cleats to attach the main insert to. with just a few screws holding it in, it will be easy to remove just in case i have a spill in there
then i made some removable wings for the top sides. i was going to hinge them, but decided to keep it simple and just make them floating pieces instead. i did drill thru and install some dowel pegs to keep them lined up with the rest of the top.
and here's a final shot of the beast all put together. overall i am extremely happy with how it turned out.
on to the next!
Senior Member
Joined: Dec 2011
Posts: 922
Likes: 1
From: Centralia, Wa
Year: 1997
Model: Cherokee
Engine: 4.0
You my friend, have a freaking gift. The Jeep is insane looking. Love how you've put everything together so far. I wish I had 10% the talent you have with doing these interior mods. Keep up the good work man! I'll be looking towards this page for help on my interior mods 
Thread Starter
Senior Member
Joined: Mar 2013
Posts: 639
Likes: 3
From: lake stevens, wa
Year: 1996
Model: Cherokee
Engine: 4.0L
thanks for the compliments guys
decided to add some adjustable dividers to the center drawer. it's the catch-all drawer, so a bit of organization couldn't hurt. the dividers are made from some scrap plexi we had laying around the shop

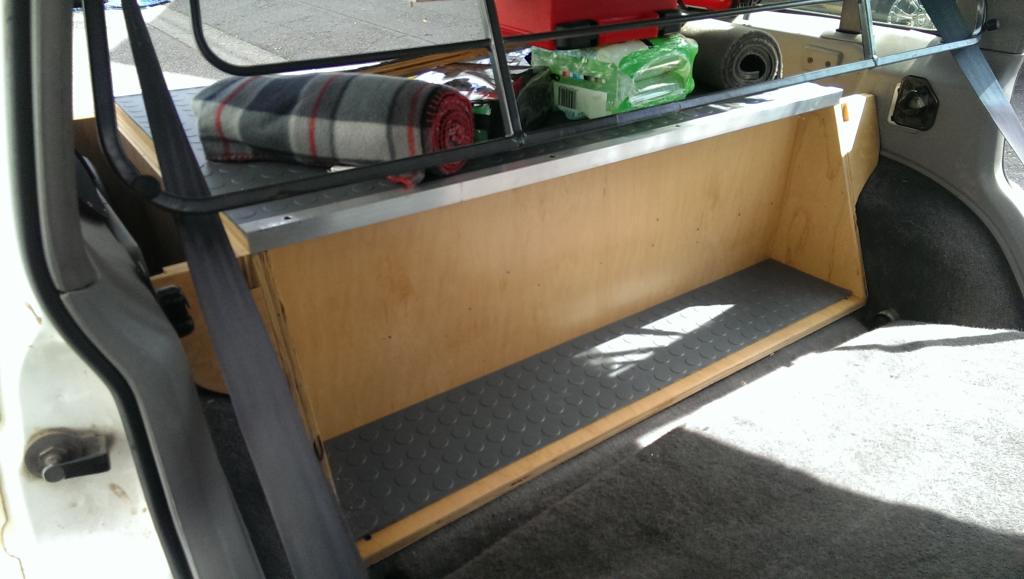
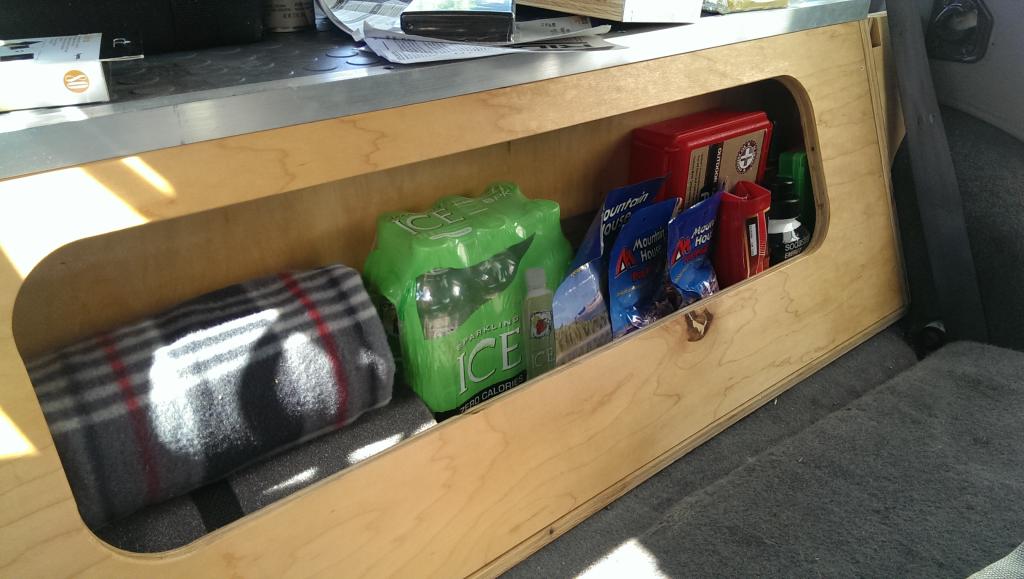
and just because, i figured i'd share my normal load-out. most of this stuff lives in there full time because a) you never know when the need may arise and b) hauling it all in and out is a pain. lol
first, behind the seat. blanket, rolled up foam mat, air compressor, first aid kit, 2 cans of butane fuel for the stove, some drinks, freeze dried food, and a package of jerky to snack on
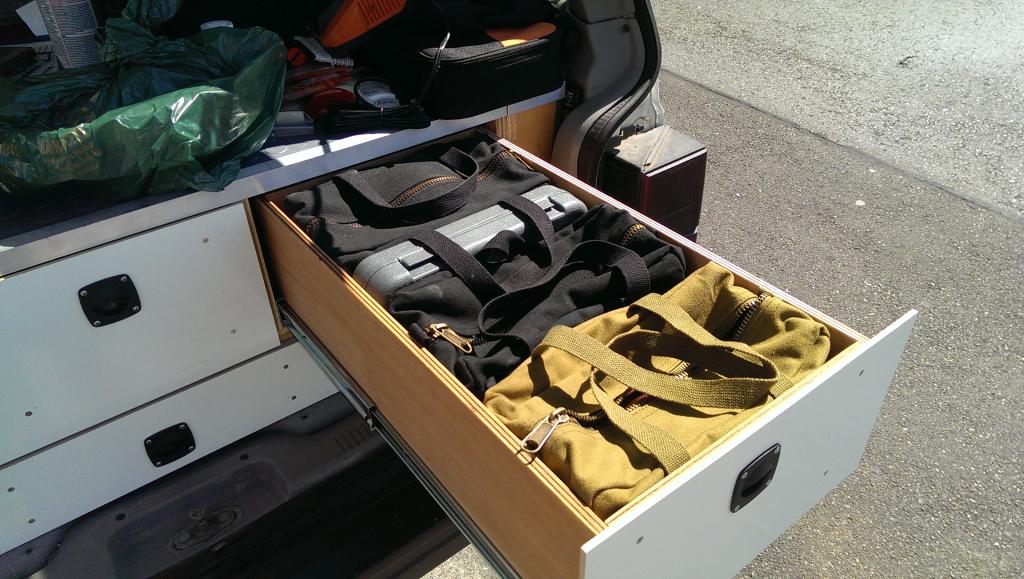
the tool drawer.. bag in the back is screwdrivers, pliers, etc.. then my socket set .. next bag holds wrenches and my oversize sockets for axles and such .. green bag is for brake cleaner, pb blaster, rtv, etc..
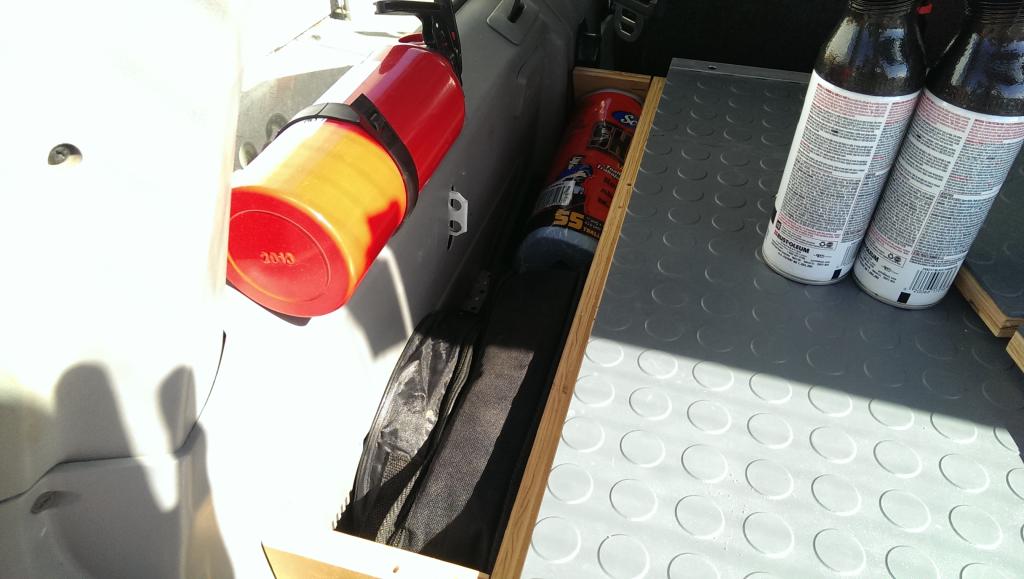
passenger side cubby holds recovery related stuff. tree saver underneath, tow strap in zip up case, jumper cables, and a roll of shop towels
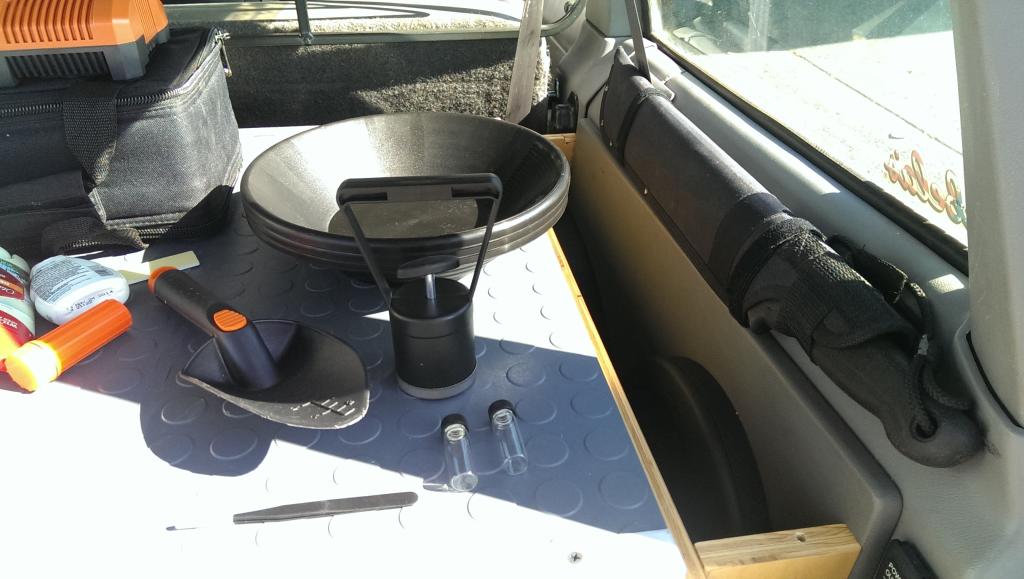
and in the driver side some gold panning stuff. we camp near rivers a lot, and the kids enjoy their newfound hobby quite a bit. it's also a great way to pass some serious time during the day.
decided to add some adjustable dividers to the center drawer. it's the catch-all drawer, so a bit of organization couldn't hurt. the dividers are made from some scrap plexi we had laying around the shop
and just because, i figured i'd share my normal load-out. most of this stuff lives in there full time because a) you never know when the need may arise and b) hauling it all in and out is a pain. lol
first, behind the seat. blanket, rolled up foam mat, air compressor, first aid kit, 2 cans of butane fuel for the stove, some drinks, freeze dried food, and a package of jerky to snack on
the tool drawer.. bag in the back is screwdrivers, pliers, etc.. then my socket set .. next bag holds wrenches and my oversize sockets for axles and such .. green bag is for brake cleaner, pb blaster, rtv, etc..
passenger side cubby holds recovery related stuff. tree saver underneath, tow strap in zip up case, jumper cables, and a roll of shop towels
and in the driver side some gold panning stuff. we camp near rivers a lot, and the kids enjoy their newfound hobby quite a bit. it's also a great way to pass some serious time during the day.
Thread Starter
Senior Member
Joined: Mar 2013
Posts: 639
Likes: 3
From: lake stevens, wa
Year: 1996
Model: Cherokee
Engine: 4.0L
the chuck wagon got put to the test on a meet-n-greet camping trip to tahuya, and passed with flying colors. while we were dealing with brake issues on one of the rigs, my daughter cooked up a bunch of hot dogs for everyone. was pretty awessome.. someone else in the group snagged this pic and posted it to the fb group page
decided to let her run a trail as thanks.. it was a relatively easy one, but she had a blast. she's been showing all her friends the video of it ever since. lol..
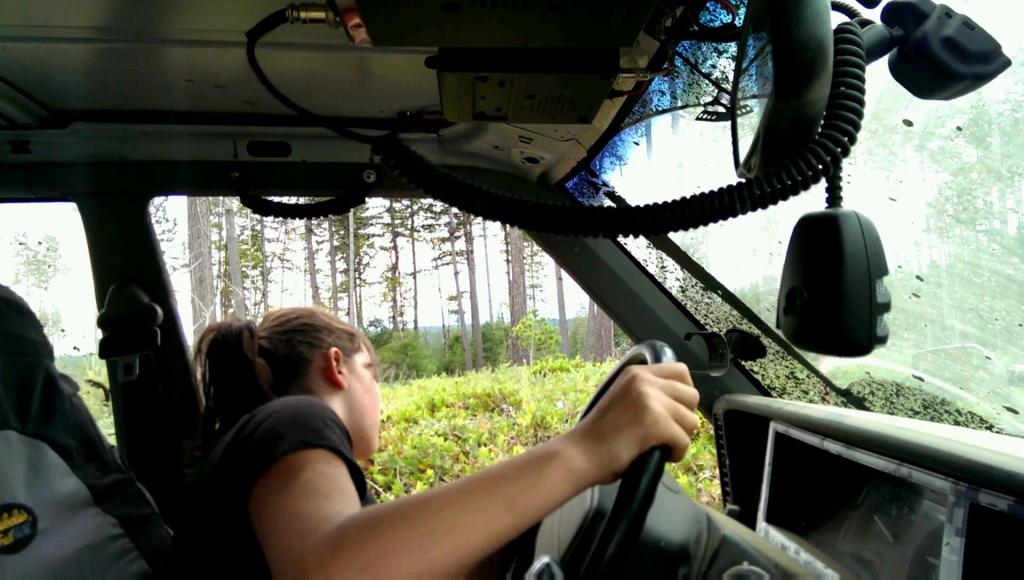
decided to let her run a trail as thanks.. it was a relatively easy one, but she had a blast. she's been showing all her friends the video of it ever since. lol..
Thread Starter
Senior Member
Joined: Mar 2013
Posts: 639
Likes: 3
From: lake stevens, wa
Year: 1996
Model: Cherokee
Engine: 4.0L
so moving back outside for a bit.. love the oly top hat, but never was a fan of how tall the basket was. made parking garages a little sketchy during daily use, and actually prevented me from using a drive-thru window at one of my local spots. so off it went in favor of something a little more useful to me.
first, a new flat base..
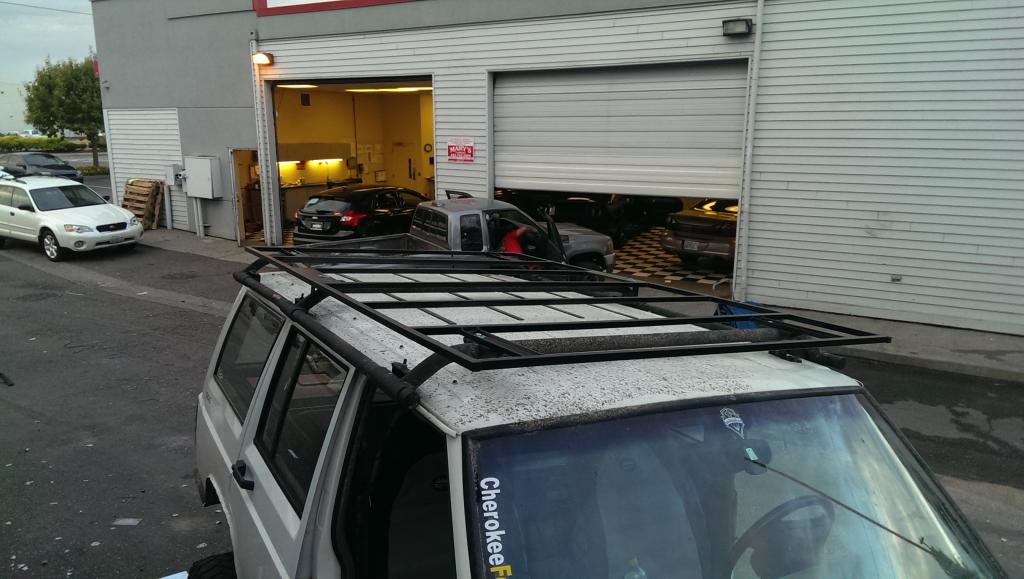

it's a little wider than the original basket, and about a foot longer. it also bolts up to the same spots, so it can be removed if need be without too much effort.
next, covering it. tossed around a few ideas and settled on outdoor cedar. way lighter than the original plan of bars/expanded steel i originally had. and looks pretty awesome as well
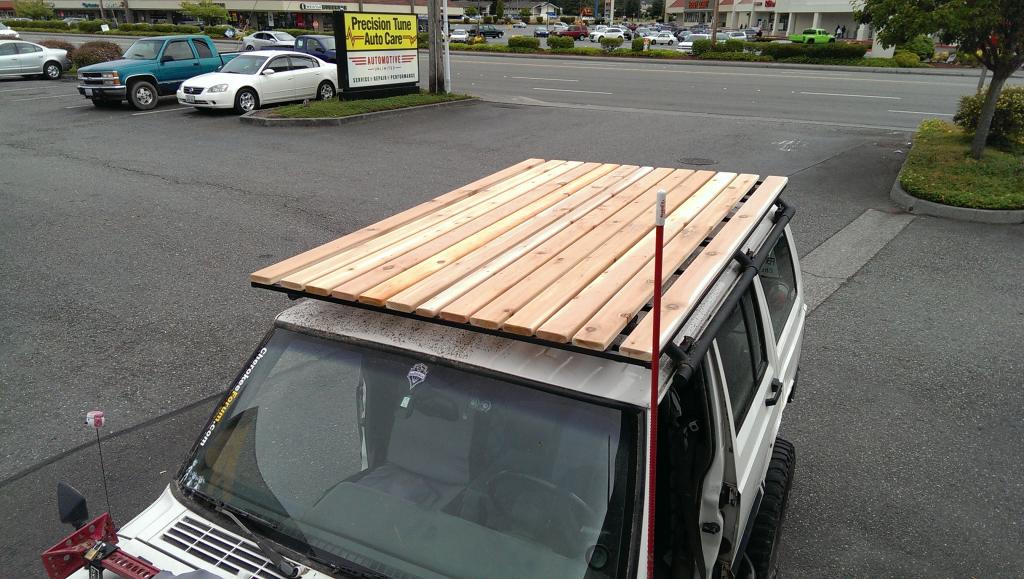
the larger spacing on the end boards will be explained later. for now i've got a huge surface to strap things down to, as well as a place for my kids to hang out when we attend outdoor events. sitting up there on lawnchairs to watch fireworks will be awesome!
first, a new flat base..
it's a little wider than the original basket, and about a foot longer. it also bolts up to the same spots, so it can be removed if need be without too much effort.
next, covering it. tossed around a few ideas and settled on outdoor cedar. way lighter than the original plan of bars/expanded steel i originally had. and looks pretty awesome as well
the larger spacing on the end boards will be explained later. for now i've got a huge surface to strap things down to, as well as a place for my kids to hang out when we attend outdoor events. sitting up there on lawnchairs to watch fireworks will be awesome!
Thread Starter
Senior Member
Joined: Mar 2013
Posts: 639
Likes: 3
From: lake stevens, wa
Year: 1996
Model: Cherokee
Engine: 4.0L
i'd be more than happy to build these for anyone willing to pay for it (i seriously love to build stuff) but nobody actually wants to