
Cargo Organization Deck Thingy with hidden bonus

Thread Starter
Junior Member
Joined: Apr 2012
Posts: 48
Likes: 3
From: Lincoln, Nebraska
Year: 2000
Model: Cherokee
Engine: 4.0
I've had a couple members here ask about plans for my Cargo Organization Deck (COD for short) thingy, so here it goes.....
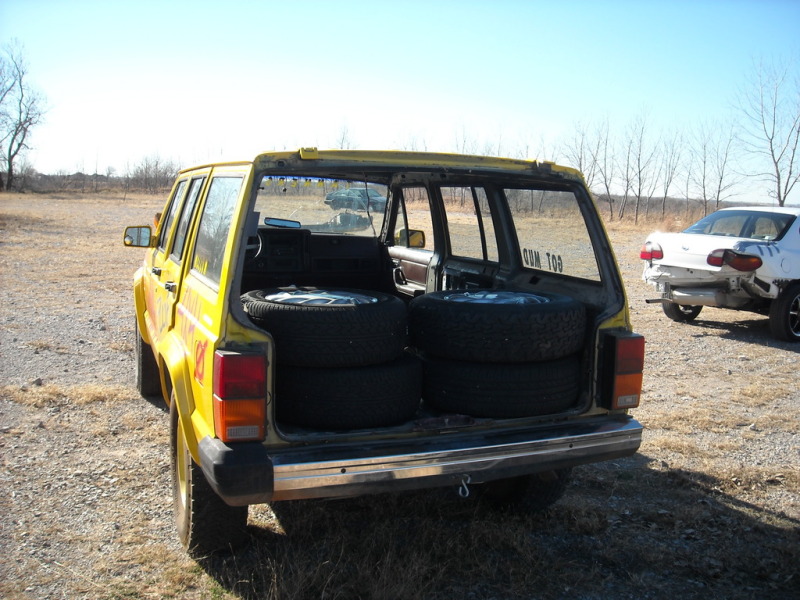
It all started last year when I picked up a 12" kicker box and amp for cheap from craigslist, I ended up with this huge ported box taking up a bunch of my cargo space (not to mention; hitches, jumper cables, and tow ropes taking space under seats and such, so I had to room from tools).
So I got tired of this....
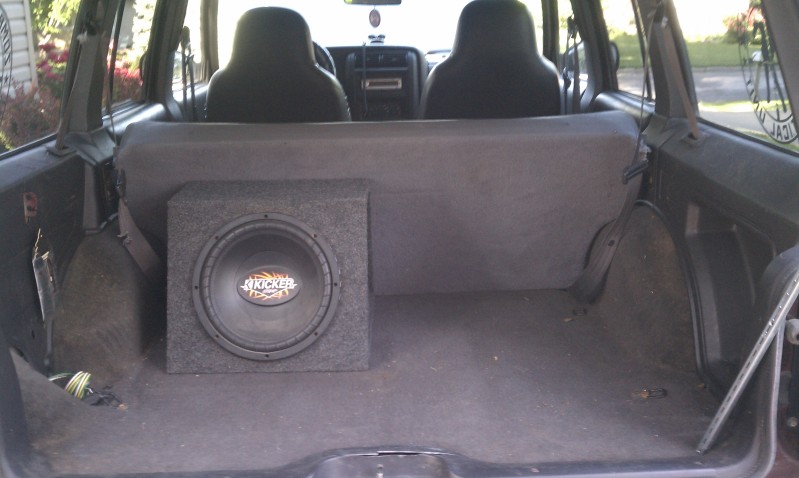
and wanted my room back (plus didn't want anyone to steal my, oh so, expensive system)
So I came up with a great design, make a 3-lid, 5 compartment COD to house amp, sub, box, tools, hitches, jumper cables....and the list goes on, but also make it look stock to the XJ.
Using the work CADD program (Microstation for those who know it), I came up with this 3D model and set of plans....
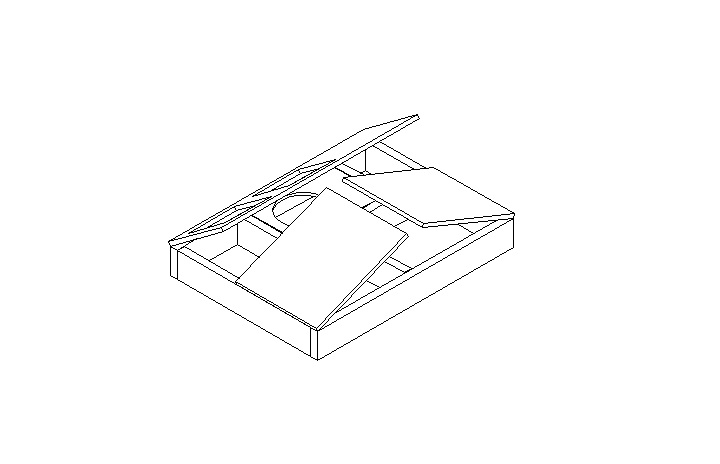
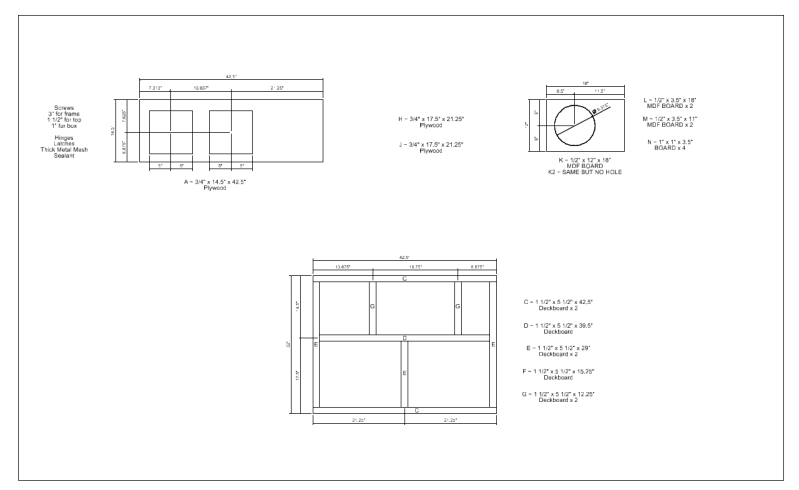
(plans are hard to read, but I have a pdf version for printing, just pm me your email if you are interested)
So my main material for the base was 5/4 Deckboard left over from building my beautiful porch. The Deckboard measures 1 1/4" (to 1 1/2" depending on quality of board) x 5 1/2" tall (so these plans will work also for 2" x 6" boards, as long as you keep the outside dimensions the same). The top is made of 3/4" plywood and the sub box is made of 1/2" MDF board.
So to get my outside dim's, I knew that my COD was going to be 6 1/4" tall and I knew that the back seat in the XJ's slant backwards (at least my '00 does, don't know about earlier models), So I took a tape measure and set it at 6 1/4" to see where I wouldn't hit the back of the rear seat (didn't want a sharp corner of plywood digging into rear passenger's backs), then measured from that vertical plane to just a few inches before the rear hatch. Also measured from wheel well to wheel well to get a width for the COD. So I came up with a deck that was 42.5" wide x 6 1/4" tall x 32" deep. The inside compartments and deck lids can be made to what ever sizes you would like, as long as you keep the outside dims the same.
For a new sub, I ended up going with this....
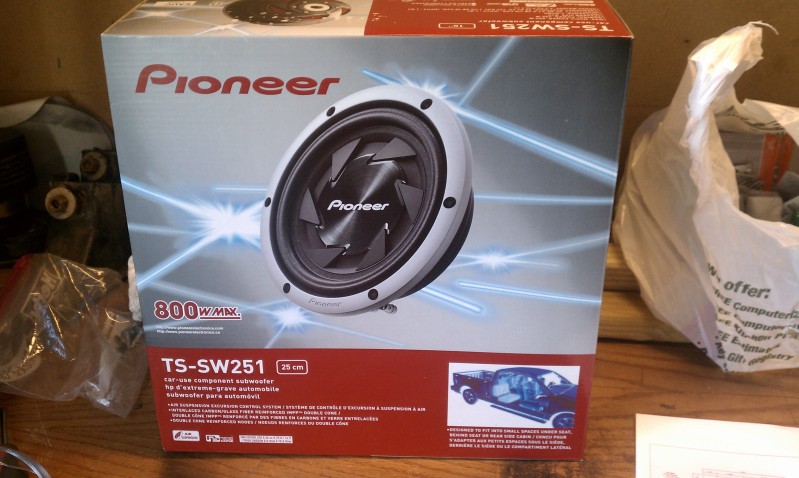
It's a shallow mount 10" (only requires 3 1/8" or so mounting depth, and .35 - .7 cubic foot of air to operate), with it being shallow mount, it allows me to hide it under the deck lid without being seen, but with a cut hole in the lid, I can hear the sub.
So off to the local big box home improvement store I went, had to get all sorts of essentials; plywood, MDF board, hinges, screws, bolts...and the list goes on. But most importantly, I had to get some type of grate to go over the hole for the sub in the deck lid so I could adhere carpet to it. The store only had weldable 2' x 2' grate sheet metal (thick enough, not to bend, if something heavy was placed on it) for about $30, talk about blowing my budget way out of proportion. So I went next door to Wal Mart and found these very nice cookie cooling stands, 2 for $5, can't beat that.
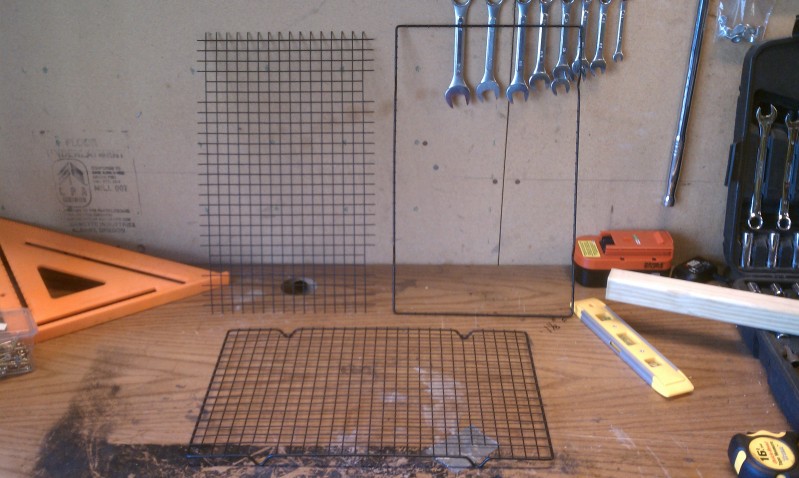
Cut the middle out and wala, got my grate to cover the hole. It's amazing the things you can find at Wal Mart.
After getting the material home, I went ahead and calculated the dimensions for the sub box (using Google to find a sub box calculator makes things a lot easier).
After that, I went ahead and started the construction of the outside frame of the COD. Some of my boards were warped pretty bad and I measured once instead of twice on a couple and made some mistakes. So I had to make some adjustments with 1/2" plywood, but nothing too serious (not like I'm building the Empire State Building).
Next step was to create the new sub box. So after cutting and sealing the box here is what it looks like...
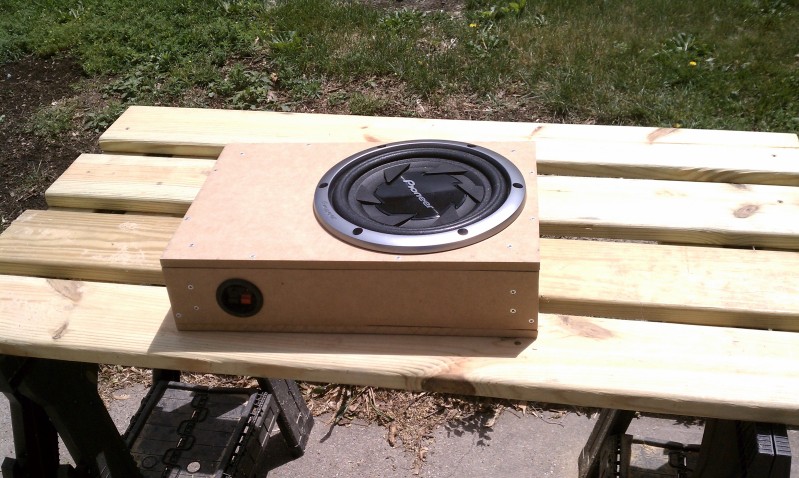
My new box will be placed under the long deck lid, with the sub centered as close as possible to the width of the Jeep, then I hid my amp next to it.
Got carpet from local auto parts store (Wal Mart only had black), gray color from auto parts store almost looks identical so factory carpet color. Adhered the carpet to the box using aerosol spray adhesive. After that, all I had to do was put the deck in, drill holes for mounting bolts and wire in the sub and amp (the little area behind the back seat and the top of the deck makes a great place to hide wires, I drilled holes in the side of deck walls to run wires through and you can't even tell there are wires there.
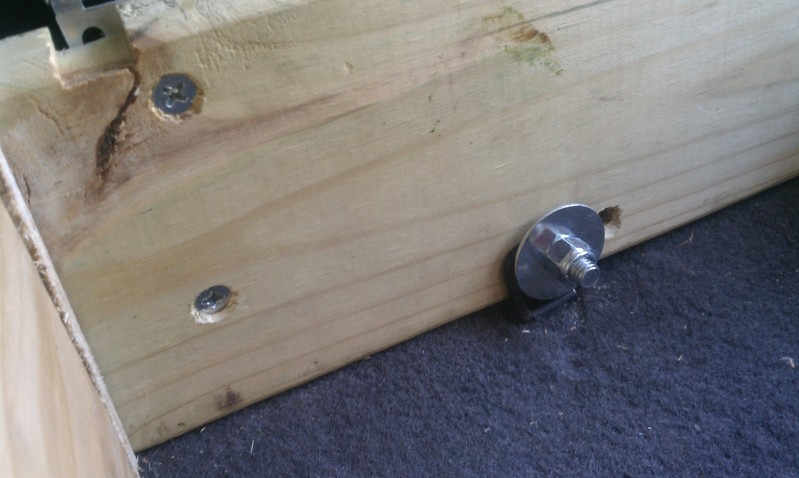
To hold down they deck, I used carriage bolts and washers with nylon lock nuts and bolted the deck down using the factory "D" loops in the cargo area (you will see in a bit why I used the smooth head of a carriage bolt and not the sharp corner of a hex head bolt).
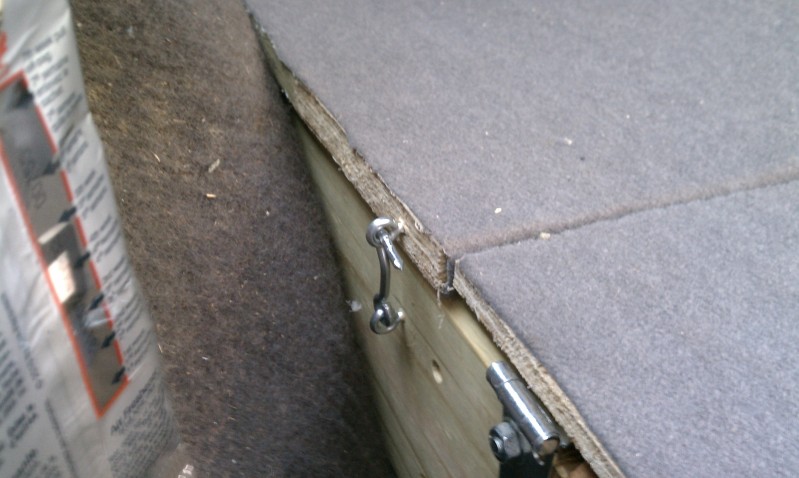
Also to keep the deck lids from vibrating and opening, I used just basic Hook and Eye hole latches found at the hardware store.
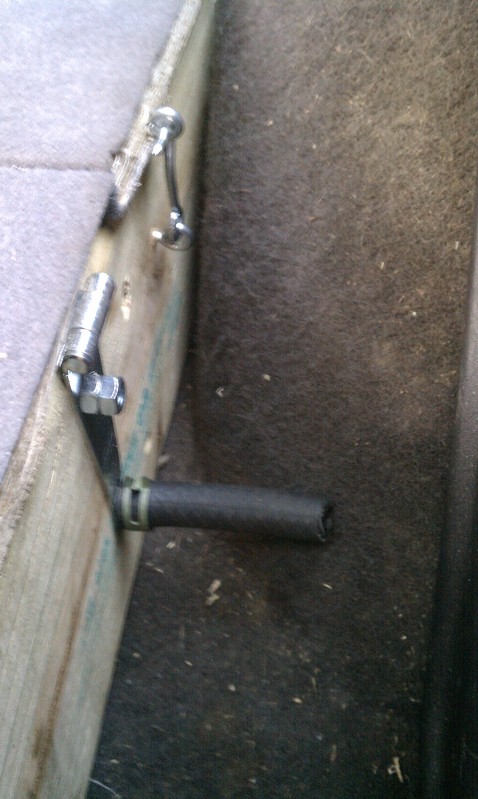
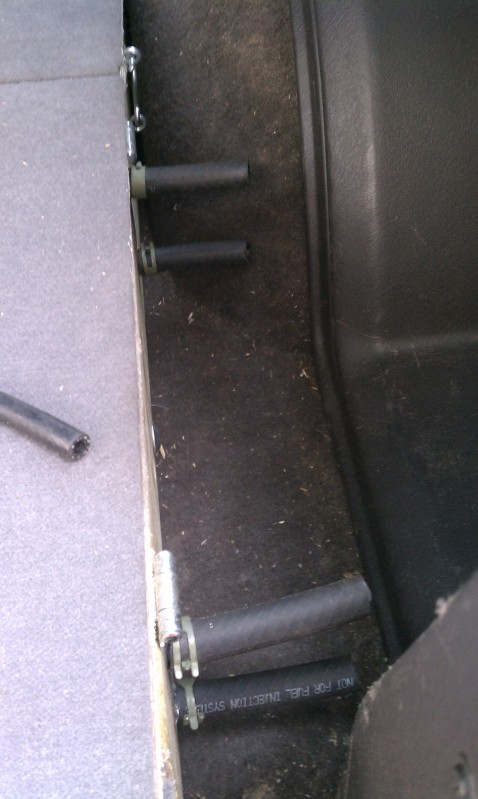
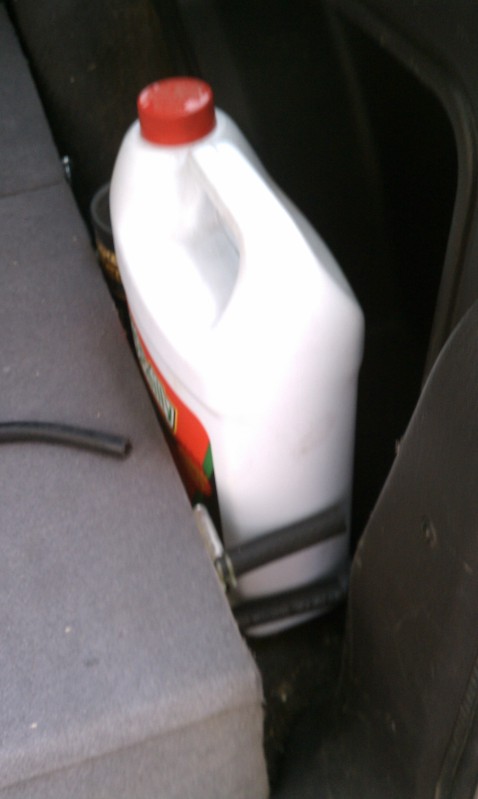
After getting the COD in place, I had some room on the passenger side to use, and I had no-where to put fluids in an upright position. So I had some threads sticking through, left over from the bolts that hold the hinges on and double nutted those, put some rubber hose over the nuts and some hose clamps I had laying around, did it to 4 hinge bolts and there you go, some little rubber fingers to hold fluids in (fits a gallon of antifreeze and a quart of fluid real nice and tight).
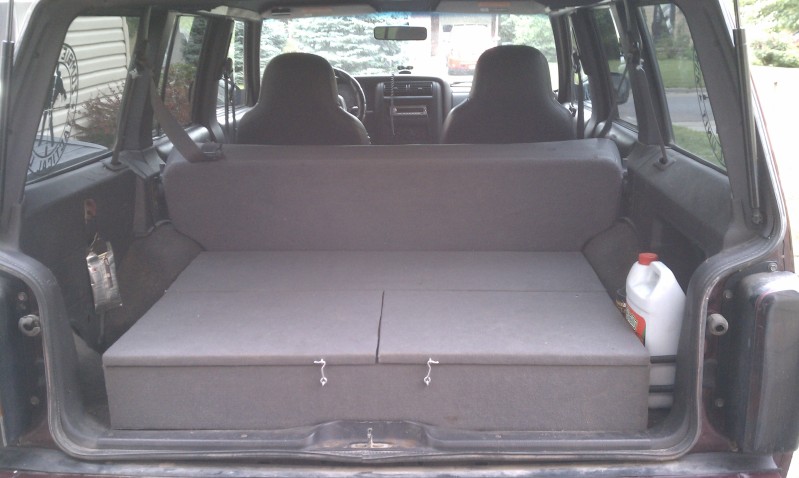
Here is a pic of the finished COD in place (can't even tell the sub is there, except when the stereo is on, you can hear my hidden bonus).....
And with all the deck lids open...
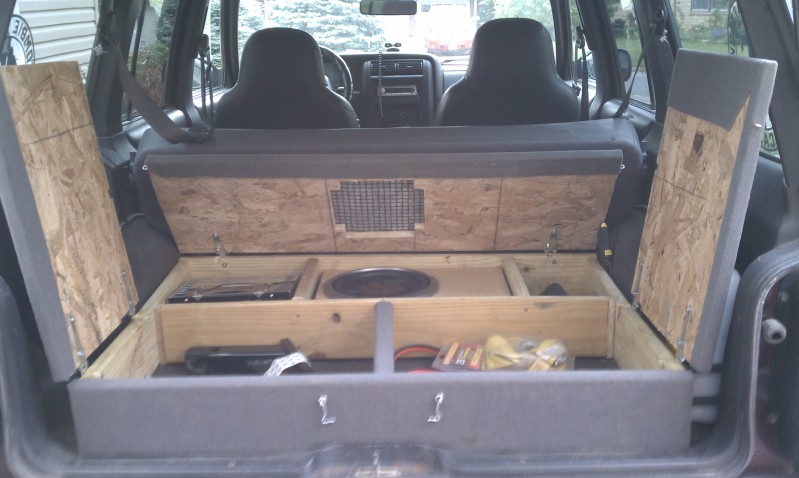
With this set-up, I have ample amount of room to fit a 10" drop hitch, 2" drop hitch, jumper cables, tow strap, basic tools, and room for much more.
Here are some modifications that I had to make to the Jeep's cargo area to get this to fit...
First, The trim piece down by the hatch latch, I had to cut that back to get the outside frame of the COD to lay flat (the trim was already broken at that location) or If one wants to keep that trim in premo condition, you could always notch out the COD frame to go around that trim.
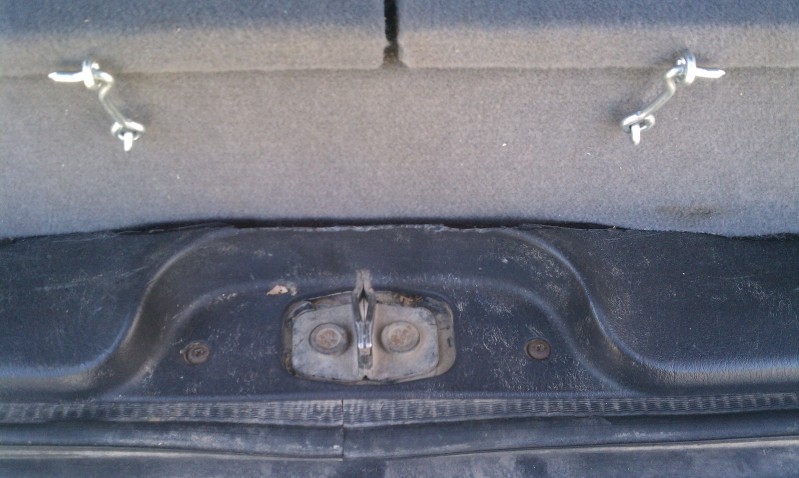
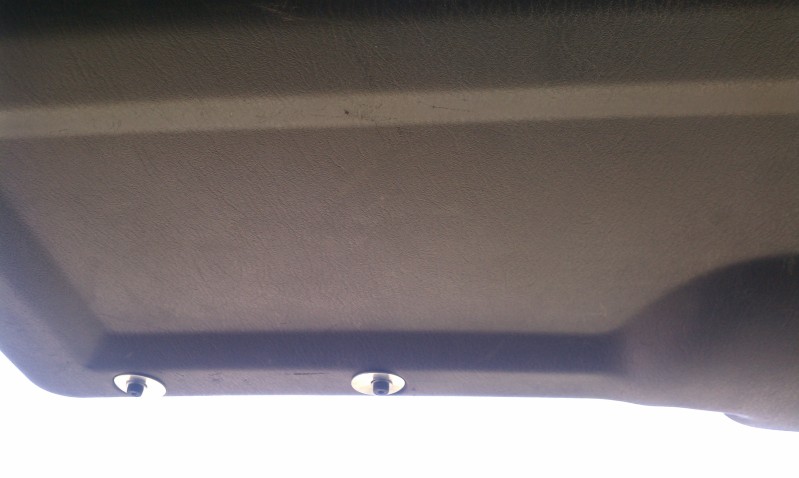
Also, the COD sits so close to the rear hatch, that when the hatch is in the closed position, the interior grab handle hits the COD, so I had to remove the handle, and just use fender washers to hold the rear hatch trim in place.
Other than those 2 things, this set-up is completely removable without any scars to the your XJ.
And after 2 months of testing the COD, I am very impressed with it's ability to free up room under the seats and in the rear cargo area, but also providing me with my much needed bass (can't listen to a stereo with out it).
-CZ
It all started last year when I picked up a 12" kicker box and amp for cheap from craigslist, I ended up with this huge ported box taking up a bunch of my cargo space (not to mention; hitches, jumper cables, and tow ropes taking space under seats and such, so I had to room from tools).
So I got tired of this....
and wanted my room back (plus didn't want anyone to steal my, oh so, expensive system)
So I came up with a great design, make a 3-lid, 5 compartment COD to house amp, sub, box, tools, hitches, jumper cables....and the list goes on, but also make it look stock to the XJ.
Using the work CADD program (Microstation for those who know it), I came up with this 3D model and set of plans....
(plans are hard to read, but I have a pdf version for printing, just pm me your email if you are interested)
So my main material for the base was 5/4 Deckboard left over from building my beautiful porch. The Deckboard measures 1 1/4" (to 1 1/2" depending on quality of board) x 5 1/2" tall (so these plans will work also for 2" x 6" boards, as long as you keep the outside dimensions the same). The top is made of 3/4" plywood and the sub box is made of 1/2" MDF board.
So to get my outside dim's, I knew that my COD was going to be 6 1/4" tall and I knew that the back seat in the XJ's slant backwards (at least my '00 does, don't know about earlier models), So I took a tape measure and set it at 6 1/4" to see where I wouldn't hit the back of the rear seat (didn't want a sharp corner of plywood digging into rear passenger's backs), then measured from that vertical plane to just a few inches before the rear hatch. Also measured from wheel well to wheel well to get a width for the COD. So I came up with a deck that was 42.5" wide x 6 1/4" tall x 32" deep. The inside compartments and deck lids can be made to what ever sizes you would like, as long as you keep the outside dims the same.
For a new sub, I ended up going with this....
It's a shallow mount 10" (only requires 3 1/8" or so mounting depth, and .35 - .7 cubic foot of air to operate), with it being shallow mount, it allows me to hide it under the deck lid without being seen, but with a cut hole in the lid, I can hear the sub.
So off to the local big box home improvement store I went, had to get all sorts of essentials; plywood, MDF board, hinges, screws, bolts...and the list goes on. But most importantly, I had to get some type of grate to go over the hole for the sub in the deck lid so I could adhere carpet to it. The store only had weldable 2' x 2' grate sheet metal (thick enough, not to bend, if something heavy was placed on it) for about $30, talk about blowing my budget way out of proportion. So I went next door to Wal Mart and found these very nice cookie cooling stands, 2 for $5, can't beat that.
Cut the middle out and wala, got my grate to cover the hole. It's amazing the things you can find at Wal Mart.
After getting the material home, I went ahead and calculated the dimensions for the sub box (using Google to find a sub box calculator makes things a lot easier).
After that, I went ahead and started the construction of the outside frame of the COD. Some of my boards were warped pretty bad and I measured once instead of twice on a couple and made some mistakes. So I had to make some adjustments with 1/2" plywood, but nothing too serious (not like I'm building the Empire State Building).
Next step was to create the new sub box. So after cutting and sealing the box here is what it looks like...
My new box will be placed under the long deck lid, with the sub centered as close as possible to the width of the Jeep, then I hid my amp next to it.
Got carpet from local auto parts store (Wal Mart only had black), gray color from auto parts store almost looks identical so factory carpet color. Adhered the carpet to the box using aerosol spray adhesive. After that, all I had to do was put the deck in, drill holes for mounting bolts and wire in the sub and amp (the little area behind the back seat and the top of the deck makes a great place to hide wires, I drilled holes in the side of deck walls to run wires through and you can't even tell there are wires there.
To hold down they deck, I used carriage bolts and washers with nylon lock nuts and bolted the deck down using the factory "D" loops in the cargo area (you will see in a bit why I used the smooth head of a carriage bolt and not the sharp corner of a hex head bolt).
Also to keep the deck lids from vibrating and opening, I used just basic Hook and Eye hole latches found at the hardware store.
After getting the COD in place, I had some room on the passenger side to use, and I had no-where to put fluids in an upright position. So I had some threads sticking through, left over from the bolts that hold the hinges on and double nutted those, put some rubber hose over the nuts and some hose clamps I had laying around, did it to 4 hinge bolts and there you go, some little rubber fingers to hold fluids in (fits a gallon of antifreeze and a quart of fluid real nice and tight).
Here is a pic of the finished COD in place (can't even tell the sub is there, except when the stereo is on, you can hear my hidden bonus).....
And with all the deck lids open...
With this set-up, I have ample amount of room to fit a 10" drop hitch, 2" drop hitch, jumper cables, tow strap, basic tools, and room for much more.
Here are some modifications that I had to make to the Jeep's cargo area to get this to fit...
First, The trim piece down by the hatch latch, I had to cut that back to get the outside frame of the COD to lay flat (the trim was already broken at that location) or If one wants to keep that trim in premo condition, you could always notch out the COD frame to go around that trim.
Also, the COD sits so close to the rear hatch, that when the hatch is in the closed position, the interior grab handle hits the COD, so I had to remove the handle, and just use fender washers to hold the rear hatch trim in place.
Other than those 2 things, this set-up is completely removable without any scars to the your XJ.
And after 2 months of testing the COD, I am very impressed with it's ability to free up room under the seats and in the rear cargo area, but also providing me with my much needed bass (can't listen to a stereo with out it).
-CZ
CF Veteran
Joined: Jan 2010
Posts: 5,482
Likes: 25
From: Virginia Beach by way of Michigan
I like it! Been thinking about doing the same (COD) since I'm going doorless. Been playing with designs and I really like this. May not be a carbon-copy, but I'll definitely be using this for inspiration.
Thread Starter
Junior Member
Joined: Apr 2012
Posts: 48
Likes: 3
From: Lincoln, Nebraska
Year: 2000
Model: Cherokee
Engine: 4.0
But if you're worried about security, you could always use this type of latch
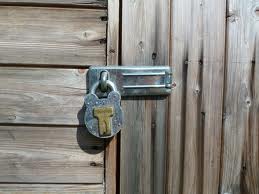
with padlocks...
Then you could go fully door less....
yea I'm talking about take the hatch off and not have to worry about stuff getting stolen, but I have yet to see someone write up a thread on a door less and hatch less XJ.
Thread Starter
Junior Member
Joined: Apr 2012
Posts: 48
Likes: 3
From: Lincoln, Nebraska
Year: 2000
Model: Cherokee
Engine: 4.0
The sub is a Pioneer TS-5W251 from Amazon ($65+ shipping). The deck frame material I had left over, but I would have to estimate (including amp and sub), probably around the range of $200-$250, if you already have the amp and sub, probably $75 - $100. The most expensive stuff was the MDF board for the sub box, the spray adhesive, and the carpet to cover it in. Everything else was fairly cheap. For the 3/4" plywood, I used 2-2'x4' pieces bc it was cheaper than buying a full 4'x8' or a 4'x4' sheet of plywood. Just doing that, saved me about $15. So if you are really looking at doing something like this. I recommend pricing stuff out for materials at different stores to ensure that you get the cheapest price.

Junior Member
Joined: Aug 2011
Posts: 72
Likes: 0
From: Whitefish, MT
Year: 2001
Model: Cherokee
Engine: 4.0
I like it! one question I have for you....do you hear your tools and various items rattle around from the sub being right there? It looks great, fantastic work!!
Trending Topics
Thread Starter
Junior Member
Joined: Apr 2012
Posts: 48
Likes: 3
From: Lincoln, Nebraska
Year: 2000
Model: Cherokee
Engine: 4.0
The sub is only 800w peak with 250w or so rms. The amp I got is a little under powered, okay way under powered at 400w peak. With my system, I really wanted more sound than rattle. My system isn't an earth shattering, ear drum blowing, pooping your pants system, but you know when the sub and amp are on. The tools next to the sub don't rattle at all, I have my hitched held down with velcro so I don't here those either. I like it, but if you would rather have the mirror shaking system, this COD is far too small. I did find a shallow mount 12" by pioneer, but it was the same 800w and more expensive. So I chose the 10" instead.


Thread
Thread Starter
Forum
Replies
Last Post
cpnwrench
Stock XJ Cherokee Tech. All XJ Non-modified/stock questions go here
14
May 5, 2024 12:21 PM
ZJBeachRunnerGC
Stock Grand Cherokee Tech. All ZJ/WJ/WK Non-modified/stock questions go here!
18
Mar 10, 2021 05:52 PM
Cherokee_of_Tennessee
Stock XJ Cherokee Tech. All XJ Non-modified/stock questions go here
4
Sep 30, 2015 12:10 PM
Currently Active Users Viewing This Thread: 1 (0 members and 1 guests)