
My Samurai build


Thread Starter
Senior Member
Joined: Nov 2010
Posts: 863
Likes: 2
From: Lynchburg, Va.
Year: 1998
Model: Grand Cherokee
Engine: 5.2/318 MSD Electronic Upgrades
I am seriously about this close >< to just ending this project, kicking it off the jackstands and catching it on fire.


That is all.
That is all.
Junior Member
Joined: Dec 2010
Posts: 37
Likes: 0
From: south bend
Year: 1990
Model: Cherokee
Engine: 4.0
Thread Starter
Senior Member
Joined: Nov 2010
Posts: 863
Likes: 2
From: Lynchburg, Va.
Year: 1998
Model: Grand Cherokee
Engine: 5.2/318 MSD Electronic Upgrades
To top it all of, I haven't been able to work on it going on four weeks now. EVERY time I go to touch it something comes up. Weather, Life situations . . . I'm just getting pretty frustrated with it.
Thread Starter
Senior Member
Joined: Nov 2010
Posts: 863
Likes: 2
From: Lynchburg, Va.
Year: 1998
Model: Grand Cherokee
Engine: 5.2/318 MSD Electronic Upgrades
Well today, at last I / we were able to work on my Samurai today. I got out to my friends house where the Samurai is around 9:30 this morning and started soon after. Doesn't sound like much got done but it did.
The rear is now finished. The Brake lines were cleaned and put back on, shocks were mounted back up.
Heres where the work was . . .
The front spring pins were flipped for the axle perches (font axle moved 1 1/2" forward), the exhaust had to be dropped so I could drill some holes for bracing the drivers side front/ rear shock mount, the passenger side had to be done as well, frond axle cleaned, perches welded on, axle hung, u-bolts cut down, steering hooked back up, front shocks mounted, brake calipers put back on, tires / wheels put on, exhaust hooked back up. I think that was it.
I think we put in a pretty good day. I know I was happy as LLEH with the outcome! I think Robbie was as well! Sorry I didn't get much progress pics but we were on a roll just trying to get it done.
Pics...
Finding the angle of the dangle.

Having to weld, let cool, weld, let cool ate up a bit of time but its done!

Robbie doing his thing.

Finished, getting ready for some paint.

Axle now hung.

Another shot of the front with the wheels/ tires on now.

The rear is now finished. The Brake lines were cleaned and put back on, shocks were mounted back up.
Heres where the work was . . .
The front spring pins were flipped for the axle perches (font axle moved 1 1/2" forward), the exhaust had to be dropped so I could drill some holes for bracing the drivers side front/ rear shock mount, the passenger side had to be done as well, frond axle cleaned, perches welded on, axle hung, u-bolts cut down, steering hooked back up, front shocks mounted, brake calipers put back on, tires / wheels put on, exhaust hooked back up. I think that was it.
I think we put in a pretty good day. I know I was happy as LLEH with the outcome! I think Robbie was as well! Sorry I didn't get much progress pics but we were on a roll just trying to get it done.
Pics...
Finding the angle of the dangle.
Having to weld, let cool, weld, let cool ate up a bit of time but its done!
Robbie doing his thing.
Finished, getting ready for some paint.
Axle now hung.
Another shot of the front with the wheels/ tires on now.
Thread Starter
Senior Member
Joined: Nov 2010
Posts: 863
Likes: 2
From: Lynchburg, Va.
Year: 1998
Model: Grand Cherokee
Engine: 5.2/318 MSD Electronic Upgrades
More of the whole thing on its own four feet! Finally! ! !
Lift all done. YJ spring conversion complete.


Love this shot for some reason. IDK.

On the move!

Still a little more needs to be taken care of. Thanks for viewing! I'll keep posted with progress for those interested.
Lift all done. YJ spring conversion complete.
Love this shot for some reason. IDK.
On the move!
Still a little more needs to be taken care of. Thanks for viewing! I'll keep posted with progress for those interested.
Thread Starter
Senior Member
Joined: Nov 2010
Posts: 863
Likes: 2
From: Lynchburg, Va.
Year: 1998
Model: Grand Cherokee
Engine: 5.2/318 MSD Electronic Upgrades
Thanks! I know I love mine! Even though this has been a PITA process. I know its all worth it in the end.
Thread Starter
Senior Member
Joined: Nov 2010
Posts: 863
Likes: 2
From: Lynchburg, Va.
Year: 1998
Model: Grand Cherokee
Engine: 5.2/318 MSD Electronic Upgrades
OK. So hopefully tomorrow I can get out to my Samurai and get the Tcase out of it, the brakes bled and a couple of smaller things done to speed things up a bit.
Well, thats the plan anyway.
Well, thats the plan anyway.
Senior Member
Joined: Feb 2009
Posts: 630
Likes: 1
Model: Cherokee
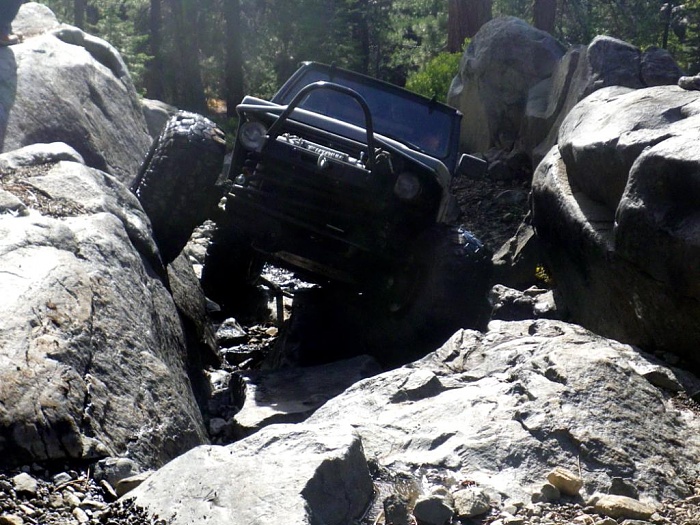
Here ya go Jeremy. But don't toss in the towel yet, I think he had to try 9 times before it passed emissions testing. But I like what he has now, it moves like an inch worm, it just goes over everything.


Thread Starter
Senior Member
Joined: Nov 2010
Posts: 863
Likes: 2
From: Lynchburg, Va.
Year: 1998
Model: Grand Cherokee
Engine: 5.2/318 MSD Electronic Upgrades
Very cool! I think I have seen that posted before on another forum. Thats kinda how I eventually want to cut mine. But thats on down the road a bit. 
I just get frustrated cause its sooo close but sooo far away at the same time.
I just get frustrated cause its sooo close but sooo far away at the same time.
Thread Starter
Senior Member
Joined: Nov 2010
Posts: 863
Likes: 2
From: Lynchburg, Va.
Year: 1998
Model: Grand Cherokee
Engine: 5.2/318 MSD Electronic Upgrades
Forgot to update this for those interested...
So after ordering the tc gears (6.5s), they sat for a little bit being that I was putting the lift together and didn't need them at the moment. So after getting the lift done, time to do the tc gears.
I previously had inspected the gears upon arrival to the house via UPS and all was well although they seemed to have a coating of cosmoline all over them. It didn't bother me because I knew it would be a bit before I would use them.
Knowing that the install was soon I cleaned them off using Hoppe's #9 solvent. (a gun cleaning solvent) That stuff worked great! After cleaning with the #9 I hit them off with some brake clean and they were ready for the install!
Clean and shinny.

Install pics. Sorry not the best of quality but I was more into the install than a photo shoot.
After being pulled.

first things first...


(size comparison) New on left, old on right...


(size comparison) Old on left, new on right...


After case was cleaned and the new seals installed the gears were put into place.

Then it was put back together!

Hopefully the next time I go to work on it I'll drive it away. I still need to bleed the brakes, Install my Alt. bracket and Atl. (its being borrowed at the moment), and hook up the drive shafts.
hopefully soon I'll be . . . around in it!
So after ordering the tc gears (6.5s), they sat for a little bit being that I was putting the lift together and didn't need them at the moment. So after getting the lift done, time to do the tc gears.
I previously had inspected the gears upon arrival to the house via UPS and all was well although they seemed to have a coating of cosmoline all over them. It didn't bother me because I knew it would be a bit before I would use them.
Knowing that the install was soon I cleaned them off using Hoppe's #9 solvent. (a gun cleaning solvent) That stuff worked great! After cleaning with the #9 I hit them off with some brake clean and they were ready for the install!
Clean and shinny.
Install pics. Sorry not the best of quality but I was more into the install than a photo shoot.
After being pulled.
first things first...
(size comparison) New on left, old on right...
(size comparison) Old on left, new on right...
After case was cleaned and the new seals installed the gears were put into place.
Then it was put back together!
Hopefully the next time I go to work on it I'll drive it away. I still need to bleed the brakes, Install my Alt. bracket and Atl. (its being borrowed at the moment), and hook up the drive shafts.
hopefully soon I'll be . . .
around in it!
Last edited by OverEasy; Mar 3, 2011 at 02:37 AM.