Basic Front Brakes
 12-04-2008, 02:17 AM
#1
CF Veteran
Thread Starter
Join Date: Mar 2008
Location: South Side Chicago
Posts: 2,088
Likes: 0
Received 2 Likes
on
2 Posts
Year: 1992, 2- 1998 (All 3, 4 Doors)
Model: Cherokee
Engine: 4.0L in all
Here's a how-to on doing your front brakes. This is on my '98 XJ 4WD, but the basics apply to almost any vehicle.
(I did the wrenching, photo credit goes to my girlfriend)
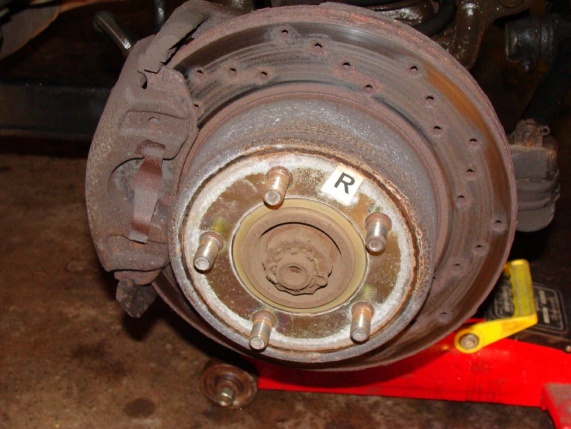
Chock the rear tires, and jack up either the whole front or whichever side you are gonna start with, and remove the tire. That should get you to this point.
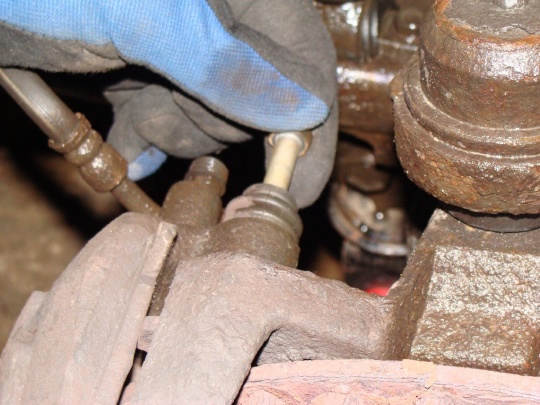
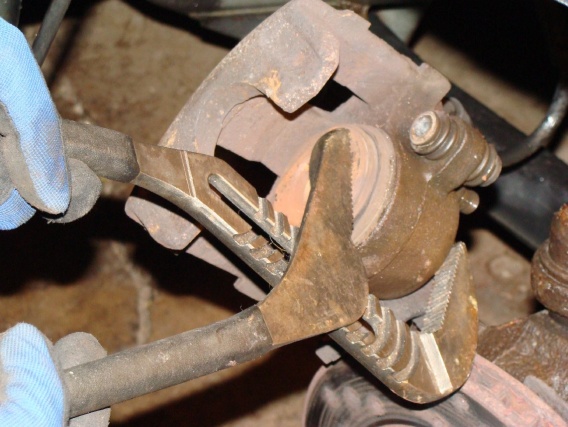
Next, remove your caliper bolts (2 of them. Mine were originally 13mm, but someone at Wagner thought it would be funny to make the new ones I was installing a 12pt. 5/16")
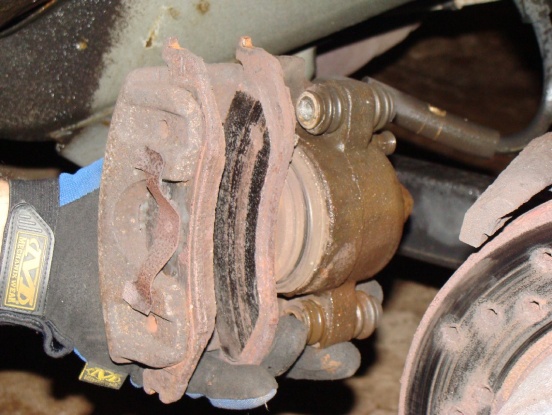
Now you can pull the caliper off. The pads usually lock into one of the channels on the caliper itself, so you might have to tip it up or down to slide it off (Note the tabs on the pads pointing straight up (top) compared with the ones pointing down (bottom).
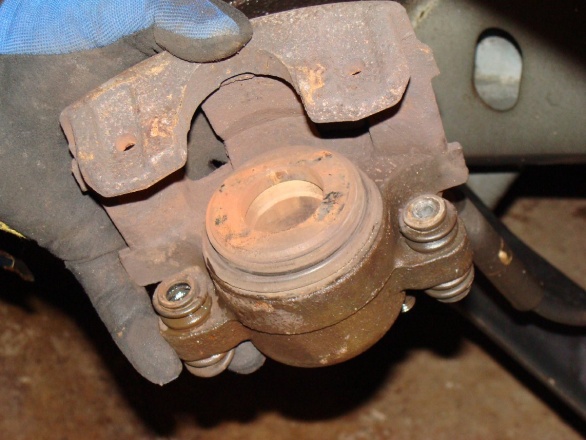
Now pop out your pads. The piston side usually comes off easy, while you might need a screwdriver to pop out the outboard pad. (I ran into a problem, hence why there's no lower caliper bolt sleeve. I had to fix the threads on the steering knuckle.). Then you can compress the piston back into its bore. I use some big azz channel locks.
(I did the wrenching, photo credit goes to my girlfriend)
Chock the rear tires, and jack up either the whole front or whichever side you are gonna start with, and remove the tire. That should get you to this point.
Next, remove your caliper bolts (2 of them. Mine were originally 13mm, but someone at Wagner thought it would be funny to make the new ones I was installing a 12pt. 5/16")
Now you can pull the caliper off. The pads usually lock into one of the channels on the caliper itself, so you might have to tip it up or down to slide it off (Note the tabs on the pads pointing straight up (top) compared with the ones pointing down (bottom).
Now pop out your pads. The piston side usually comes off easy, while you might need a screwdriver to pop out the outboard pad. (I ran into a problem, hence why there's no lower caliper bolt sleeve. I had to fix the threads on the steering knuckle.). Then you can compress the piston back into its bore. I use some big azz channel locks.
Last edited by BowtieGuy3; 12-04-2008 at 03:16 AM.
 12-04-2008, 02:28 AM
#2
CF Veteran
Thread Starter
Join Date: Mar 2008
Location: South Side Chicago
Posts: 2,088
Likes: 0
Received 2 Likes
on
2 Posts
Year: 1992, 2- 1998 (All 3, 4 Doors)
Model: Cherokee
Engine: 4.0L in all
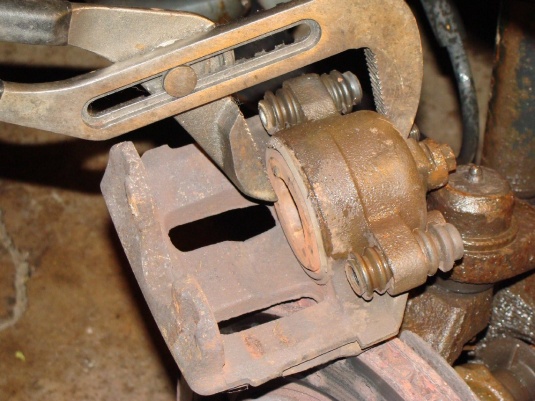
Here's what the caliper looks like when full compressed into its bore:
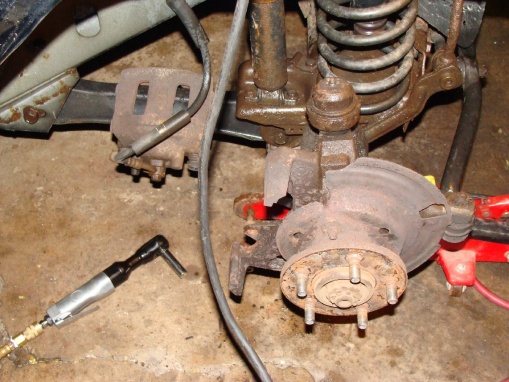
Now hang the caliper out of the way for now (I use my LCA. Fits perfect.) and remove your old rotor. If re-using them, use some care in removal as to not warp the hell out of them, and bring them out to get cut if they're still within spec. If not, scrap them.
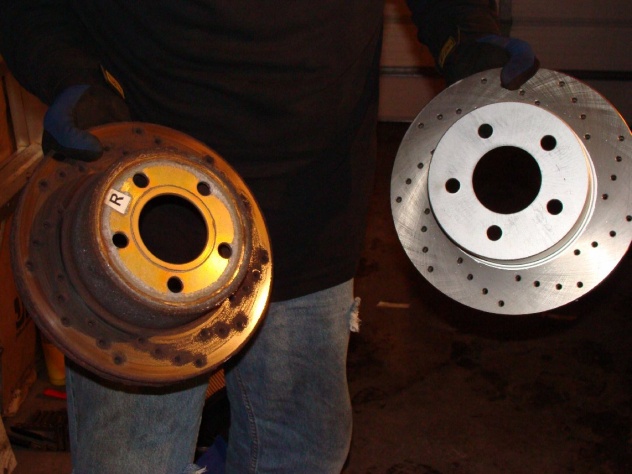
Here's new compared with old (rotors and pads):

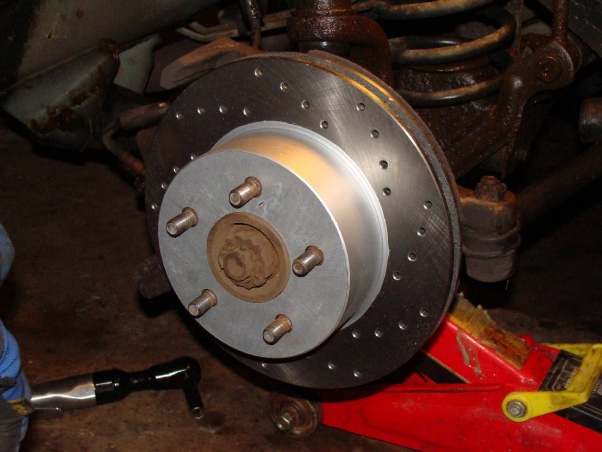
Now just slide the rotor onto the hub:
Now hang the caliper out of the way for now (I use my LCA. Fits perfect.) and remove your old rotor. If re-using them, use some care in removal as to not warp the hell out of them, and bring them out to get cut if they're still within spec. If not, scrap them.
Here's new compared with old (rotors and pads):
Now just slide the rotor onto the hub:
Last edited by BowtieGuy3; 12-04-2008 at 03:07 AM.
12-04-2008, 02:42 AM
#3
CF Veteran
Thread Starter
Join Date: Mar 2008
Location: South Side Chicago
Posts: 2,088
Likes: 0
Received 2 Likes
on
2 Posts
Year: 1992, 2- 1998 (All 3, 4 Doors)
Model: Cherokee
Engine: 4.0L in all
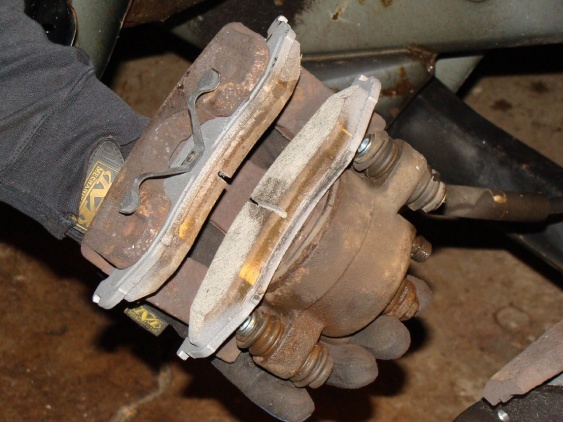
Now, pop your pads on. The 3 fingered pad is your inboard pad, and the one with the 2 spring tabs on it is outboard. If you like, you can smear the disc brake quiet on there at this point before placing them into the caliper.
Here's the pads installed:
Now remount the caliper. Make sure you place the tabs onto the caliper mount and rock them forward/backward to seat the caliper!!! Installation at this point and on is the exact opposite of installation. Once the caliper is seated, use some caliper grease on the bolts, and slide them in and start threading them by hand. Then just tighten, and low and behold, this is what it looks like:

Now place your wheel back on and tighten your lug nuts and you're done with one side. Repeat on other side.
When finished, make sure to check your brake fluid and top off as needed, then start your Jeep and pump up the brake pedal several times to seat the pads and set the caliper piston before going anywhere.
Here's the pads installed:
Now remount the caliper. Make sure you place the tabs onto the caliper mount and rock them forward/backward to seat the caliper!!! Installation at this point and on is the exact opposite of installation. Once the caliper is seated, use some caliper grease on the bolts, and slide them in and start threading them by hand. Then just tighten, and low and behold, this is what it looks like:
Now place your wheel back on and tighten your lug nuts and you're done with one side. Repeat on other side.
When finished, make sure to check your brake fluid and top off as needed, then start your Jeep and pump up the brake pedal several times to seat the pads and set the caliper piston before going anywhere.
Last edited by BowtieGuy3; 12-04-2008 at 03:25 AM.

Thread
Thread Starter
Forum
Replies
Last Post
SixShooterXJCherokee
Stock XJ Cherokee Tech. All XJ Non-modified/stock questions go here
9
09-23-2015 06:27 PM
madmanmarty
Stock XJ Cherokee Tech. All XJ Non-modified/stock questions go here
30
08-30-2015 03:17 PM
cherokee01
Stock XJ Cherokee Tech. All XJ Non-modified/stock questions go here
10
08-30-2015 05:04 AM
Currently Active Users Viewing This Thread: 1 (0 members and 1 guests)