
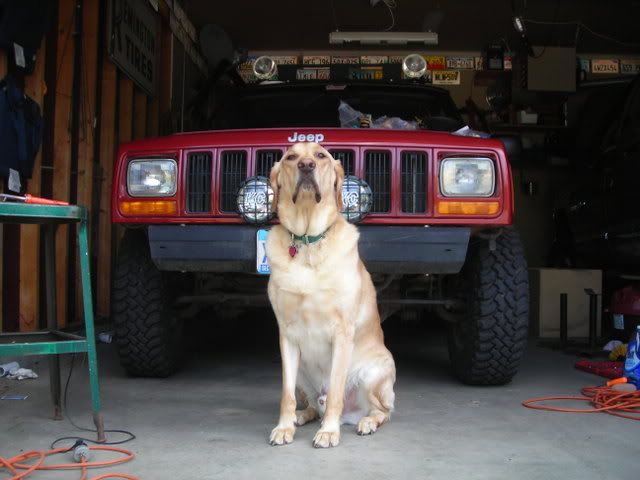
How To: wiring up aftermarket lights on the bumper and roof

Thread Starter
CF Veteran
Joined: Jul 2008
Posts: 2,328
Likes: 1
From: Minnesota
Year: 1999
Model: Cherokee
Engine: 4.0
it takes time, tools and practice to get it done right but the end result is worth it. first off, the tools.
heres what i had:
-soldering iron (i used one i bought my dad for his birthday, 40 watt iron)
-solder (electrical solder ofcourse)
-extra wire (16 gauge and 12 gauge)
-wire cutters
-wire strippers
-wet rag (or towel)
-heat shrink tubing
-electrical tape
-needle nose pliers
-screwdriver
probably more to it then that but thats all i can think of that i used.
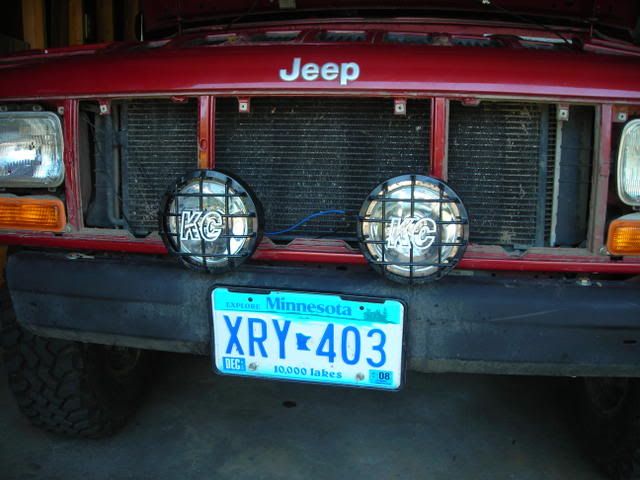
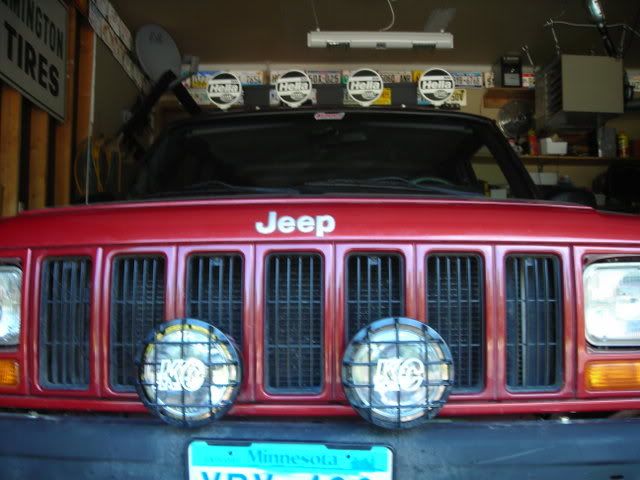
ill start off with the bumper lights since i didnt take any pics during install. these are all just pictures of the setup and how its put together.
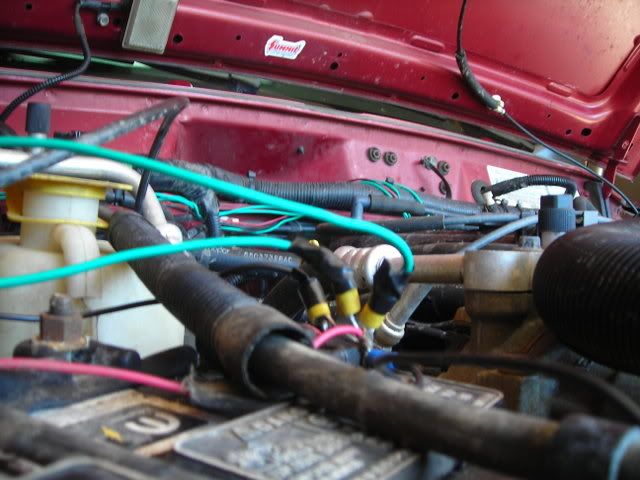
i used a standard 20 amp switch wired to a 40 amp relay (lights pull around 20-25 amps). the power wire and wire from the switch to the relay come through a gromet in the firewall i used back when i had the bajas.
the wires run along the top of the firewall and to the battery along by the passengers side fender
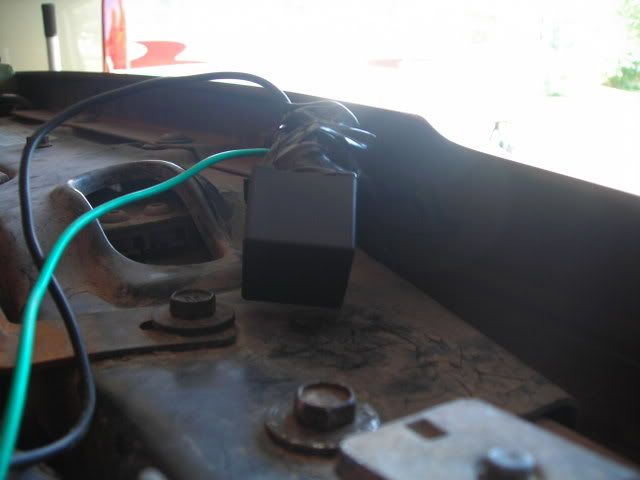
the power for the switch comes straight from the battery so thats where that goes but the green (which activates the lights) goes to the relay and the relay hides under the front facia above the passengers side head light.
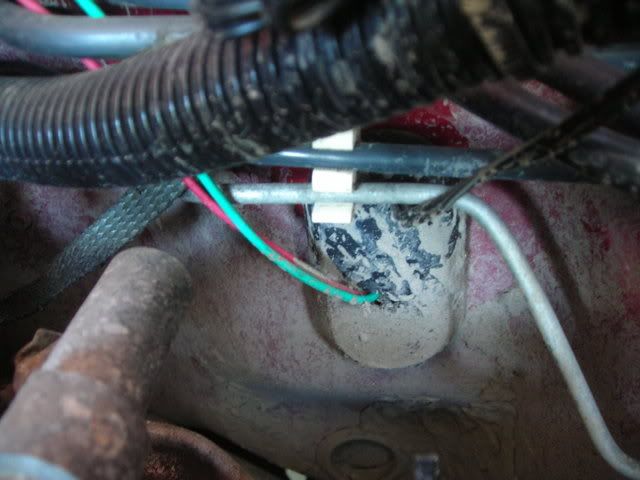
for the ground, i used the same one i used with the bajas which was just a random bolt that holds the front plate on the front of the engine bay
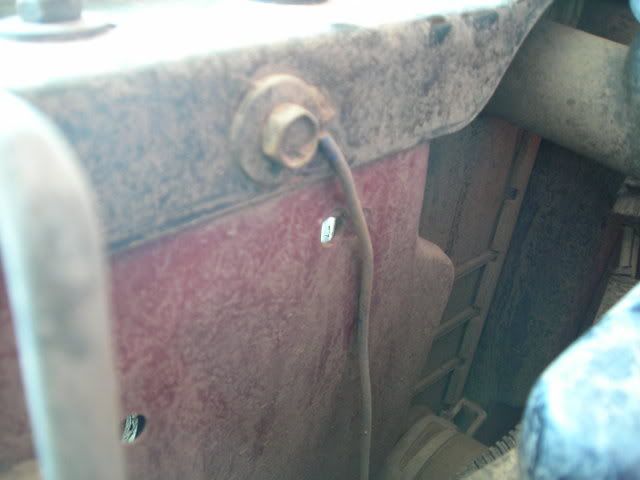
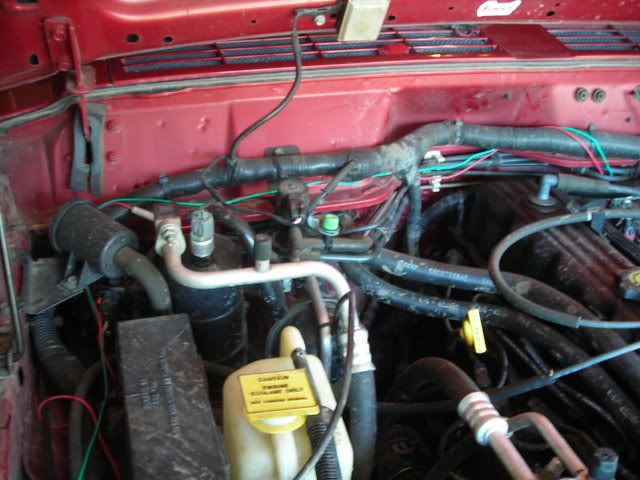
heres how it looks without the grill which is where all the wiring is
there are two wires coming off the lights. a positive and negative. power goes in, power goes out. the wire you hook up to the bulb itself is the positive and the wire that comes off the plate that the bulb is on is the negative which goes to a ground. the positive is hooked up to the relay and the negative goes to a ground (the ground i chose is pictured above.)
heres how the wires look coming off the lights

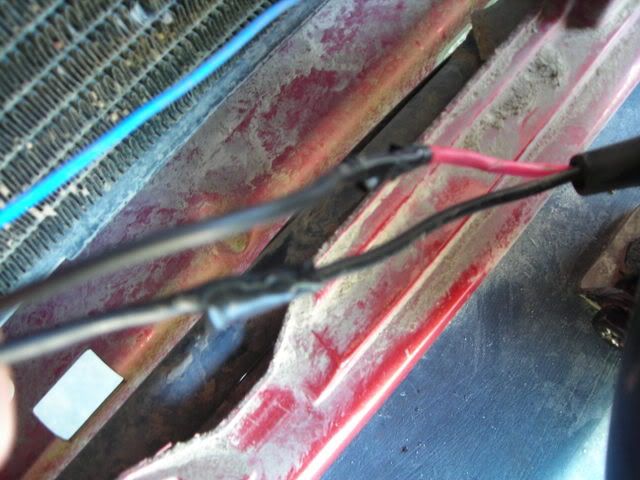
this is the negative wires which go to the ground (yeah that wire i showed going to that bolt really is blue). the wire that is black is coming from the relay..both blues are coming off the lights and i wired them into a T and they all go to that same ground.

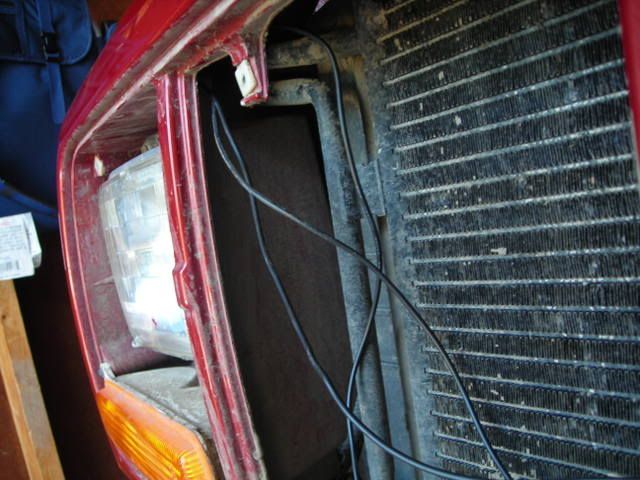
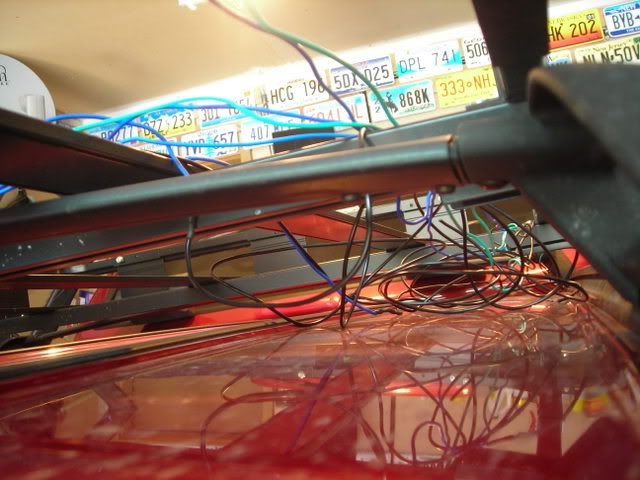
all the wires from the lights go up next to the radiator
and thats basically it for the bumper lights..today i did the roof lights and they take more wire and power to run all 4 so i took some pics along the way.
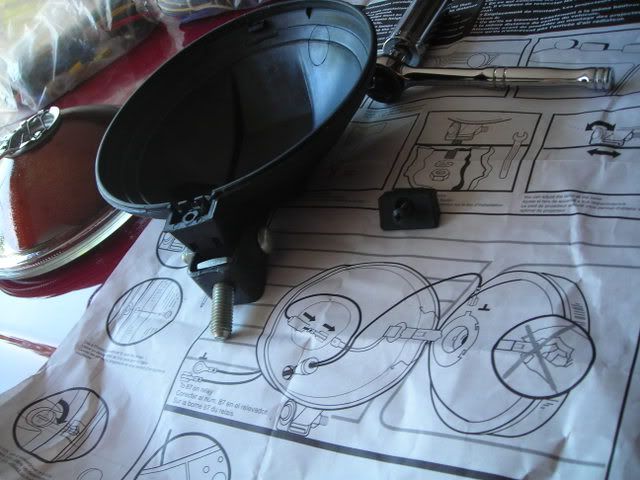
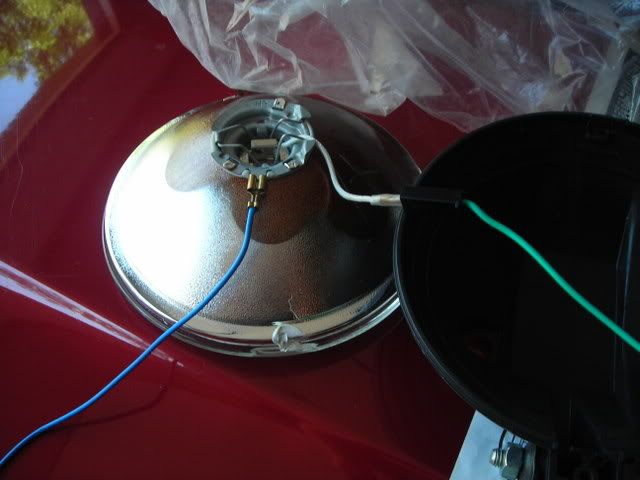
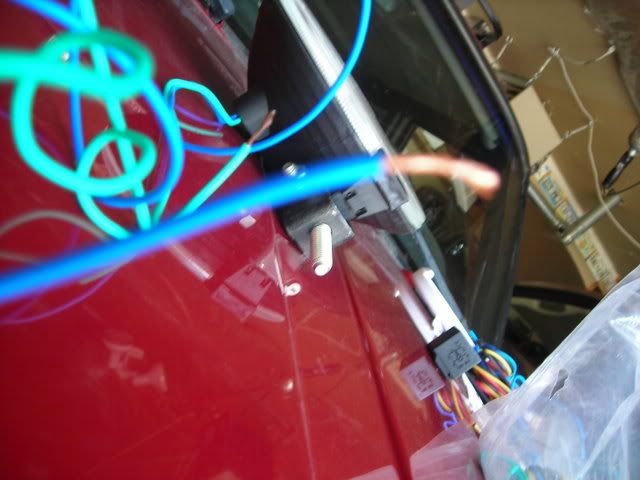
first up, when i got the lights, they didnt have any wires coming off of them, just off the bulb which is where you hook the positive up to. what you do is open up the lamp and install a positive and negative. this is how the hellas came.
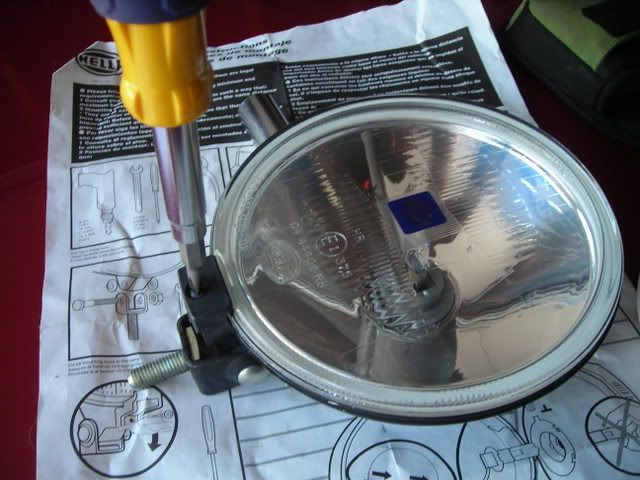
heres the diagram of how to hook it up
hooked up
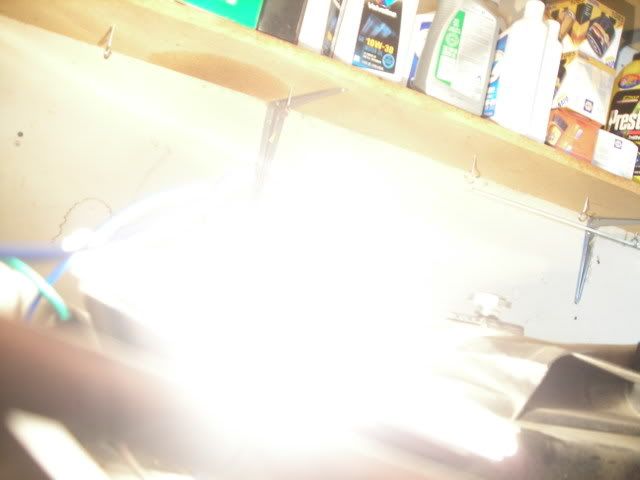
i like to test the lights before i install them to make sure they work. since my hood was being used as a work bench, i used the battery in my dads ram. the light friggen blinded me but sure enough, it works.
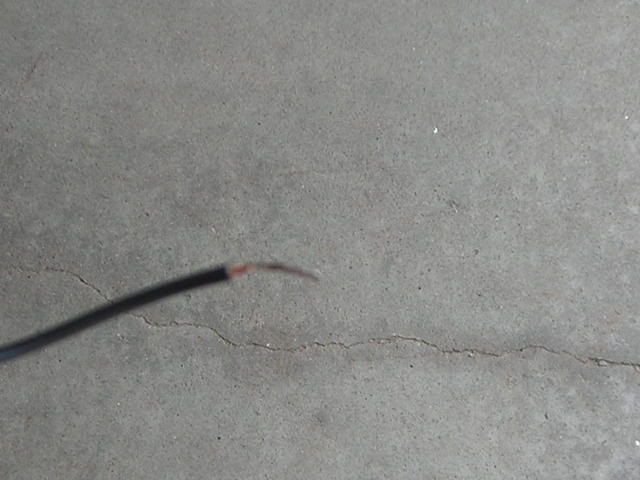
now comes some soldering. what you do is take your wire strippers, put the wire in the correct size setting on your strippers (in this case, 16 gauge) and clamp the strippers and then pull the insulation off. your left with bare wire which is what you want
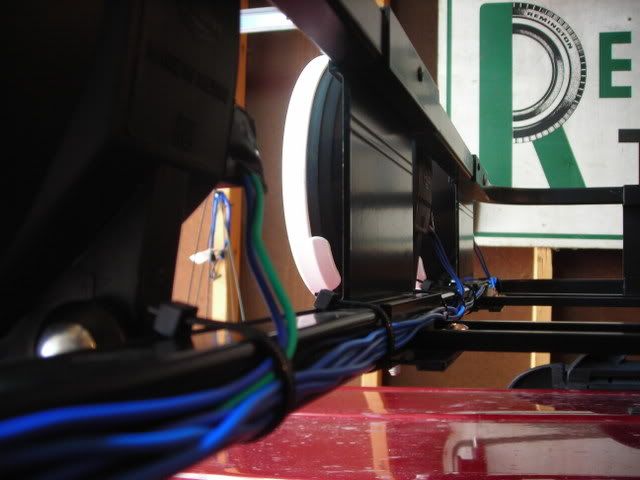
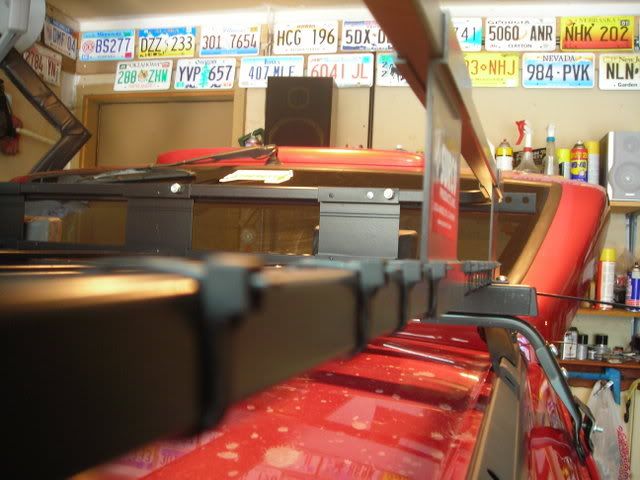
i did this to all the wires and then i mounted them back up on the rack.
note: im using two relays since the hellas are only setup for two lights per the relay they came with. the relay is only rated at 30amps and all 4 would draw more than that so i wired the lights using the two outside lights on one relay and switch and the two inside lights on a seperate relay and seperate switch.
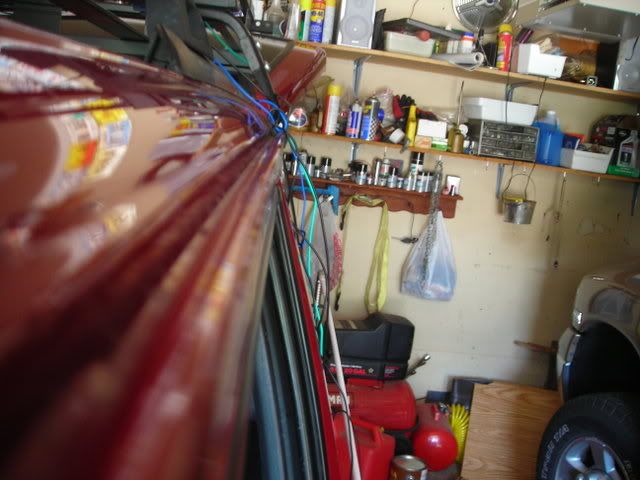
i decided to run the wires down the roof rack and through the hatch for a clean look and no holes being drilled. so i measured how much wire i would need and tied it to the wire i would solder it to off the light so i knew which extra wire went to the wire coming off the light
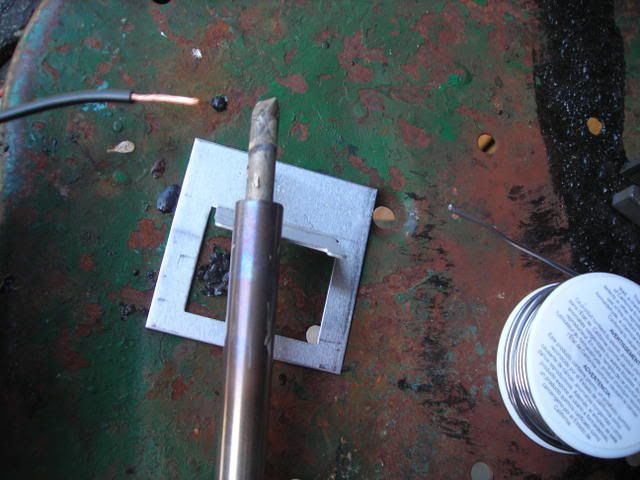
next comes soldering. if youve never done this before, its easy. just put the iron on the stand, put the bare wire on the flat surface on the iron and wait for it to heat up a little bit. then put some solder on the wire and if it doesnt melt on right away, dab the tip of the solder quickly on the iron and then onto the bare wire and it will start to flow onto the bare wire.
this is called tinning. you do this to each end of the wires you are soldering together. heres a picture of how you do this
and a bad picture of a tinned wire
heres what i had:
-soldering iron (i used one i bought my dad for his birthday, 40 watt iron)
-solder (electrical solder ofcourse)
-extra wire (16 gauge and 12 gauge)
-wire cutters
-wire strippers
-wet rag (or towel)
-heat shrink tubing
-electrical tape
-needle nose pliers
-screwdriver
probably more to it then that but thats all i can think of that i used.
ill start off with the bumper lights since i didnt take any pics during install. these are all just pictures of the setup and how its put together.
i used a standard 20 amp switch wired to a 40 amp relay (lights pull around 20-25 amps). the power wire and wire from the switch to the relay come through a gromet in the firewall i used back when i had the bajas.
the wires run along the top of the firewall and to the battery along by the passengers side fender
the power for the switch comes straight from the battery so thats where that goes but the green (which activates the lights) goes to the relay and the relay hides under the front facia above the passengers side head light.
for the ground, i used the same one i used with the bajas which was just a random bolt that holds the front plate on the front of the engine bay
heres how it looks without the grill which is where all the wiring is
there are two wires coming off the lights. a positive and negative. power goes in, power goes out. the wire you hook up to the bulb itself is the positive and the wire that comes off the plate that the bulb is on is the negative which goes to a ground. the positive is hooked up to the relay and the negative goes to a ground (the ground i chose is pictured above.)
heres how the wires look coming off the lights
this is the negative wires which go to the ground (yeah that wire i showed going to that bolt really is blue). the wire that is black is coming from the relay..both blues are coming off the lights and i wired them into a T and they all go to that same ground.
all the wires from the lights go up next to the radiator
and thats basically it for the bumper lights..today i did the roof lights and they take more wire and power to run all 4 so i took some pics along the way.
first up, when i got the lights, they didnt have any wires coming off of them, just off the bulb which is where you hook the positive up to. what you do is open up the lamp and install a positive and negative. this is how the hellas came.
heres the diagram of how to hook it up
hooked up
i like to test the lights before i install them to make sure they work. since my hood was being used as a work bench, i used the battery in my dads ram. the light friggen blinded me but sure enough, it works.
now comes some soldering. what you do is take your wire strippers, put the wire in the correct size setting on your strippers (in this case, 16 gauge) and clamp the strippers and then pull the insulation off. your left with bare wire which is what you want
i did this to all the wires and then i mounted them back up on the rack.
note: im using two relays since the hellas are only setup for two lights per the relay they came with. the relay is only rated at 30amps and all 4 would draw more than that so i wired the lights using the two outside lights on one relay and switch and the two inside lights on a seperate relay and seperate switch.
i decided to run the wires down the roof rack and through the hatch for a clean look and no holes being drilled. so i measured how much wire i would need and tied it to the wire i would solder it to off the light so i knew which extra wire went to the wire coming off the light
next comes soldering. if youve never done this before, its easy. just put the iron on the stand, put the bare wire on the flat surface on the iron and wait for it to heat up a little bit. then put some solder on the wire and if it doesnt melt on right away, dab the tip of the solder quickly on the iron and then onto the bare wire and it will start to flow onto the bare wire.
this is called tinning. you do this to each end of the wires you are soldering together. heres a picture of how you do this
and a bad picture of a tinned wire
Last edited by aircruiser; Jul 31, 2008 at 01:01 PM.
Thread Starter
CF Veteran
Joined: Jul 2008
Posts: 2,328
Likes: 1
From: Minnesota
Year: 1999
Model: Cherokee
Engine: 4.0
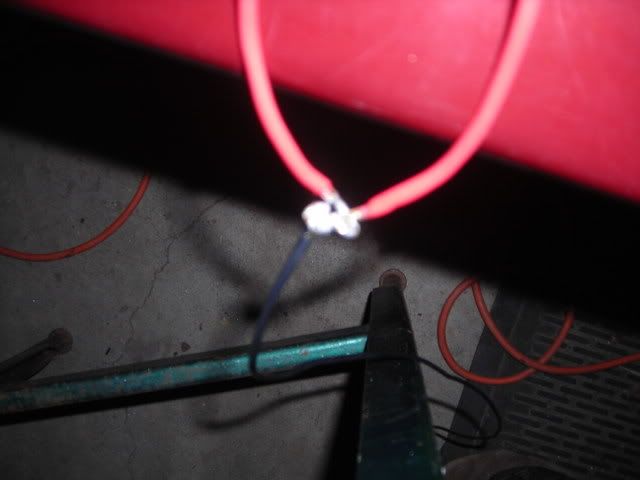
once youve done both wires, put them together over the iron and wait for them to heat up and then put a little more solder on. pull the wires off the iron and blow on the solder to cool it off so it stays. it is alot easier to do with someone else holding the wire. if you dont have anyone else around to do it (like me), just bend the wires into hook shapes and hook them together. just make sure they arent touching the insulation or the circuit wont be complete.
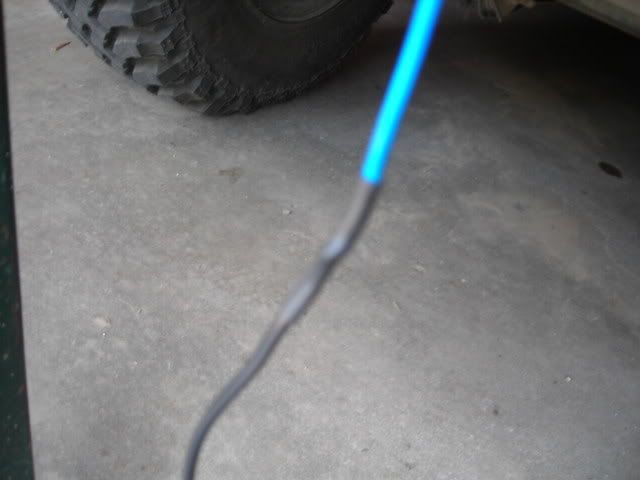
next up come heat shrink tubing. if youre completing a circuit, put the tubing on before you solder. since one end isnt soldered yet on mine, i could just slide it over the other end. heres what it looks like and with the bare solder joint in the background.

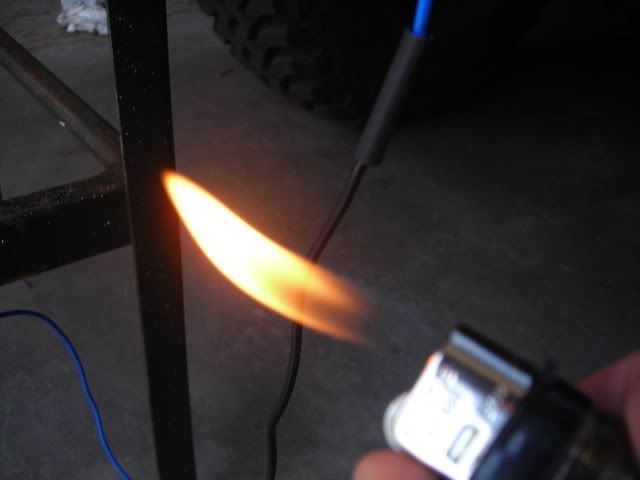
heat shrink tubing protects the joints from shorts and what not. that or electrical tape will work. once the tubing is over the joint, use a match or lighter to heat it up and it will shrink
i didnt take pictures of all of them but you get the point. now its on to wiring up the relay.

the hellas came with instructions but theres also a confusing diagram on the back of the relay box too.
heres how it goes. one side gets wired to the battery in the vehicle, one side goes to the switch, both lights go to another side and then you ground the relay too using the other side. different relays have different setups and ways of hooking it up so before you do yours, look at the directions on the relay.
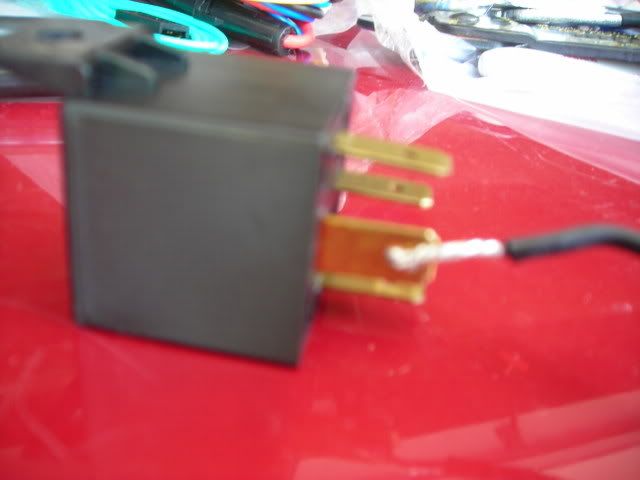
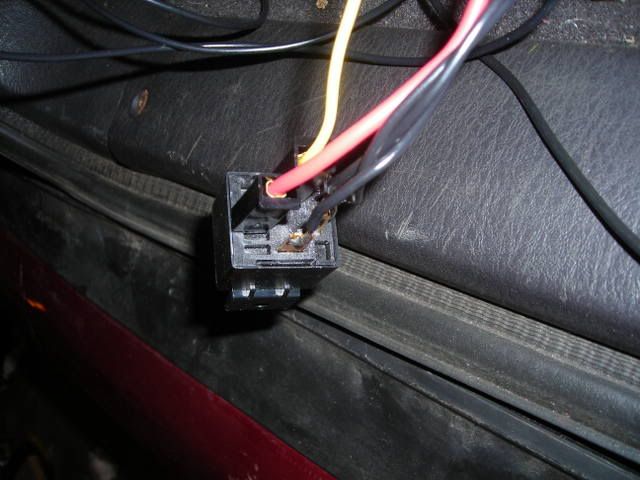
to wire the relay, with bare wires you can just use a needle nose pliers to hook the wire through the eye in the relay terminal. i like to solder the wire to the relay for re-assurance..but here it is before solder
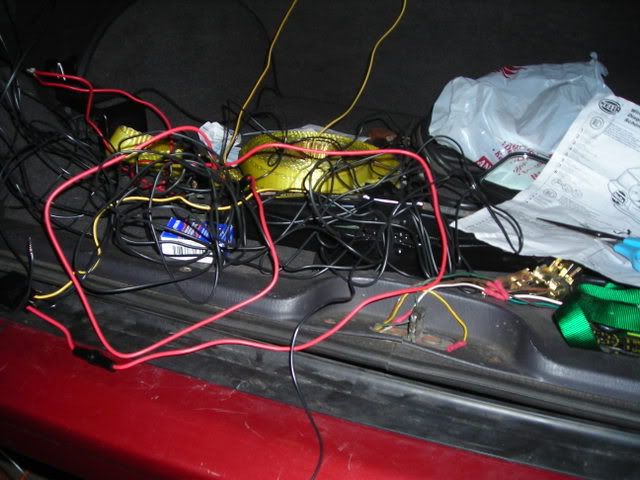
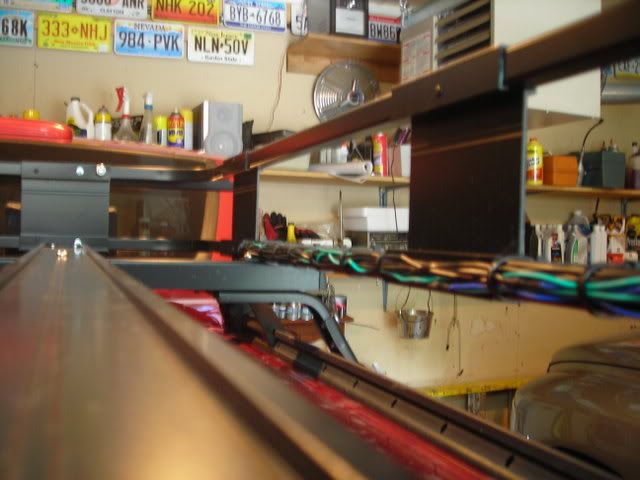
now that all the lights are rigged up, its time to move down to the hatch..im left with this mess of wires.
so now were in the hatch with two relays and a bunch of wires

the hellas came with plugs to plug in the power and the switch so thats all i had to do and the relay was set. red is power and has a fuse on it and yellow goes to the switch
the power wire uses 12 gauge wire instead of 16 gauge like the lights. thats because the power wire draws more power through it. however, i wanted to get the lights done so i wired both powers on the relay to a piece of 16 gauge wire. ill be swapping that out probably friday but it works but gets hot. i plan to re-wire it using independent wires going to the battery for each relay.
either way, heres the mess i was left with
now the negatives on the lights all have to go to a ground. what i did was run them all back to the hatch and then i soldered all 4 negatives to one wire and ran it to the same ground as one of the relays. there isnt much current going through the wires so theres no worries about wiring up so many negatives to one wire.
and the grounded wires
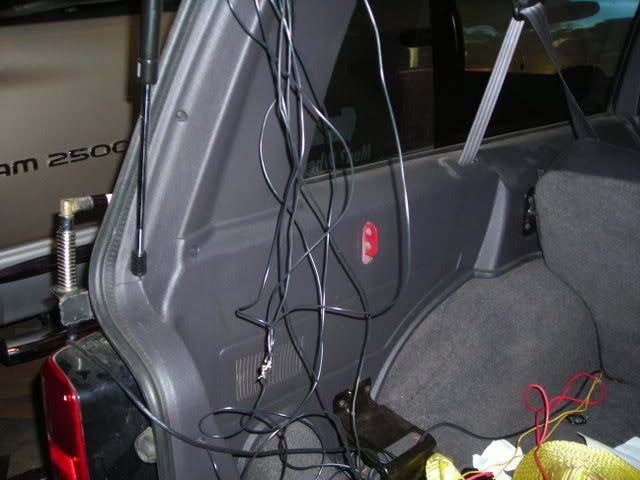
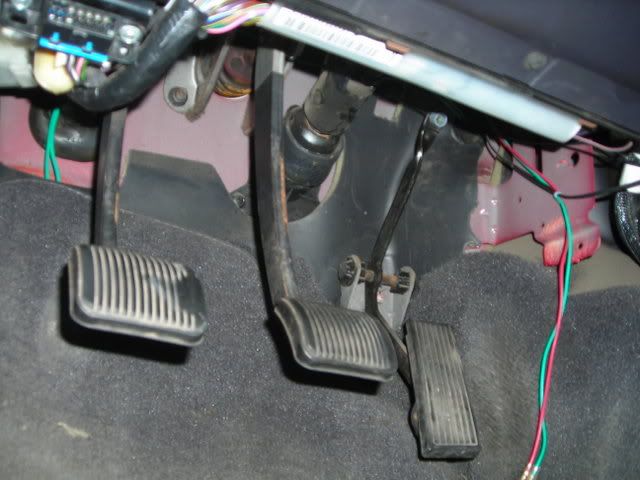
for the switch and power, i ran it like the cb coax which goes beside the back rests, under the rear seats, under the floormats and under the drivers seat (passengers side for the cb)
heres all you can really see.
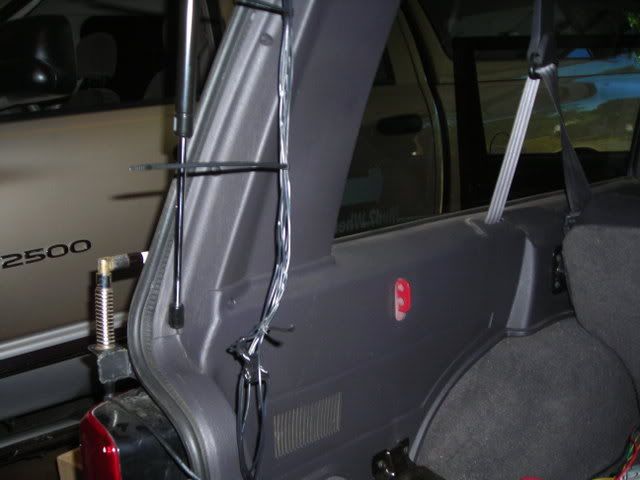
i sent the power wire for the relays back through that gromet in the top pics and ran it to the battery. i did the same with the power wire for the other two switches and soldered a Y so i only ran one wire to the power for both switches. i then connected everything up, zip tied the wires for the lights to the rack so now you almost cant see them and tomorrow ill clean up the interior wires.
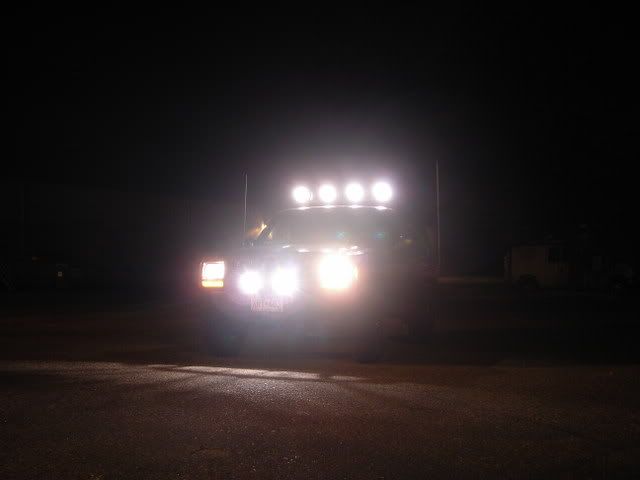
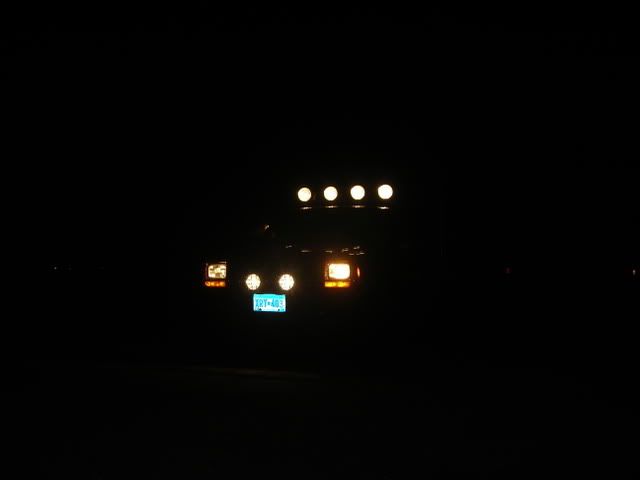
but incase you need any motivation, heres my rig all lit up.
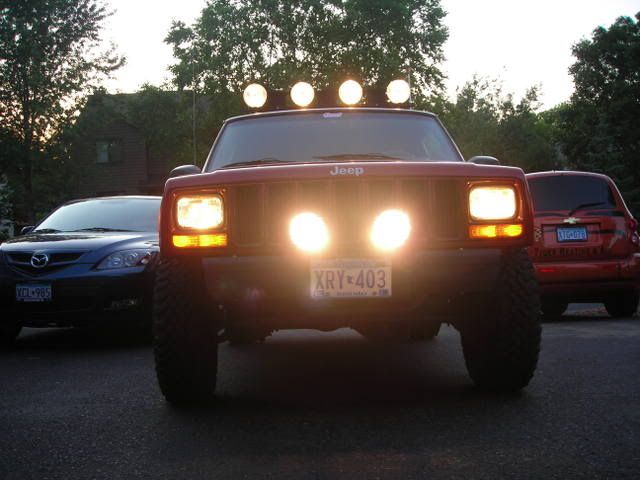
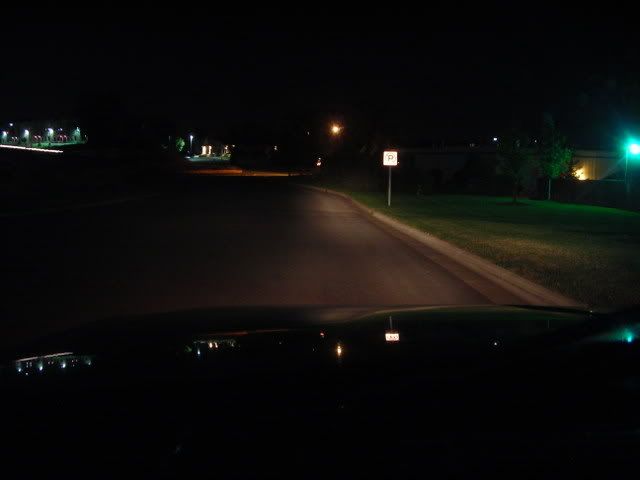
stock lights
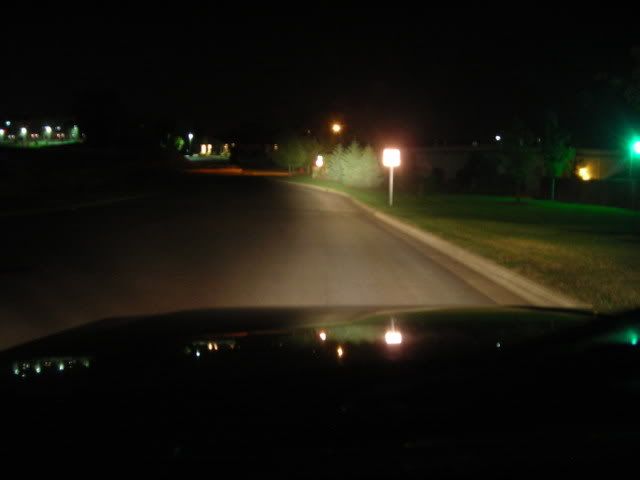
plus KCs
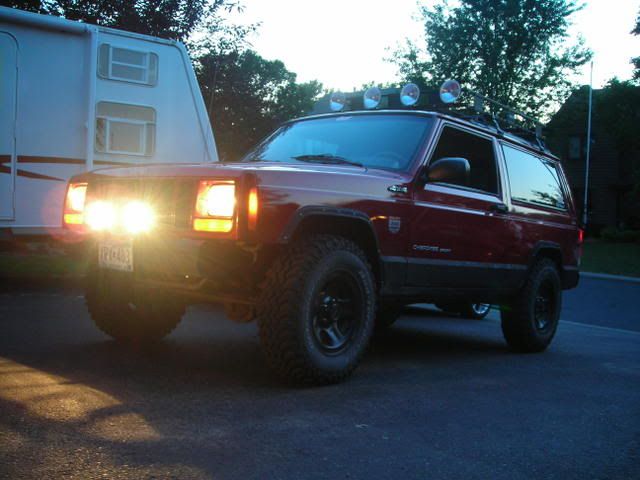
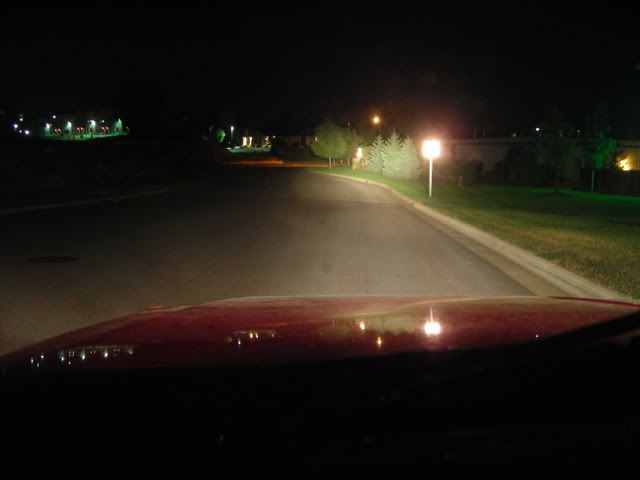
plus outer roof lights
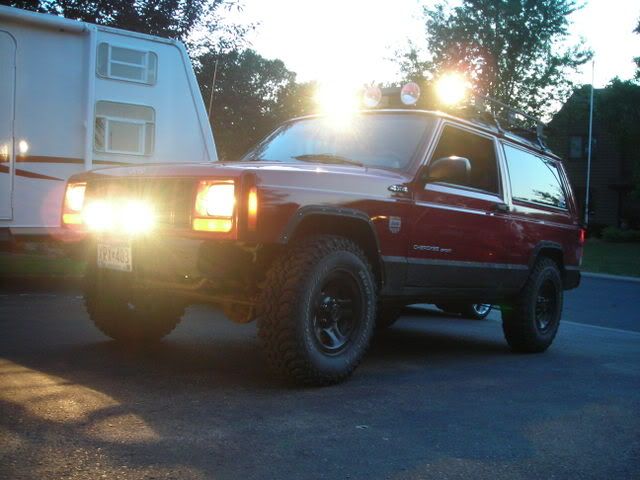
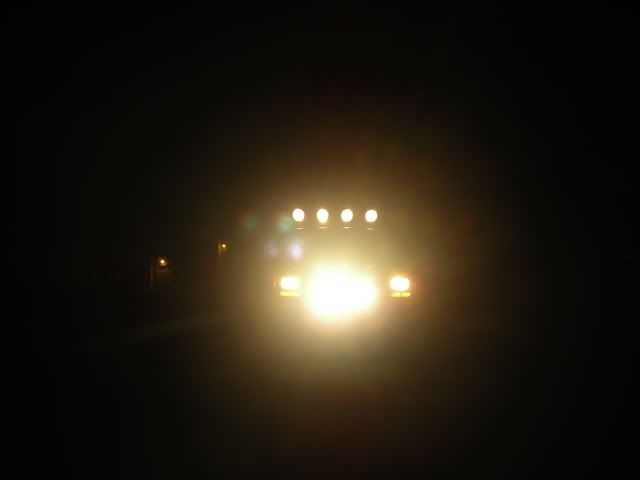
plus all of them
next up come heat shrink tubing. if youre completing a circuit, put the tubing on before you solder. since one end isnt soldered yet on mine, i could just slide it over the other end. heres what it looks like and with the bare solder joint in the background.
heat shrink tubing protects the joints from shorts and what not. that or electrical tape will work. once the tubing is over the joint, use a match or lighter to heat it up and it will shrink
i didnt take pictures of all of them but you get the point. now its on to wiring up the relay.
the hellas came with instructions but theres also a confusing diagram on the back of the relay box too.
heres how it goes. one side gets wired to the battery in the vehicle, one side goes to the switch, both lights go to another side and then you ground the relay too using the other side. different relays have different setups and ways of hooking it up so before you do yours, look at the directions on the relay.
to wire the relay, with bare wires you can just use a needle nose pliers to hook the wire through the eye in the relay terminal. i like to solder the wire to the relay for re-assurance..but here it is before solder
now that all the lights are rigged up, its time to move down to the hatch..im left with this mess of wires.
so now were in the hatch with two relays and a bunch of wires
the hellas came with plugs to plug in the power and the switch so thats all i had to do and the relay was set. red is power and has a fuse on it and yellow goes to the switch
the power wire uses 12 gauge wire instead of 16 gauge like the lights. thats because the power wire draws more power through it. however, i wanted to get the lights done so i wired both powers on the relay to a piece of 16 gauge wire. ill be swapping that out probably friday but it works but gets hot. i plan to re-wire it using independent wires going to the battery for each relay.
either way, heres the mess i was left with
now the negatives on the lights all have to go to a ground. what i did was run them all back to the hatch and then i soldered all 4 negatives to one wire and ran it to the same ground as one of the relays. there isnt much current going through the wires so theres no worries about wiring up so many negatives to one wire.
and the grounded wires
for the switch and power, i ran it like the cb coax which goes beside the back rests, under the rear seats, under the floormats and under the drivers seat (passengers side for the cb)
heres all you can really see.
i sent the power wire for the relays back through that gromet in the top pics and ran it to the battery. i did the same with the power wire for the other two switches and soldered a Y so i only ran one wire to the power for both switches. i then connected everything up, zip tied the wires for the lights to the rack so now you almost cant see them and tomorrow ill clean up the interior wires.
but incase you need any motivation, heres my rig all lit up.
stock lights
plus KCs
plus outer roof lights
plus all of them
Thread Starter
CF Veteran
Joined: Jul 2008
Posts: 2,328
Likes: 1
From: Minnesota
Year: 1999
Model: Cherokee
Engine: 4.0
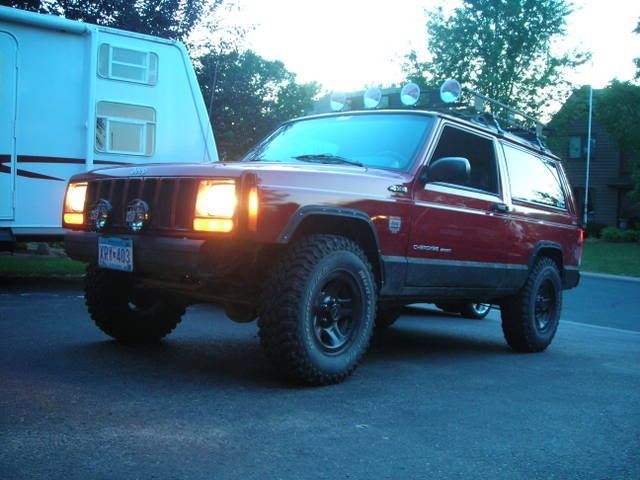
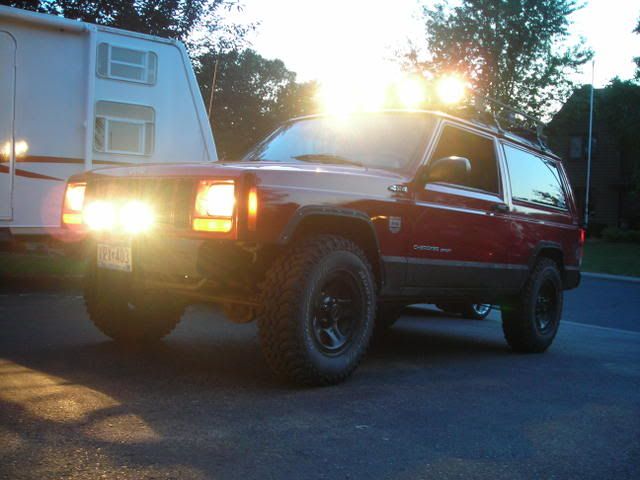
stock lights
plus KCs
plus hellas
nother comparison picture in the same order
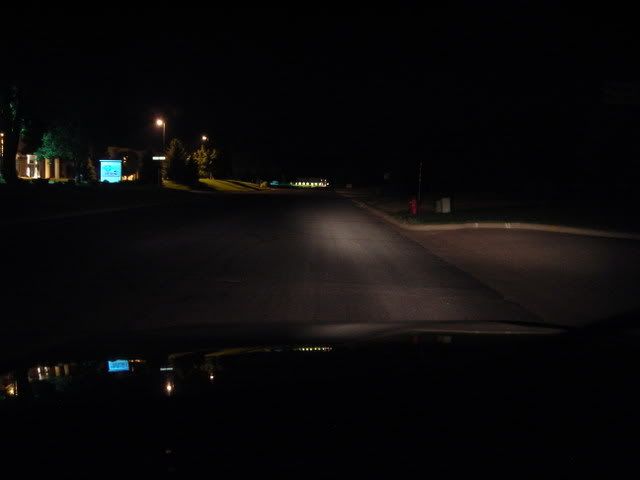
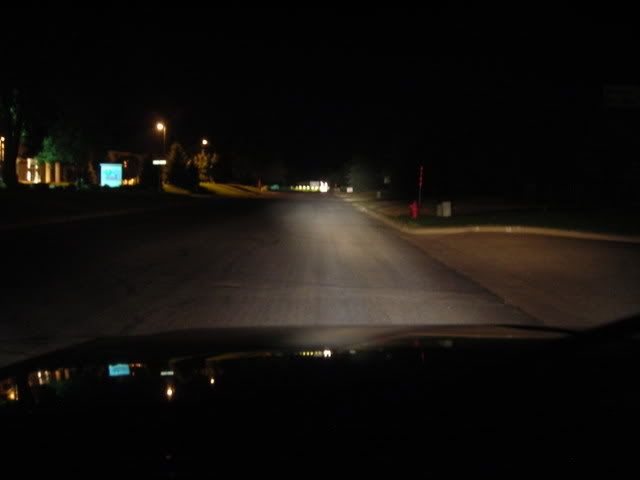
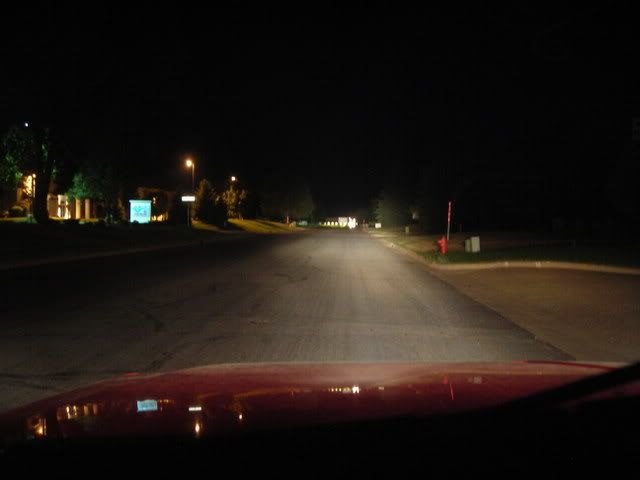
pic with flash to dim out light glare
all i got next are the bajas and ill be done. plus re-wiring the power to the relays but thats it for now. definitly well worth the look and power these lights give out. im no electrical expert but ive learned from my dad and doing stuff myself so if anyones got any questions, ill do my best to answer them. hope this helps some of you.
plus KCs
plus hellas
nother comparison picture in the same order
pic with flash to dim out light glare
all i got next are the bajas and ill be done. plus re-wiring the power to the relays but thats it for now. definitly well worth the look and power these lights give out. im no electrical expert but ive learned from my dad and doing stuff myself so if anyones got any questions, ill do my best to answer them. hope this helps some of you.
Thread Starter
CF Veteran
Joined: Jul 2008
Posts: 2,328
Likes: 1
From: Minnesota
Year: 1999
Model: Cherokee
Engine: 4.0
added:
i re-wired the power to the relays
was:
(one little wimpy 16g wire soldered to both beefy 12g wires..the 16g wouldnt have been able to handle the power for more than 5 minutes)
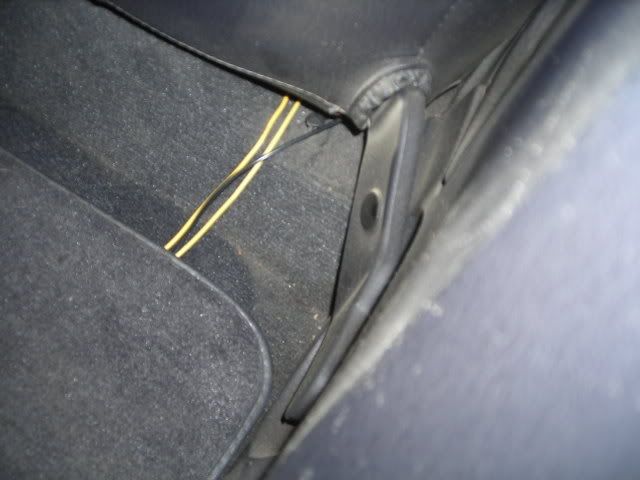
now:
(the two green wires are both 14g wires (just a little less beefy then 12g) and they can handle all the power and they both run to their own relay so its better wire and the load is split in half from the original)
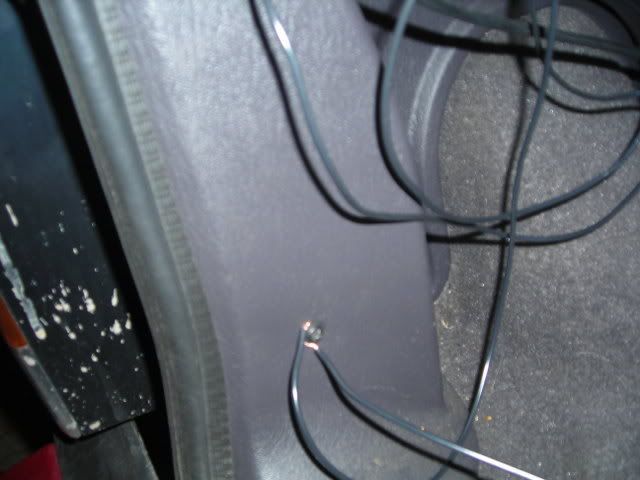
heres how i hid the wires. theyre just ziptied.
i also ran the power to the relay wires behind the gas and brake pedals and down beside the clutch pedal and then under the floormat
cleaned up the wires in the hatch too...also with zip ties
ill get more pics tomorrow..if not, when i get back from vacation next week. i didnt finish cleaning up the wires because i was to busy installing my new muffler today but ill try and get more pictures as soon as i can.
i re-wired the power to the relays
was:
(one little wimpy 16g wire soldered to both beefy 12g wires..the 16g wouldnt have been able to handle the power for more than 5 minutes)
now:
(the two green wires are both 14g wires (just a little less beefy then 12g) and they can handle all the power and they both run to their own relay so its better wire and the load is split in half from the original)
heres how i hid the wires. theyre just ziptied.
i also ran the power to the relay wires behind the gas and brake pedals and down beside the clutch pedal and then under the floormat
cleaned up the wires in the hatch too...also with zip ties
ill get more pics tomorrow..if not, when i get back from vacation next week. i didnt finish cleaning up the wires because i was to busy installing my new muffler today but ill try and get more pictures as soon as i can.

Thread
Thread Starter
Forum
Replies
Last Post
xjallseasons
Stock XJ Cherokee Tech. All XJ Non-modified/stock questions go here
7
Aug 29, 2015 08:31 PM
Currently Active Users Viewing This Thread: 1 (0 members and 1 guests)