Round 2
 12-15-2012, 11:37 PM
#121
CF Veteran
Thread Starter
Join Date: Nov 2011
Location: Las Vegas, NV - St. George, UT
Posts: 1,314
Likes: 0
Received 0 Likes
on
0 Posts
Year: 1996
Model: Cherokee
Engine: 4.0
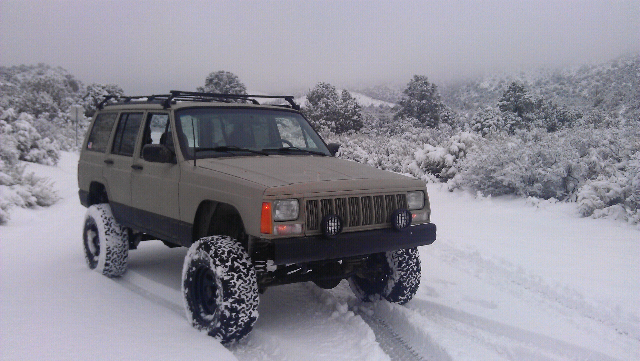
It was frickin cold up there!! Some pics for now. More to come when I get them off my phone.


 01-01-2013, 07:13 PM
#122
CF Veteran
Thread Starter
Join Date: Nov 2011
Location: Las Vegas, NV - St. George, UT
Posts: 1,314
Likes: 0
Received 0 Likes
on
0 Posts
Year: 1996
Model: Cherokee
Engine: 4.0
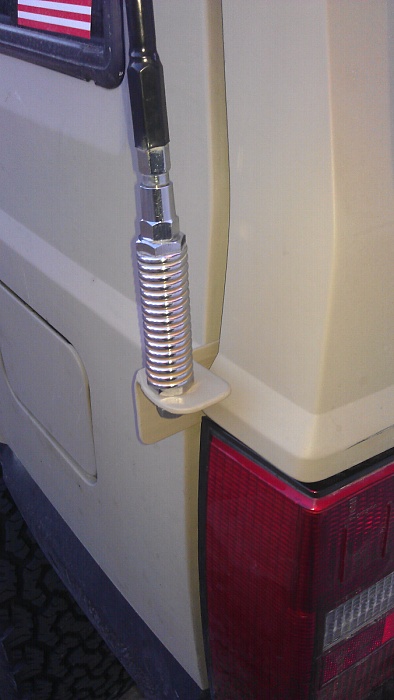
Made an antenna mount yesterday at work.
1/8" thick 2x2 angle iron. Cut one side off to clear the hatch and secured it with 2 self tapping screws and the tail light mount.
1/8" thick 2x2 angle iron. Cut one side off to clear the hatch and secured it with 2 self tapping screws and the tail light mount.
 01-07-2013, 11:01 PM
#123
CF Veteran
Thread Starter
Join Date: Nov 2011
Location: Las Vegas, NV - St. George, UT
Posts: 1,314
Likes: 0
Received 0 Likes
on
0 Posts
Year: 1996
Model: Cherokee
Engine: 4.0
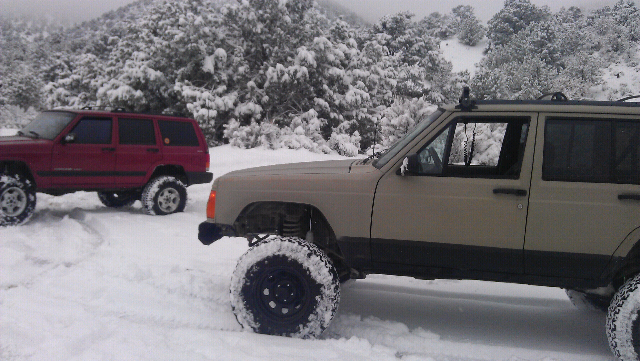
More pictures from the snow run to Lovell Canyon


Last edited by Driver X; 01-24-2015 at 10:12 AM.
01-07-2013, 11:13 PM
#124
CF Veteran
Thread Starter
Join Date: Nov 2011
Location: Las Vegas, NV - St. George, UT
Posts: 1,314
Likes: 0
Received 0 Likes
on
0 Posts
Year: 1996
Model: Cherokee
Engine: 4.0
For those with the rear hatch panel that will not stay in place... I have a suggestion for the fix. I picked up the following from Home Depot


Hollow wall anchors #6-32 X 1-1/2" screw length. There are 5 pieces per pack so you will need 2-3 packs total depending on secure you want the panel.
Here it is installed in the hatch. Since mine is a '96, I have the fiberglass hatch. Not sure how this will work on the '97+ models since they have metal hatch.


Here it is installed with the panel and screw.


Installation instructions are pretty simple. Remove the hatch panel, if it has yet to fall off from the cheap plastic clips. Locate the 11 mounting holes and make sure the clips have not broken off inside. If they have, just remove all of them. Drill the holes on the hatch to 5/16" as per the instructions on the package. Insert one anchor into each hole (it is easier to do one at a time as you will be working above your head, so take a break every so often). Once you have one anchor installed, use the supplied screw and tighten it until the anchor compresses internally to grip the hatch. Remove the screw and repeat for all 11 holes. On the panel, use a 1/4" drill bit and drill each mounting clip hole at the position where the clip will bottom out. I didn't take pictures of this as I was using my old panel as a practice piece and broke it in half so I could see behind it while test fitting it into position. When the clips are removed, you will see how it "bottoms out" in the panel. That is where you will want to drill through the panel for the screw. Once all 11 holes have been drilled in the panel, the install is straight forward. It doesn't rattle now, and I have removed it several times to fix the stupid hatch switch for my dome lights.
I replaced my hatch panel with a carpeted one that has the speaker cutouts for future upgrades. I believe this is out of a '92 or '93 that I picked up from the junk yard.
Hollow wall anchors #6-32 X 1-1/2" screw length. There are 5 pieces per pack so you will need 2-3 packs total depending on secure you want the panel.
Here it is installed in the hatch. Since mine is a '96, I have the fiberglass hatch. Not sure how this will work on the '97+ models since they have metal hatch.
Here it is installed with the panel and screw.
Installation instructions are pretty simple. Remove the hatch panel, if it has yet to fall off from the cheap plastic clips. Locate the 11 mounting holes and make sure the clips have not broken off inside. If they have, just remove all of them. Drill the holes on the hatch to 5/16" as per the instructions on the package. Insert one anchor into each hole (it is easier to do one at a time as you will be working above your head, so take a break every so often). Once you have one anchor installed, use the supplied screw and tighten it until the anchor compresses internally to grip the hatch. Remove the screw and repeat for all 11 holes. On the panel, use a 1/4" drill bit and drill each mounting clip hole at the position where the clip will bottom out. I didn't take pictures of this as I was using my old panel as a practice piece and broke it in half so I could see behind it while test fitting it into position. When the clips are removed, you will see how it "bottoms out" in the panel. That is where you will want to drill through the panel for the screw. Once all 11 holes have been drilled in the panel, the install is straight forward. It doesn't rattle now, and I have removed it several times to fix the stupid hatch switch for my dome lights.
I replaced my hatch panel with a carpeted one that has the speaker cutouts for future upgrades. I believe this is out of a '92 or '93 that I picked up from the junk yard.
Last edited by Driver X; 01-24-2015 at 10:15 AM.


 01-07-2013, 11:29 PM
#126
CF Veteran
Thread Starter
Join Date: Nov 2011
Location: Las Vegas, NV - St. George, UT
Posts: 1,314
Likes: 0
Received 0 Likes
on
0 Posts
Year: 1996
Model: Cherokee
Engine: 4.0
While on the trail, my temp gauge went above 210 until my fan kicked on. At least I know it works with my bypass switch! Unfortunately, the thermostat opened and stayed open all the way until I got home. Absolutely no heater and it wouldn't go above 120 degrees.

Removed the thermostat today and confirmed it is stuck open.

At least it didn't get stuck closed! And I am glad that it did not overheat. I added Prestone flush chemical to the radiator earlier today and ran it for about a half hour with the heater on. Drained the coolant, filled with water and ran it even more. I did this several times with the thermostat removed and filled with 50/50 premix coolant until I got all the water and flush chemical out. I installed an OEM 195 degree thermostat and filled with coolant until the air bubbles were purged. Heat is hot, temp is at 210 until the thermostat opens then it drops as normal and raises back to 210 the entire time. Tomorrow will be the test when it is 35 degrees outside and I will see how long it takes to warm up.
Removed the thermostat today and confirmed it is stuck open.
At least it didn't get stuck closed! And I am glad that it did not overheat. I added Prestone flush chemical to the radiator earlier today and ran it for about a half hour with the heater on. Drained the coolant, filled with water and ran it even more. I did this several times with the thermostat removed and filled with 50/50 premix coolant until I got all the water and flush chemical out. I installed an OEM 195 degree thermostat and filled with coolant until the air bubbles were purged. Heat is hot, temp is at 210 until the thermostat opens then it drops as normal and raises back to 210 the entire time. Tomorrow will be the test when it is 35 degrees outside and I will see how long it takes to warm up.
Last edited by Driver X; 01-24-2015 at 10:18 AM.
01-15-2013, 01:34 PM
#127
CF Veteran
Thread Starter
Join Date: Nov 2011
Location: Las Vegas, NV - St. George, UT
Posts: 1,314
Likes: 0
Received 0 Likes
on
0 Posts
Year: 1996
Model: Cherokee
Engine: 4.0
So far the engine temp is right where it is supposed to be. After 2 flushes in a week, the coolant is now green. I think one more flush should be fine until next year.
01-15-2013, 01:38 PM
#128
CF Veteran
Thread Starter
Join Date: Nov 2011
Location: Las Vegas, NV - St. George, UT
Posts: 1,314
Likes: 0
Received 0 Likes
on
0 Posts
Year: 1996
Model: Cherokee
Engine: 4.0
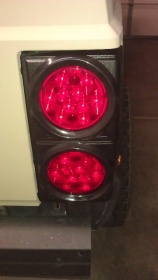
Modified my original tail lights for LED trailer lights. These were already cracked so I fixed it with some epoxy and sprayed bedliner on em. Two 4-1/2" LED lights on each. Top is STT and bottoms are just tails.
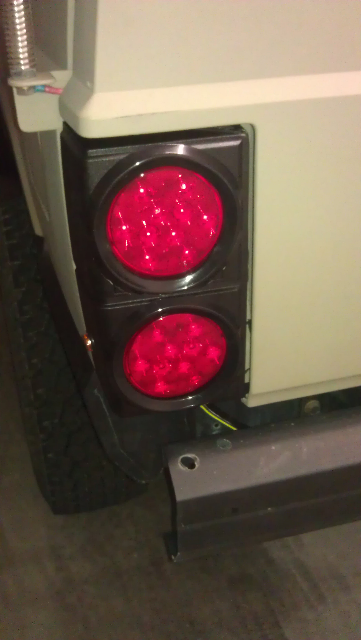
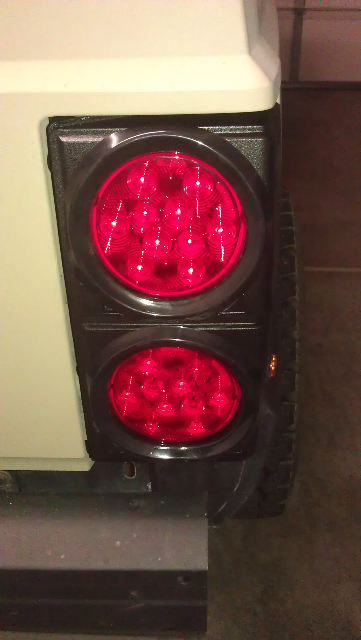
My reverse lights are moved as well, mounted to my hitch using slim profile wide beam fog lights.

My reverse lights are moved as well, mounted to my hitch using slim profile wide beam fog lights.
01-22-2013, 12:14 AM
#130
CF Veteran
Thread Starter
Join Date: Nov 2011
Location: Las Vegas, NV - St. George, UT
Posts: 1,314
Likes: 0
Received 0 Likes
on
0 Posts
Year: 1996
Model: Cherokee
Engine: 4.0
While searching for parts to get, I came across BDS shocks by Fox Racing. Since I have a friend who works for their distributor and can get me 15% off, I might give these a shot.
Also looking into a long arm kit. My UCA bushings are shot. And the LCA poly bushings are a harsh ride. Since they are the old non-greaseable style, I figured it is time for an upgrade. With the rear sitting about an inch higher than the front, I have spare isolators to hopefully level it out. And since I have to remove the spring to put those in, it would be wise to adjust the bumpstops accordingly.
So the suspension list continues again. Long arm upgrade (not sure on which brand yet, maybe Serious Offroad). Shocks on all four corners as well. Greaseable shackles (non-greaseable style is on there now).
Hopefully I can get this done before fall!
02-02-2013, 10:16 AM
#131
CF Veteran
Thread Starter
Join Date: Nov 2011
Location: Las Vegas, NV - St. George, UT
Posts: 1,314
Likes: 0
Received 0 Likes
on
0 Posts
Year: 1996
Model: Cherokee
Engine: 4.0
Found some old pictures of my Silverado on my laptop... how did I manage to keep this thing so clean, yet I neglect my XJ! 


Also found the air tank that was in the Silverado. 10 gallons and my VIAIR 405C compressor. Looks like I might be adding on board air soon!

Also found the air tank that was in the Silverado. 10 gallons and my VIAIR 405C compressor. Looks like I might be adding on board air soon!
 02-03-2013, 11:23 PM
#135
CF Veteran
Thread Starter
Join Date: Nov 2011
Location: Las Vegas, NV - St. George, UT
Posts: 1,314
Likes: 0
Received 0 Likes
on
0 Posts
Year: 1996
Model: Cherokee
Engine: 4.0
Thanks guys.
And yea I hear you on the thermostat being stuck open. I had a '67 Chevelle that the thermostat got stuck closed, in traffic, on Las Vegas Blvd! I ended up in a parking lot near a souvenir store waiting for it to cool off so I could yank the t-stat out of the 327. Tourists surrounded me while I worked on it in the sun so it was a quick pull it and go situation. I never put one back in for the 11 years that I owned it and it never got above 190, even in the Vegas summer.
Continuing on with the project... finally built the roof rack. Looked at many of these online, pondered it for several months and even thought about just buying one. I read so many of these builds, looked at so many pictures and finally decided to just do it. Total cost is around $60 not including the u-bolts holding it to my Thule crossbars.
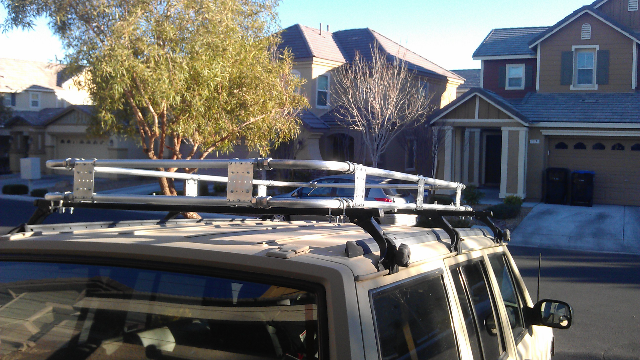
I still need to paint it. These are the test fit pictures so I could make the final adjustments prior to bolting it all down.
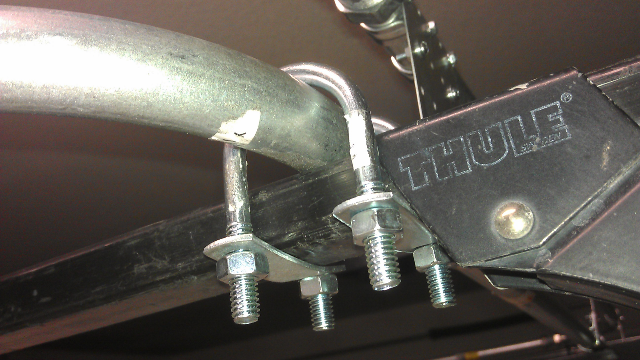
3/4" EMT conduit. Compression fittings. 3x5 stud plate for the side supports. Numerous screws and bolts holding it together. 1" u-bolts with bottom plate. 1/2" EMT conduit for the floor.
The top is 70" and the floor is 74-1/4". Overal dimensions are 74-1/4" x 40".
12 u-bolts hold it to the 3 Thule crossbars. It is almost a full length rack. I don't know why I built it this big, but I do plan on adding an awning later. I built it so I can add a wind fairing too, and the angle matches the windshield.
I will post up more pics after it is painted. Sanding EMT is a pain! But self etching primer, or any primer that specifies use on galvanized steel, will work. I tested on some scrap pieces last week. One with Krylon paint and one with spray on bed liner. Both had a week to cure and I hit both today with a screwdriver, and both chipped easily. Primed another piece with self etching primer and it held up.
And yea I hear you on the thermostat being stuck open. I had a '67 Chevelle that the thermostat got stuck closed, in traffic, on Las Vegas Blvd! I ended up in a parking lot near a souvenir store waiting for it to cool off so I could yank the t-stat out of the 327. Tourists surrounded me while I worked on it in the sun so it was a quick pull it and go situation. I never put one back in for the 11 years that I owned it and it never got above 190, even in the Vegas summer.
Continuing on with the project... finally built the roof rack. Looked at many of these online, pondered it for several months and even thought about just buying one. I read so many of these builds, looked at so many pictures and finally decided to just do it. Total cost is around $60 not including the u-bolts holding it to my Thule crossbars.


I still need to paint it. These are the test fit pictures so I could make the final adjustments prior to bolting it all down.
3/4" EMT conduit. Compression fittings. 3x5 stud plate for the side supports. Numerous screws and bolts holding it together. 1" u-bolts with bottom plate. 1/2" EMT conduit for the floor.
The top is 70" and the floor is 74-1/4". Overal dimensions are 74-1/4" x 40".
12 u-bolts hold it to the 3 Thule crossbars. It is almost a full length rack. I don't know why I built it this big, but I do plan on adding an awning later. I built it so I can add a wind fairing too, and the angle matches the windshield.
I will post up more pics after it is painted. Sanding EMT is a pain! But self etching primer, or any primer that specifies use on galvanized steel, will work. I tested on some scrap pieces last week. One with Krylon paint and one with spray on bed liner. Both had a week to cure and I hit both today with a screwdriver, and both chipped easily. Primed another piece with self etching primer and it held up.