
Project 'Pane in the ***


Thread Starter
Junior Member
Joined: Apr 2010
Posts: 97
Likes: 0
So begins Project 'Pane in the ***..
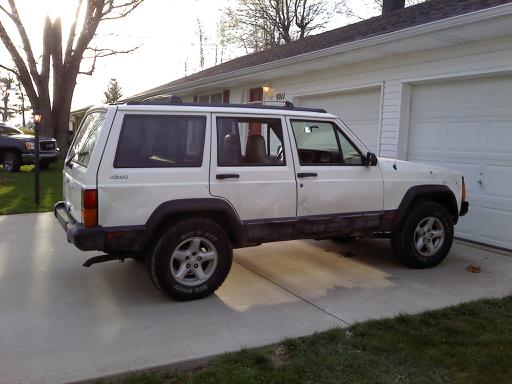
Here it is the day i got it home.. Body is absolutely beat all to hell, looks like PO's ex got happy with a ball peen hammer and possibly an ax..
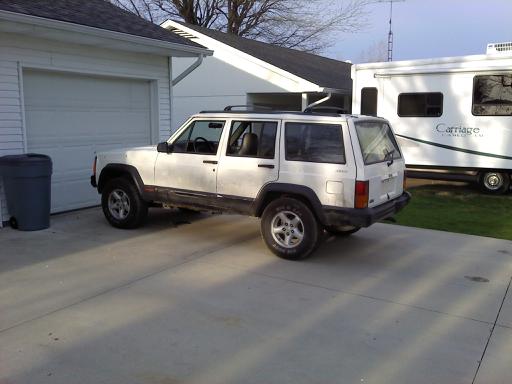
I flat towed it home, driveshaft ratchet strapped to the muffler, got home to notice that the guy had left one wheel with only one lug nut and the other rear they were all loose!!!
Luckily it didnt tear up the wheel tho
Here it is the day i got it home.. Body is absolutely beat all to hell, looks like PO's ex got happy with a ball peen hammer and possibly an ax..
I flat towed it home, driveshaft ratchet strapped to the muffler, got home to notice that the guy had left one wheel with only one lug nut and the other rear they were all loose!!!
Luckily it didnt tear up the wheel tho
Last edited by COSXJFAN; Apr 29, 2010 at 04:23 PM. Reason: circumventing the language filters!
Thread Starter
Junior Member
Joined: Apr 2010
Posts: 97
Likes: 0
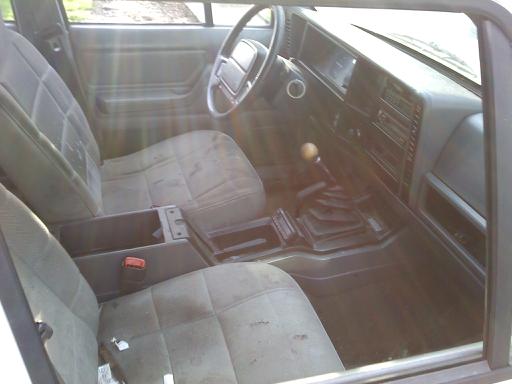
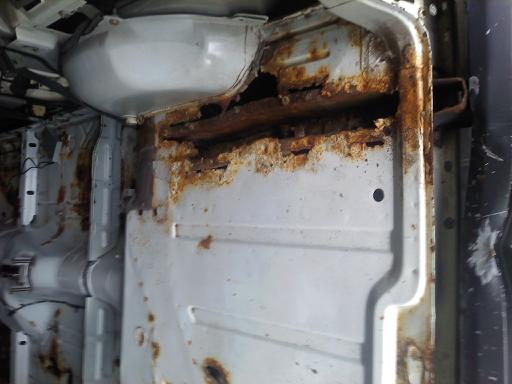
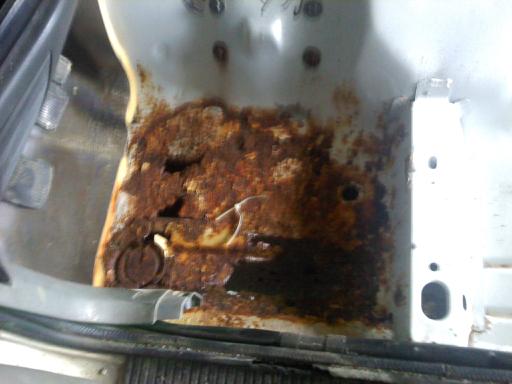
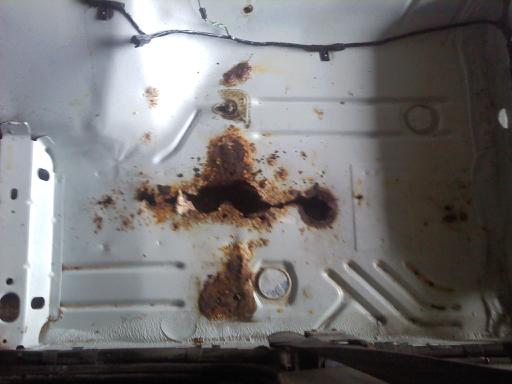
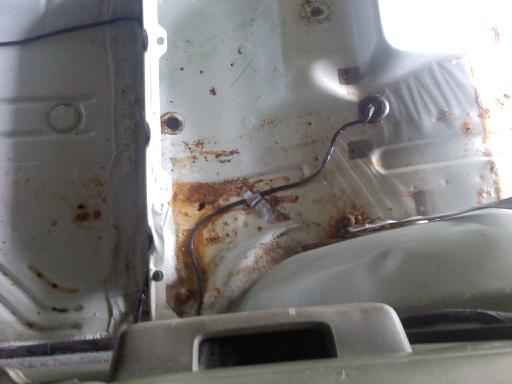
While my family was sitting in my new house on our first ever hosted Easter i was in the garage with my buddy JackD and we took the inside of the jeep apart so i could simply rhino line it.. Well this is what i ended up finding..
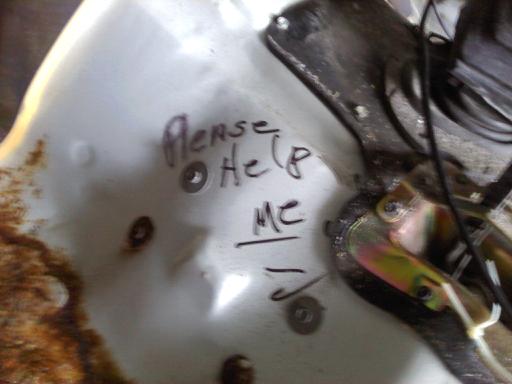
Whats funny is that it doesnt appear as though the carpet had ever been out of the car, and it was written in grease pencil, like what they use on the assembly line.. (im assuming that it was a PO'd worker having a bad day)
Whats funny is that it doesnt appear as though the carpet had ever been out of the car, and it was written in grease pencil, like what they use on the assembly line.. (im assuming that it was a PO'd worker having a bad day)
Thread Starter
Junior Member
Joined: Apr 2010
Posts: 97
Likes: 0
So what confuses me is that i looked over the thing and didnt see any rust from underneath.. Because its rotted on the top of the "frame rails" and it appears to be rotted from the inside out.. So im going to have to fix the floors. Im going to leave that for last though because the rot allows me access to all the troubled fasteners inside the rails so i can heat them and not break them.. I forgot to mention, i picked this thing up for 300 bucks, because its a 5 speed ,but it was also a 5 cylinder.. LOL

Thread Starter
Junior Member
Joined: Apr 2010
Posts: 97
Likes: 0
So now for the plan for the beast.. First order of business is to get it running and armored.. Im pretty decent at fab work, and i plan to build a set of tight fitting bumpers with recovery points and reese mounts mounted flush and using a self designed handle release pin mechanism to hold in the hitch and or winch mounted on a reese.. I plan to run dual batteries in the rear, and a huge GM single wire alternator to power all of it, wire both ends of the rig for the quick connect plug-ins for the winch and controls.. I plan to copy some type of small tube flare, do the cut and install around a 3" home brew long arm type suspension/crossmember assembly, thinking 3 link. add some airbags in the rear to help with loads a little and allow for on camber changes in ride height.
Now the fun part.. I am going to remove the stock fuel tank and all of the stock fuel system in favor of a holley baseplate style propane mixer, i stole (not litterally) off of a schwans truck. it is rated at 650 CFM which should be plenty to power the READY FOR IT!!! LS1 i plan to poke between the frame rails. I am going to run the 5 speed until i break it, then do a NV4500/NP205 combo. I plan to stick with the stock hp dana 30 in the front and the chrysler 8.25 in the rear until i break one and then swap in a set of rubicon 44s..
So what do you think so far..
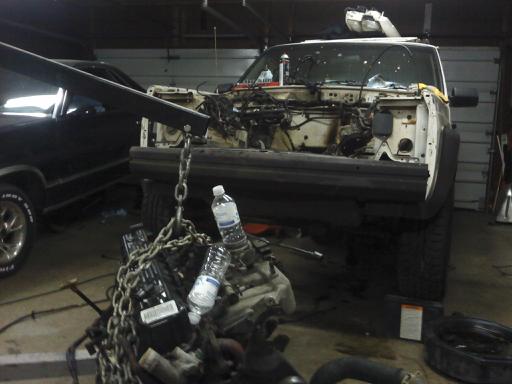
Keep in mind, this is all just me catching up with the thread, not in real time, even though it only took like 30 minutes to get the engine/trans/case out of the truck and swinging..
By the way if anyone needs a few stock XJ parts let me know. have alot for sale.. Be parts specific..
Now the fun part.. I am going to remove the stock fuel tank and all of the stock fuel system in favor of a holley baseplate style propane mixer, i stole (not litterally) off of a schwans truck. it is rated at 650 CFM which should be plenty to power the READY FOR IT!!! LS1 i plan to poke between the frame rails. I am going to run the 5 speed until i break it, then do a NV4500/NP205 combo. I plan to stick with the stock hp dana 30 in the front and the chrysler 8.25 in the rear until i break one and then swap in a set of rubicon 44s..
So what do you think so far..
Keep in mind, this is all just me catching up with the thread, not in real time, even though it only took like 30 minutes to get the engine/trans/case out of the truck and swinging..
By the way if anyone needs a few stock XJ parts let me know. have alot for sale.. Be parts specific..
Thread Starter
Junior Member
Joined: Apr 2010
Posts: 97
Likes: 0
Last night i seperated the engine from the trans.. Had a BRAND new clutch installed in it.. Bonus for me.. started stripping the LS1 down for mockup.. Im having to clean all the trans front parts though, the cylinder that left was 6 and it blew oil and crap everywhere.. I drove it all over with the hole in the block though so its my own fault..
The LS1 will have to be freshened up.. so i am going to do all the build with an empty block.. easier to move..
Right now i am working to get a pattern so the local machine shop can water jet me an adapter from the AX15 trans to the GMls1 bellhousing.. I know that Novak makes one but my theory is that since you need to space the pilot bearing .400 towards the transmission.. if you make an adapter that moves the input shaft .400 towards the crank then you wouldnt need that.. So basically i want a novak adapter that is .400 thinner and they say they cant do that, so i intend on making a two piece steel one at the local machine shop and having it tigged together..
Should work out great.. i think
CF Veteran
Joined: Jan 2010
Posts: 1,316
Likes: 1
From: Coeur d' Alene, Idaho
Year: 1998
Model: Cherokee
Engine: 4.0 rebuilt w/ bored TB, banks header, upgraded ignition, 3 row rad, high flow h2o pump, 180* t-stat
suscribed definatly followin this one...
good luck with your build man, looks like you got alot ahead of you, cant wait to see it trail ready!
definatly followin this one...good luck with your build man, looks like you got alot ahead of you, cant wait to see it trail ready!
Senior Member
Joined: Sep 2008
Posts: 504
Likes: 0
From: MD
Year: 2000
Model: Cherokee
Engine: 4.0
Sounds like you got more of a project than you bargined for. but seems like your makeing the best of it. Deffinatly gonna make for an interesting project. i will be one of the many fallowing this thread closely. keep up the good work
Trending Topics
Thread Starter
Junior Member
Joined: Apr 2010
Posts: 97
Likes: 0
Well today while at work ( oh i mean while on my break  ) i cleaned the super huge amount of trash out of the bellhousing and threw it in the steam cleaner.. cleaned up the stock flywheel and all good parts.. going home to push the Heep out into the driveway and steam clean under the hood and underneath. Then continue the disassembly. I cannot seem to figure out where i put the damper bolt and cannot pull the damper until i find it.. comes along with too many projects..
My El Camino is currently in the process of getting a custom (by me) set of adjustable control arms in the rear so it is in one bay torn apart on jack stands and the jeep is in the other.. Wife doesnt like having to leave the brand new Mini in the driveway.. Gunna have to do this quickly.. LOL
) i cleaned the super huge amount of trash out of the bellhousing and threw it in the steam cleaner.. cleaned up the stock flywheel and all good parts.. going home to push the Heep out into the driveway and steam clean under the hood and underneath. Then continue the disassembly. I cannot seem to figure out where i put the damper bolt and cannot pull the damper until i find it.. comes along with too many projects.. My El Camino is currently in the process of getting a custom (by me) set of adjustable control arms in the rear so it is in one bay torn apart on jack stands and the jeep is in the other.. Wife doesnt like having to leave the brand new Mini in the driveway.. Gunna have to do this quickly.. LOL
Member
Joined: Jul 2009
Posts: 244
Likes: 0
From: Indiana PA
Year: 1995
Model: Cherokee
Engine: 4.0L HO
I am going to follow this very closely so when my motor "goes" I know exactly what I have to do. I am going to love this thread can't wait to see the finished product.
oh and a quick question ... are you going to keep it a "stock" carbed LS1 or are you going to beef up the cam, heads and such

I am going to love this thread can't wait to see the finished product.oh and a quick question ... are you going to keep it a "stock" carbed LS1 or are you going to beef up the cam, heads and such

Thread Starter
Junior Member
Joined: Apr 2010
Posts: 97
Likes: 0
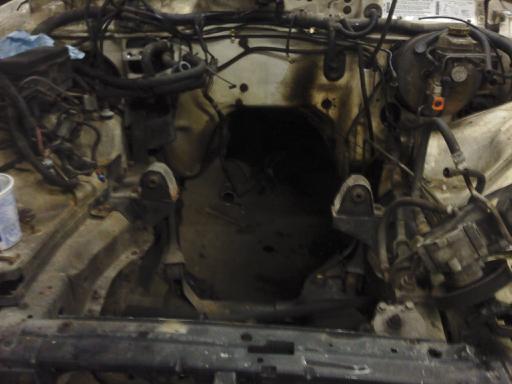
Well this evening I managed to push the Jeep out of the garage, actually it rolled off the wheel ramps and almost tore the water heater off the wall.. I hooked up the battery without anything shorting out and roll the windows up. I heaved the heep out and power washed under the hood. Finally got the rusted cage nut cut off the rear bumper and removed it totally.. Washed the rig, cleaned under it, removed the whole exhaust.. I started to remove the fuel tank but i had some items on the honey do list to take care of.. the yard doesnt mow itself.. Unluckily the lawnmower met the same fate as the jeep engine and now has a rod hanging out of the block.. LOL
Took the oportunity after the Lawnmower cut loose to take a few decent pics of the Jeep and the LS1. I also set out the bellhousings and made a comparison of install height.. Seems there is a 1 inch difference in mounting surface distance to trans.. Subtract the necessary .40 inches and you are left with .600 inches.. Not much. So i am going to go see my in house machinist and see if we can make something like that..
Will have to post pics tomorrow.. Laptop isnt cooperating
Seasoned Member
Joined: Jan 2010
Posts: 412
Likes: 0
From: Former Tampa Fl. now Southern Indiana
Year: 1990
Model: Cherokee
Engine: 4.0 HO
I see you are like me with a yard full of projects..I've been thinking of installing a 5.0 HO engine/C6/205 transfer in my Cherokee..I will be watching your build
CF Veteran
Joined: Feb 2010
Posts: 5,420
Likes: 0
From: Soddy Daisy TN
Year: 97
Model: Cherokee
Engine: 4.0L
Wouldn't waste my time with the Rubicon 44s. The front is a 30 with 44 chunk and the rear has 35 tubes. The rubi front is also low pinion like a waggy but the waggy has thicker tubes and you can use locking hubs.
Thread Starter
Junior Member
Joined: Apr 2010
Posts: 97
Likes: 0
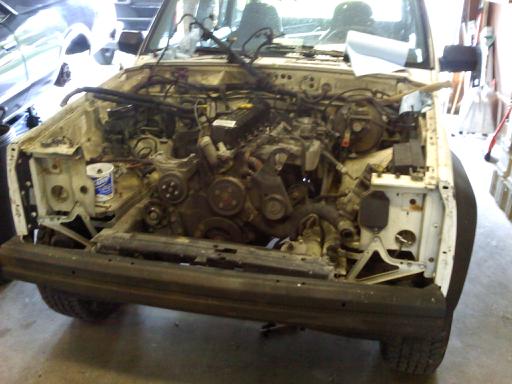
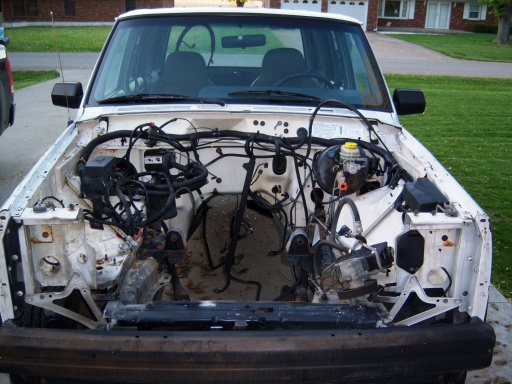
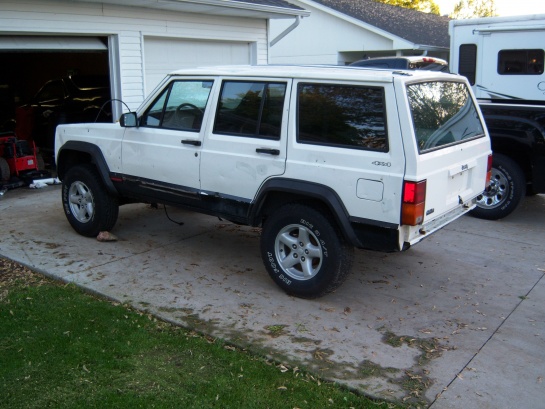
Well here are the pics of the progress.. I took a few outside shots so you could see the body damage that the rig already has.. i bet i washed 25lbs of road grime out of the body.. not mud.. like salt and traction sand.. Nasty. Anyhow here are the pics..
All washed up under the hood
Just a few outside pics
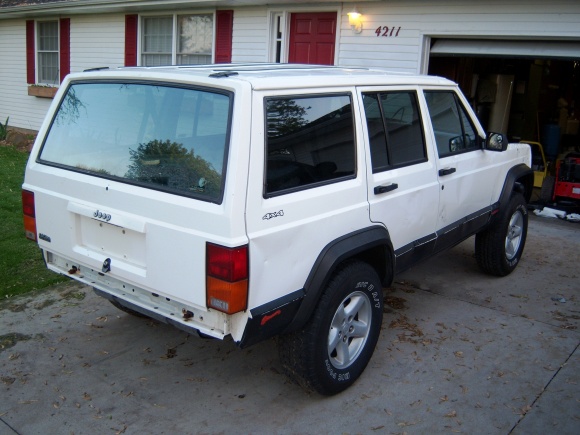
One more outside pic
All washed up under the hood
Just a few outside pics
One more outside pic