

Well, after about 1.5 years Of crawling this website and 3 different xj's its time to start a build thread for my latest and greatest
Let me start by Thanking everyone on this forum for support, Knowledge, Idea's, Inspiration, and laughs.
Here's what im working with.


2000 Limited 119,000, aw4, 242, 8.25" and a lp 30 up front. stock 3.55 gears and saggy leaves.
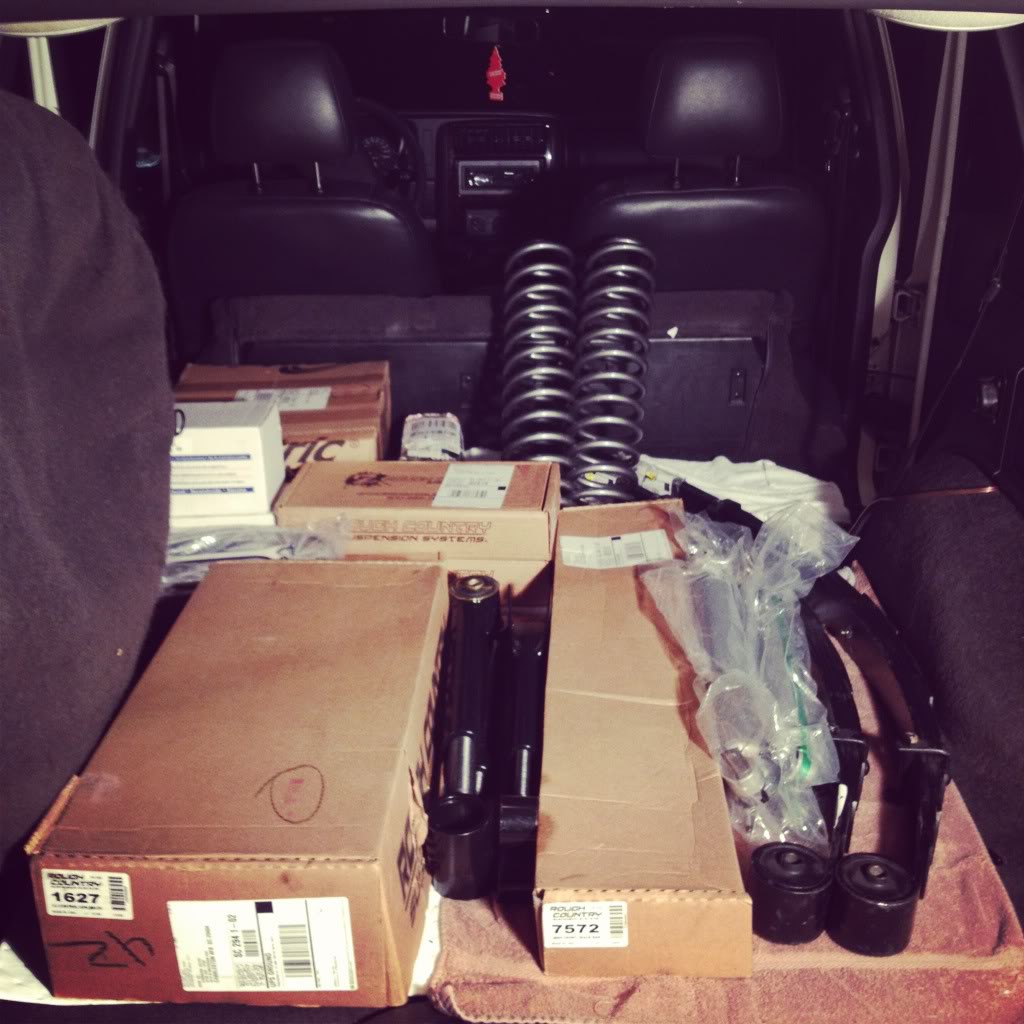
As of this morning i spent a decent bit on goodies (thank you uncle sam)
- Rough country 4.5" x series
- Rough country 1.5" wheel spacers So i can keep the icons.
- Iron Rock Offroad HnT sye/ refurbed Drive shaft
- TreadWright 265/75/R16's Guard dog Formerly Bfg M/t's
- Rampage h4 Headlight Conversion
- Eautoworks Upgraded/heavy duty headlight harness stock# PUT230004HW
Hoping everything is here by next weekend so me and my buddy can bust our knuckles and eat wings.
But before hand i went out with my coworker and his yota.
I kept up Pretty well until it came to a sloppy Hill at about 30% grade.

He's sitting on about 6" of lift and 33x11.50
Let me start by Thanking everyone on this forum for support, Knowledge, Idea's, Inspiration, and laughs.
Here's what im working with.
2000 Limited 119,000, aw4, 242, 8.25" and a lp 30 up front. stock 3.55 gears and saggy leaves.
As of this morning i spent a decent bit on goodies
(thank you uncle sam)- Rough country 4.5" x series
- Rough country 1.5" wheel spacers So i can keep the icons.
- Iron Rock Offroad HnT sye/ refurbed Drive shaft
- TreadWright 265/75/R16's Guard dog Formerly Bfg M/t's
- Rampage h4 Headlight Conversion
- Eautoworks Upgraded/heavy duty headlight harness stock# PUT230004HW
Hoping everything is here by next weekend so me and my buddy can bust our knuckles and eat wings.
But before hand i went out with my coworker and his yota.
I kept up Pretty well until it came to a sloppy Hill at about 30% grade.
He's sitting on about 6" of lift and 33x11.50
I would like to take a moment to share my history with xj's
My first. The one that got the itch started!

This was a 99 sport 2 door 2wd With 180,000 miles.
I owned it for about 8 months and after a Surf trip to the obx in nc and getting stuck in sand driveways i was done with 2wd.
I sold it for 700$ more than i bought it for. and bought this for 2500 as is

91 Laredo. Locked front and rear with detroits. 4.88 gears. Armored front to back, sliders. and 33x12.50 Sitting on a 6.5" short arm. The odometer was sitting at around 278,000. It was a monster. But 10 mpg. and so many electrical issue's That i started going crazy! Then someone shows up and offer's me 5 grand for it on the spot. Sure enough i miss it. but i let it go. My wife wasn't a big fan either when it was our only vehicle for about 2 months.
Which leaves me where i am now. Building my own. Trying to learn from mine and everyone elses mistakes/regrets. I miss that heep. but i see it now and again and know its in good hands. :cheers2:
My first. The one that got the itch started!
This was a 99 sport 2 door 2wd With 180,000 miles.
I owned it for about 8 months and after a Surf trip to the obx in nc and getting stuck in sand driveways i was done with 2wd.
I sold it for 700$ more than i bought it for. and bought this for 2500 as is
91 Laredo. Locked front and rear with detroits. 4.88 gears. Armored front to back, sliders. and 33x12.50 Sitting on a 6.5" short arm. The odometer was sitting at around 278,000. It was a monster. But 10 mpg. and so many electrical issue's That i started going crazy! Then someone shows up and offer's me 5 grand for it on the spot. Sure enough i miss it. but i let it go. My wife wasn't a big fan either when it was our only vehicle for about 2 months.
Which leaves me where i am now. Building my own. Trying to learn from mine and everyone elses mistakes/regrets. I miss that heep. but i see it now and again and know its in good hands. :cheers2:
The first few items to Take care of On the new addition to the family were maintance issues. First off. my coolant WAS disgusting Rusty and had all sorts of sediment in it. surely the p/o used hose water in exchange for coolant.
So i installed a 3core csf, All new hoses. Flushed the system nice and good, New thermostat. And it stays at a cool 205 or cooler now. But I have more recently noticed A Mystery loss of coolant. My bets are That Ive got a 0331 winner. Ill find out in 2 weeks when i get back from a trip and tear the head off and get it pressure tested.
Plenty Of pics to come tomorrow. Looking Forward to Sharing the Experience With everyone!:wave::wave:
Well, The first of All my ordered goodies Came in today! I promise when i do the install ill show the new wiring harness and the old compared to new with side shots.
Teaser

First Issues i wanted to address were the Deteriorating Charging system Cables after they left me hanging When my wife and i went surfing a few weeks ago.
So I made a trip down to west Marine and bought some 4 guage Wire and fittings to craft my own. I used jeephammr's Write up for referance And sealed them off with what i had availible. Not quite as pretty but it worked perfect none the less, Going on 6 months now no issues.
http://www.jeepforum.com/forum/f8/ma...rectly-691172/
I also used a coating of melted petroleum jelly and baking soda on the open copper wire before inserting them in the Terminals to help prevent corrosion.
While i was at it i picked up a duracell battery @ samsclub for 80 bucks. Its got the glasspack base like most expensive batteries. And a 5 year warranty so why not.


After That i Decide to Get it dirty! Dont Underestimate A stock jeep. however, some clearence was to be desired. My wife and i spent 3 hours on christmas day with the rear diff Sunk into the mount between some ruts i slid into.


So i installed a 3core csf, All new hoses. Flushed the system nice and good, New thermostat. And it stays at a cool 205 or cooler now. But I have more recently noticed A Mystery loss of coolant. My bets are That Ive got a 0331 winner. Ill find out in 2 weeks when i get back from a trip and tear the head off and get it pressure tested.
Plenty Of pics to come tomorrow. Looking Forward to Sharing the Experience With everyone!:wave::wave:
Well, The first of All my ordered goodies Came in today! I promise when i do the install ill show the new wiring harness and the old compared to new with side shots.
Teaser
First Issues i wanted to address were the Deteriorating Charging system Cables after they left me hanging When my wife and i went surfing a few weeks ago.
So I made a trip down to west Marine and bought some 4 guage Wire and fittings to craft my own. I used jeephammr's Write up for referance And sealed them off with what i had availible. Not quite as pretty but it worked perfect none the less, Going on 6 months now no issues.
http://www.jeepforum.com/forum/f8/ma...rectly-691172/
I also used a coating of melted petroleum jelly and baking soda on the open copper wire before inserting them in the Terminals to help prevent corrosion.
While i was at it i picked up a duracell battery @ samsclub for 80 bucks. Its got the glasspack base like most expensive batteries. And a 5 year warranty so why not.
After That i Decide to Get it dirty! Dont Underestimate A stock jeep. however, some clearence was to be desired. My wife and i spent 3 hours on christmas day with the rear diff Sunk into the mount between some ruts i slid into.
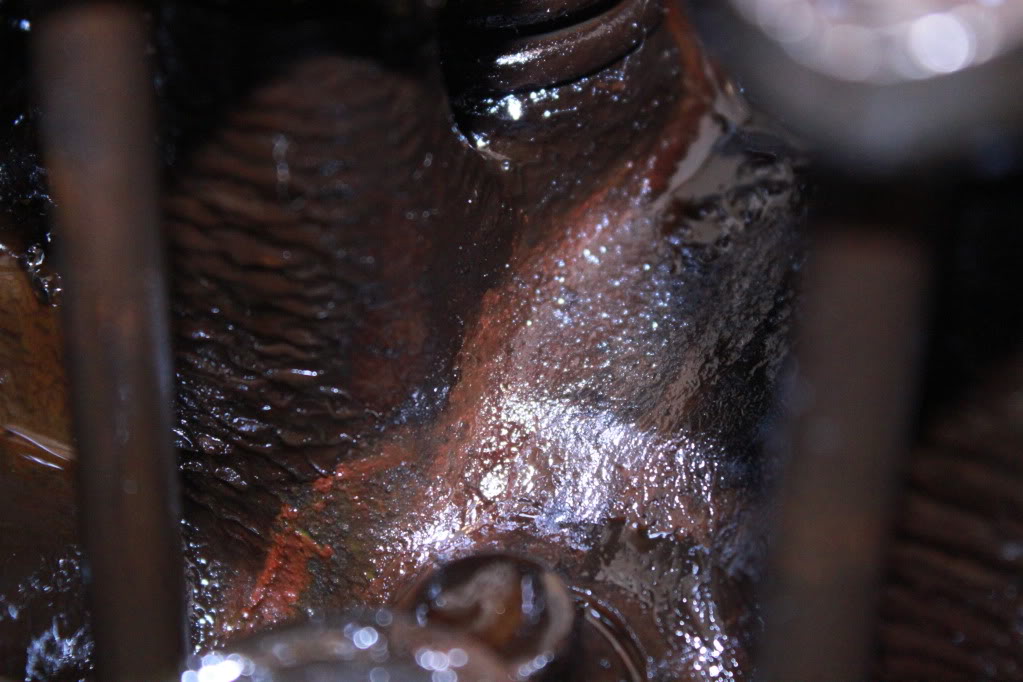
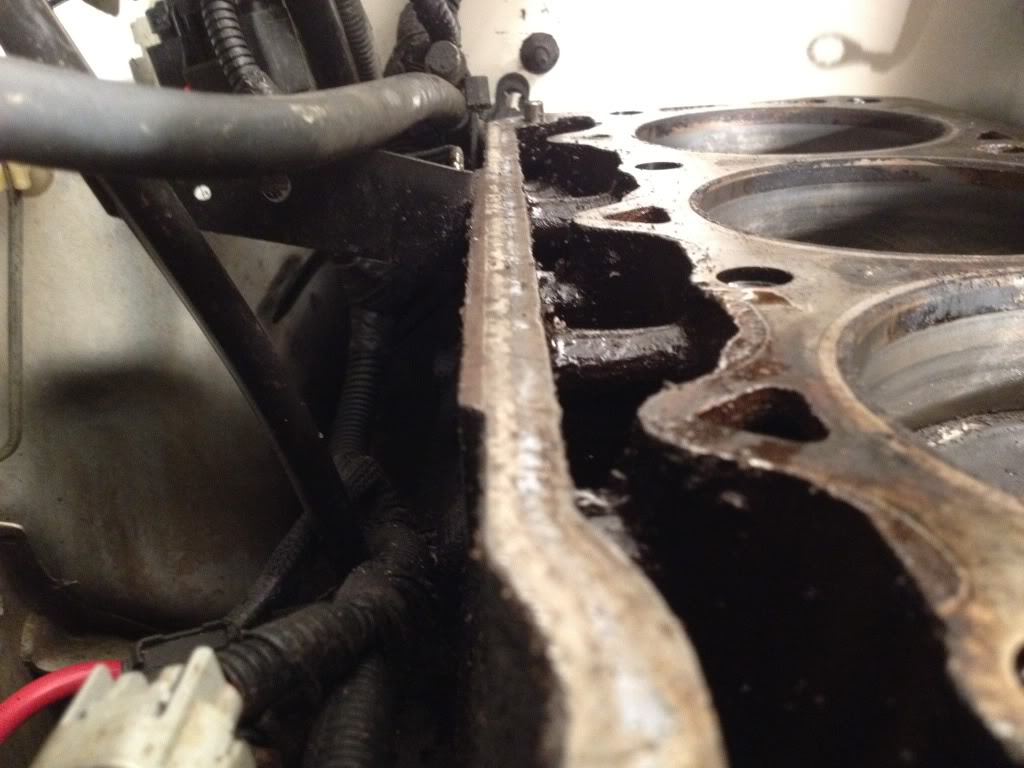
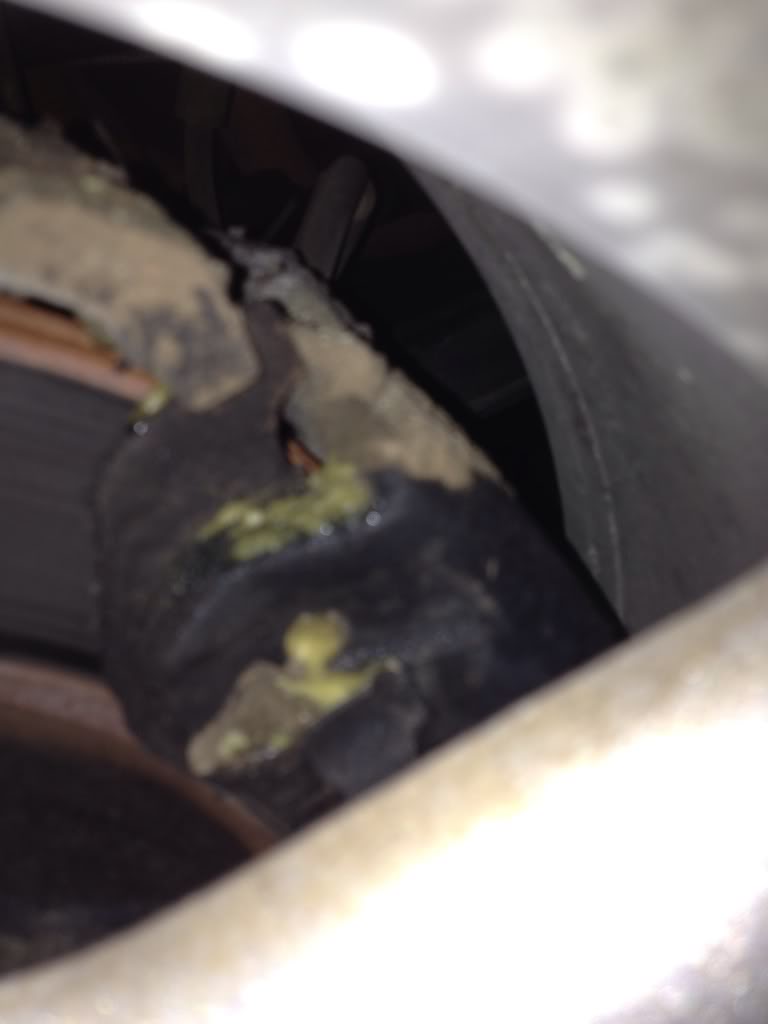
After Coming home I Did my Usual Inspection/Cleaning And i stumble upon this.

I guess a Bunch Of wonderful Sediment left behind from the previous Owner had worked its way loose when i put it through its rpm range in 4wd. But the motor had been creeping suspiciously close to 210 when driving around, and inching its way between 210 and 220 with a/c on in traffic. (its a must in Charleston) So I Figured id Start with main vain.
So i Ordered a CSF 3 Core All Aluminum Radiator... Which btw for 200 dollars should come with a radiator cap. If its made for a jeep Id think the pressure rating is the same across the board. But maybe it fits Other vehicles aswell.
(edit; 700 miles later the csf started pissing fluid from the core, and it's really dissapointing, also partstrain.com will never get my business again. it took 4 hours on customer service phone calls and over a week to get them to give me a stock 1 row as my replacement and refund me the differnce. the stock one last 120,000 miles and this aftermarket 3 row lasted 2 months without even wheeling)
Out with the old, In with the new

Along with the new Rad, I flushed(and back flushed) The heater core. Heat works now! Replaced the heatercore hoses, Upper and lower rad hoses, All clamps, Fan flutch, Fan shroud because i broke it during removal (12 year old brittle plastic), And the Coolant bottle because it was stained disgusting brown.
I guess a Bunch Of wonderful Sediment left behind from the previous Owner had worked its way loose when i put it through its rpm range in 4wd. But the motor had been creeping suspiciously close to 210 when driving around, and inching its way between 210 and 220 with a/c on in traffic. (its a must in Charleston) So I Figured id Start with main vain.
So i Ordered a CSF 3 Core All Aluminum Radiator... Which btw for 200 dollars should come with a radiator cap. If its made for a jeep Id think the pressure rating is the same across the board. But maybe it fits Other vehicles aswell.
(edit; 700 miles later the csf started pissing fluid from the core, and it's really dissapointing, also partstrain.com will never get my business again. it took 4 hours on customer service phone calls and over a week to get them to give me a stock 1 row as my replacement and refund me the differnce. the stock one last 120,000 miles and this aftermarket 3 row lasted 2 months without even wheeling)
Out with the old, In with the new
Along with the new Rad, I flushed(and back flushed) The heater core. Heat works now! Replaced the heatercore hoses, Upper and lower rad hoses, All clamps, Fan flutch, Fan shroud because i broke it during removal (12 year old brittle plastic), And the Coolant bottle because it was stained disgusting brown.
So After A few weeks of replacing my almost entire Cooling system, Im Still loosing coolant. DUN DUN DUN!!!!!
I do see a little gloss on the side of the block near the head gasket. But Also i smell coolant when the heat is on. But no damp carpet... So I think In a week or so im going to pull the head and get it pressure tested since i have a 0331. Until then im Staying off the trails. And only driving it to work and back. about 3.2 miles round trip per day. Barely enough to get up to operating temp. So while im crusing around I figured i could use Some Bump in my system.
With the help of some of my airforce commrades, I pieced together An amp and subwoofer in a sealed box for a total of 15 dollars
My buddy with a tj Had a 12" rockford in his mustang before he sold it With a 250x1 kenwood amp. He was willing to part with them For a future assist on his jeep, which i would have done anyway. Any opportunity to hack on other peoples stuff And bull**** sounds like a good day to me..
Then another coworkers Audio store was Overstocked on wiring kits. so he hooked me up with an older schoche 8 guage with an inline fuse.
Out comes the interior (a good opportunity to Clean the carpets anyway.

I Ran The Positive wire From the battery, Along the firewall right infront of the Cowling/wipermotorers. Through the rubber grommet in the firewall on the drivers side. Up under the dash to the center console where i routed it under the center console through the carpet to the Amp which is under the Fwd Passenger Seat. The fuse is about 8" from the battery because the closer the better. And I used a wire brush to scrape the paint under the back right seat post hole. Which is where i ran the ground too. Because the shorter the ground the better. I hooked all this up to a pioneer headunit, And threw some kicker 5.25" speakers in the roof and doors. (buy one set get one free on the crutch) Total stereo investment now sits at 225 Dollars.
And it sounds Wonderful! For about a week -_- ... Then the 9 year old subwoofer starts to become intermittent. And after an hour with a multi meter and my electrician co worker. We traced it to the coil in the subwoofer. So rather than try and repair it. I used a 50$ best buy gift card i found in a bowling alley parking lot to Pick up a kicker 12" comp Sub At a day after christmas sale at best buy. And after the break in period i couldnt be happier with my now 65$ invested subwoofer/amp setup. Aside from loosing a little space. Its so easy to disconnect it takes me 12 seconds to get my trunk space back if i need it. Picks will come soon of it installed.
I do see a little gloss on the side of the block near the head gasket. But Also i smell coolant when the heat is on. But no damp carpet... So I think In a week or so im going to pull the head and get it pressure tested since i have a 0331. Until then im Staying off the trails. And only driving it to work and back. about 3.2 miles round trip per day. Barely enough to get up to operating temp. So while im crusing around I figured i could use Some Bump in my system.
With the help of some of my airforce commrades, I pieced together An amp and subwoofer in a sealed box for a total of 15 dollars
My buddy with a tj Had a 12" rockford in his mustang before he sold it With a 250x1 kenwood amp. He was willing to part with them For a future assist on his jeep, which i would have done anyway. Any opportunity to hack on other peoples stuff And bull**** sounds like a good day to me..
Then another coworkers Audio store was Overstocked on wiring kits. so he hooked me up with an older schoche 8 guage with an inline fuse.
Out comes the interior (a good opportunity to Clean the carpets anyway.
I Ran The Positive wire From the battery, Along the firewall right infront of the Cowling/wipermotorers. Through the rubber grommet in the firewall on the drivers side. Up under the dash to the center console where i routed it under the center console through the carpet to the Amp which is under the Fwd Passenger Seat. The fuse is about 8" from the battery because the closer the better. And I used a wire brush to scrape the paint under the back right seat post hole. Which is where i ran the ground too. Because the shorter the ground the better. I hooked all this up to a pioneer headunit, And threw some kicker 5.25" speakers in the roof and doors. (buy one set get one free on the crutch) Total stereo investment now sits at 225 Dollars.
And it sounds Wonderful! For about a week -_- ... Then the 9 year old subwoofer starts to become intermittent. And after an hour with a multi meter and my electrician co worker. We traced it to the coil in the subwoofer. So rather than try and repair it. I used a 50$ best buy gift card i found in a bowling alley parking lot to Pick up a kicker 12" comp Sub At a day after christmas sale at best buy. And after the break in period i couldnt be happier with my now 65$ invested subwoofer/amp setup. Aside from loosing a little space. Its so easy to disconnect it takes me 12 seconds to get my trunk space back if i need it. Picks will come soon of it installed.
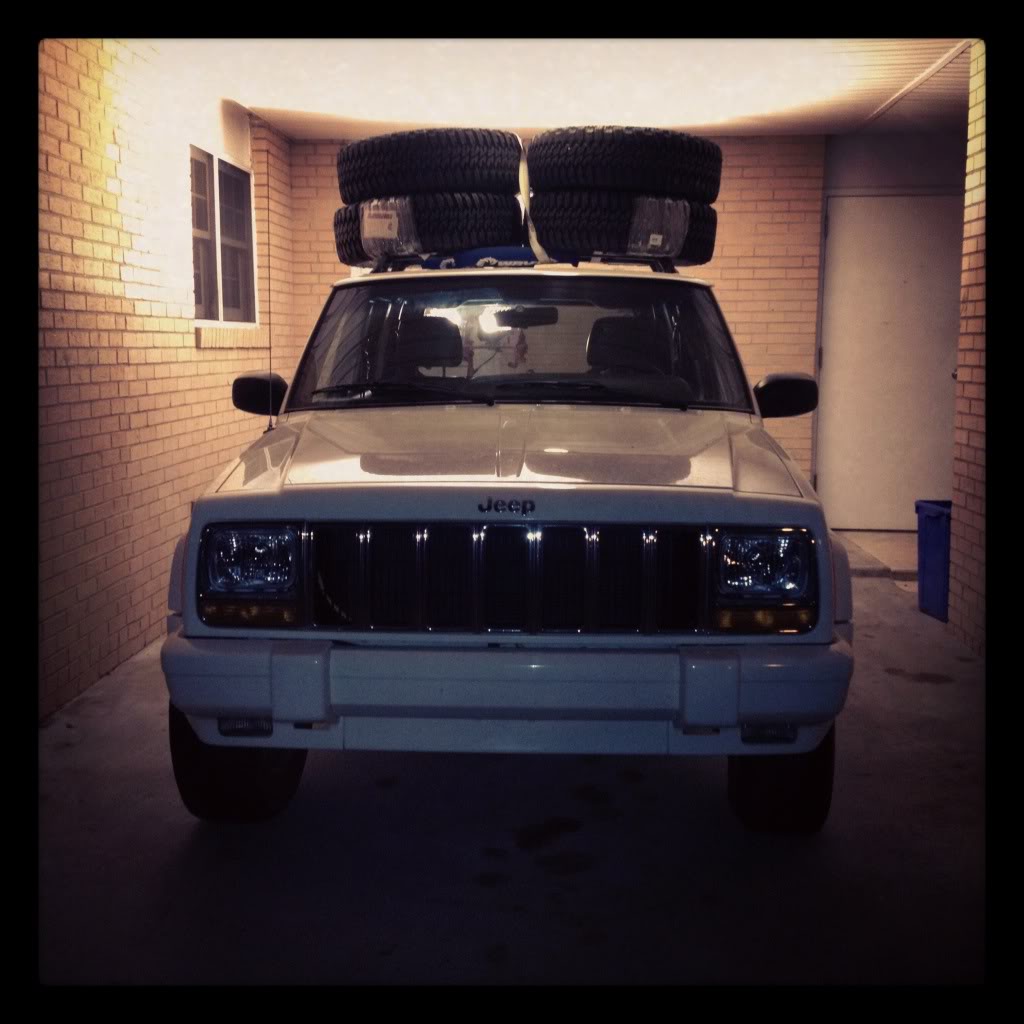
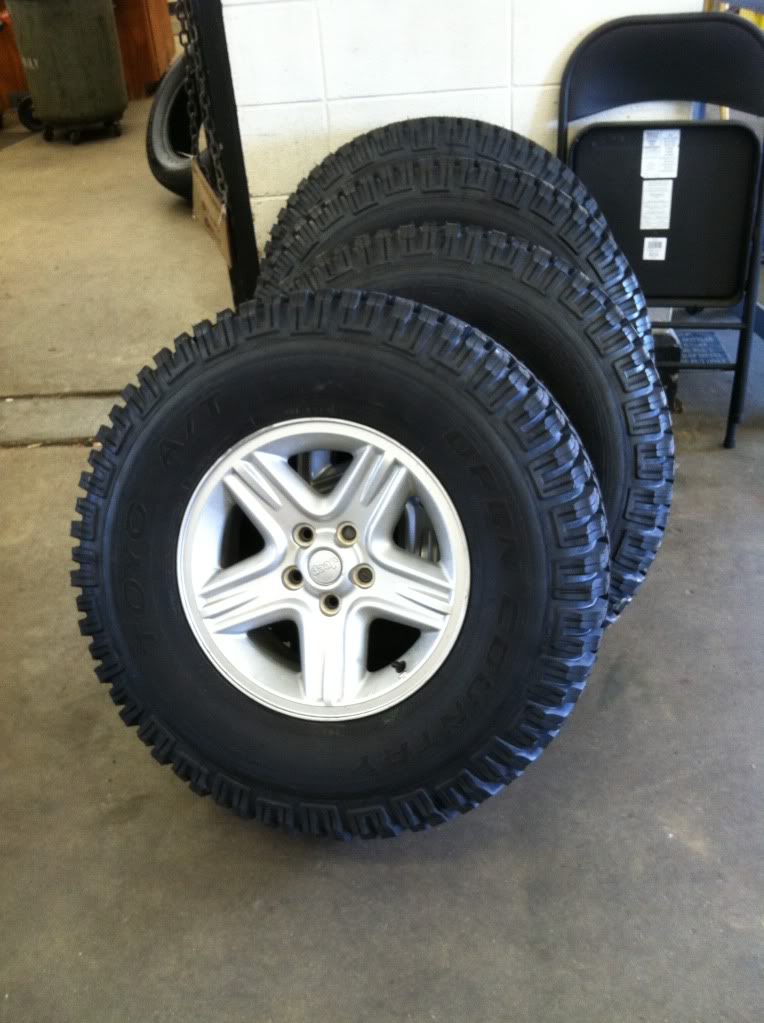
In Other news my Retreads Showed up today! treadwright guard dogs (tires marked toyo open country) With bfg M/T tread pattern.

They look awesome! Cant wait to get them mounted after my lift finally comes in.
:update- Called rough country today, My order should have been here today since i ordered last saturday. But the front springs are out of stock until next week. So looks like this 3 day weekend will go to waste. On the other hand I did get my wife the help me run wires

And My tj friend and i convinced my other friend to trade his civic in on a jk. And it worked! Within a week he ordered a 2.5" kit and treadwrights. So we helped him install it over a few beers last week (they enjoyed the beverages. while i did the work. J/K we all got our hands dirty. :?


Hopefully My lift/driveshaft/hnt/Wheel spacers/and drop brackets. Will all get here by next weekend. Im Starting a Professional Military education class tommorow anyway so its probably best my first weekend is free so i can get ahead of schedule on some of the Assignments. bleck... Cheers everyone
They look awesome! Cant wait to get them mounted after my lift finally comes in.
:update- Called rough country today, My order should have been here today since i ordered last saturday. But the front springs are out of stock until next week. So looks like this 3 day weekend will go to waste. On the other hand I did get my wife the help me run wires
And My tj friend and i convinced my other friend to trade his civic in on a jk. And it worked! Within a week he ordered a 2.5" kit and treadwrights. So we helped him install it over a few beers last week (they enjoyed the beverages. while i did the work. J/K we all got our hands dirty. :?
Hopefully My lift/driveshaft/hnt/Wheel spacers/and drop brackets. Will all get here by next weekend. Im Starting a Professional Military education class tommorow anyway so its probably best my first weekend is free so i can get ahead of schedule on some of the Assignments. bleck... Cheers everyone
Been About 2 weeks since i last updated the build thread. And a busy two weeks at that.... so after i pulled the coolant cap and found that crap and under my valve cover oil fill cap. I stopped driving it until i got my priorities straight. My buddy was comming down for 4 days and i figured what better way to entertain a guest..
Just a warning, im a picture crazy person.
119,998 miles. Another one bites the dust....
So lets get down to the nitty gritty. I ordered a new head from clearwater cylinder head in Florida (btw best customer service ever) They even gave me free freight shipping on an 80 lb head since im military. maybe they will do a jeep forum discount. Since it was expected to be here by tuesday my buddy kyle and i got down into it. Let the images begin.
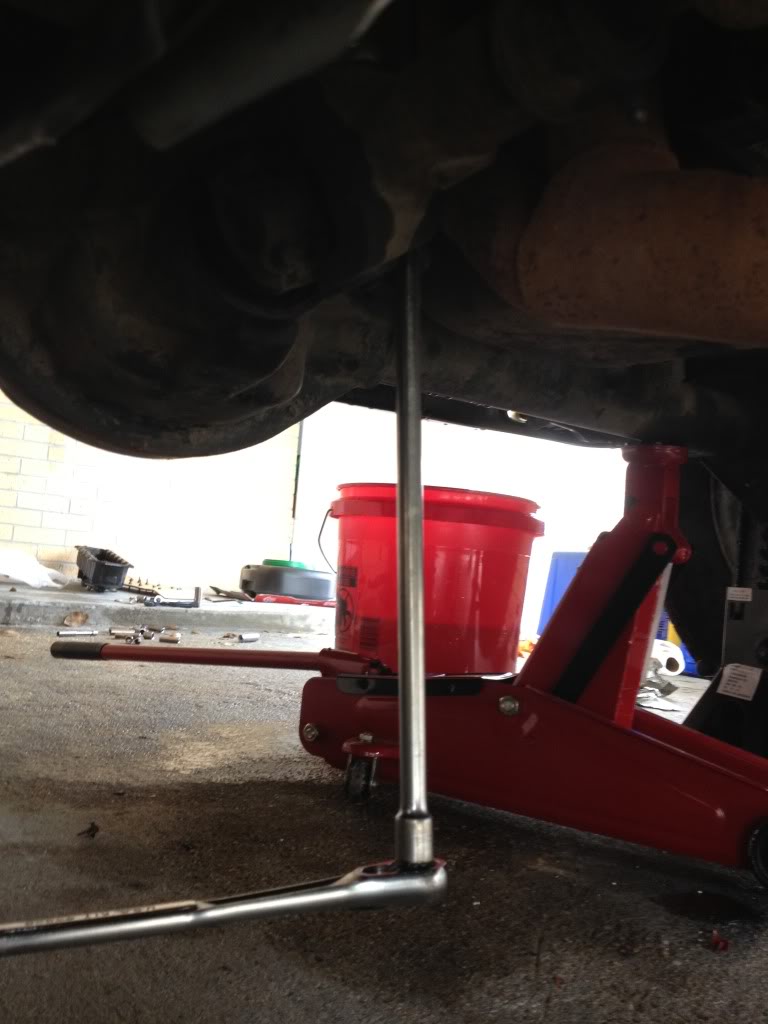
First things first, I got a bunch of parts bags together and placed a bunch of soak-em-up underneath the front end.
Drained the coolant, and since it hadnt been turned over in about 2 days i wasnt to worried about the fuel pressure. disconnected the battery and used a 5 dollar tool from pep boys. 3/8" i believe. its 2 sizes on each end. just got the smaller of the two they offered.
Disconnected the fuel line
removed the airbox,and hose to the throttle body to give me some room to get in there.
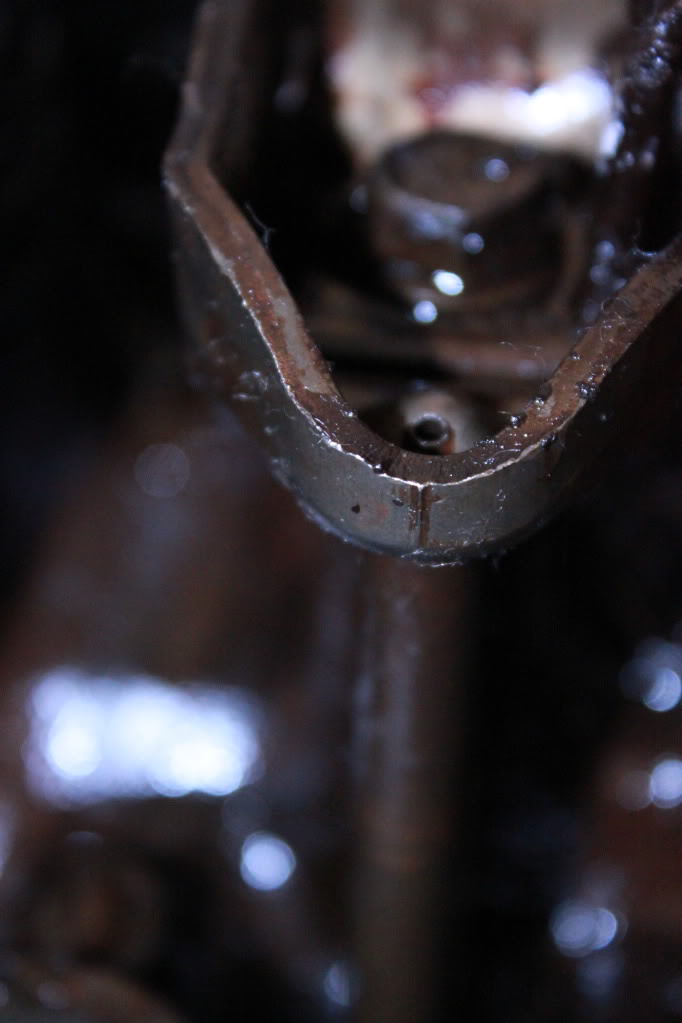
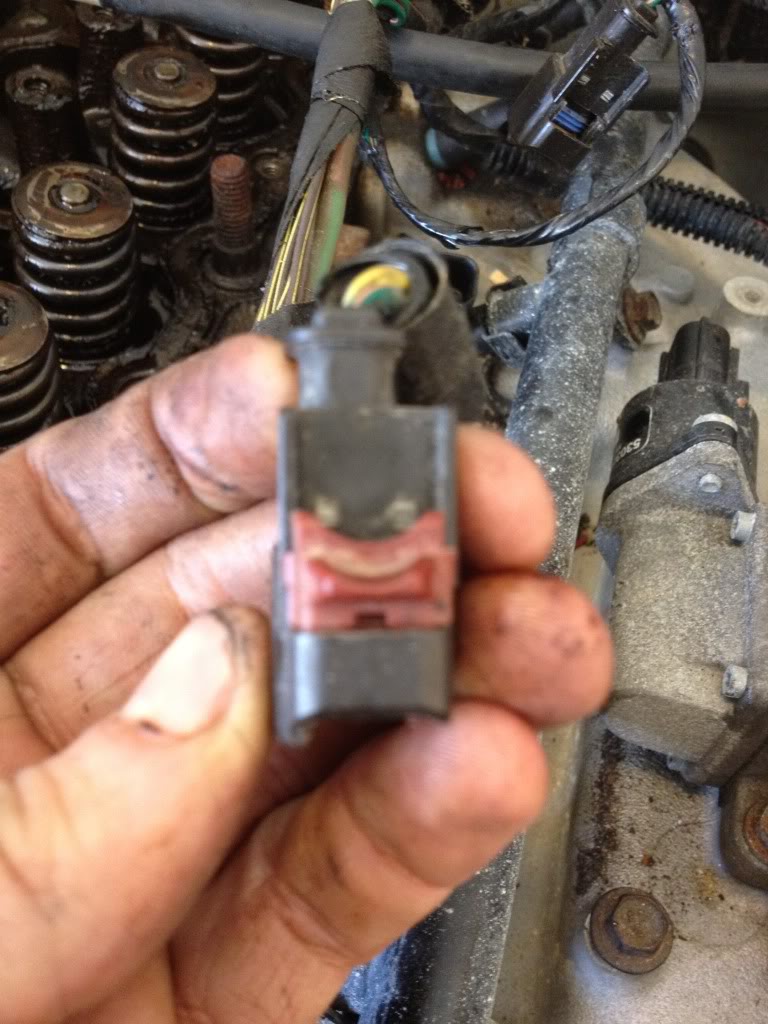
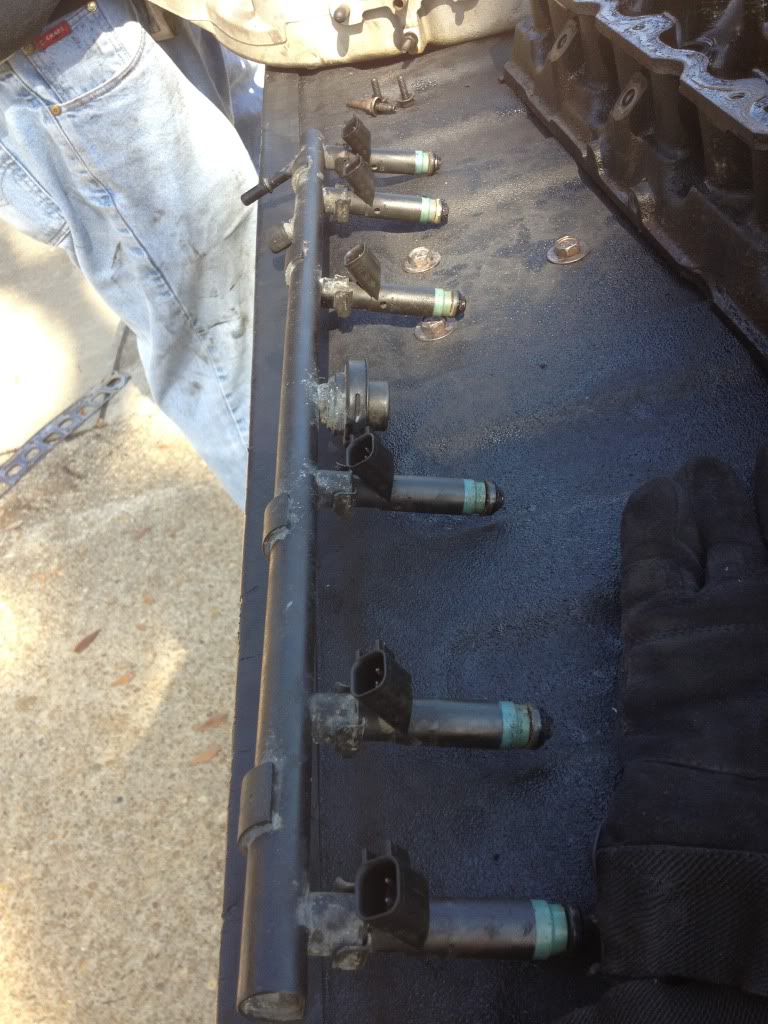
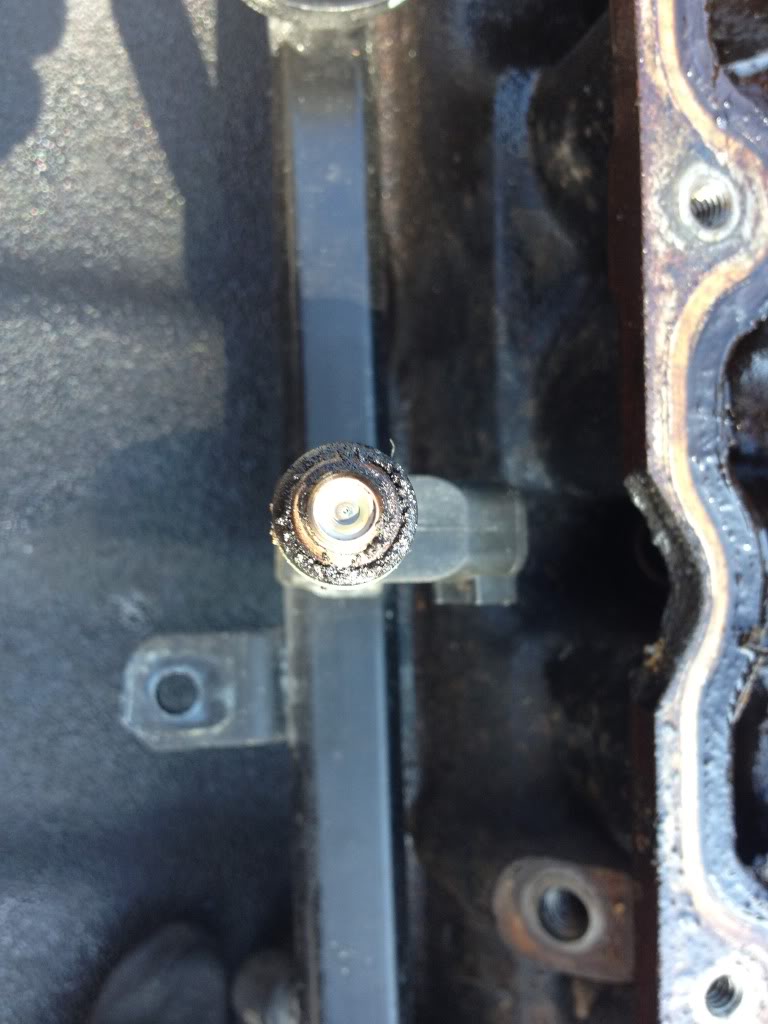
started to pull the injectors. 12 years old and the heat in the south has gotten to them. with little pressure after sliding the red tabs up to unlock them this happened. TO EVERY SINGLE ONE!!!

Just a warning, im a picture crazy person.
119,998 miles. Another one bites the dust....
So lets get down to the nitty gritty. I ordered a new head from clearwater cylinder head in Florida (btw best customer service ever) They even gave me free freight shipping on an 80 lb head since im military. maybe they will do a jeep forum discount. Since it was expected to be here by tuesday my buddy kyle and i got down into it. Let the images begin.
First things first, I got a bunch of parts bags together and placed a bunch of soak-em-up underneath the front end.
Drained the coolant, and since it hadnt been turned over in about 2 days i wasnt to worried about the fuel pressure. disconnected the battery and used a 5 dollar tool from pep boys. 3/8" i believe. its 2 sizes on each end. just got the smaller of the two they offered.
Disconnected the fuel line
removed the airbox,and hose to the throttle body to give me some room to get in there.
started to pull the injectors. 12 years old and the heat in the south has gotten to them. with little pressure after sliding the red tabs up to unlock them this happened. TO EVERY SINGLE ONE!!!
Let me state, That before i did anything. i took about 20 photos from differnt angles and i did a 3 minuite video explaining to myself while panning the camera what lines went from this point to this point and what components they were attached to.
Much credit deserved to the6nightmares, because his thread on replacing his head helped me SOOOO MUCH. Thank you again sir.
Then i started ripping stuff out,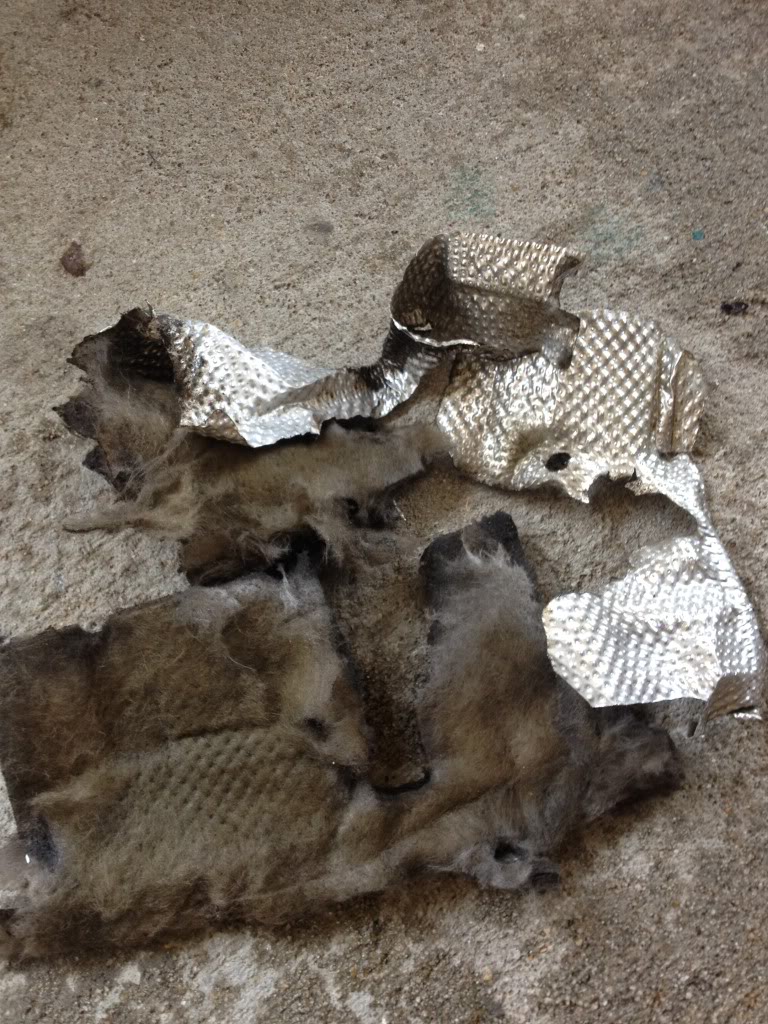
Disconnected the exhaust manifold from the downpipe. I dont have a california equiped 2000 xj, so i dont have two more precats up their thank god. At first they would not budge!!!! but i blasted them with some pb blaster. came back 5 minuites later and it took almost no force to break them free. glad i didn't have to use a saws-all
Wonderful sword of extensions to reach it from the ground while my buddy held a 15mm box end wrench on the nutplates from the mani down.
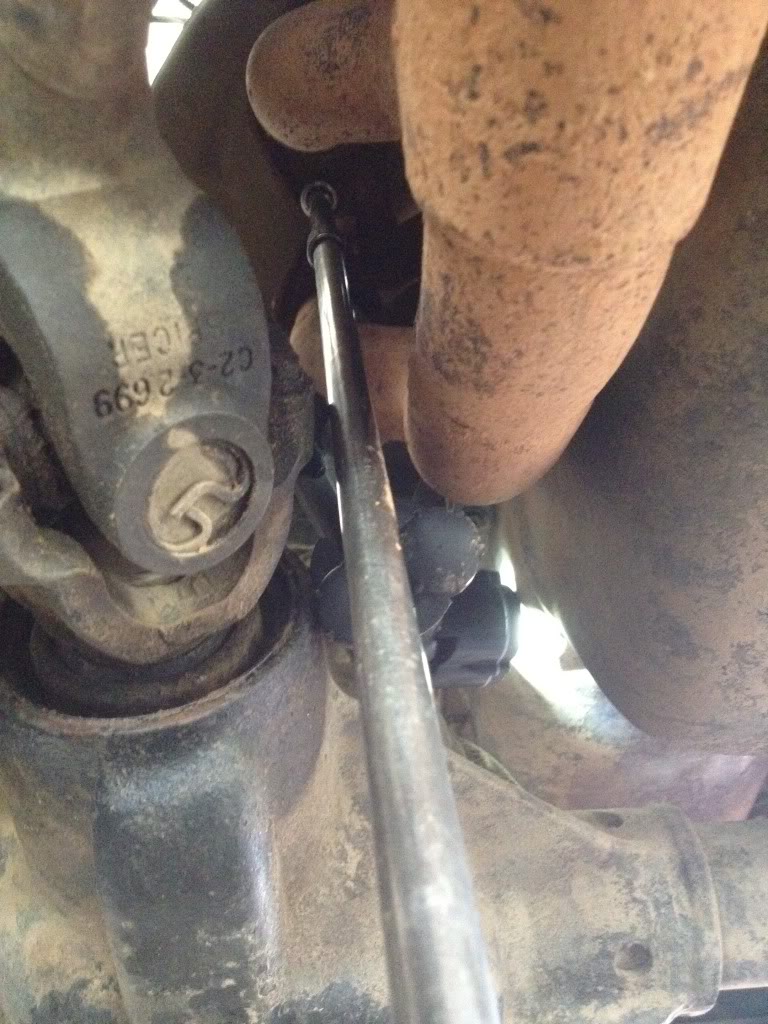
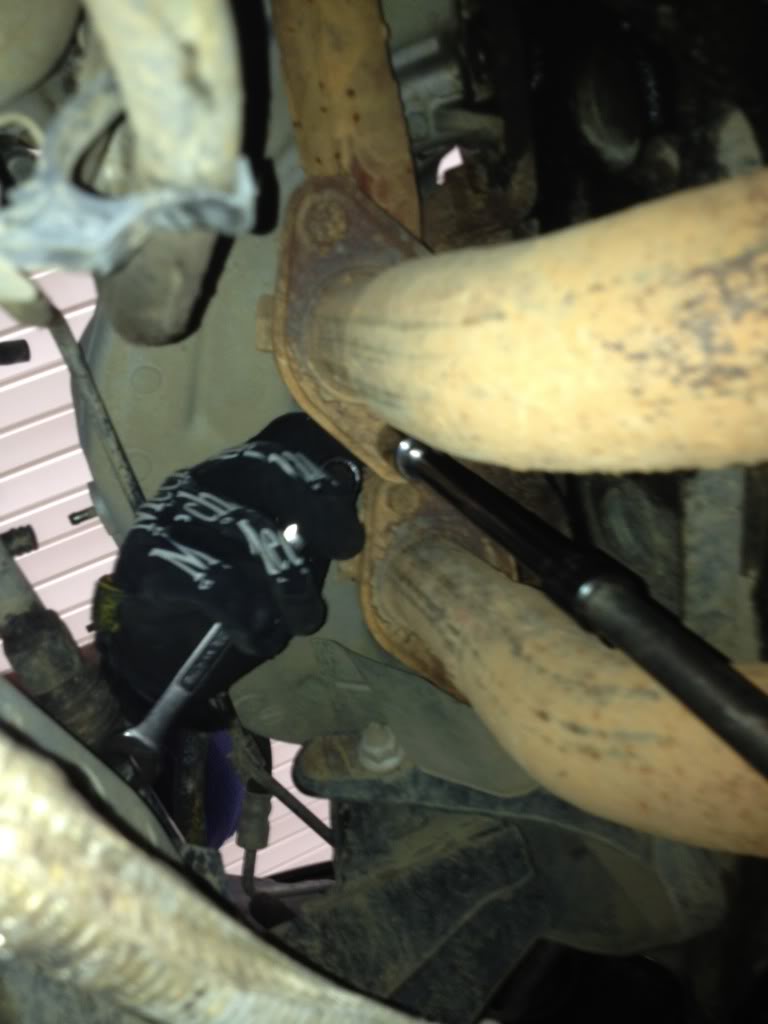
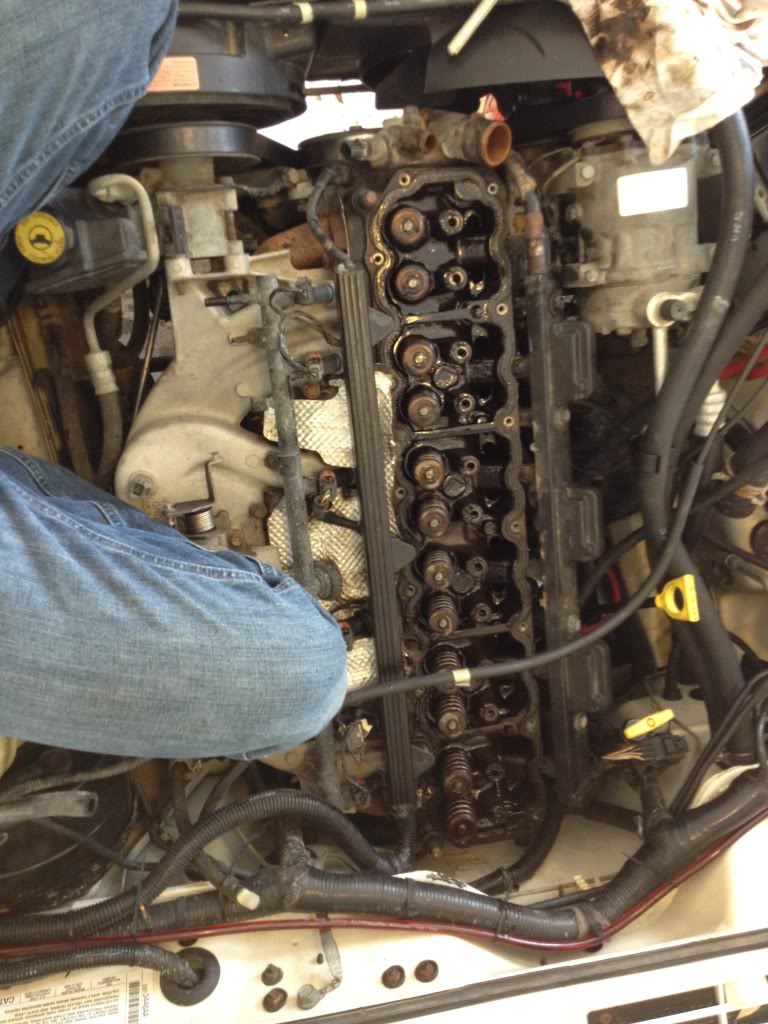
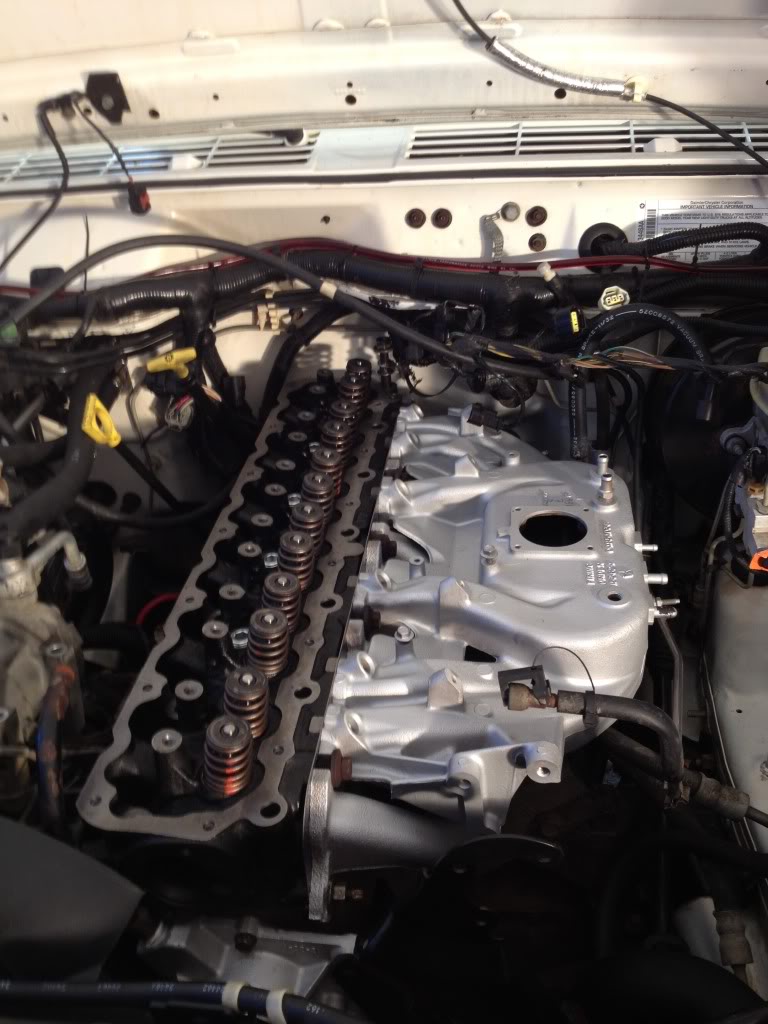
After that i Disconnected all vacuum lines, Throttle cables, and sensors secured to the side of the head, belt, Power steering pump (dont disconnect lines) a/c comp (dont disconnect lines, just 4 bolts on top and 2 attached to the head.) Took out the tension pullet bracket. And water pump. Disconnected all the radiator hoses. Basically anything that was in the way. Common sense stuff. And got a neighbor to help me lift it up and out. Pulled the head bolts which took some pb blaster and a cheater bar. #14 wont come out so you just have to lift it up and wrap some painters tape around the shaft so it doesn't catch. lifted up the front end of the head and intake/exhaust mani and slid a cargo strap underneath it. they stood on the side and front lifting from their and the back of the head. while i was sitting where the air box was guiding the mani's and moving lines out of the way. (dont step on your steering system....)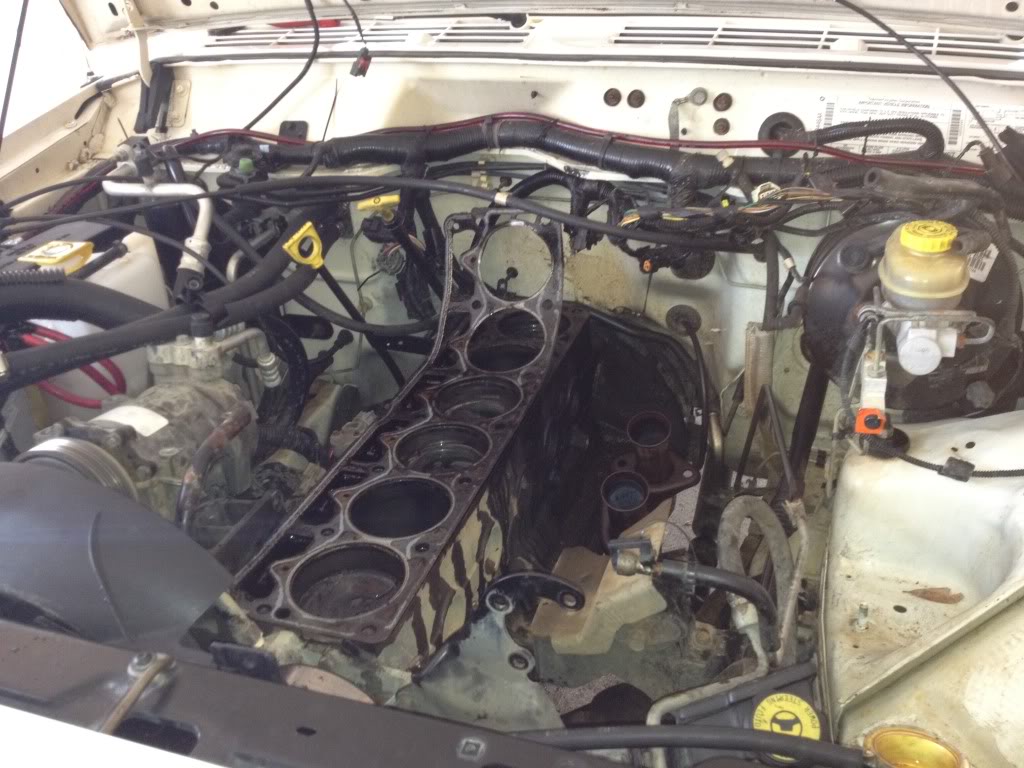

Much credit deserved to the6nightmares, because his thread on replacing his head helped me SOOOO MUCH. Thank you again sir.
Then i started ripping stuff out,
Disconnected the exhaust manifold from the downpipe. I dont have a california equiped 2000 xj, so i dont have two more precats up their thank god. At first they would not budge!!!! but i blasted them with some pb blaster. came back 5 minuites later and it took almost no force to break them free. glad i didn't have to use a saws-all
Wonderful sword of extensions to reach it from the ground while my buddy held a 15mm box end wrench on the nutplates from the mani down.
After that i Disconnected all vacuum lines, Throttle cables, and sensors secured to the side of the head, belt, Power steering pump (dont disconnect lines) a/c comp (dont disconnect lines, just 4 bolts on top and 2 attached to the head.) Took out the tension pullet bracket. And water pump. Disconnected all the radiator hoses. Basically anything that was in the way. Common sense stuff. And got a neighbor to help me lift it up and out. Pulled the head bolts which took some pb blaster and a cheater bar. #14 wont come out so you just have to lift it up and wrap some painters tape around the shaft so it doesn't catch. lifted up the front end of the head and intake/exhaust mani and slid a cargo strap underneath it. they stood on the side and front lifting from their and the back of the head. while i was sitting where the air box was guiding the mani's and moving lines out of the way. (dont step on your steering system....)
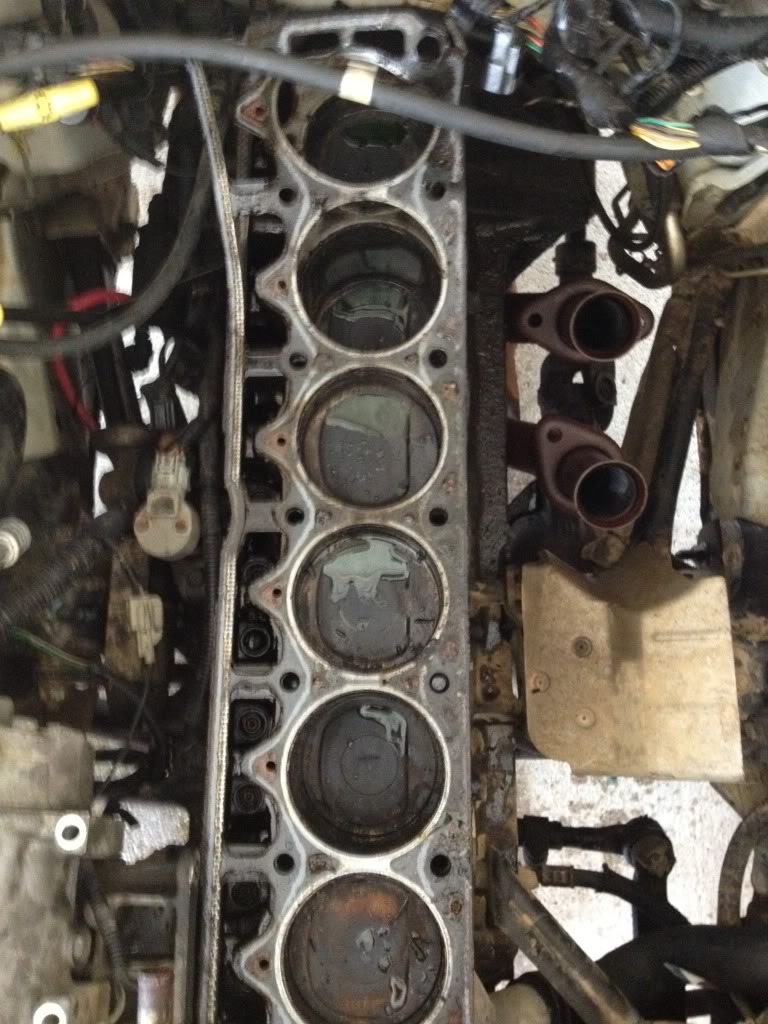
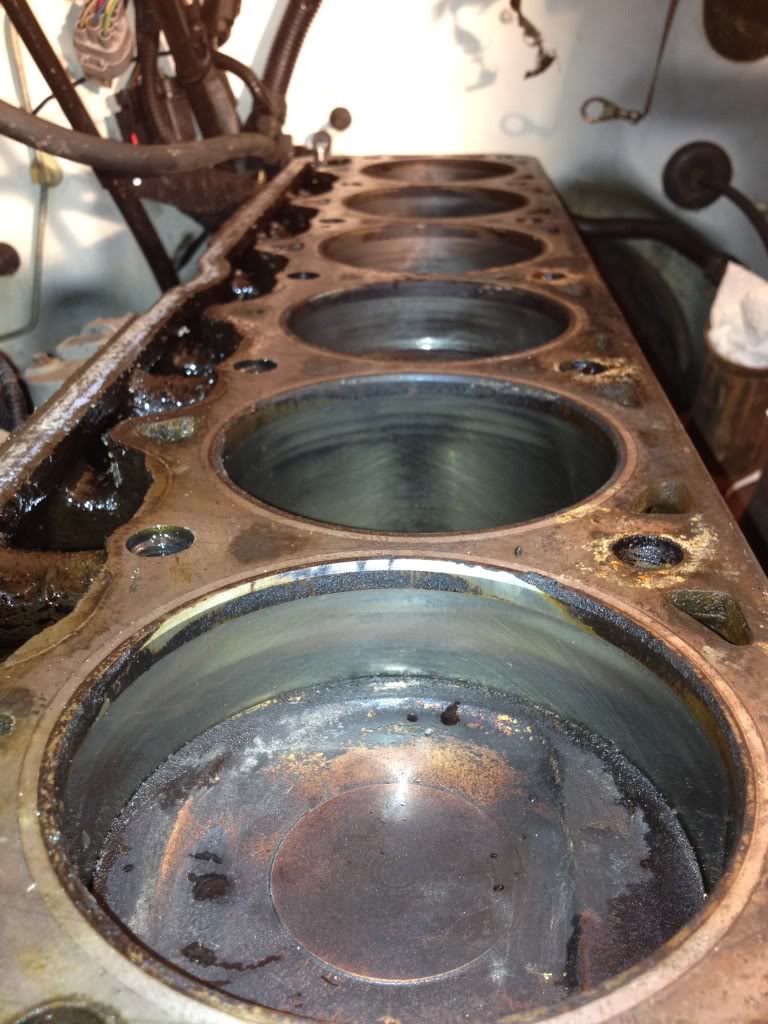
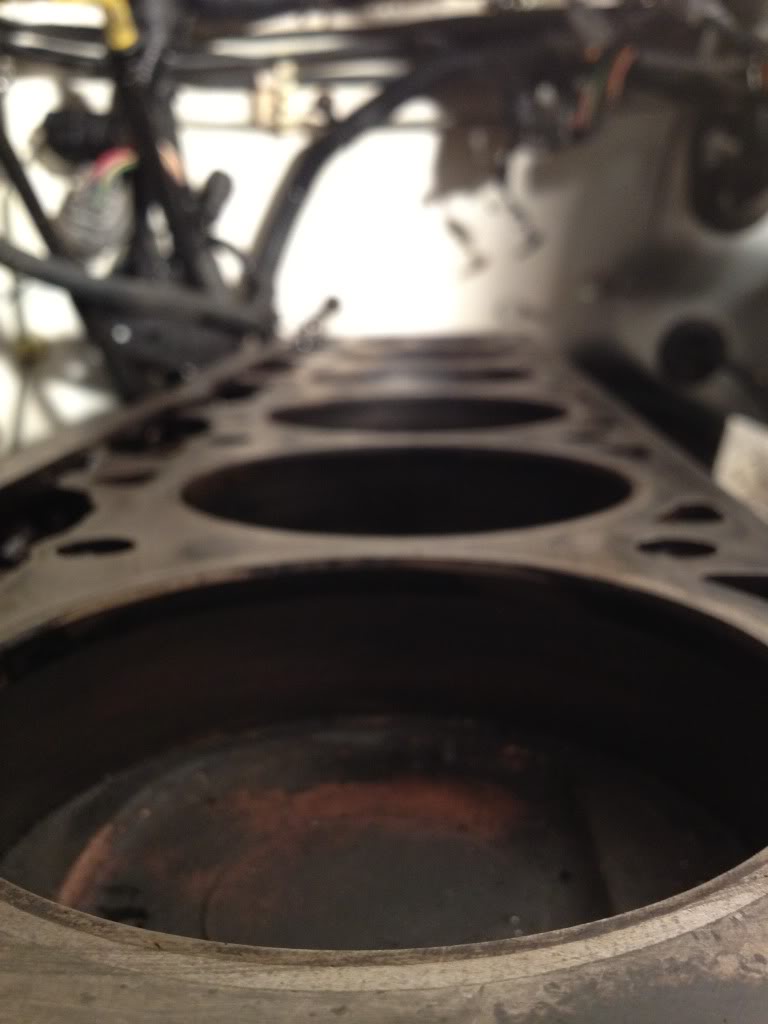
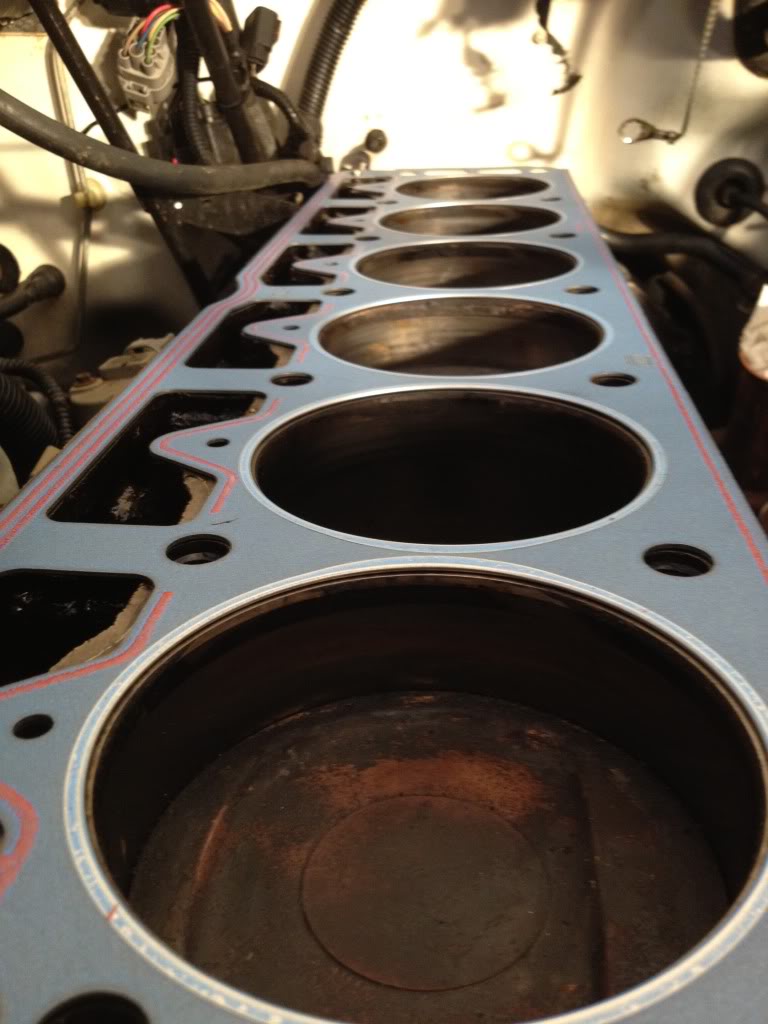
Okay so then the head was out, but my new one wasnt here yet, So what else can i do!!!!! First things first. It was a mess, and their was coolant in the piston chambers so i cleaned that up first. Shop vac-ed the pusher rod seats and stuff. then stuffed paper towel in the pistons chambers and the exhaust down pipe so it could stay debris free for now. Until then We started Tearing the top end apart.
I used a box to keep all the pushrods, rockers,bridges,headbolts, and valve cover bolts in order. I marked the box (front,rear,pass,driver) to avoid any confusion later.
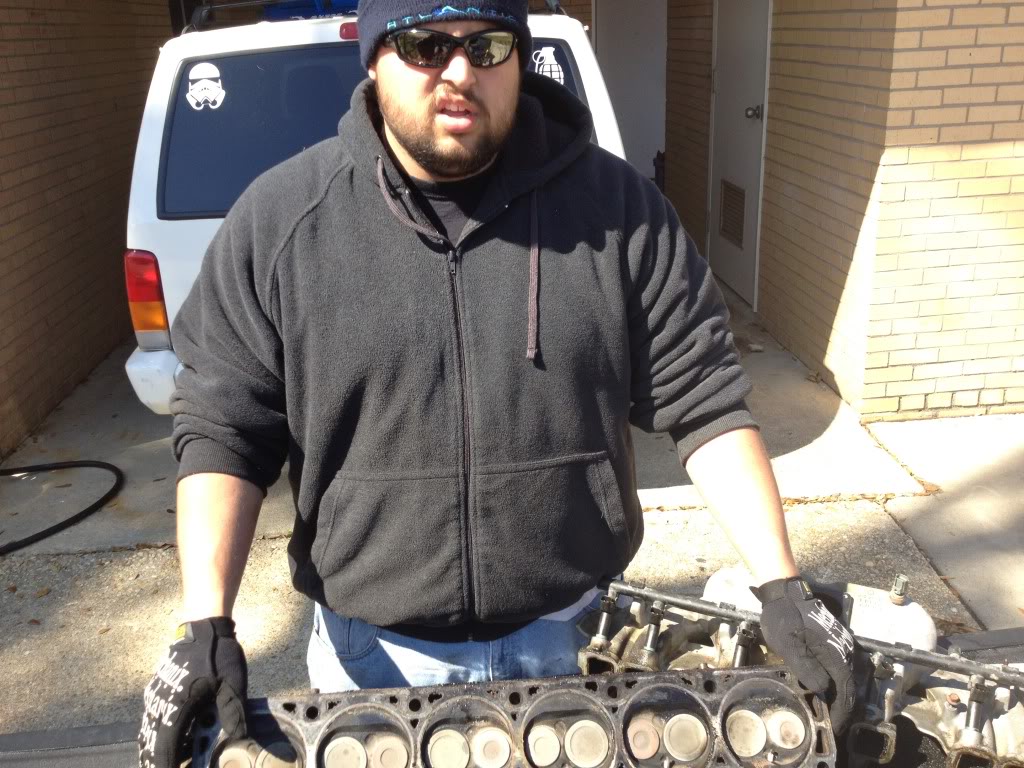
My best friend looking grim while we tear it down on his tailgate.
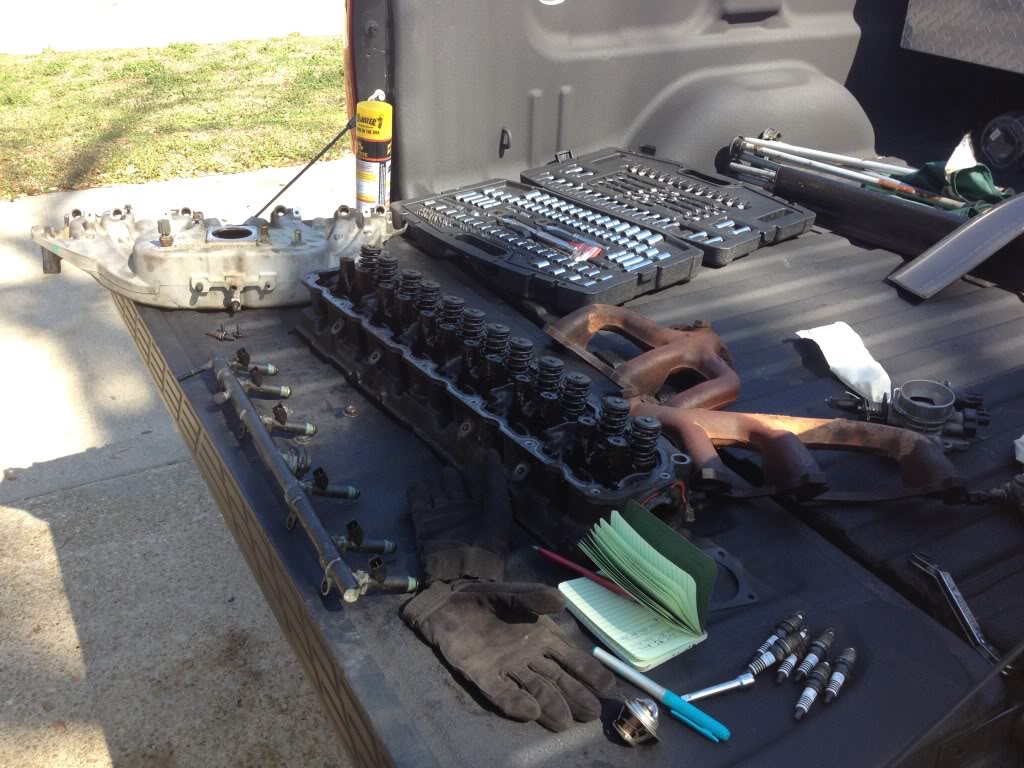
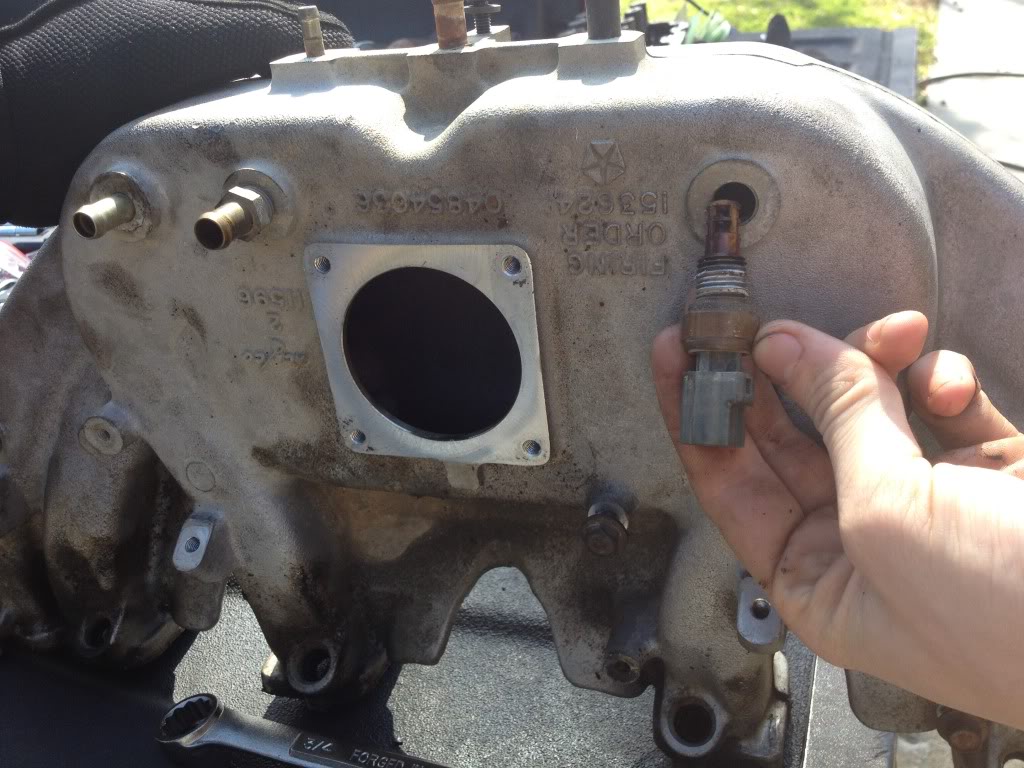
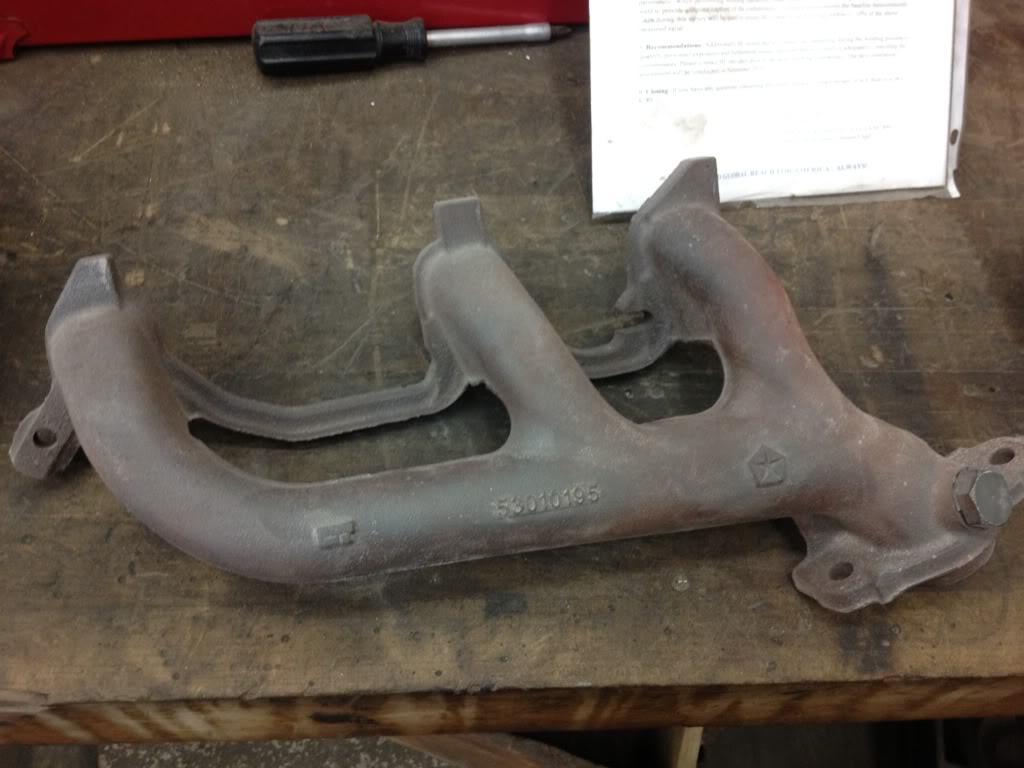
I plan to strip down and clean the exhaust manifold and intake manifold While i inspect them for damage
remember where everything goes!!!!

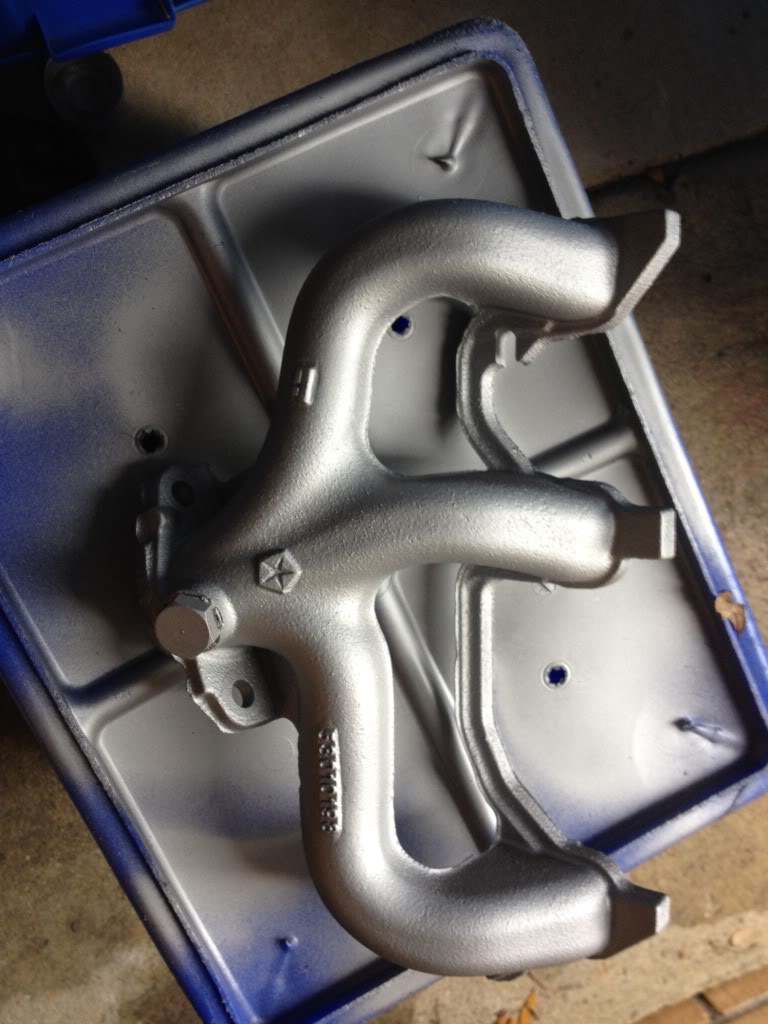
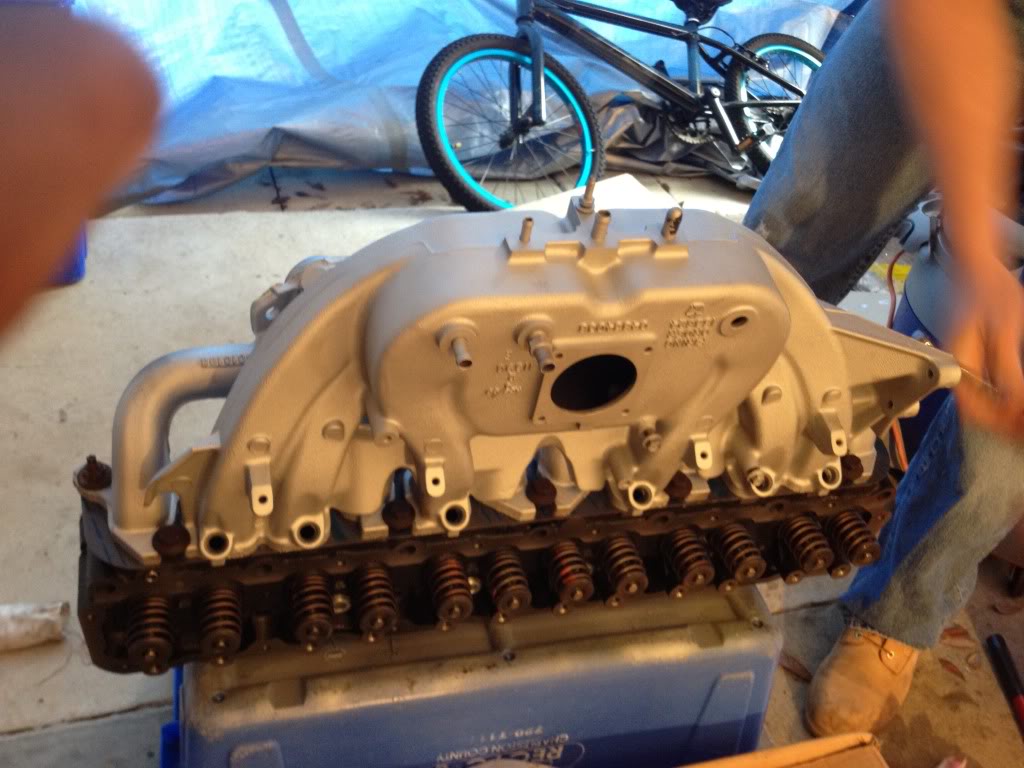
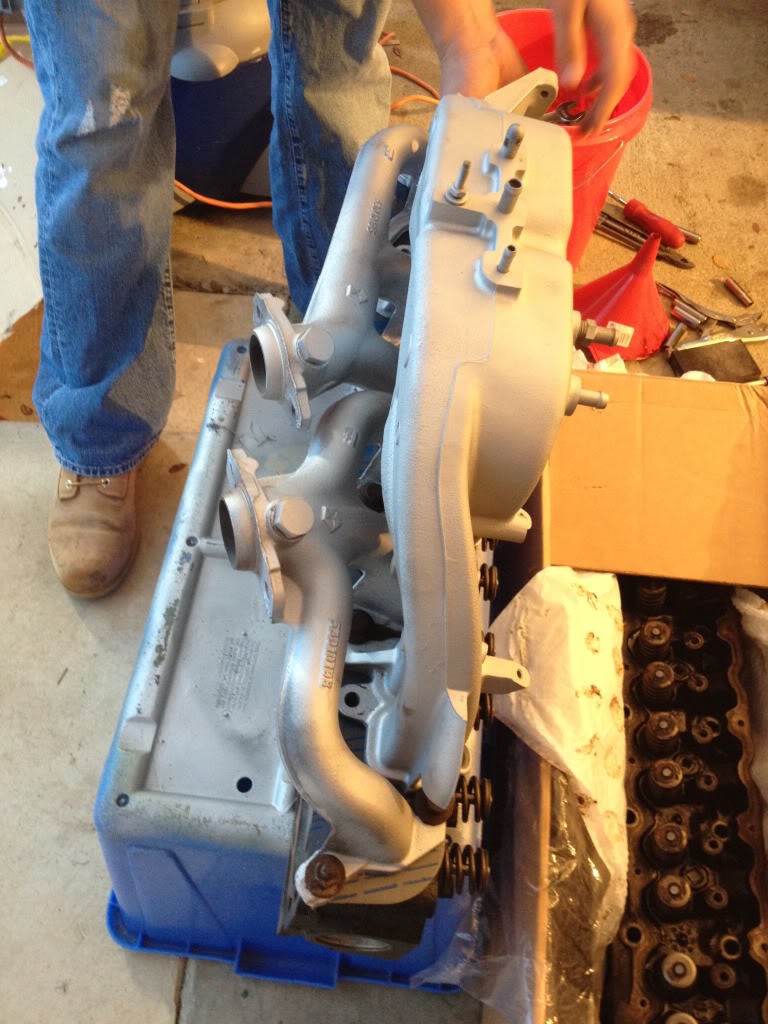
So while it was pulled apart i ran to my auto skills center on base and sandblasted the exhaust mani and intake mani
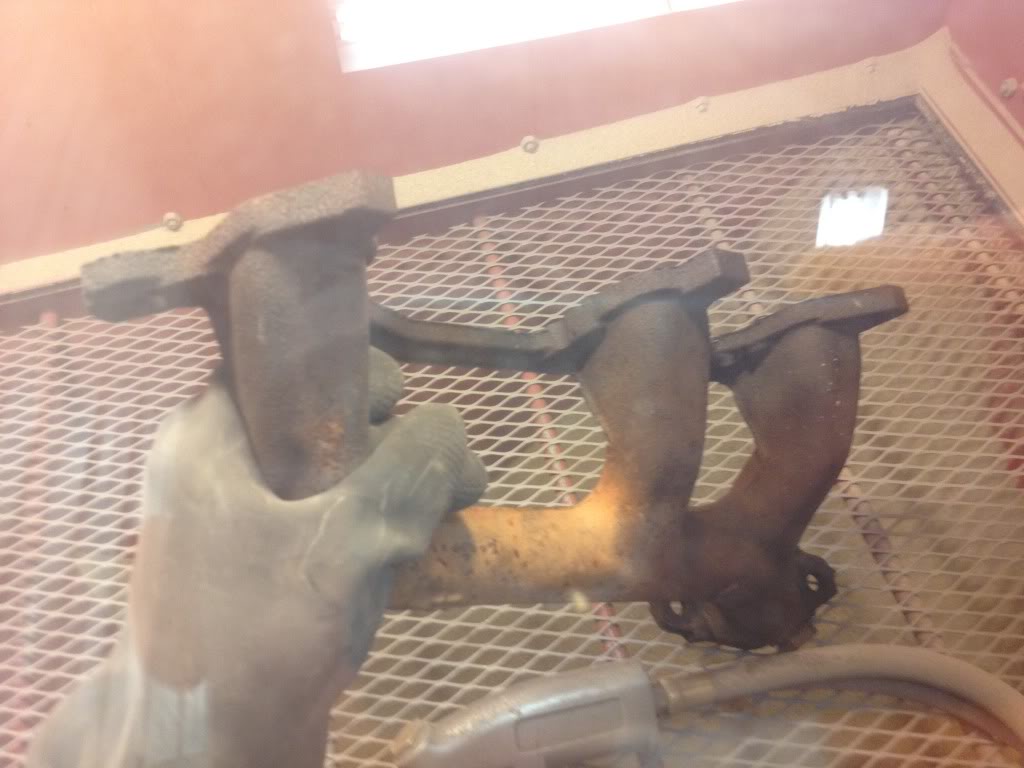
After sandblasting
Then i cleaned them all off with the air compressor and simple green and let them dry completely.
picked up a can of vht 1300-2000 ceramic header paint (a little more silver than i wished for)
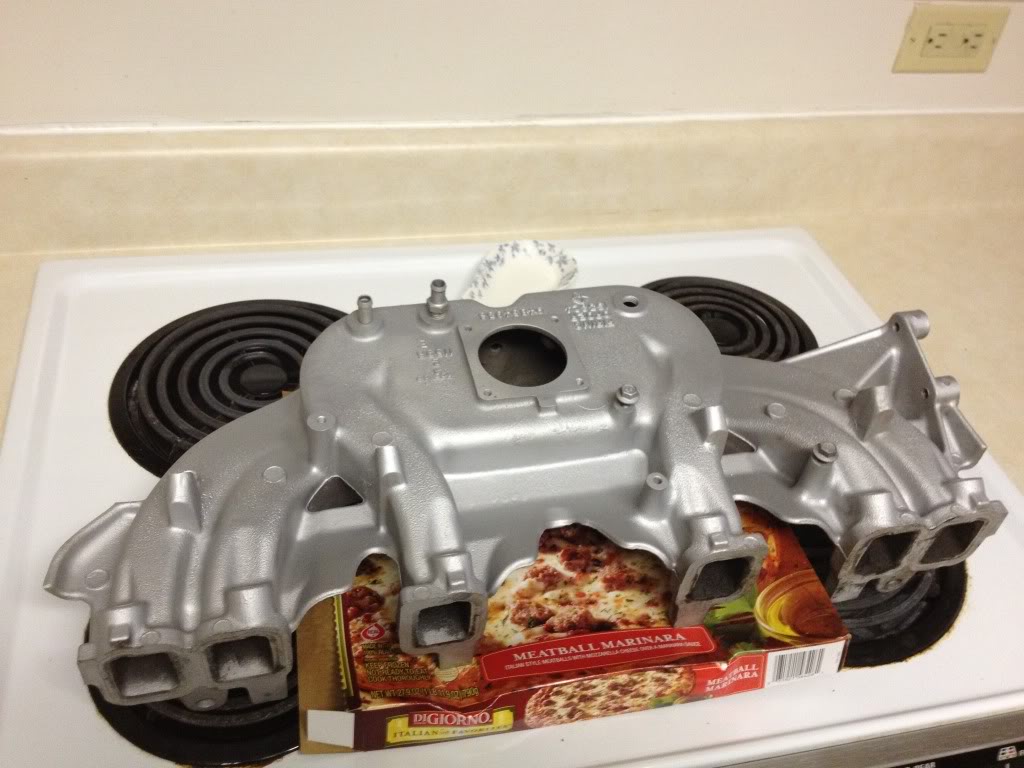
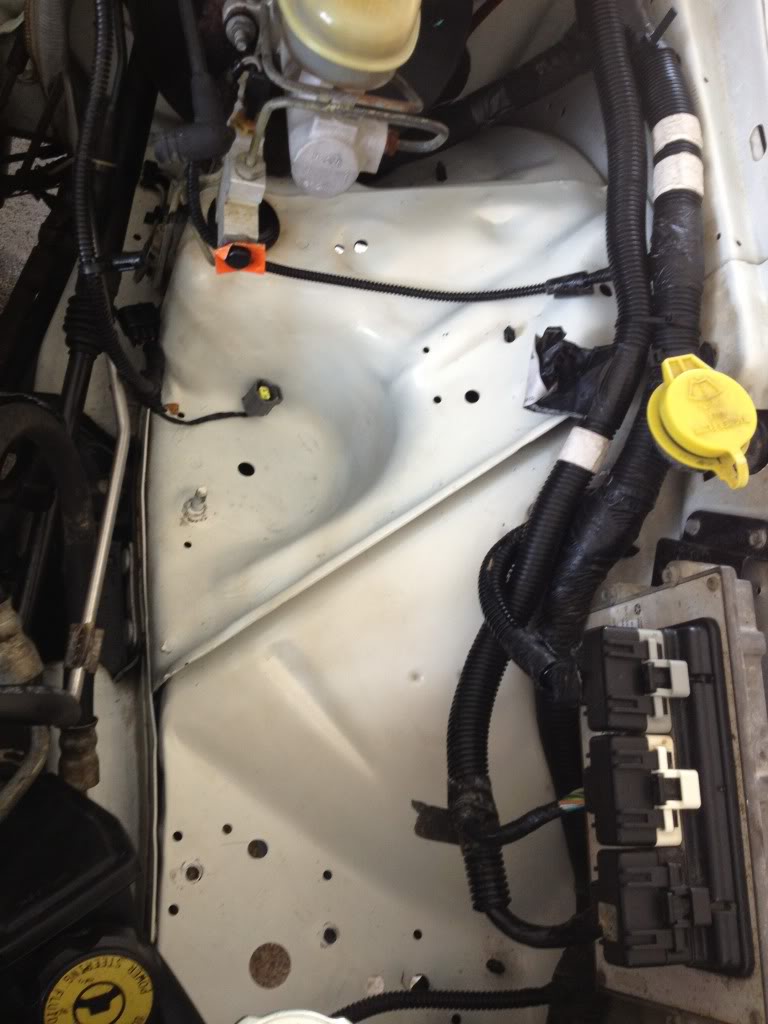
While those baked in the oven we decided to address the issue of my dirty engine compartment. Yes i know it will get dirty again. However. Their was alot just sitting in their driving me crazy... So we went simple green crazy
Before.
After
I used a box to keep all the pushrods, rockers,bridges,headbolts, and valve cover bolts in order. I marked the box (front,rear,pass,driver) to avoid any confusion later.
My best friend looking grim while we tear it down on his tailgate.
I plan to strip down and clean the exhaust manifold and intake manifold While i inspect them for damage
remember where everything goes!!!!
So while it was pulled apart i ran to my auto skills center on base and sandblasted the exhaust mani and intake mani
After sandblasting
Then i cleaned them all off with the air compressor and simple green and let them dry completely.
picked up a can of vht 1300-2000 ceramic header paint (a little more silver than i wished for)
While those baked in the oven we decided to address the issue of my dirty engine compartment. Yes i know it will get dirty again. However. Their was alot just sitting in their driving me crazy... So we went simple green crazy
Before.
After
2 hours and 3 different bake temps later we were still cleaning in the engine compartment, and wandered to other areas.
half cleaned lol
So it was all cleaned up and My buddy left. We wrapped all parts in trash bags and stored them in the jeep, filled open areas of the motor with shop rags. and covered the block with trash bags.
Closed the hood and tarped off the opening to my carport so no weather could get in anywhere i dont want it
Good thing, It rained allllllllllllllllllll week. Head came in tuesday though.
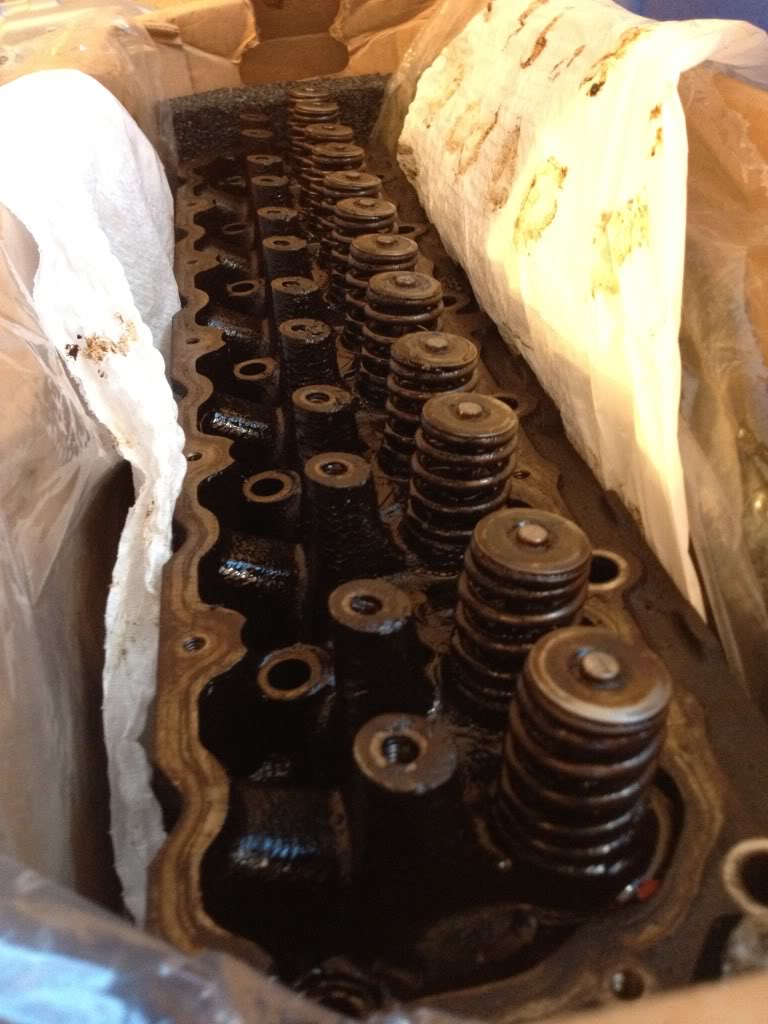
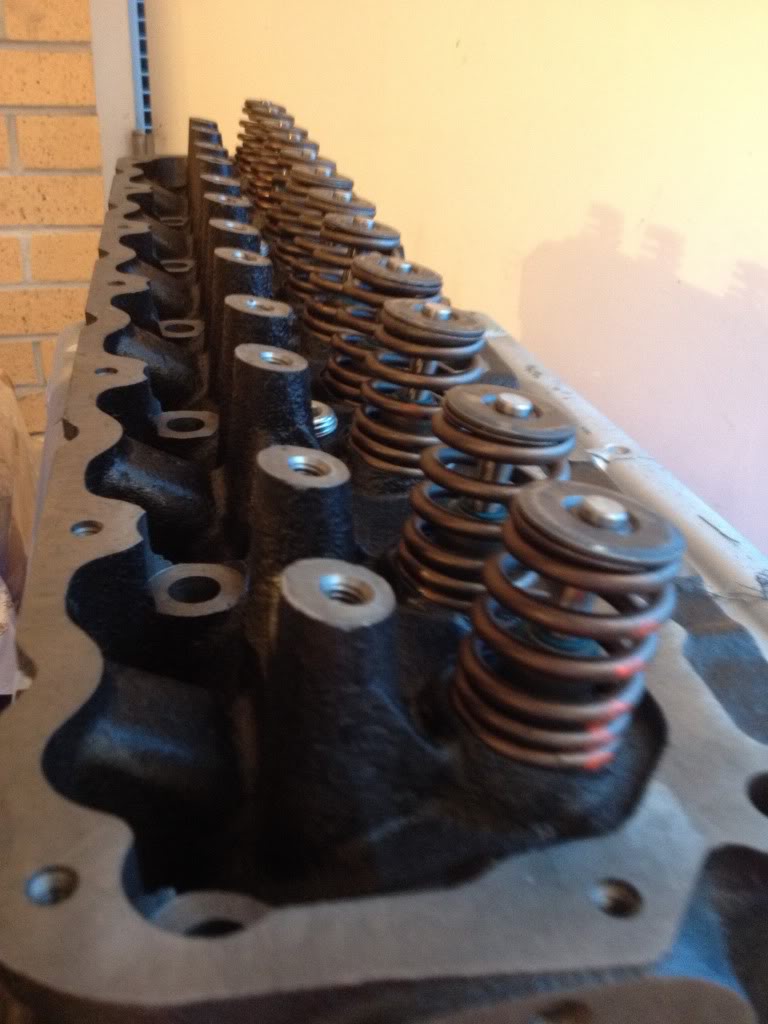
pics of old vs new.
old obviously
New
So Friday night before my weekend i stayed up late in the carport by myself cleaning and prepping as much as i could.
scrapped and cleaned up
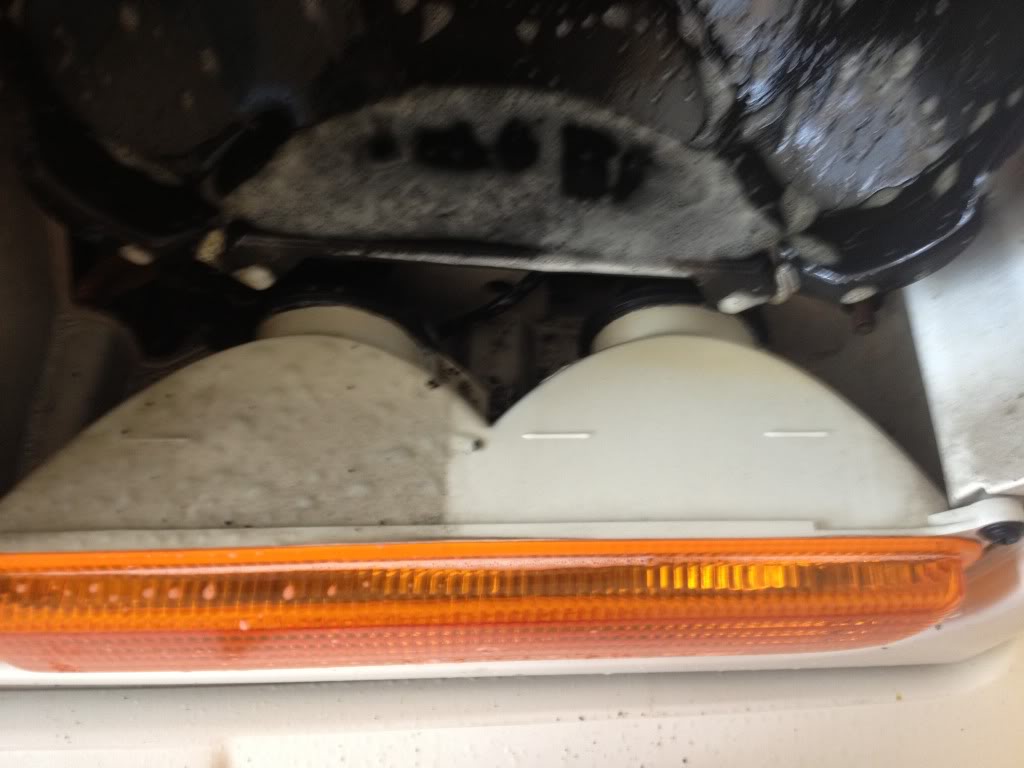
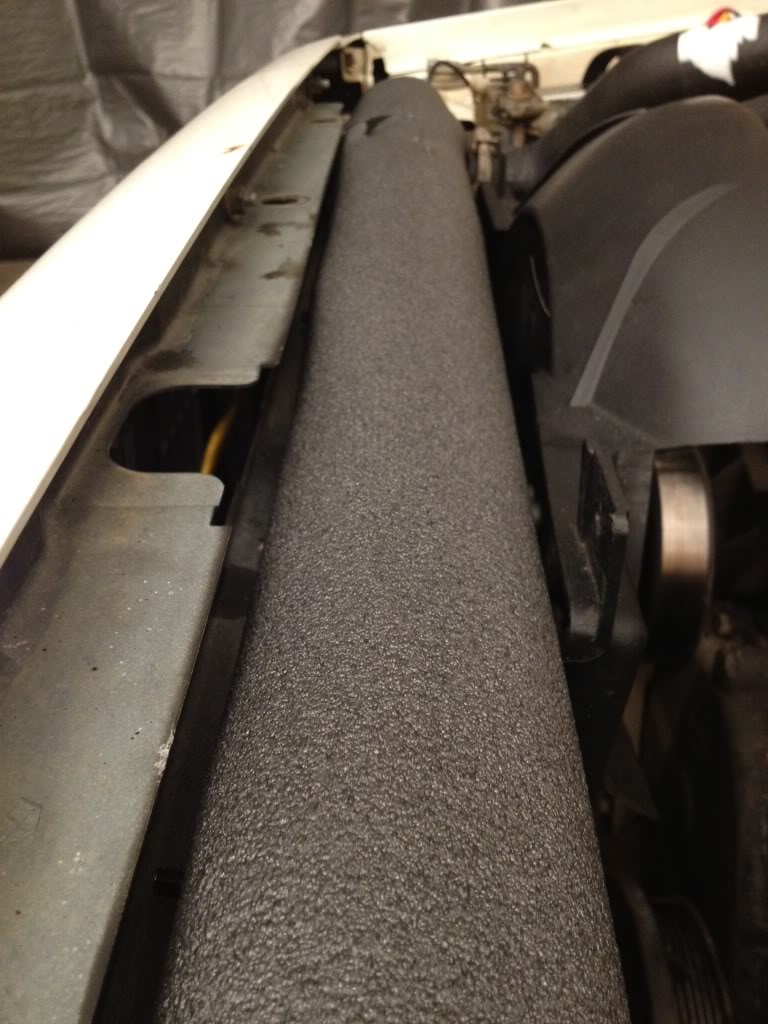
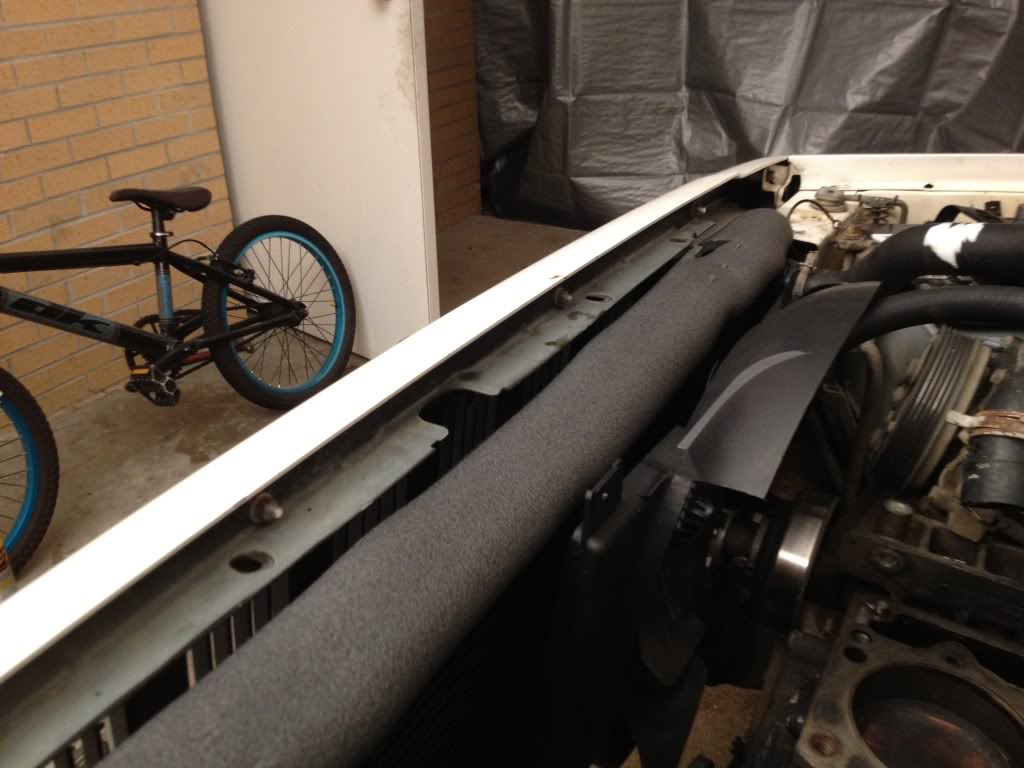
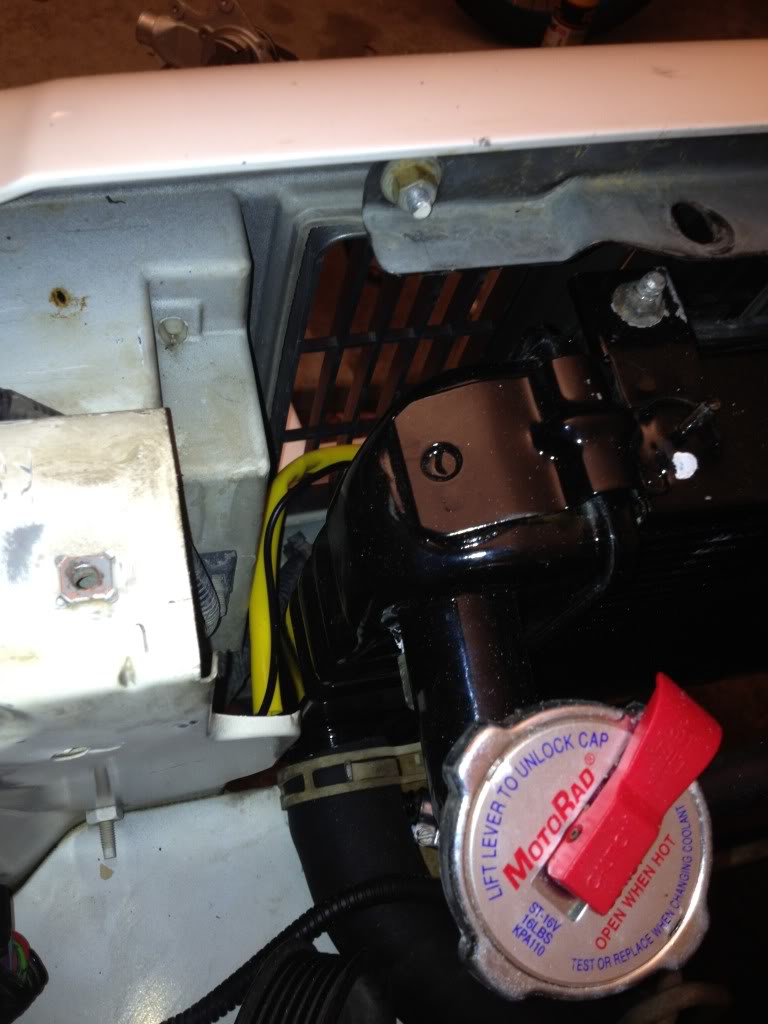
Also with my new csf 3 row i could wiggle it forward and backward. I didnt like that. I also didnt like the 1.5" gap between the radiator and the radiator support. Allowing air to pass over instead of through it and wiggle around. Id rather not. I Saw someone else on here use a pool noodle to fill the gap. However pool noodles will melt very easy if in contact with a hot surface. So i picked up some 3/4" copper pipe insulating cover. 1$ at walmart for a four pack. and it took one piece. Has sticky open ends and is already slit down the middle. Trimmed off a few inches and spots for the radiator support to slide back in. PERFECT FIT. And no more wiggle. Satisfied 1$ customer here.
Tried to clean out the threads to the best of my ability. But im not buying a tap or w/e it is. So i stuffed an electronics compressed air straw in it and blasted it out.
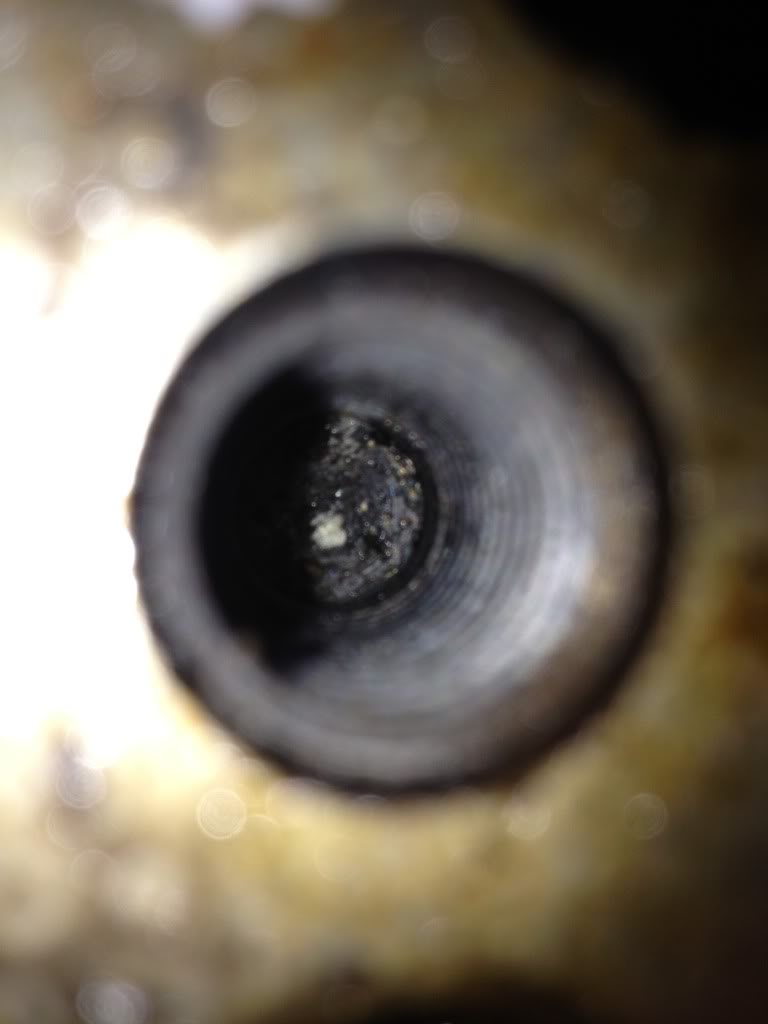
Good enough for government work
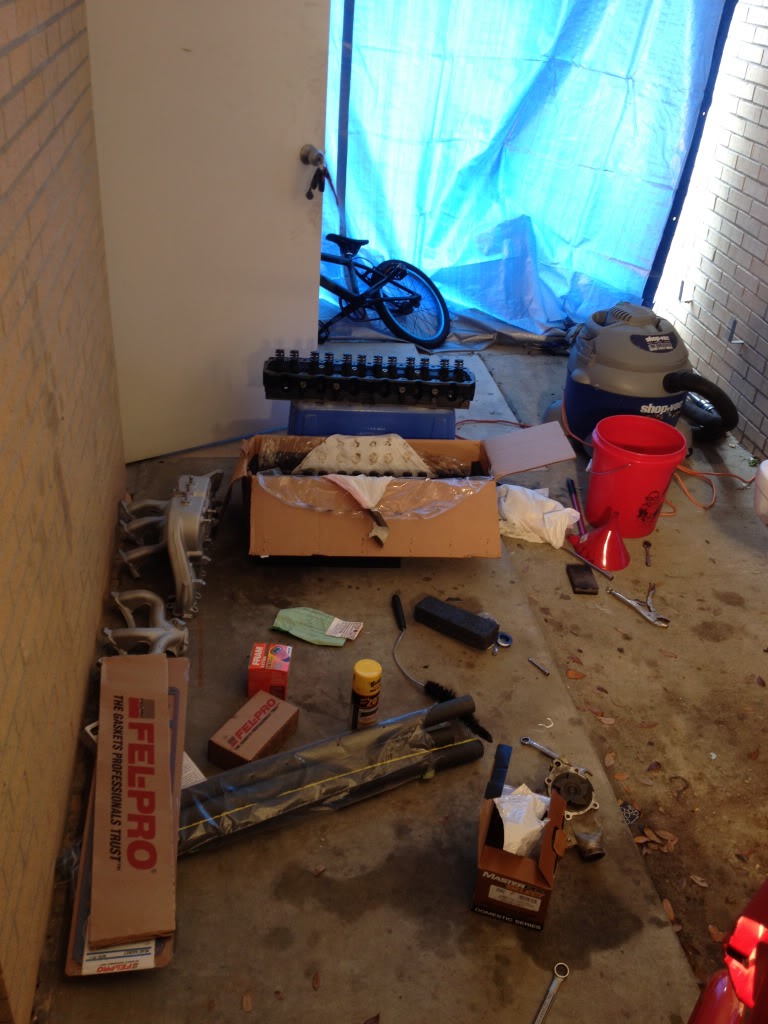
Messy carport Drove me insane.
Also when i pulled the head last week i kept all the tools i needed in a wash bucket so i didnt have to re-find them when the time came for the install.
Also that night i wired my Rampage h4 housing with my e-autoworks Harness.
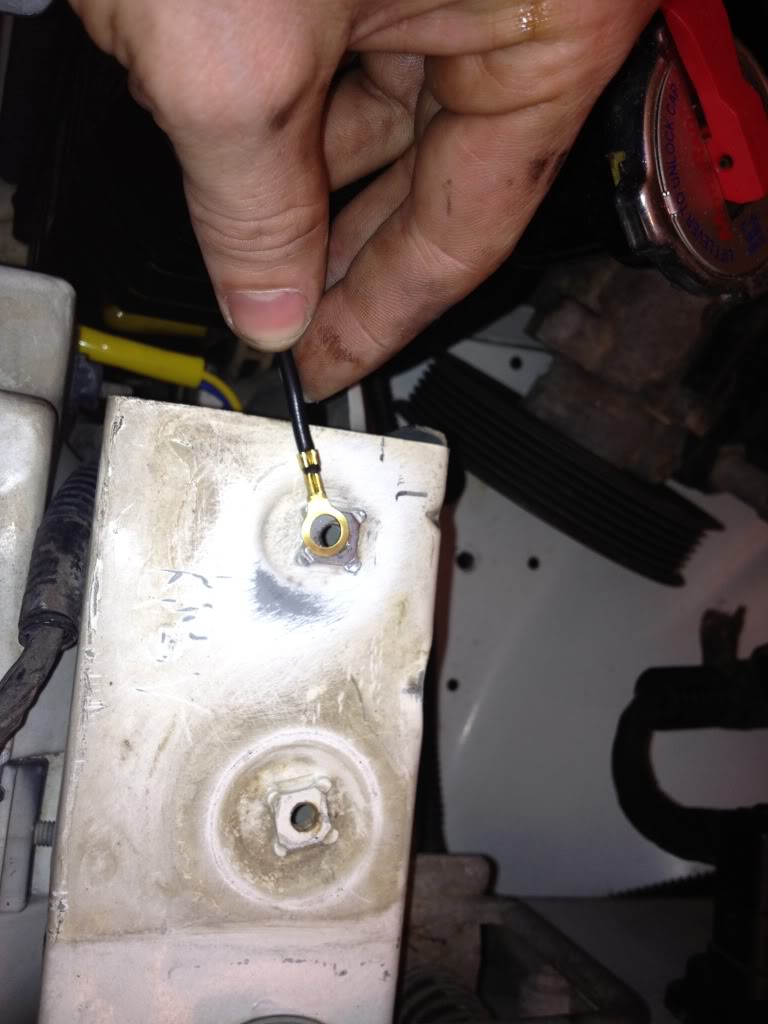
While i had the radiator support off i cleaned one of the bolt holes and used it as a ground on each side of the grill for my ground on the harness.
I left the old harness right where it was and just unplugged it from the headlights. The E-autoworks one plugs in on the passenger side to get a signal from the headlight switch.
Like so...
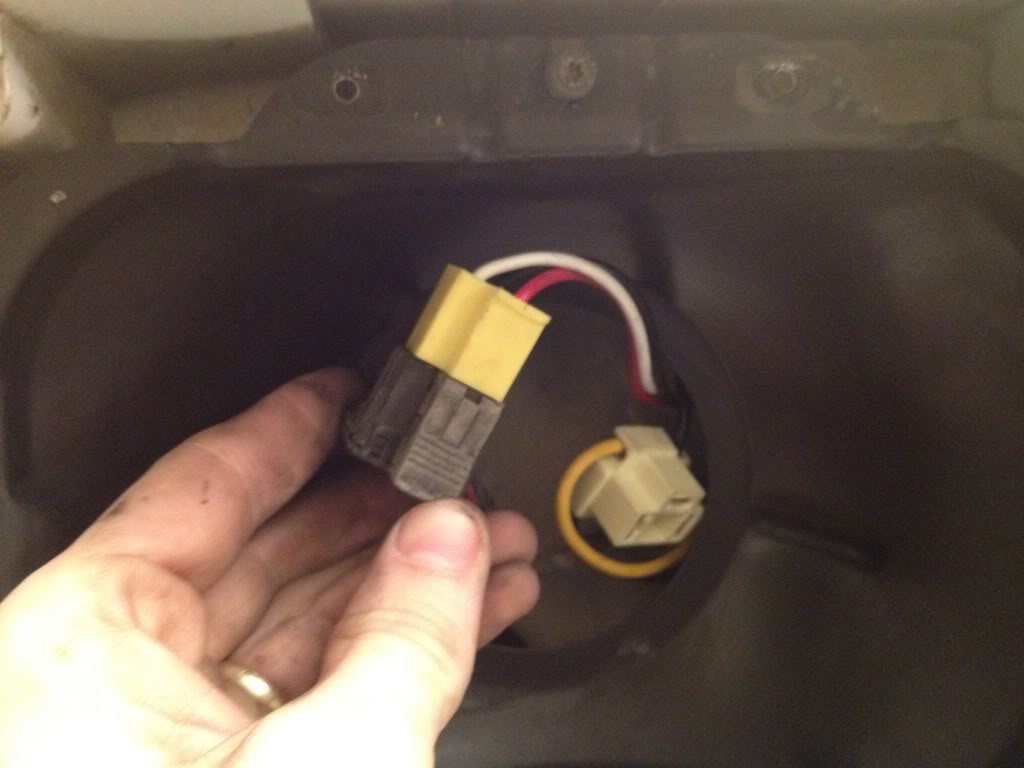
Stock harness is black connector. Male on aftermarket plugs into it. And the female plugs into your new h4 bulbs.
Each light has a ground.
The harness is wired perfect.
The positive cables fit perfect on my military style battery terminal and the relays mounted on their Included L-bracket on the left side where the throttle thing thing is. w/e its called. youll find a spot to mount it close to the battery.
Just a shot of where i ran the wire. Much easier with the radiator support out
messy carport shot...

Ill update the install of the head tomorrow. I have class At 6:45. Yeah Military!!!!!!!
Cheers guys.
half cleaned lol
So it was all cleaned up and My buddy left. We wrapped all parts in trash bags and stored them in the jeep, filled open areas of the motor with shop rags. and covered the block with trash bags.
Closed the hood and tarped off the opening to my carport so no weather could get in anywhere i dont want it
Good thing, It rained allllllllllllllllllll week. Head came in tuesday though.
pics of old vs new.
old obviously
New
So Friday night before my weekend i stayed up late in the carport by myself cleaning and prepping as much as i could.
scrapped and cleaned up
Also with my new csf 3 row i could wiggle it forward and backward. I didnt like that. I also didnt like the 1.5" gap between the radiator and the radiator support. Allowing air to pass over instead of through it and wiggle around. Id rather not. I Saw someone else on here use a pool noodle to fill the gap. However pool noodles will melt very easy if in contact with a hot surface. So i picked up some 3/4" copper pipe insulating cover. 1$ at walmart for a four pack. and it took one piece. Has sticky open ends and is already slit down the middle. Trimmed off a few inches and spots for the radiator support to slide back in. PERFECT FIT. And no more wiggle. Satisfied 1$ customer here.
Tried to clean out the threads to the best of my ability. But im not buying a tap or w/e it is. So i stuffed an electronics compressed air straw in it and blasted it out.
Good enough for government work
Messy carport Drove me insane.
Also when i pulled the head last week i kept all the tools i needed in a wash bucket so i didnt have to re-find them when the time came for the install.
Also that night i wired my Rampage h4 housing with my e-autoworks Harness.
While i had the radiator support off i cleaned one of the bolt holes and used it as a ground on each side of the grill for my ground on the harness.
I left the old harness right where it was and just unplugged it from the headlights. The E-autoworks one plugs in on the passenger side to get a signal from the headlight switch.
Like so...
Stock harness is black connector. Male on aftermarket plugs into it. And the female plugs into your new h4 bulbs.
Each light has a ground.
The harness is wired perfect.
The positive cables fit perfect on my military style battery terminal and the relays mounted on their Included L-bracket on the left side where the throttle thing thing is. w/e its called. youll find a spot to mount it close to the battery.
Just a shot of where i ran the wire. Much easier with the radiator support out
messy carport shot...
Ill update the install of the head tomorrow. I have class At 6:45. Yeah Military!!!!!!!
Cheers guys.
Well my other buddy showed up Saturday to help me Put it all back in, mind you neither of us have motor work in out history except on aircraft. Principals transfer but not the knowledge.
Here he is Cheesing while we lined up the int/exh mani gasket and put them on.

Then we put the headgasket on and very gingerly with 3 people lifted it up and in. dropped into place perfect thanks to the alignment dowels or w/e on the engine block. Pretty impossible to mess up.
Its in!!!
Dont forget the high temp Sealent on #11 Bolt. Red stuff.
Now time to start hooking Everything up. I put the spark plugs in while he put the throttle body back on. (new gaskets on everything) Then we put the fuel injectors back in. I replaced the o-rings on them too. Cheaper through o-reilys than online.
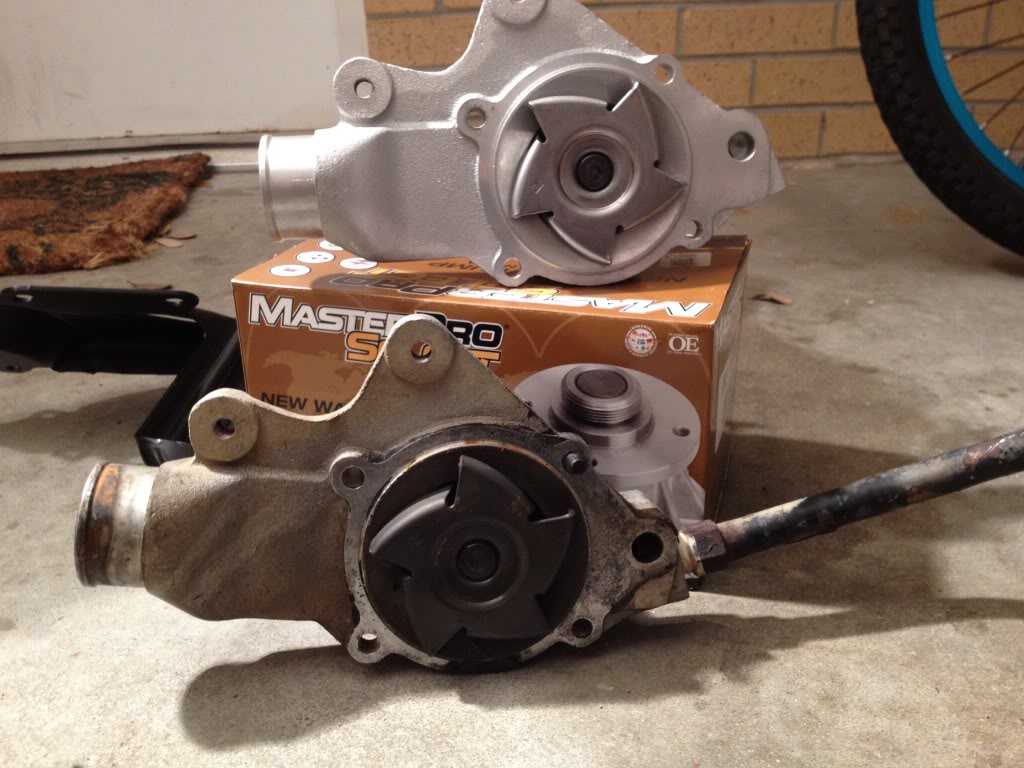
New water pump.
put the power steering pump back in.
Tentioner pulley and bracket.
Ran the belt.
Poured oil over the head/rockers and whatnot. (about 3/4 of a quart) then installed the new valve cover gasket and valve cover. Then put the rest of the oil in. Cheap penzoil since im changing it in a week or so anyway. Hooked up all my vacuum lines and throttle cables. Coilpack/rail thing thing. plugged in all electrical connectors and radiator hoses. Also while everything is pulled out. I flushed the radiator with about 5 gallons of freshwater, and flushed and backflushed the heatercore like 8 times each way. Stuff was still comming out. (rusty sediment) I had no heat btw.
So i get it all hooked up and the moment of truth is here.
Battery cable hooked up.
Key in (aux power comes on) first good sign.
fuel pump pressurizes.
Turn (chug,chug,chug)
IT LIVES!!!!!!
Its going to smoke alot just so everyone doesnt freak out like i did, it went away though. Probably from the vht header paint. or maybe just the new head and all that jazz. Either way. Victory. So we let it get up to operating temp and pressurize. No leaks!
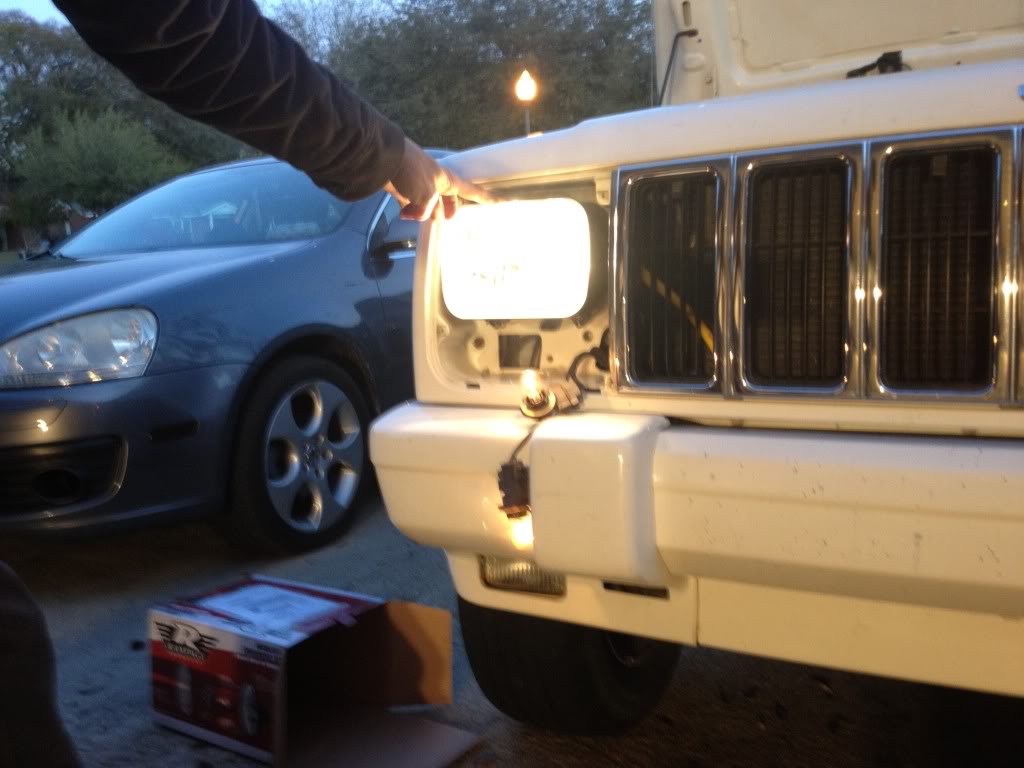
Old housings before the harness upgrade
While that warmed up we installed the rampage housings.
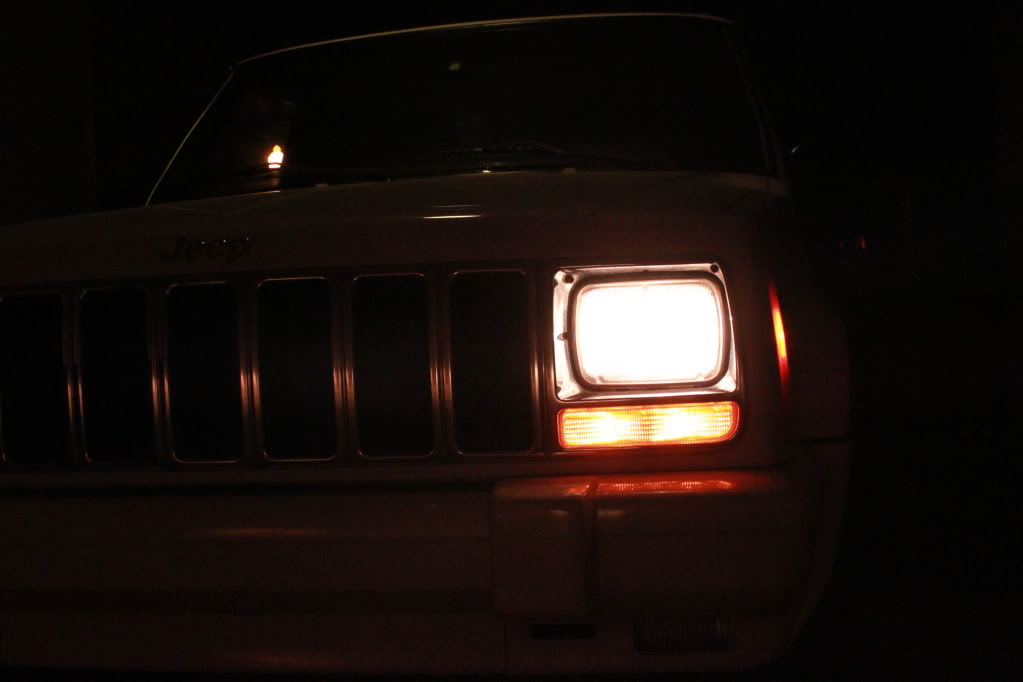
Took it for a ride around the neighborhood to a dark dead end to get a beam pattern idea in the dark
Here it is for yah. AMAZING (pictures do it no justice.)
Low beams
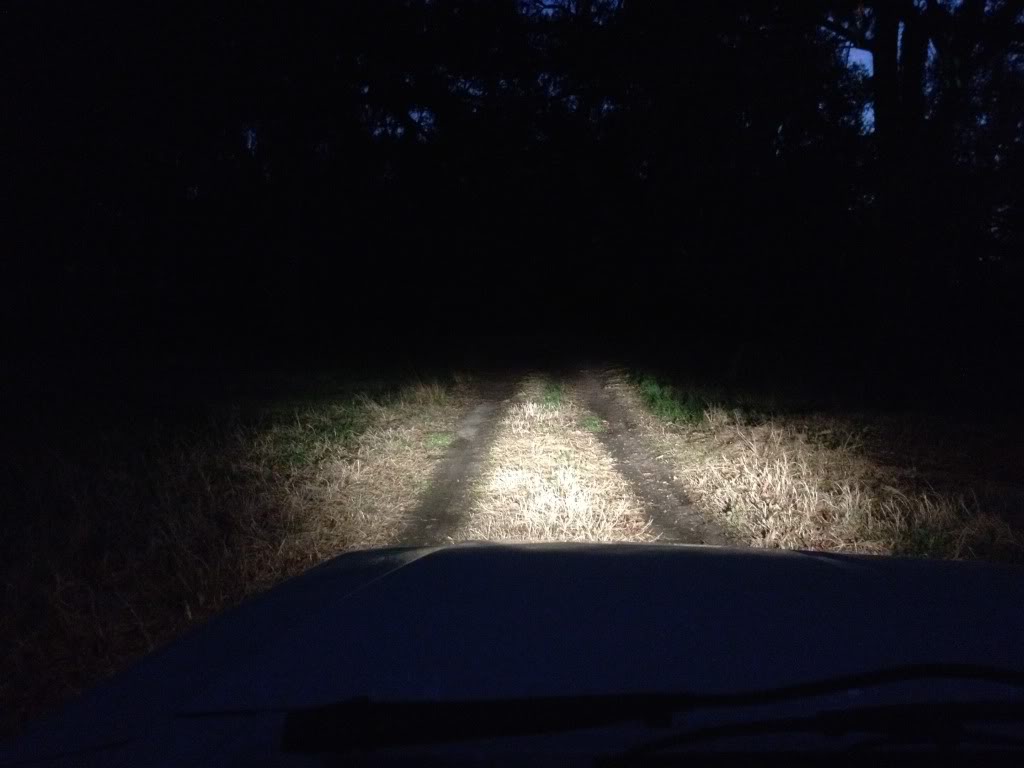
High Beams

Easily 4x as bright. And soooooooooo Much clearer. They put my 2006 jetta's hyperblue lights to shame
Now it sits in my driveway/2 miles to the afb until next weekend when my goodies go on
4.5" x series. drop brackets. IRO HnT and my retread 265/75/16s
Here he is Cheesing while we lined up the int/exh mani gasket and put them on.
Then we put the headgasket on and very gingerly with 3 people lifted it up and in. dropped into place perfect thanks to the alignment dowels or w/e on the engine block. Pretty impossible to mess up.
Its in!!!
Dont forget the high temp Sealent on #11 Bolt. Red stuff.
Now time to start hooking Everything up. I put the spark plugs in while he put the throttle body back on. (new gaskets on everything) Then we put the fuel injectors back in. I replaced the o-rings on them too. Cheaper through o-reilys than online.
New water pump.
put the power steering pump back in.
Tentioner pulley and bracket.
Ran the belt.
Poured oil over the head/rockers and whatnot. (about 3/4 of a quart) then installed the new valve cover gasket and valve cover. Then put the rest of the oil in. Cheap penzoil since im changing it in a week or so anyway. Hooked up all my vacuum lines and throttle cables. Coilpack/rail thing thing. plugged in all electrical connectors and radiator hoses. Also while everything is pulled out. I flushed the radiator with about 5 gallons of freshwater, and flushed and backflushed the heatercore like 8 times each way. Stuff was still comming out. (rusty sediment) I had no heat btw.
So i get it all hooked up and the moment of truth is here.
Battery cable hooked up.
Key in (aux power comes on) first good sign.
fuel pump pressurizes.
Turn (chug,chug,chug)
IT LIVES!!!!!!
Its going to smoke alot just so everyone doesnt freak out like i did, it went away though. Probably from the vht header paint. or maybe just the new head and all that jazz. Either way. Victory. So we let it get up to operating temp and pressurize. No leaks!
Old housings before the harness upgrade
While that warmed up we installed the rampage housings.
Took it for a ride around the neighborhood to a dark dead end to get a beam pattern idea in the dark
Here it is for yah. AMAZING (pictures do it no justice.)
Low beams
High Beams
Easily 4x as bright. And soooooooooo Much clearer. They put my 2006 jetta's hyperblue lights to shame
Now it sits in my driveway/2 miles to the afb until next weekend when my goodies go on
4.5" x series. drop brackets. IRO HnT and my retread 265/75/16s
Well I got to drive it for two days before this crap happens....
Here's a shady cell phone picture of my caliper after it caught fire.
Here's a shady cell phone picture of my caliper after it caught fire.
Got some Premium Centex rotor's and some ebc's yellow, new calipers and new brake lines. I Plan to install my lift kit, and that **** tommorow. Wish me luck. hopefully i can get it done in 9 hours. Me and a buddy, Teaser pics.

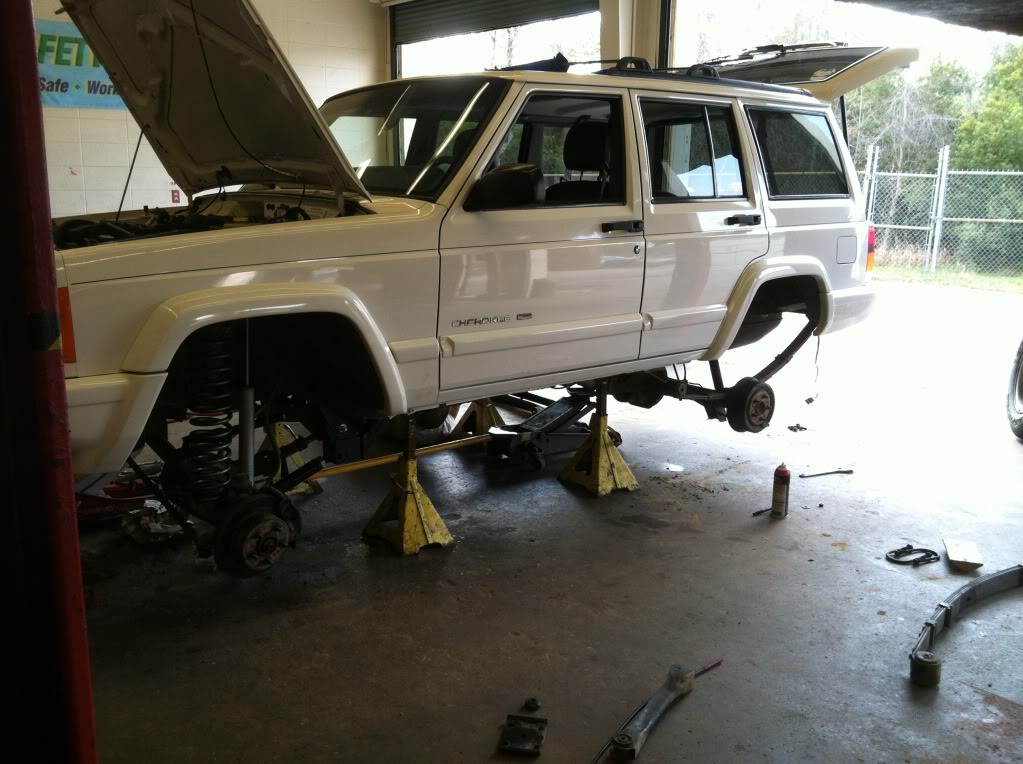
So Saturday was a win/lose. We didnt finish, but we did learn alot! and now im thinking that the x series lift with 2 people that have never done it before drop brackets, and brakes and driveline change. We got done what we could in the 7 hours the shop was open. With a pizza break. So first i want to say, Rough country should have included new hardware for the leaf springs imho. Also the self taping hardware for the drop brackets seems.... solid, but not as solid as i would have liked. make sure you use the right size drill bit because you only get one shot at it. and use cutting oil or that drill bit is going to heat up FAST, and those metal shavings are hot as hell. so wear eye and hand protection.
So what did we get accomplished?
we got the front drivers side done. Spring,shock,control arms, and drop bracket. Passanger side uca bolt is rounded off. so im going to end up cutting that one Tuesday when the shop opens again and i can get to my jeep. Ill have to figure out a solid replacement piece of hardware.
And we got the rear passenger side Leaf spring in. With the help of my wife and her epic precision skills. :x
After that the shop let us know it was time to clean up.
Another issue people might run into with this kit, The factory leaf spring retaining plates have a hole in the middle for the centering pin on the springs. The rough country ones were a little to big to fit into it. So i tried using a drill press to open the whole a little. But those plates are tough, and the 80 year old drill press didnt have enough power to get through it. So we just used an impact wrench to tighten the ubolts down and that forced the centering pin nut through the center plate. No worries it seems plenty strong and doesnt seem to have affected the plate.
Also it seems it would have been much easier to hook up the front part of the leaf spring first, then shackle. but someone reccomended to me to do shackle first. Ill try it the other way on the drivers side.
Also the rough country control arms and drop brackets seem perfectly designed for eachother, It looks great and the positioning is wonderful on the front end.
However the bushings in the joint you put together yourself do seem a little.... Cheap. if you will.
anyway, enough of me rambling. Time for pictures!!!!!!
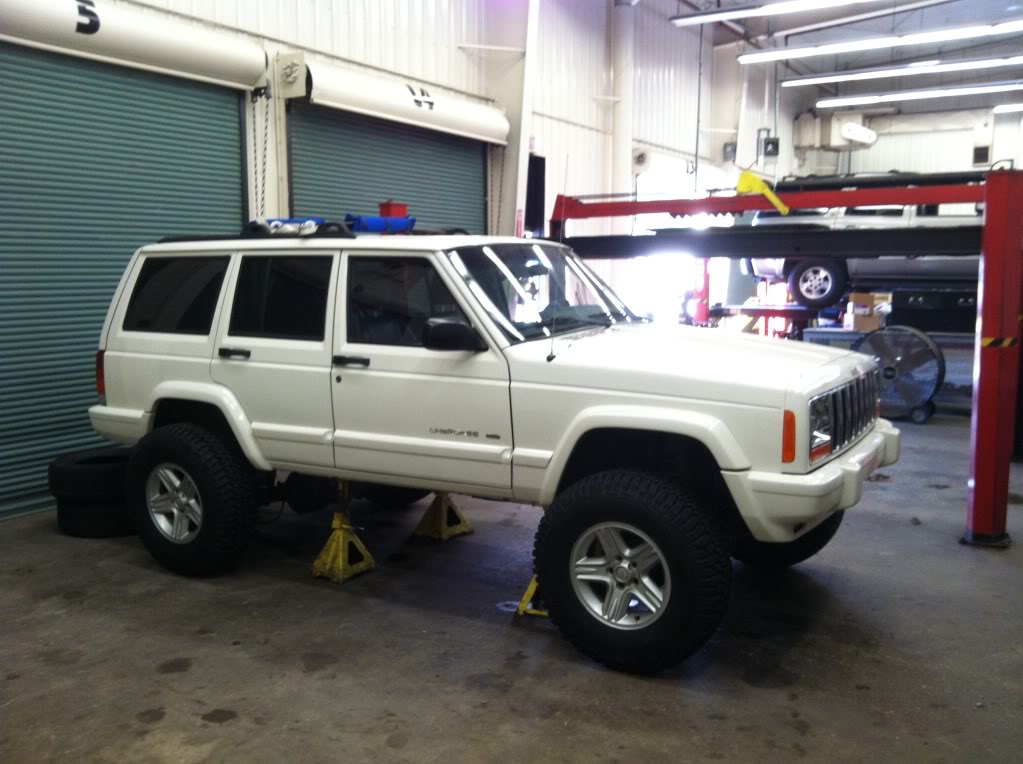
picture is a little dark, but you can see the new spring without a load on it is massive. Depending on how much it compresses i may get alot more lift than i thought i would
But, it looks awesome, the shocks seems decent, i dont think they will be a limiting factor for flex. They are at full extension in the picture.
Got my retreads mounted on the icons since i knew i wasnt driving it home that day. Couldn't be happier with the look.
looks how bad the back end sagged with all my lift kit and stuff in the back and 4 tires on top

Now ill go get pictures of everyone involved in helping me ruin my jeep yesterday.
So what did we get accomplished?
we got the front drivers side done. Spring,shock,control arms, and drop bracket. Passanger side uca bolt is rounded off. so im going to end up cutting that one Tuesday when the shop opens again and i can get to my jeep. Ill have to figure out a solid replacement piece of hardware.
And we got the rear passenger side Leaf spring in. With the help of my wife and her epic precision skills. :x
After that the shop let us know it was time to clean up.
Another issue people might run into with this kit, The factory leaf spring retaining plates have a hole in the middle for the centering pin on the springs. The rough country ones were a little to big to fit into it. So i tried using a drill press to open the whole a little. But those plates are tough, and the 80 year old drill press didnt have enough power to get through it. So we just used an impact wrench to tighten the ubolts down and that forced the centering pin nut through the center plate. No worries it seems plenty strong and doesnt seem to have affected the plate.
Also it seems it would have been much easier to hook up the front part of the leaf spring first, then shackle. but someone reccomended to me to do shackle first. Ill try it the other way on the drivers side.
Also the rough country control arms and drop brackets seem perfectly designed for eachother, It looks great and the positioning is wonderful on the front end.
However the bushings in the joint you put together yourself do seem a little.... Cheap. if you will.
anyway, enough of me rambling. Time for pictures!!!!!!
picture is a little dark, but you can see the new spring without a load on it is massive. Depending on how much it compresses i may get alot more lift than i thought i would
But, it looks awesome, the shocks seems decent, i dont think they will be a limiting factor for flex. They are at full extension in the picture.
Got my retreads mounted on the icons since i knew i wasnt driving it home that day. Couldn't be happier with the look.
looks how bad the back end sagged with all my lift kit and stuff in the back and 4 tires on top
Now ill go get pictures of everyone involved in helping me ruin my jeep yesterday.