
Project Do work - 2001 XJ Build (Pic intensive)


Member
Joined: Oct 2010
Posts: 204
Likes: 1
From: NY
Year: 2001
Model: Cherokee
Engine: 4.0L
This is the best adjustment I ever made to my Jeep.. and its free and takes 1 minute LOL.. https://www.cherokeeforum.com/f2/free-quick-fix-41821/

Junior Member
Joined: Oct 2010
Posts: 56
Likes: 0
From: Illinois
Year: 2001
Model: Cherokee
Engine: 4.0 I6
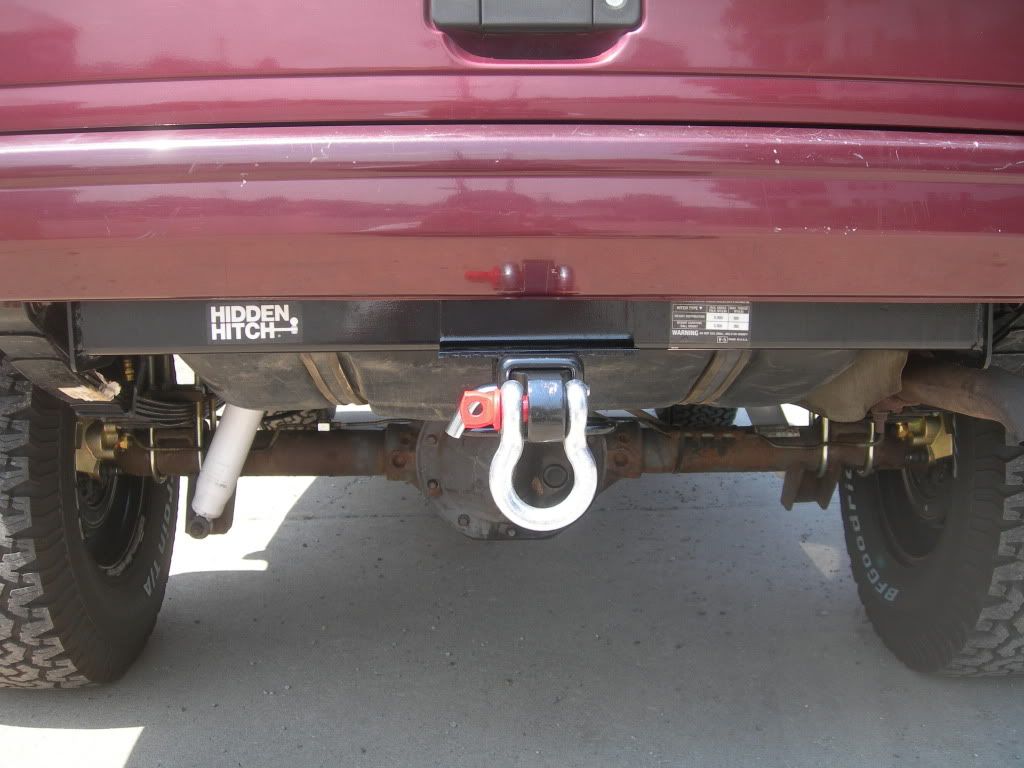
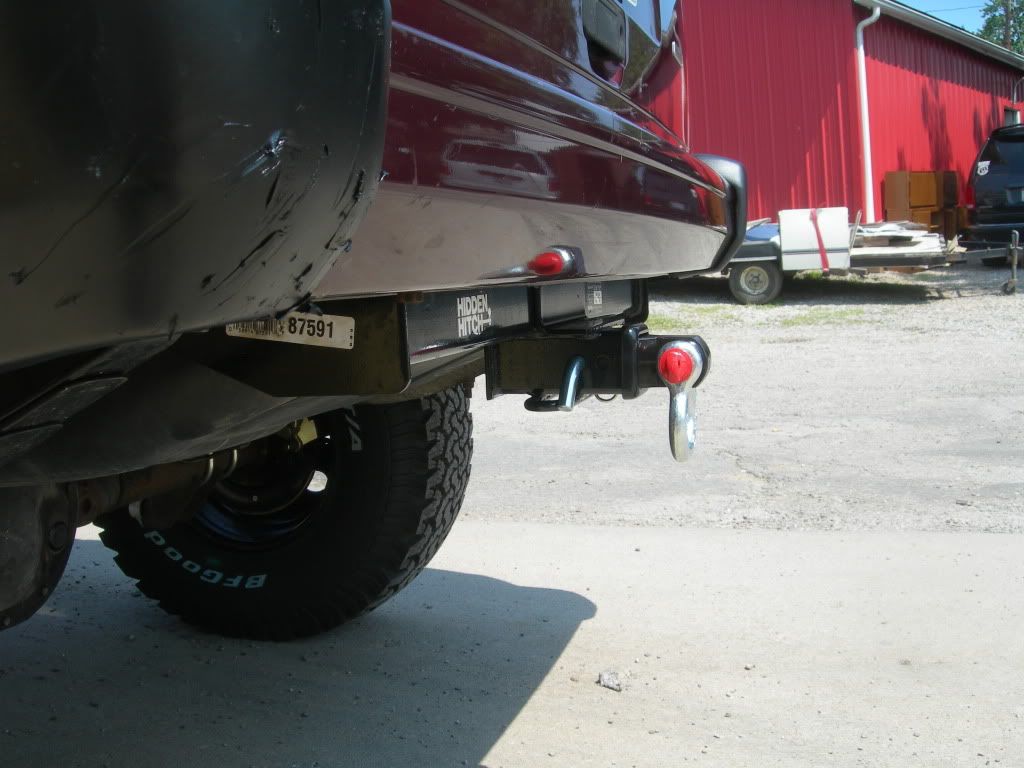
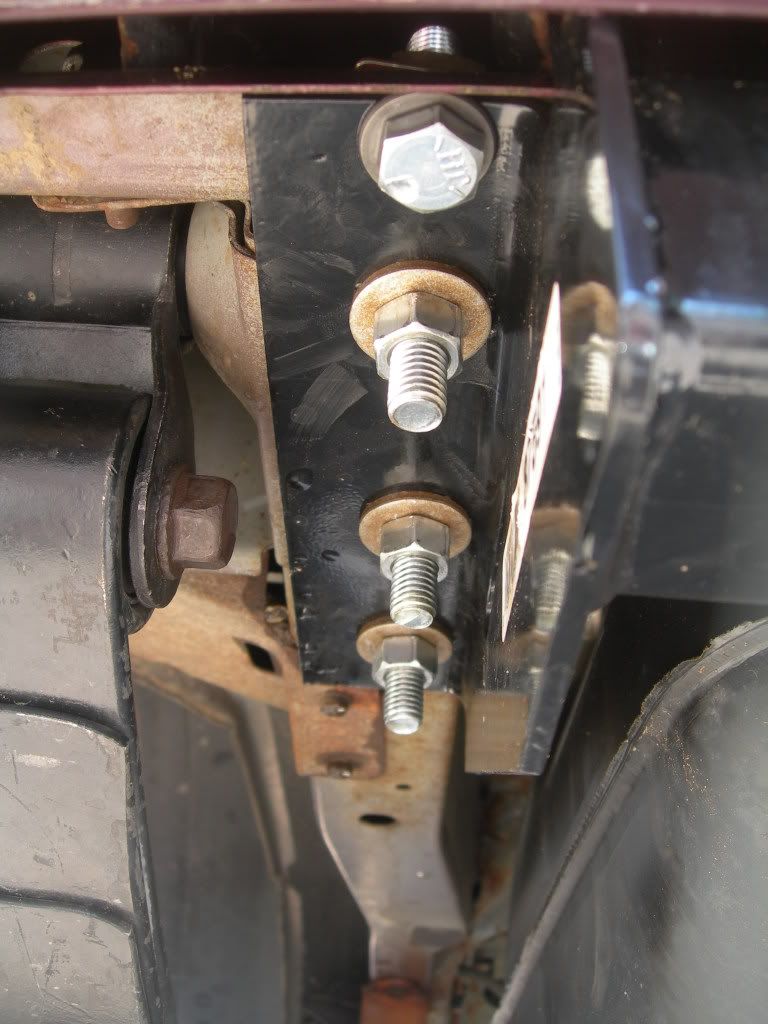
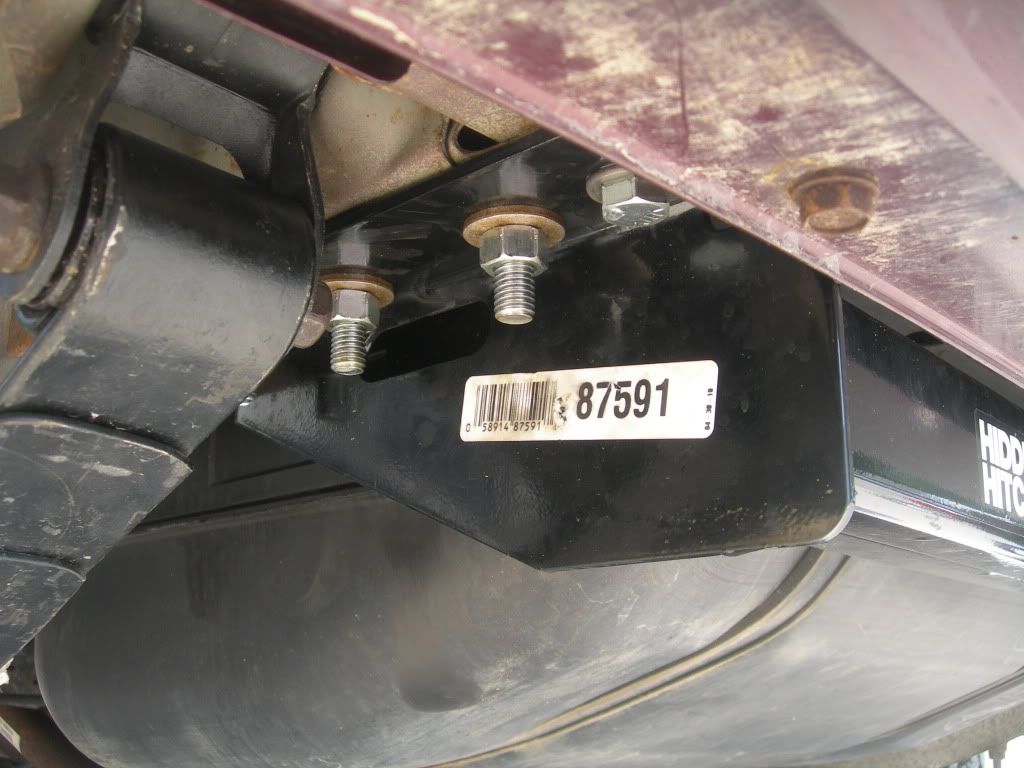
Also got the rear hitch installed yesterday... Again, no camera until I was finished so didn't get to snap some shots along the way. But basically, another simple procedure involving fishing of some plates and bolts through the frame rails. And if you're familiar with my thread, you know I'm a master of fishing hardware, haha.
Anyway, it's just held in by 8 bolts... we fished them all without any issues. However, one thing to note is that we deviated slightly from the Hidden Hitch installation directions which instructed to use the factory nut strip located in the passenger side (there was not one in the driver side) frame rail. It's basically just a metal strip of nuts running along the inside of the frame rail that was being used to bolt an exhaust hanger and gas tank side plate up. It simply lays in there and is not welded in place. The nut strip was extremely corroded and would not allow the new hardware to bolt in so we removed the nut strip by sliding it out the end of the frame rail towards the rear bumper.
The hitch came packaged with enough bolts and plates for both sides so I'm pretty sure that it just depends on the model/year of your XJ on whether or not you even have that nut strip. Either way, I like not having to depend on an old rusted up nut strip to hold the passenger side of my hitch up.
I wanted to hitch more for recovery than actual towing so I also purchased a nice d-ring receiver for it. Here's a couple shots:
How do you mount the bolts for the hitch?
Nevermind refreshed pictures and say how ya do it
Last edited by 2001XJdriver; Nov 13, 2010 at 07:30 PM.
Thread Starter
Seasoned Member
Joined: May 2010
Posts: 415
Likes: 0
From: Columbus, OH
Year: 2001
Model: Cherokee
Engine: 4.0 I6
 but then you would have put mud all over the place....hahahah !!
Yeah, basically you just have to fish some plates up into the frame rail. It's kind of awkward but doable. I decided not to use the factory nut strip which was severely corroded so I pulled it out. Let me know if you have any other questions.
Thread Starter
Seasoned Member
Joined: May 2010
Posts: 415
Likes: 0
From: Columbus, OH
Year: 2001
Model: Cherokee
Engine: 4.0 I6
Hey fellas... nothing too big to report. I did however install my swaybar quick disconnect brackets, something that I had just never gotten around to doing when installing the lift. They work and LOOK a lot better than zip ties/shoelaces 
What I started with:

Place the bracket in the general location:

Now mock it up with the swaybar installed on the bracket:

Mark and drill the holes:

Install the bracket with the supplied self-tapping screws:

Done. Doesn't it look purdy!?!?

What I started with:
Place the bracket in the general location:
Now mock it up with the swaybar installed on the bracket:
Mark and drill the holes:
Install the bracket with the supplied self-tapping screws:
Done. Doesn't it look purdy!?!?
Thread Starter
Seasoned Member
Joined: May 2010
Posts: 415
Likes: 0
From: Columbus, OH
Year: 2001
Model: Cherokee
Engine: 4.0 I6
Yeah, I think it looks a lot cleaner.
Bungees are nice for sure. Last time I was off roading it was kind of a spur of the moment thing and I didn't have anything to tie 'em up with so I ended up having to use my shoe laces haha. It worked well though.
Good luck and be sure to post up your progress!
Bungees are nice for sure. Last time I was off roading it was kind of a spur of the moment thing and I didn't have anything to tie 'em up with so I ended up having to use my shoe laces haha. It worked well though.
Good luck and be sure to post up your progress!
Thread Starter
Seasoned Member
Joined: May 2010
Posts: 415
Likes: 0
From: Columbus, OH
Year: 2001
Model: Cherokee
Engine: 4.0 I6
I ordered up a custom rear drive shaft for the XJ last week and picked it up today. A local shop did the work, here's what she looks like:


Now I don't have to run the junkyard front drive shaft that I was using in the rear. It looks a lot nicer too!
Now I don't have to run the junkyard front drive shaft that I was using in the rear. It looks a lot nicer too!
Thread Starter
Seasoned Member
Joined: May 2010
Posts: 415
Likes: 0
From: Columbus, OH
Year: 2001
Model: Cherokee
Engine: 4.0 I6

Thread Starter
Seasoned Member
Joined: May 2010
Posts: 415
Likes: 0
From: Columbus, OH
Year: 2001
Model: Cherokee
Engine: 4.0 I6
Here's the shop:
http://www.jointclutchandgear.com/index.html
Seasoned Member
Joined: Nov 2009
Posts: 331
Likes: 0
Year: 1997 2 door
Model: Cherokee
Engine: 4.0
Great build and that driveshaft is mmmm good. Quite jealous!