When you click on links to various merchants on this site and make a purchase, this can result in this site earning a commission. Affiliate programs and affiliations include, but are not limited to, the eBay Partner Network.
Alright - so I thought I'd put together another post to get my thoughts straight and my to do list updated.
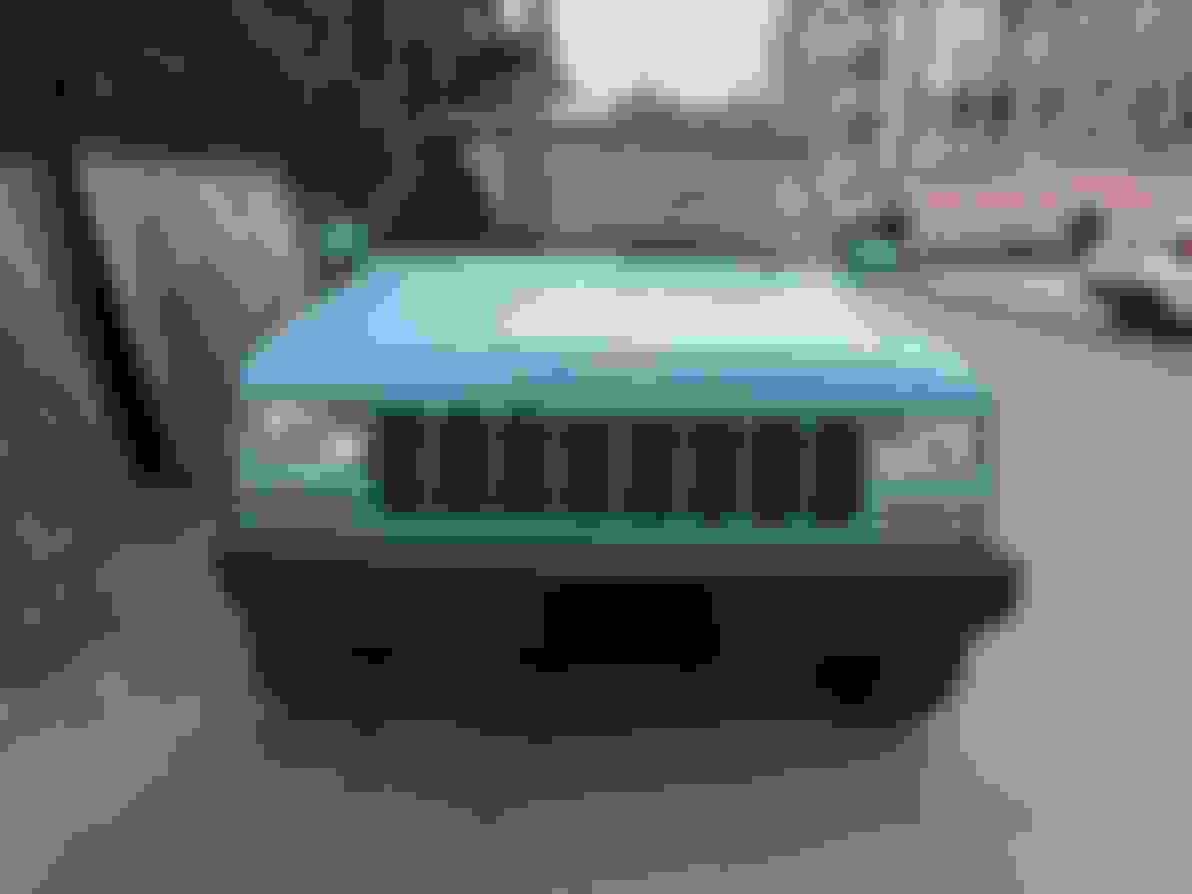
Today we came back from yet another visit with my family out of town. We just got back from there 1.5 weeks ago and had to go out again this weekend. We've been spending a lot of time in the Jeep lately...
One thing we learned today was the Cruise Control works. I didn't have it on my list for some reason, but my wife has been bugging me off and on to fix it. Well it turns out it didn't work when we bought the Jeep, but then I guess when I fixed the wiring under the dash that must have fixed it. She just hasn't tried it since then...
Also, I've been checking under the hood at the battery connections. We've had two instances where the ignition switch didn't give power (neither to the starter nor the accessories) and I had assumed it was a loose ground. I did tighten the battery disconnect each time, and that seemed to improve things, but I am also a little concerned that it could be the tumbler. I'll keep an eye on this. All grounds look clean.
My wife is going back to school, just for the year, so I have two (conflicting) issues:
We have less income
I need stuff to do while she's at school in the evenings
So I'll be pursuing some other hobbies, but I would like to also focus on low cost and labour intensive things to work on for the Jeep. I will be doing some bigger ticket improvements, such as winter tires and a new suspension, but I'll also want to do a lot of little things that won't break the bank.
Here is the to do list. I've now removed items that were previously completed.
Under hood lighting
Install the two speakers under the dash in the stock location
Replace valve cover gasket & paint valve cover.
Remove & paint the stock wheels - likely will do this in the winter when I change to winter tires
Cupholders - this is a good one to do while my wife is at work. I can take my time to fabricate these. I am also considering making a new, custom centre console lid to match.
Repair the rear hatch lock mechanism light switch - eg the thing that turns the cargo area light on when the hatch is open.
Dedicated winter tires - We have new AT tires now, but I'm still keen on a dedicated set of winter ones
Headlight harness upgrade + new headlights - I have the headlight harness and will buy the headlights soon.
Upcountry suspension - Estimate is in progress. I got a preliminary estimate, but waiting for a more detailed one before making the appointment to have the work done.
Replace the positive battery terminal with a military style terminal
Replace the CAT
Replace the AUX fan with a new one - not needed until next summer
Fog lights
Roof rack - long term. Probably a year away at least.
Roof top tent - long term. Probably a year away at least.
Repair AC
Priorities:
Headlights - the winter is coming and I want this done before the days get dark
Positive battery terminal - I'd like this done with the headlights since I need to connect the new headlight harness and relays anyways
Upcountry suspension - want to have this done before winter, so it's set up before the first snow
Snow tires - will buy as close to winter as possible
Cupholders and custom centre console lid - this is a good side project while my wife is in school in the evenings
Loved the build man! All those little 3D printer modifications you are adding looks so cool! Really wish I had the expertise to do that stuff. I as well have those crappy cupholders that seem to not be able to hold any size cup. Subbed and can't wait to see what else you have in store for your Jeep!
Loved the build man! All those little 3D printer modifications you are adding looks so cool! Really wish I had the expertise to do that stuff. I as well have those crappy cupholders that seem to not be able to hold any size cup. Subbed and can't wait to see what else you have in store for your Jeep!
Thanks! I tried convincing my wife to let me buy a 3D printer, but she's not thrilled. We don't have much space. If she was on board I'd be making all sorts of little widgets and pieces.
Hoping I can finally replace the headlights this weekend - we'll see if the weather holds out enough for me to get it done on Saturday.
In other news, I just paid for the parts for the upcountry lift. Getting it done at a small overlanding shop locally. Once the parts come in (soon) we'll be arranging for the installation. While I really wish I could do it myself, I've come to terms with reality - I just can't get this done in the alley behind our apartment and I'll never get it done myself. This shop has a good rate and is my best option at actually getting it done.
Finally installed the headlight harness, upgraded H4 housings and the military style positive battery terminal today.
It took me ~2.5 hours because I was being slow, picky and I did more than the harness. I find it takes me much longer to work on stuff in the alley - I have to be careful about where I put my tools, I sometimes have to run in/out to get tools. Just not ideal layout to do work (I can't leave anything out unattended, otherwise it'll be stolen).
What was done:
(Done 2 weeks ago) Extended ground wires on headlight harness to connect directly to battery
(Done 2 weeks ago) Made custom bracket to mount relays
Installed the headlight harness, including mounting the custom made mounting bracket to the wall on the inside of the engine compartment
Installed the new headlights
Painted under engine bay and in headlight buckets
Installed positive battery terminal and crimped positive wires with 3/8" ring terminal. Added double wall heat shrink tubing to all connections.
Before the swap. We bought the Jeep with sealed beam headlights. They were not that bright.
After removing the grille, trim, and pulling the headlights out. Everything came out easy.
After pulling the driver side plug over from the harness. I took the opportunity to paint the headlight buckets (they were getting corroded). Figured I might as well.
Passenger side pulled through. Painted this headlight bucket as well. After this (before installing the headlights) I had routed the wires nicely and zip tied them very cleanly.
Don't worry - I installed all four screws. I took this photo during installation. As you can see I replaced the screws with new self tapping roberston screws.
On the left you will see one of the wires I had yet to shorten and crimp a ring terminal to (to attach to the battery terminal).
I had also taken the opportunity to paint the engine bay around the battery. This wasn't my primary goal for the day, so I only painted where I was working. Even then it slowed me down a bit (which is fine). I'll paint the rest as I work on the Jeep. You'll notice I also pulled the positive battery terminal off. I had an old battery terminal on the battery but have been wanting to put the military style on for some time. So this was my opportunity.
At this time I was just mocking everything up and checking wire lengths.
Back inside the apartment... a week or two ago I took the harness and lengthened the ground wires (not shown) so they could be directly attached to the negative battery terminal. I don't trust grounding to the body by the headlights. We spend so much time cleaning the grounds, why shouldn't we ground the headlights either on a common ground or directly to the battery?
Also, I extended the positive wire and attached it directly to the battery terminal as well.
Since I extended the wires I had tucked them into the loom and added more loom for abrasion resistance to the exposed wires.
Soldering the wires up. I later used double wall heat shrink on all connections.
Also, I had made a bracket to mount the relays. I didn't want to mount directly to the wall of the engine compartment. Instead I made this bracket and used an existing mounting bolt. On the right side in the below image, you'll see a lot of material between the hole and end of the bracket. I shortened this bracket down so there was only ~1/2" of material on the right side of the hole. It made it tidier and was necessary to make the bracket fit.
Everything installed. You'll see next to the battery is a bracket that mounts the switch for the hood light. I used the mounting bolt for this bracket to mount the relays.
The wires are fairly tidy but I might still want to clean them up a little more.
You can see the new positive battery terminal. I crimped all the positive wires to 3/8" ring terminals.
I don't like the kink in the positive wire from the headlight harness. I might pull that wire out and lengthen it. I'd also like to put some conduit around the coolant hose around the positive wires for abrasion resistance.
Finished photo!
We drove it into our parking garage and realized I need to adjust the headlights. I'll do that in the parking garage. I just couldn't do the adjustment out in the alley (too bright; no wall).
They definitely seem brighter than the sealed beams. The headlights used to be barely noticeable when we drove into the parking garage of our apartment. I noticed them right away today. I'd say we got 15-25% brighter on low beams. We'll see how the high beams look the next time we drive at night.
(Done 2 weeks ago) Extended ground wires on headlight harness to connect directly to battery
(Done 2 weeks ago) Made custom bracket to mount relays
Installed the headlight harness, including mounting the custom made mounting bracket to the wall on the inside of the engine compartment
Installed the new headlights
Painted under engine bay and in headlight buckets
Installed positive battery terminal and crimped positive wires with 3/8" ring terminal. Added double wall heat shrink tubing to all connections.
Back inside the apartment... a week or two ago I took the harness and lengthened the ground wires (not shown) so they could be directly attached to the negative battery terminal. I don't trust grounding to the body by the headlights. We spend so much time cleaning the grounds, why shouldn't we ground the headlights either on a common ground or directly to the battery?
Also, I extended the positive wire and attached it directly to the battery terminal as well.
Since I extended the wires I had tucked them into the loom and added more loom for abrasion resistance to the exposed wires.
Soldering the wires up. I later used double wall heat shrink on all connections.
Also, I had made a bracket to mount the relays. I didn't want to mount directly to the wall of the engine compartment. Instead I made this bracket and used an existing mounting bolt. On the right side in the below image, you'll see a lot of material between the hole and end of the bracket. I shortened this bracket down so there was only ~1/2" of material on the right side of the hole. It made it tidier and was necessary to make the bracket fit.
Everything installed. You'll see next to the battery is a bracket that mounts the switch for the hood light. I used the mounting bolt for this bracket to mount the relays.
The wires are fairly tidy but I might still want to clean them up a little more.
You can see the new positive battery terminal. I crimped all the positive wires to 3/8" ring terminals.
I don't like the kink in the positive wire from the headlight harness. I might pull that wire out and lengthen it. I'd also like to put some conduit around the coolant hose around the positive wires for abrasion resistance.
I wanted to do something similar with the headlight harness. I put OEM type fog lights in my '00 that did not come with them. Used a factory switch but the set up is wired just like you would do any other aftermarket lighting. Also might add more lights. Plus there is the Ext Idle switch I want to hook up. Plus the headlight harness. The thinking is put in an aux fuse box for the 12V run sources for the switches and power to relays. Also would like to put all this in one place so it looks nice and tidy. I was thinking about taking the headlight harness and rewiring it completely, to lengthen all the wires, so I could put this where I want. Thinking at the moment is maybe set up the aux fuse box and relays near the open spot by the power brake booster or somewhere on the firewall. Thing is I don't really know if lengthening all the wires on the headlight harness would keep it from working as well as it should. Longer wires equal more resistance. Does that even matter? Plus there is exactly how do I do this. Use a circuit breaker with the fuse box? If so how many amp? Electrical is not my strong suit. Been trying to get a handle on what to do. But that would all be set up at the same time I get the alt rebuilt and the amps upped plus do the battery cable upgrade.
I wanted to do something similar with the headlight harness. I put OEM type fog lights in my '00 that did not come with them. Used a factory switch but the set up is wired just like you would do any other aftermarket lighting. Also might add more lights. Plus there is the Ext Idle switch I want to hook up. Plus the headlight harness. The thinking is put in an aux fuse box for the 12V run sources for the switches and power to relays. Also would like to put all this in one place so it looks nice and tidy. I was thinking about taking the headlight harness and rewiring it completely, to lengthen all the wires, so I could put this where I want. Thinking at the moment is maybe set up the aux fuse box and relays near the open spot by the power brake booster or somewhere on the firewall. Thing is I don't really know if lengthening all the wires on the headlight harness would keep it from working as well as it should. Longer wires equal more resistance. Does that even matter? Plus there is exactly how do I do this. Use a circuit breaker with the fuse box? If so how many amp? Electrical is not my strong suit. Been trying to get a handle on what to do. But that would all be set up at the same time I get the alt rebuilt and the amps upped plus do the battery cable upgrade.
The littelfuse ones are weather proof, rated to 30A each circuit and have slots for fuses and relays.
The fuse boxes you buy on amazon generally just hold fuses. Then you need a distribution centre to distribute power and ground. There are several on amazon that seem fine (but not weatherproof). I believe the PDC from littelfuse would have all of that combined.
I would not worry about longer wires and resistance. Worry about using the correct gauge wire. Don't pass the wires through mechanical junctions. If you want to connect two wires, join them and solder them together properly. Don't pass power through a switch.
The resistance from added wire length is quite low and unlikely you will need to consider. The mechanical connections are where resistance will go up.
Any reason you are not looking at putting the fuse box close to the XJ's stock PDC? I have lots of room over there..that's where I would put it.
Also I have seen an instruction on the forums here from someone that shows how to expand the stock PDC. This is a bit of work, but it's tempting as it's much more clean.
But yea, I'm with you on this. The headlight harness is the only added circuit at the moment. If I add any more I'll move everything over to a new PDC or run everything through the stock PDC. I just really wanted to keep the changes to a minimum on this so I could troubleshoot if something didn't work.
Those things at the link you gave seem kinda cool. Like how you could configure an array of relays and fuses in the one box. Just don't understand where they get power from. I was thinking something like this.
Not really sure what you mean by "The fuse boxes you buy on amazon generally just hold fuses. Then you need a distribution centre to distribute power and ground.". Thinking the box at the link I gave takes care of everything. It is just whether to put a circuit breaker in front of it and how big if so. Also my research seems to indicate the farther away from the battery the aux fuse box is the more you might want to use the circuit breaker. Haven't really scoped out where I would put it.
If I rewire the headlight harness I am going to try to use new terminal and not solder in wire to make it longer but use new wire too. Think I have found a place that has all the locking terminals that were used in the headlight harness.
Welp! you're right. The one you link to pulls in one power wire and distributes it to all the fuses. For some reason I didn't find one like this. The ones I found on amazon all just are a plastic housing that will hold the fuses and relays, but did not have a way to pull one power wire in without buying ANOTHER terminal to do the power distribution. I've searched again on my laptop and I can easily find ones like the one you link to. I have no idea what lead me astray when searching earlier. Sorry!
Although the one you linked to looks pretty solid and really well built, the one thing I don't like about the fuse boxes like that to is they aren't very weather proof. I mean, the OEM one isn't either, but I definitely liked the weather resistance rating on the litelfuse ones. *shrugs*
I can understand putting a circuit breaker in if the power wire between the fuse box and battery is too long. I didn't think of that - but it's a good point.
Good idea to just extend the wires. I'd probably go that route as well since it's installed now.
If you are looking at putting a circuit breaker and modifying the harness, have you considered just wiring up your own circuit instead of using the harness? You could also get a relay box if your chosen fuse box doesn't have a slot for relays. Then snip the stock headlight harness and run it to the relay instead. Then new, large gauge wires from your relay and fuse box to headlight plugs.
Personally, I've been doing as it as "modular" as I can. I can't get an extension cord out to our alley so if I need to solder any wires I'm SOL. I went with the relay harness to give me a plug in option for now. Then I could replace entire wires later to integrate better with a new PDC.
I am still feeling my way through this idea. I started a thread awhile back hoping to get some insight, ideas, criticisms (LOL), but nobody really responded. Not having slots for the relays is not a big deal. I just figure a bracket of some sorts somewhere with them all attached to it.
Wiring up my own circuit? I need to keep this simple. Out of all the things I do poorly anything electrical is probably at the top of the list. Plus my goal is to change as little as possible of the Jeep when it comes to upgrades and mods. Example. I have a guy that rebuilds alternators. He thinks he can get as much as 150 amps out of a stock '00 one. Now why not just get the 136 amp GC or 160 amp Durango one, grind the bracket, and be done with it. Cause I want it to be a straight bolt in. The headlight harness improves the Jeeps headlights. Installs easy. Removes easy. No mods needed. I like that I can put it back to the way it was no problem. Why would I want to? Not a clue. Just like the idea that I can.
Ah yea, it's too bad the forums are sometimes a little quiet and certain threads don't get much attention. Other times they just explode with replies!
I know what you mean about feeling through it - I'm not an electrical kind of guy either so sometimes it can be daunting. I've also had enough incidents with car batteries when I was younger that I don't feel as comfortable even handling car batteries as I should. Installing the headlights and terminals this past weekend is a little unusual but also good practice.
I agree that it's kind of reassuring you can unplug your electrical work (headlight harness, other stuff) and have the stock wiring. I've done this with a bunch of little mods as well (eg: power mirror switches use the stock plug and harness). But ultimately I think as long as you do a good job with wiring it doesn't matter. It just REALLY sucks if you do a poor job wiring and either yourself later or the next owner have to deal with bad electrical work.
Updating the to do list again. I've removed items that were previously completed.
Under hood lighting
Install the two tweeters under the dash in the stock location
Replace valve cover gasket & paint valve cover.
Remove & paint the stock wheels - likely will do this in the winter when I change to winter tires
Cupholders - this is a good one to do while my wife is at school. I can take my time to fabricate these. I am also considering making a new, custom centre console lid to match.
Repair the rear hatch lock mechanism light switch - eg the thing that turns the cargo area light on when the hatch is open.
Dedicated winter tires - We have new AT tires now, but I'm still keen on a dedicated set of winter ones
Upcountry suspension - Estimate is in progress. I got a preliminary estimate, but waiting for a more detailed one before making the appointment to have the work done.
Replace the CAT
Replace the AUX fan with a new one - not needed until next summer
Fog lights
Roof rack - long term. Probably a year away at least.
Roof top tent - long term. Probably a year away at least.
Repair AC
Priorities:
Headlights - the winter is coming and I want this done before the days get dark
Adjust headlights properly [Gotta do this still. Either need to do it quietly in our parking garage or drive to a parking lot nearby and do it]
Positive battery terminal - I'd like this done with the headlights since I need to connect the new headlight harness and relays anyways
Upcountry suspension - want to have this done before winter, so it's set up before the first snow [Parts are ordered. Shop will install when they arrive]
Snow tires - will buy as close to winter as possible
Cupholders and custom centre console lid - this is a good side project while my wife is in school in the evenings
The suspension is almost there. Waiting on parts and I have a shop lined up for installation.
I have winter tires selected (I think) so I'll just keep an eye on the weather forecast and pull the trigger when I need to.
Next up will be the cupholders. I've got some foam available (abandoned in our apartment storage unit area) so I'll probably make it out of fibreglass. I'll work on the plan this week I think.
Ah yea, it's too bad the forums are sometimes a little quiet and certain threads don't get much attention. Other times they just explode with replies!
I know what you mean about feeling through it - I'm not an electrical kind of guy either so sometimes it can be daunting. I've also had enough incidents with car batteries when I was younger that I don't feel as comfortable even handling car batteries as I should. Installing the headlights and terminals this past weekend is a little unusual but also good practice.
I agree that it's kind of reassuring you can unplug your electrical work (headlight harness, other stuff) and have the stock wiring. I've done this with a bunch of little mods as well (eg: power mirror switches use the stock plug and harness). But ultimately I think as long as you do a good job with wiring it doesn't matter. It just REALLY sucks if you do a poor job wiring and either yourself later or the next owner have to deal with bad electrical work.
If I ever get to this I will do a write up. That's when I will get tons of replies, ideas, and criticisms. LOL. And I will be thinking where were all these ideas before I went down this rabbit hole. More LOL.
Curious as to what you bought to duplicate an Up Country suspension.
Curious as to what you bought to duplicate an Up Country suspension.
I know there are a few ways to get this done, but I looked into what others have done and I asked my shop for recommendations and they came up with the same parts list.
Crown 4886186AA Leaf Spring × 2
Moog CC782 Coil Springs × 1 pair
Energy Suspension 2.2109G Bushings × 1
Crown 52002393 Rear Bump Stop × 2
Monroe 37083 Front Strut × 2
Monroe 37027 Rear Strut × 2
Iron Rock Offroad Adjustable Shackles × 1
Rubicon Express .75" Coil Spring Spacer Lift Kit - RE1333
The intent is to use the coil spacers and 3/4" adjustable shackles to level the lift out. I prefer the rear a little higher than the front if it can't be perfectly level (but level is preferred!). So if the front coil spacers aren't needed then we won't use them.
Also the rear bump stops are totally rotted out so we are just putting some Crown ones in so there is *something* there.
Still waiting for a few suspension parts to arrive at the shop. It's a small business, so they don't get very frequent shipments coming in from suppliers. I was hoping we could drop the Jeep off this weekend for them to work on it..but we'll see.
I just bought a dash cam and one of the dedicated dashcam external batteries. I've been seeing some unusual stuff going down in my parking garage in my building; I'd like footage so I can get video confirmation of what's going on. I was also thinking about getting one for some time - this just pulled that ahead a lot sooner. I know I could hook up the dash cam to the battery of the Jeep instead of getting an external battery, but I don't want to drain the battery and when we go camping the Jeep is parked for a few days at a trail head with the battery disconnected. It's best if we have an external power source for the dash cam in those situations. The batteries allow you to daisy chain together - so you can just keep adding batteries so the dashcam can run longer. When parked it's triggered by motion and "shock" detection (eg: if someone bumps into the Jeep).
Well .. that was quick. I got the dash cam in the mail yesterday. The company I bought it from is local so I got it like a day after I ordered it.
Blackvue DR590W-1CH
Blackvue Power Magic Ultra Battery B-124
It looks easy to set up. I got it for the "Parking Mode" to watch the XJ while parked; hopefully will see what's going on in our parking garage. We disconnect the battery when we go backpacking and leave the XJ for days at trailheads so it's just to keep an eye on the Jeep and anything we leave in it. I wanted to get a dual channel camera to monitor inside the cab and outside but they are much too expensive for now.
We don't drive the XJ often so I need to battery to last at least a week in the garage, and a week or so when we go backpacking. I only got one battery to start with so I'll charge it every few days with an AC-DC converter when parked at home. Before next summer I'll get a couple more batteries to extend the battery life to a week.
I forgot to buy the AC-DC converter.. so I haven't charged the battery ... and so I haven't set up the camera yet. I'll buy a converter tomorrow hopefully at Canadian Tire; hopefully I'll set up the camera Monday or Tuesday.