
Leikarnes's XJ project, lot's of pictures!

Thread Starter
Newbie
Joined: Aug 2011
Posts: 25
Likes: 0
From: Norway
Year: 1988/1995
Model: Cherokee
Engine: 4.0 HO
Hey! Greetings from Western Norway! 
I figured out that I'd share my XJ project with all of you. I bought my first Jeep in may this year. It was already lifted 2,5" with a full Trailmaster kit, BFG's and HID conversion. i paid 35.000,- norwegian krones for it, thats abouuut > 4500$ the reason i desided to do a build thread is that i'm an engineerapprentice (engine/mechanic) on a anchorhadling vessel/ship in the north sea, so i'm at sea for 4 weeks then i have 4 weeks at home "jeeping" very good paid holiday every second month!
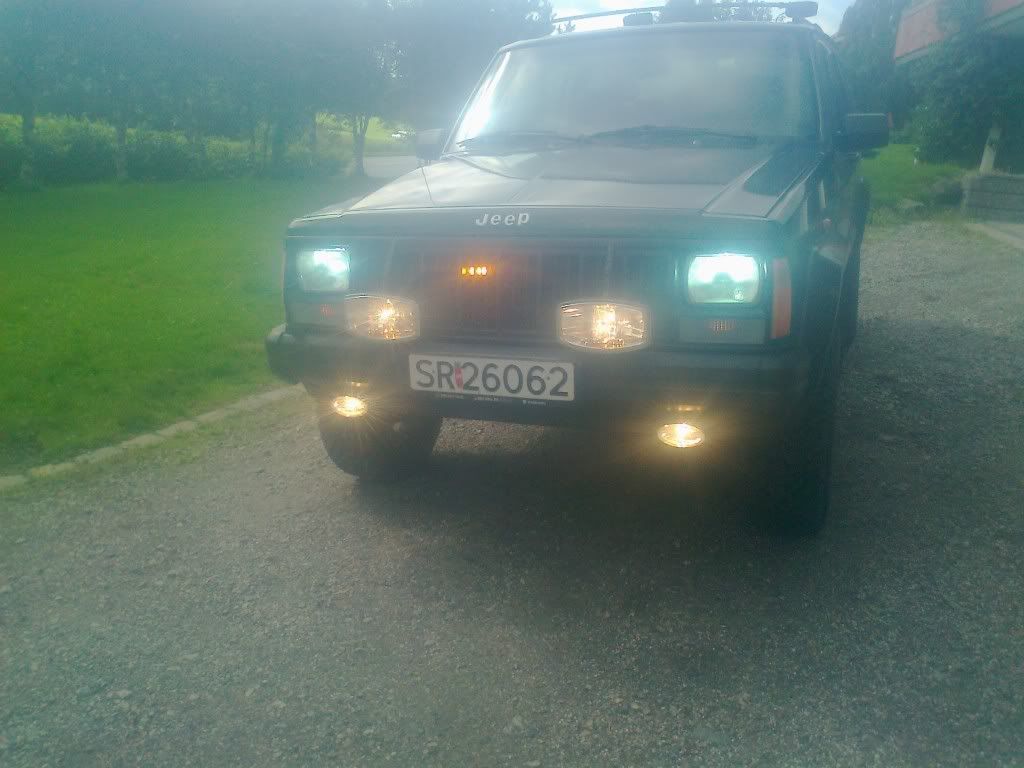
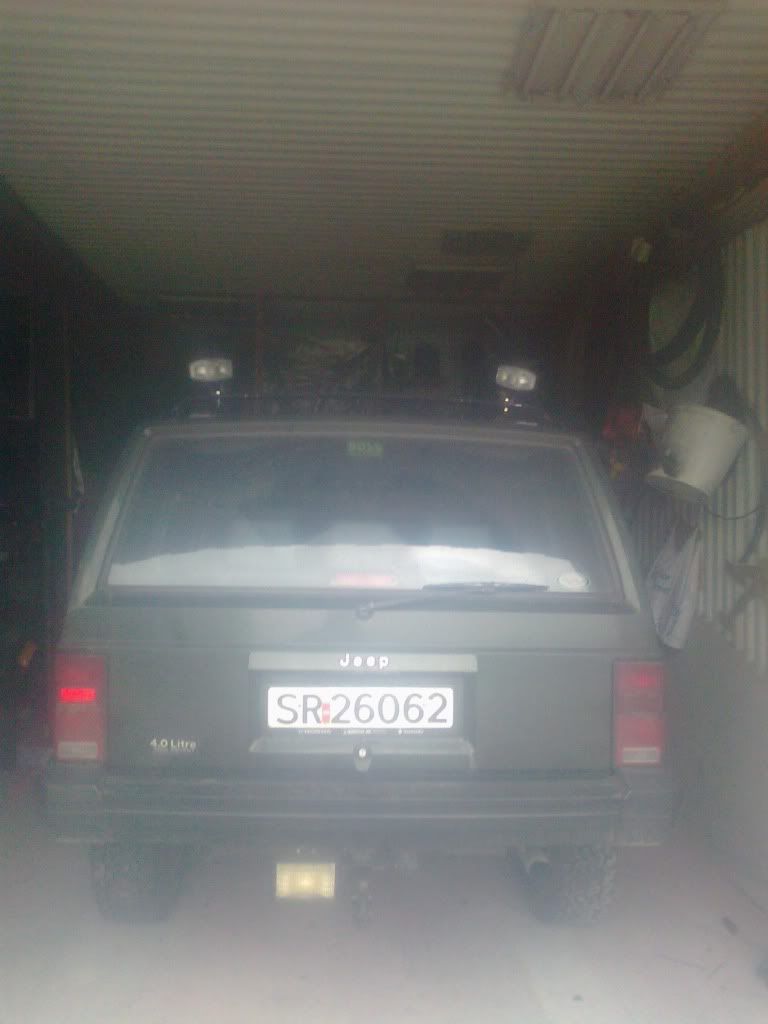
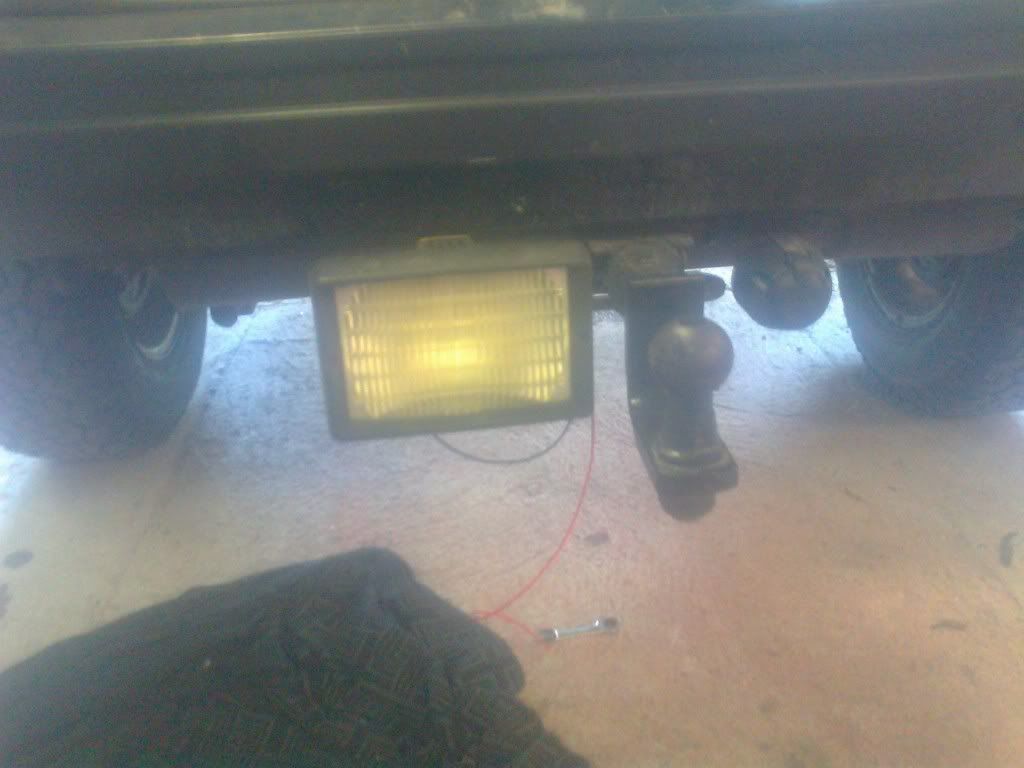
I added some more lightning, some fog lights, and working lights in the rear, ah, and yes i also threw on a working light from one of our tractors as a better reverse light. i have one strobe in the grill at front, i have 6 more lying around waiting for me to install them around the car.
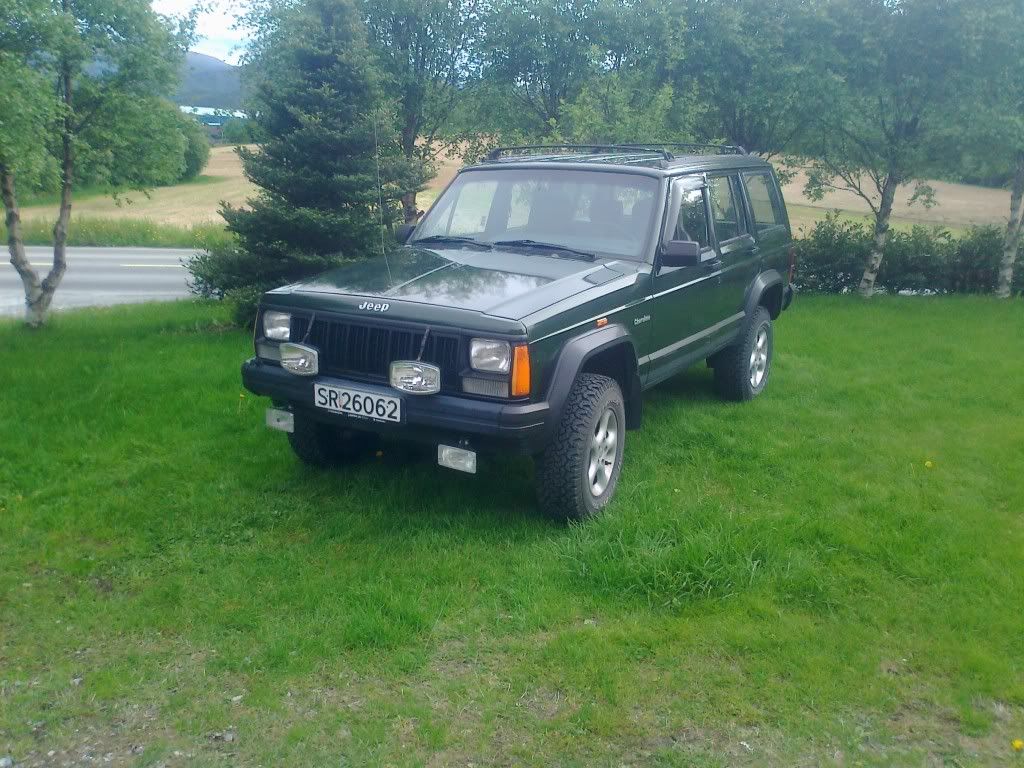
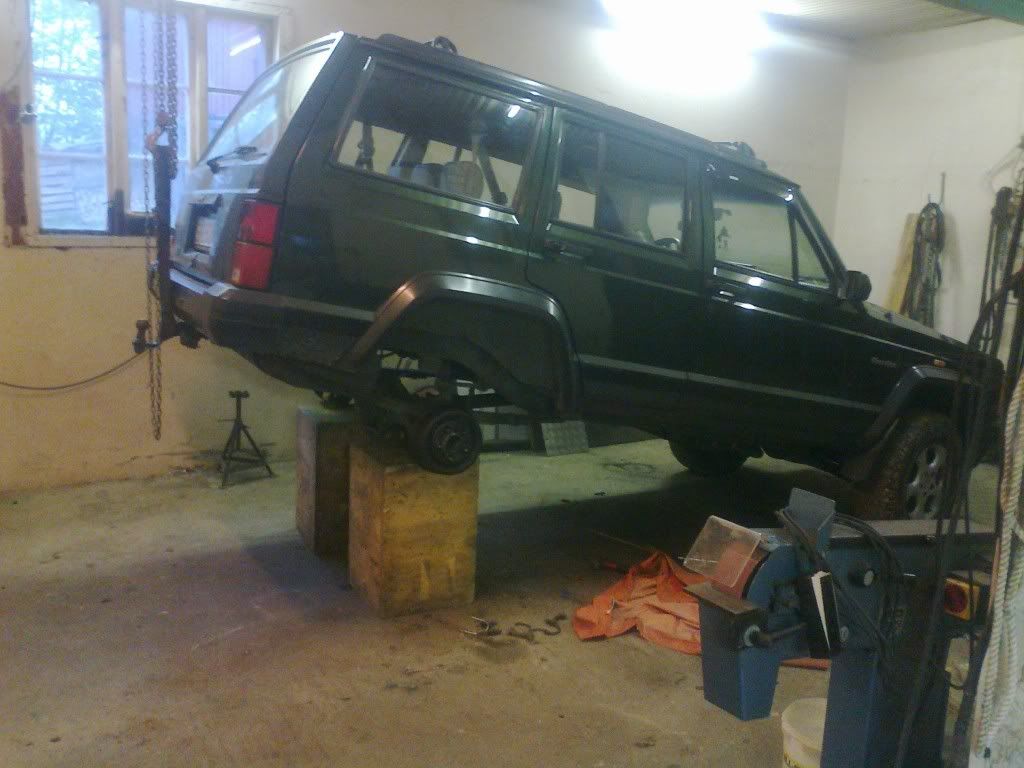
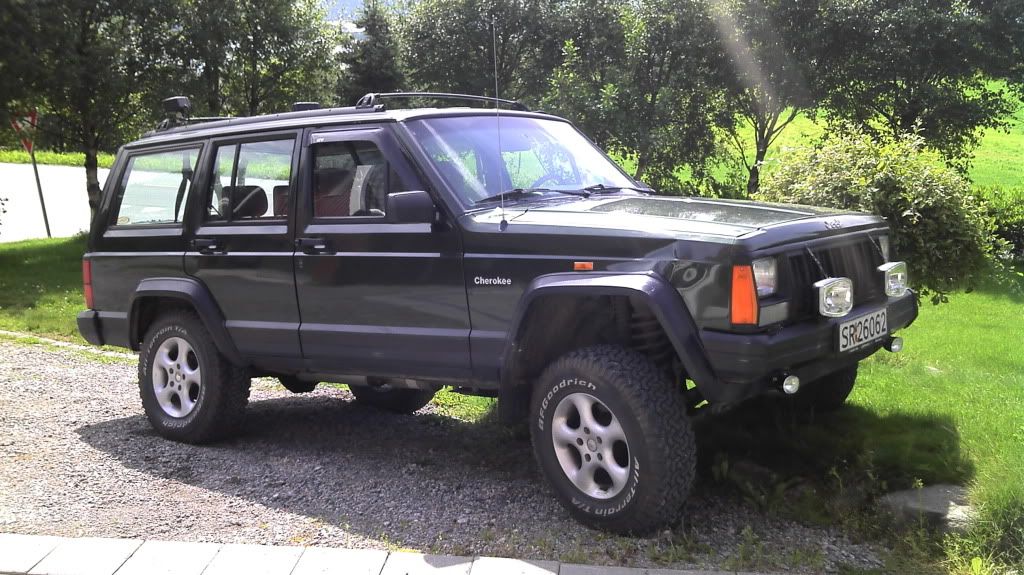
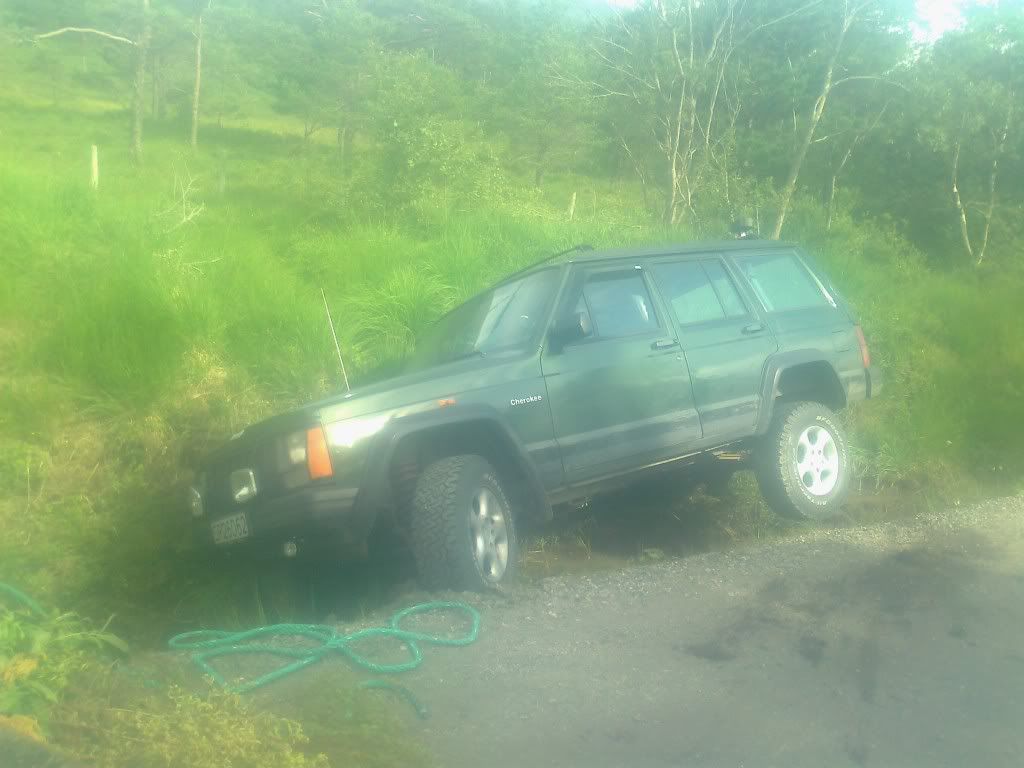
When i first got hold of it:
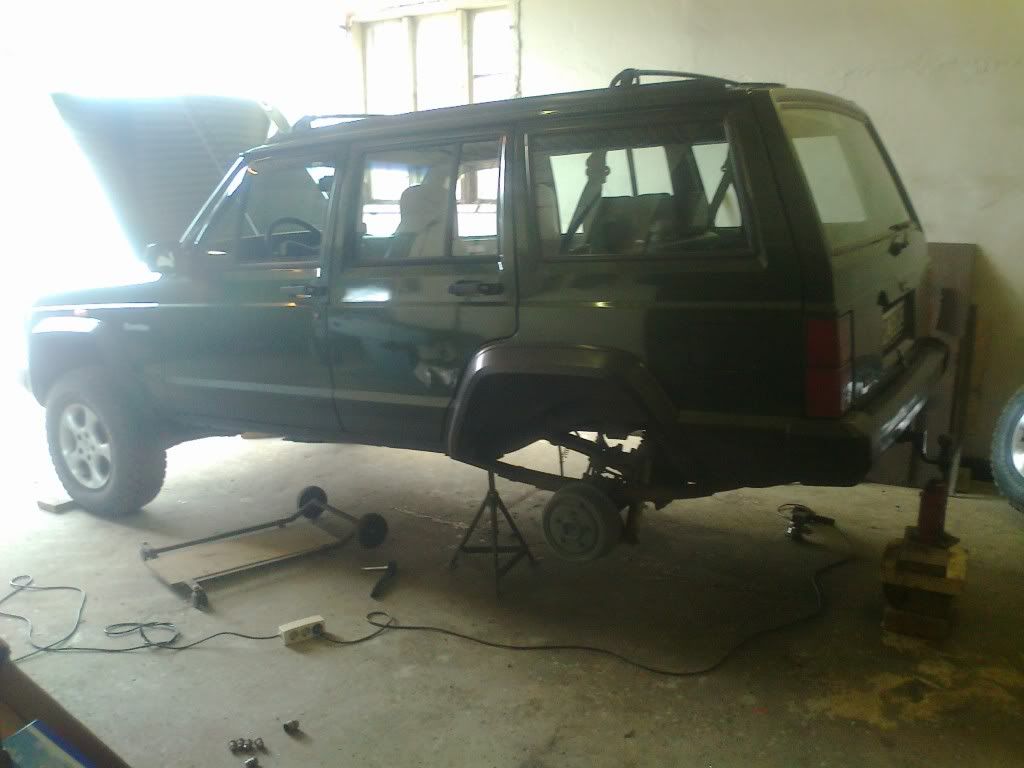
had to fix a couple things before i stared driving it:
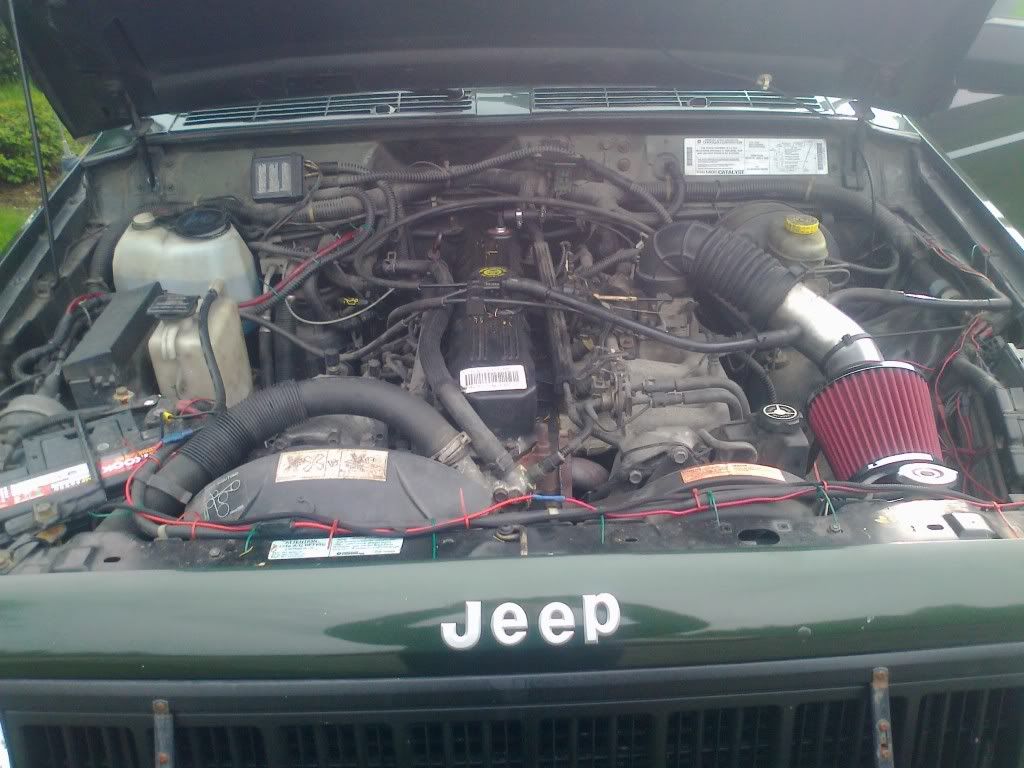
had to redo the whole exhaust
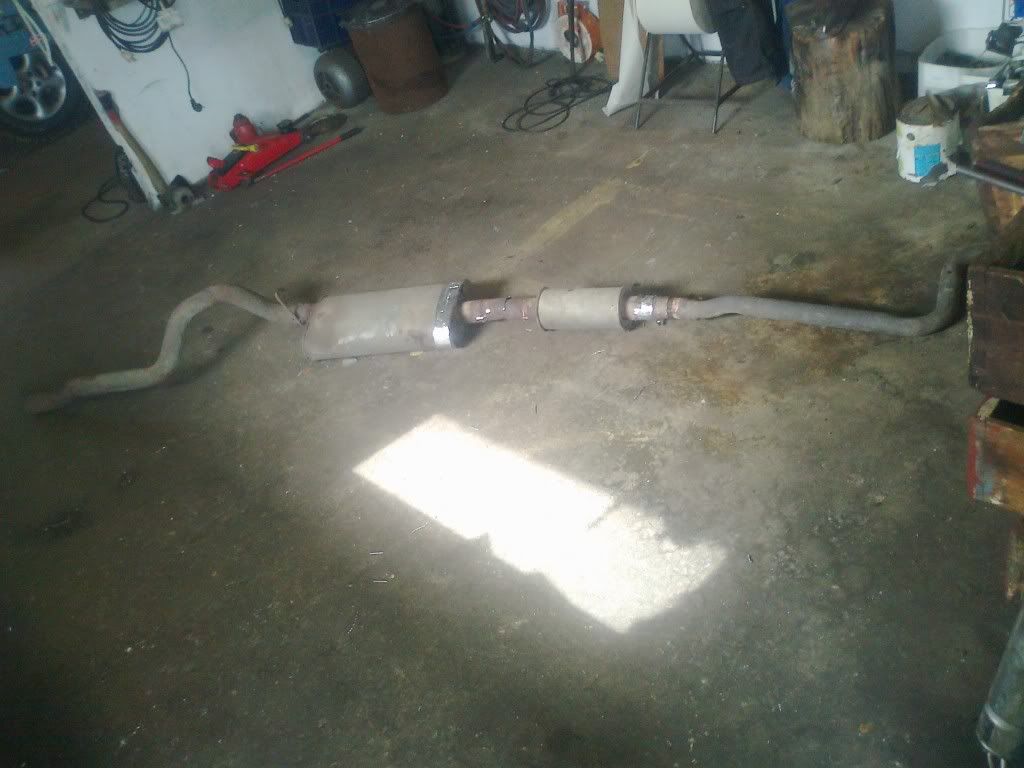
tried at first with only one silencer, wasn't enough so i had to go and get one more... total cost: 120$
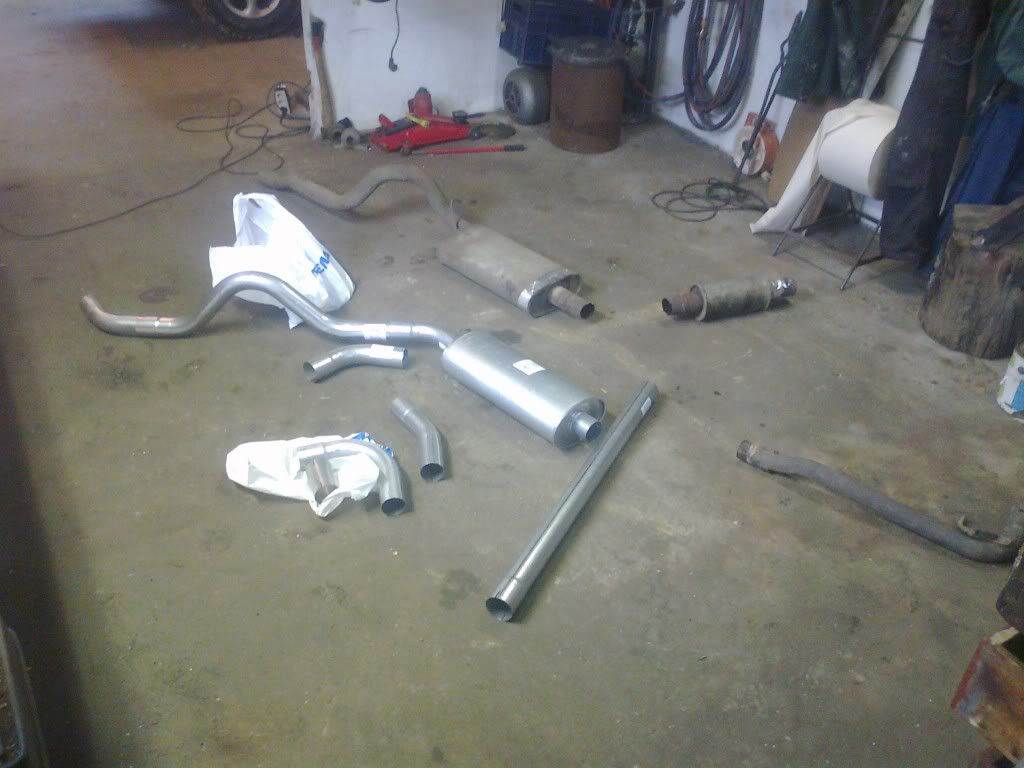
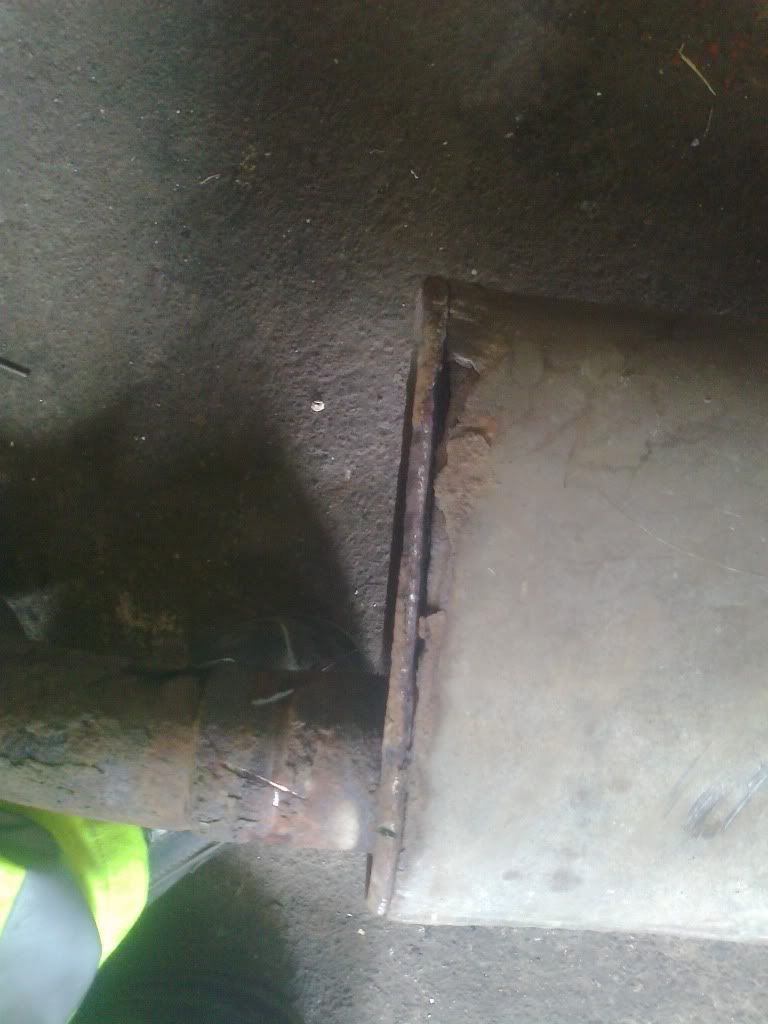
new fitting for the exhaust:
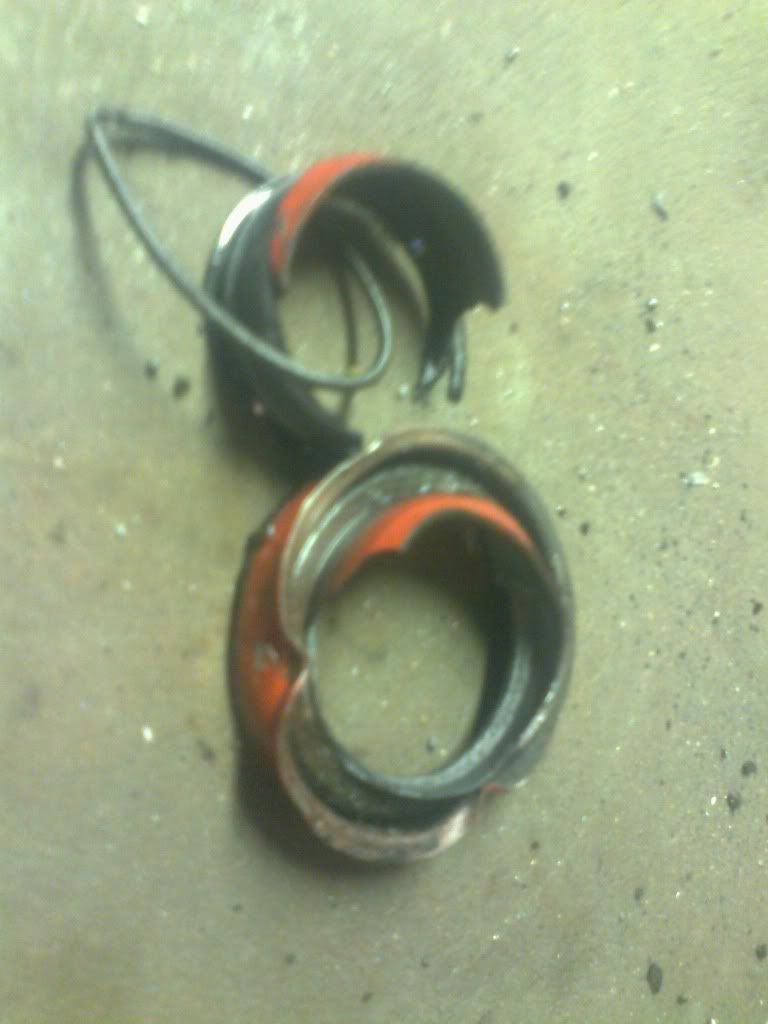
had to change the seal on the transfercase (fortunatly i got the sealing when i bougth the car!)
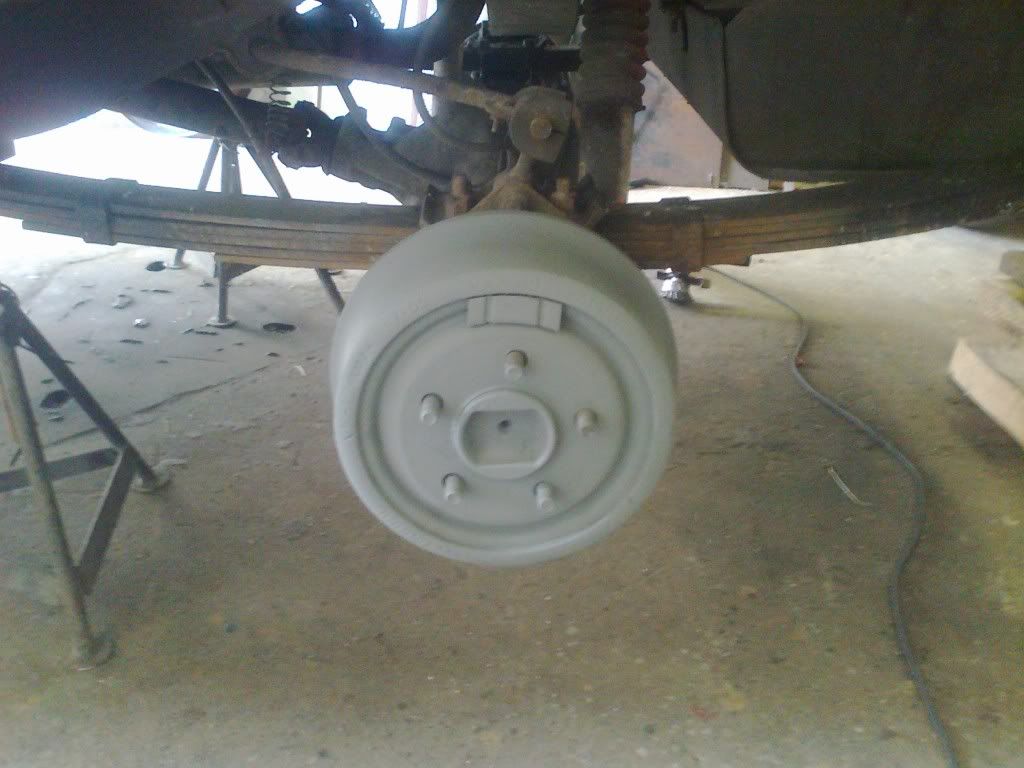
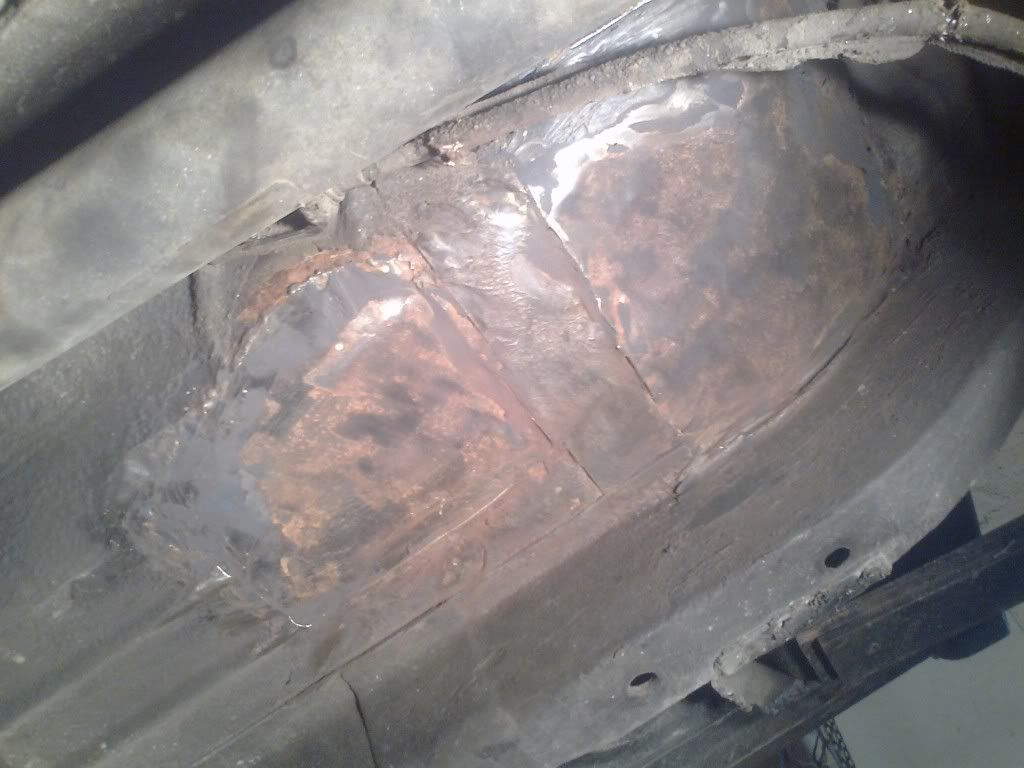
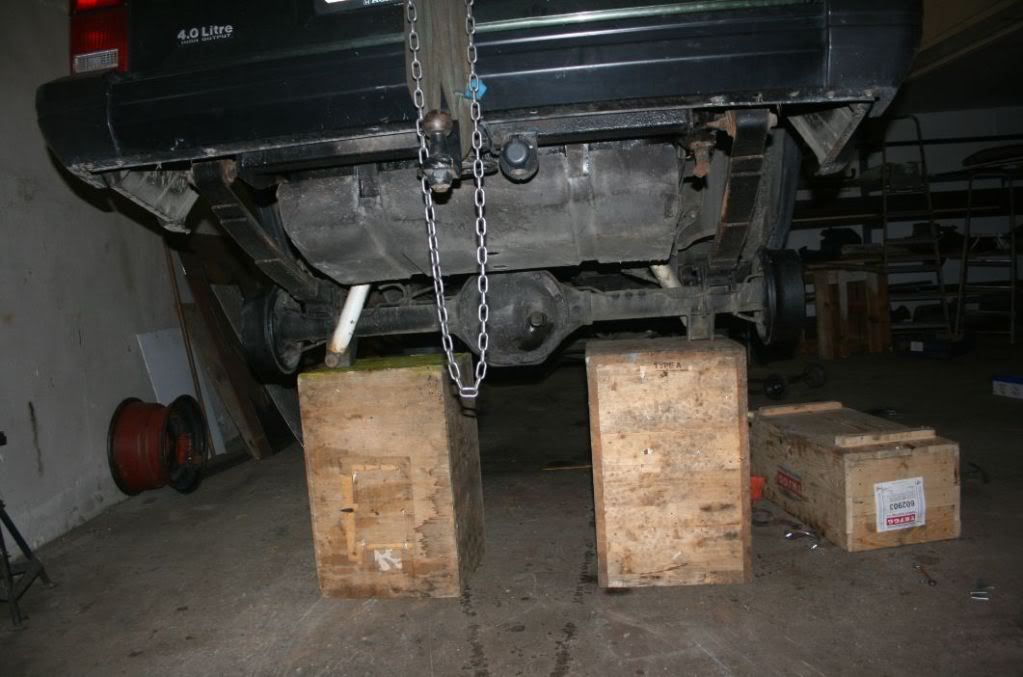
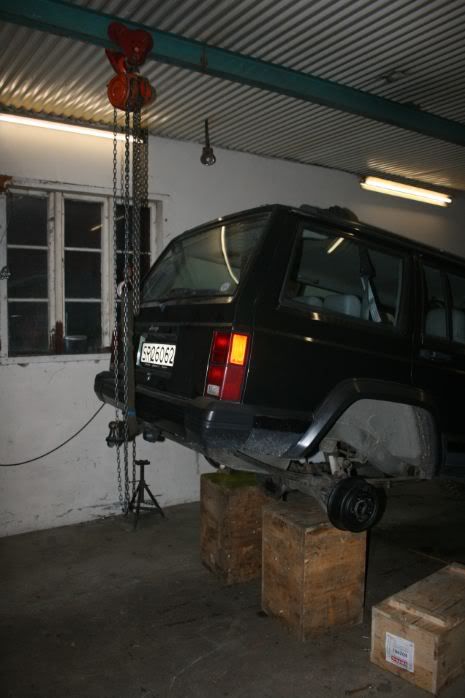
Grinding rust and tecylin' underneath
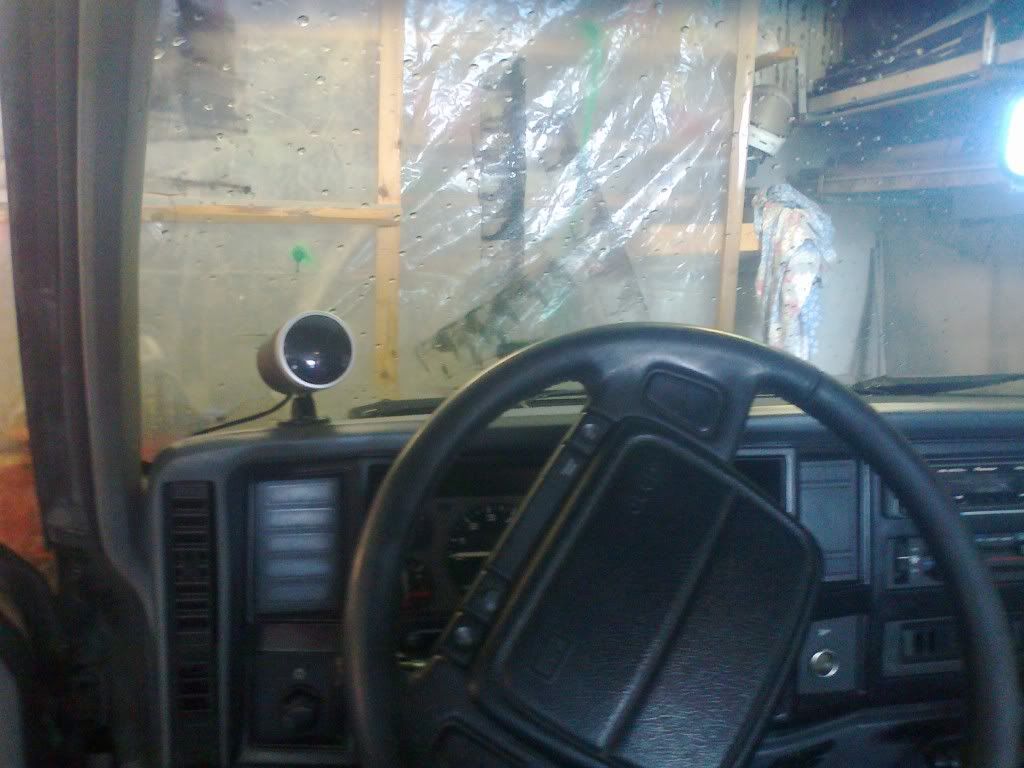
Vaccummeter:
lightning is important!.... more to come

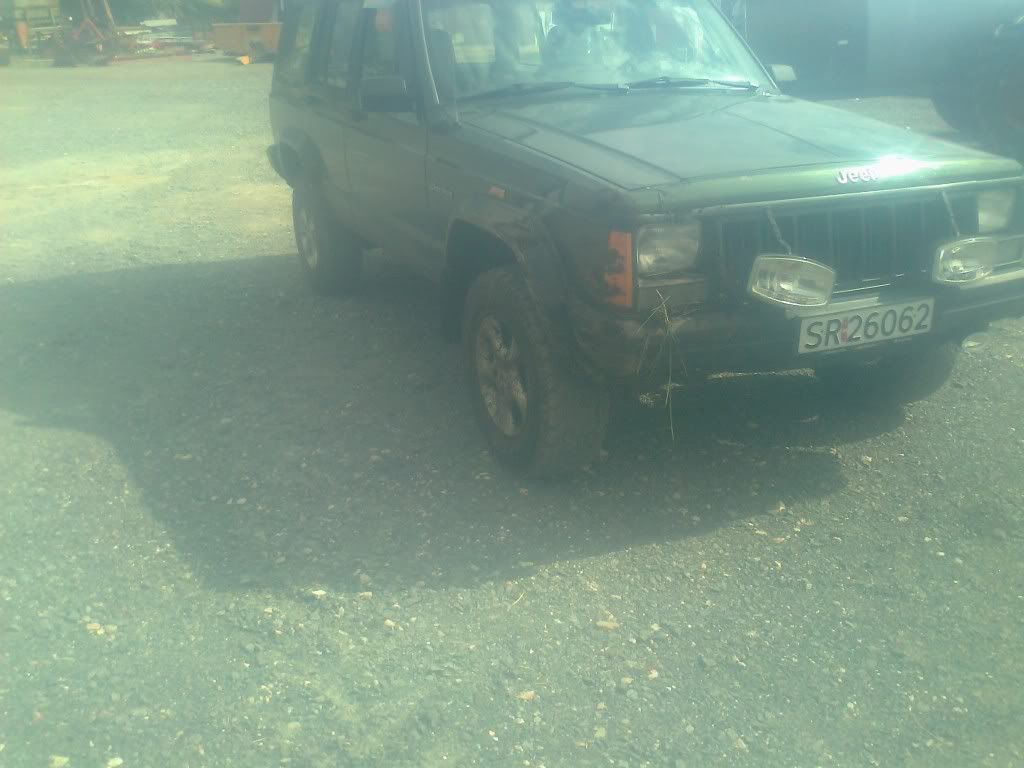
many crappy cellphone pictures here... haha...
workinglight from one of our tractors as reverse light
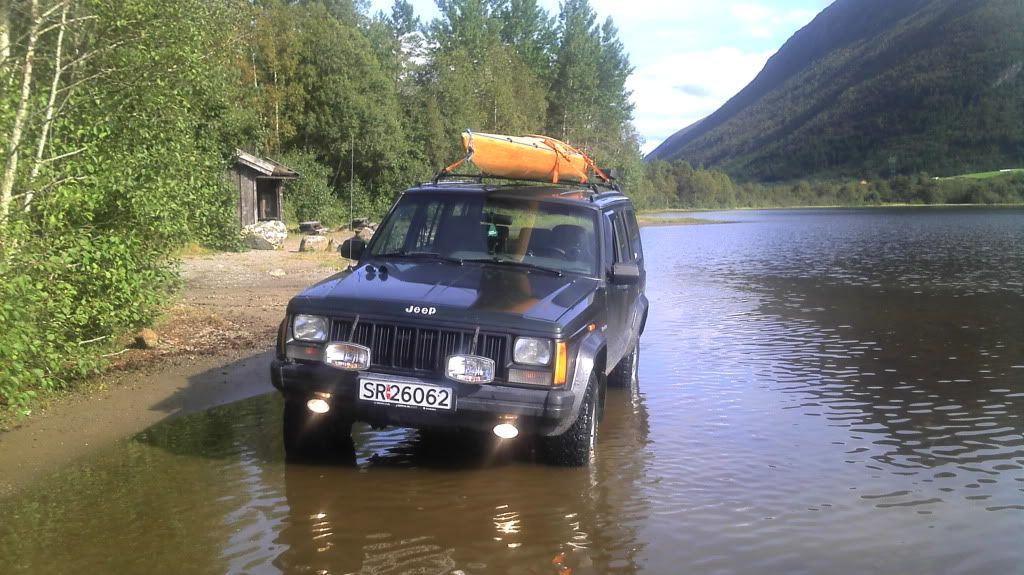
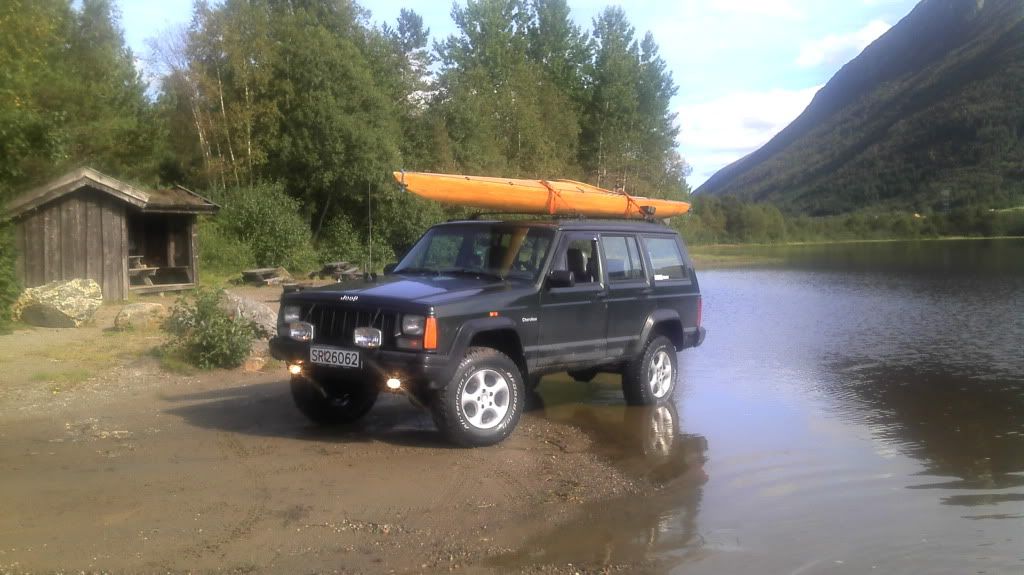
fishing trip with my homemade kayak:
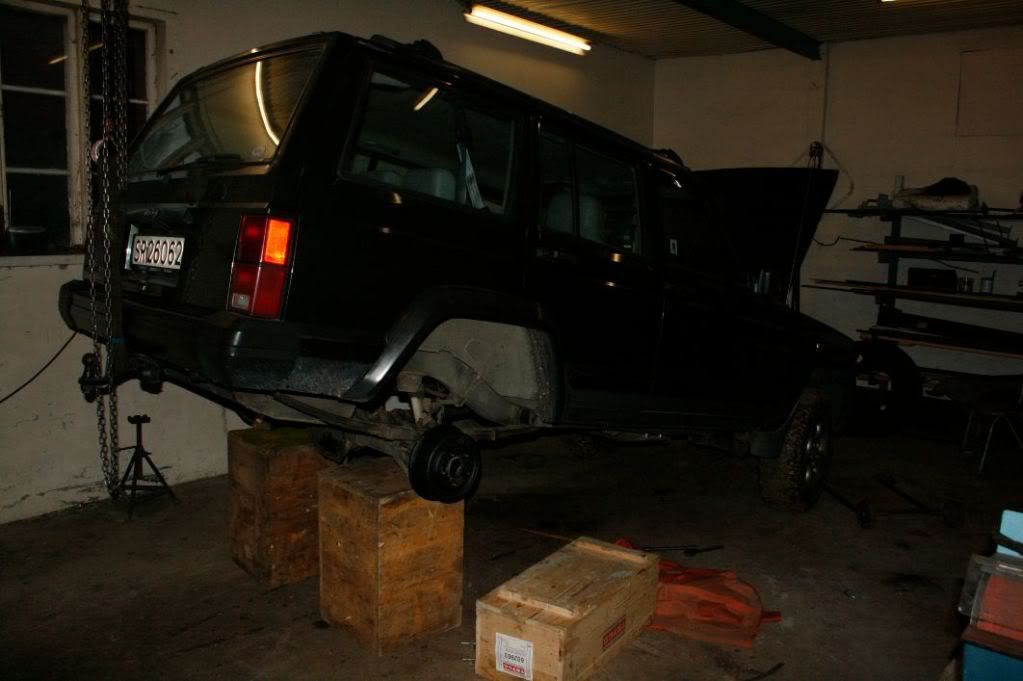
tried not to hit a deer early one morning and bam ditched... -.- yeeee, little skuffed at the front corner... nothing to worry about, will get the pictures from the ditch later!
it's gonna be a lot more pictures when i get my photobucket to accept my uploads again... crappy internet at sea...
seeyah!
I figured out that I'd share my XJ project with all of you. I bought my first Jeep in may this year. It was already lifted 2,5" with a full Trailmaster kit, BFG's and HID conversion. i paid 35.000,- norwegian krones for it, thats abouuut > 4500$ the reason i desided to do a build thread is that i'm an engineerapprentice (engine/mechanic) on a anchorhadling vessel/ship in the north sea, so i'm at sea for 4 weeks then i have 4 weeks at home "jeeping" very good paid holiday every second month!
I added some more lightning, some fog lights, and working lights in the rear, ah, and yes i also threw on a working light from one of our tractors as a better reverse light. i have one strobe in the grill at front, i have 6 more lying around waiting for me to install them around the car.
When i first got hold of it:
had to fix a couple things before i stared driving it:
had to redo the whole exhaust
tried at first with only one silencer, wasn't enough so i had to go and get one more...
new fitting for the exhaust:
had to change the seal on the transfercase (fortunatly i got the sealing when i bougth the car!)
Grinding rust and tecylin' underneath
Vaccummeter:
lightning is important!.... more to come
many crappy cellphone pictures here... haha...
workinglight from one of our tractors as reverse light
fishing trip with my homemade kayak:
tried not to hit a deer early one morning and bam ditched... -.- yeeee, little skuffed at the front corner... nothing to worry about, will get the pictures from the ditch later!
it's gonna be a lot more pictures when i get my photobucket to accept my uploads again... crappy internet at sea...
seeyah!
Last edited by leikarnes; Sep 28, 2011 at 05:13 PM.
Thread Starter
Newbie
Joined: Aug 2011
Posts: 25
Likes: 0
From: Norway
Year: 1988/1995
Model: Cherokee
Engine: 4.0 HO
Hey!
My photobucket suddenly agreed to cooperate with me again!
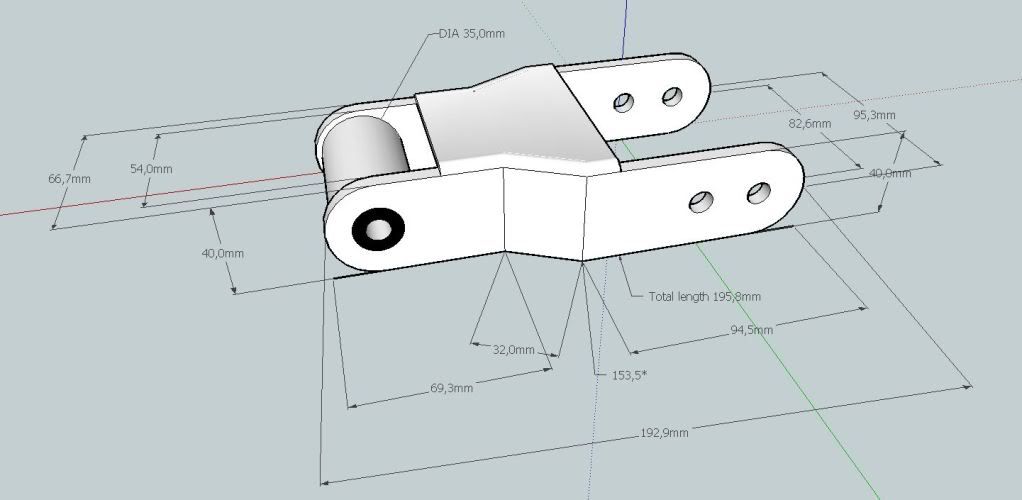
i'm right now working on fabricating my own rear shackles, "optional lift adjustment..." we have a great workshop aboard the ship so i can make anything!
here's my workdrawing/idea, the distance thats marked up is the orginal shackle.


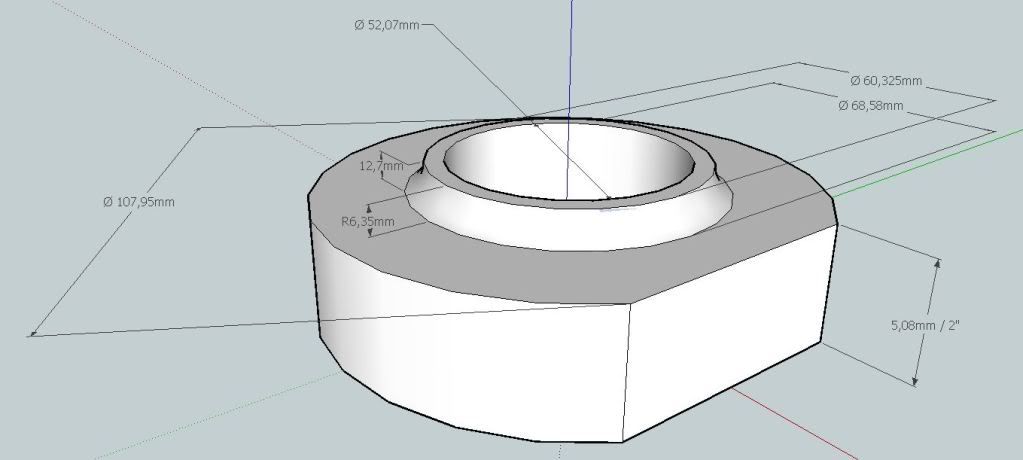
i'm also going to fab up some coil spacers in adition to my lift kit
and as i promised: The ditched jeep... :S
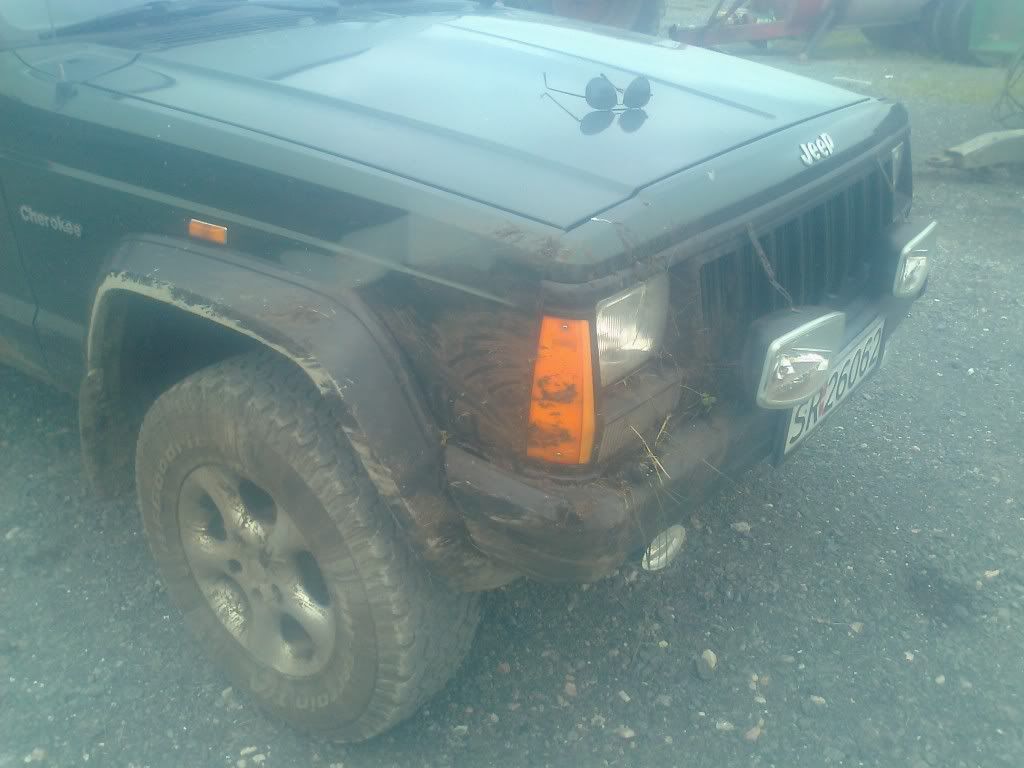
Looks great eh? haha...
well, it's time to sleep a bit! it's 00.10 here in Norway, work starts 07.30 soooo... g'night!
My photobucket suddenly agreed to cooperate with me again!
i'm right now working on fabricating my own rear shackles, "optional lift adjustment..." we have a great workshop aboard the ship so i can make anything!
here's my workdrawing/idea, the distance thats marked up is the orginal shackle.
i'm also going to fab up some coil spacers in adition to my lift kit
and as i promised: The ditched jeep... :S
Looks great eh? haha...
well, it's time to sleep a bit! it's 00.10 here in Norway, work starts 07.30 soooo... g'night!
Thread Starter
Newbie
Joined: Aug 2011
Posts: 25
Likes: 0
From: Norway
Year: 1988/1995
Model: Cherokee
Engine: 4.0 HO
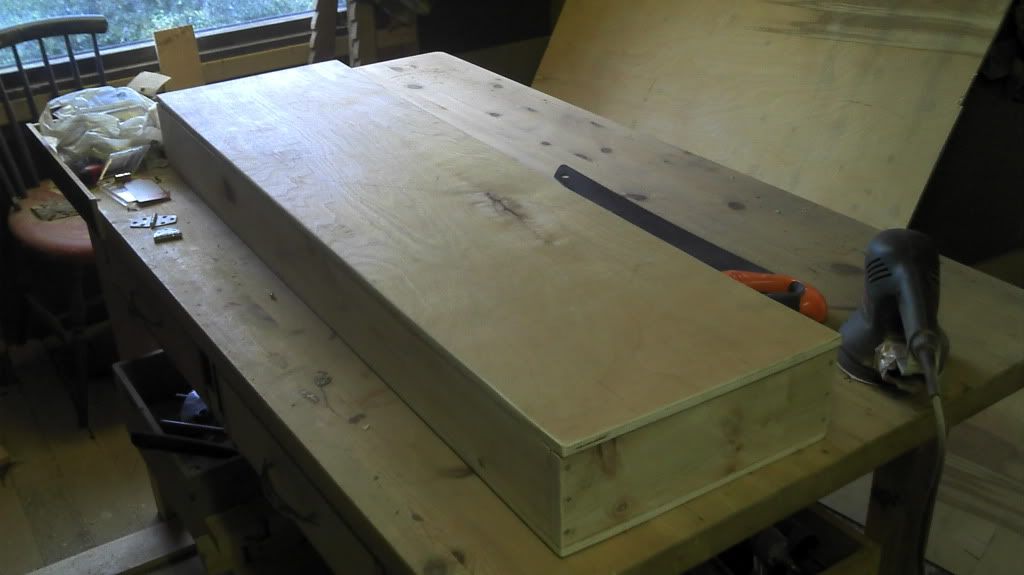
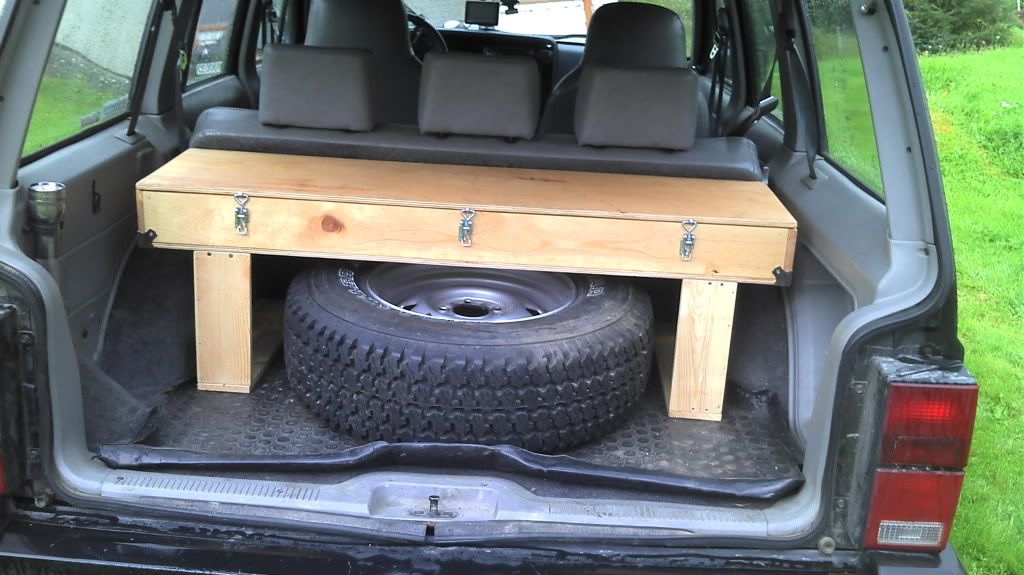
When i woke up one day i couldn't figure out what i had to that day so i desided that i was gonna make a storage kinda thing in the back of the Cherokee.
sooo, i started by calling up a friend asking for a plywood plate (is plate the correct word?...) haha, he had one who had been damaged, i got it for free!
started making my box, i just measured a little and started making it. when i had made it i found out that i hadn't measured enough... (i planned to have the box at the floor of the cherokee, but when i was done... it was 1 inch to big oh, well i thought, then i'll lift it so my spare fits underneath and keep's the box in place! and i'm really happy with the result!
some (many...) pictures

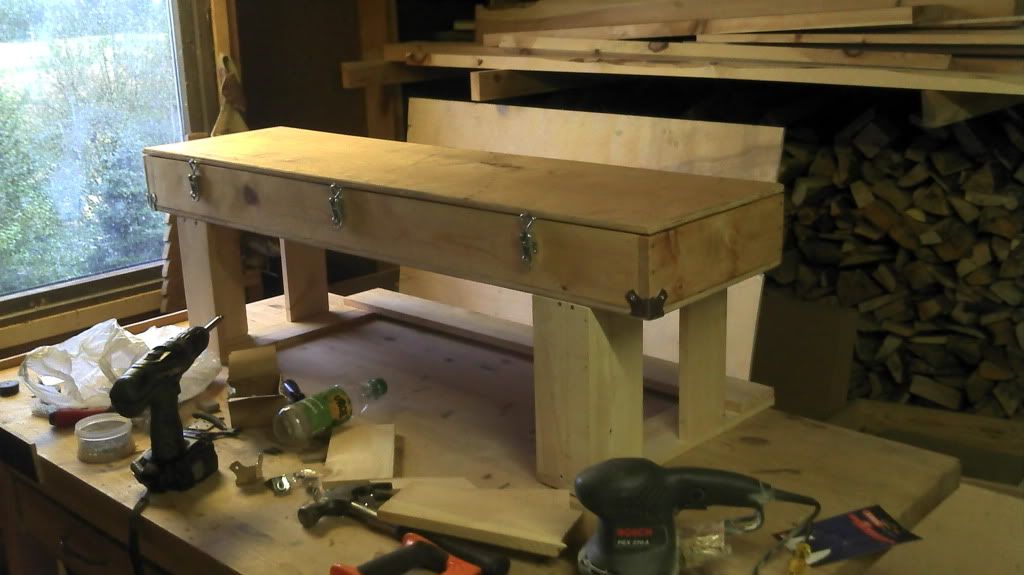
i used kitchendoor hinges so the lid would stay open when i lift it!
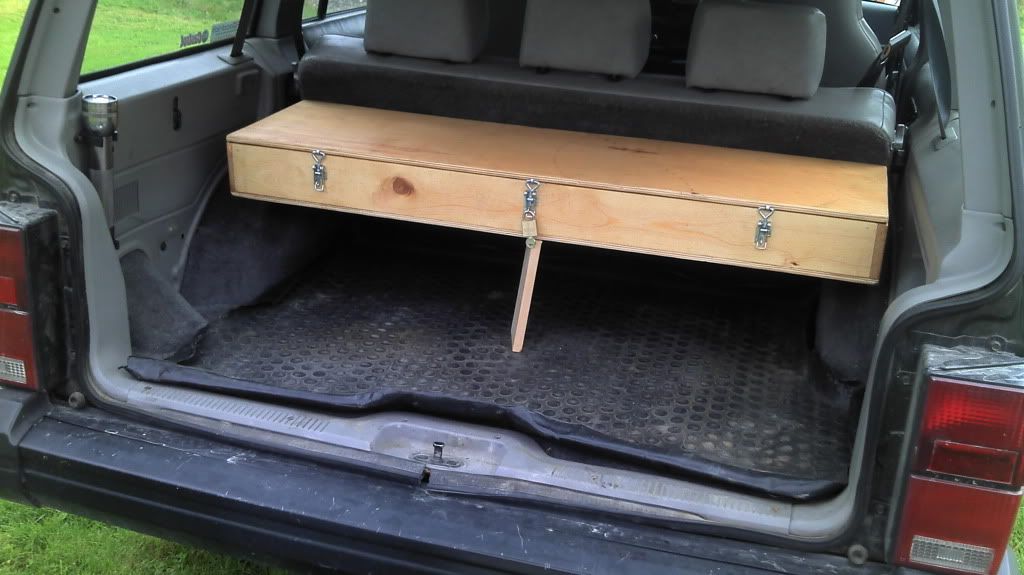
figuring out how to make it fit...
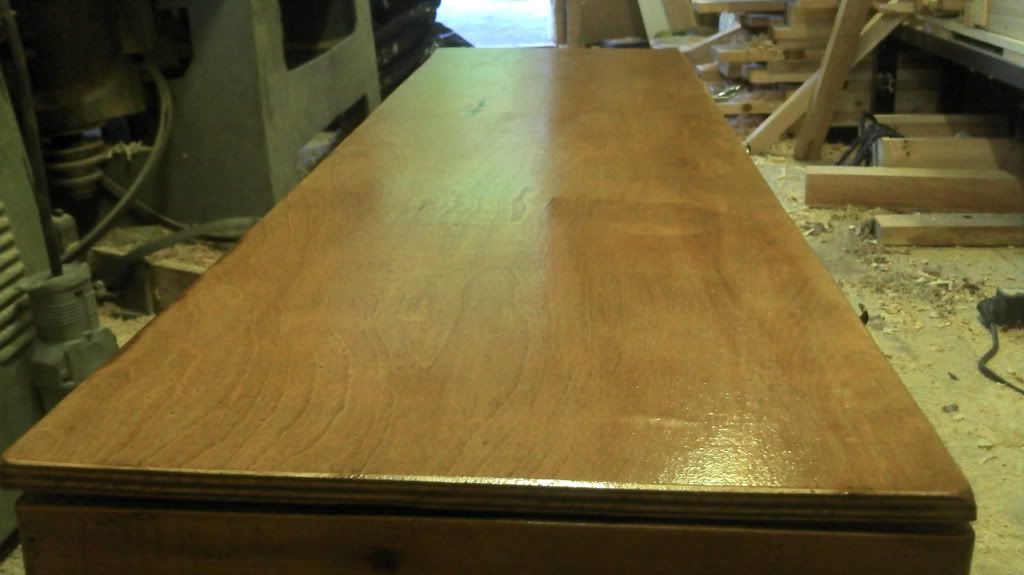
The new idea:
then i figured it would be better looking darker:
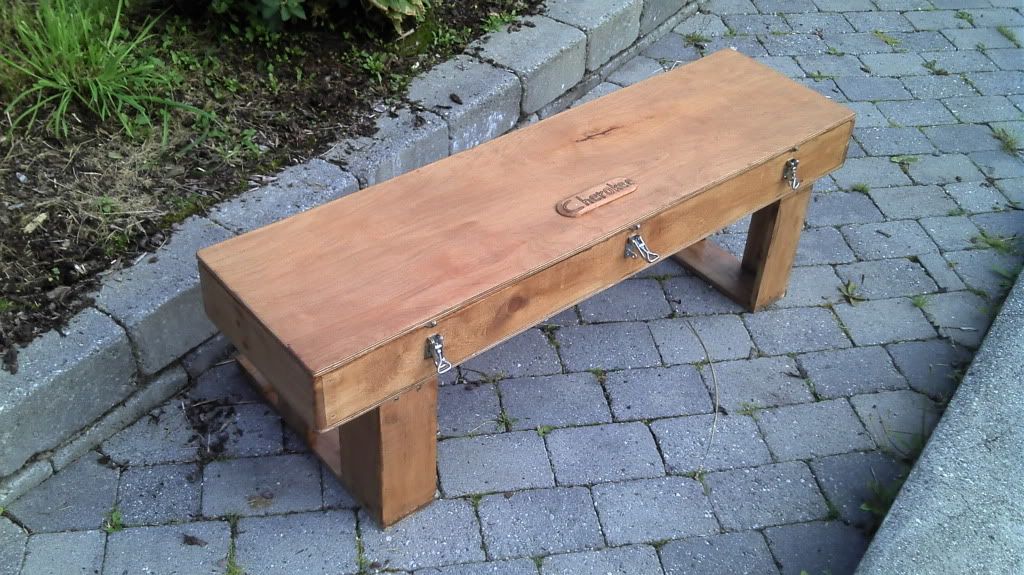
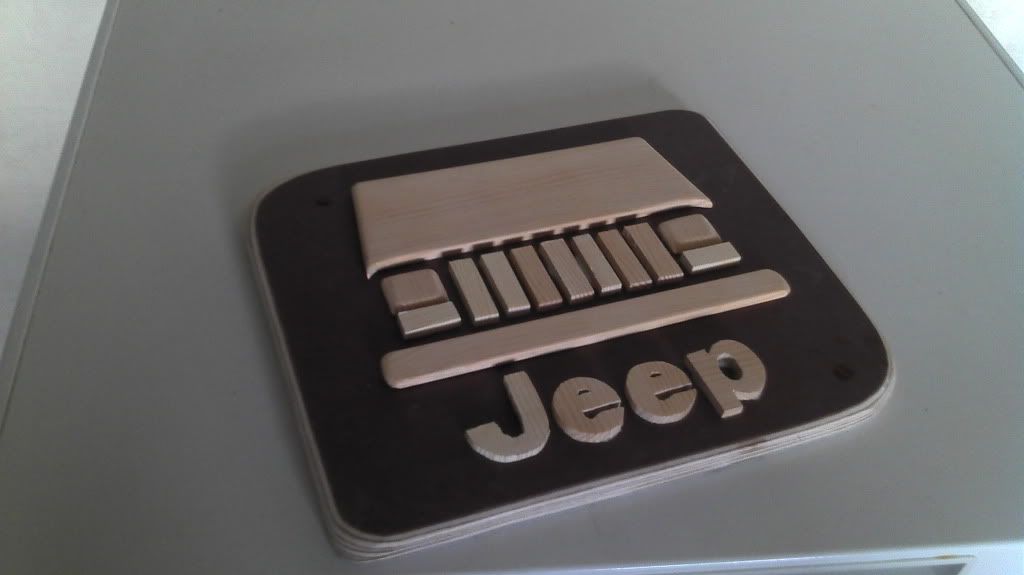
a tag i made up for fun:
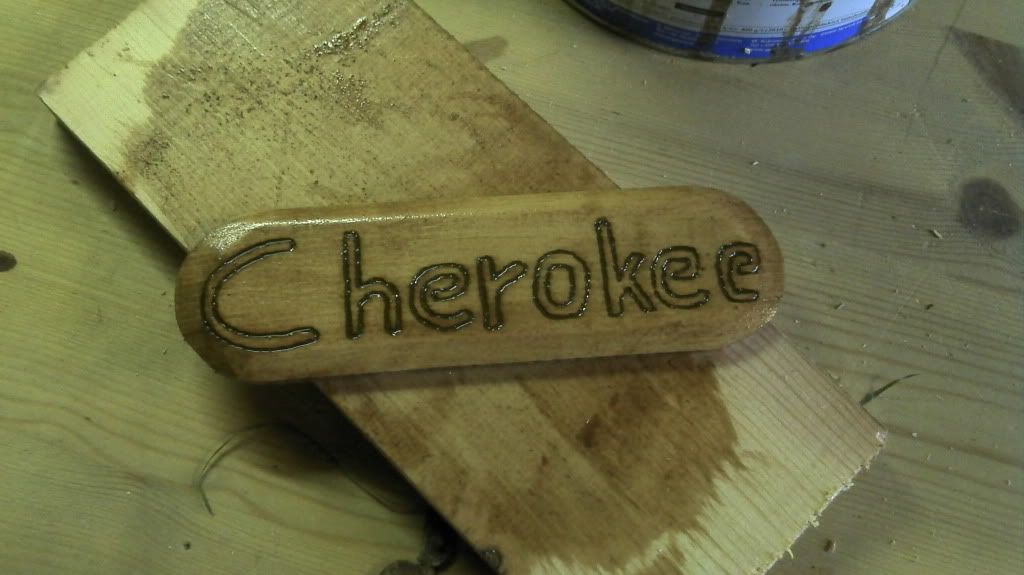
Sign:
i'm soon up to date on my project... so i don't have so much pictures, but i'm working on my lift shackles whenever i have some free time at work! i think i'll be able to finish the up at sunday!
sooo, i started by calling up a friend asking for a plywood plate (is plate the correct word?...) haha, he had one who had been damaged, i got it for free!
started making my box, i just measured a little and started making it. when i had made it i found out that i hadn't measured enough... (i planned to have the box at the floor of the cherokee, but when i was done... it was 1 inch to big
oh, well i thought, then i'll lift it so my spare fits underneath and keep's the box in place! and i'm really happy with the result! some (many...) pictures
i used kitchendoor hinges so the lid would stay open when i lift it!
figuring out how to make it fit...
The new idea:
then i figured it would be better looking darker:
a tag i made up for fun:
Sign:
i'm soon up to date on my project... so i don't have so much pictures, but i'm working on my lift shackles whenever i have some free time at work! i think i'll be able to finish the up at sunday!

Thread Starter
Newbie
Joined: Aug 2011
Posts: 25
Likes: 0
From: Norway
Year: 1988/1995
Model: Cherokee
Engine: 4.0 HO
I love working with wood and steel as well! i've been making knives and axes for years! i live on a farm too soo... it kinda is in my blood... haha
Thread Starter
Newbie
Joined: Aug 2011
Posts: 25
Likes: 0
From: Norway
Year: 1988/1995
Model: Cherokee
Engine: 4.0 HO
Here's the one of the two similar fish's i caught when i went fishing...
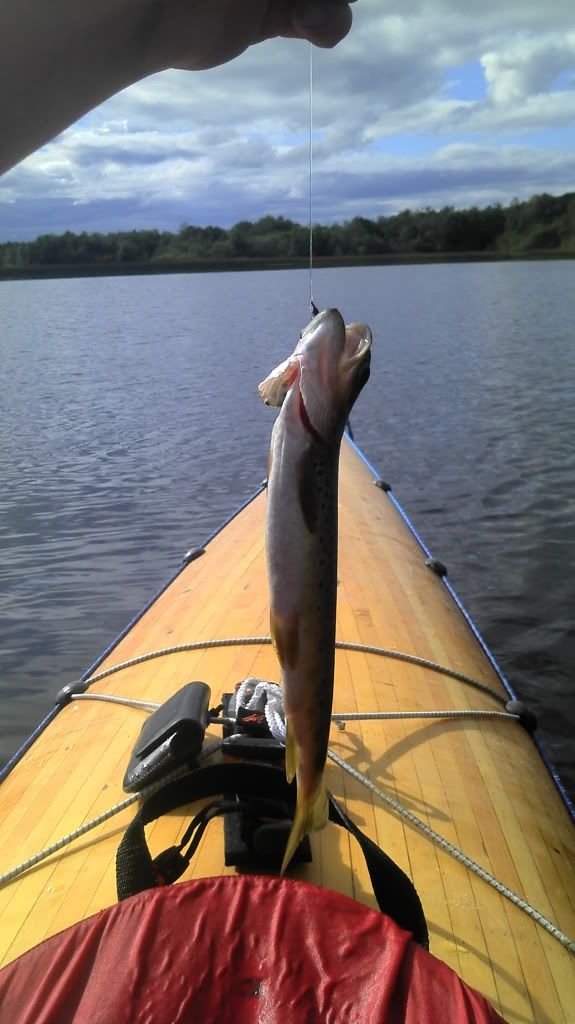
(and yes, i threw them both back out...)
(and yes, i threw them both back out...)
CF Veteran
Joined: Jun 2011
Posts: 1,845
Likes: 3
From: S.E. Tx
Year: 1992
Model: Cherokee
Engine: 4.0 I6 firepower ignition, cat-back w/ magnaflow muffler, poweraid tb spacer, optima blue top
Nice clean xj, sucks about ditching it though. Very good job on the box, seems very useful. One more thing, that is one awesome kayak.
Trending Topics
Thread Starter
Newbie
Joined: Aug 2011
Posts: 25
Likes: 0
From: Norway
Year: 1988/1995
Model: Cherokee
Engine: 4.0 HO
Me and my dad built two of those kayaks a couple years ago.
Thread Starter
Newbie
Joined: Aug 2011
Posts: 25
Likes: 0
From: Norway
Year: 1988/1995
Model: Cherokee
Engine: 4.0 HO
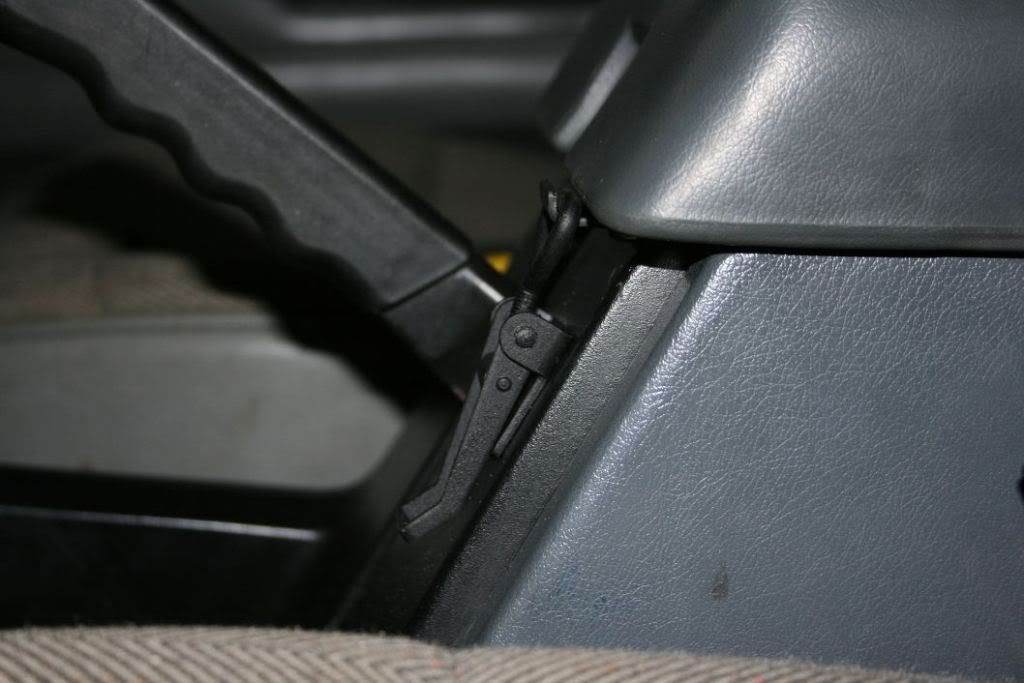
I had to fix the center consol lock, it was broken when i bought the car... sooo i figured i'd do a quick solution, went to the barn looked all around and found this latch on an old AC unit we had lying around :
some more pictures from when i tecyled the underside:
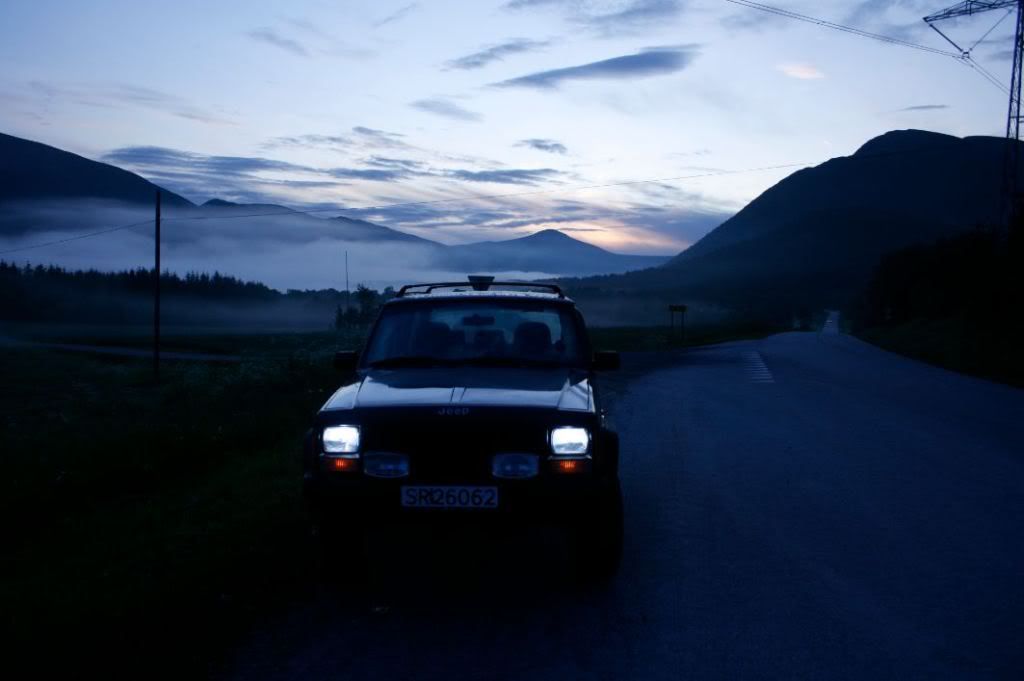
In the middle of the night or nearly in the moring, sunrise and fog!
some more pictures from when i tecyled the underside:
In the middle of the night or nearly in the moring, sunrise and fog!
Thread Starter
Newbie
Joined: Aug 2011
Posts: 25
Likes: 0
From: Norway
Year: 1988/1995
Model: Cherokee
Engine: 4.0 HO
i'm wonderin' if it would look good with a red valve cover, red whit white or black stripes, white whit red stripes or black... black whit white or red stripes maybe...
i think i'm gonna play around whit photoshop a bit..
i think i'm gonna play around whit photoshop a bit..
Thread Starter
Newbie
Joined: Aug 2011
Posts: 25
Likes: 0
From: Norway
Year: 1988/1995
Model: Cherokee
Engine: 4.0 HO

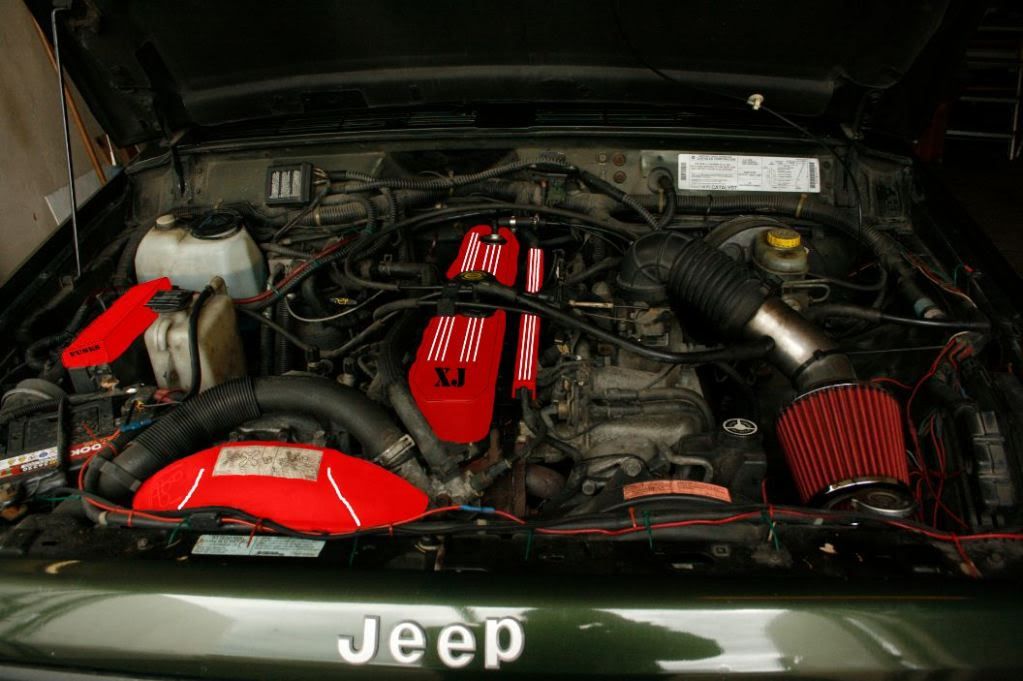
i might go with red and white stripes, looks kinda cool i think... i'm gonna paint it when i get home from sea 12.oktober!

Thread Starter
Newbie
Joined: Aug 2011
Posts: 25
Likes: 0
From: Norway
Year: 1988/1995
Model: Cherokee
Engine: 4.0 HO
I just ordered me a center consol cup holder from ebay

wonderin' if this will be any good, if not i may have to fab up some better... the only problem whit the cherokee is that it's not much space around the drivers seat...
wonderin' if this will be any good, if not i may have to fab up some better... the only problem whit the cherokee is that it's not much space around the drivers seat...
Thread Starter
Newbie
Joined: Aug 2011
Posts: 25
Likes: 0
From: Norway
Year: 1988/1995
Model: Cherokee
Engine: 4.0 HO
Hey!
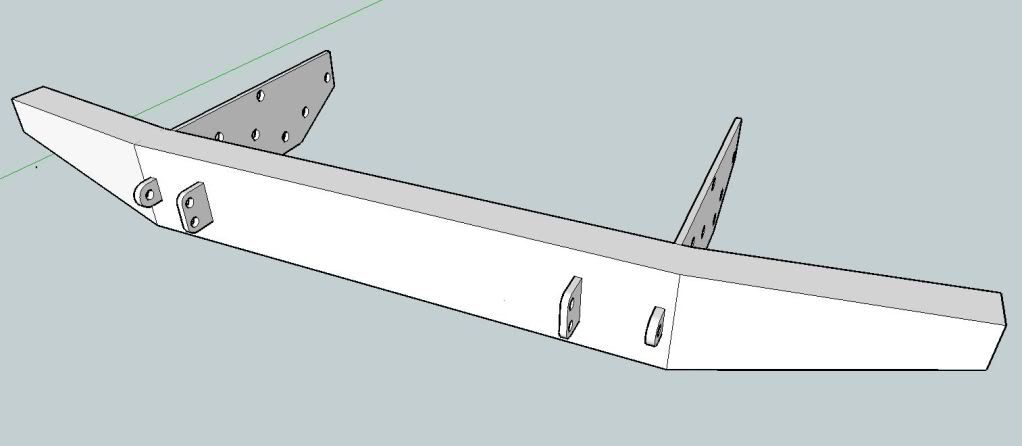
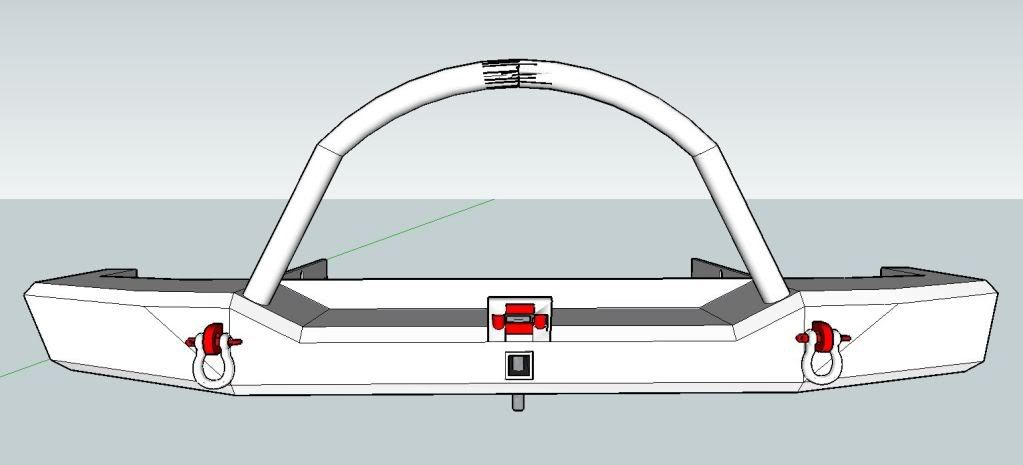
i had nothing to do some days ago, so i searched the internet, found a drawing whit the measurements for a front bumper,so i desided to make a model of how i would like my bumper to look, i have made a couple different one though, still working on one.
I think i will make the easiest one first, just to get the hang of how i'm gonna do the winchbumper i want.
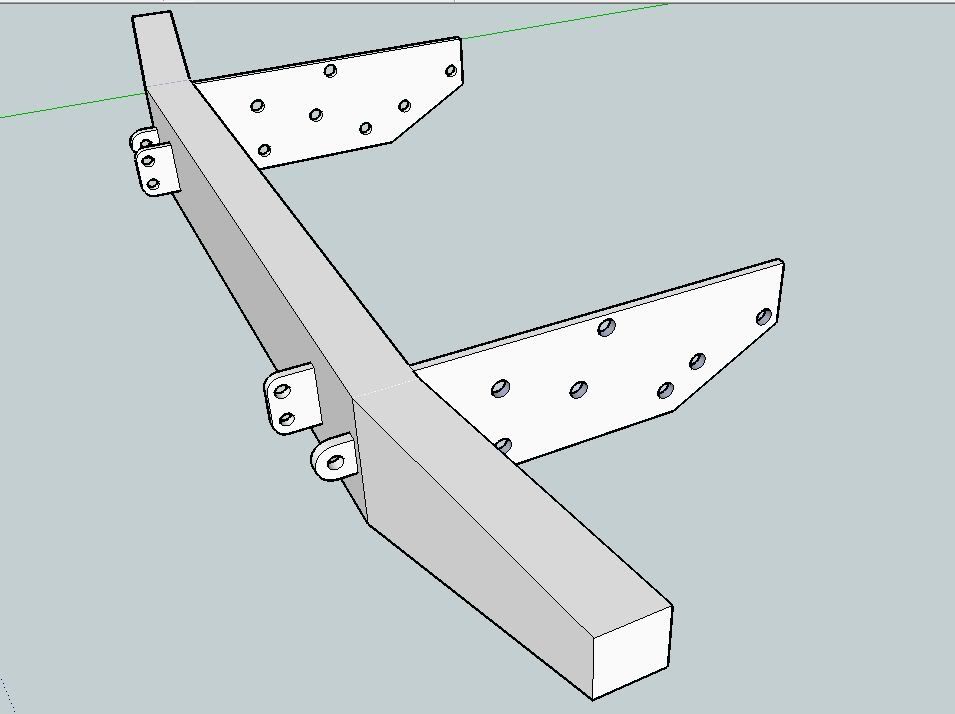
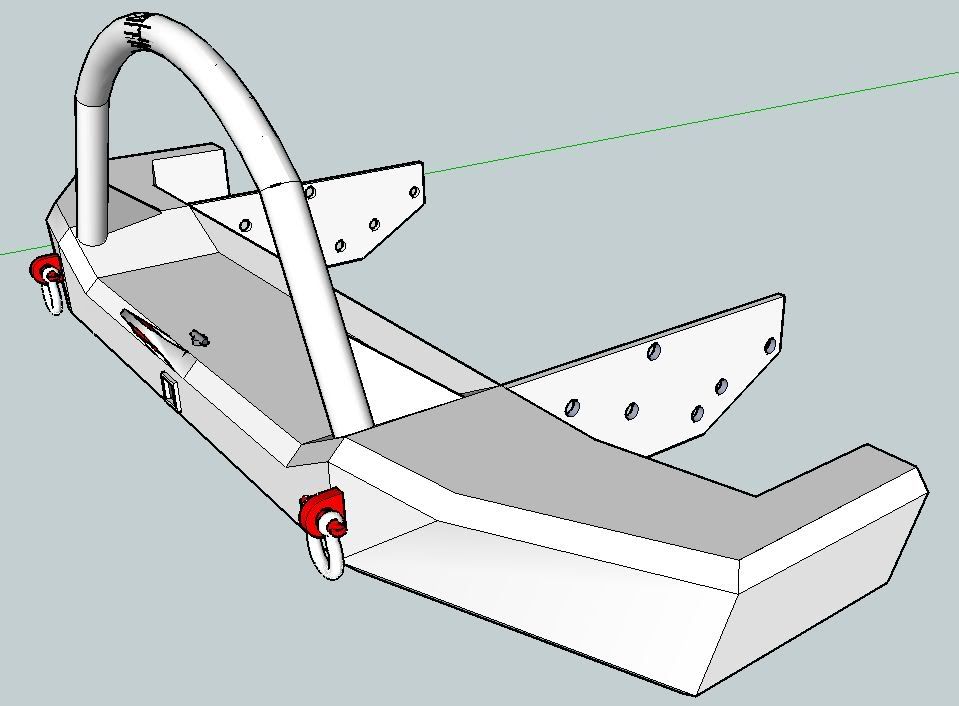
"Easy one" will be made out of a bar of rectangular square steel (i have no idea what i should call it in english...) D-ring mounts, and the two other wount is drew on it is for a bull bar/light bar, like the one the General Lee has.
the "easy one":
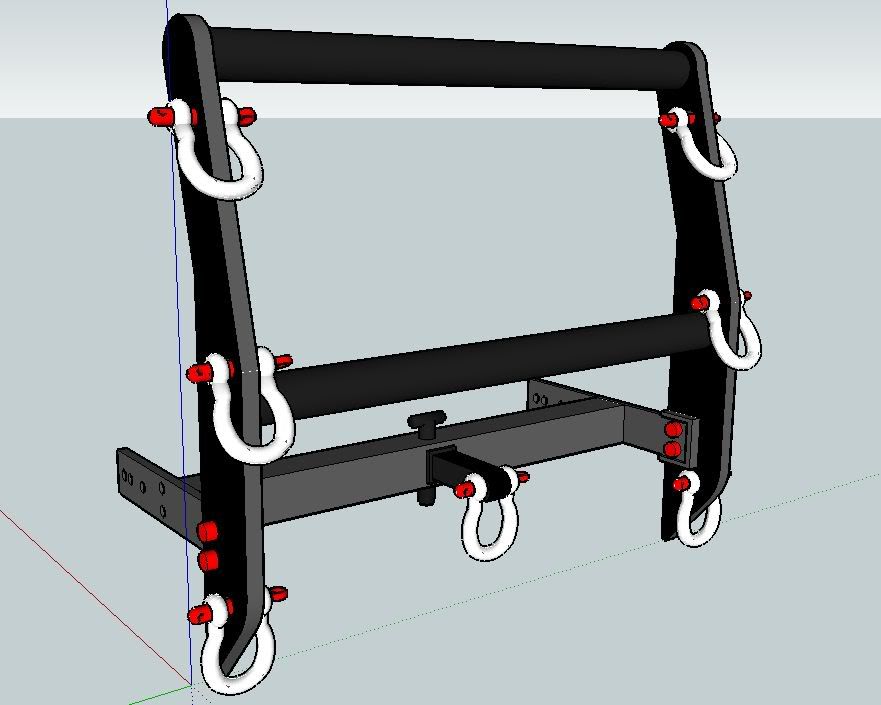
Bull Bar:
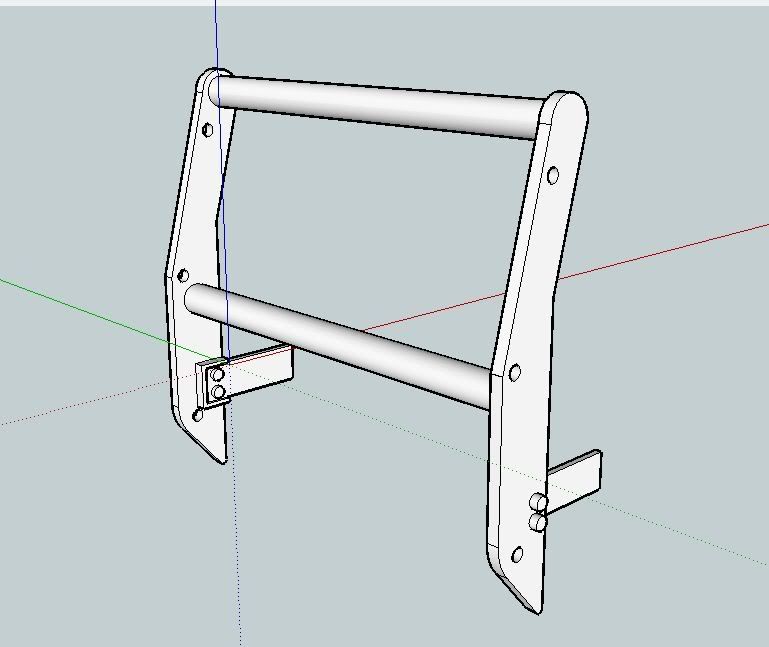
A bit overkill whit all the shackles maybe... :
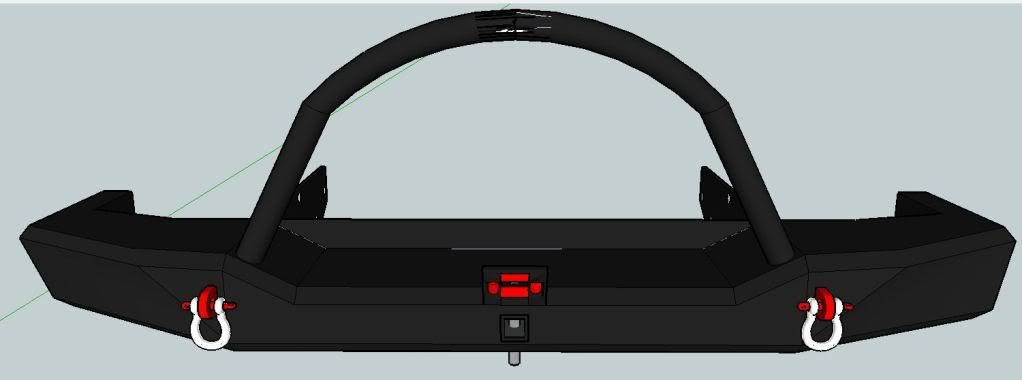
This is the frontbumper i want to make eventually, it's like many others you can buy though...
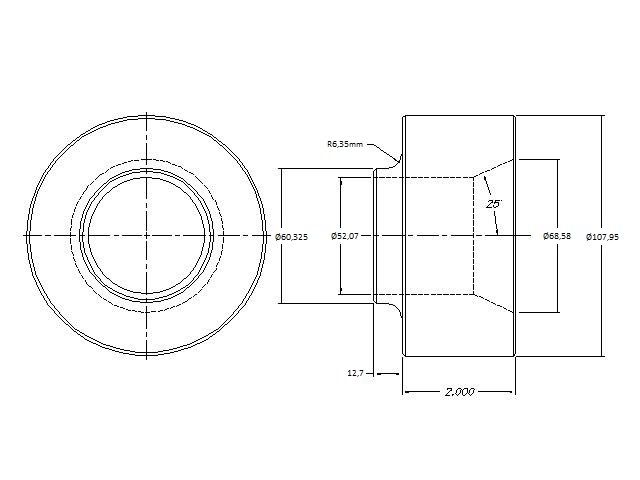
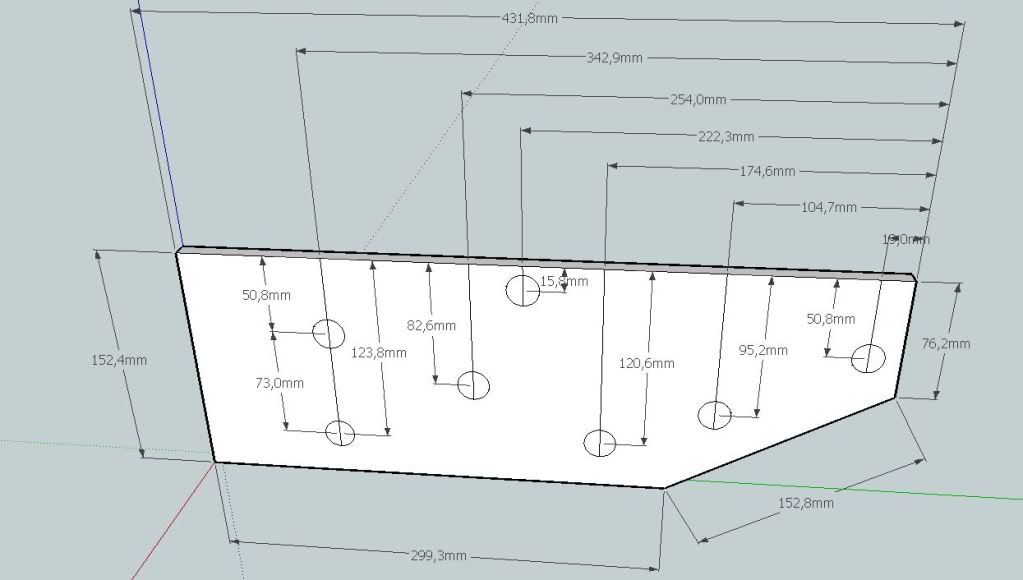
Here's the drawing i found, which i used to get the dimensions for my models:

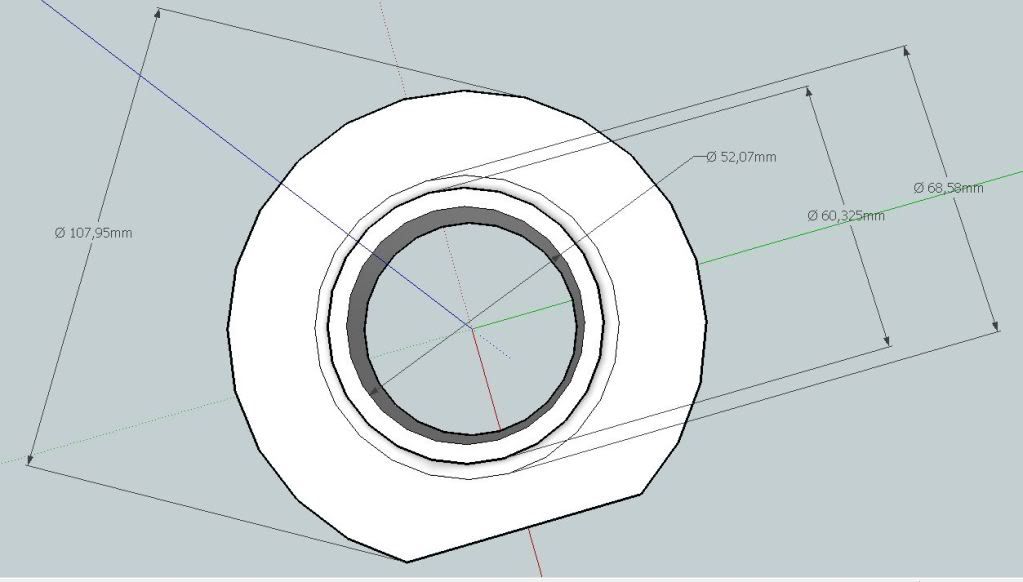
My drawing of the mount's the lenght you may choose for youreself:
i had nothing to do some days ago, so i searched the internet, found a drawing whit the measurements for a front bumper,so i desided to make a model of how i would like my bumper to look, i have made a couple different one though, still working on one.
I think i will make the easiest one first, just to get the hang of how i'm gonna do the winchbumper i want.
"Easy one" will be made out of a bar of rectangular square steel (i have no idea what i should call it in english...) D-ring mounts, and the two other wount is drew on it is for a bull bar/light bar, like the one the General Lee has.
the "easy one":
Bull Bar:
A bit overkill whit all the shackles maybe... :
This is the frontbumper i want to make eventually, it's like many others you can buy though...
Here's the drawing i found, which i used to get the dimensions for my models:
My drawing of the mount's the lenght you may choose for youreself: