Jeep Builds Make your own jeep build thread here, discuss and view jeeps here. All Jeep models are welcome here.
Sponsored by:
Sponsored by:

Johnny Boots 98 XJ Build

Thread Tools
 
Search this Thread
 
Old 11-02-2016, 10:26 AM
  #76  
Member
 
Pelagius's Avatar
 
Join Date: Jan 2015
Location: Glendale, Az
Posts: 167
Likes: 0
Received 0 Likes on 0 Posts
Year: 1998
Model: Cherokee
Engine: 4.0 Inline 6 Cylinder
Default

i got the same cargo rack from HF a few months ago. Love it!
Old 11-11-2016, 03:39 PM
  #77  
Member
Thread Starter
 
ih8cornnuts's Avatar
 
Join Date: Nov 2010
Location: Greensboring, NC
Posts: 220
Likes: 0
Received 1 Like on 1 Post
Year: 1998
Model: Cherokee
Default

Got my CB installed, I went with the Cobra 75WXST. It was just too damn clean to not go this route.

Johnny Boots 98 XJ Build-image-3490746163.jpg
Old 11-11-2016, 03:39 PM
  #78  
Member
Thread Starter
 
ih8cornnuts's Avatar
 
Join Date: Nov 2010
Location: Greensboring, NC
Posts: 220
Likes: 0
Received 1 Like on 1 Post
Year: 1998
Model: Cherokee
Default

Also dropped in a Magnaflow 11225 muffler and new pipe. Looks like the cat is also going bad so that'll be a welding project in the coming month or 2.

Johnny Boots 98 XJ Build-image-374093296.jpg

Last edited by ih8cornnuts; 11-11-2016 at 03:41 PM.
Old 11-15-2016, 09:23 PM
  #79  
Member
Thread Starter
 
ih8cornnuts's Avatar
 
Join Date: Nov 2010
Location: Greensboring, NC
Posts: 220
Likes: 0
Received 1 Like on 1 Post
Year: 1998
Model: Cherokee
Default

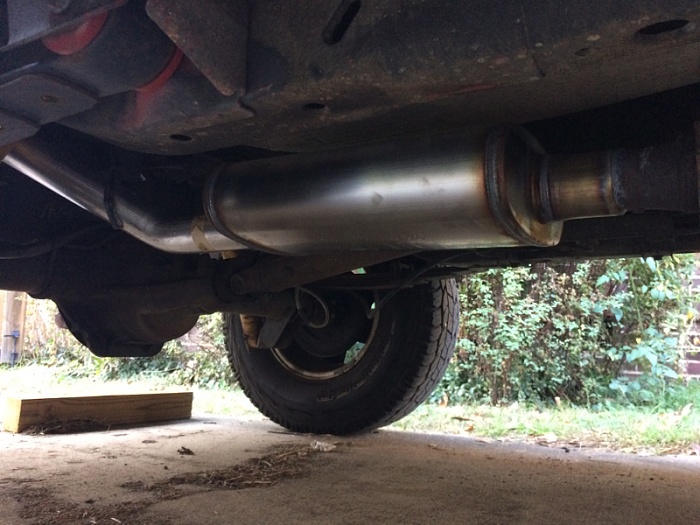
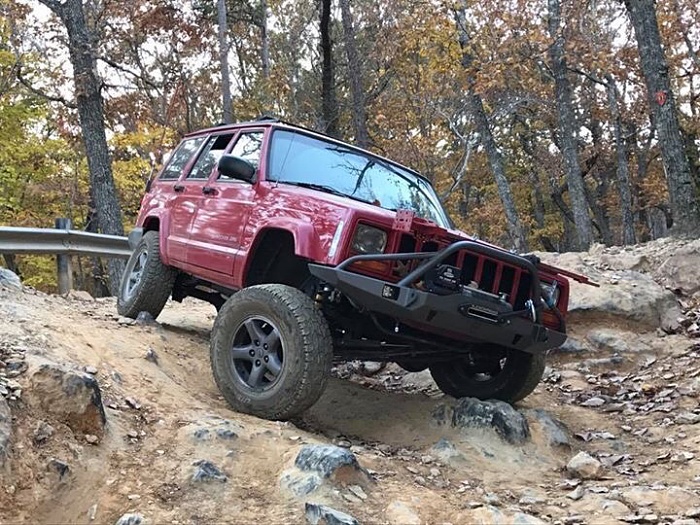
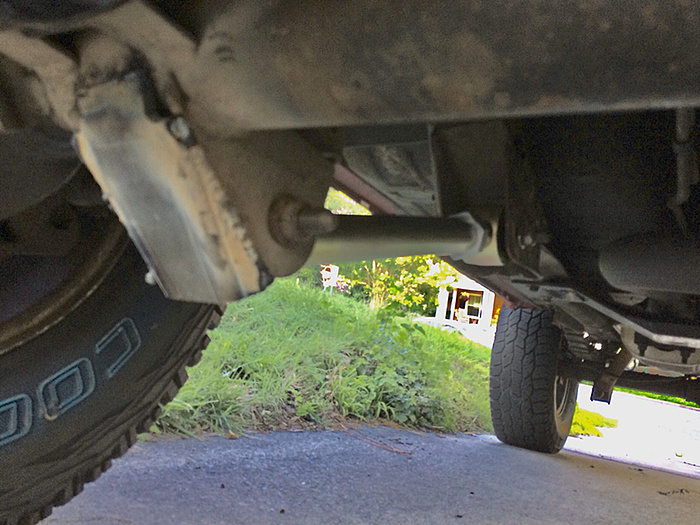
Finally got a chance to finish off my lift with a set of OME AAL's. This should be it as far as vertical lift is concerned. They went in pretty easy, there is surprisingly very little info about installing these online. I didn't really take any pics to help in the matter but they're in. The rid is a good bit stiffer which should level out when I get my gear back in it. It feels more planted and so far I'm happy. We're heading to Uwharrie this weekend so I'll get to try it out. Install went like this:

1) Jack up the axle
2) Put Jackstands under the frame
3) Remove Tires
4) Remove U-Bolts
5) Undo spring shackles (the small U bolts on the springs).
6) Remove the center pin (I needed to use vise grips to remove mine and bought new center pins for the re-installation).
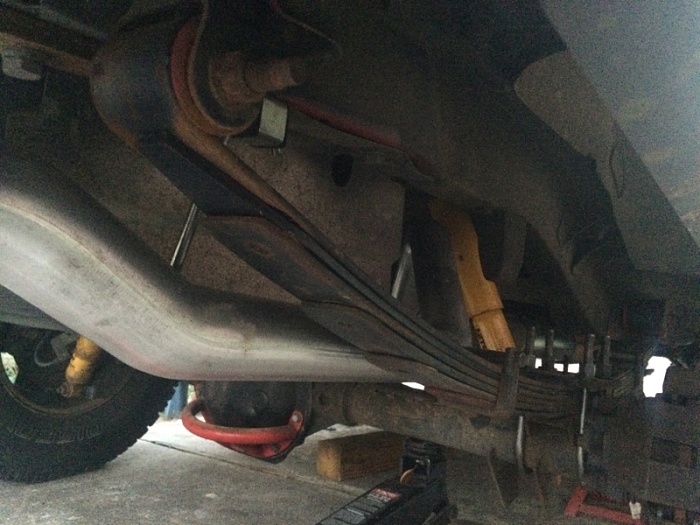
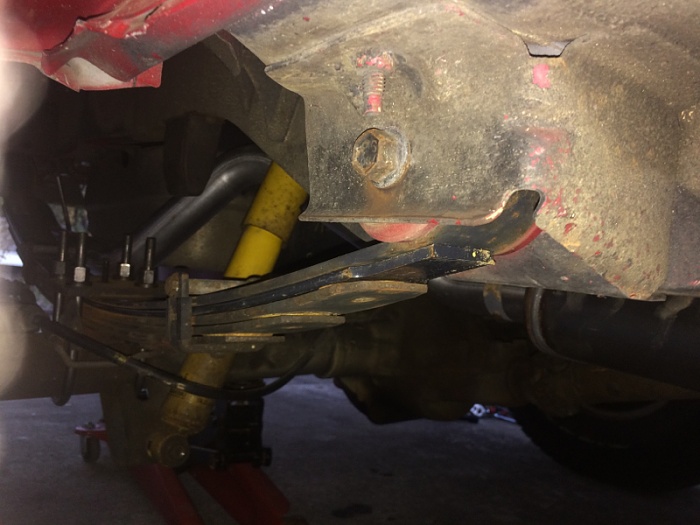
7) Install OME AAL in the 2nd to the top location, notched side towards front, tapered towards the rear.

I also needed to remove my shocks to get things aligned. I finished in the dark so tomorrow I'll level it out with the JKS ACOS. All in all this got me 3-4" of lift.

Johnny Boots 98 XJ Build-image-4290678399.jpg

Johnny Boots 98 XJ Build-image-2525988607.jpg

Last edited by ih8cornnuts; 11-17-2016 at 12:24 PM.
Old 11-17-2016, 12:21 PM
  #80  
Member
Thread Starter
 
ih8cornnuts's Avatar
 
Join Date: Nov 2010
Location: Greensboring, NC
Posts: 220
Likes: 0
Received 1 Like on 1 Post
Year: 1998
Model: Cherokee
Default

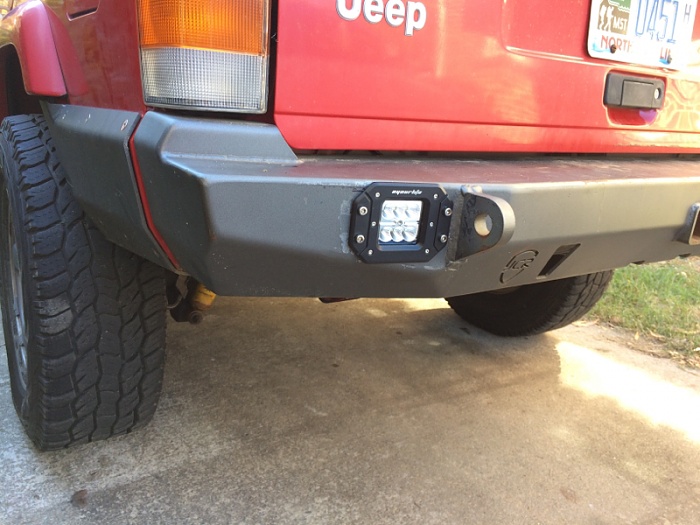
Installed some Amazon LED lubs in the rear to replace the ones from JCR which are now located on the front bumper. I already had the wiring and switch in place so this was a simple wiring job. I did need to make the JCR holes larger which required breaking out the hack saw. Add $10 to the cost of the lights because I went through 4 blades to make this happen. Otherwise I'm happy with it. The angle is perfect for seeing behind you through the rear glass or out the sides.

Johnny Boots 98 XJ Build-image-1556248648.jpg

Last edited by ih8cornnuts; 11-17-2016 at 12:27 PM.
Old 11-17-2016, 12:22 PM
  #81  
Member
Thread Starter
 
ih8cornnuts's Avatar
 
Join Date: Nov 2010
Location: Greensboring, NC
Posts: 220
Likes: 0
Received 1 Like on 1 Post
Year: 1998
Model: Cherokee
Default

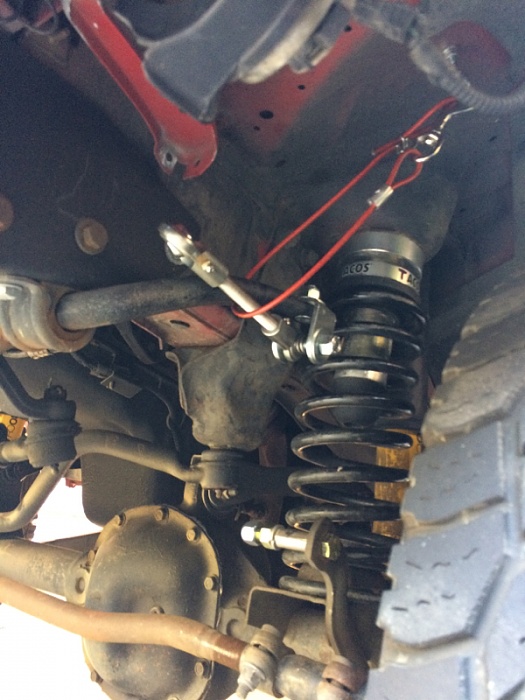
Homemade discos which I posted previously. But this we brought some disco cables to the party! I made these from a dog run that I had laying around which had almost all the hardware and was even coated.

I also adjusted the ACOS down 1/2" to level out the new rear OME AAL's. Pretty happy with the functionality of these although even when I lifted the front end, disconnected the sway I still needed to use a spring compressor to adjust. Removing the shock didn't help either.

Johnny Boots 98 XJ Build-image-3082125237.jpg

Last edited by ih8cornnuts; 11-17-2016 at 12:58 PM.
Old 11-17-2016, 12:22 PM
  #82  
Member
Thread Starter
 
ih8cornnuts's Avatar
 
Join Date: Nov 2010
Location: Greensboring, NC
Posts: 220
Likes: 0
Received 1 Like on 1 Post
Year: 1998
Model: Cherokee
Default

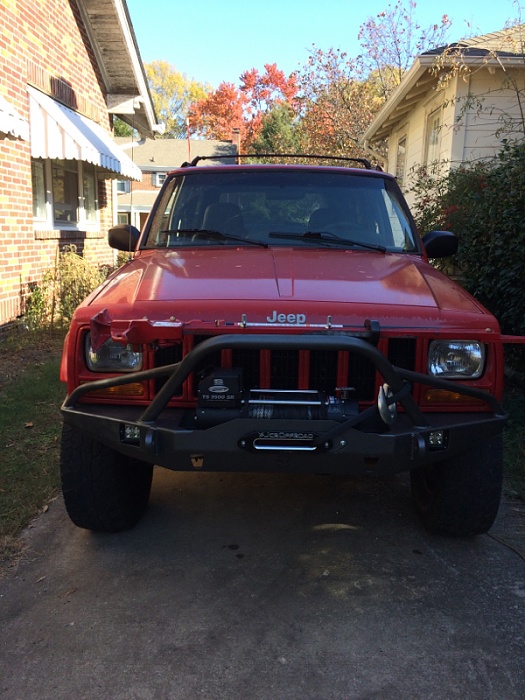
And now we're winching! This puppy came in the mail yesterday, got it all mounted up and tossed on the cable this morning. We'll see if Uwharrie forces me to use it.

I also mounted the Hi-Lift on the light bar tabs. It wont stay there permanently, only when I'm heading to go out wheeling. I doubt I'll use those light tabs for anything soon anyway.

Johnny Boots 98 XJ Build-image-1330229064.jpg

Last edited by ih8cornnuts; 11-17-2016 at 12:56 PM.
Old 11-23-2016, 08:55 AM
  #83  
Member
Thread Starter
 
ih8cornnuts's Avatar
 
Join Date: Nov 2010
Location: Greensboring, NC
Posts: 220
Likes: 0
Received 1 Like on 1 Post
Year: 1998
Model: Cherokee
Default

Some wheeling pics from uwharrie, this was Rocky Mountain trail. Had a blast camping, shooting and wheeling.

Johnny Boots 98 XJ Build-image-893722265.jpg
Attached Thumbnails Johnny Boots 98 XJ Build-photo227.jpg   Johnny Boots 98 XJ Build-photo172.jpg   Johnny Boots 98 XJ Build-photo242.jpg  

Last edited by ih8cornnuts; 11-23-2016 at 09:19 AM.
Old 12-03-2016, 11:17 AM
  #84  
Member
Thread Starter
 
ih8cornnuts's Avatar
 
Join Date: Nov 2010
Location: Greensboring, NC
Posts: 220
Likes: 0
Received 1 Like on 1 Post
Year: 1998
Model: Cherokee
Default

Black Friday parts are rolling in...on the docket for install today, IRO track bar and a on/off switch for the winch.

Installed pics to follow.
Attached Thumbnails Johnny Boots 98 XJ Build-photo500.jpg  
Old 01-04-2017, 05:20 PM
  #85  
Member
Thread Starter
 
ih8cornnuts's Avatar
 
Join Date: Nov 2010
Location: Greensboring, NC
Posts: 220
Likes: 0
Received 1 Like on 1 Post
Year: 1998
Model: Cherokee
Default

Spark plug wires! Rotor and cap coming soon. Also got that IRO track bar in, pics to follow.
Attached Thumbnails Johnny Boots 98 XJ Build-photo953.jpg  
Old 06-03-2017, 11:01 PM
  #86  
Member
Thread Starter
 
ih8cornnuts's Avatar
 
Join Date: Nov 2010
Location: Greensboring, NC
Posts: 220
Likes: 0
Received 1 Like on 1 Post
Year: 1998
Model: Cherokee
Default

Been a while since I've done some wrenching on the jeep but had some nice weather today and no other pressing house projects so I decided to tackle some long in the tooth projects.

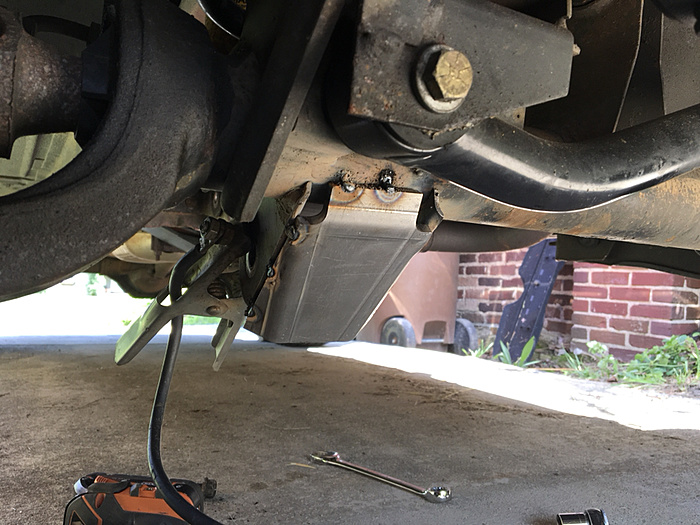
I think I purchased these jks mini-skids over a year ago. I got them installed today although my welding wasn't the greatest. I couldn't get the jeep closest to an outlet so I needed an extension cord to run the welder and thus, had a hard time getting it to produce enough heat for the 1/4" plates. I might run another bead in the future... but for now they're installed.

Johnny Boots 98 XJ Build-photo791.jpg

After I got the skids welded up I put in the Metal Cloak LCA's. had some trouble lining up the first one but a ratchet strap helped greatly. 2nd one went in like pie.

Johnny Boots 98 XJ Build-photo577.jpg

Took her for a spin and the ride is definitely better. Also cleaned up my homemade discos too by changing around the bolt/washer set up. Now to get the disco cables back in.
Old 11-04-2017, 04:00 PM
  #87  
Member
Thread Starter
 
ih8cornnuts's Avatar
 
Join Date: Nov 2010
Location: Greensboring, NC
Posts: 220
Likes: 0
Received 1 Like on 1 Post
Year: 1998
Model: Cherokee
Default

Got a little overdue work in today before the rain came. I bought this safety switch for the winch a while back and put it in. This way the winch is always in the off position and can easily be switched on when it’s needed or switched off in an emergency.


I also installed a led a new front diff cover I got last year as a buy one get one I went in on with a buddy.

Old 11-21-2017, 01:57 PM
  #88  
Member
Thread Starter
 
ih8cornnuts's Avatar
 
Join Date: Nov 2010
Location: Greensboring, NC
Posts: 220
Likes: 0
Received 1 Like on 1 Post
Year: 1998
Model: Cherokee
Default

Got started on painting these JCR crusader body mount sliders to match my bumpers. Should be done with the paint today and maybe get them installed tomorrow or over the weekend.

Old 11-21-2017, 03:09 PM
  #89  
Member
Thread Starter
 
ih8cornnuts's Avatar
 
Join Date: Nov 2010
Location: Greensboring, NC
Posts: 220
Likes: 0
Received 1 Like on 1 Post
Year: 1998
Model: Cherokee
Default


Also tossed on this hockey puck winch saver. A 3/4” forstner bit made quick work of the rubber and allowed the synthetic line to be snuggly fit through with one hole rather than some of the multiple holes creating a slot like others have done.
Old 11-26-2017, 02:00 PM
  #90  
Member
Thread Starter
 
ih8cornnuts's Avatar
 
Join Date: Nov 2010
Location: Greensboring, NC
Posts: 220
Likes: 0
Received 1 Like on 1 Post
Year: 1998
Model: Cherokee
Default

And we have sliders...install went pretty clean minus that trash rivnut tool jcr gives with the sliders. I made my own and it went easy after that.


Quick Reply: Johnny Boots 98 XJ Build


All times are GMT -5. The time now is 07:47 PM.