
Joemomma's Mud Grinder

Thread Starter
Seasoned Member
Joined: Jan 2013
Posts: 380
Likes: 0
From: Central NJ
Year: 2001
Model: Cherokee
Engine: 4.0L I6

doing many layers isn't a bad idea at all! I think it might actually work! And even if you get water in the XJ, as long as no metal from the floor is exposed, you can make custom drain plugs that you can let the water out from, heck you can even spray down the inside of the XJ and the plugs will let it drain.
if multiple layers actually works i think ill just do this with no carpet. if 1 galon is enough to do the tub once, 3 gallons = 3 layers right? hahaha thats $210 instead of having it professionally done 1 layer for $500 right? sounds good to me!
As far as your rear gate not opening. Push in on the gate as you lift the handle. You may need to use your knee or something, but it will open. Try it, once you've done it once or twice you will get good at it. Then pull the panel off the inside of your gate and clean the mechanism up real good and lube it. The little rubber stops on either side of the gate on the inside near the tail lights will probably need to be replaced also. I dealt with this for a long time till I finally got around to fixing it, never had a problem since. Do not have someone push on the inside while you try to open it, won't work and will probably damage something. Jeep is looking good!
fwiw, when i bought it i changed the pistons that lift the gate up because it would just fall when open hahah. not that that was related but its my build thread so i figured id add in that i did that

Thread Starter
Seasoned Member
Joined: Jan 2013
Posts: 380
Likes: 0
From: Central NJ
Year: 2001
Model: Cherokee
Engine: 4.0L I6
WOOOOOOOOOHOOOOOOOOOOOO my bilsteins came in today!!! 


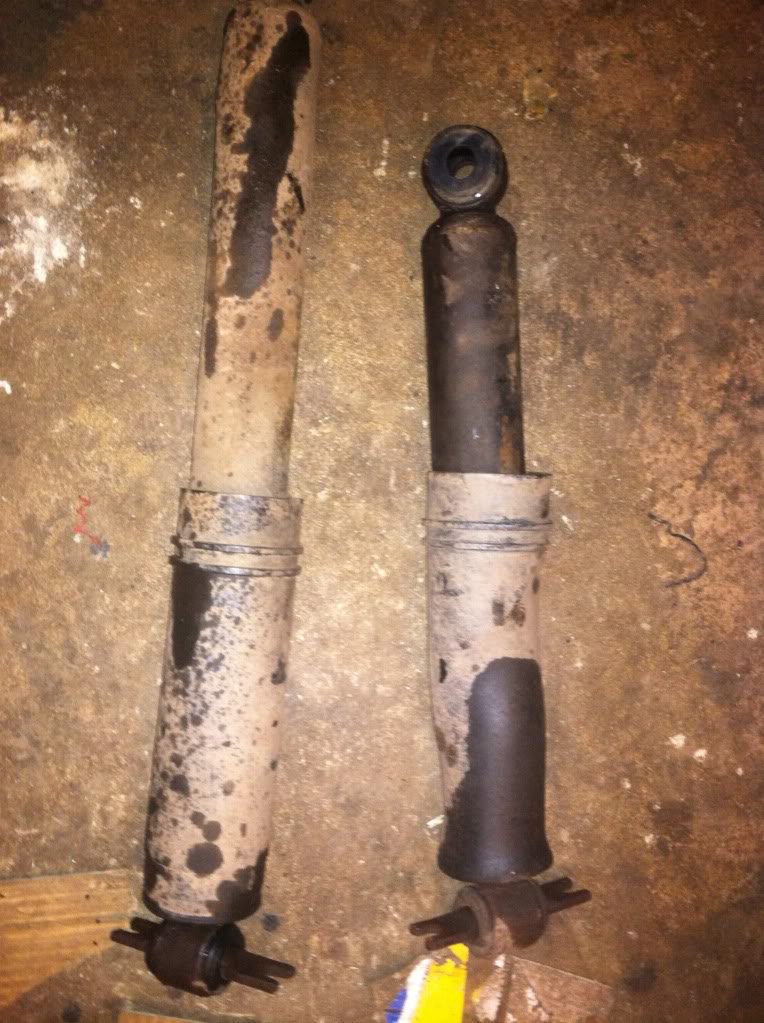
Old shocks that havent ever been changed EVER came out. nice longer billys
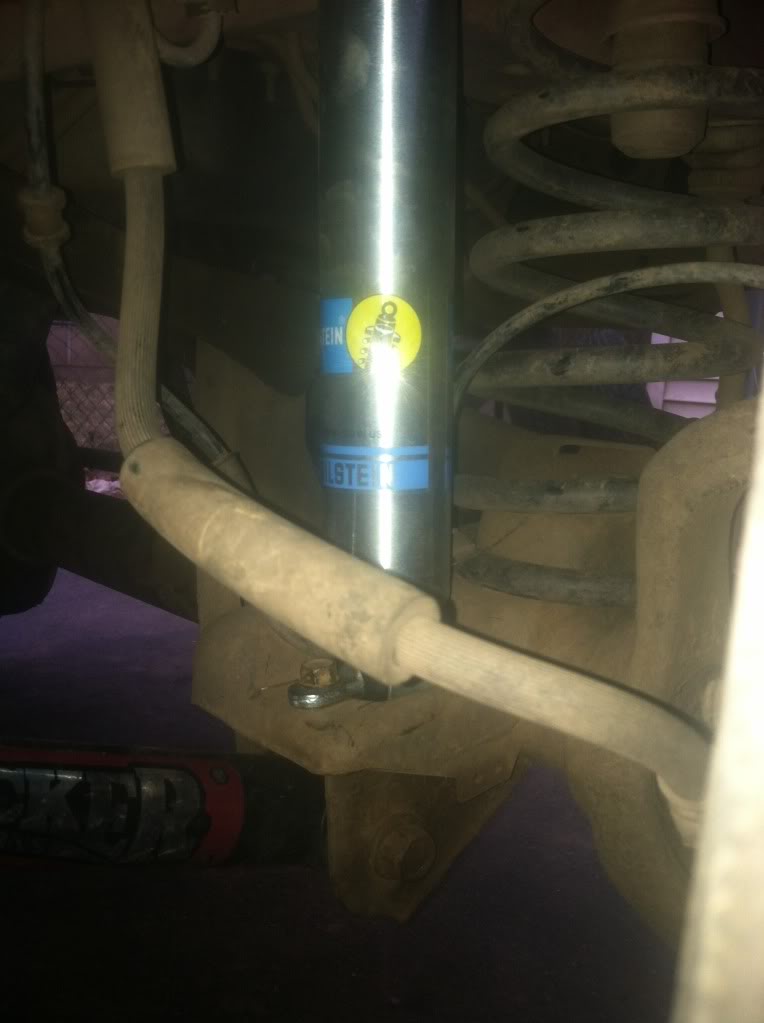
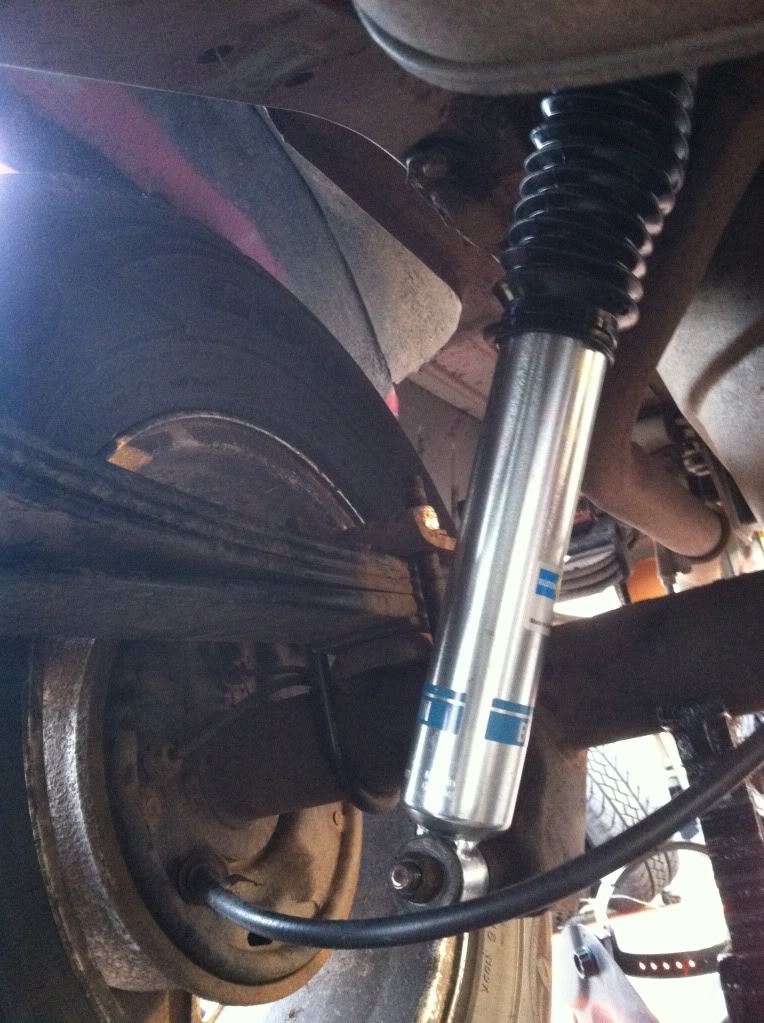
Got the fronts installed (one with flash one without)
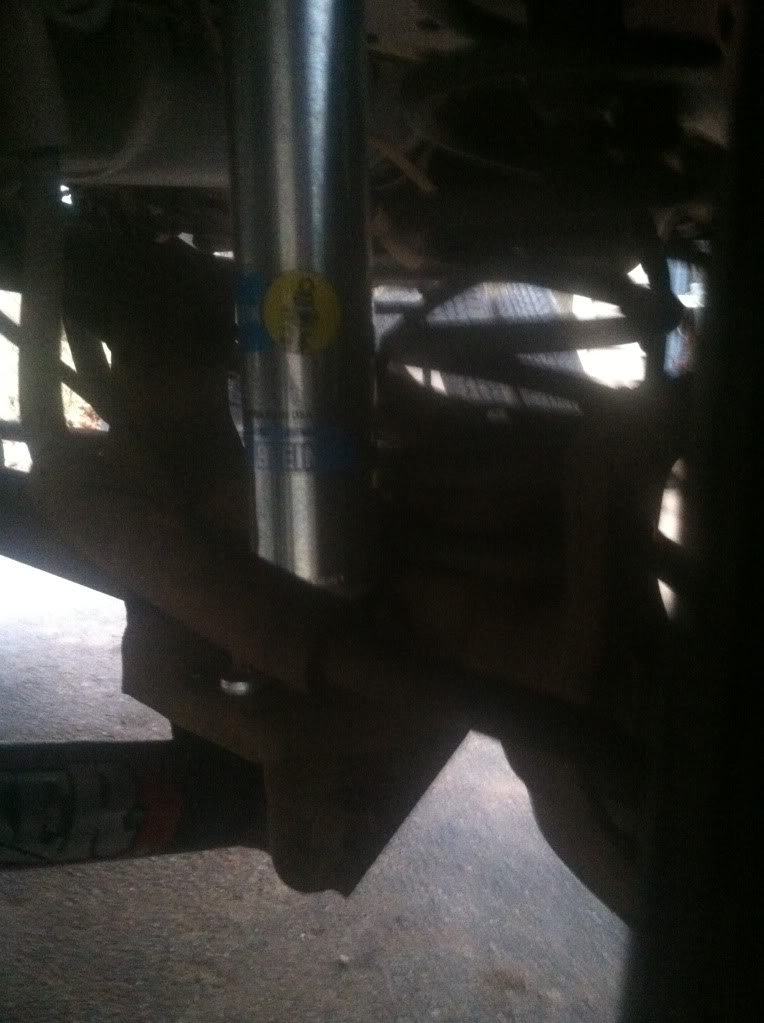
Was kind of a pain to do the driverside top because of all the abs crap. i got the nut off with a bending ratcheting wrench, these things are great

unfortunately, the bilstein came with a bigger nut, and i didnt have the right size bendy wrench to tighten it back on, so i had to take my air box off and just used an air socket wrench.
When i went to start the back, the bottom nut came off nice and easy because i had already gotten it off when i did the leafs, but when i attempted to do the top mounts, the head of the bolt snapped off.... thats when i said ef it, its cold and raining. put the bottom bolt back on and called it a day. the front rides so much nicer. so smooth now.
My old shocks that i took out, when i put my weight on them and compress all the way, i pick them up and they stayed compressed.... so yeah they were a little shot.
I think this is next on my list http://froehlichsuspension.3dcartsto...e-XJ_p_22.html
shouldnt be that bad because of my current trailer hitch's hardware. we'll see, currently waiting on an email about it all.
Didnt get to the carpets today either, again it was cold and raining. I did however get my trunk gate open thanks to the push and pull method that KevMez suggested. thanks. i still need to clean it, but for now i just hit it with some wd40 and the air gun... also swept and vaccumed some dirt off of the plastic panels the gate closes onto.
thats about it for today
Old shocks that havent ever been changed EVER came out. nice longer billys
Got the fronts installed (one with flash one without)
Was kind of a pain to do the driverside top because of all the abs crap. i got the nut off with a bending ratcheting wrench, these things are great
unfortunately, the bilstein came with a bigger nut, and i didnt have the right size bendy wrench to tighten it back on, so i had to take my air box off and just used an air socket wrench.
When i went to start the back, the bottom nut came off nice and easy because i had already gotten it off when i did the leafs, but when i attempted to do the top mounts, the head of the bolt snapped off.... thats when i said ef it, its cold and raining. put the bottom bolt back on and called it a day. the front rides so much nicer. so smooth now.
My old shocks that i took out, when i put my weight on them and compress all the way, i pick them up and they stayed compressed.... so yeah they were a little shot.
I think this is next on my list http://froehlichsuspension.3dcartsto...e-XJ_p_22.html
shouldnt be that bad because of my current trailer hitch's hardware. we'll see, currently waiting on an email about it all.
Didnt get to the carpets today either, again it was cold and raining. I did however get my trunk gate open thanks to the push and pull method that KevMez suggested. thanks. i still need to clean it, but for now i just hit it with some wd40 and the air gun... also swept and vaccumed some dirt off of the plastic panels the gate closes onto.
thats about it for today
CF Veteran
Joined: Feb 2013
Posts: 1,185
Likes: 1
From: Colorado
Year: 1998
Model: Cherokee
Engine: 4.0L
I had a similar problem with my hatch.
1. First you need to get you hatch open. To do this, you must climb into the back of you jeep and pull the trim on hatch back as much as possible. Grab it under the window in the middle and jerk it back. Once it is open enough for you to see down in there shine a light down there and look for this mechanism. [IMG]file:///C:/Users/sylex/Pictures/2013-02-27/233.jpg[/IMG]
Grab the vertical rod and pull it up. This should unlatch you door and you will be able to open it.
2. Now to fix it. Take a screw driver and completely remove the rear trim panel. Now, if your problem is the same as mine, this is what to do. There is a clamp type devise attached to the rod. [IMG]file:///C:/Users/sylex/Desktop/demo%202.png[/IMG]
This has probably slid up out of its original position. The clamp slides up and down the rod fairly easily so slide it back down as far as it will go. Now - call me a redneck if you want, but this has held up for me for over a year - wrap duct tape around this clamp and to the rod in the correct position.
3. Don't replace the trim panel yet. Try it out a few times to make sure it opens and closes properly. You may have to adjust the position of the clamp on the rod.
4. Replace the trim and screw it back in.
Hope this works
1. First you need to get you hatch open. To do this, you must climb into the back of you jeep and pull the trim on hatch back as much as possible. Grab it under the window in the middle and jerk it back. Once it is open enough for you to see down in there shine a light down there and look for this mechanism. [IMG]file:///C:/Users/sylex/Pictures/2013-02-27/233.jpg[/IMG]
Grab the vertical rod and pull it up. This should unlatch you door and you will be able to open it.
2. Now to fix it. Take a screw driver and completely remove the rear trim panel. Now, if your problem is the same as mine, this is what to do. There is a clamp type devise attached to the rod. [IMG]file:///C:/Users/sylex/Desktop/demo%202.png[/IMG]
This has probably slid up out of its original position. The clamp slides up and down the rod fairly easily so slide it back down as far as it will go. Now - call me a redneck if you want, but this has held up for me for over a year - wrap duct tape
around this clamp and to the rod in the correct position.3. Don't replace the trim panel yet. Try it out a few times to make sure it opens and closes properly. You may have to adjust the position of the clamp on the rod.
4. Replace the trim and screw it back in.
Hope this works
CF Veteran
Joined: Feb 2013
Posts: 1,185
Likes: 1
From: Colorado
Year: 1998
Model: Cherokee
Engine: 4.0L
Dang. The images aren't showing. I probably did something wrong. I attached them here. The first is the mechanism you're looking for and the second shows the clamp.
How do you insert images in the txt?
I attached them here. The first is the mechanism you're looking for and the second shows the clamp.How do you insert images in the txt?
Thread Starter
Seasoned Member
Joined: Jan 2013
Posts: 380
Likes: 0
From: Central NJ
Year: 2001
Model: Cherokee
Engine: 4.0L I6
Thanks guys. The bilsteins even in just the front significantly improved the ride quality. Can't wait to get rears in and relocate shackles. Will be nice and smooth
@nygiants, I'm in south Plainfield... You?
Thanks for the help and pics. I think I'll be ripping into this tonight after class
@nygiants, I'm in south Plainfield... You?
I had a similar problem with my hatch.
1. First you need to get you hatch open. To do this, you must climb into the back of you jeep and pull the trim on hatch back as much as possible. Grab it under the window in the middle and jerk it back. Once it is open enough for you to see down in there shine a light down there and look for this mechanism. [IMG]file:///C:/Users/sylex/Pictures/2013-02-27/233.jpg[/IMG]
Grab the vertical rod and pull it up. This should unlatch you door and you will be able to open it.
2. Now to fix it. Take a screw driver and completely remove the rear trim panel. Now, if your problem is the same as mine, this is what to do. There is a clamp type devise attached to the rod. [IMG]file:///C:/Users/sylex/Desktop/demo%202.png[/IMG]
This has probably slid up out of its original position. The clamp slides up and down the rod fairly easily so slide it back down as far as it will go. Now - call me a redneck if you want, but this has held up for me for over a year - wrap duct tape around this clamp and to the rod in the correct position.
3. Don't replace the trim panel yet. Try it out a few times to make sure it opens and closes properly. You may have to adjust the position of the clamp on the rod.
4. Replace the trim and screw it back in.
Hope this works
1. First you need to get you hatch open. To do this, you must climb into the back of you jeep and pull the trim on hatch back as much as possible. Grab it under the window in the middle and jerk it back. Once it is open enough for you to see down in there shine a light down there and look for this mechanism. [IMG]file:///C:/Users/sylex/Pictures/2013-02-27/233.jpg[/IMG]
Grab the vertical rod and pull it up. This should unlatch you door and you will be able to open it.
2. Now to fix it. Take a screw driver and completely remove the rear trim panel. Now, if your problem is the same as mine, this is what to do. There is a clamp type devise attached to the rod. [IMG]file:///C:/Users/sylex/Desktop/demo%202.png[/IMG]
This has probably slid up out of its original position. The clamp slides up and down the rod fairly easily so slide it back down as far as it will go. Now - call me a redneck if you want, but this has held up for me for over a year - wrap duct tape
around this clamp and to the rod in the correct position.3. Don't replace the trim panel yet. Try it out a few times to make sure it opens and closes properly. You may have to adjust the position of the clamp on the rod.
4. Replace the trim and screw it back in.
Hope this works
Thread Starter
Seasoned Member
Joined: Jan 2013
Posts: 380
Likes: 0
From: Central NJ
Year: 2001
Model: Cherokee
Engine: 4.0L I6
alright i got some updates. and pics will come later or tomorrow.
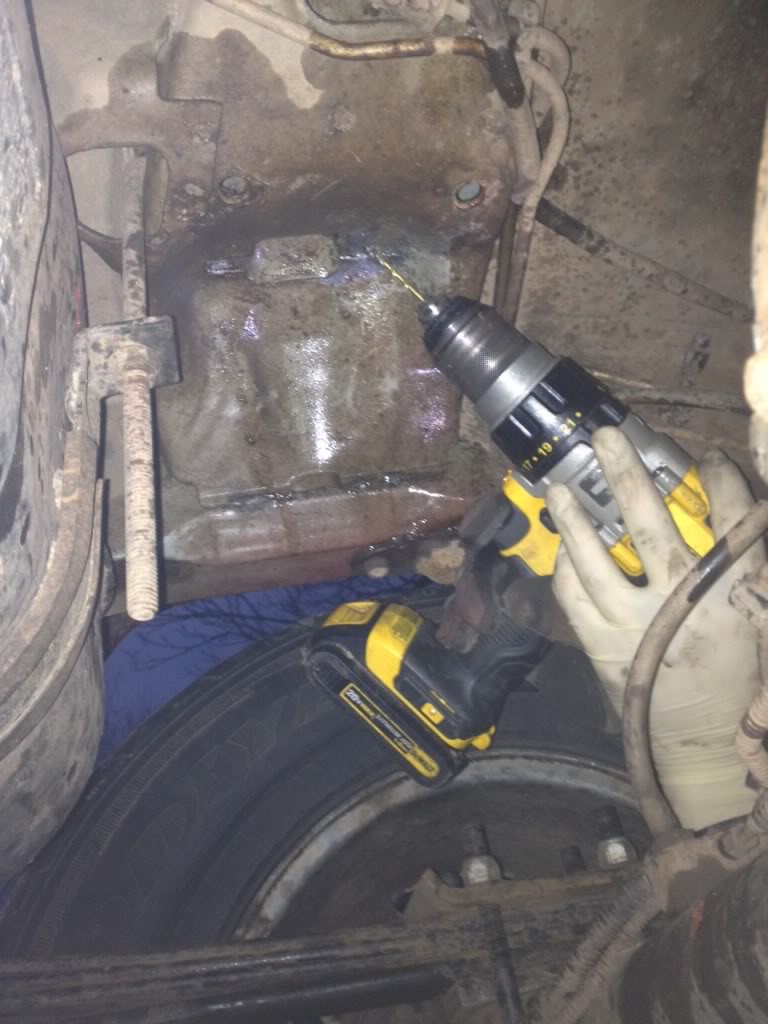
got the shocks out but all 4 bolt heads that hold the top of the rear shocks snapped off. what do i do?
i bought some drill bits but they didnt seem to be getting very far with the one i started.
can anyone help please?
got the shocks out but all 4 bolt heads that hold the top of the rear shocks snapped off. what do i do?
i bought some drill bits but they didnt seem to be getting very far with the one i started.
can anyone help please?
Seasoned Member
Joined: Aug 2010
Posts: 326
Likes: 0
From: southern nj
Year: 1999
Model: Cherokee
Engine: 4.0
Originally Posted by joemomma22
Thanks guys. The bilsteins even in just the front significantly improved the ride quality. Can't wait to get rears in and relocate shackles. Will be nice and smooth
@nygiants, I'm in south Plainfield... You?
Thanks for the help and pics. I think I'll be ripping into this tonight after class
Far i got an uncle in Plainfield haha
Thread Starter
Seasoned Member
Joined: Jan 2013
Posts: 380
Likes: 0
From: Central NJ
Year: 2001
Model: Cherokee
Engine: 4.0L I6
Sorry again bein late w. the pics. After a total of 9 hours ovr the course of 3 days working in my rear shocks, I'm finally done. Sexy *** bilsteins. Holy crap they make the ride sooooo nice. Def a recommendation. Only thing is that I got them at serious offroad, for a great price too, but I want some stickers! Lol. I have no suspension stickers at all on my jeep. I have a full skyjacker lift setup that didn't even come with 1 sticker. And no billy sticker either. Haha we all know they are just as important!!! 
Ill post pics and details and stuff later
Ill post pics and details and stuff later
CF Veteran
Joined: Oct 2012
Posts: 1,277
Likes: 0
From: Orlando/Winter Garden
Year: 1998
Model: Cherokee
Engine: I6
Sorry again bein late w. the pics. After a total of 9 hours ovr the course of 3 days working in my rear shocks, I'm finally done. Sexy *** bilsteins. Holy crap they make the ride sooooo nice. Def a recommendation. Only thing is that I got them at serious offroad, for a great price too, but I want some stickers! Lol. I have no suspension stickers at all on my jeep. I have a full skyjacker lift setup that didn't even come with 1 sticker. And no billy sticker either. Haha we all know they are just as important!!!
Ill post pics and details and stuff later
Ill post pics and details and stuff later
Thread Starter
Seasoned Member
Joined: Jan 2013
Posts: 380
Likes: 0
From: Central NJ
Year: 2001
Model: Cherokee
Engine: 4.0L I6
Alright so i got an update and some pics (Finally) of the bilsteins in the rear. still have to find somewhere to flex for a sexy flex pic but well cross that bridge when we get there.
So All in all, it took me and a buddy of mine about 9 hours to change out the rear shocks.
First day i broke one bolt (when i first did my front ) and said screw it. came home from school the following day to see that my shock had fallen out of the mount lol
i decided maybe it i should just change them and get it over with. so i went out to lowes bought myself a nice ratchet set and drill bit set (couldnt find anything in my messy *** garage thanks to frank and kyle
dontchya just love shiny new tools
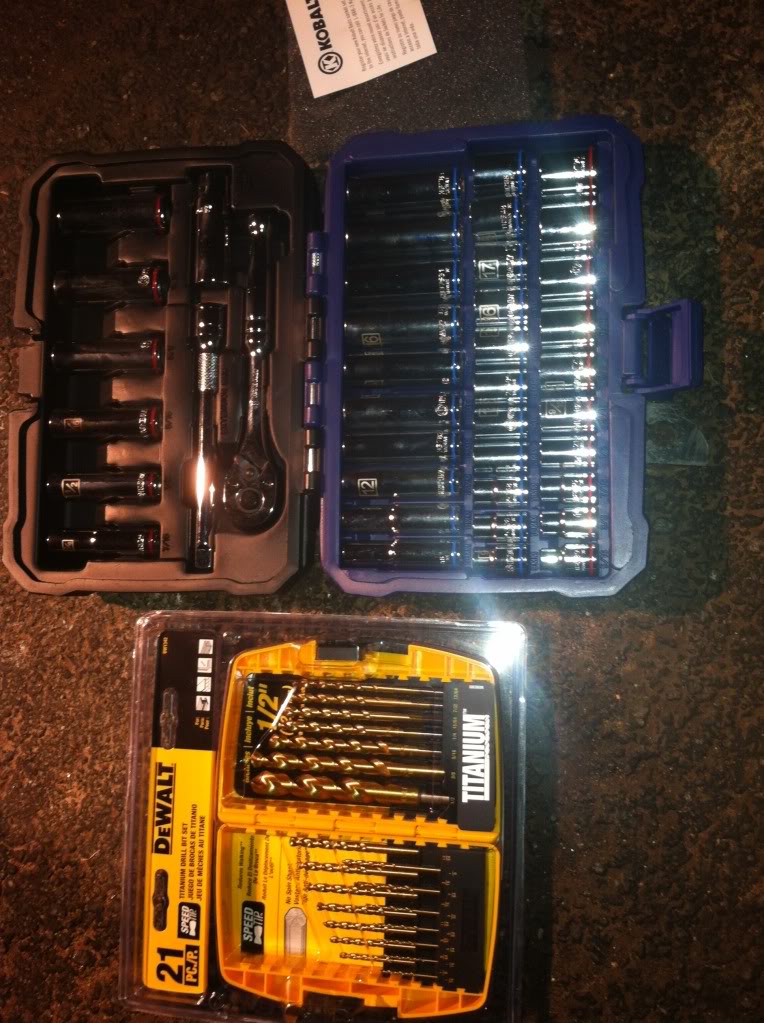
P.S these are the best possible things to have when working on your car
So on the first actual night of trying to get the shocks off i broke the 3 remaining bolts with no problem at all. they snapped right off.

so i started drilling... after about 5 minutes by myself at night in the cold of just pushing straight up into my jeep with new bits and not getting anywhere i again said screw it. but at least i got the shocks out... hey maybe this is why my ride felt like hell in a gokart
that night i posted here to find out wtf to do. someone pointed me to the write up and to use an air hammer to break the weld nuts out. okay fine.
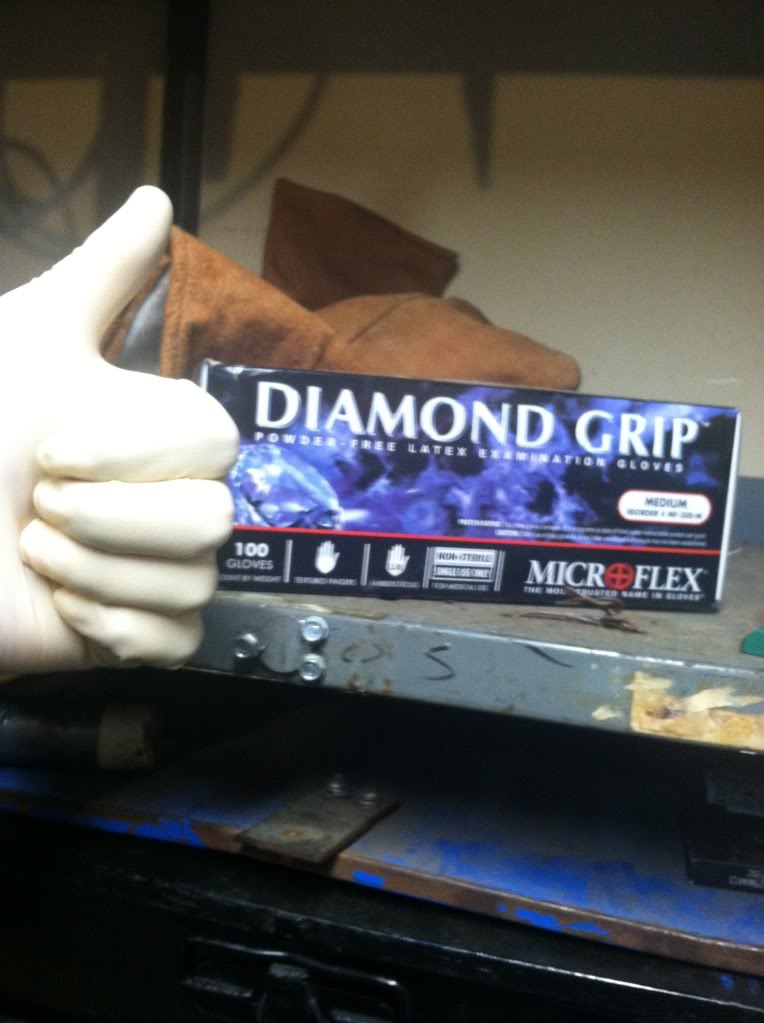
next day i got a ride to school (def dont wanna drive with no back shocks!!!!) after school lucas (best friend/ guy that spent 9 hours under my jeep w. me and drove me to school) and i grab the air hammer, drill, some other random tools and got to work. oh hey, SAFETY GLASSES WHENEVER YOUR UNDER YOUR JEEP. S@#T FALLS OUT OF THAT THING FROM EVERYWHERE!!!! at one point i actually had on an auto darkening welding helmet haaha.
so we got to it, unfortunately my air hammer had no trigger so one of us held the thing and the other one stabbed a screw driver into it to hit the button. after about an hour or so we got the passenger side weld nuts out, and we put the new bolts in using a wrench on the thread under the washers. when the thread peeped through the hole the other guy (with a free hand) grabbed it with needlenose. teamwork ftw. Took a while but we got it!
So purdy
went inside for a bit to warm up. came back out to start the driver side. holy hell did murphys law take into place or what. so my triggerless air hammer crapped out after another hour or 2 of banging on one of the bolts. tried to seal it. didnt work. we took a trip to harbor frieght bought another one for $15. got home plugged in. didnt work. at all. whatsoever!!!!!!!!!!!!!!!!!!!!!!
SCREW IT!
next day go back to harbor frieght with my girlfriend. exchange it. go home later on in the day.
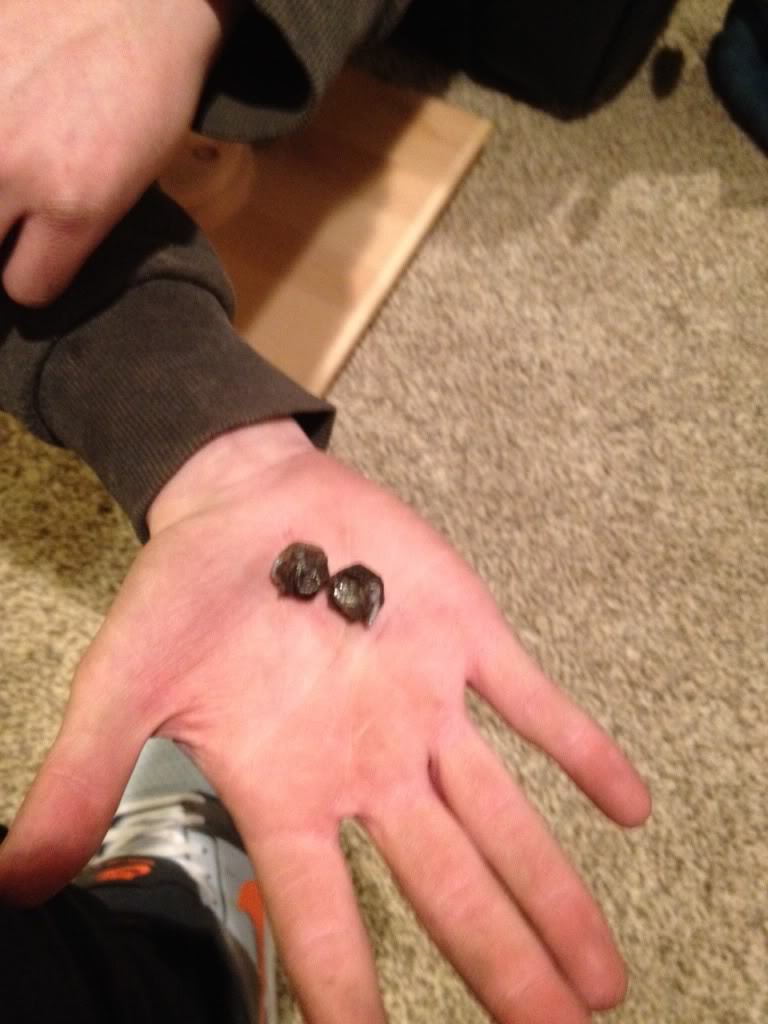
lucas came back over and we spent about another 4 hours trying to get the last weld nut to break. mother f**ker would come out no matter what. air hammer, drills, different hammer chisels, a tunnel bore bit. all in all i broke the super expensive bore bit, and 3 of my new bits.


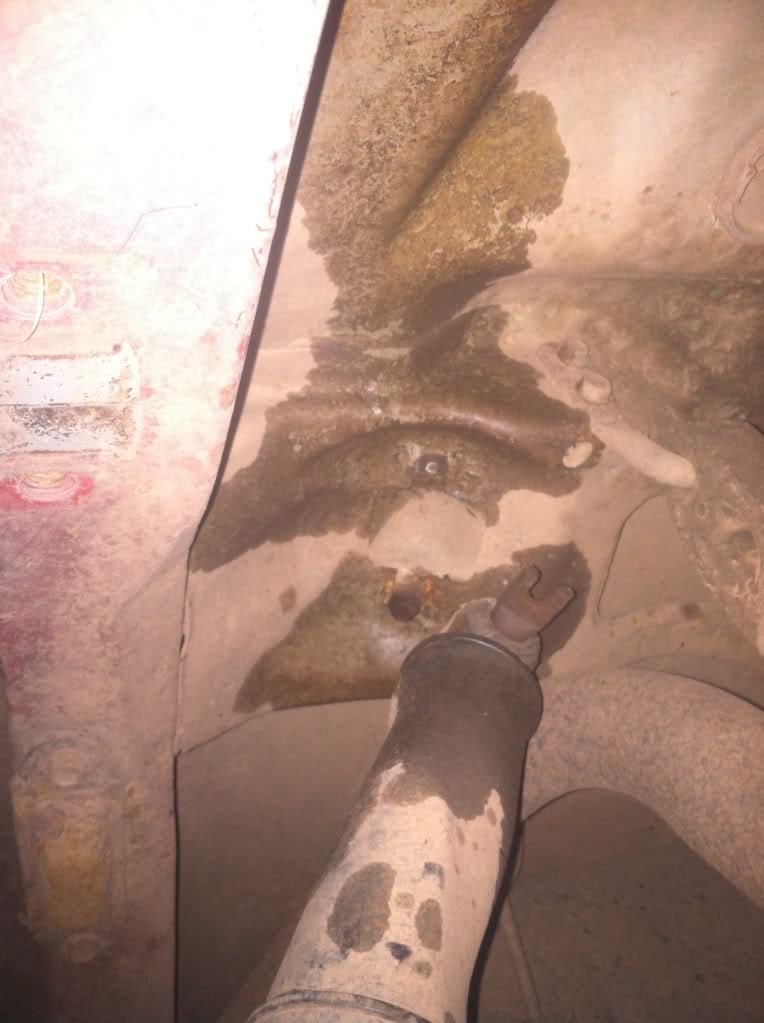
this is what it looked like after 4 hours of slamming it

honestly not sure how, but somehow, and im thinking it was just pure rage, but i got it out with a nail set and a bfh (aka the convincer)
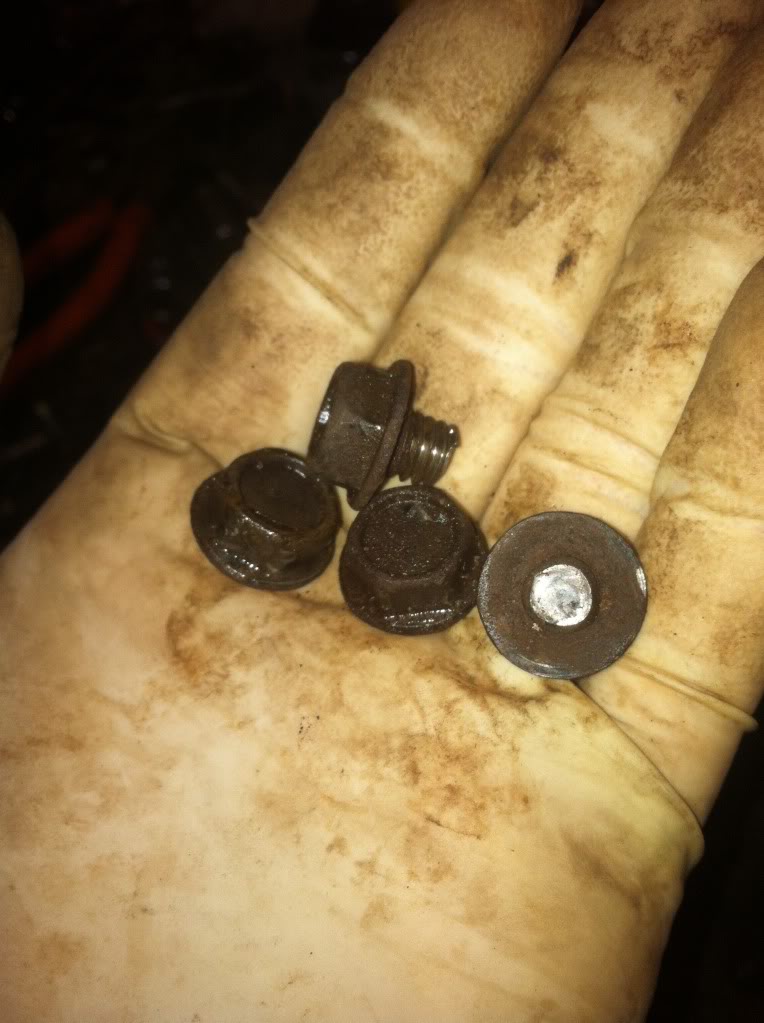
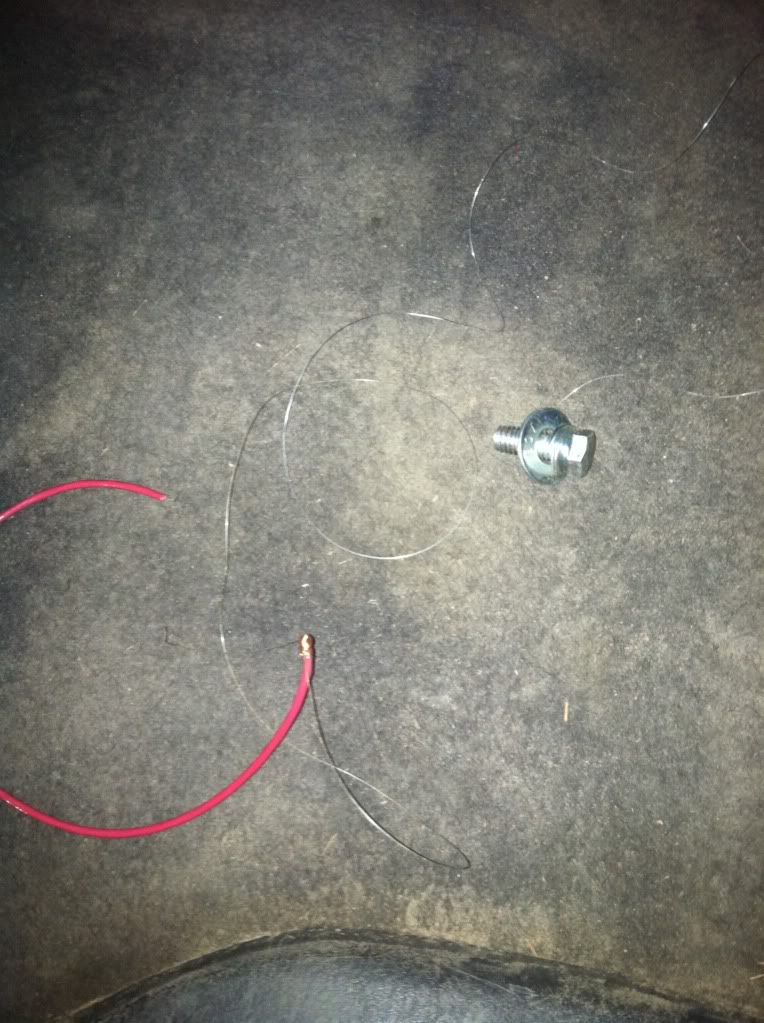
here are the 2 culprits (weldnuts) that caused the most problems
one has about 3 drill holes in it (or more?)
So now on to the hard part, getting the new bolt in the drivers side was a lot harder because the part you put the bolts into the holes was much farther. my hands couldnt reach, not even with a wrench. and the magnet stick i bought while i was at harbor freight couldnt do it either cause the washers caused the bolt to go sideways. such a pain. so i had an epiphany and i thought hey what about fishing wire.
then i realized oh crap i have no fishing wire.
HOME BREW!!!! fishing line + wire = amazing fishing wire. (im sure people knew this already but i didnt read it anywhere i thought of it on my own so yeah. my idea)
worked perfectly.
finally new shock in (that was hard too... nothin to hold the bolts to the body while putting the upper shock mount in. ended up using a big wrench and some leverage. passenger side was easy i just used my fingers both at hte same time.
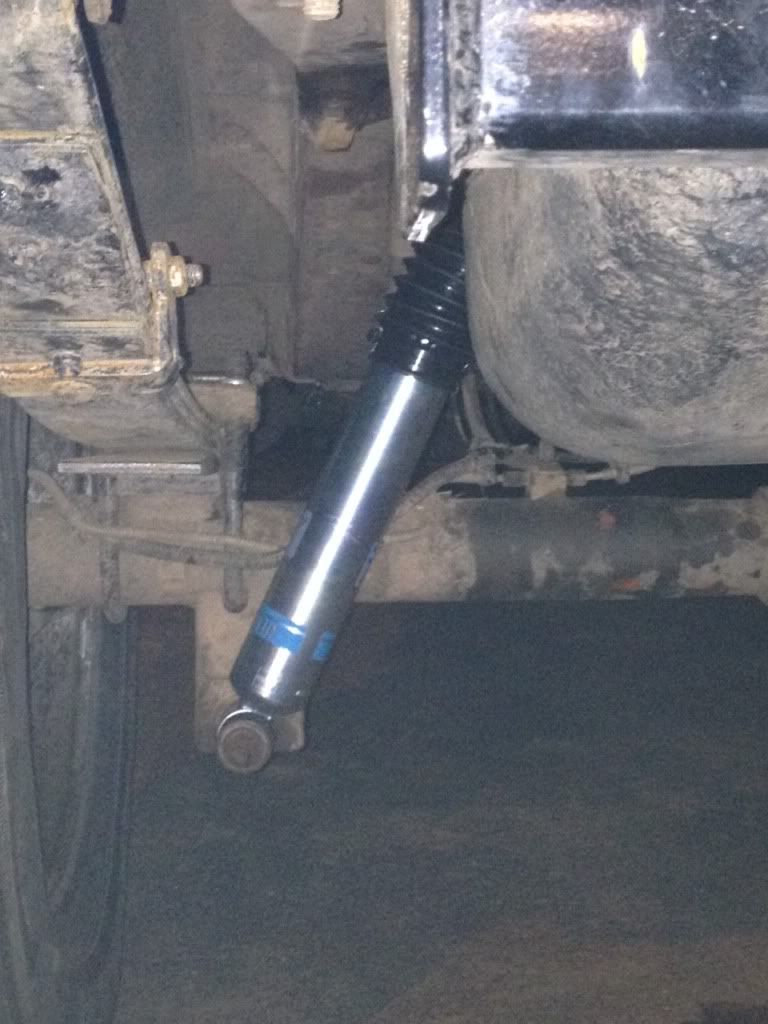
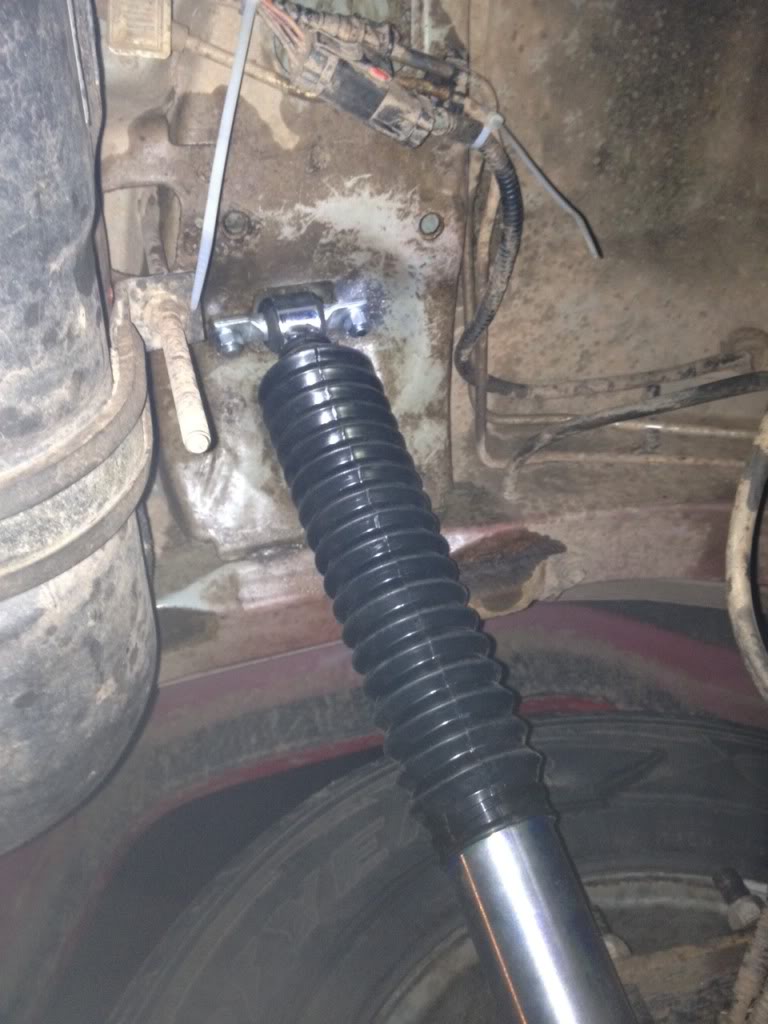
so shocks in! woo. they look sexy
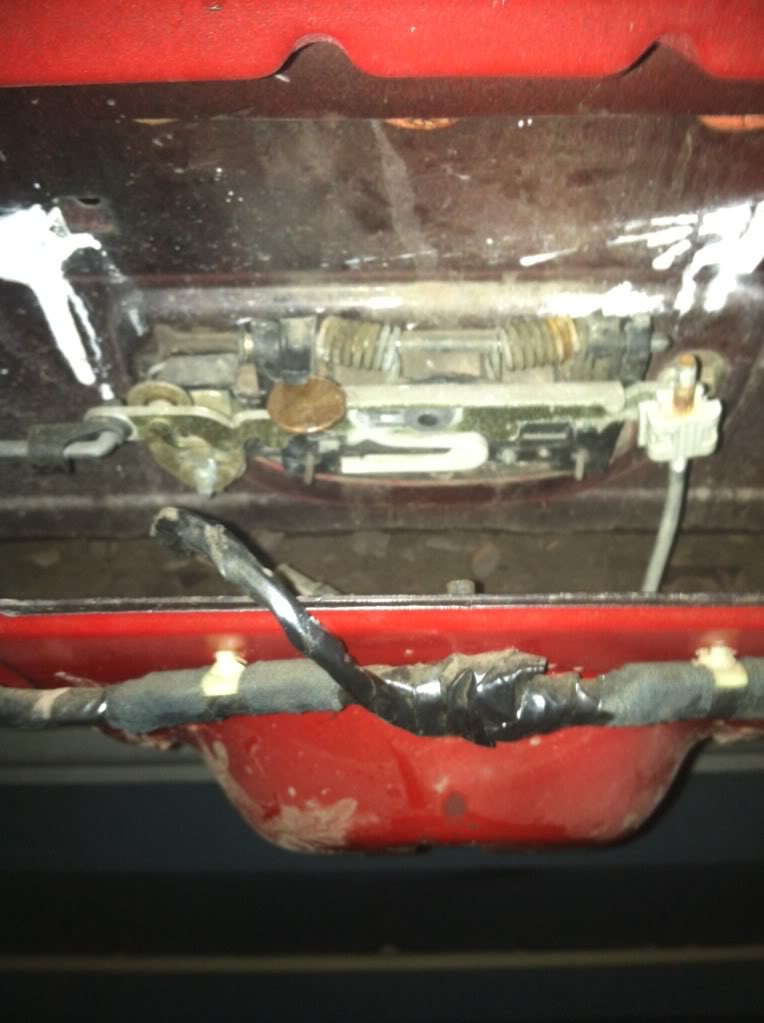
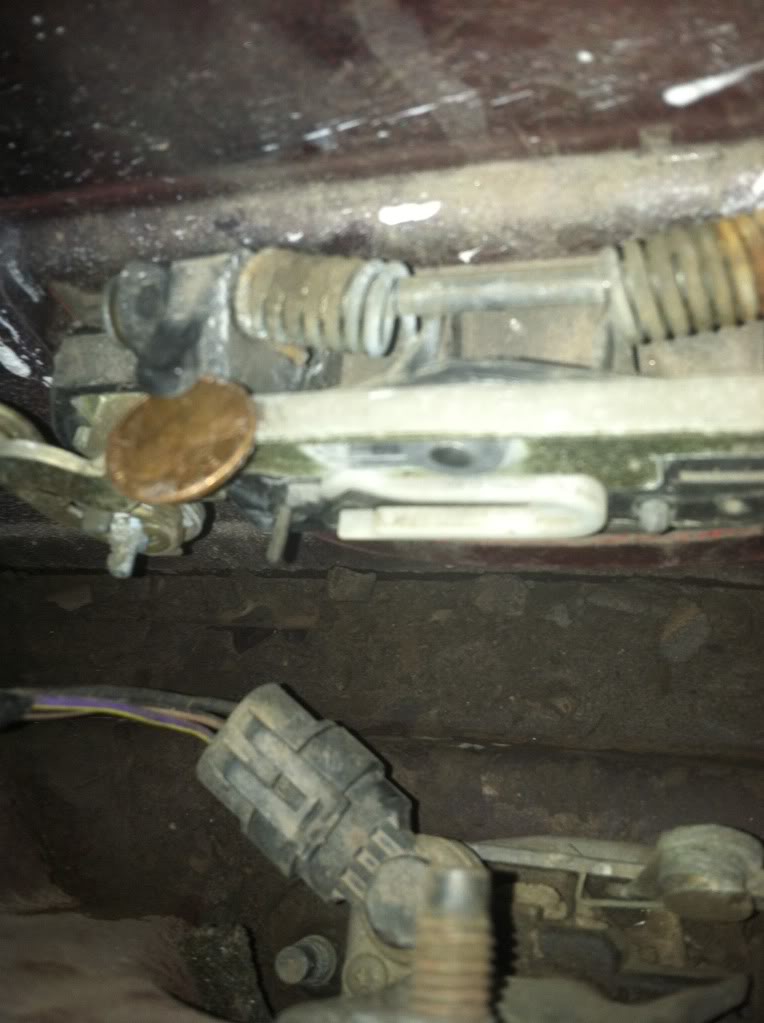
Also guys on the first night i decided to tackle my trunk lift gate thing. took the panel out and fiddled for a while. figured one reason why my trunk wasnt opening was cause the piece that pushes down didnt have enough leverage. so i added more for only $.01. cheapest mod ever. i literally glued in a penny and now it opens every time and still locks and unlocks no probs.
~~~~~~~~~~~~~~~~~~~~~~~~~~~~~~~~~~~~~~~~~~~~
Started prepping for bedlining of sorts/ drying of the floorpan yesterday.
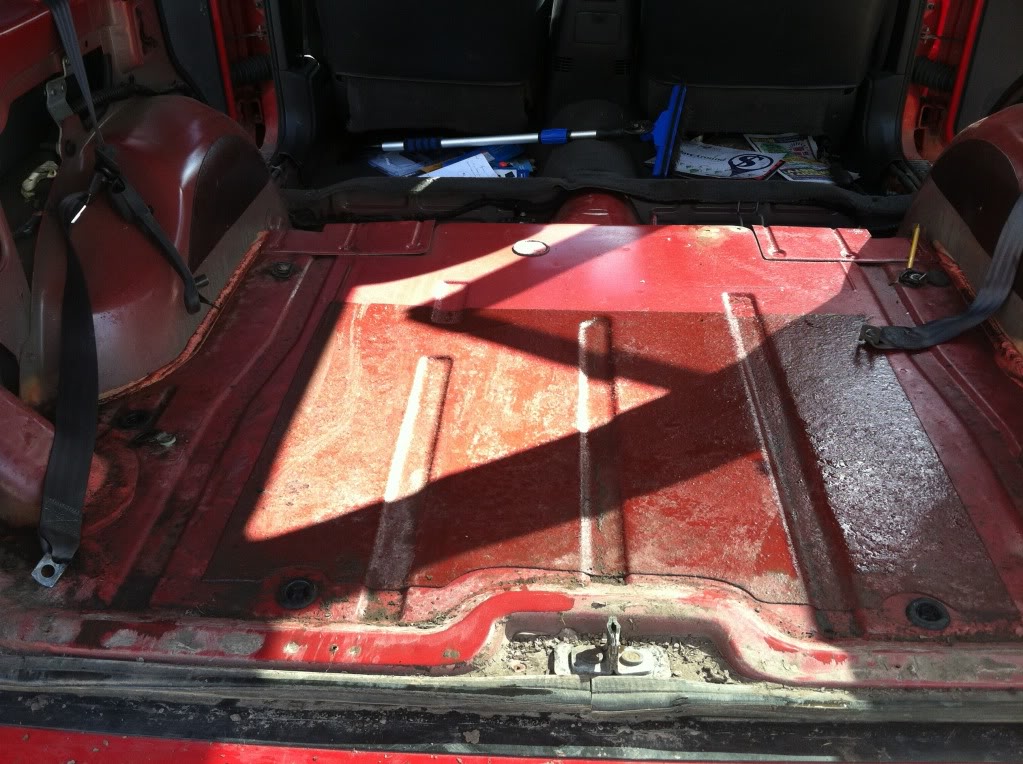
took the trunks carpet out and the seats. all thats left in tehre now is drivers seat, console, and carpet in the cab. i only had an hour or 2 so thats as far as i got.
you can see on the right of the deadener how muddy it is
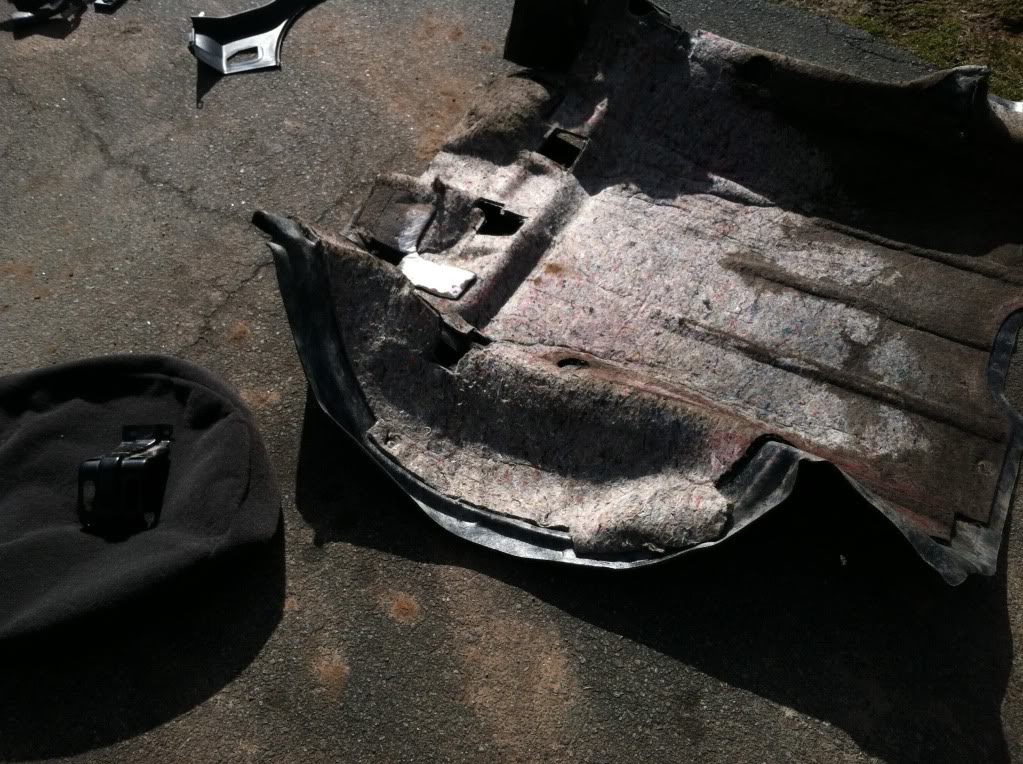
Gonna get all the carpets ripped up and powerwash/ scrup the floorpan so muddy.
also, i took out the "spare" tire.... i wouldnt even trust this on the little red wagon i had as a kid. wtf jeep. dissapointment.
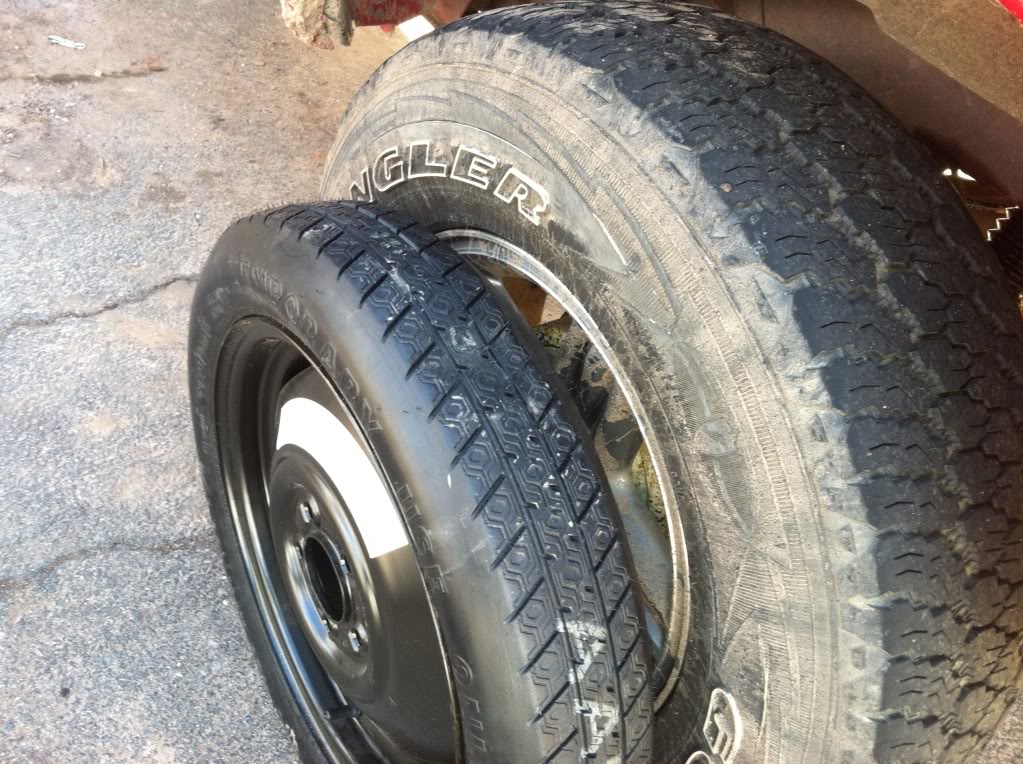
thats just embarrassing.
I could really use a write up or some tuts of lining the floors cause theres all kindsa electric and idk what to do with it.
Well thats it for now guys. hey if you focused and read through all that, thanks.
So All in all, it took me and a buddy of mine about 9 hours to change out the rear shocks.
First day i broke one bolt (when i first did my front ) and said screw it. came home from school the following day to see that my shock had fallen out of the mount lol
i decided maybe it i should just change them and get it over with. so i went out to lowes bought myself a nice ratchet set and drill bit set (couldnt find anything in my messy *** garage thanks to frank and kyle
dontchya just love shiny new tools
P.S these are the best possible things to have when working on your car
So on the first actual night of trying to get the shocks off i broke the 3 remaining bolts with no problem at all. they snapped right off.
so i started drilling... after about 5 minutes by myself at night in the cold of just pushing straight up into my jeep with new bits and not getting anywhere i again said screw it. but at least i got the shocks out... hey maybe this is why my ride felt like hell in a gokart
that night i posted here to find out wtf to do. someone pointed me to the write up and to use an air hammer to break the weld nuts out. okay fine.
next day i got a ride to school (def dont wanna drive with no back shocks!!!!) after school lucas (best friend/ guy that spent 9 hours under my jeep w. me and drove me to school) and i grab the air hammer, drill, some other random tools and got to work. oh hey, SAFETY GLASSES WHENEVER YOUR UNDER YOUR JEEP. S@#T FALLS OUT OF THAT THING FROM EVERYWHERE!!!! at one point i actually had on an auto darkening welding helmet haaha.
so we got to it, unfortunately my air hammer had no trigger so one of us held the thing and the other one stabbed a screw driver into it to hit the button. after about an hour or so we got the passenger side weld nuts out, and we put the new bolts in using a wrench on the thread under the washers. when the thread peeped through the hole the other guy (with a free hand) grabbed it with needlenose. teamwork ftw. Took a while but we got it!
So purdy
went inside for a bit to warm up. came back out to start the driver side. holy hell did murphys law take into place or what. so my triggerless air hammer crapped out after another hour or 2 of banging on one of the bolts. tried to seal it. didnt work. we took a trip to harbor frieght bought another one for $15. got home plugged in. didnt work. at all. whatsoever!!!!!!!!!!!!!!!!!!!!!!
SCREW IT!
next day go back to harbor frieght with my girlfriend. exchange it. go home later on in the day.
lucas came back over and we spent about another 4 hours trying to get the last weld nut to break. mother f**ker would come out no matter what. air hammer, drills, different hammer chisels, a tunnel bore bit. all in all i broke the super expensive bore bit, and 3 of my new bits.
this is what it looked like after 4 hours of slamming it
honestly not sure how, but somehow, and im thinking it was just pure rage, but i got it out with a nail set and a bfh (aka the convincer)
here are the 2 culprits (weldnuts) that caused the most problems
one has about 3 drill holes in it (or more?)
So now on to the hard part, getting the new bolt in the drivers side was a lot harder because the part you put the bolts into the holes was much farther. my hands couldnt reach, not even with a wrench. and the magnet stick i bought while i was at harbor freight couldnt do it either cause the washers caused the bolt to go sideways. such a pain. so i had an epiphany and i thought hey what about fishing wire.
then i realized oh crap i have no fishing wire.
HOME BREW!!!! fishing line + wire = amazing fishing wire. (im sure people knew this already but i didnt read it anywhere i thought of it on my own so yeah. my idea)
worked perfectly.
finally new shock in (that was hard too... nothin to hold the bolts to the body while putting the upper shock mount in. ended up using a big wrench and some leverage. passenger side was easy i just used my fingers both at hte same time.
so shocks in! woo. they look sexy
Also guys on the first night i decided to tackle my trunk lift gate thing. took the panel out and fiddled for a while. figured one reason why my trunk wasnt opening was cause the piece that pushes down didnt have enough leverage. so i added more for only $.01. cheapest mod ever. i literally glued in a penny and now it opens every time and still locks and unlocks no probs.
~~~~~~~~~~~~~~~~~~~~~~~~~~~~~~~~~~~~~~~~~~~~
Started prepping for bedlining of sorts/ drying of the floorpan yesterday.
took the trunks carpet out and the seats. all thats left in tehre now is drivers seat, console, and carpet in the cab. i only had an hour or 2 so thats as far as i got.
you can see on the right of the deadener how muddy it is
Gonna get all the carpets ripped up and powerwash/ scrup the floorpan so muddy.
also, i took out the "spare" tire.... i wouldnt even trust this on the little red wagon i had as a kid. wtf jeep. dissapointment.
thats just embarrassing.
I could really use a write up or some tuts of lining the floors cause theres all kindsa electric and idk what to do with it.
Well thats it for now guys. hey if you focused and read through all that, thanks.
CF Veteran
Joined: Dec 2009
Posts: 1,882
Likes: 0
From: Oxford NC
Year: 1998
Model: Cherokee
Engine: 4.0L
i just got undercoating from rustolem in the spray. how i did my white xj rockers and the inside. now on my red classic just like yours going to do the rockers with it. awsome stuff and alot cheaper than hurculiner!