
Hybrid cage build

CF Veteran
Joined: Apr 2008
Posts: 2,340
Likes: 8
From: Burlington, NC
Year: 1994...mostly...
Model: Cherokee (XJ)
Engine: 4.0L I6 HO, Lot's of Bolt Ons
What if you run the bar up and over the windsheild wipers instead of in front of them? You'll have a little hoop in your windshield there but shouldn't look to bad. I assume your going to run tube from the roof suport down the winshield frame. Maybe do a third down the center section to the hoop you'd have and it would flow pretty well. I'll try to photoshop somthing up.
Thread Starter
Seasoned Member
Joined: Nov 2008
Posts: 478
Likes: 0
From: Belmont, NC
Year: 99
Model: Cherokee
Engine: 4.0
yes, there will be an upsidedown "V" in the middle of the windshield and both A pillars will attach from the roof bar down to the windshield/cowl bar. I was trying to keep it as close to the body as possible and with going over the wipers it would be a few inches higher than i really wanted.
I think i'll just cut out the two bends in the middle and insert a piece that will make it fit better.
I think i'll just cut out the two bends in the middle and insert a piece that will make it fit better.
CF Veteran
Joined: Apr 2008
Posts: 2,340
Likes: 8
From: Burlington, NC
Year: 1994...mostly...
Model: Cherokee (XJ)
Engine: 4.0L I6 HO, Lot's of Bolt Ons
So cut it down and put a slug in it so it sits closer to the windshield wipers? Sounds like that would work pretty good.
When can I drop my Jeep off for a little make over
When can I drop my Jeep off for a little make over
Last edited by Desertfox1023; Apr 27, 2009 at 05:54 PM.

Thread Starter
Seasoned Member
Joined: Nov 2008
Posts: 478
Likes: 0
From: Belmont, NC
Year: 99
Model: Cherokee
Engine: 4.0
I ended up moving the cowl bar up 1/4" and back about 1/2". It still hits the hood if you try to open it all the way but atleast now I can get to the first hood prop hole. If i ever need to open it further to work on it i can always just unbolt it.
Here are some pics of todays progress:
Welded up roof sliders and painted it and the internal part of the cage:

I cut the ends at the same angle as the hatch line and capped it off:


Got the seats put back in and installed the harnesses. I realized I put the harness bar just a little lower than i had wanted but the way the frame of the seat is, the angle from my shoulders to where the pull point is will work fine. Its about 5deg. I don't think the angle from the pull point (inside seat back) to mounting point will be a problem.


I need to decide if i'm going to weld up the roof where the tube goes through or just put black silicone around it so it doesn't leak. I was able to cut the holes just right so the tube fits real tight so welding shouldn't be too hard if i decide to go that route.

As you can see, I still need to build the A pillars and fender bars to the bumper. Also planning on a front hood (radiator) bar. I don't know if it will all get done before friday's ride since i have to be out of town for work on thursday but i'm going to try to get the A pillars done and the upsidedown "V" infront of the windshield done tomorow before towing it out to the farm for friday.

I don't know what it is, but after working on this thing all week all I feel like doing is taking it out on the trail and pounding on it... anyone else feel like that after working on thier rigs? You would think i'd want to be nice and easy with it after doing all that work but for some reason I'm feeling the opposite. Maybe friday will be a good show
Here are some pics of todays progress:
Welded up roof sliders and painted it and the internal part of the cage:
I cut the ends at the same angle as the hatch line and capped it off:
Got the seats put back in and installed the harnesses. I realized I put the harness bar just a little lower than i had wanted but the way the frame of the seat is, the angle from my shoulders to where the pull point is will work fine. Its about 5deg. I don't think the angle from the pull point (inside seat back) to mounting point will be a problem.
I need to decide if i'm going to weld up the roof where the tube goes through or just put black silicone around it so it doesn't leak. I was able to cut the holes just right so the tube fits real tight so welding shouldn't be too hard if i decide to go that route.
As you can see, I still need to build the A pillars and fender bars to the bumper. Also planning on a front hood (radiator) bar. I don't know if it will all get done before friday's ride since i have to be out of town for work on thursday but i'm going to try to get the A pillars done and the upsidedown "V" infront of the windshield done tomorow before towing it out to the farm for friday.
I don't know what it is, but after working on this thing all week all I feel like doing is taking it out on the trail and pounding on it... anyone else feel like that after working on thier rigs? You would think i'd want to be nice and easy with it after doing all that work but for some reason I'm feeling the opposite. Maybe friday will be a good show
Thread Starter
Seasoned Member
Joined: Nov 2008
Posts: 478
Likes: 0
From: Belmont, NC
Year: 99
Model: Cherokee
Engine: 4.0
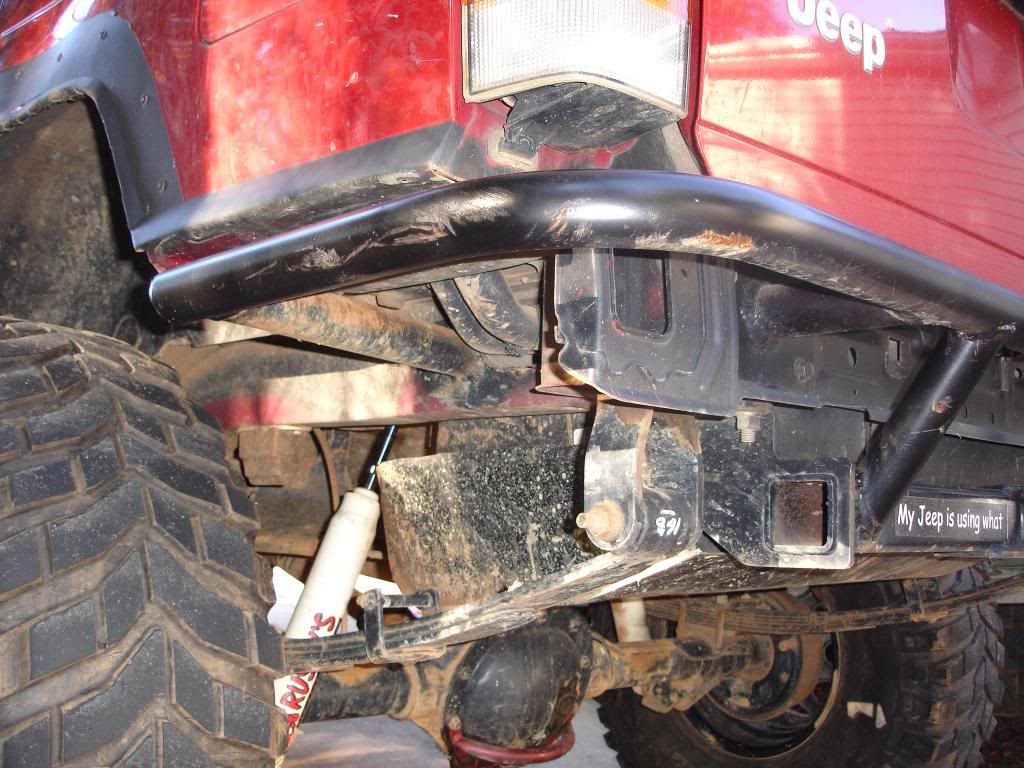
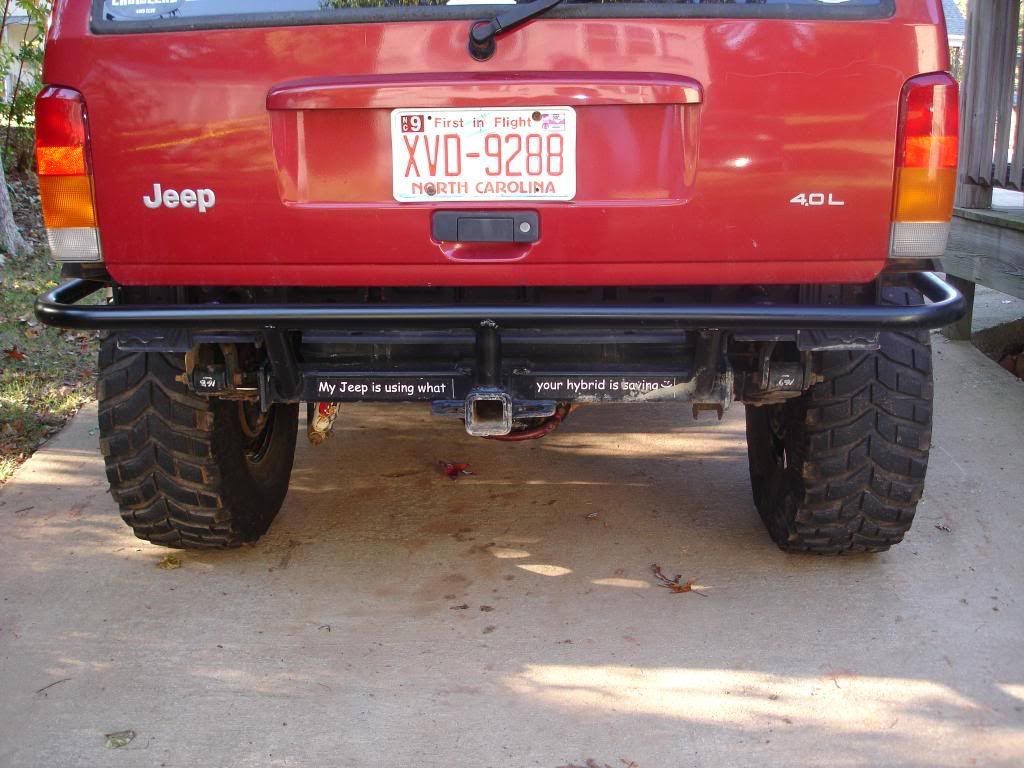
I haven't decided if i am going to tie in the roof bars to the rear bumper or not. Probably not, but here is what the rear bumper looks like. I built this a year ago or so.
CF Veteran
Joined: Apr 2008
Posts: 2,340
Likes: 8
From: Burlington, NC
Year: 1994...mostly...
Model: Cherokee (XJ)
Engine: 4.0L I6 HO, Lot's of Bolt Ons
Looking good man. I would maybe do a bar going from the roof to the rear bumper. Kinda seems incomplete to someone who didn't know it was just an extension of the insde cage.
Thread Starter
Seasoned Member
Joined: Nov 2008
Posts: 478
Likes: 0
From: Belmont, NC
Year: 99
Model: Cherokee
Engine: 4.0
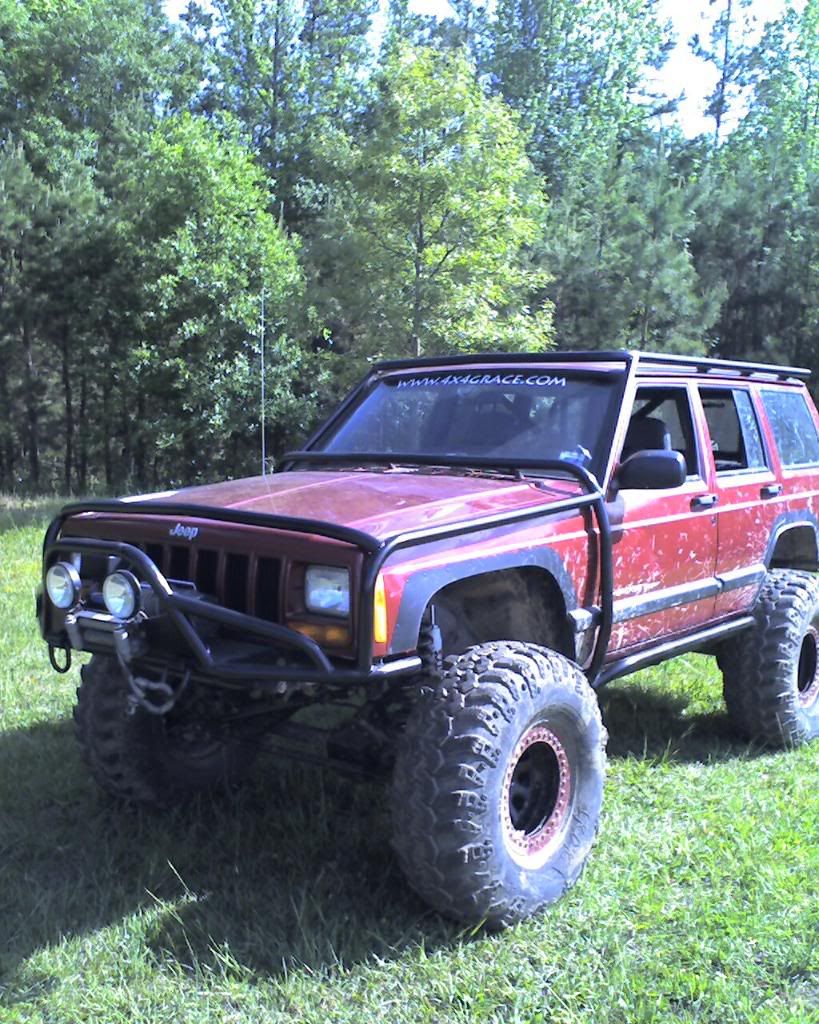
the Iroks i'm running now are the best i've ever ran. They grip where other tires i've had just slip and spin. When these are worn out I will more than likely replace them with a new set just like them.
The Baja Claws in the bottom pic were the 35's that I used to run. I had those because i wanted radials since it used to pull double duty as a Daily driver and trail rig. They did good. I ran BFG muds (33's) before them and i'd say they both performed about the same. The only complaint i had with the claws were that they didn't seem to hold up well on sharp rocks. I had lots of chunks missing out of the side lugs when i got rid of them.
If you are considering Iroks, i'd say you can't go wrong as long as it is a trail only truck.
If you are considering claws, i'd say if you can get a good deal on a set then try them but there are others out there that I would say are better or equal but less expensive.
Senior Member
Joined: Dec 2008
Posts: 543
Likes: 0
Year: 1987
Model: Cherokee
Engine: 4.0 soon to be gc ho 4.0
um first off. i lke the xj. second. i live in kingsmountain and from gastonia...where bouts in belmont you live? if you ever need a hand, welder, or company workin on the jeep let me know. i never have help on mine. no one has the same passion or intrest to bend tube, weld and talk about it like i do. major props on the cage work. im ready to start mine and i have my tubing, just no bender.
oh yea. lemme know when you wanna get rid of those iroks...ill take em when you do.
oh yea. lemme know when you wanna get rid of those iroks...ill take em when you do.
Thread Starter
Seasoned Member
Joined: Nov 2008
Posts: 478
Likes: 0
From: Belmont, NC
Year: 99
Model: Cherokee
Engine: 4.0
today i finished up the cage. I made both A pillars, both fender bars and a radiator bar and painted it up. I may still add the bars infront of the windshield but I didn't have time today for that.


Senior Member
Joined: Sep 2008
Posts: 688
Likes: 1
From: Nashville, TN
Year: 2000
Model: Cherokee
Engine: 4.0L HO
awesome work so far...
for the hood, would it be possible to redo the hinges on the outside? similar to a wranglers setup? possibly use hinges like this:
http://www2.partstrain.com/images/photos/J130105.JPG
for the hood, would it be possible to redo the hinges on the outside? similar to a wranglers setup? possibly use hinges like this:
http://www2.partstrain.com/images/photos/J130105.JPG