
Cactus_jack's build

Thread Starter
Junior Member
Joined: May 2012
Posts: 82
Likes: 0
From: Morehead, KY
Year: 98
Model: Cherokee
Engine: 4.0
Well it's been a while since I've had time to give the Jeep some love. Between work, college and a lack of a warm work area, I just haven't been able to do much.
Today was a sunny 75 degrees and I decided to tackle my steering gear box. It had some noticeable slop and was getting quite annoying. I opted to go with the Durango upgrade.
I got the Durango box from NAPA for about $130 with my employee discount. Went ahead and got new pressure and return lines as well.
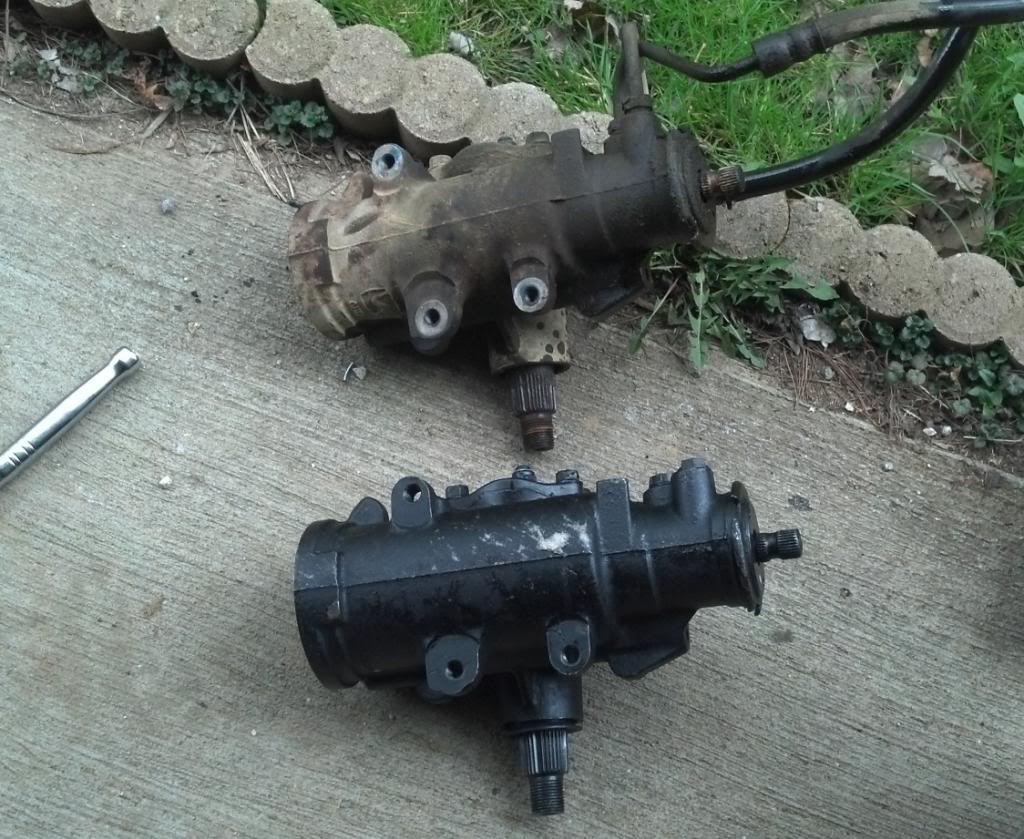
Here they are side-by-side. Not much difference except the Durango box has a slightly noticeable beef to it.
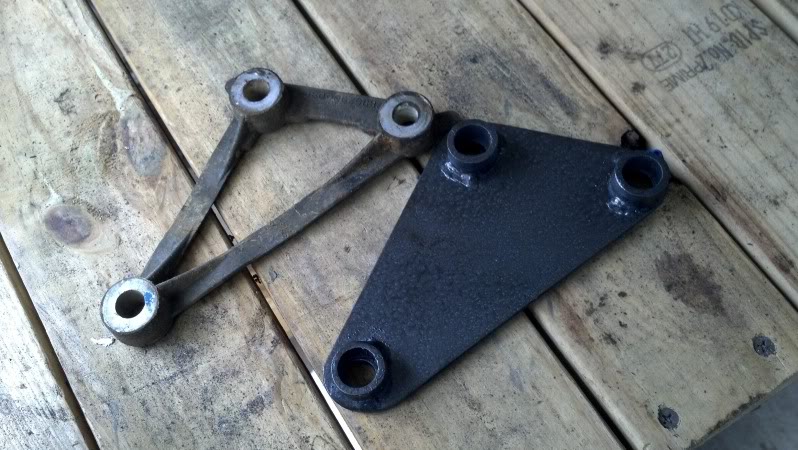
Also had Mark over at Detours Offroad Hardware fabricate this beefy spacer out of 3/16 plate. I was surprised to see the factory aluminum spacer came out in one piece.
Overall, a MUCH better drive with the new box. Steering is much tighter and has much better response at highway speeds. I'd highly recommend it to anyone looking to upgrade.
In other news, I'm doing some slight customizing to my eBay bumper as well as adding some lights. Should have it done next Monday.
Today was a sunny 75 degrees and I decided to tackle my steering gear box. It had some noticeable slop and was getting quite annoying. I opted to go with the Durango upgrade.
I got the Durango box from NAPA for about $130 with my employee discount. Went ahead and got new pressure and return lines as well.
Here they are side-by-side. Not much difference except the Durango box has a slightly noticeable beef to it.
Also had Mark over at Detours Offroad Hardware fabricate this beefy spacer out of 3/16 plate. I was surprised to see the factory aluminum spacer came out in one piece.
Overall, a MUCH better drive with the new box. Steering is much tighter and has much better response at highway speeds. I'd highly recommend it to anyone looking to upgrade.
In other news, I'm doing some slight customizing to my eBay bumper as well as adding some lights. Should have it done next Monday.
Thread Starter
Junior Member
Joined: May 2012
Posts: 82
Likes: 0
From: Morehead, KY
Year: 98
Model: Cherokee
Engine: 4.0
Took care of the dreaded exhaust manifold. Didn't take care of my ticking noise but at least I don't smell like exhaust fumes every time I drive it
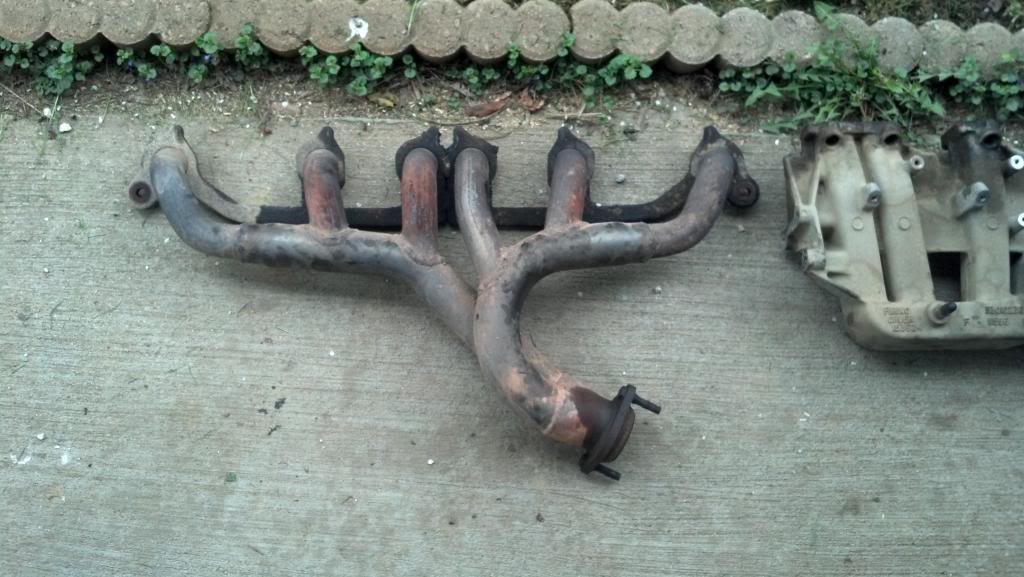
It had a pretty significant crack at the bottom
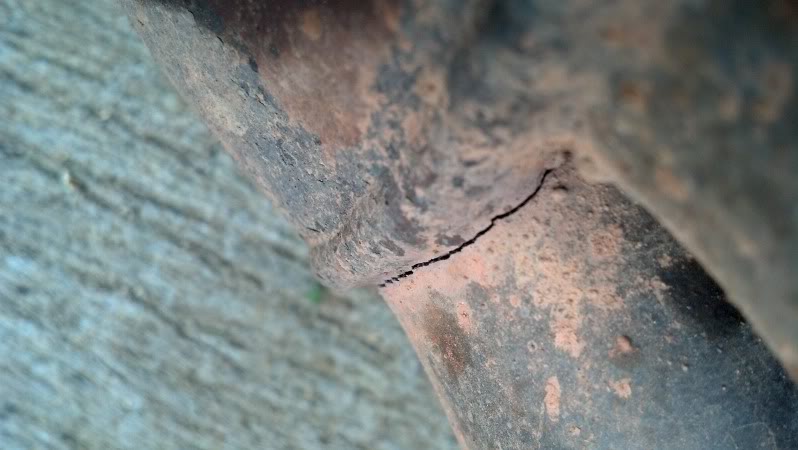
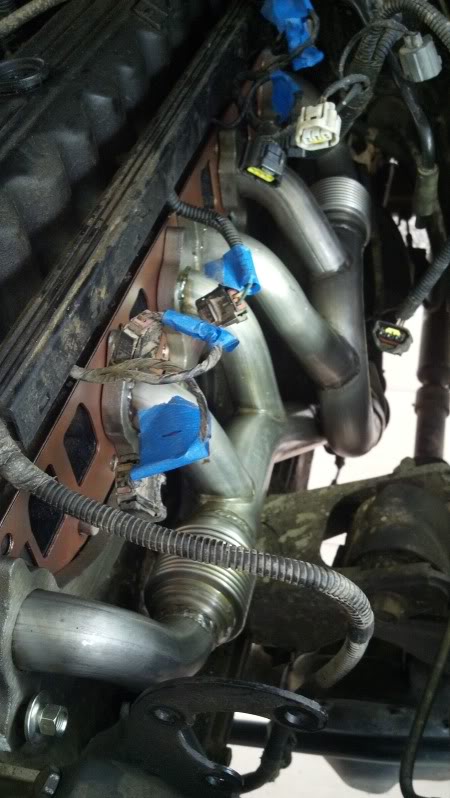
Wasn't too bad of a job. Took me about 2 1/2 hours. Hardest part was the bottom intake bolts. I'll be getting that bumper finished up Monday hopefully as long as the weather cooperates.
It had a pretty significant crack at the bottom
Wasn't too bad of a job. Took me about 2 1/2 hours. Hardest part was the bottom intake bolts. I'll be getting that bumper finished up Monday hopefully as long as the weather cooperates.
Thread Starter
Junior Member
Joined: May 2012
Posts: 82
Likes: 0
From: Morehead, KY
Year: 98
Model: Cherokee
Engine: 4.0
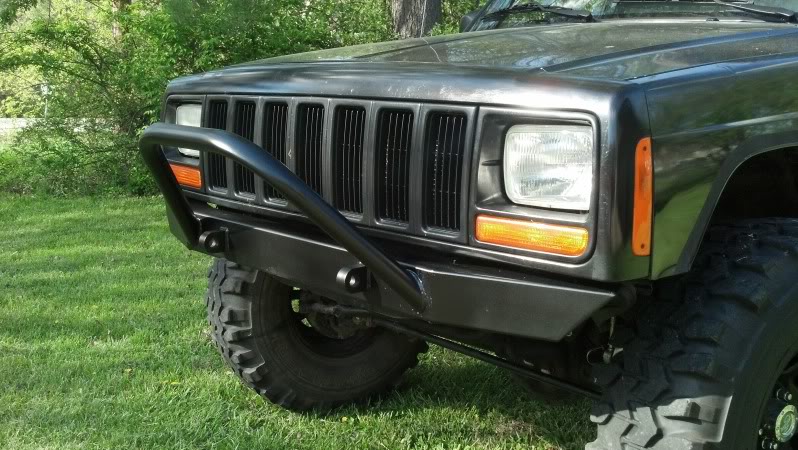
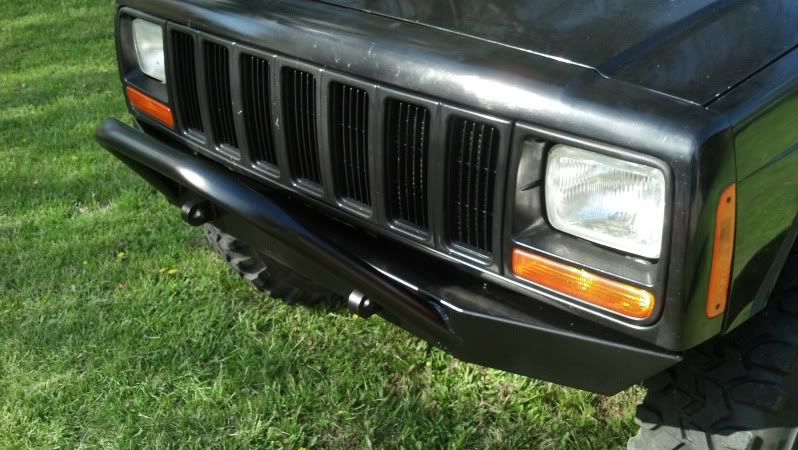
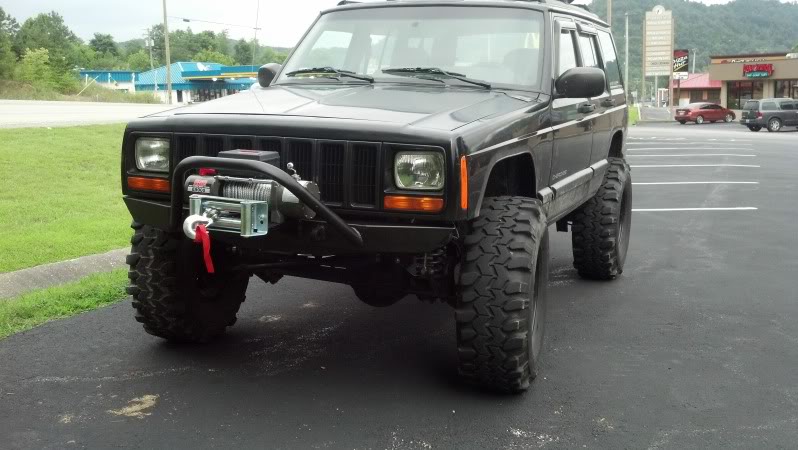
Finally finished fixing my eBay bumper today. I didn't like how it ran straight across the front so I made some relief cuts, bent and welded it on both sides. Also cut off the smaller tubing pieces and just left the bull bar.
Thread Starter
Junior Member
Joined: May 2012
Posts: 82
Likes: 0
From: Morehead, KY
Year: 98
Model: Cherokee
Engine: 4.0
It's been a while since my last update. I've since started a new job and haven't had a lot of time to spend with a wrench in my hand.
On the upside, I just ordered an Engo E9000 from JeepAddOns.com. He's got a killer deal on them for $269 shipped to JeepForum members so I couldn't pass it up. The winch had great reviews and did well in torture tests I had read about. Once I get the winch, I'll be doing the install as well as installing some new lights and fabbing a light bar for the roof.
On the upside, I just ordered an Engo E9000 from JeepAddOns.com. He's got a killer deal on them for $269 shipped to JeepForum members so I couldn't pass it up. The winch had great reviews and did well in torture tests I had read about. Once I get the winch, I'll be doing the install as well as installing some new lights and fabbing a light bar for the roof.
Thread Starter
Junior Member
Joined: May 2012
Posts: 82
Likes: 0
From: Morehead, KY
Year: 98
Model: Cherokee
Engine: 4.0
Thanks man. Durango upgrade made a good difference. Tires aren't too bad until you get up to highways speeds, then they're stoooopid loud! You get used to it though.
Thread Starter
Junior Member
Joined: May 2012
Posts: 82
Likes: 0
From: Morehead, KY
Year: 98
Model: Cherokee
Engine: 4.0
Ok, shew! I know I know, it's been a while. I haven't had much time for Jeep love lately with my new job and such but I'm finally getting settled in and will start having some more free time.
Here's what's up:
WINCH:
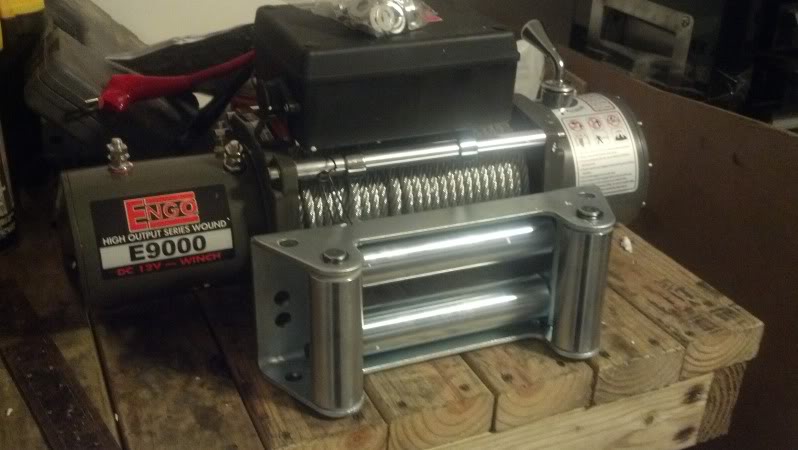
I've had this Engo E9000 shacked up for way too long. It's time to get it out of the box and on the Jeep. I've got a decent eBay bumper that I modified earlier in this build, so I didn't want to go out and spend $700 on another overpriced bumper.
I decided I wanted to build my own winch plate. I wanted to keep it simple, yet strong.

It'll be made out of 1/4" plate and should be pretty strong. What do you guys think of the design? I wanted to get some opinions before I put it together this weekend.
LIGHTS
I've already got a pair of cheap rectangles for the bumper. I opted to go cheap on the lights because hey, I don't wheel at night, and if I do, these lights will be more than enough for what I need. It'll be nice to have a little extra light during the snow this winter, that's about it.
I'll also have four more for the roof after I fab my roof rack cross bars. I've also been planned a switch panel for these:
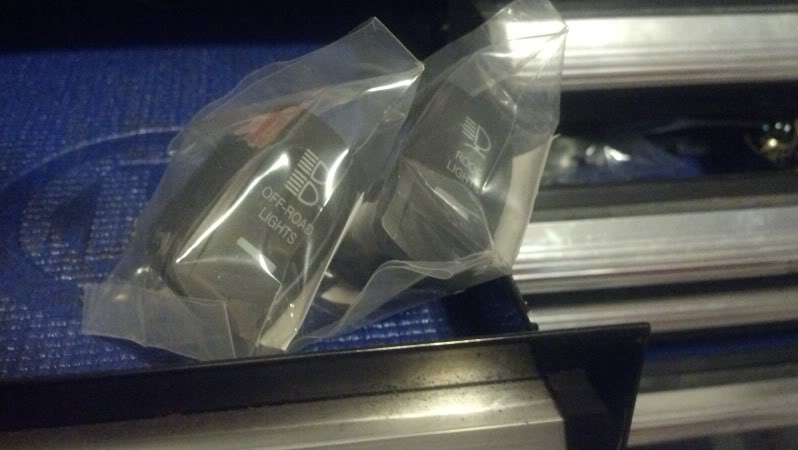
Bad photo, I know. I actually have three of these switches from OTRATTW. The other one says rear roof lights which I am debating on whether or not to use.
Let me know what you guys think of the winch plate idea, I'd like to get some feedback on it.
Here's what's up:
WINCH:
I've had this Engo E9000 shacked up for way too long. It's time to get it out of the box and on the Jeep. I've got a decent eBay bumper that I modified earlier in this build, so I didn't want to go out and spend $700 on another overpriced bumper.
I decided I wanted to build my own winch plate. I wanted to keep it simple, yet strong.
It'll be made out of 1/4" plate and should be pretty strong. What do you guys think of the design? I wanted to get some opinions before I put it together this weekend.
LIGHTS
I've already got a pair of cheap rectangles for the bumper. I opted to go cheap on the lights because hey, I don't wheel at night, and if I do, these lights will be more than enough for what I need. It'll be nice to have a little extra light during the snow this winter, that's about it.
I'll also have four more for the roof after I fab my roof rack cross bars. I've also been planned a switch panel for these:
Bad photo, I know. I actually have three of these switches from OTRATTW. The other one says rear roof lights which I am debating on whether or not to use.
Let me know what you guys think of the winch plate idea, I'd like to get some feedback on it.
Member
Joined: Sep 2010
Posts: 150
Likes: 0
From: Longview, TX
Year: 1992
Model: Cherokee
Engine: 4.0
I'm liking your build. Did your winch plate end up being true to your posted design? Did you use 2 or 3 gussets beneath it? I was going to do the same basic design, do you have any close up pics?
Thread Starter
Junior Member
Joined: May 2012
Posts: 82
Likes: 0
From: Morehead, KY
Year: 98
Model: Cherokee
Engine: 4.0
Thanks man it worked out perfectly. I only used 2 gussets underneath but it is stout as an ox. My welding skills have diminished since my last weld job in the Navy (4 years ago!) but I'm confident in the design.

