Black Widow Build (SlimGoaty)

Thread Starter
Senior Member
Joined: Dec 2011
Posts: 922
Likes: 1
From: Centralia, Wa
Year: 1997
Model: Cherokee
Engine: 4.0
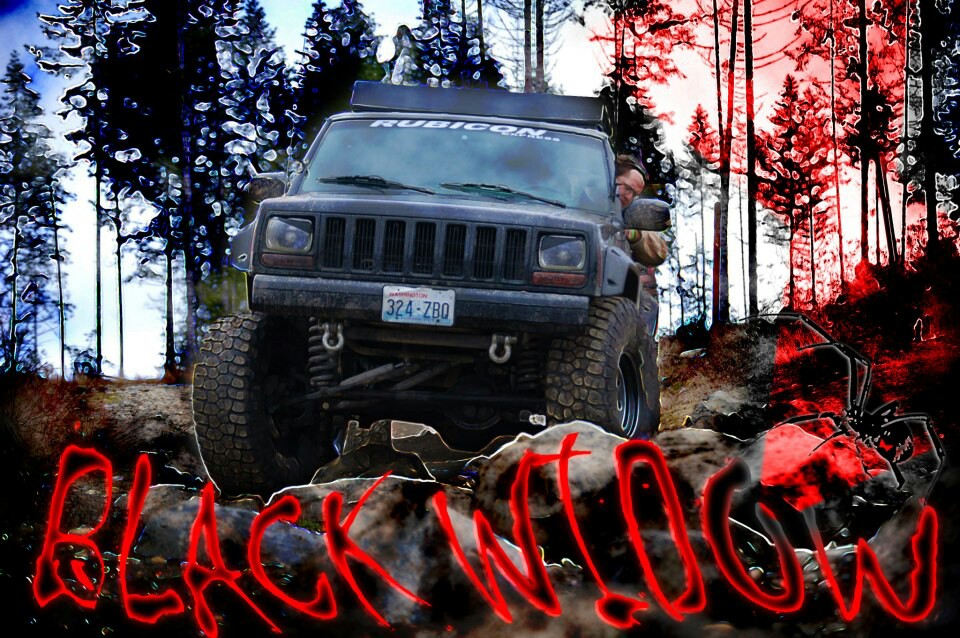
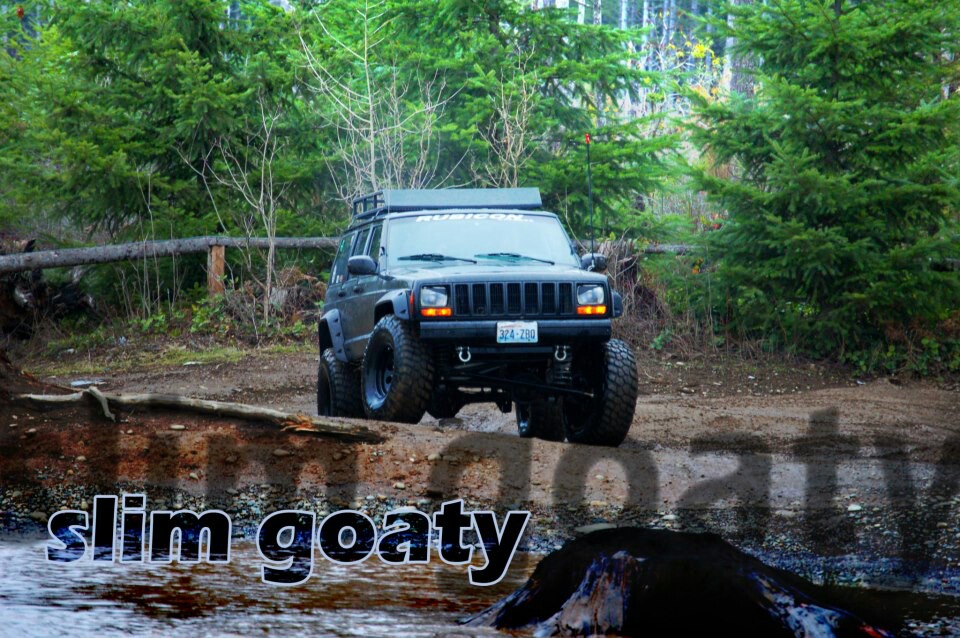
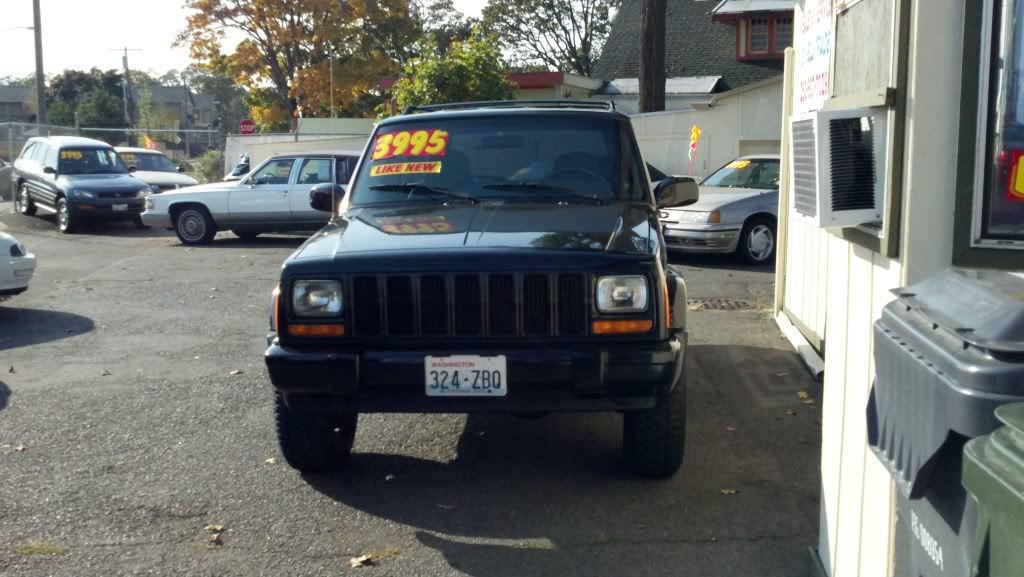
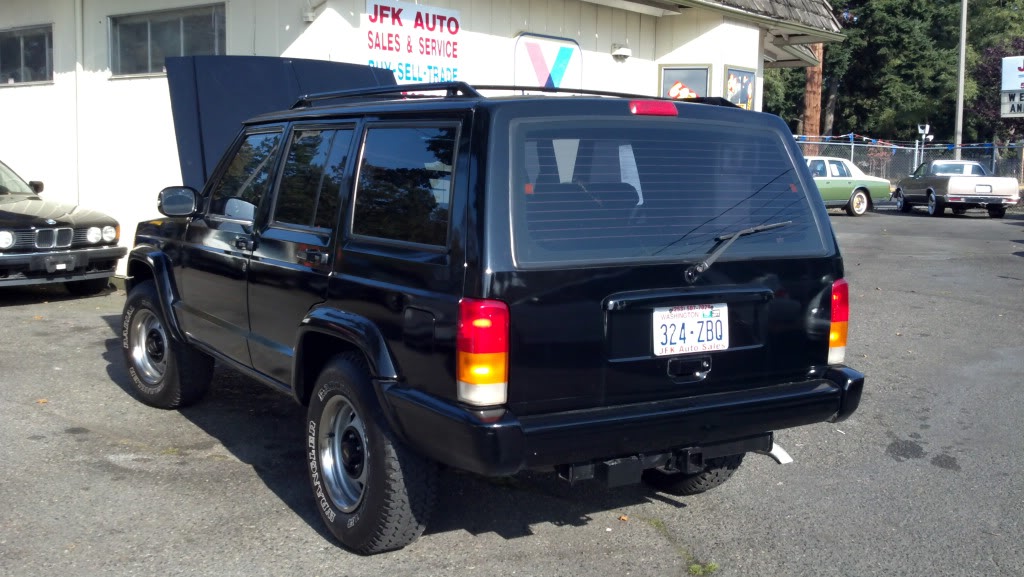
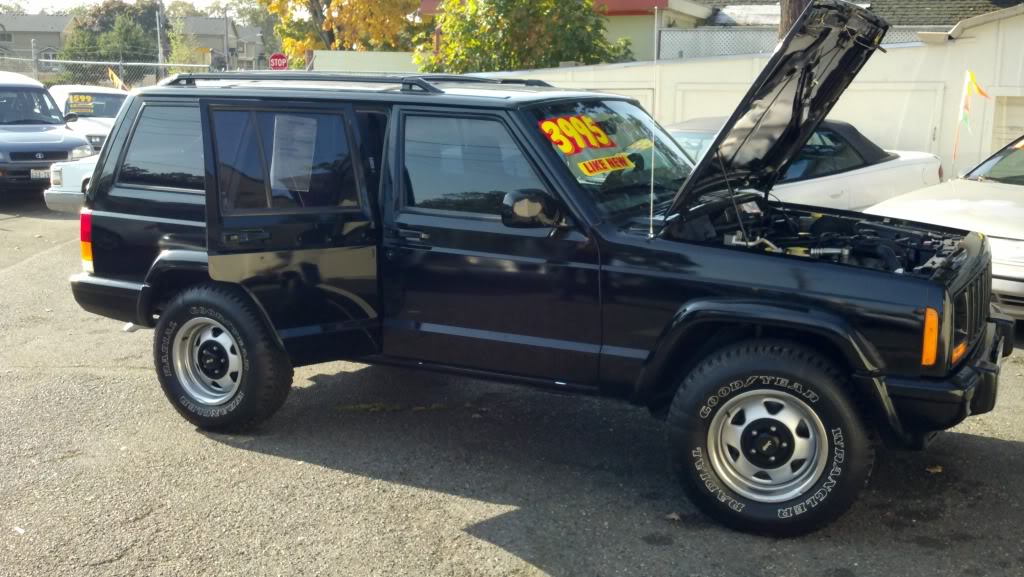
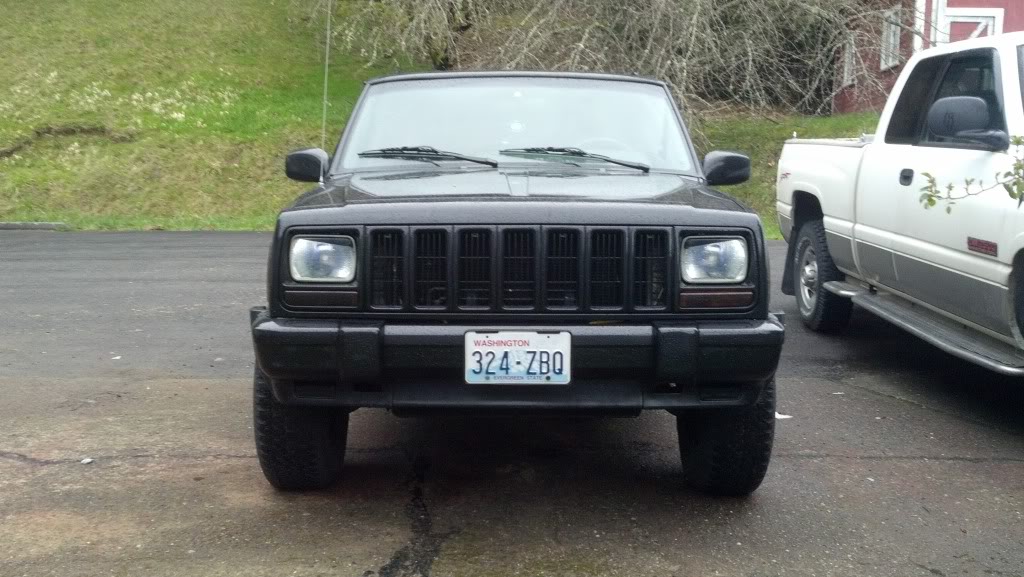
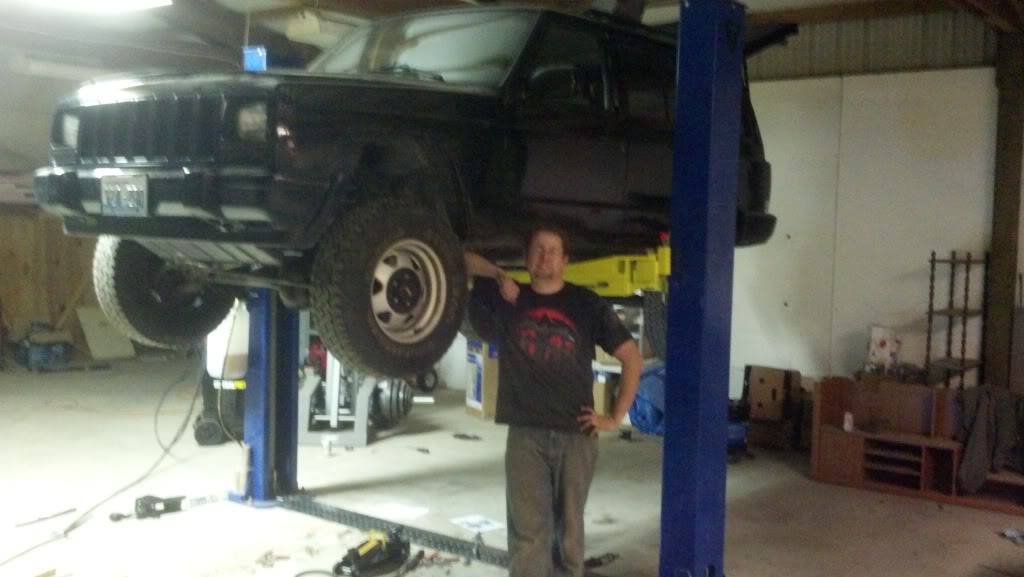
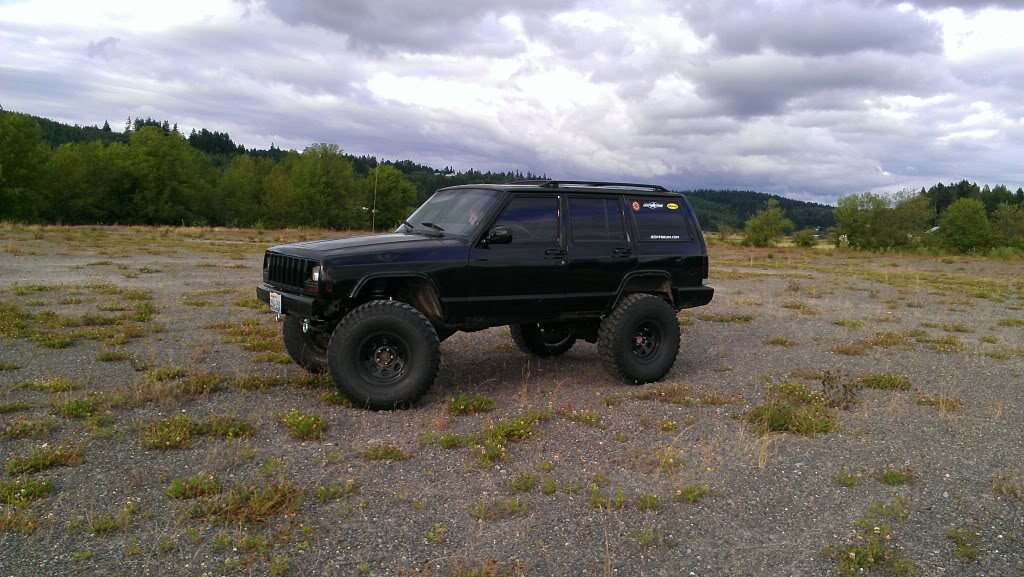
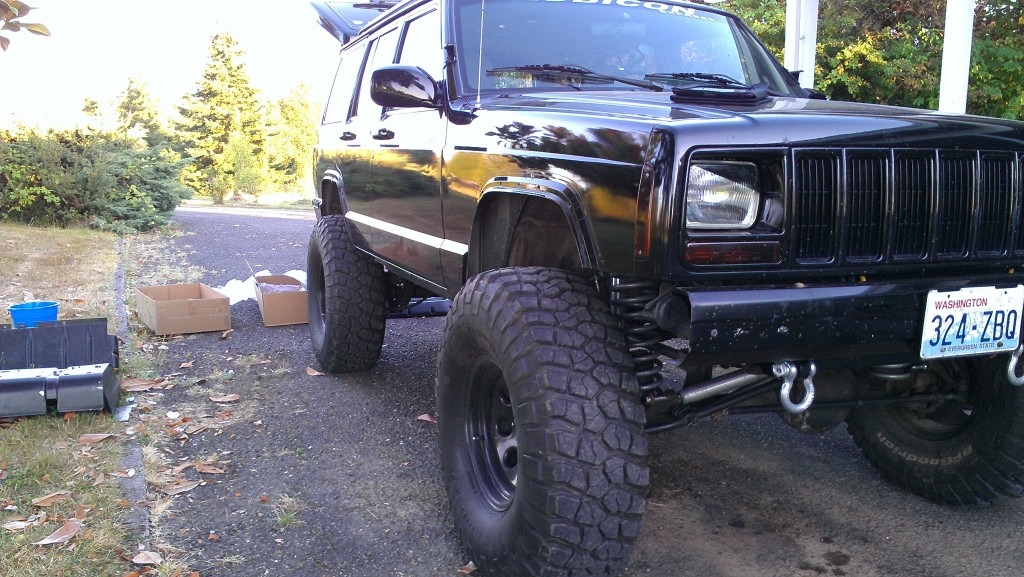
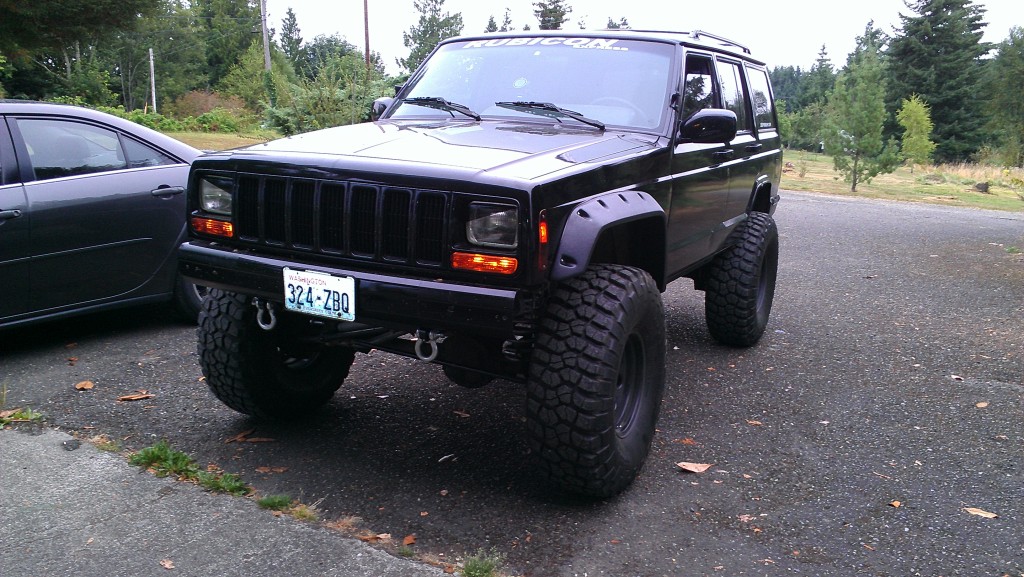
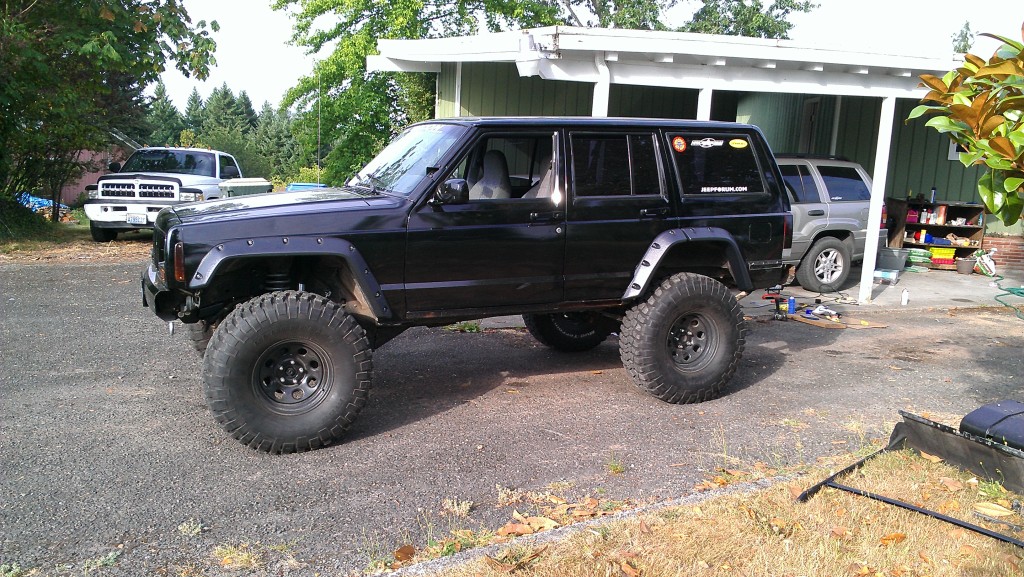
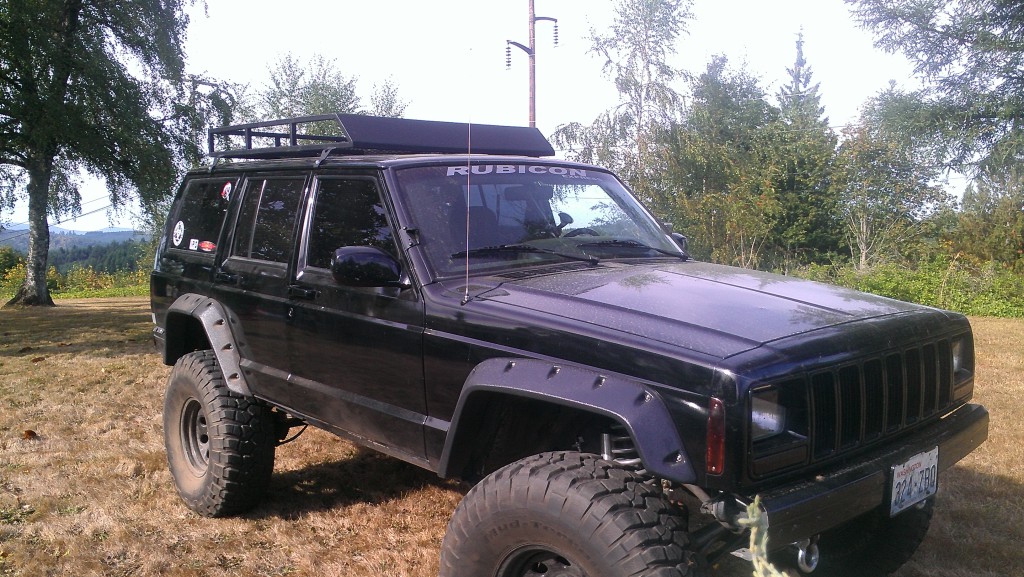
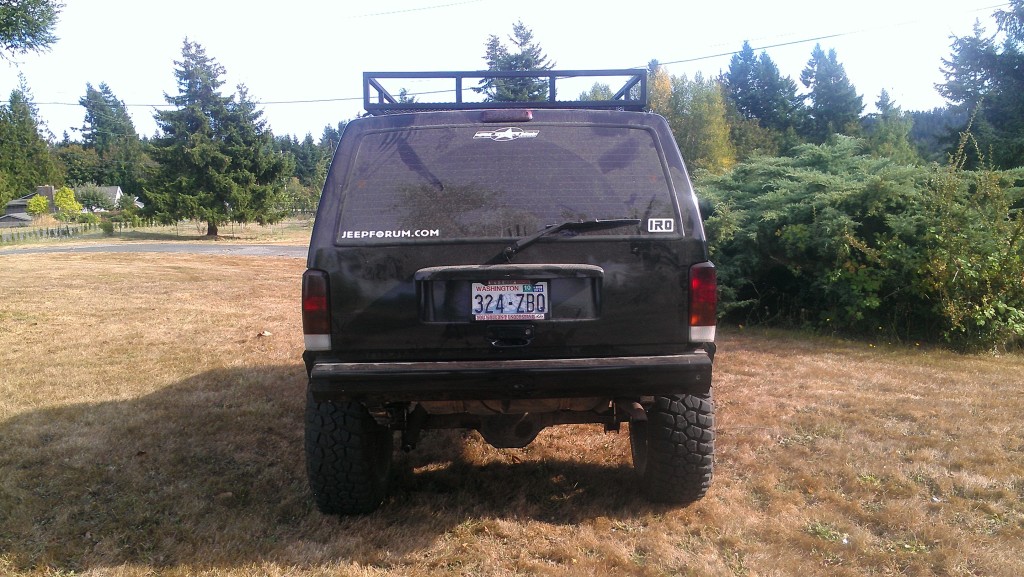
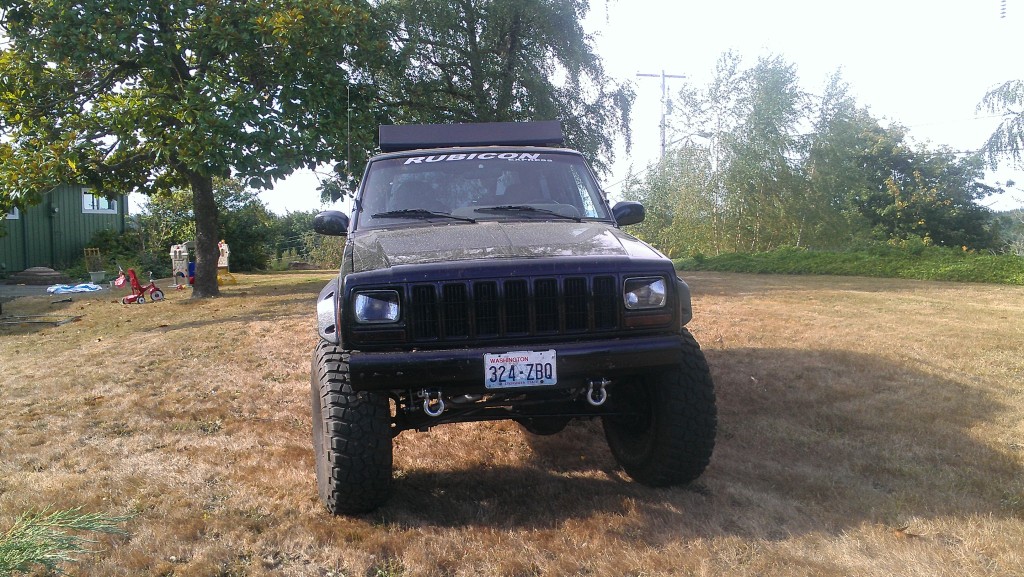
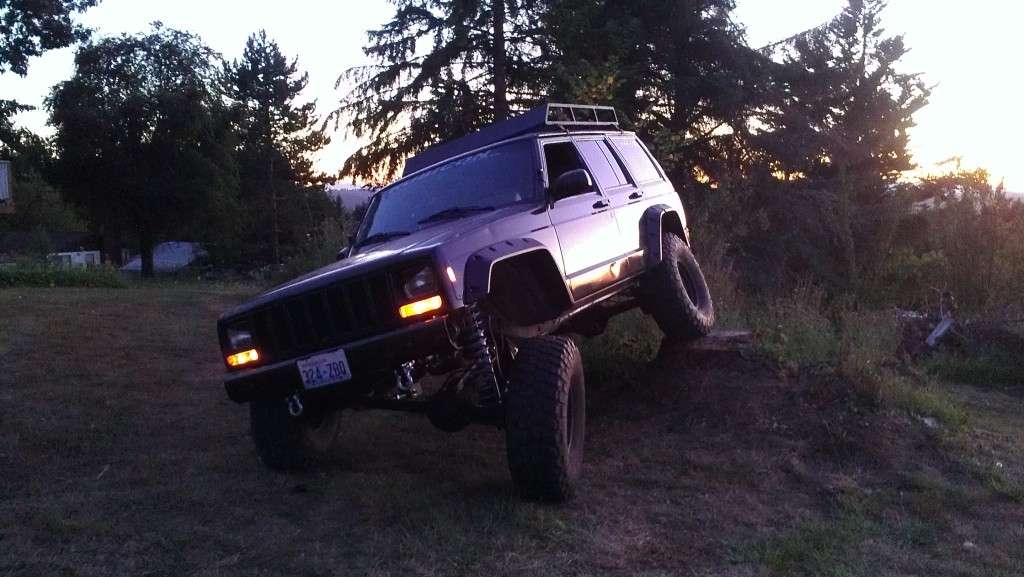
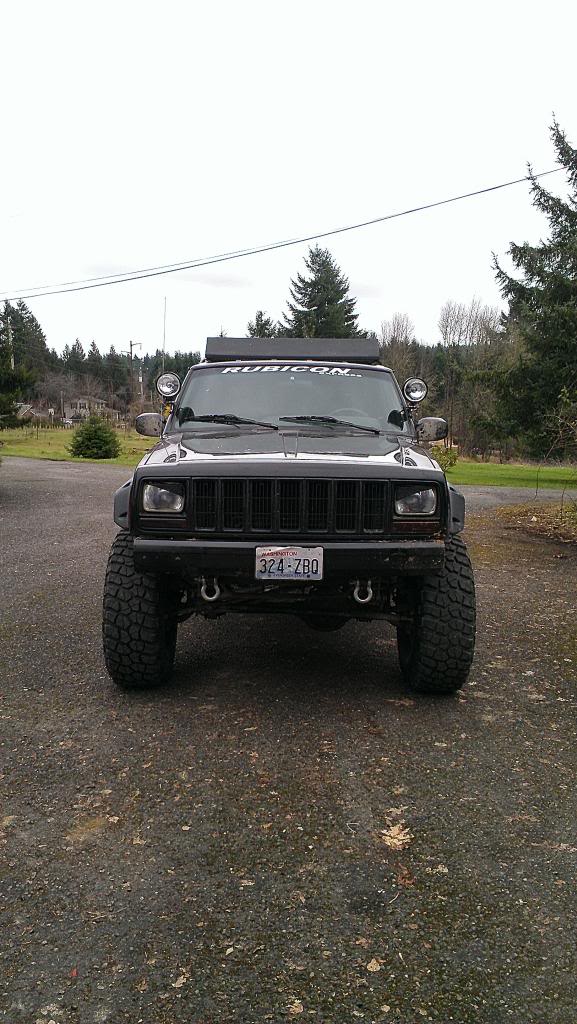
Hey Guys, here is the build up I've been working on. This is my 3rd XJ and 5th Jeep but the 1st Ive been able to actually build. My journey started with few weeks of searching and holding out. Came across EXACTLY what I was looking for in an XJ. It was a 97 base model with 145k and the best axles you could ask for that year (HP30, 29SP 8.25). Here is the most recent pictures of the Black Widow (Cuz it crawls over obstacles like a spider)
Here is what I started with, guy wanted 4k but I talked him down to 2500$
I started looking at lifts immediatly after my purchase and I knew what I wanted to do with it. I wanted to run atleast 33's on a 4.5. After weeks and weeks of researching I finally pulled the trigger on the RE 5.5 SA w/Drop Brackets. I couldn't decide on long arm kit i wanted. The consensus among the forums was unless you paid 4k for a long arm lift you would DIE if you drove it down the road...not exactly what was said but you get the idea. My 2nd choice was going to be the Rough Country Long arm but you won't find a single person who doesn't have to change the bushings all the time, yes even the new generation ones.
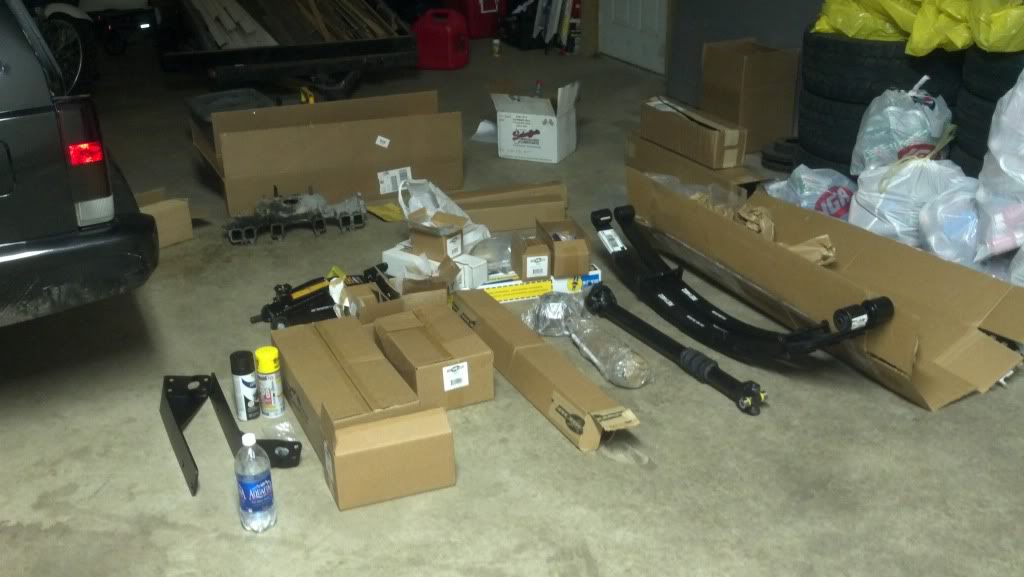
I ordered my kit through 4x4GroupBuy.com and I will never purchase another item from them ever again. I placed my order on February 7th and received PART of the kit at the end of march. Opened the box and half the items were the wrong ones and they only had 1 leaf spring. No mention anywhere of back ordered items or anything. The only thing positive I can say about my experience is that Jason from 4x4 Group buy usually dealt with my issues pretty quick but the fact remains it took almost a full 2 months to receive my order.

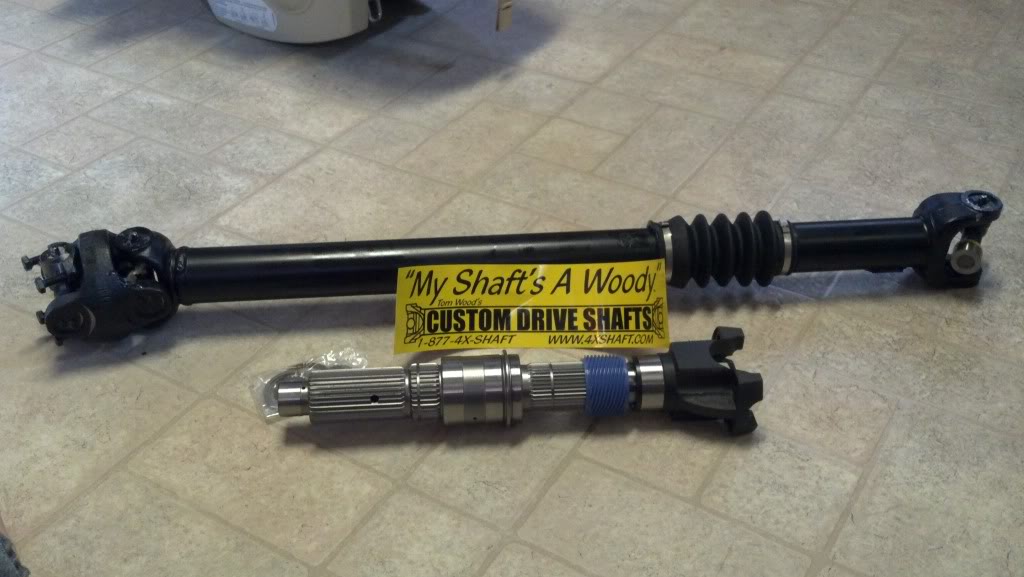
The Kit included a Tom woods custom DS and advanced adapters SYE
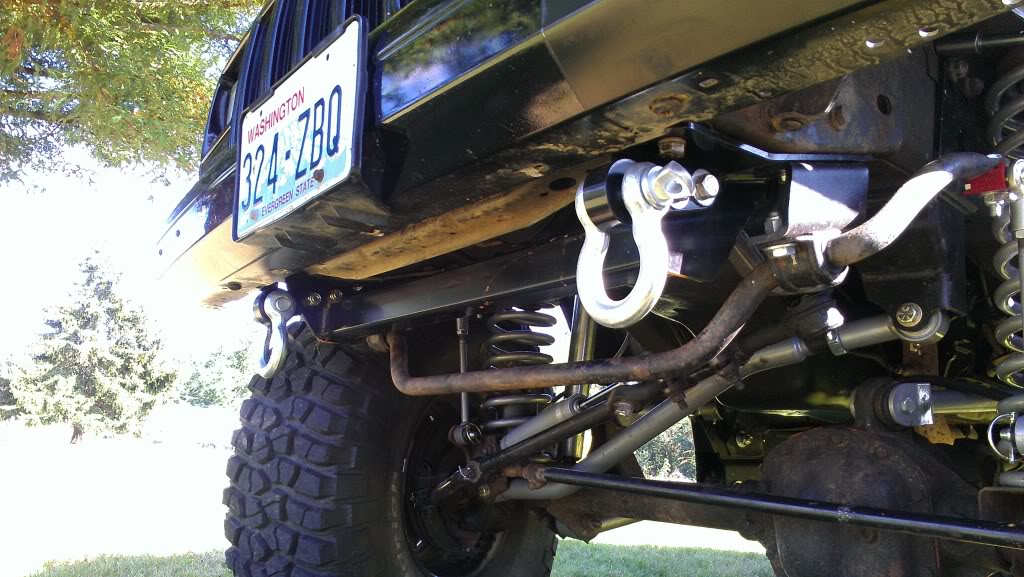
IRO Front Recovery
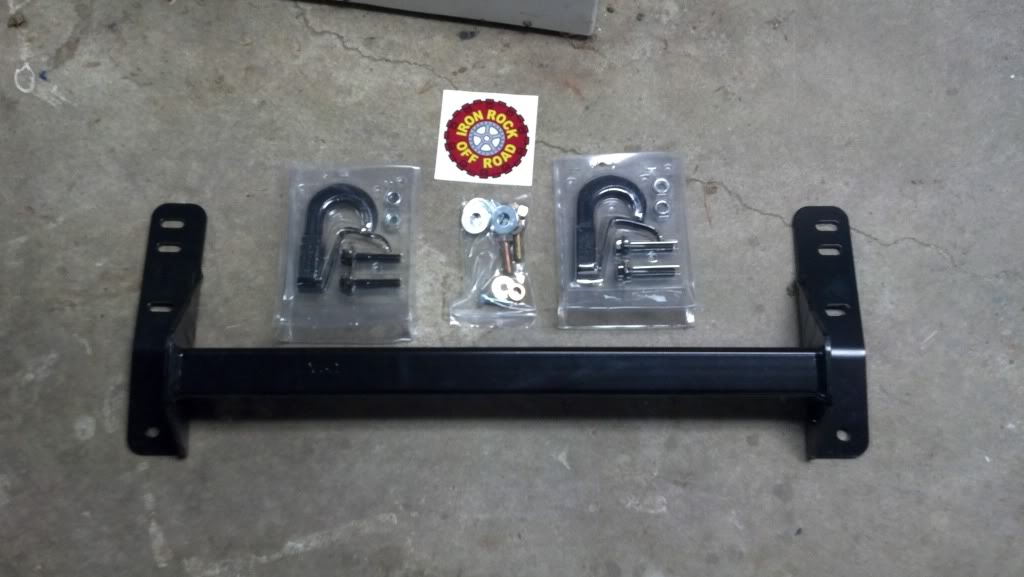
It came with hooks but I opted for the d-ring mounts, heres a comparison to show how beefy it is.

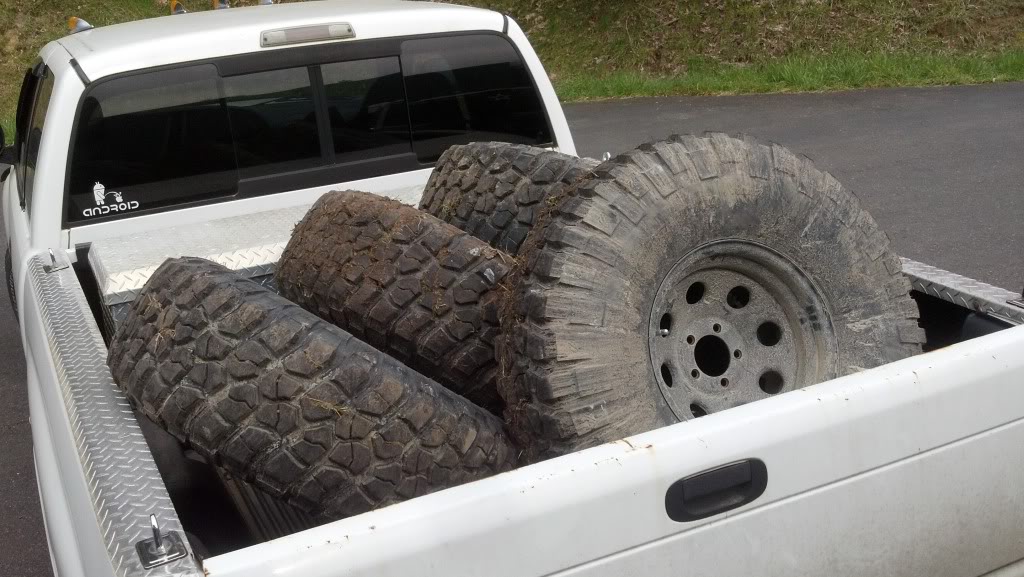
Got a sweet deal on 4 35" KM2's mounted on Soft 8's with only 800 miles for just 600$
Of course I had to do the angry eye mod

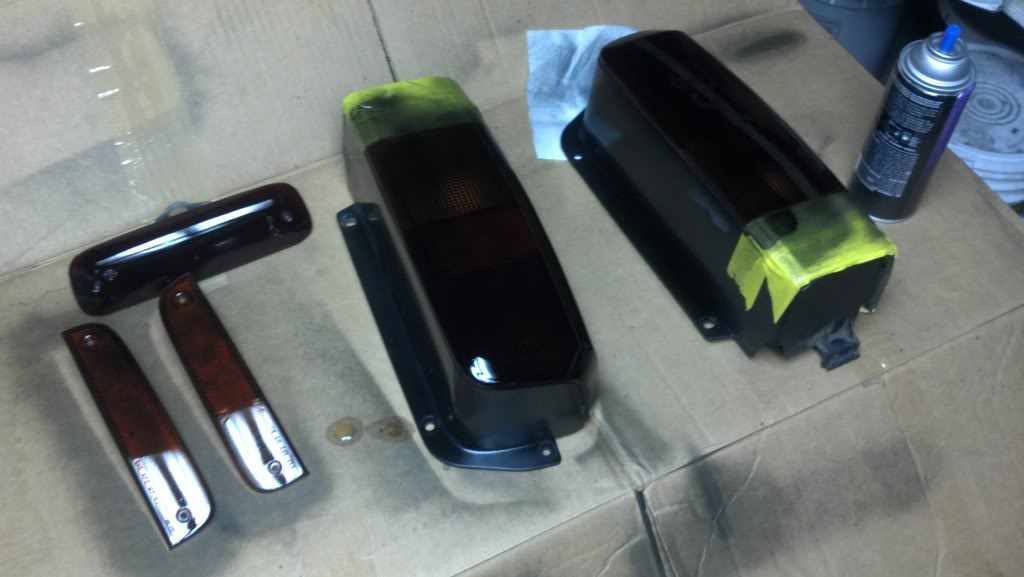
I also blacked out all the plastic's (Flaming not needed)
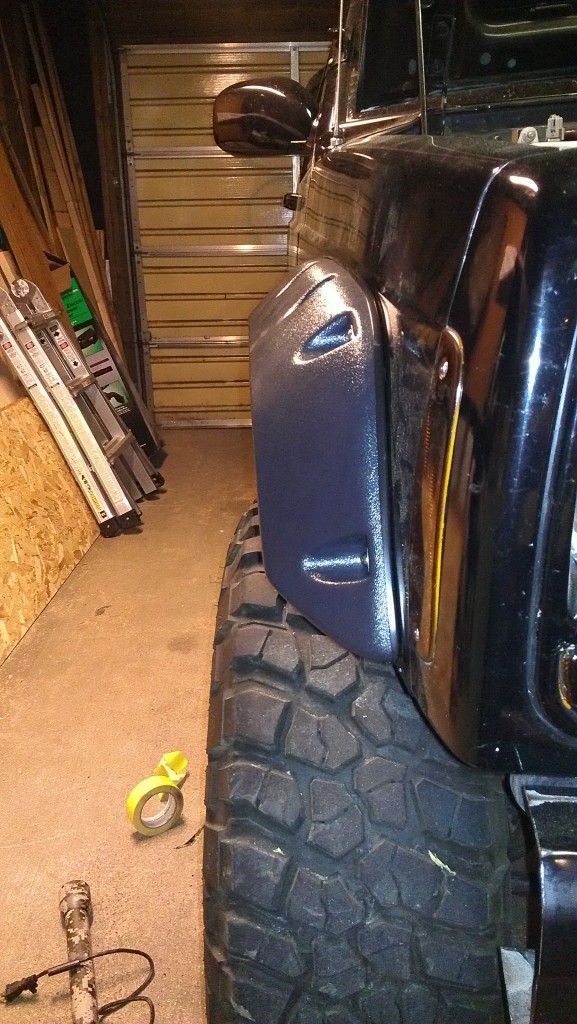
Picked up the stock armor for 100$
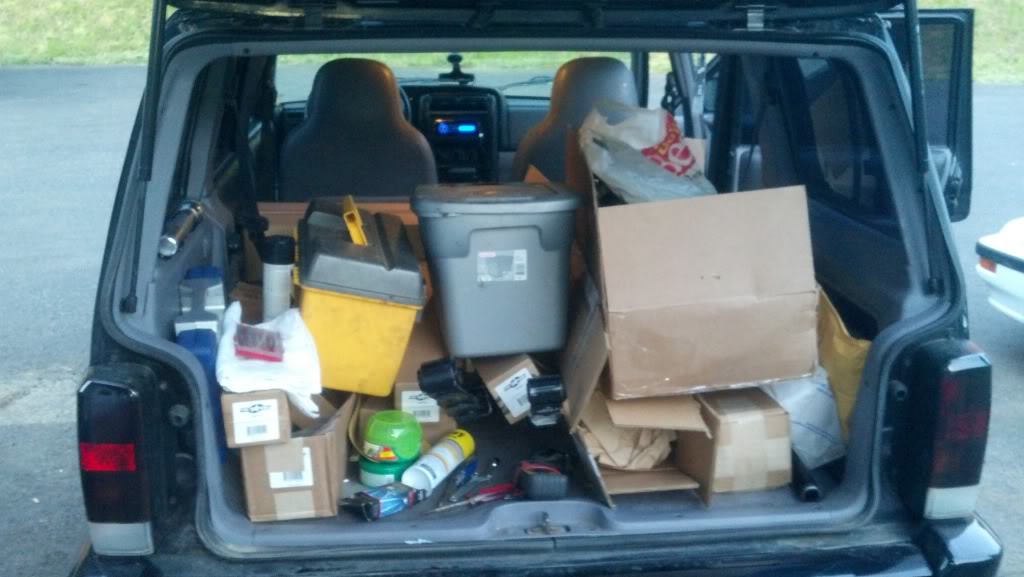
All Packed up ready to go
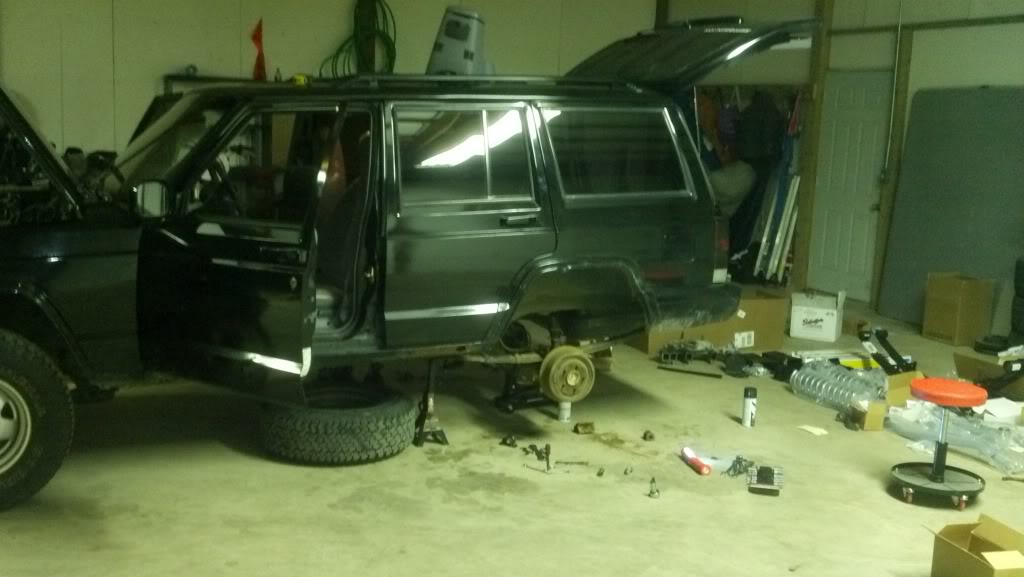
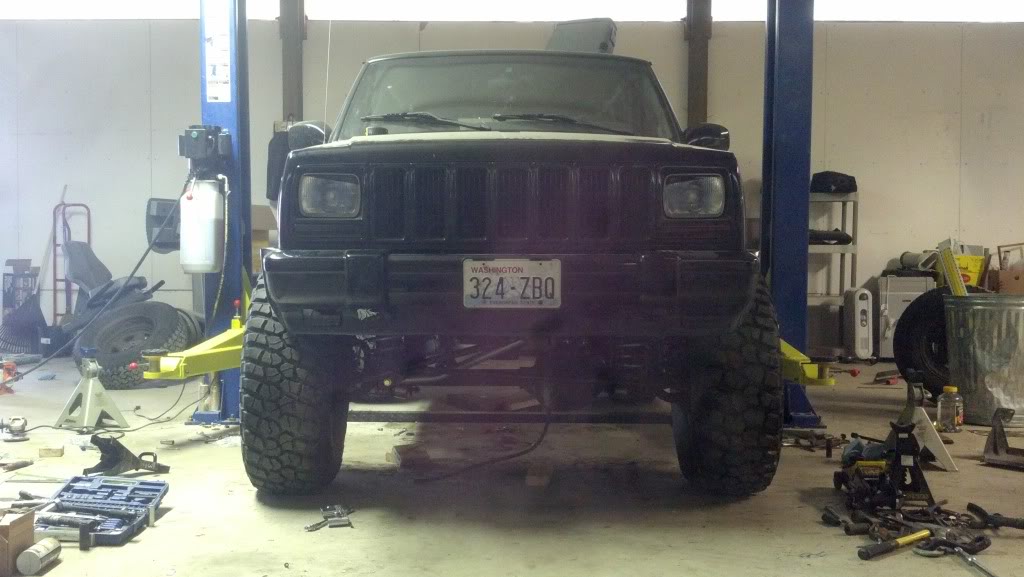
The lift process begins!
The back was somewhat easy except trying to remove the leafs. Both the bolts holding the shackle to the body and the front of the leaf to the body were completely seized up. Keep in mind I sprayed PB plaster on everything for WEEKS before attempting the lift, it made no difference on a lot of stuff. I'm sure if I would have had some impact tools it would have been a lot easier but the whole process was kind of a PITA.
Here you can see that when I was trying to remove the bolt going through the leaf that the nut welded inside the from started spinning. I ended up having to cut open the pocket and inserting a wrench in there to hold the nut. I highly suggest getting an impact, even if its the 39.99$ harbor freight one, its probably good enough.
Rear pretty much done.
For the rear we moved the XJ onto my buddies lift he's got in his garage...lucky SOB
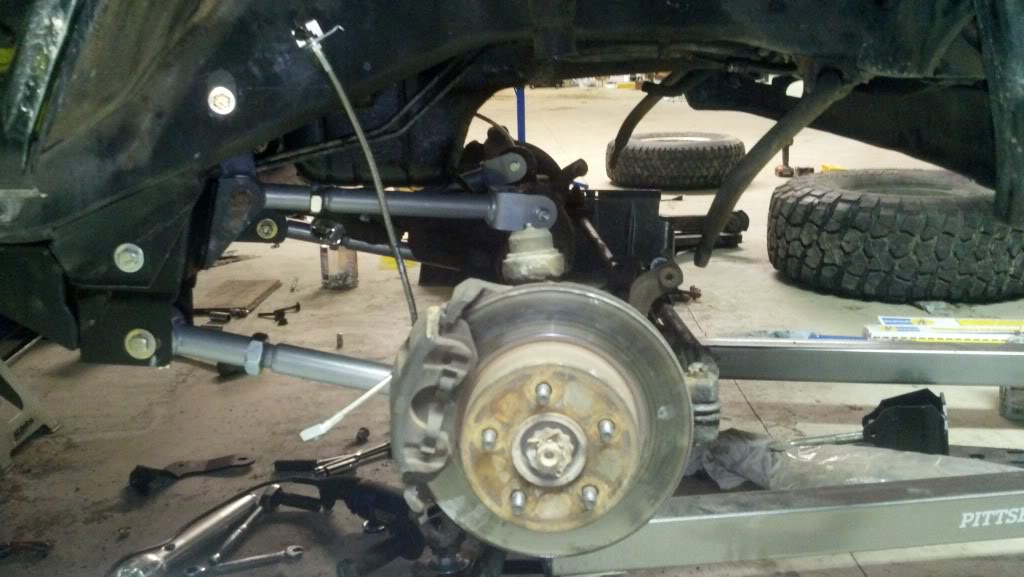
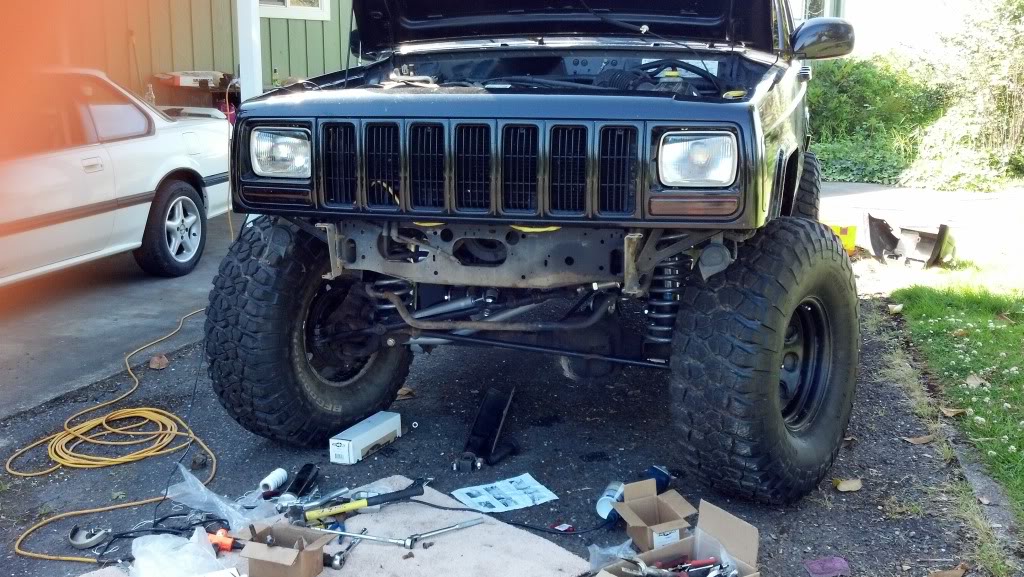
The front came apart a lot easier, but was still tricky. My biggest problem we ran into on the front was getting the stock pitman off, I tried heat...impact...curse words and violence...nothing worked! I finally decided to grab my angle grinder with a cut off wheel and cut a line in it all the way to the steering box output shaft, then I put a chisel in the cut and 2 BFH swings later the pitman was on the ground.
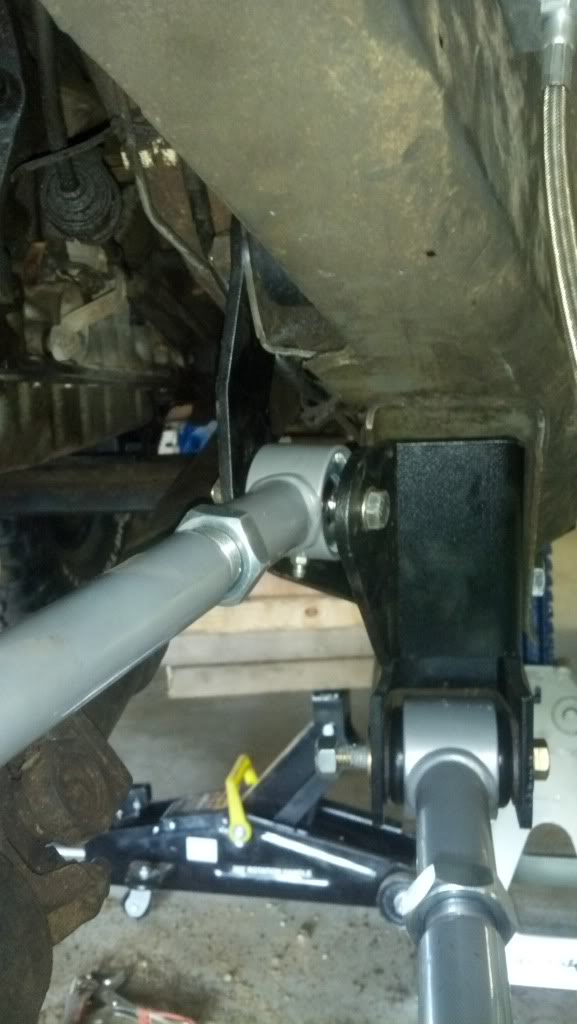
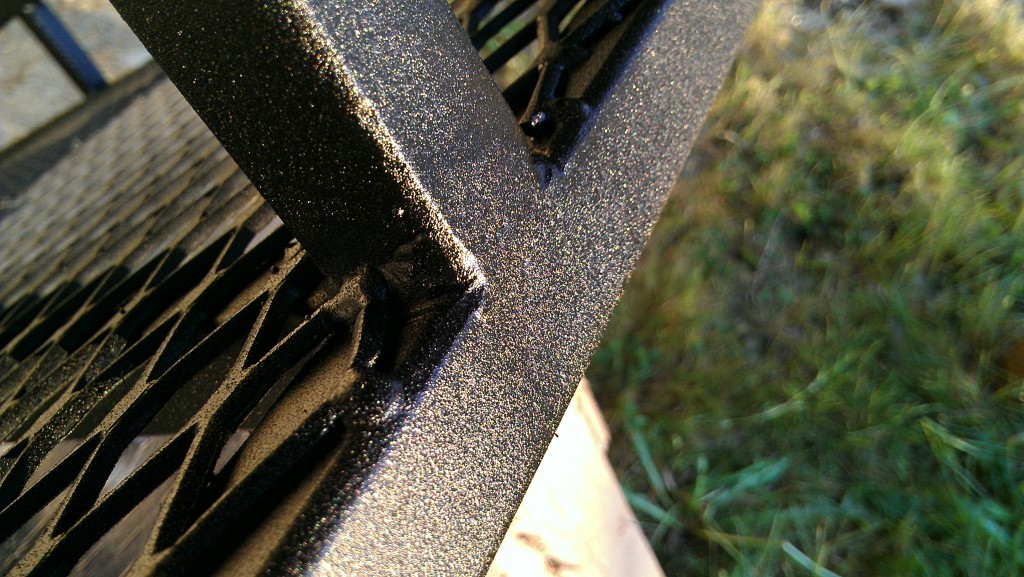
A good look at the RE drop brackets. It moved both the upper and lower mounts down atleast 3-4 inches to help keep a nice geometry. This helps it ride better but flex closer to a long arm.
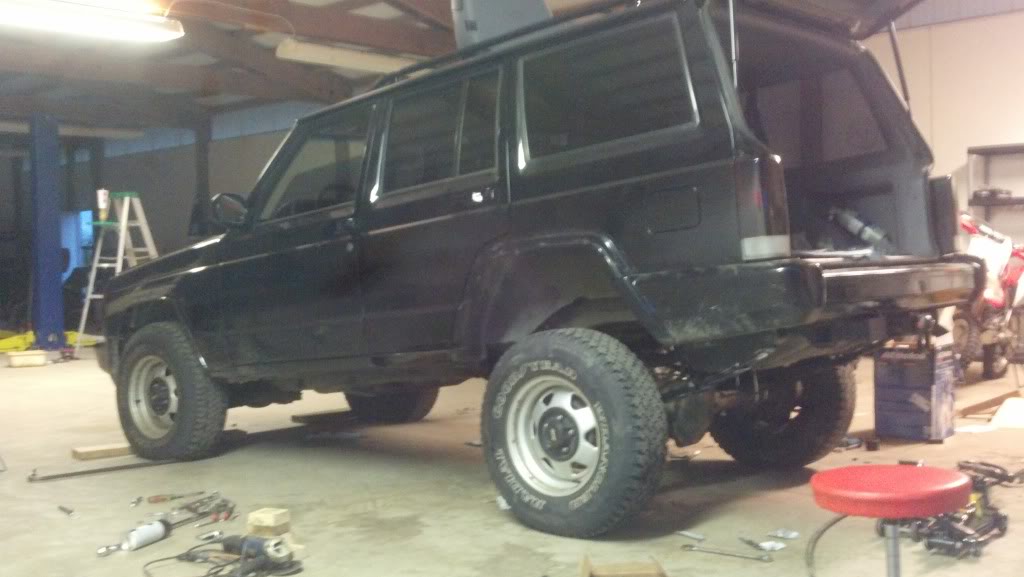
Almost done!
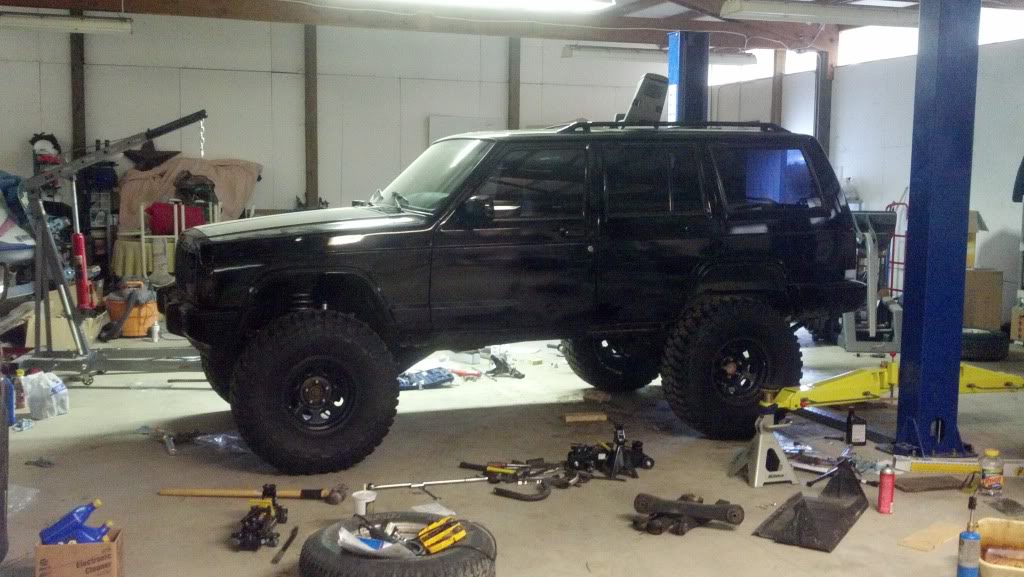
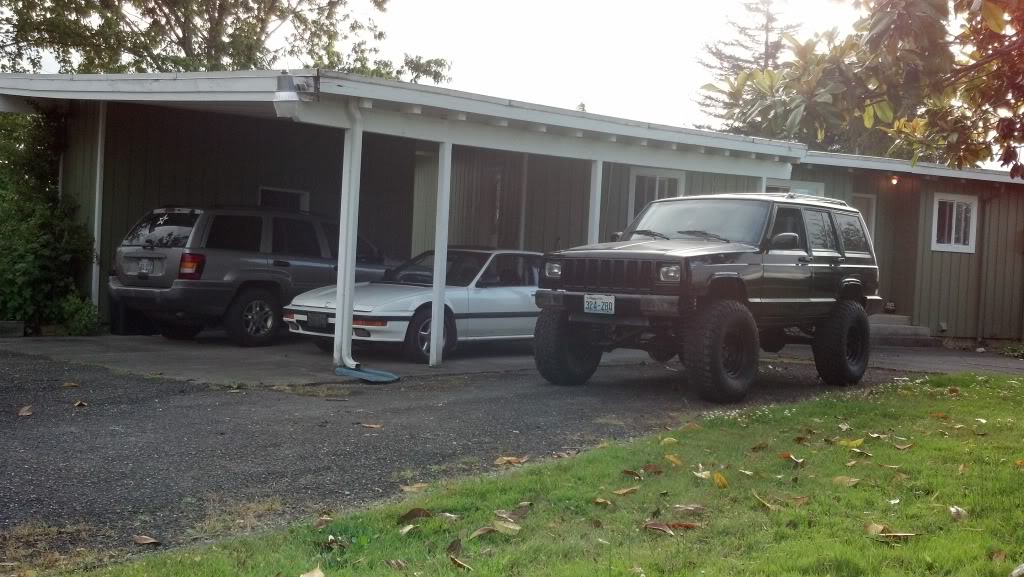
Ended up trailering it home from a friends so I could spend more time on it at. Here it is next to my 3G prelude and the WJ
I then got to work on installing the IRO front recovery, best recovery you can buy if you ask me.

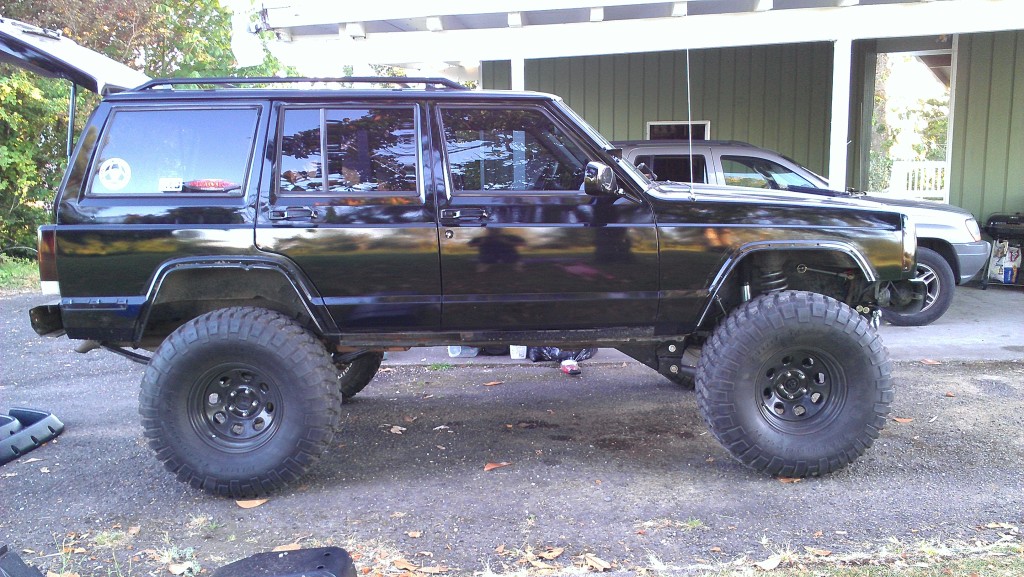
After finishing a few other things and doing the SYE I was finally able to take it for a spin! I could barely keep it going straight the alignment was so far off but after a trip to les schwab I was ready to go.
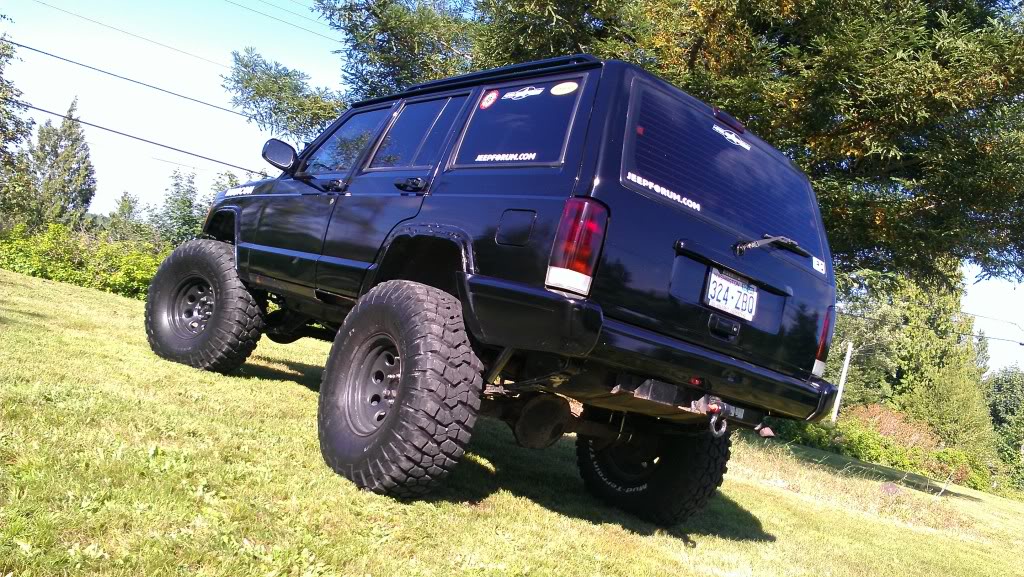
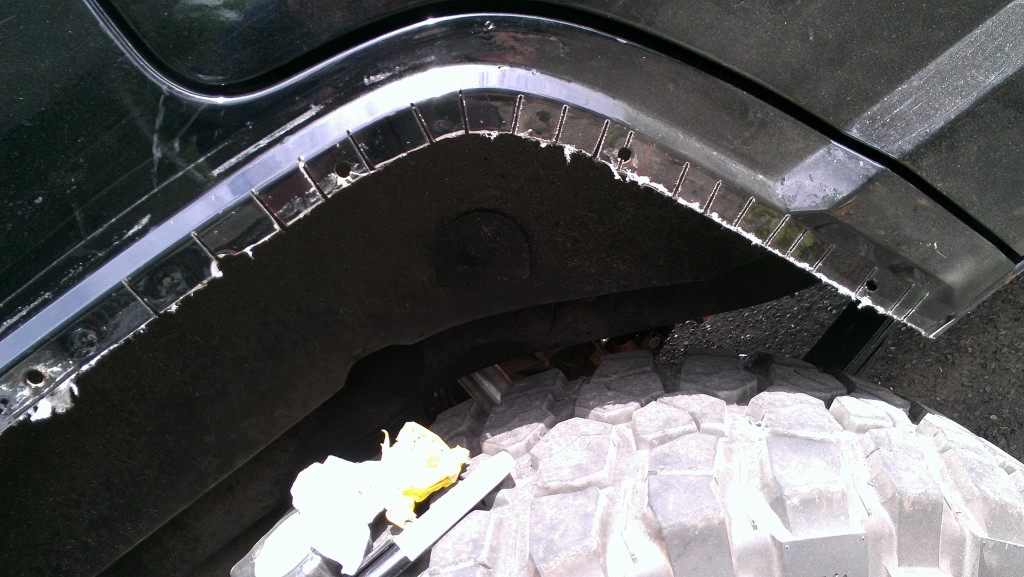
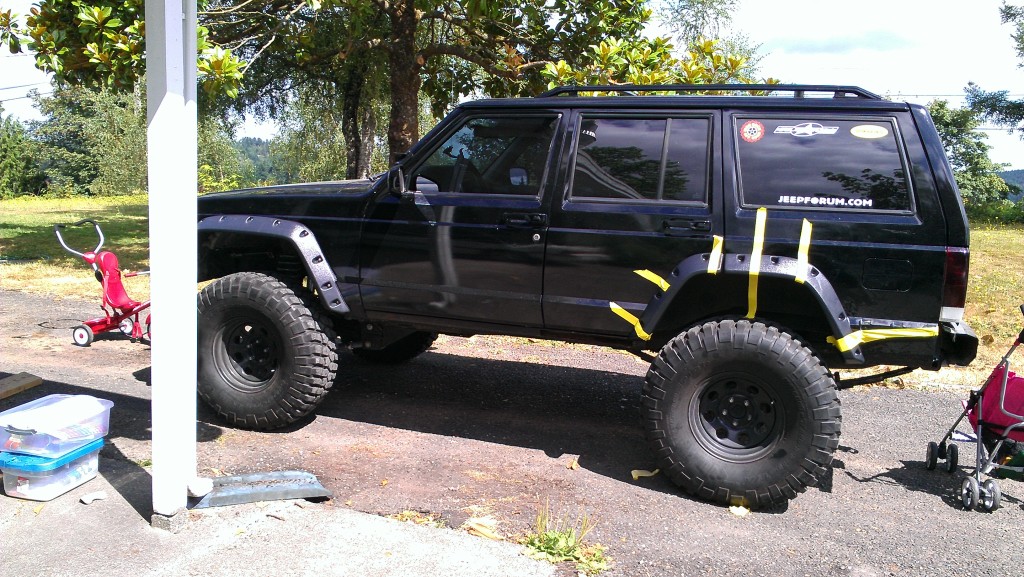
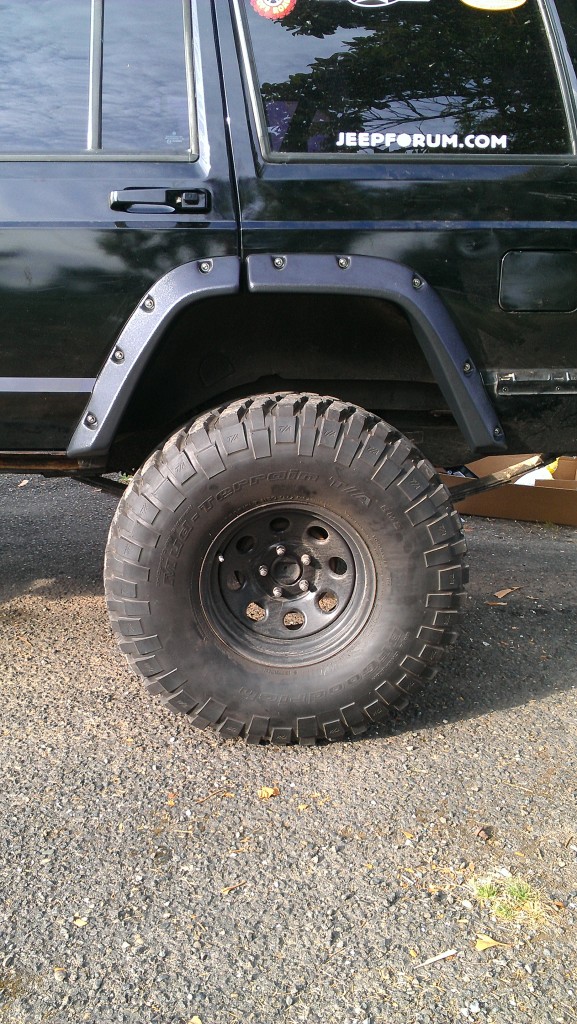
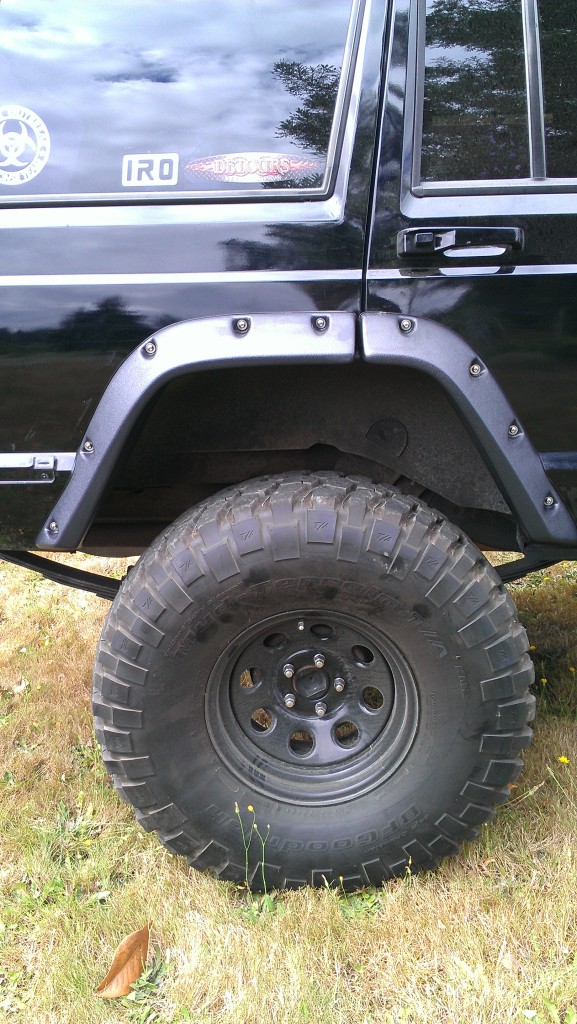
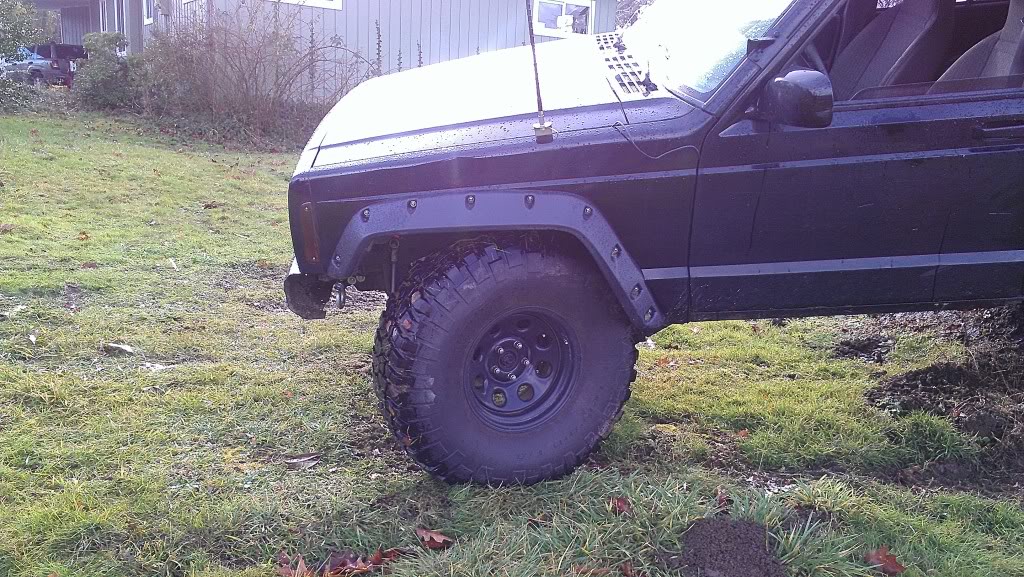
My 3rd trip away from my house I was pulled over by a Sheriff, he hassled me about my tires sticking out too far and needing mudflaps. So as soon as I got home I ordered some awesome Flares from Napier Precision Products.
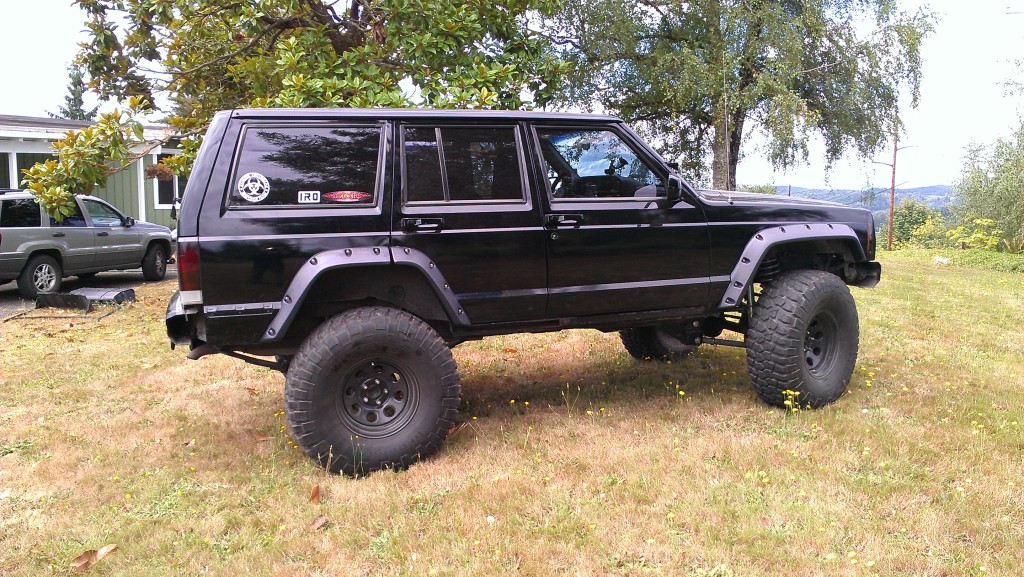
The front was easier by far, but I knew going into this that was going to be the case. I simply made a template of the flare and copied that to masking tape placed on the jeep. Out came the grinder and metal started melting away.
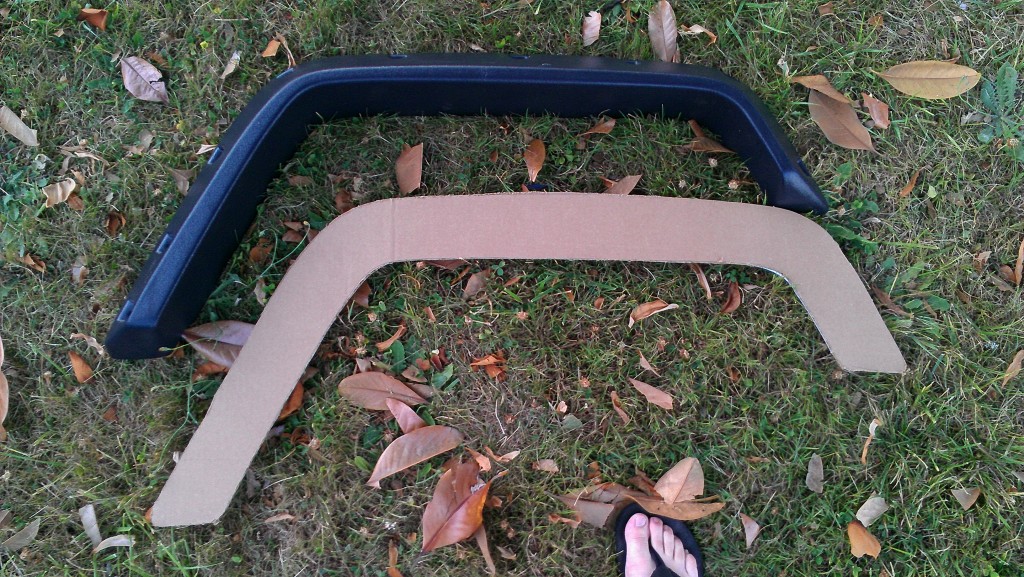
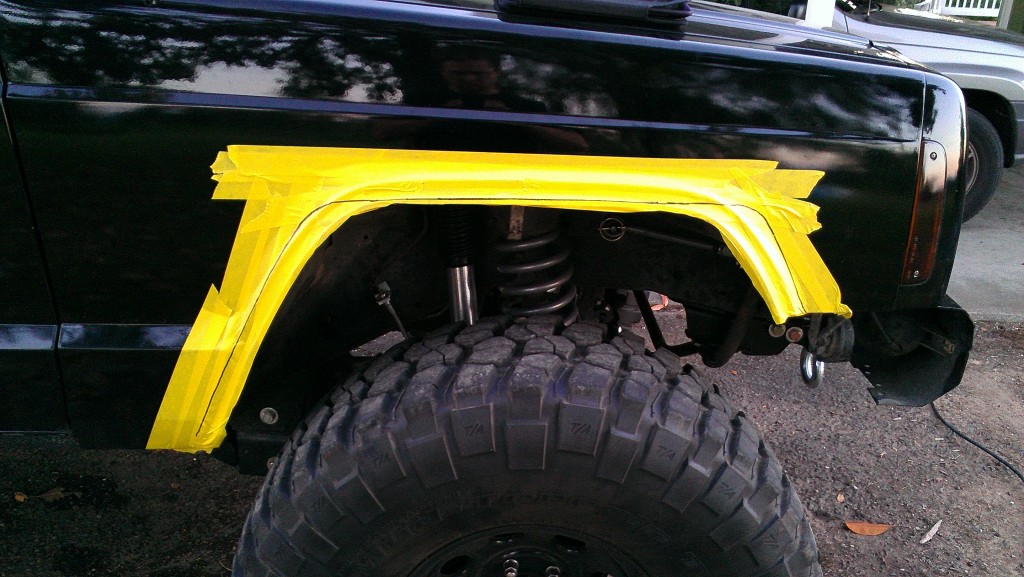
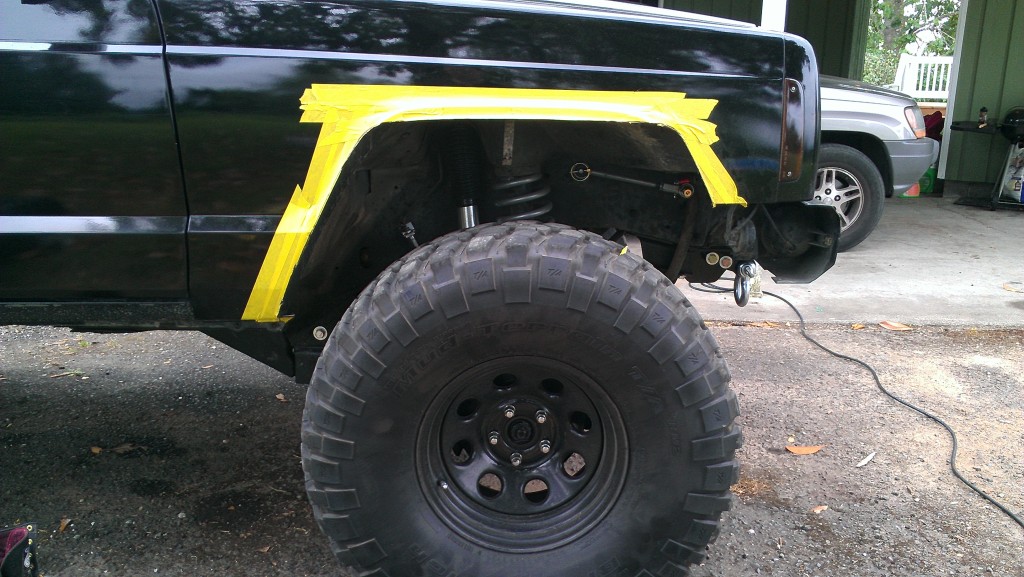
I followed my template a little too closely. I found out once I was done cutting that I needed a little wiggle room. There is a lot of room from the top and bottom of the flare so you can cut up to a couple extra inches away and still have plenty of material to mount to. Thus giving you the wiggle room to maneuver the flare how you want.
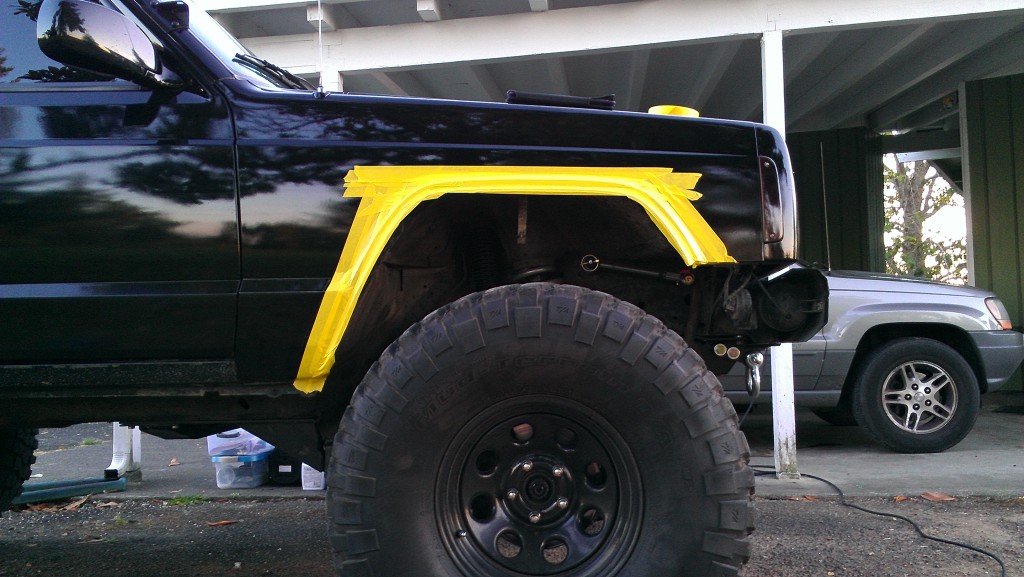
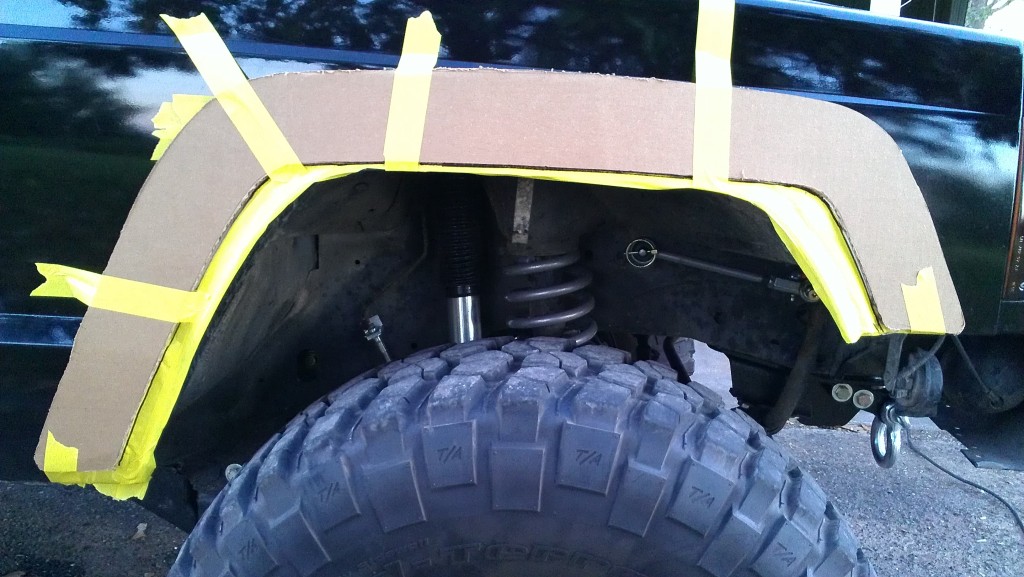
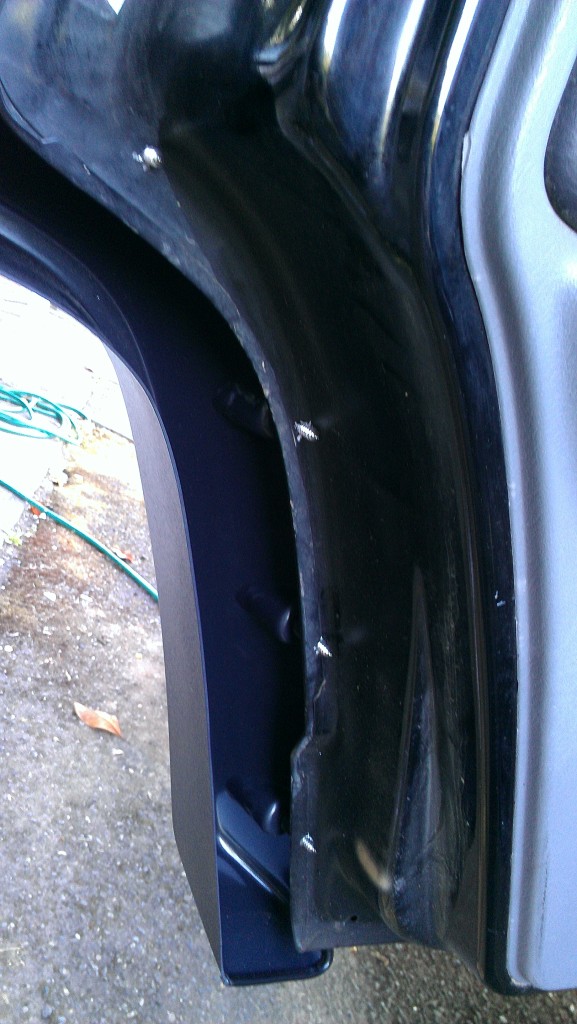
The rear is an entirely different story however. As most of you know you can't just go cutting away the metal in the rear as its spot welded. These welds hold the exterior sheet metal and wheel well liner together. If you just cut them off you could literally reach right inside the jeep and put your hand inside the rear trim pieces, if your like most who dont have trim pieces, you could just reach in and grab various tools and fluids :2thumbsup:
You have to cut the spot welds like tabs and then use a BFH to bend them back into the wheel well. I could have done a better job cutting and bending, but the finished product looks legit unless you really start looking around.
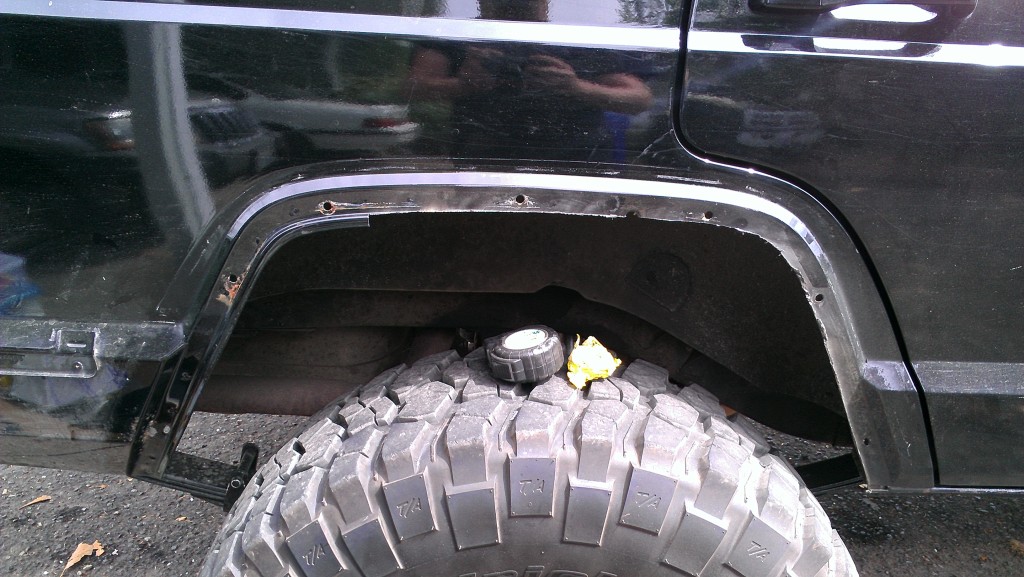
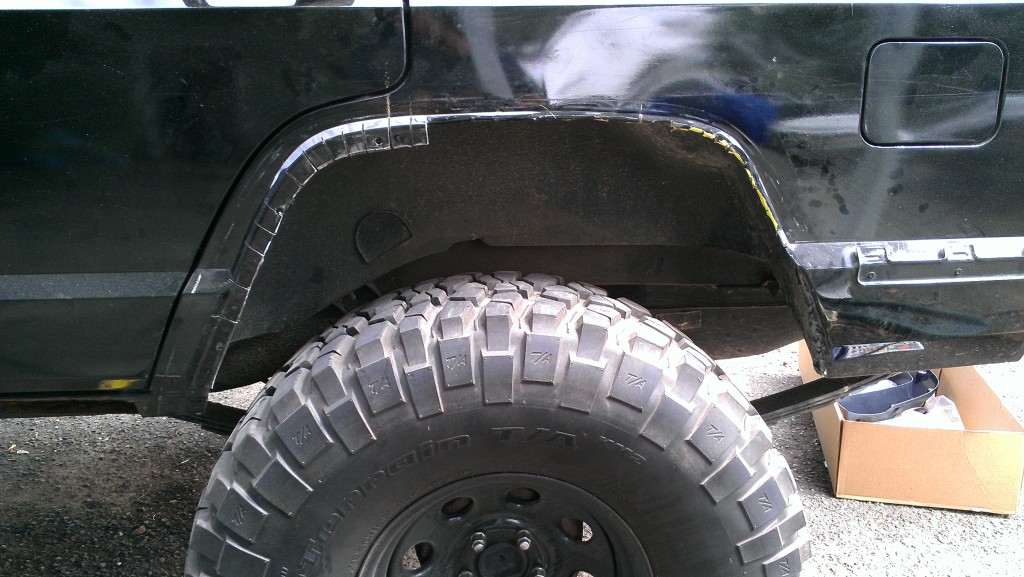
Before attaching the flares in the rear I ground down everything and made it somewhat smooth. Be careful if you take this route as sheet metal is very thing and a grinding wheel will eat it very quickly. After I was happy with how all the tabs laid I sprayed a rust inhibitor paint and rubberized bedliner to somewhat seal the area. One thing I chose to do was also remove the interior trim piece and run a bead of flexible high temp silicon anywhere that I cut deep enough so that water wouldn't get inside.
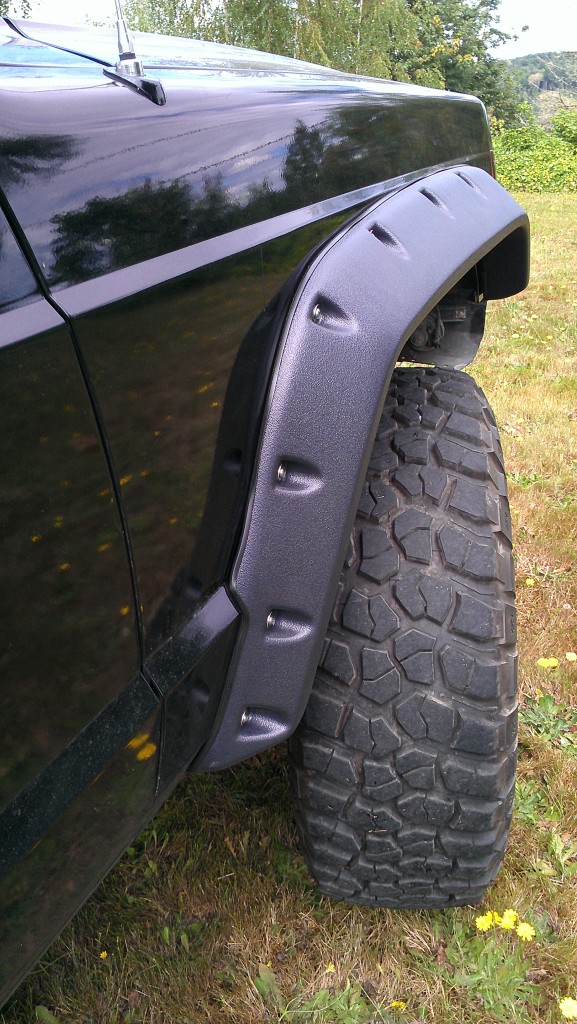
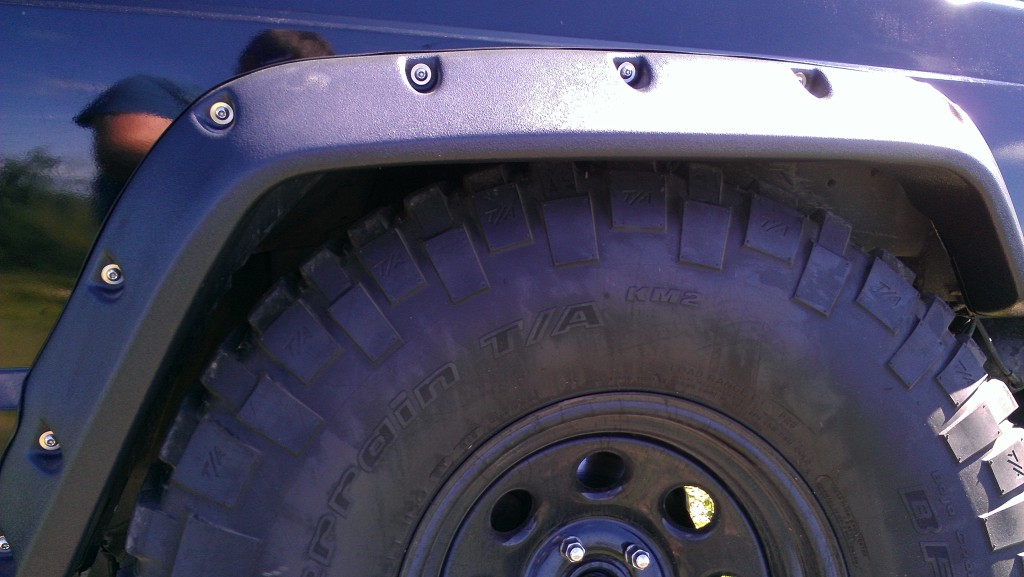
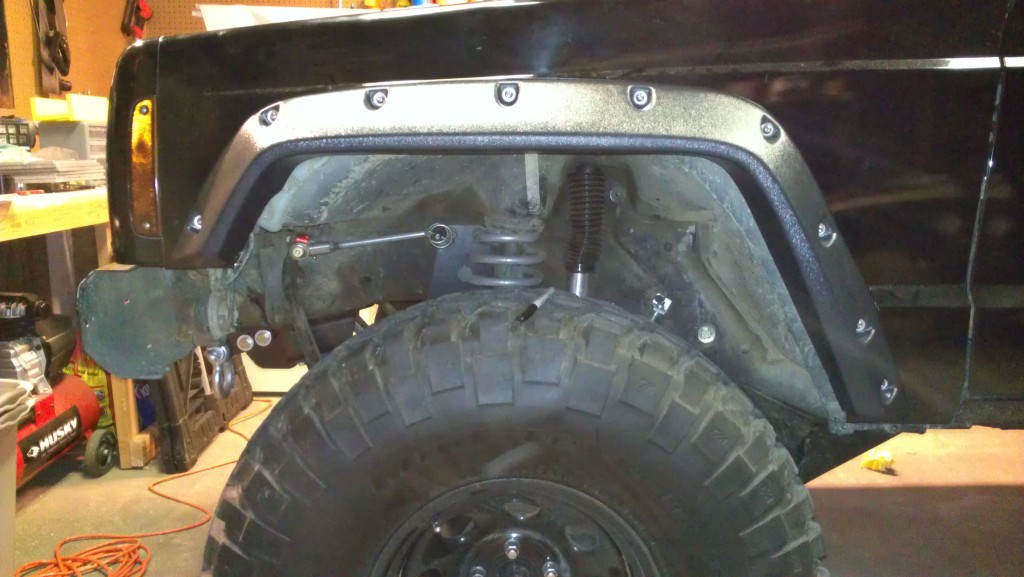
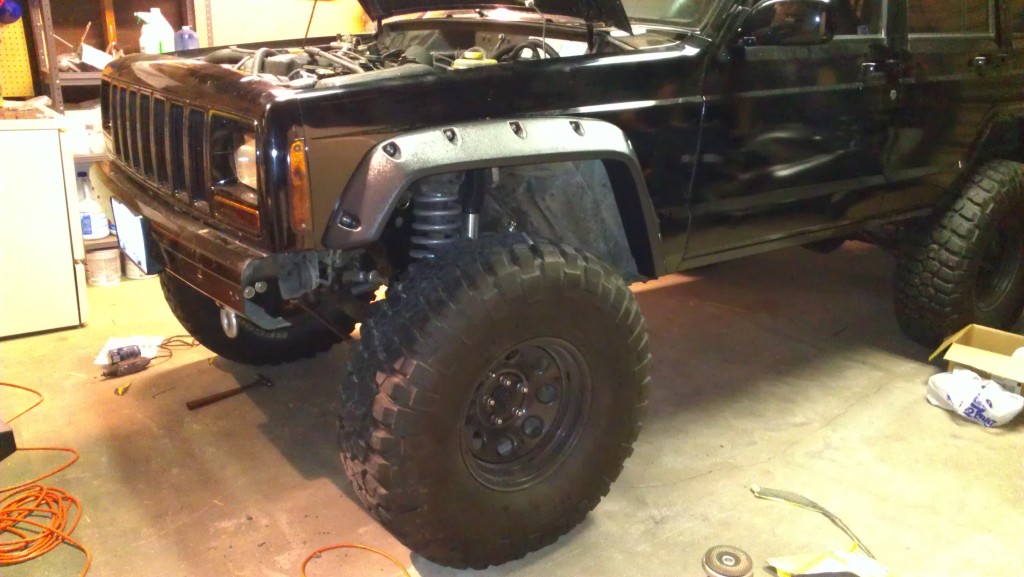
No two people will probably install these the same, and thats whats nice about them. You can customize them to fit. I ended up removing some of the flare material at certain points so it would fit better to the jeep. I basically took the flare and visualized what I wanted it to accomplish as far as flex was concerned. Then tried to make it look visually appealing and structural.
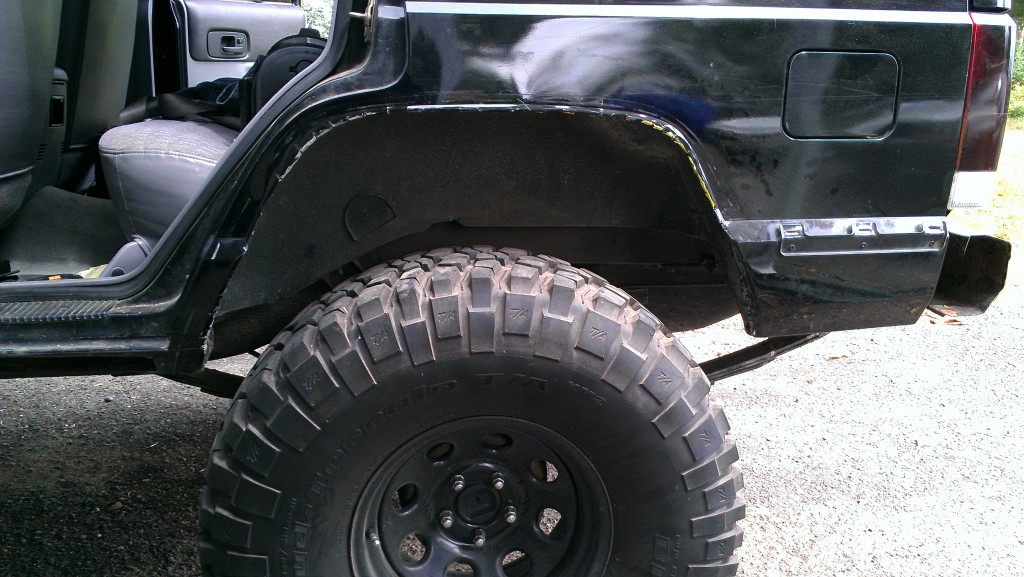
These flares are very beefy. These are supposed to be twice as thick as a bushwacker and if thats the truth I can't imagine anyone putting paper thin buswackers on their rigs, as these aren't crazy thick as it is. They are very sturdy and look great. I'm running 35's and these make them look small.
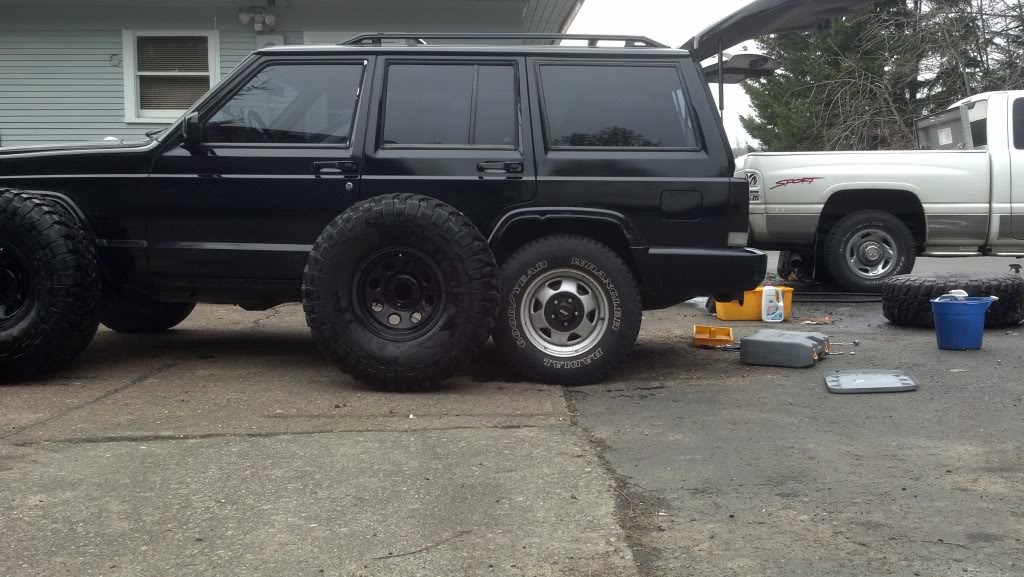
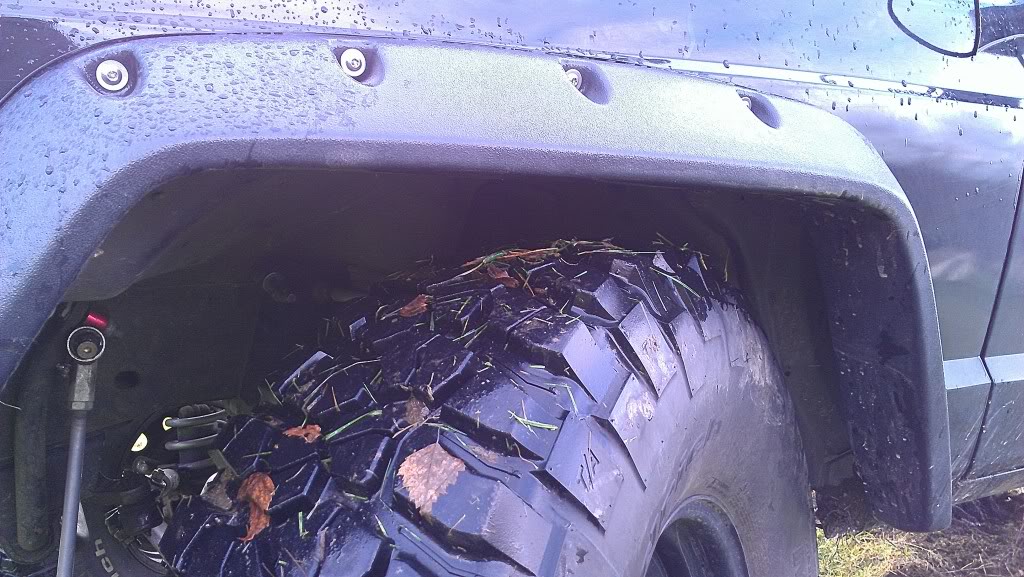
I still had to install some Daystar extended bumpstops but once I did I can turn full lock side to side and I have no rubbing!
Thread Starter
Senior Member
Joined: Dec 2011
Posts: 922
Likes: 1
From: Centralia, Wa
Year: 1997
Model: Cherokee
Engine: 4.0
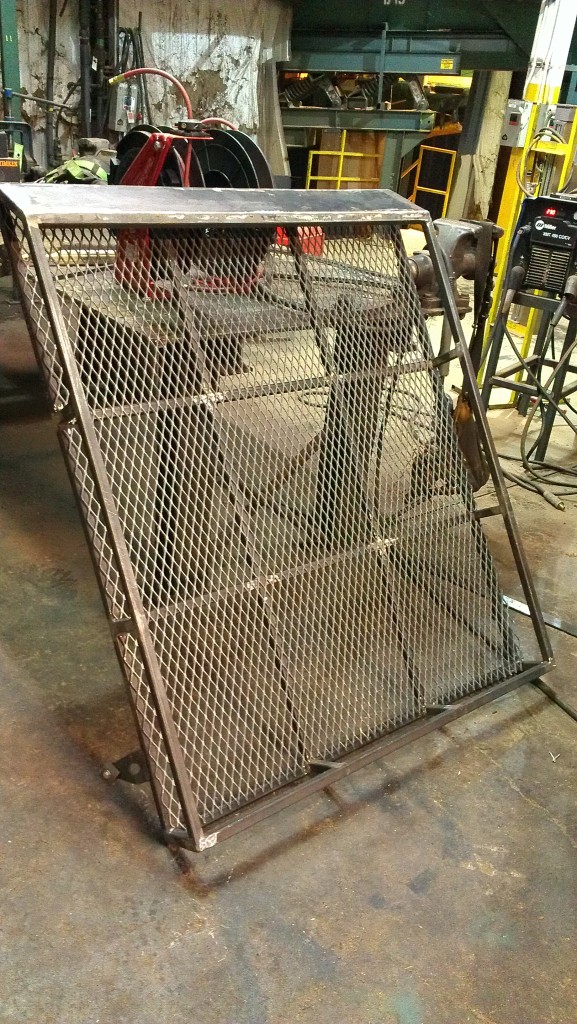
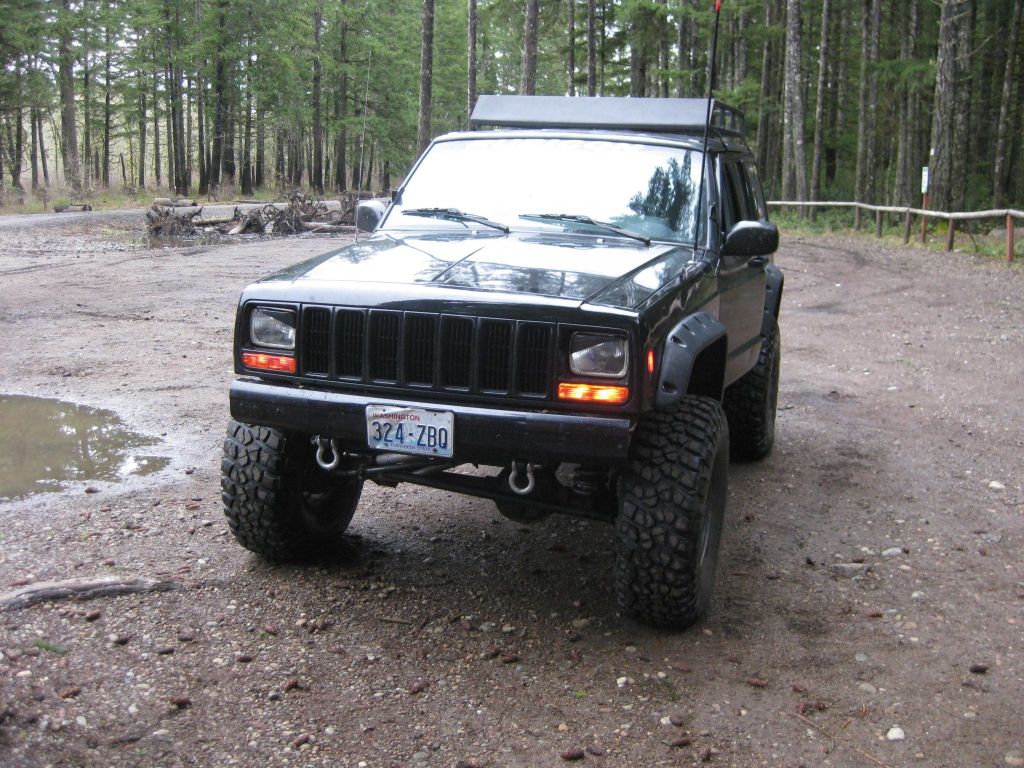
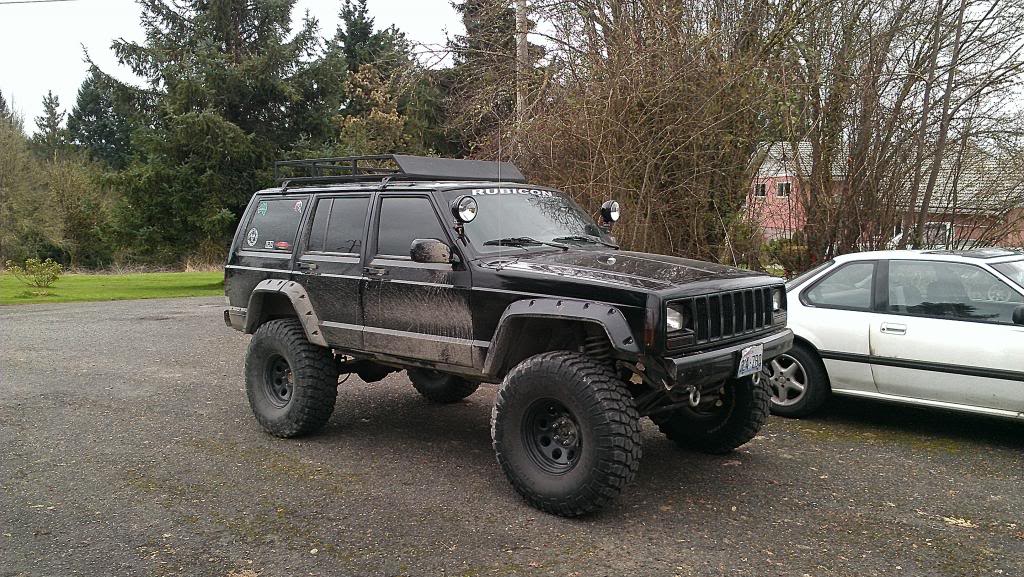
I also designed and built a rack myself.
As far as I'm concerned it turned out pretty good. I ended up ordering gutter mounts from JCR and they worked perfectly for what I wanted to do. The mounts are strong and should work great, but if I could improve them in any way it would be to make them longer were they sit in the rail. Theory behind my wanting to do that would be to distribute the load over a broader range, instead of just 4 1" spots.
All in all I think i'm into the rack for less then 150$ including the bed coating. Its extremely sturdy and weighs in around 80lbs. If I do it again I would like to make it about a foot longer. I'm going to weld on some light tabs once I figure out what I'm going to be using.
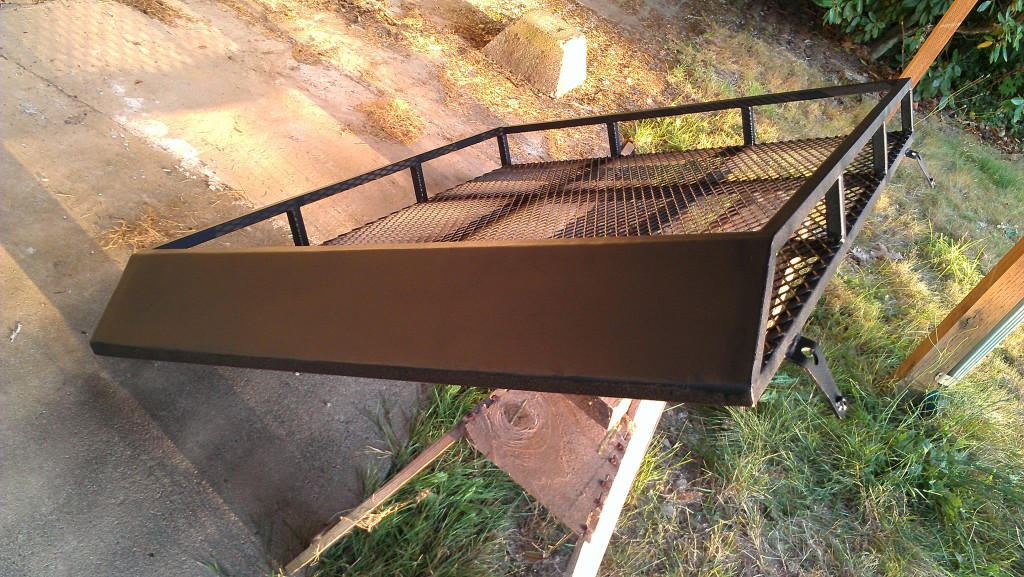
Done, just needing a finish.
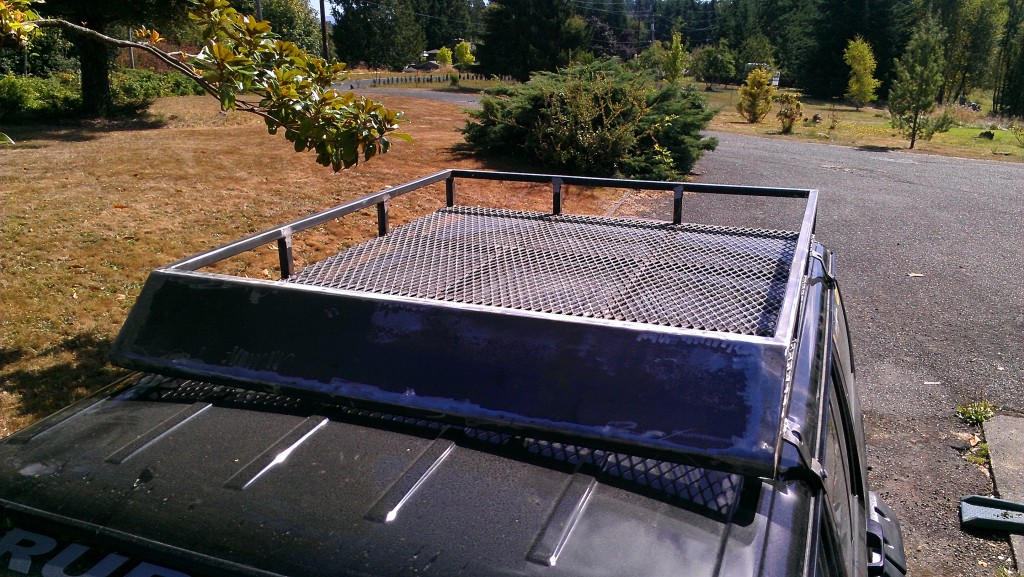
I was going to have it powder coated but decided I would instead just apply some Rustoleum truck coating. It turned out darker and glossier then I thought it would, which is what I was looking for. I'm not sure how durable it will be but if it doesn't work out long term I'm only out 25$ and will still get it powdercoated.
Close up of finish
Here it is sitting on my XJ
Most recently I installed an Aussie Locker in the rear. Took me about 2-3 hours and it was my first time ever messing with a diff. Two hours of that was probably actual work and the extra hour was trying to put the fluid in . I dont have any install pictures from that but I used write-up from JeepN4KC over on JF
I got a chance to test out the new Aussie this past weekend and I have to say I'm blown away at the difference. I knew it would make a difference but I never really thought I would be able to do as much in 2wd now as I did in 4wd before. Best 350$ ever spent!
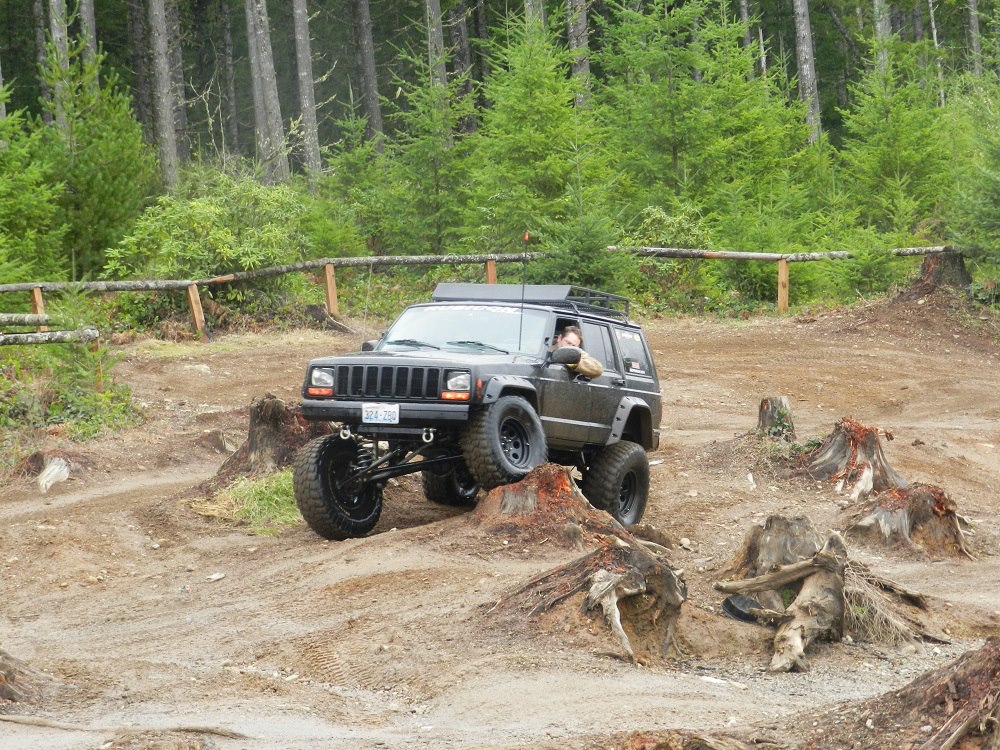
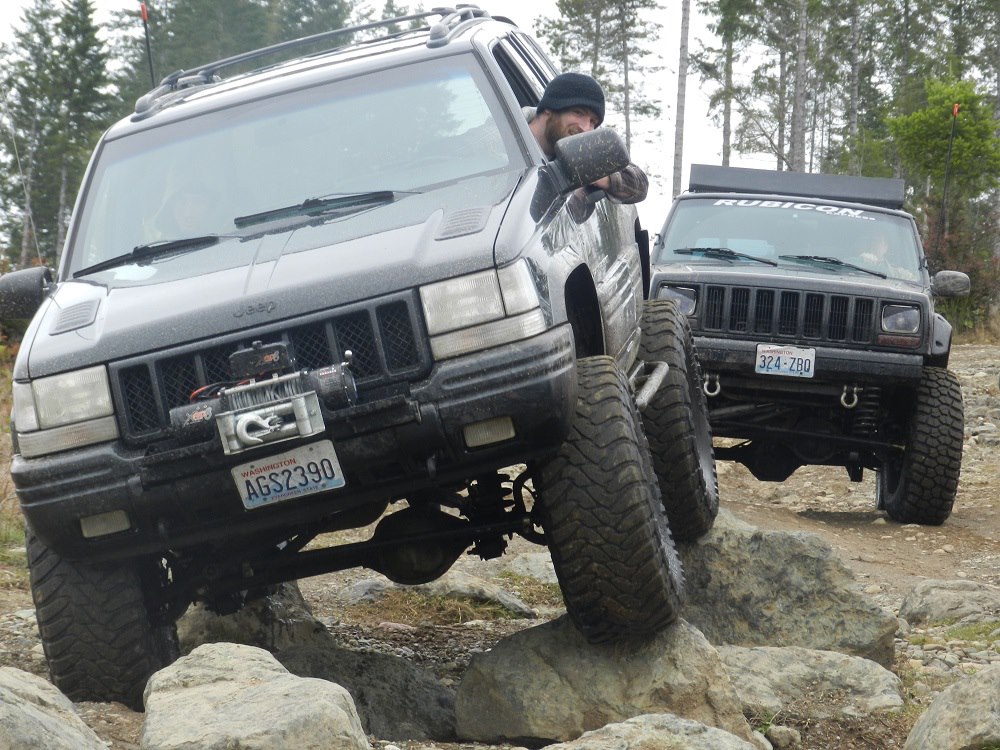
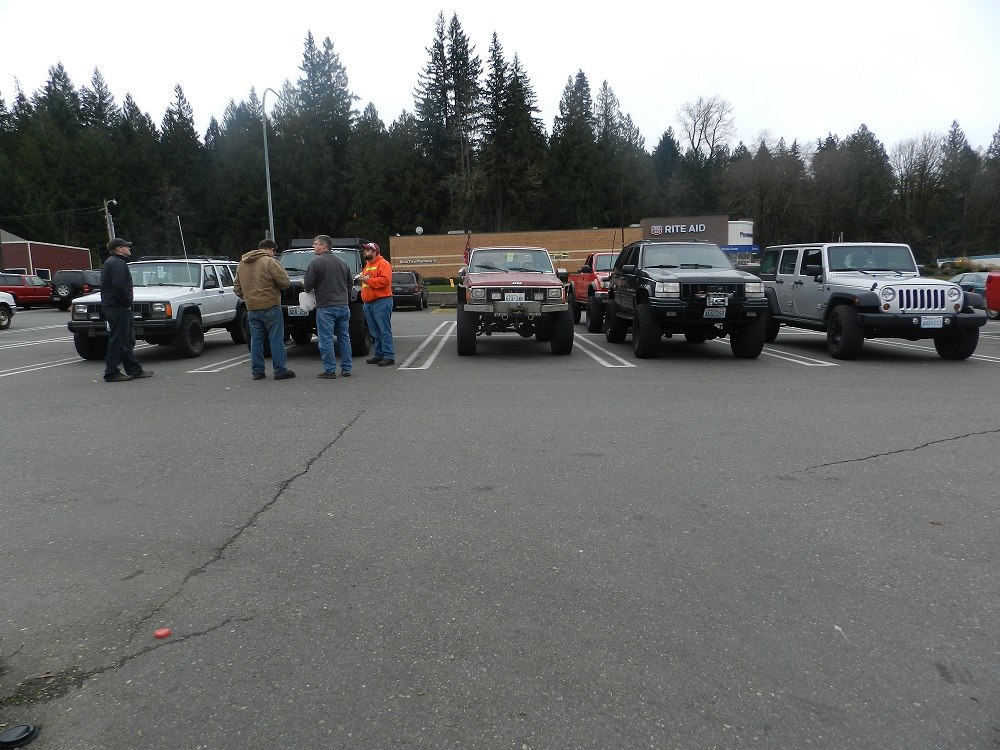
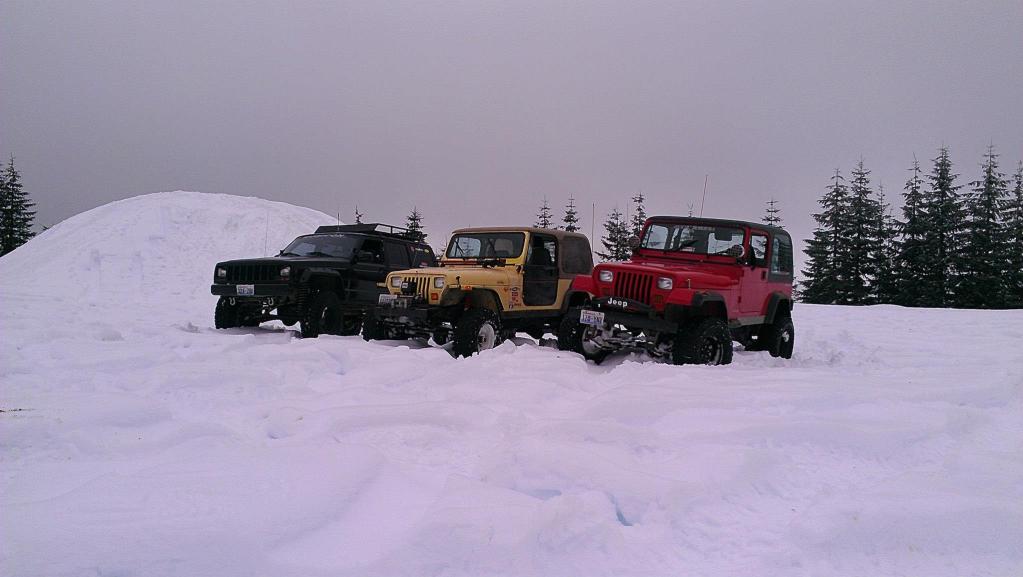
Myself and a small group of guys took the rigs out at a ORV park just a couple hours from my house called Tahuya. Its a great place to test out modifications and get a feel for your rigs.
Here is a couple pictures, I'm still waiting for others to upload more.
With the newly installed front daystar bump-stops my up-travel is perfect. Fully stuffed on either side and I can turn the wheel lock to lock and I have zero rubbing.
I was also able to get a few short videos.
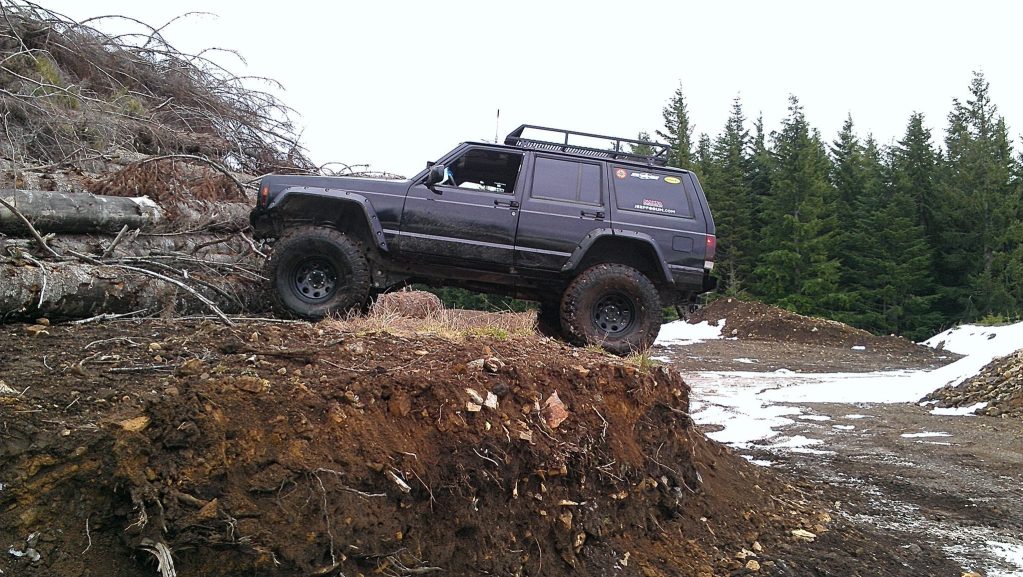
Not bad suspension travel for a short arm :2thumbsup:
As far as I'm concerned it turned out pretty good. I ended up ordering gutter mounts from JCR and they worked perfectly for what I wanted to do. The mounts are strong and should work great, but if I could improve them in any way it would be to make them longer were they sit in the rail. Theory behind my wanting to do that would be to distribute the load over a broader range, instead of just 4 1" spots.
All in all I think i'm into the rack for less then 150$ including the bed coating. Its extremely sturdy and weighs in around 80lbs. If I do it again I would like to make it about a foot longer. I'm going to weld on some light tabs once I figure out what I'm going to be using.
Done, just needing a finish.
I was going to have it powder coated but decided I would instead just apply some Rustoleum truck coating. It turned out darker and glossier then I thought it would, which is what I was looking for. I'm not sure how durable it will be but if it doesn't work out long term I'm only out 25$ and will still get it powdercoated.
Close up of finish
Here it is sitting on my XJ
Most recently I installed an Aussie Locker in the rear. Took me about 2-3 hours and it was my first time ever messing with a diff. Two hours of that was probably actual work and the extra hour was trying to put the fluid in
. I dont have any install pictures from that but I used write-up from JeepN4KC over on JFI got a chance to test out the new Aussie this past weekend and I have to say I'm blown away at the difference. I knew it would make a difference but I never really thought I would be able to do as much in 2wd now as I did in 4wd before. Best 350$ ever spent!
Myself and a small group of guys took the rigs out at a ORV park just a couple hours from my house called Tahuya. Its a great place to test out modifications and get a feel for your rigs.
Here is a couple pictures, I'm still waiting for others to upload more.
With the newly installed front daystar bump-stops my up-travel is perfect. Fully stuffed on either side and I can turn the wheel lock to lock and I have zero rubbing.
I was also able to get a few short videos.
Not bad suspension travel for a short arm :2thumbsup:
Last edited by Slimgoaty; Feb 4, 2013 at 02:10 AM.
Trending Topics
Member
Joined: May 2012
Posts: 238
Likes: 0
From: Oklahoma City
Year: 2001
Model: Cherokee
Engine: I6 4.0L 242
Seriously clean XJ you have there sir.
Are you on stock steering? If so what are your plans to beef it? I'm to the point I want to do my steering next but I don't think I want to shell out for OTK so I might opt for the Crown HD set up since it maintains stock geometry.
Are you on stock steering? If so what are your plans to beef it? I'm to the point I want to do my steering next but I don't think I want to shell out for OTK so I might opt for the Crown HD set up since it maintains stock geometry.
Thread Starter
Senior Member
Joined: Dec 2011
Posts: 922
Likes: 1
From: Centralia, Wa
Year: 1997
Model: Cherokee
Engine: 4.0
Thank you guys for the compliments! I missed a bunch of stuff In the buildup but I'll try to fill in the blanks.
Yes I'm still running stock gears. Anywhere you go guys will tell you it's not possible to drive it on stock gears, I daily drive it and wheel it on stock gears. Yes it feels like a stock Toyota 4banger and when I hit a hill I give it enough gas to shift down but it's driveable. Put about 10k in it with the 35's. I'd love to have new gears but I want to do a selectable in the front at the same time, so I'm probably looking around 3k for something like that.
As far as steering goes its all stock except the rustys Tie Rod which is very beefy, and the drop pitman. I haven't made a choice on what setup I'm going to do.
Member
Joined: May 2010
Posts: 160
Likes: 0
From: Colorado Springs, Colorado
Year: 2001
Model: Cherokee
Engine: 4.0L
Good lookin' rig! :-) I like the roof rack you built, very nice. Those flares look pretty good too. Haven't seen them before. I doubt they are twice as thick as bushwackers, because when I put mine on, I needed to trim to fit around my rock rails, and it was quite thick and a pain to trim, lol. I like the look of yours though. It is almost a blend of the cutouts and the flat/thin look. I liked those vids, great flex. :-) If you are looking for a good steering upgrade, I like the kit from Frank @ seriousoffroadproducts.com. Still under the knuckle, but 1 ton tie rod ends, and thick tie rod and drag links. I pitch his stuff every chance I get, lol. I am running his setup and love it. Looking forward to seeing what else you end up doing! :-)
Thread Starter
Senior Member
Joined: Dec 2011
Posts: 922
Likes: 1
From: Centralia, Wa
Year: 1997
Model: Cherokee
Engine: 4.0
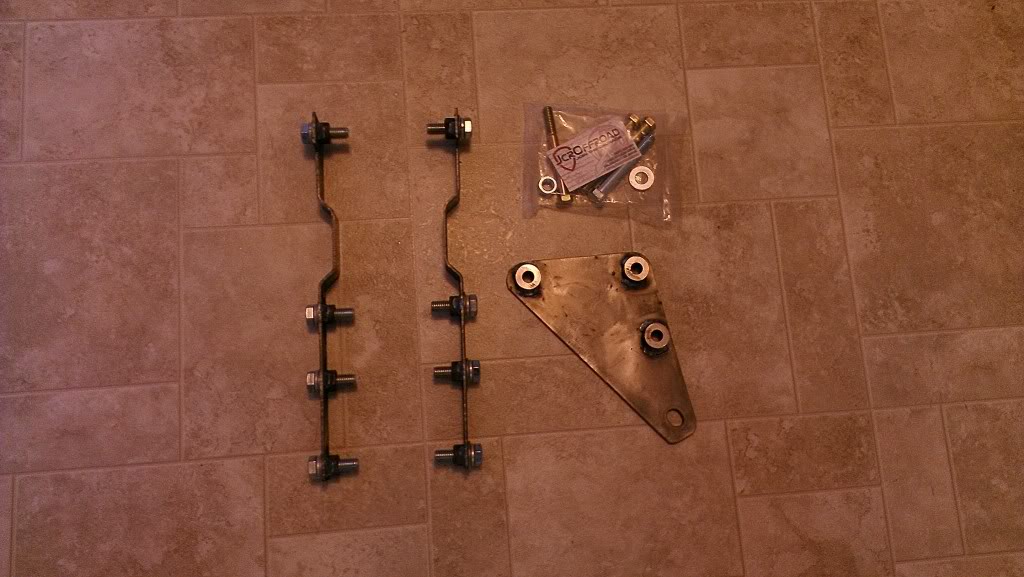
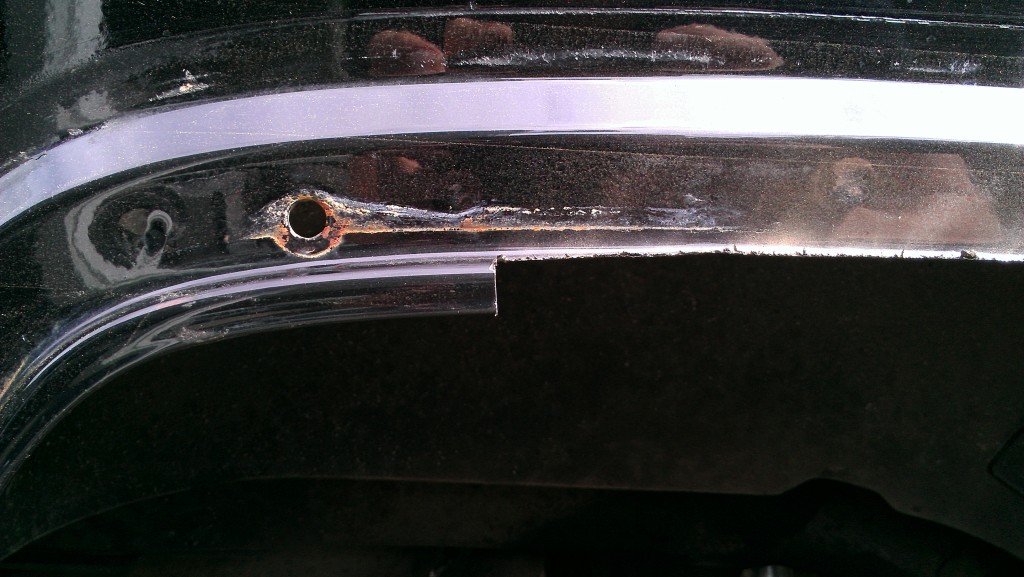
Got a couple things down past week. Ordered up some Low-profile shackle relocation brackets from froehlichsuspension (LeadFoot Over on CF). To go along with those I also ordered the JCR nutstrips. L&L fabrication says my bumper is nearly finished and to go along with it I also ordered the JCR steering box spacer and hardware. After watching a cherokee break his steering box straight off the unibody I'll be sure to take whatever steps necessary so it doesn't happen to me.
I also finally mounted some Daylighters on my A-pillars, heres a couple pictures,
This weekend I plan on doing the valve cover gasket and Oil-filter adapter O-rings so i can stop the excessive territorial marking my jeep feels that it needs to do.
I also finally mounted some Daylighters on my A-pillars, heres a couple pictures,
This weekend I plan on doing the valve cover gasket and Oil-filter adapter O-rings so i can stop the excessive territorial marking my jeep feels that it needs to do.
Thread Starter
Senior Member
Joined: Dec 2011
Posts: 922
Likes: 1
From: Centralia, Wa
Year: 1997
Model: Cherokee
Engine: 4.0
Also went on a snow run last weekend. Got a chance to try out the Aussie in the snow, wow! What a difference! What another guy was doing in 4wd I could do easily in 2wd. So far that aussie has been worth its weight in gold
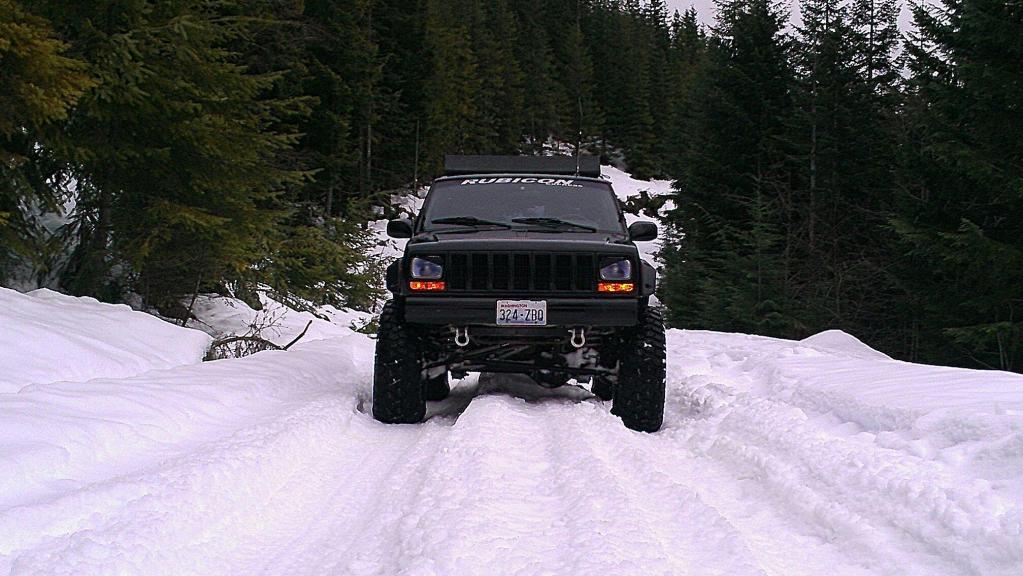

Took a couple videos, they are pretty slow paced and truly not all that exciting but I'll post them anyways because thats how I roll
Took a couple videos, they are pretty slow paced and truly not all that exciting but I'll post them anyways because thats how I roll
Thread Starter
Senior Member
Joined: Dec 2011
Posts: 922
Likes: 1
From: Centralia, Wa
Year: 1997
Model: Cherokee
Engine: 4.0
Got the JCR upgraded steering box brace and nutrips sitting in wait. Hoping to have my Low profile relocation brackets in the next week or two, already paid for them just waiting to get shipped. The L&L Fab front winch bumper should be here any day and I'm trying to finagle some free shipping out of quadratec on one of their Q9500I winch's. Price is too good to just not try it out. I'm ok with being a Guinea pig for the rest of the forum.